- 09/21/2023
- 4 Min Read
- By: Christian Schaefer
Car Electrical Systems Explained - How To Diagnose A Failing Alternator vs. A Failing Battery

One of the most common issues car owners run into is with the battery. The car sits for a while, and then it doesn't turn on, or the battery light comes on while driving, and then the car dies on the road. Those issues are electrical related, but not always the battery's fault. The real issue lies in the car's electrical system, specifically the charging system.
The charging system of a car doesn't need to remain a mystery. In actuality, it's a fairly simple system comprised of only a few components, the alternator, wiring, battery, and ECU.
What is an Alternator?
Gasoline, air, and electricity are the three things a car needs to run. We fill it with gas, the engine pulls in the air it needs, and the car takes the battery's electricity. But contrary to what you might think, the battery only has enough power to run a car for maybe an hour with no charging system. Alternators are used to prevent a constant need for a new battery. The alternator is a belt-driven generator that charges the battery.
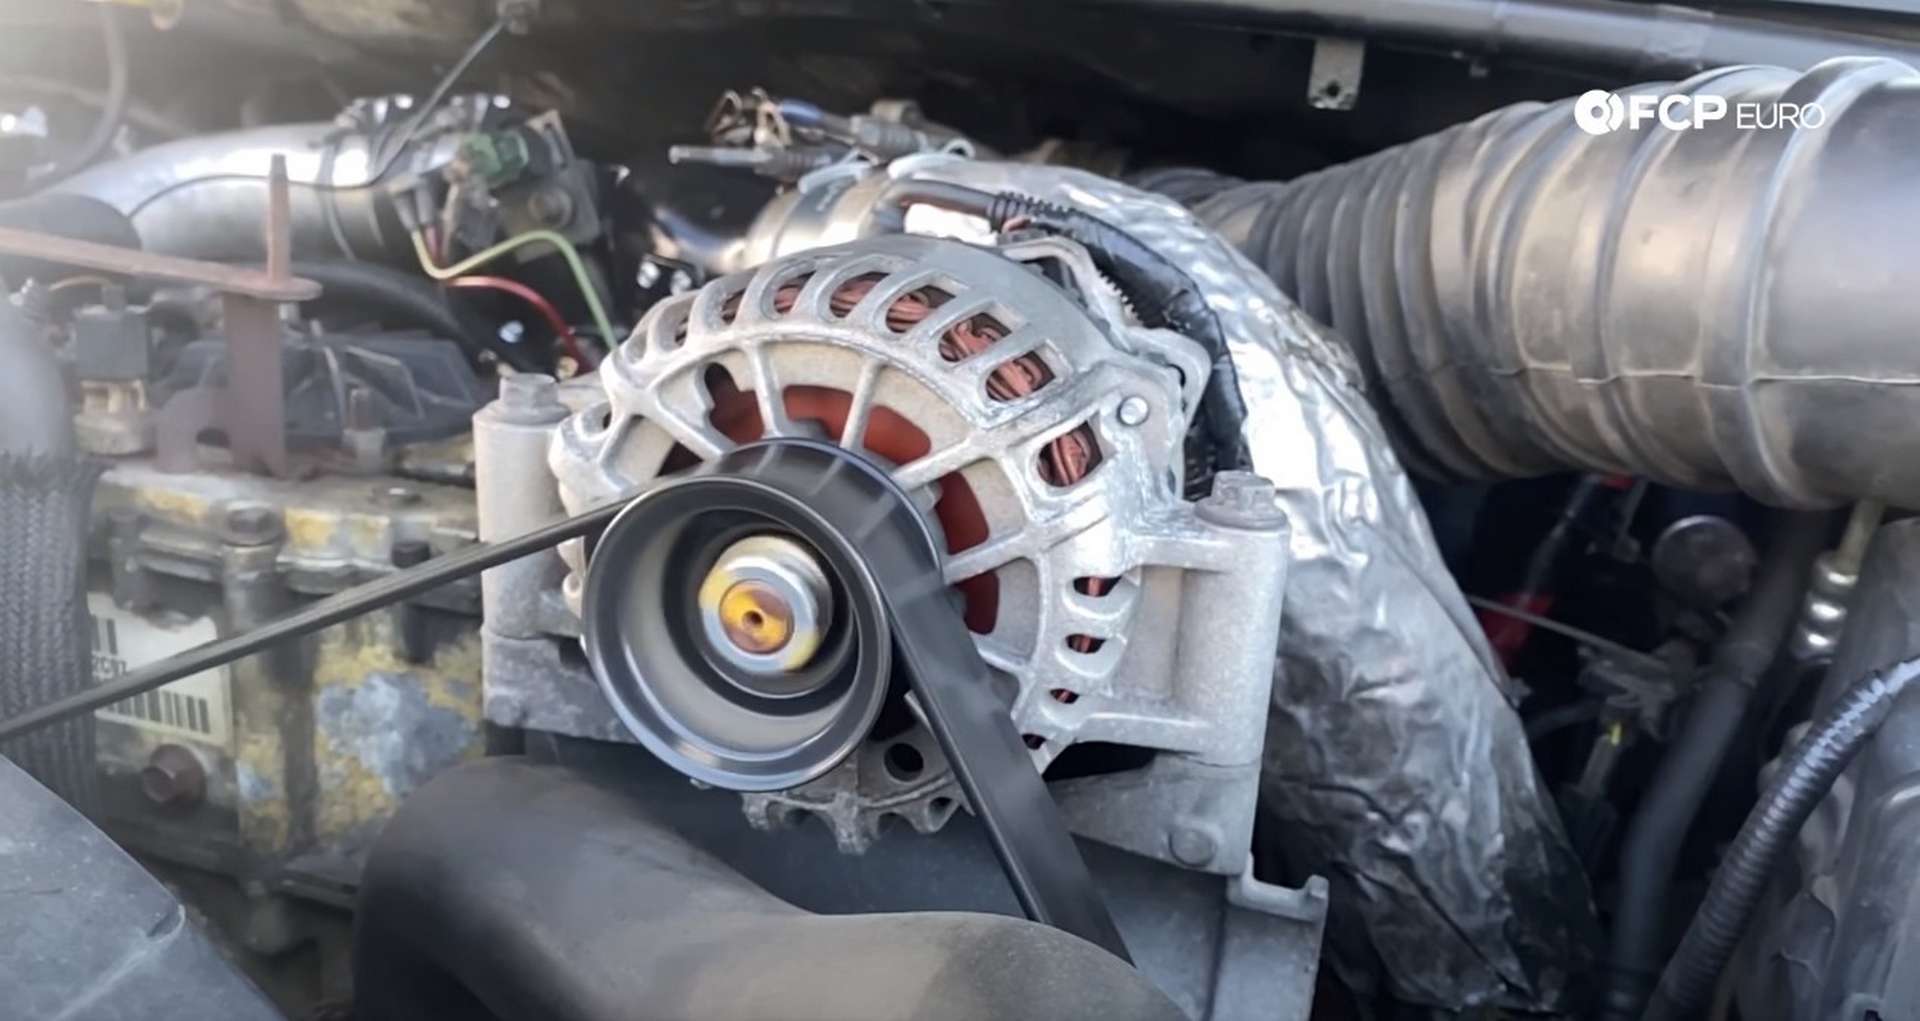
The belt is run off of a pulley on the crankshaft. It spins a rotor inside the alternator, which generates a magnetic field. The AC current is then put through a rectifier that changes the power to a DC current. Several wires run off of the alternator and deliver power to the battery, keeping it charged.
Why is my Car's Battery Light on?
The battery light comes on when the car detects that the electrical system drops below a certain voltage. While the car is off, the battery should read 12 volts. But with the car on and the alternator charging the battery, the battery should read between 13.5 and 14.5 volts. The battery light is there to warn you that something isn't right with the charging system and that a repair might need to be made.
Before doing any work that involves removing parts, take a look at the engine bay. The alternator is driven off of a belt and sits on the front of the engine. For transversely mounted engines, the alternator will be against the passenger's side of the engine bay. Check the condition of the belt with the engine off. Is there any fraying or cracking on the belt, and does it look worn in general? As the belts wear out, they stretch and become stiffer, causing the belt to slip under the engine's load. If the belt slips, the alternator won't charge enough. A squeaky belt while the car is running also signifies a worn belt.
Take a look at the battery next if the alternator belt is OK. The batteries we use in nearly every car are of a lead-acid type. The batteries are prone to leaking and will cause heavy corrosion buildup on the battery terminals. The corrosion will interfere with the battery's connection to the car's wiring harness and cause a voltage drop across the connection. Use a battery corrosion cleaner found at any auto parts store and a stiff plastic-bristle brush to remove the terminals' corrosion. However, if a worn belt or corrosion isn't the cause, you'll need to use a multimeter to investigate further.
While unlikely, check the alternator wiring. Mice like to chew on wires, and they could have gotten to them if the car has sat.
How to Test an Alternator
You can test an alternator in a few different ways, with some being safer and more precise than others. None of these tests require a rocket scientist skill level and can be completed by following along below.
How to Test an Alternator With a Multimeter
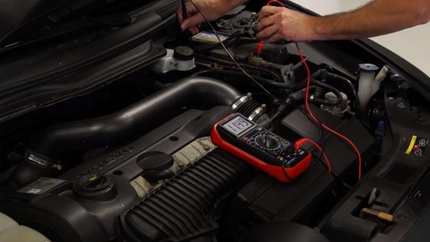
A multimeter is a tool used to measure electrical currents, voltages, and resistances. Using the two leads that come off the tool, you will read the battery's voltage while the car is on and off. The voltage reading you get from this test will determine what needs to be replaced. The multimeter tool can be bought for around $30 and is useful for all electrical issues.
First, set up the multimeter correctly. Because the multimeter can check so many different things, it has a dizzying variety of settings. Locate the section around the dial that has a capital V and two straight lines next to it. The V indicates that you are looking to determine voltage, and the two lines show the DC-style power.

Since you aren't looking for anything more than 15 volts, set the multimeter dial to 20.
Next, start the car and uncover the battery. Place the black multimeter lead onto the negative battery terminal and the red lead onto the positive terminal. Look at the number that appears on the multimeter while you hold the leads onto the battery. It should read in the 13 to 14-volt range.
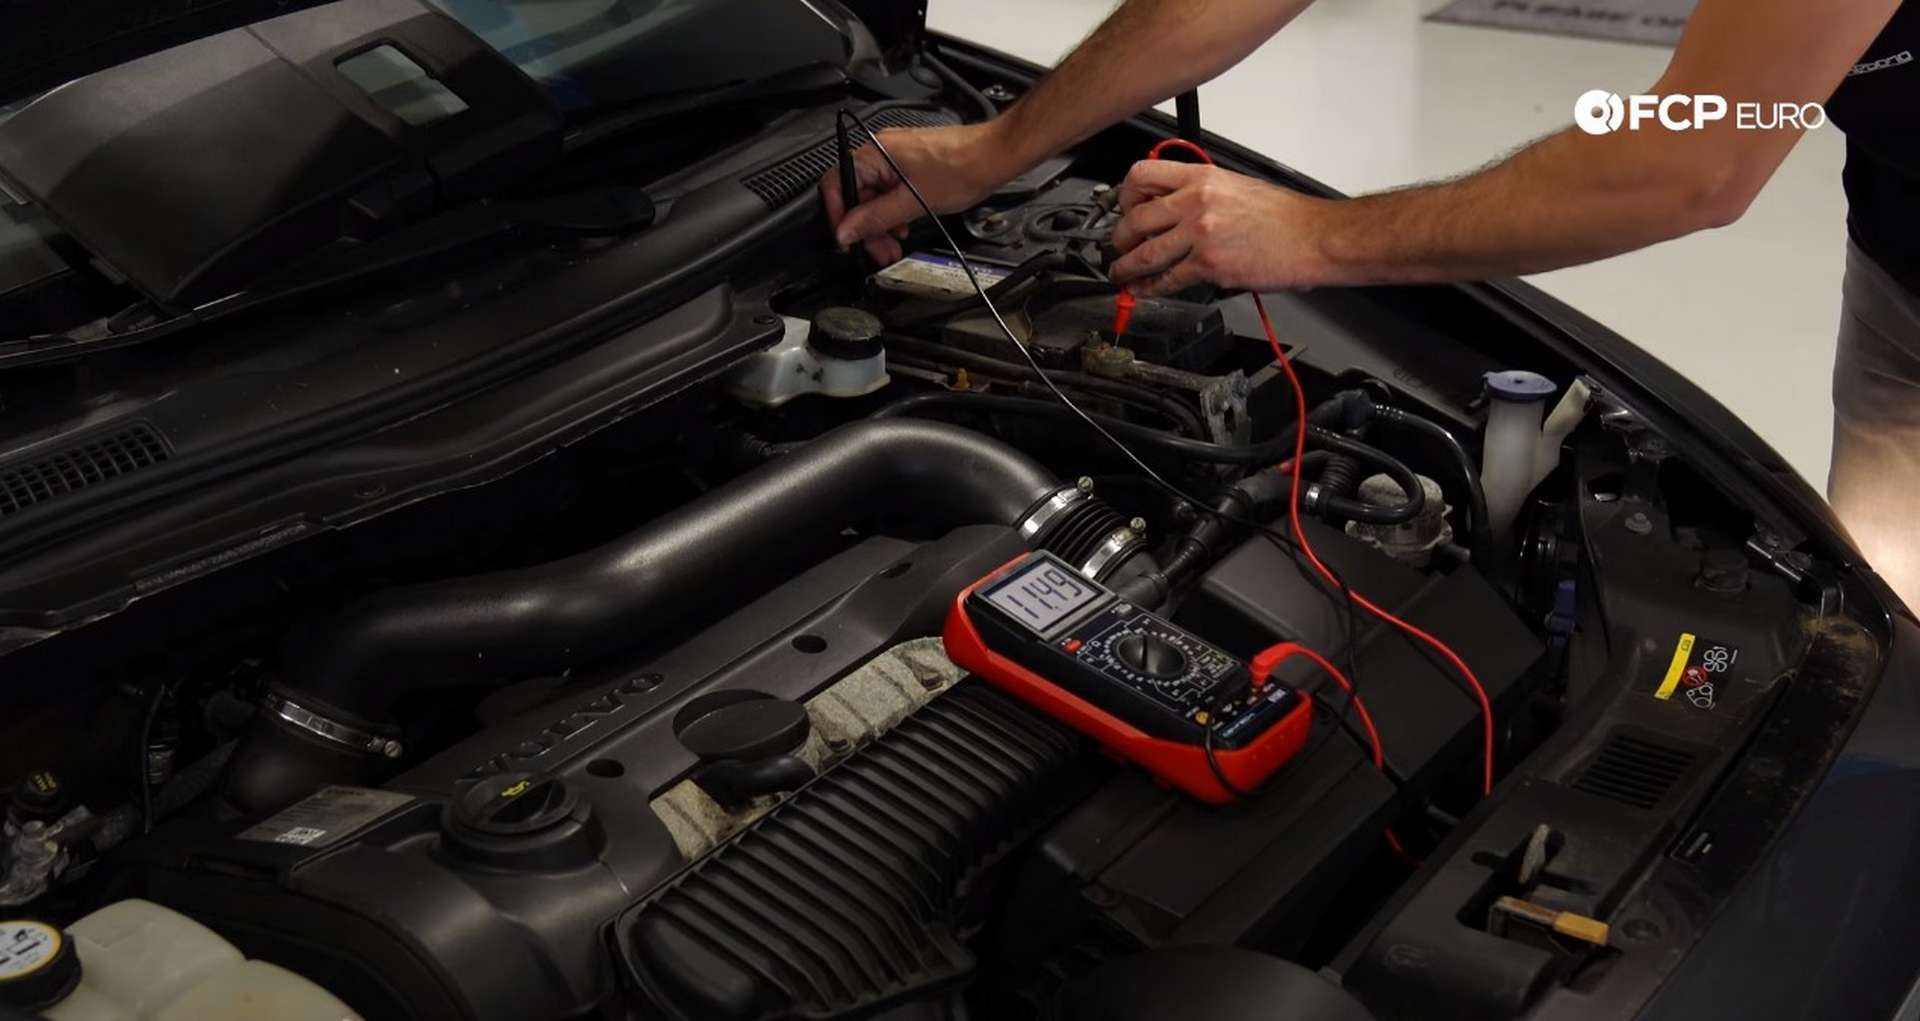
A voltage below 12, while the car is on, confirms an issue with the charging system. Now run the same test with the vehicle off. If the battery reads closer to 12 volts, you now know that the car is drawing voltage from the battery to run but isn't charging itself back up. Suppose the battery registers even less voltage than it did with the car running. In that case, the battery isn't holding the proper charge anymore and needs to be replaced.
How to Test an Alternator by Disconnecting The Battery
This test comes under scrutiny but is technically still a way of testing the effectiveness of alternators. I would suggest avoiding this test for those with more modern cars as it may damage some of the electronics. Early 00's vehicles are where I would stop using this test.
The first step is to open the hood and start the car. From there, disconnect the negative side of the battery. If the vehicle dies, then it shows that the car was running on battery power alone and that the alternator isn't charging.
The idea behind the test is that if the alternator keeps a car running when the battery is disconnected, it works properly. To some degree, that sentiment is true, but this test won't help in the case of a failed internal voltage regulator. The problem can be that the alternator produces too much voltage, and this test doesn't test for that.
How to Test an Alternator With a Screwdriver
Like the previous test, use this test as a last resort. Unlike the previous test, the screwdriver method works on any vehicle. The test will tell you even less than disconnecting the battery, but it is, again, technically still a way of testing an alternator's effectiveness.
Put the tip of a screwdriver near the alternator's pulley when the car is running. A small magnetic field runs through the pulley as the alternator runs, and it should pull the end of the screwdriver to it. If there is no magnetic pull, the alternator has failed.
How to Diagnose What Failed on The Alternator
The alternator can be broken down into five key parts when determining what went wrong. The five are the pulley, rotor, stator, rectifier, and voltage regulator. A failed pulley is easy to change and can be done at come. A failed stator isn't either of those things.
Just about every car from the last decade uses a decoupler pulley on its alternator. This pulley type allows the pulley to spin at the engine's direct speed during acceleration and allows the alternator to spin freely during deceleration. The pulleys remain decoupled during acceleration when they fail, causing the rotor not to spin and no electric charge to be produced. If you determine that the pulley is the issue, head to our website and look up the correct pulley for your vehicle. They are sold separately from the alternators, allowing you to change them in your garage with the help of this CTA pulley tool.

The next part that often fails is the internal voltage regulator. An internal regulator allows for better packaging and fewer alternator wires. Similarly to the pulley, the regulators can be purchased and replaced on the alternator without replacing the entire alternator unit. As the name suggests, the voltage regulator determines how much juice the battery receives from the alternator. A broken regulator can lead to too much or not enough voltage being sent to the battery. Each of those issues has its own separate effects.
The rotor, stator, and rectifier are all inside of the alternator case. Parts can be bought but aren't easy to source and difficult to replace by a DIYer. We recommend replacing the entire unit if any of these three pieces cause the failed alternator.
What Should You Do When the Battery Light Illuminates?
We recommend that you pick up a multimeter and test the battery yourself if you prefer to do it yourself. Multimeters are cheap and can be used for so much more than a simple alternator test. We wouldn't use the other two tests for definitive answers to what your charging system problem might be, but they will work in a pinch.
There isn't any shame in taking the car to a local repair shop if you aren't confident in your own mechanical aptitude. They'll run the same test we showed here and help you get back to a healthy and fully functioning charging system.
If you have any questions about the charging system of your car, leave them in the comments section below.