Now that the US has finally gotten as cold as it should be in the winter, I'm sure I'm not alone amongst Volvo owners that noticed their cars complaining a bit more than usual. In my case, the ABS module just started showing signs of failure by illuminating the dash like a Christmas tree.
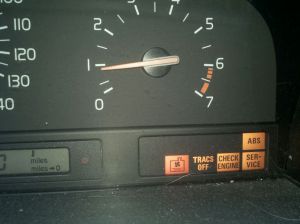 ABS and TRACS OFF are the telltale signs of ABS module failure
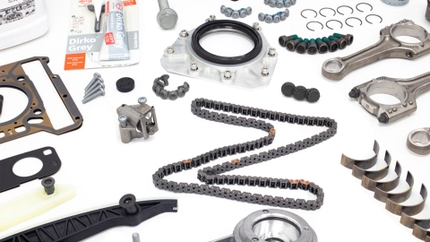
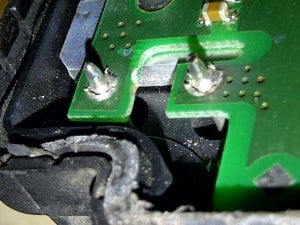 Cracked, disconnected solder joints
Diagnosis
Having worked on enough of these cars already, it's pretty obvious to me when a module has failed. On my '99 S70, the ABS, BRAKE, and STC/TRACS light illuminate randomly while driving, and will go away for awhile after a cold restart. I already performed this procedure four years ago, but the bitter cold seems to have had an effect on my soldering job again. What does this mean?
The ABS module is actually a pretty reliable unit, if you don't count the weak solder joints. These joints will "dry out" or crack over time, disconnecting the vital pins from the circuit board, causing it to freak out and disable the system entirely. This can happen to any number of the controller's joints on the board, so you'll have to hit them all if you choose to repair it yourself. It's not that hard if you're handy with a soldering iron.
But what if a wheel speed sensor has actually failed, not the module? It's worth knowing before you delve into this procedure, although it can't hurt to do anyways since these modules are so failure prone. Since an ABS module can throw a false wheel speed sensor code, check each sensor at each wheel to make sure the wiring is intact and the sensors are clean. If they look good, they're probably good. Scanning the vehicle for codes is also a good step, but since the possibility exists for false codes, it may not be worth any expense to do this until you've exhausted every option.
Removal
The ABS module is secured to the ABS pump using four E5 torx screws. It's best to buy the proper socket, it's not worth mucking up the head of these delicate screws with a socket that "kind of" fits. Access to these screws is limited, but can be improved by popping off the airbox lid and tucking the inlet hose over a bit. I can usually get these modules off of an S70 without removing anything, but early P2 cars like the 1999 Volvo S80 may be a little more cramped.
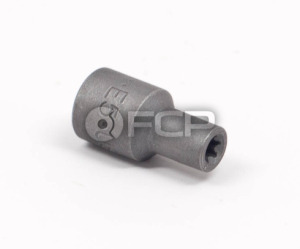 E5 Torx Socket
There are two bits of wiring to remove. The 12V wiring connector (2 pins) and a large, hinged lever-actuated connector pack full of pins. Pull these off carefully (the hinged connector should require no force) and you're set to either rebuild or replace your module with a rebuilt one.
Repair
[gallery type="square" ids="7725,7727,7726"]
The first step to tackling a DIY ABS module rebuild is to cut off the cover. There is a seam that runs around the outside of the black plastic module - this can be carefully cut using a Dremel with a cutting wheel. (I'm open to hearing other suggestions as well) It's best if you don't cut too deep, but I've found that the Dremel cutting wheels are the perfect depth so as not to damage the circuit board.
With the cover removed, you'll see a smattering of pins on the right side of the unit. The two pins at the bottom are power and ground, and the upper sets go to the wheel speed sensors, vehicle speed sensors, etc. This becomes a tricky issue because if a pin going to a wheel speed sensor has failed, the car will throw a false ABS code when the module is really at fault.
After peeling back the protective membrane around the pin areas, apply a hot soldering iron to the base of each pin, taking care to get the "meat" of the solder melted around the base. When the solder re-flows into the joint, pull off and inspect to make sure the joint is solid. If it isn't, the pin will wiggle around in the socket as if it isn't connected at all. (This was the problem in the first place)
One reader suggests that more advanced soldering iron users can add new electrical solder containing flux to each joint. This will make for a longer lasting repair. The fresh solder should outlast the car, rather than reusing the original. (Thanks Jeff!)
When you're confident that every joint has a firm connection, it's time to seal it up again for re-installation. I use a thick silicone adhesive known as "Automotive GOOP," but any silicone adhesive rated for automotive-type temperatures will suffice. Apply a thick bead of sealant around the recently-cut surface, then put the cover back on. I rest a 10lb weight on top of the module for 24hrs to ensure it seals properly with no chance of moisture leaks.
Replacement
Not everyone has the time or confidence to rebuild an ABS module, and that's why remanufactured units exist. Not only do they come with a warranty, but they're rebuilt by people that do this for a living, and most times even tested in-house before shipment. If you're interested in making this a 30 minute job rather than a whole-day affair, a remanufactured unit is the way to go. Units from BBA Reman and Programa are among a few popular brands available for Volvo vehicles.
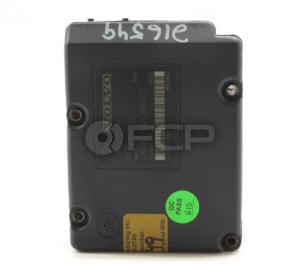 BBA Reman ABS module
About the Author: Alex Fiehl
Alex is FCP's Blog Editor and a Desktop Engineer from Endwell, NY. He has over 9 years of experience working on a wide array of import makes, but has found his home with European cars. With a Volkswagen and Volvo at home, the garage is always busy.