The Saab WIS doesn’t indicate a service schedule for changing the brake fluid (also known as bleeding the brake system) but this is something that should be done as preventative maintenance. I usually do this every 3-5 years as hydraulic brake systems will be less effective since the fluid attracts moisture and contaminants over time.
Saab WIS says to start the brake bleed process at the closest wheel and work your way out to the furthest wheel. This is opposite to what I usually do but since it’s spelled out in that order that’s how I’ll do the procedure as well.
The old-school way of doing this job was to have a helper sit in the driver seat to push on the brake fluid when instructed by the person bleeding the brake calipers (which is how this DIY is based on). Today there are several systems that allow 1 person to do the job. I’ve read about tools that attach with the fluid reservoir and use pressure, or tools that attach to the bleeder valve screws and pull vacuum. Whichever method you use, make sure you never allow the brake fluid reservoir to go completely empty else you’ll be dealing with a much longer job trying to get all the air out of the brake system.
Tools you'll need:
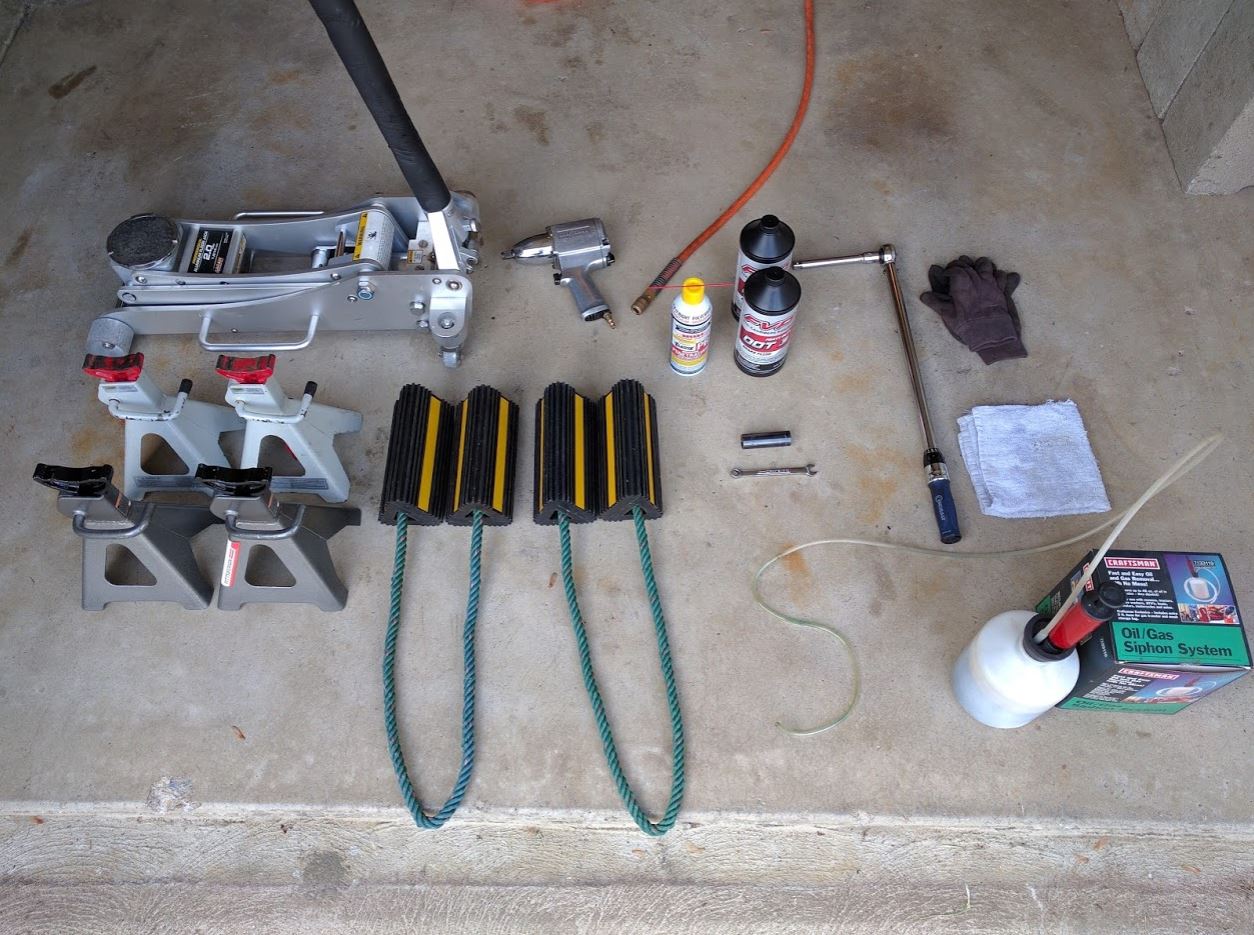
- new DOT 3 or DOT 4 brake fluid (2 x 32oz containers were enough for me)
- floor jack, jack stands + wheel chocks
- Impact wrench + air compressor
- 17mm deep impact socket
- 10mm closed end wrench
- torque wrench
- penetrant (I used PB Blaster)
- tube + container to collect the old brake fluid (I used a siphoning system)
- gloves + rags
- a good helper who can follow instructions and your voice commands
- about 1-2 hours of free time
Ready to change the brake fluid?
Make sure you avoid getting any brake fluid on painted surfaces as paint will come off if gets in contact.
Step 1:
Raise the hood and the car so that all 4 wheels are suspended in the air using a floor jack and jack stands. Remove the wheels with an impact wrench and a 17mm deep impact socket:

Step 2:
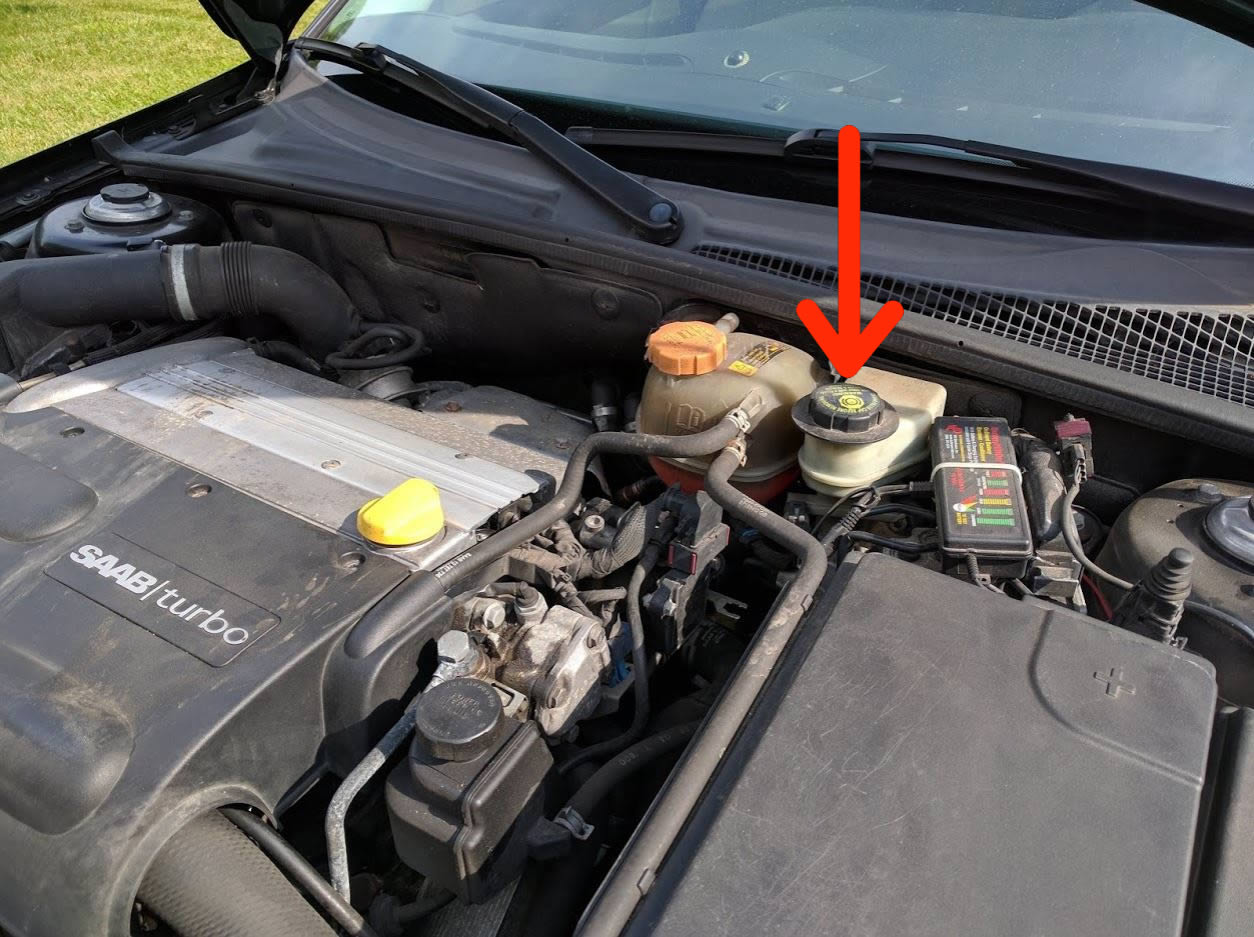
Locate the brake fluid reservoir:
Step 3:
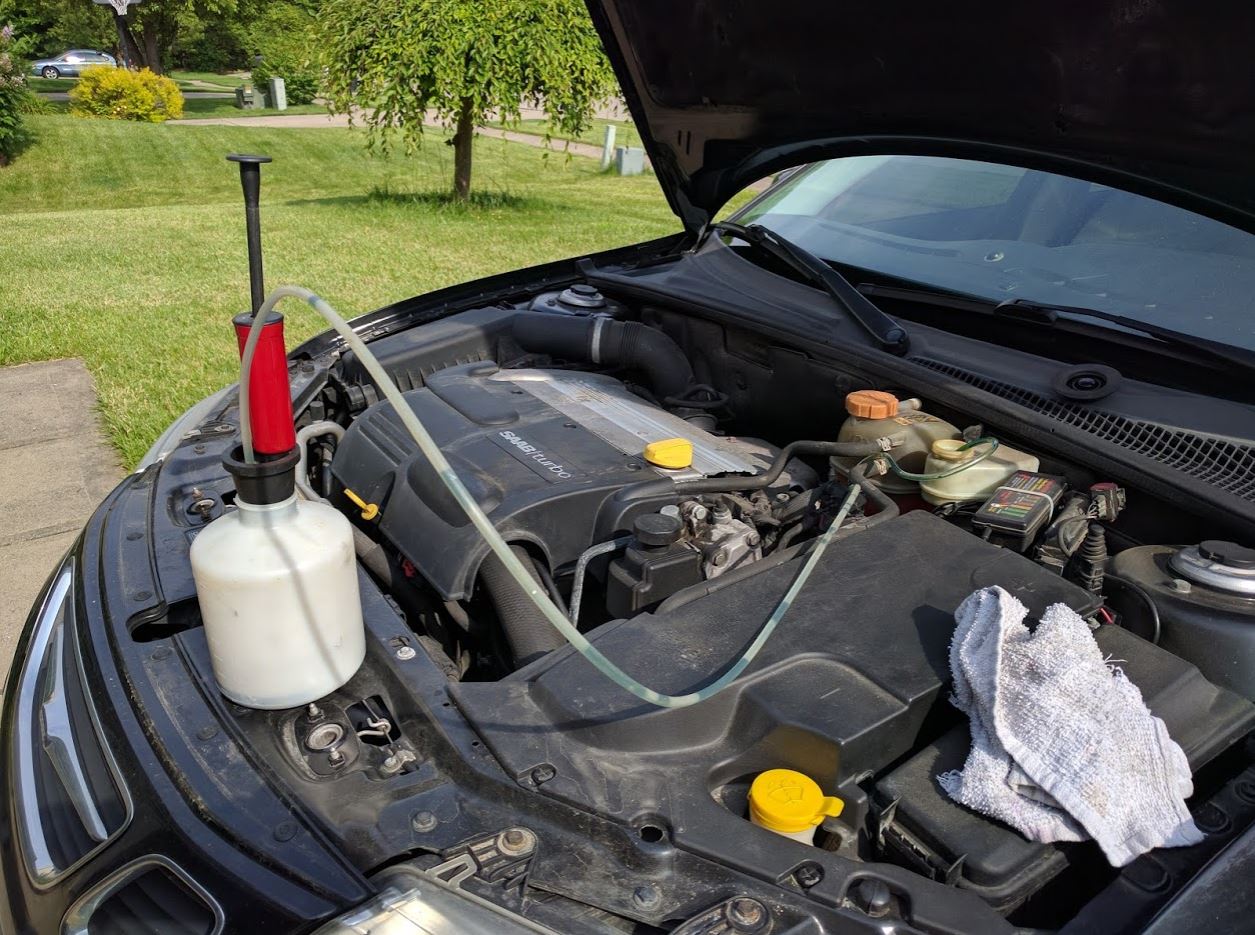
Remove some of the old brake fluid from the reservoir if possible to avoid having to take a longer time getting it all out at the first caliper’s brake bleed.
Step 4:
Top off the reservoir with new fluid and cover it back up. Place new brake fluid nearby so it’s within reach as you’ll be refilling it often.

Step 5:
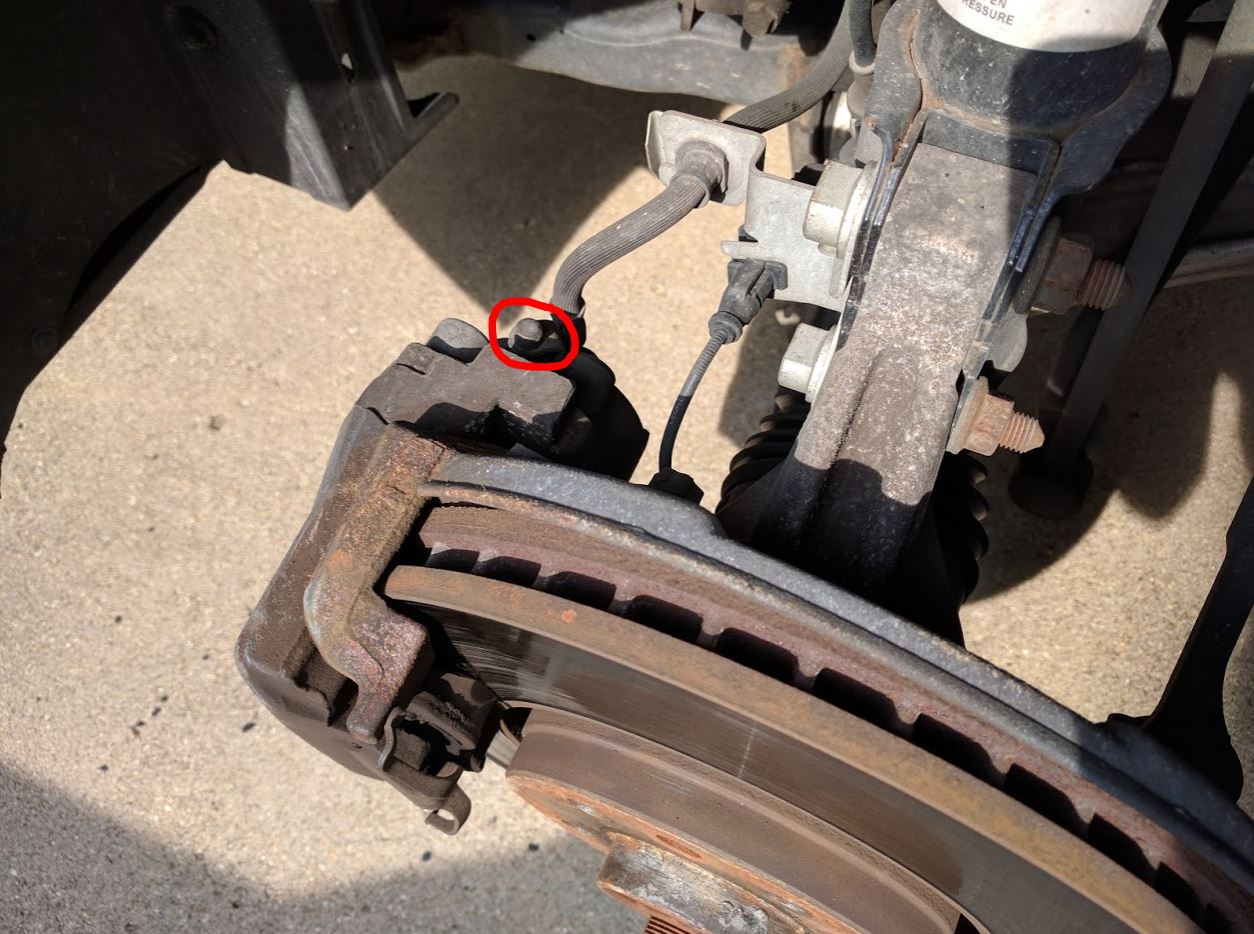
Head to the closest corner to start, which is the front driver side wheel as the brake fluid reservoir is at the firewall on the driver side. Locate the bleed screw at the top of the brake caliper and remove the protective cover:
Step 6:
Have your helper sitting in the driver seat ready to pump the brake pedal on your command.
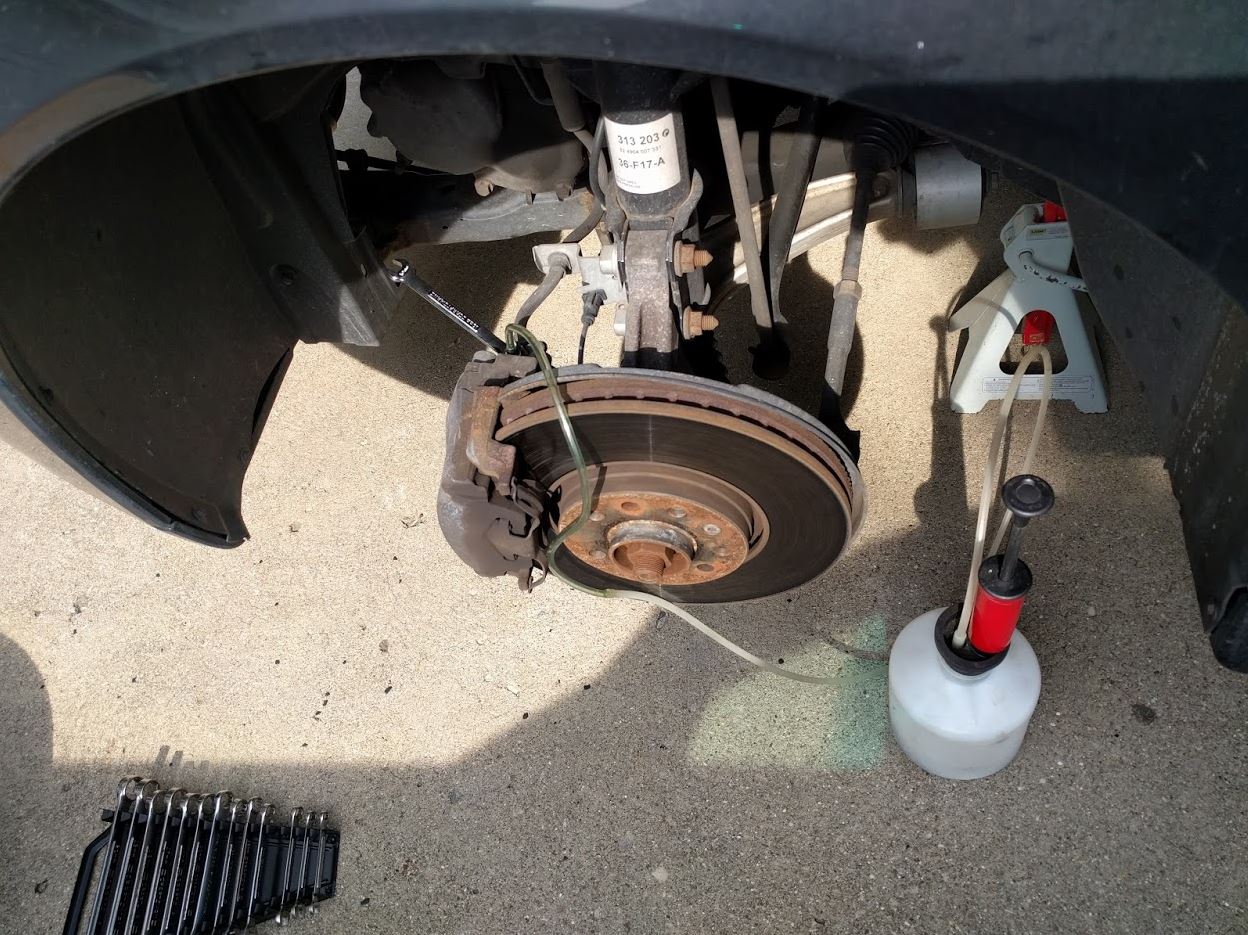
Step 7:
Set a 10mm closed-end wrench onto the bleed screw and connect a tube so it forms an air-tight seal. Untighten the bleed screw about ⅛ to ¼ turn counter-clockwise and have your helper start pressing the brake pedal continuously. You may want to consider soaking the bleed screws in a penetrant to help get it to turn if you think it may be seized up:
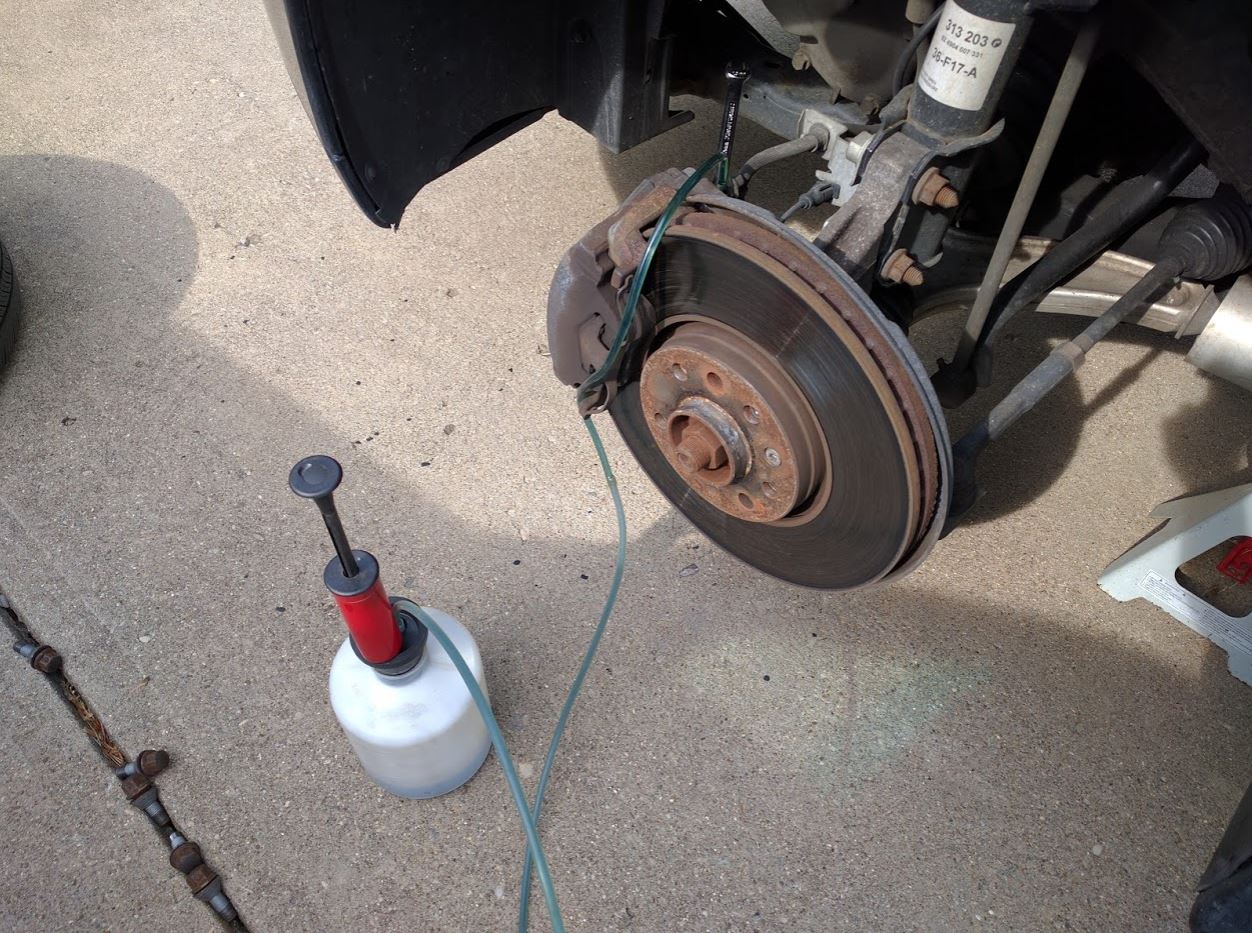
Step 8:
Old fluid should be coming out:
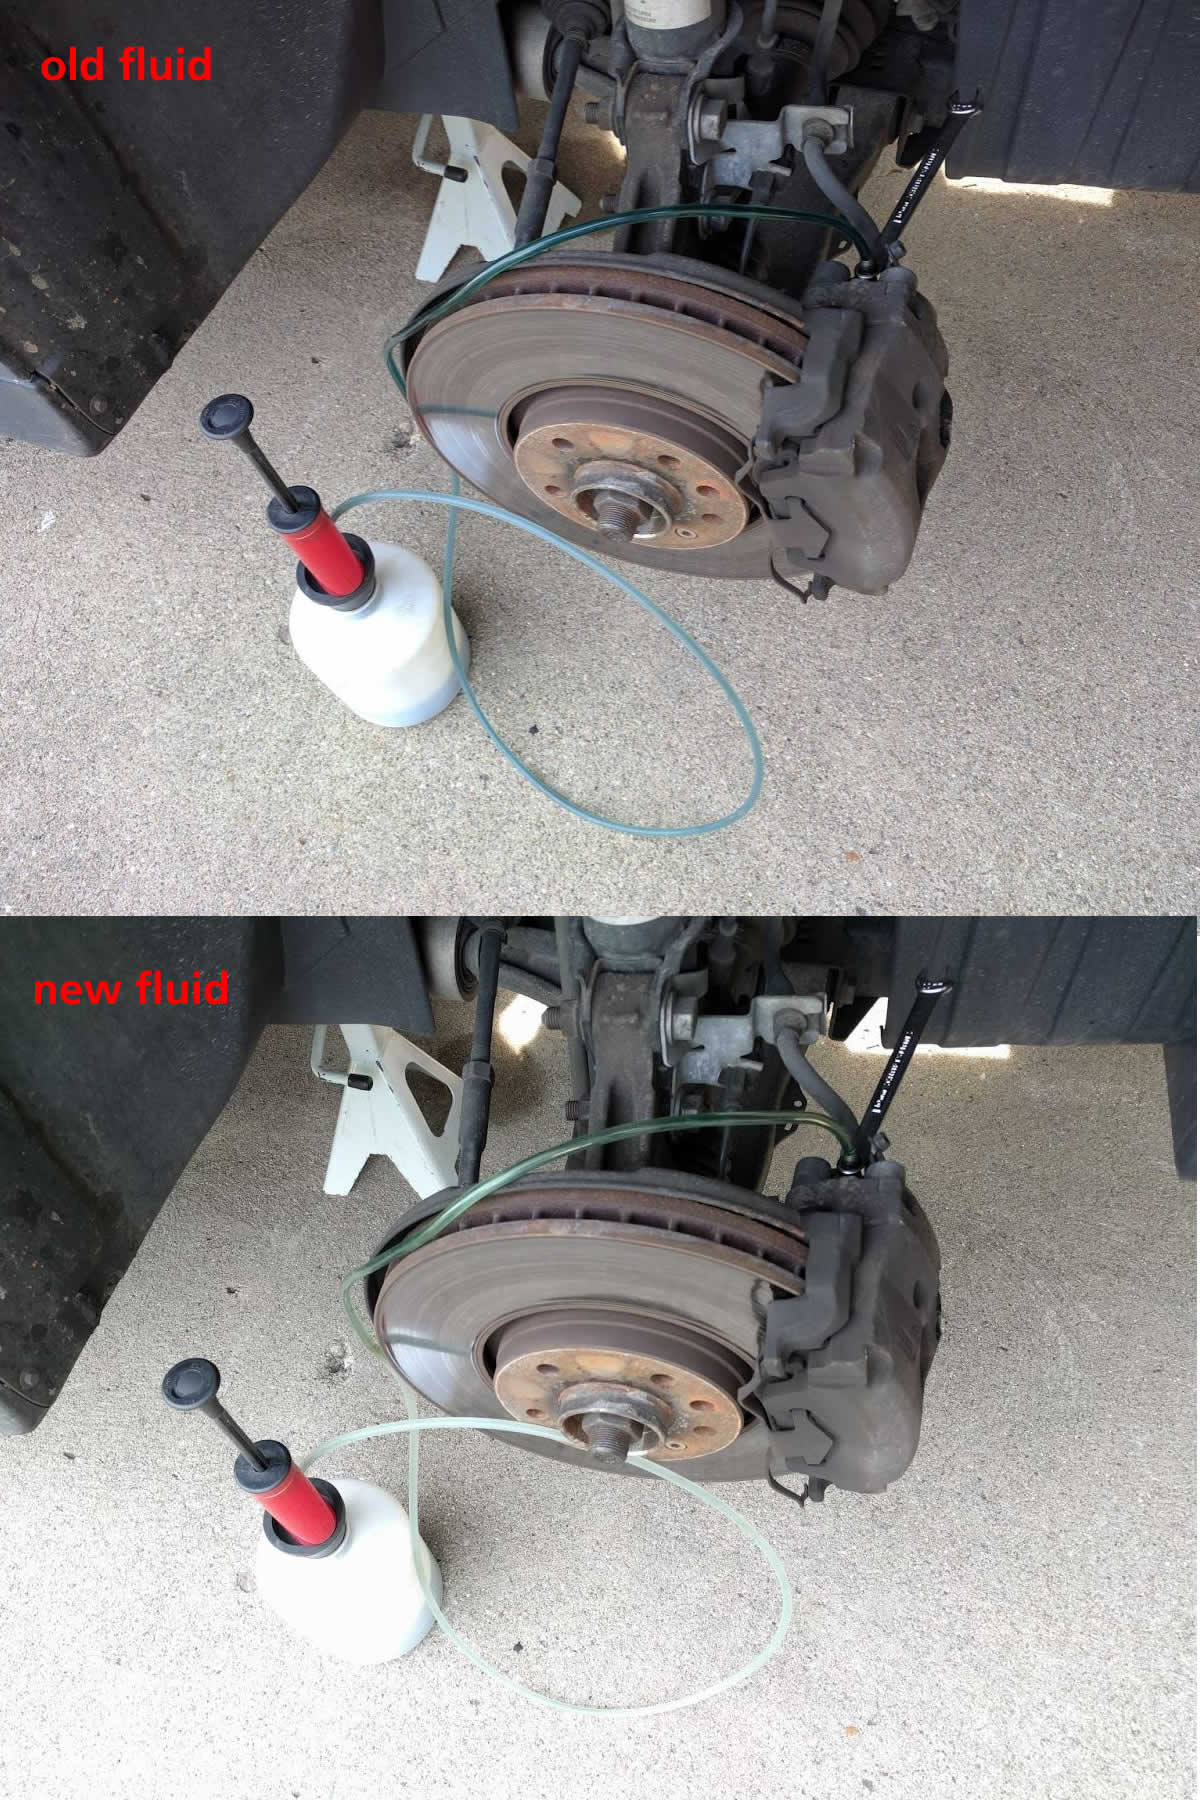
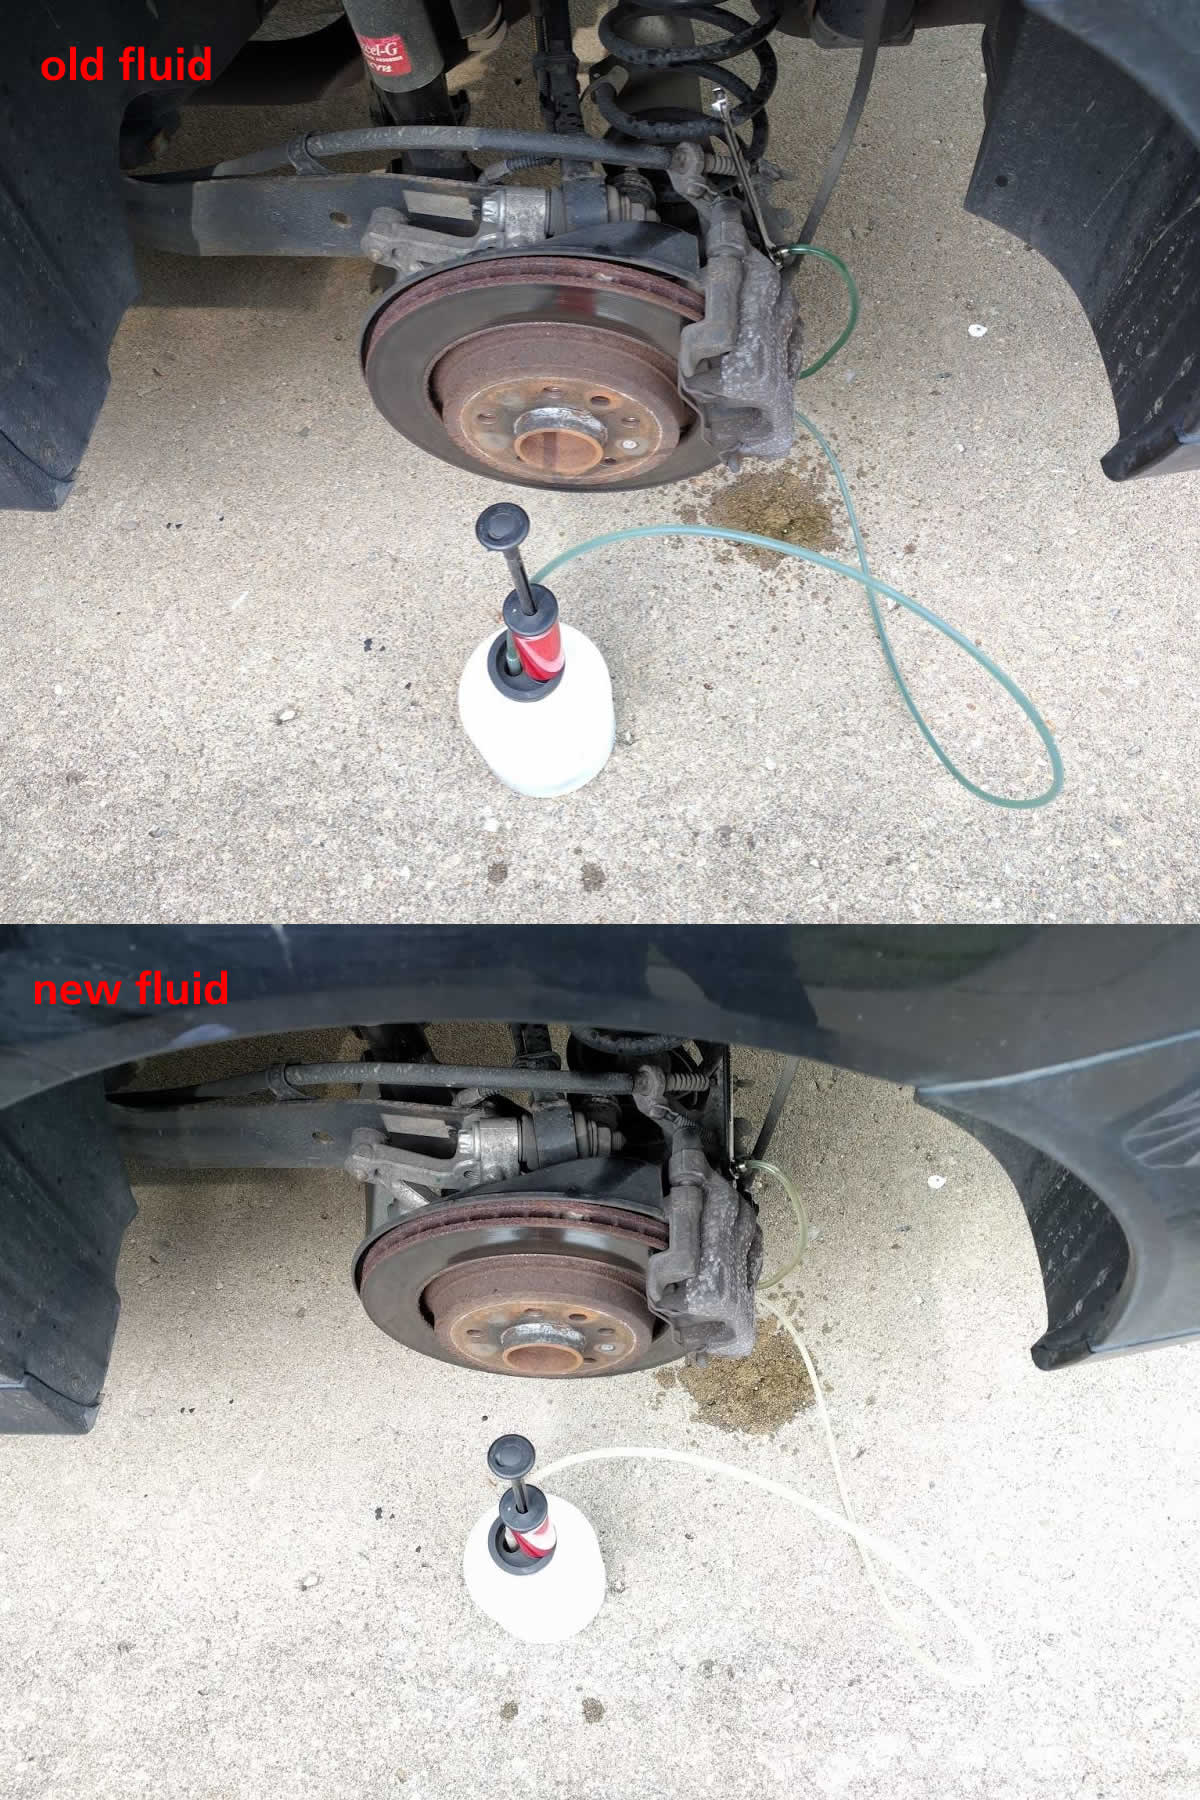
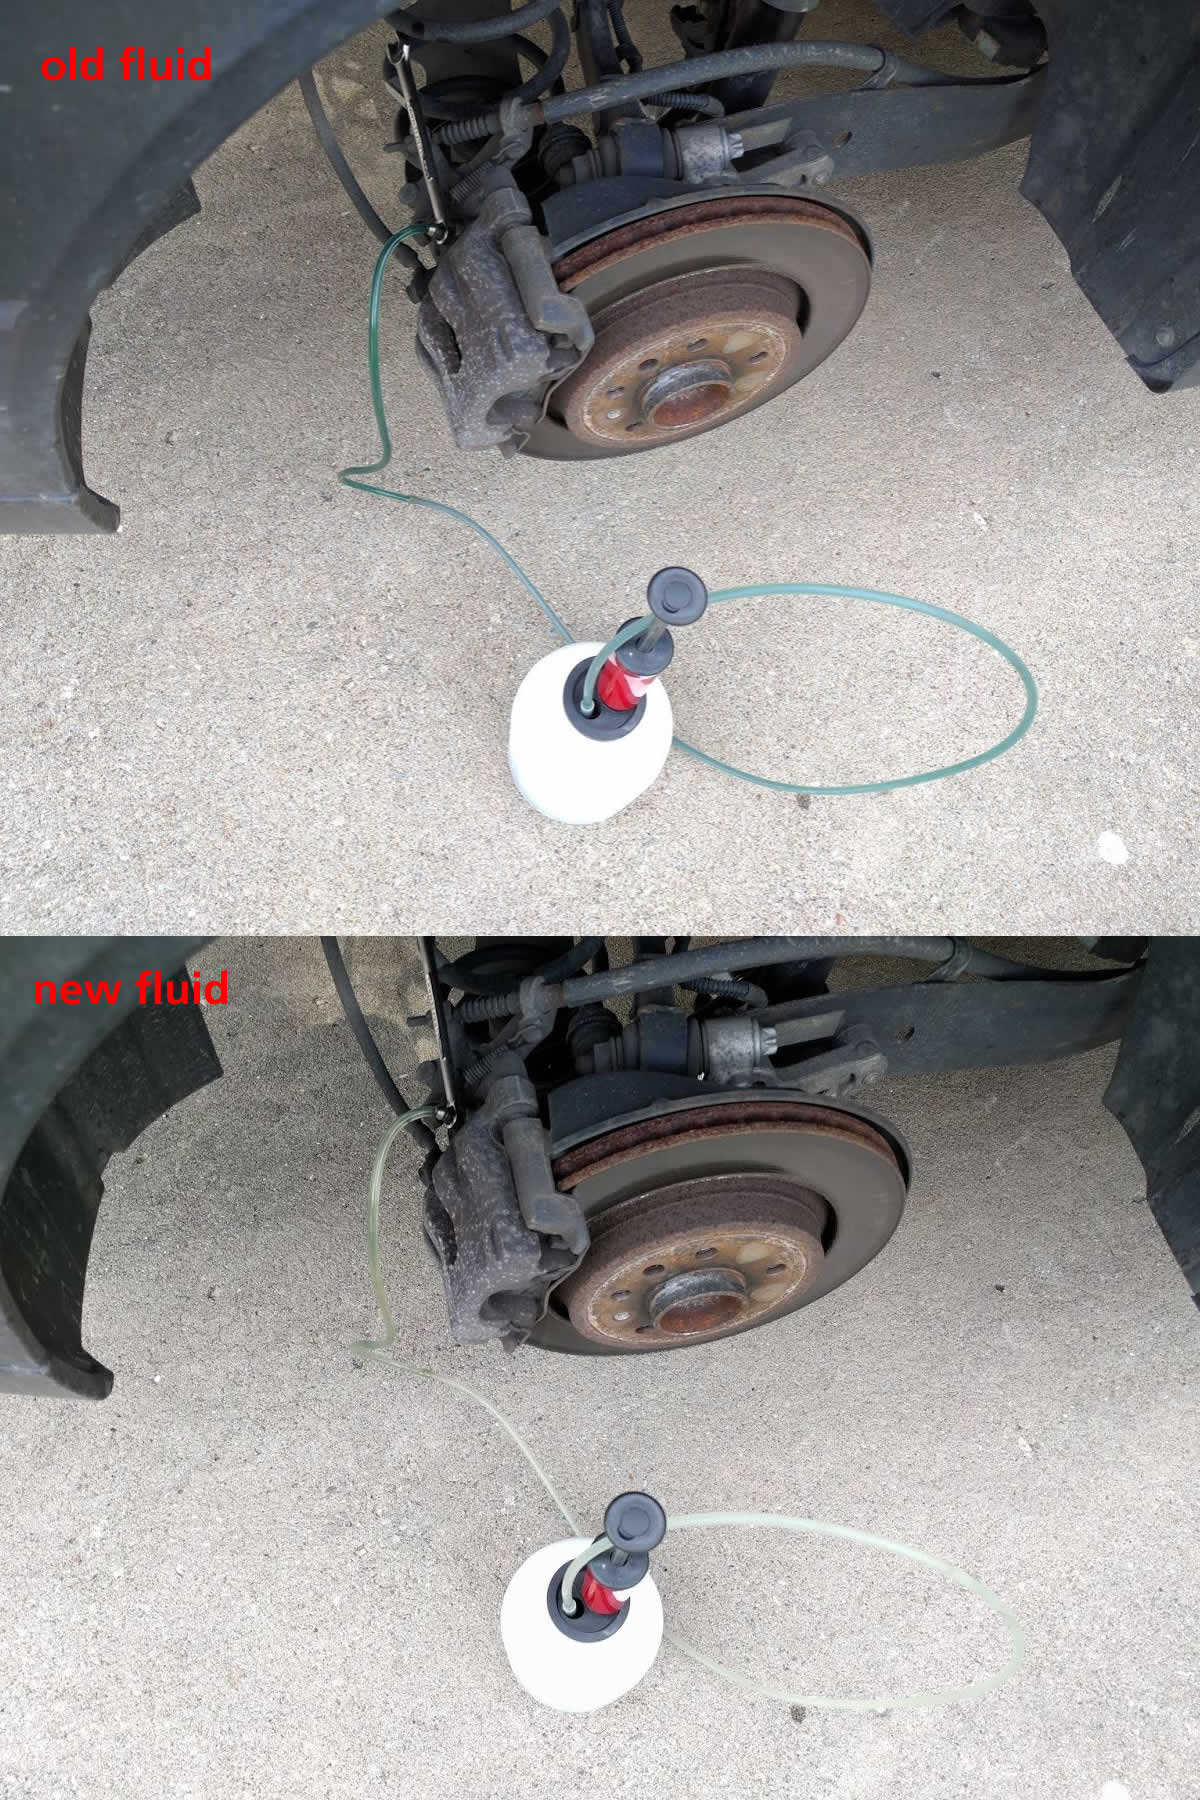
Step 9:
New fluid will eventually come out. When there aren’t any air bubbles showing with each brake pedal pump, tighten the bleed screw during one of the pumps to ensure air doesn’t seep into the brake line. Notice the color change as the old fluid was blue and the new fluid is clear (this will vary based on whatever fluid color is in your vehicle and what the new color is):

Step 10:
Repeat for the front passenger side (the next closest corner to the brake fluid reservoir):
Step 11:
Repeat for the rear driver side (the next closest corner to the brake fluid reservoir):
Step 12:
And finally repeat once more for the rear passenger side (the furthest corner to the brake fluid reservoir):
Step 13:
Re-install the wheels and hand tighten the bolts. Jack up the car to remove the jack stands, then lower the car and torque the wheel bolts to 80 ft-lb.
Step 14:
Top off the brake fluid reservoir so that the level is at the “max” line.
Go for a quick test drive to ensure that the brakes are working and consider treating your helper!