- 02/03/2017
- 2 Min Read
- By: Jay VanGorden
How to Change Valve Cover Gaskets on a Saab 9-3

Valve cover gaskets are something I consider replacing as preventative maintenance when it has seen over 100k miles. The gaskets tend to become hard+brittle with increasing likelihood that it may spring a leak and make a mess. In addition, oil sludge can form if you don’t stick to the recommended oil listed in the owner’s manual (especially for a 2004 Saab 9-3 Arc, which is the focus of this DIY). Checking underneath the valve cover and taking a look to see if there’s a sludge problem while replacing an aged gasket makes it even more worthwhile to do.
Tools you’ll need:
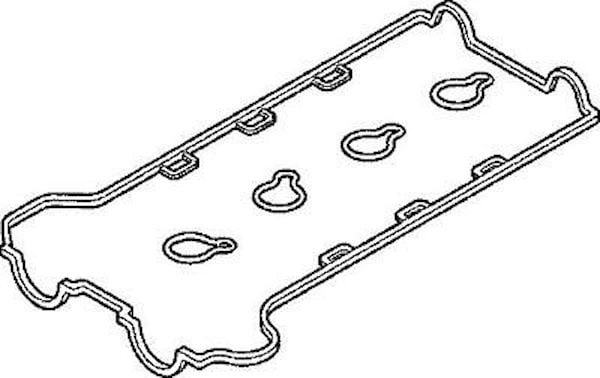
- New valve cover gaskets
- ¼” drive ratchet, extension + 10mm deep socket
- Torx T30 bit
- Torque wrench
- Flathead screwdriver
- Hose clamp pliers
- Rubber mallet
- Small pry bar
- Magnet pickup (recommended in case you drop a bolt in a crevice somewhere)###Ready to change your valve cover gasket?
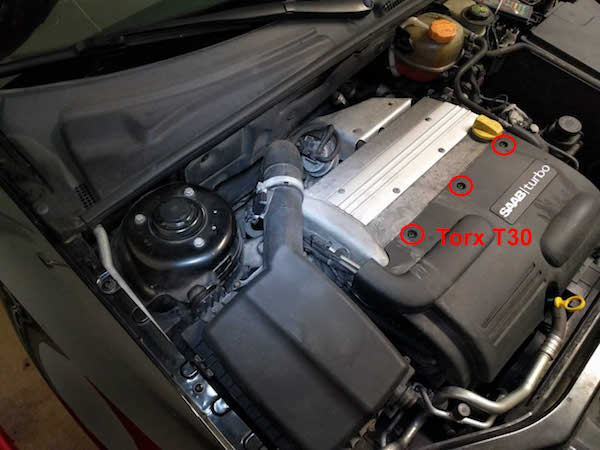
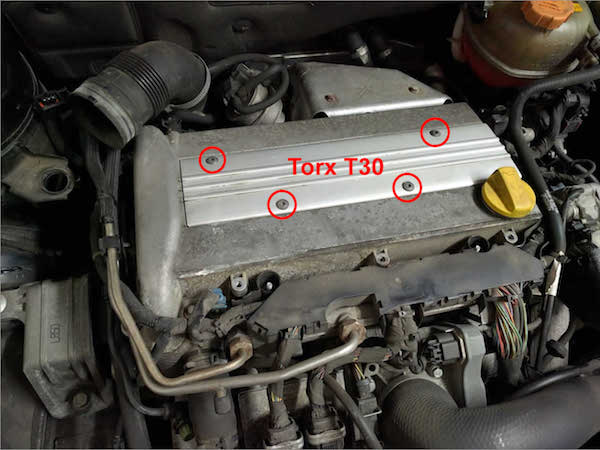
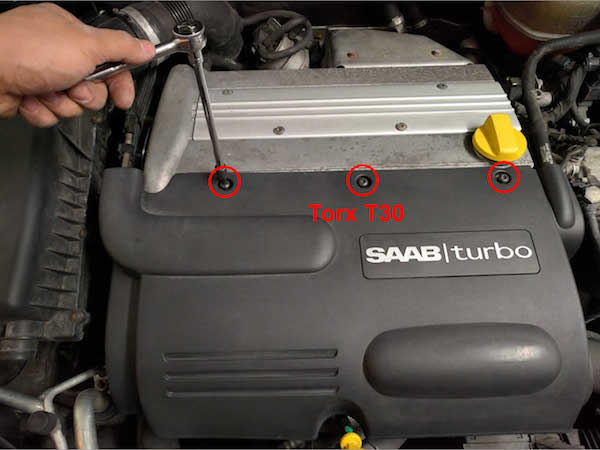
Remove the upper engine cover using a Torx T30 bit:
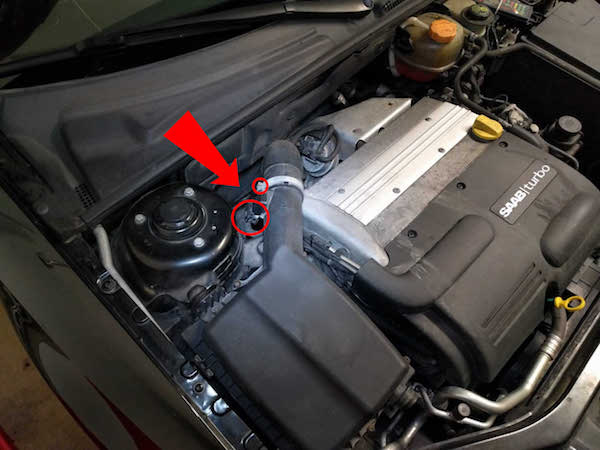
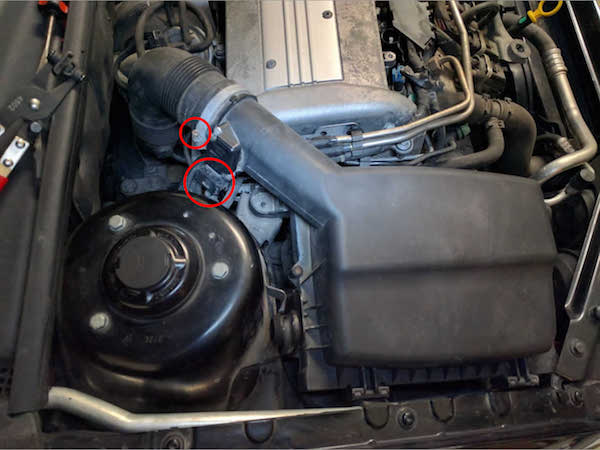
Remove the air filter box by using a flathead screwdriver to disconnect the inlet hose and *carefully* disconnecting the mass air flow sensor connector, then lifting the housing out of the car:
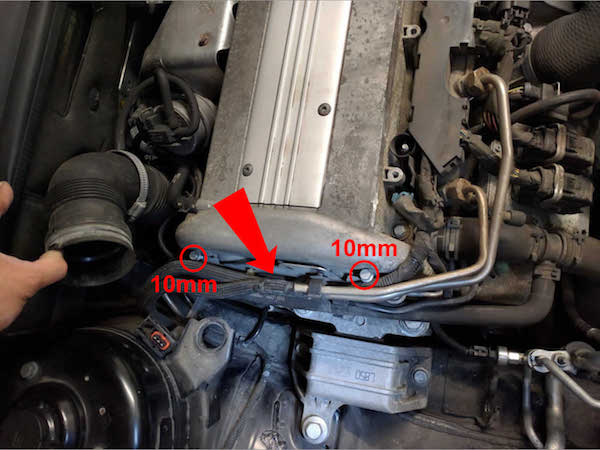
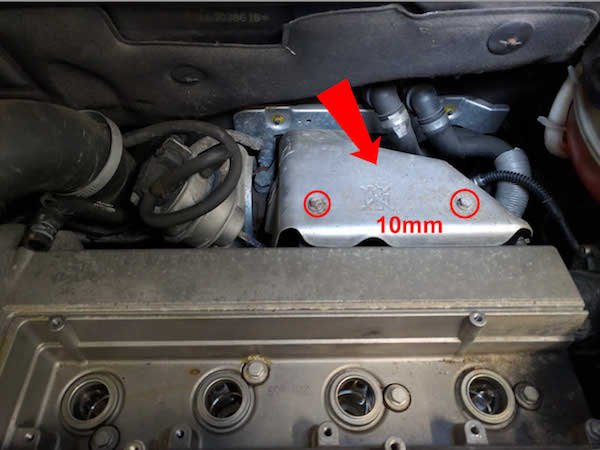
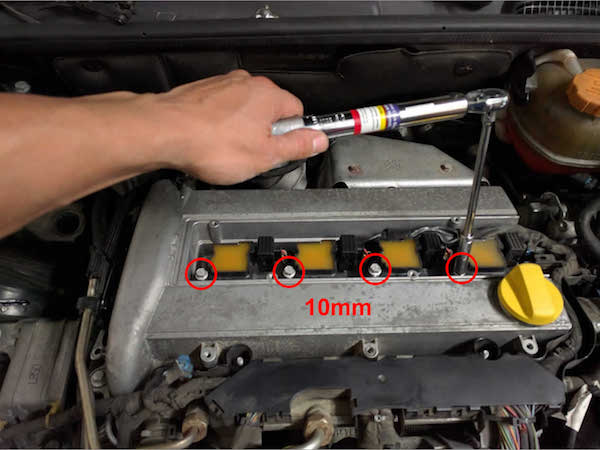
Disconnect as many fuel and electrical lines’ retaining clips as needed from the mounting plate to clear enough room around the valve cover then remove the plate’s mounting bolts using a 10mm socket. Be warned: some of the retaining clips may break as the plastic becomes brittle over time.
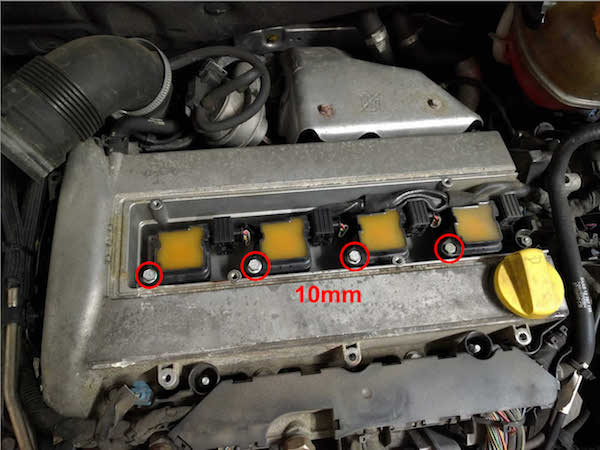
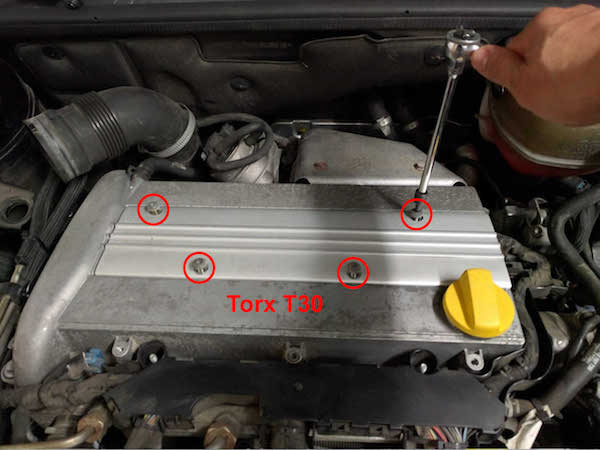
Remove the cover over the ignition coils using a Torx T30 bit:
Remove and set aside the ignition coils using a 10mm socket:
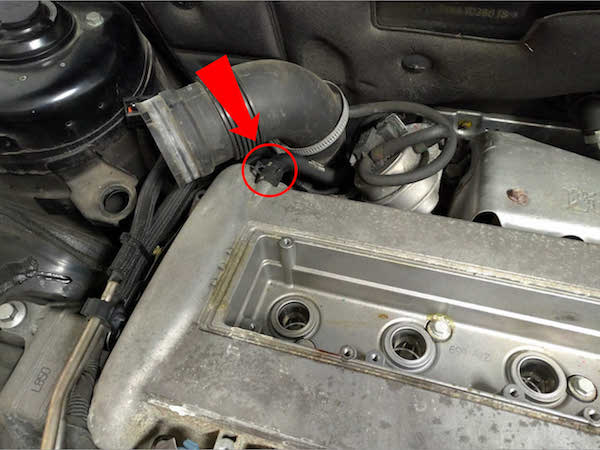
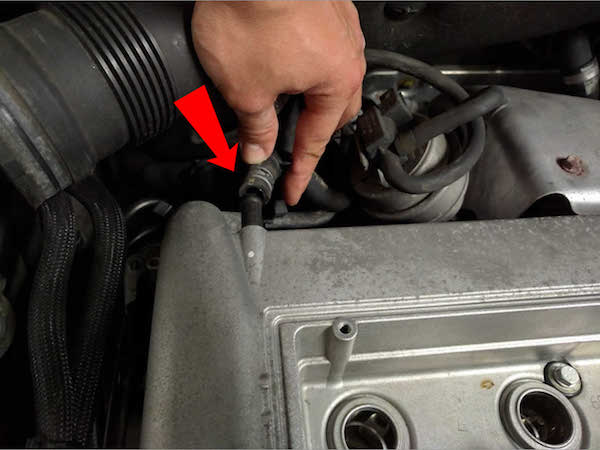
Disconnect the crankcase ventilation hose from the valve cover using hose clamp pliers:
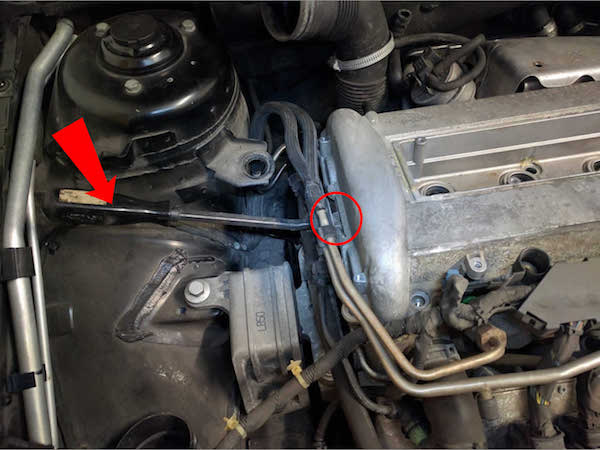
Disconnect the cable duct using a 10mm socket and carefully guide it away from the edges of the valve cover:
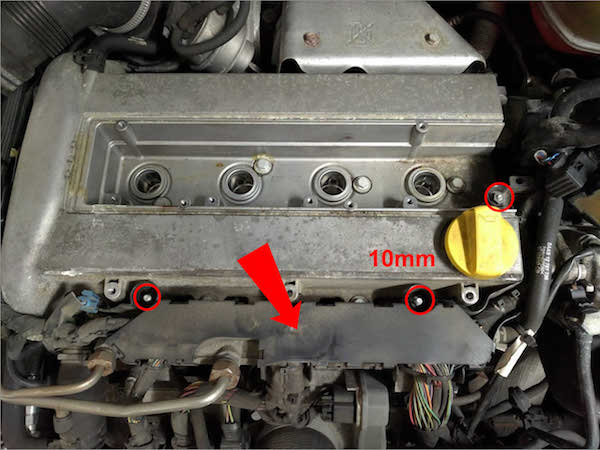
Remove the heat shield over the turbocharger using a 10mm socket. Mine didn’t slip out for some reason but I was able to move it just enough out of the way:
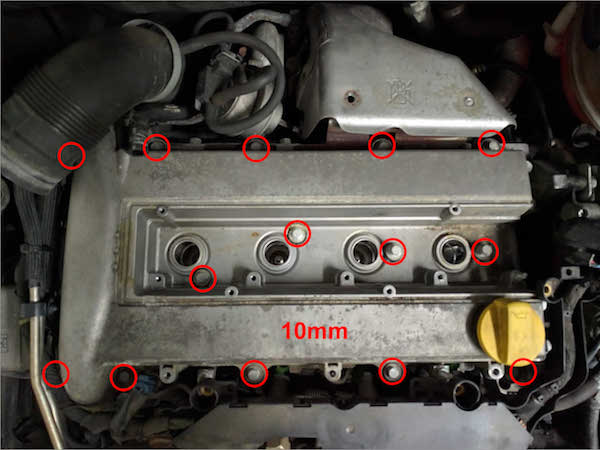
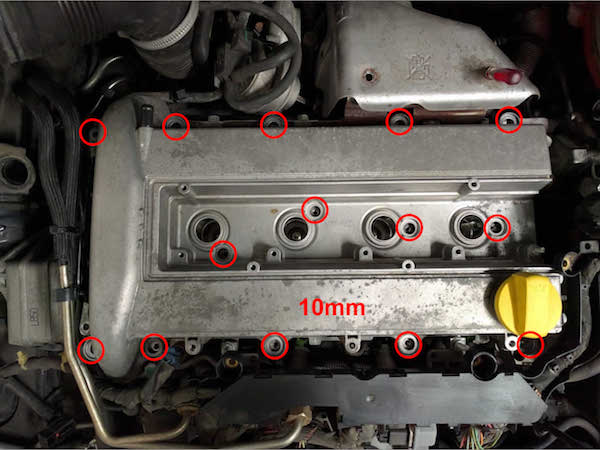
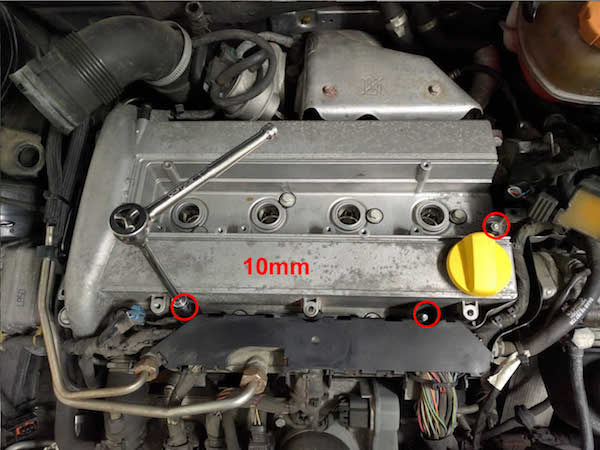
Remove the valve cover bolts using a 10mm socket:
If needed, use a rubber mallet to try and loosen the valve cover. Mine seemed to need this to help get it off.
There’s a spot on the passenger side where you can use a small pry bar as leverage to get the valve cover off:
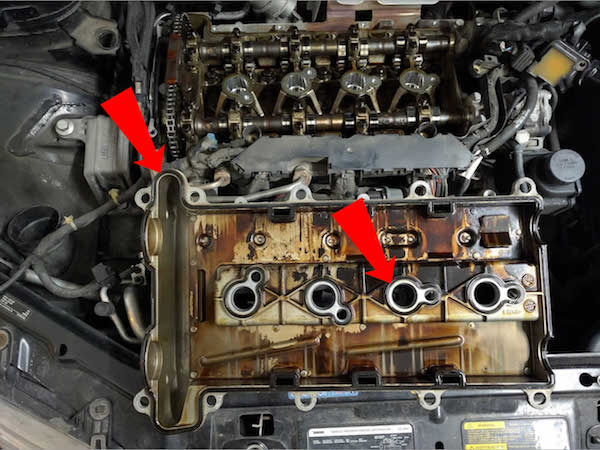
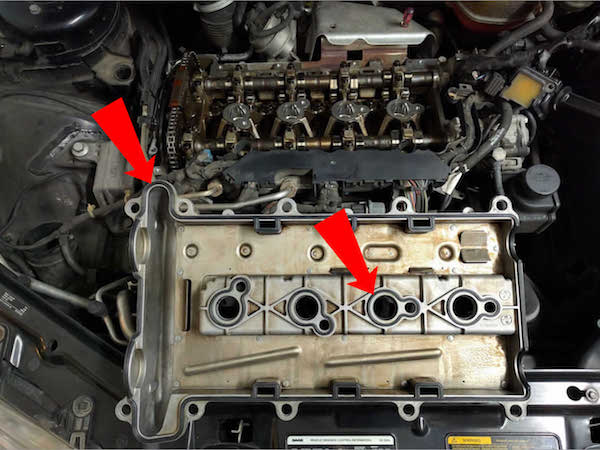
Once the valve cover is removed, flip it over and remove the old valve cover gasket and seals around the spark plug holes. The old ones were getting pretty hard so it was time to replace them. At this point you can also assess whether or not you’ve got an oil sludge problem. This car didn’t have any which supports the previous owner’s history records listing exclusive use of Mobil-1 full synthetic oil in each of the oil change intervals.
###Reassembly!
Installation is essentially the reverse of removal.
Clean up the mating surfaces where the new gaskets contact both the valve cover and the engine using a clean rag or paper towels. While not necessary to do I also scrubbed the valve cover clean but it took me over 2 hours to get all the water out (I used dish detergent and a bristle brush in a sink). I admit going a bit OCD with cleanliness here.
Insert the new gaskets:
While ensuring that the gaskets remain in place, install the valve cover and torque the bolts in a criss-cross pattern to 88 in-lb using a 10mm socket and torque wrench. Before installing the bolts I cleaned up all the crustiness from each bolt’s seal using a damp rag so they felt smooth and pliable.
Install the heat shield over the turbocharger using a 10mm socket:

Install the cable duct using a 10mm socket:
Connect the crankcase ventilation hose using hose clamp pliers:
Install the ignition coils and torque to 70 in-lb using a 10mm socket and torque wrench:
Install the cover over the ignition coils using a Torx T30 bit:
Reconnect any fuel and electrical lines’ retaining clips to the mounting plate and install the plate’s mounting bolts using a 10mm socket:

Install the air filter box by using a flathead screwdriver to reconnect the inlet hose and *carefully* reconnect the mass air flow sensor connector. Ensure that the lower intake hose is seated correctly into the bottom of the air filter housing.
Install the upper engine cover using a Torx T30 bit:
Congrats, you've just accomplished what many find scary to do! It's really not that hard: it just looks intimidating.