As your beloved Volvo parts age, more and more of the suspension is wearing out and can make funny clunking noises. The most recent job I did is to replace the front control arms on my 2006 XC90 V8. As the control arm bushings wore out, I would get odd changes in steering during braking and acceleration. During braking, the car would dive to the left, and during acceleration the car would pull to the right. The steering wheel also didn't return to dead center when the car was going straight, I had to turn the wheel about 10 degrees to the left.
After moving the wheels and inspecting the control arms, it was pretty obvious that the bushings were shot and would have to be replaced.

Step 1: Remove the front wheels and undertray
Remove the wheels so we can gain access to the suspension components. Make sure the car is secured on jack stands - never work under a car secured only by a jack. Once the car is lifted and the wheels removed, also remove the undertray.
Step 2: Remove the brake calipers
The brake calipers are held on by two 18mm bolts. Use extra jack stands or bungee cords to secure the calipers - don't let them hang by the brake lines.
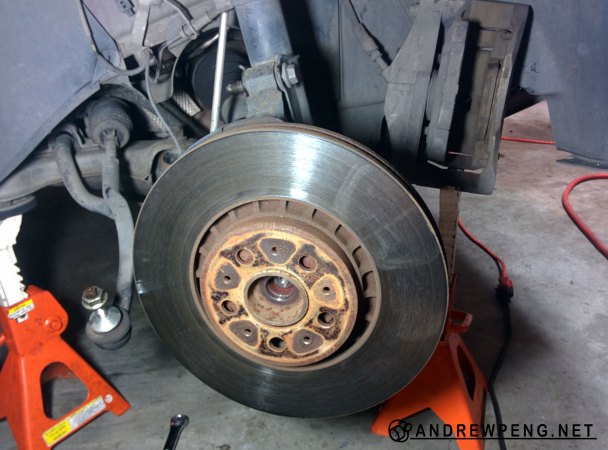
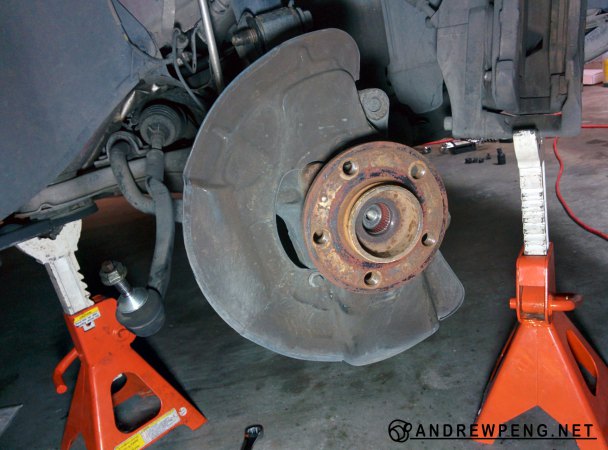
Step 3: Remove the brake rotors
With the brake caliper off, remove the 10mm bolt holding the rotor to the hub. Remove the rotor and set it aside.
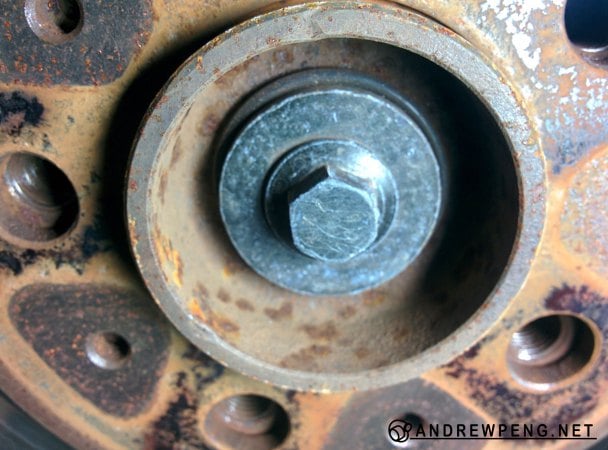
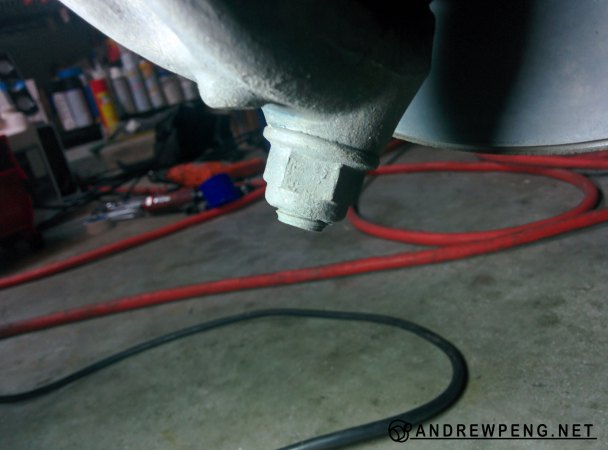
Step 4: Remove the axle bolt
Remove the 14mm bolt holding the axle to the hub.
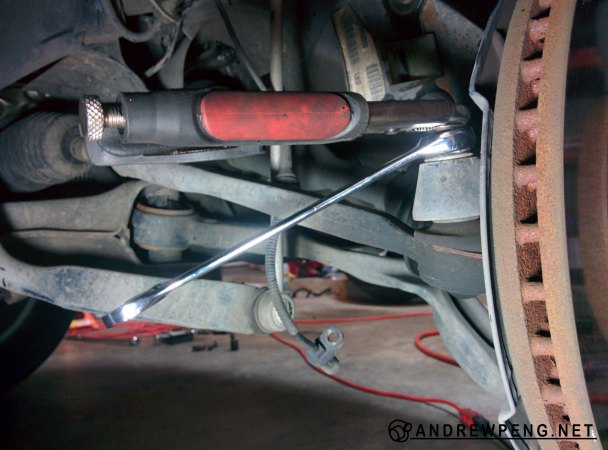
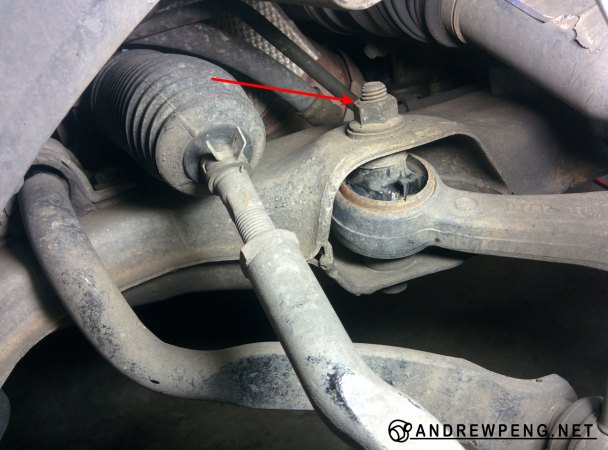
Step 5: Remove tie rod ball joint nut
Remove the 19mm nut holding the tie rod end to the hub. You may need to hold the end of the tie rod with a set of locking pliers and remove the nut with a box wrench. You may need to "encourage" the tie rod end to come out of the hub with a hammer. Careful with the threads.
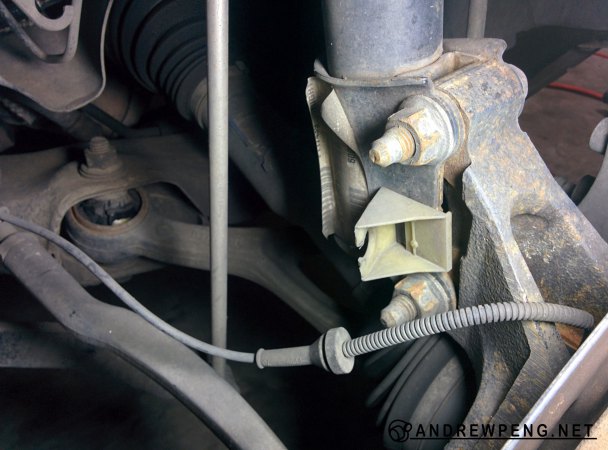
Step 6: Remove the ABS sensor
The ABS sensor is held in with an 8mm bolt. Remove it and carefully pull out the ABS sensor.
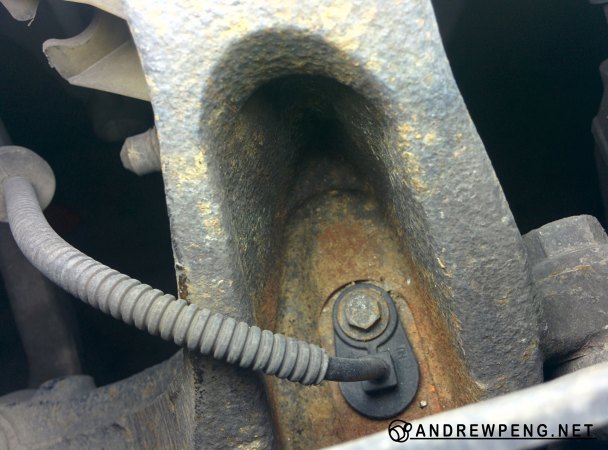
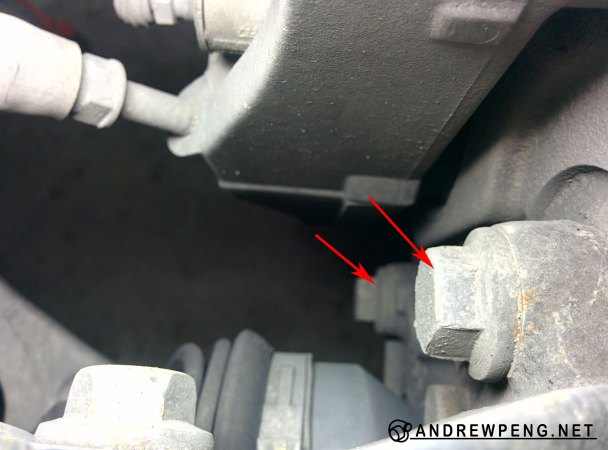
Step 7: Remove the lower ball joint nut
Remove the 21mm lower ball joint nut. I used an impact gun, but a long breaker bar will work as well.
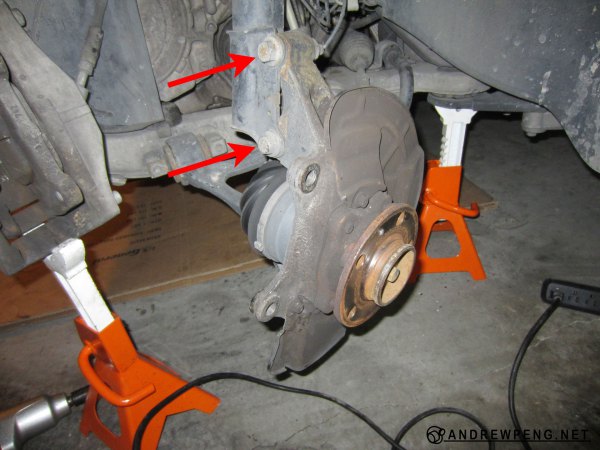
Step 8: Remove the strut bolts
Remove the two 21mm nuts from the 18mm strut bolts.
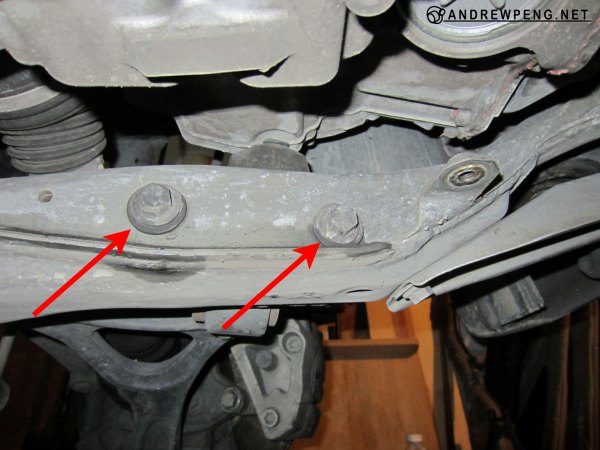
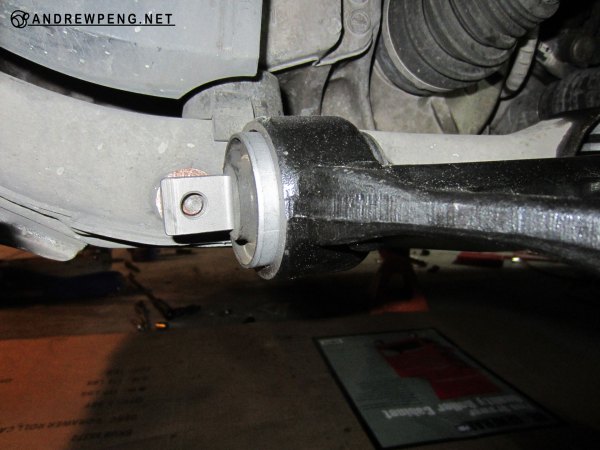
Step 9: Remove the control arm rear bolt
The rear of the control arm is held in by a 18mm bolt and a 21mm nut.
Step 10: Remove the control arm front bolts
The front of the control arm is held by two 15mm bolts. The front of the control arm may snap free.
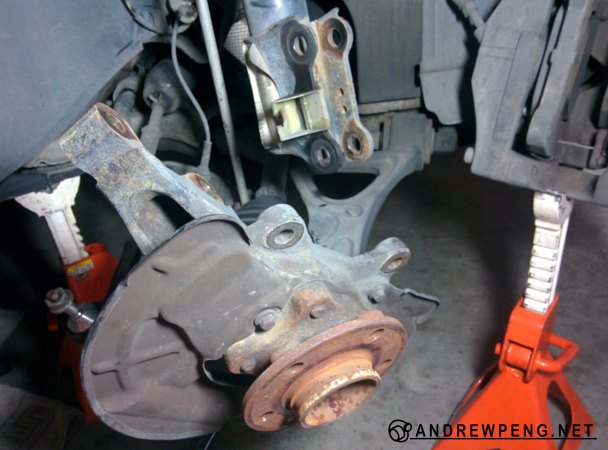
Step 11: Remove the hub and lower control arm assembly
I do this by first removing the strut bolts, then pulling the top of the hub assembly away from the car. Several taps of a hammer against the strut mount may be required to free the hub assembly. Grab the axle shaft and push it into the transmission to collapse the CV joint. This should pull the axle out of the hub. Once the hub is free of the strut, remove the hub and lower control arm assembly as one unit. The ball joint will probably be still attached to the control arm.

Step 12: Separate the control arm from the hub
This is a separate step because it's a significant amount of work, particularly if you're not comfortable with using force. I used a drilling hammer to hit the side of the control arm where the ball joint is inserted in. It will take several sharp hits with a large hammer to free the control arm from the ball joint. Penetrating lubricant such as PB Blaster will help. My OEM Volvo ball joints were still in excellent condition, so I opted to keep them installed to the hub.

Step 13: Install the lower control arm to the subframe
Install the control arm to the subframe with the two 15mm forward bolts and the rear 18mm bolt and 21mm nut. The front two bolts needs to be tightened to 59 lb-ft. The rear large vertical bolt needs to be torqued to 96 lb-ft.
Step 14: Install the hub
Drop the hub and ball joint into the new control arm. Install the 21mm nut loosely onto the ball joint threads. Getting the hub assembly mated to the strut will take considerable effort. I used a long breaker bar inserted through the control arm. By sitting on the breaker bar, I was able to get the hub and control arm assembly low enough to slip the strut into the mount and quickly slip in the two bolts. While negotiating the strut into place, you'll also need to insert the axle into the hub assembly. Grab the axle shaft and pull it away from the transmission to extend the CV joint, and feed it into the hub assembly. Loosely install the nuts for the strut bolts.
Step 15: Attach the tie rod end to the hub
Rotate the hub assembly to line up with the tie rod end and install the nut. Tighten to 58 lb-ft.
Step 16: Tighten ball joint and strut bolts
Ball joint nut should be tightened to 74 lb-ft. Strut bolts should be tightened to 74 lb-ft.
Step 17: Install ABS sensor
Install the ABS sensor and install the 8mm bolt. Hand tighten.
Step 18: Install rotors and calipers
Set the brake rotors on the hub and install the bolt that fixes the rotor on the hub. Make sure the friction surfaces are clean on the rotors, and install the brake calipers. Torque brake caliper bolts to 78 lb-ft and then angle tighten 60°
Step 19: Install axle bolt
Install the axle bolt and tighten to 26 lb-ft, then angle tighten 120°
Step 20: Install wheels and undertray
Should be self explanatory - my dislike of wheel bolts knows no bounds. Tighten wheel bolts to 108 lb-ft
Step 21: Get the car aligned
Since we messed around with the suspension geometry in the front of the car, it would be best to get the car realigned!