- 01/05/2015
- 2 Min Read
- By: Anthony Peacock
How to Change Your Volvo's ATF The Easy Way (P80)
Changing the transmission fluid on your Volvo is one of those jobs you are always ready to do, whether you know it or not. It requires minimal tools, hardly any preparation, and can take no more than 30 minutes if you have someone to help. The automatic transmission fluid is essential to the operation of your vehicle, and unlike engine oil, the usable capacity of the transmission is much closer to its maximum fill point. This means if your engine needs 6.1L of oil it can burn some off and still be fine. This is not the case when it comes to ATF. The owners manual states:
"The space between the MIN and MAX marks on the dipstick corresponds to 0.5 US qt. (0.5 liter). Do not fill the transmission with too much oil, since this can result in oil being ejected from the transmission. Too little oil, on the other hand, can negatively affect transmission operation, particularly in very cold weather."
The 93-00 Four-speed Aisin AW50-42 automatic transmission holds two gallons of fluid. Your car may have a slightly different total capacity which can be found in the owners manual.
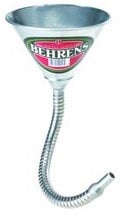 Tools needed:
- Transmission Fluid Funnel
- ATF Cooling Hose Retaining Clips (depending on model year)
- 3 Gallons of Dexron III Approved ATF (I used Castrol Dex/Merc)
- 3'-4' clear tube with an internal diameter of 1/2"
- Paper Towels / Gloves
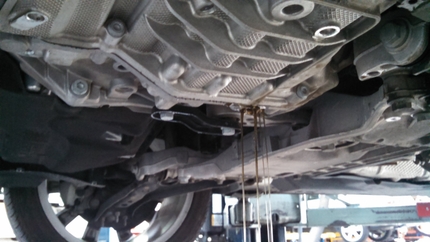
There are at least two ways of extracting the transmission fluid from your Volvo. The first being the bottom drain plug requiring you to lift the car and remove the plug just like you would drain the engine oil. This method is alright but doesn't offer any way to monitor the total amount of fluid extracted. It also may involve laying on the ground, and that's just annoying.
Option 2: Don't lift the car
By using the transmission as a pump you can evacuate all of the fluid through the transmission oil cooler line located right under the air intake. This way you can collect the fluid just a few quarts at a time and your don't even have to lift the car, win win right?
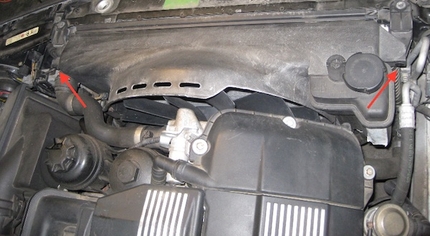
Begin by removing the piece of the intake that bridges the air box and the piece right behind the radiator support. Next locate the yellow transmission fluid dip stick. You'll need to remove this and use it as a filling point for your new fluid. Use caution when removing the dipstick, every one I've encountered is pretty well seized in place and takes some maneuvering to free from the tube. If it breaks off its not the end of the world but it will certainly extend your job time. To gain further access in this area un-mount the evap valve and place it aside.
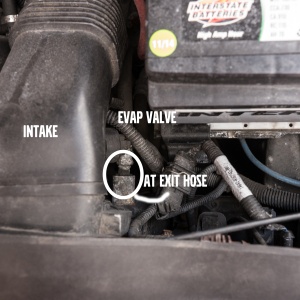
Next locate the transmission cooler line itself. There are two styles, and the newer version which appears on 1999+ cars will have a reusable plastic clip while older models ('93-'98) have a disposable metal one that must be replaced after removal.
While the 99+ style is reusable, they often become brittle and break regardless. It's always a good idea to have these on hand anyway.
Depress both sides of the green clip and start to work it out. Just like the dipstick be careful and wiggle/rotate as you pull. Don't expect much fluid to be lost at this point but have a paper towel ready. If you have the older style, use a flat blade screw driver to expand the clip from around the tube. With the metal clip off, the tube will pull back freely.
I removed the front most o-ring so I could protect it from any breaking or cuts as a result of the drain tube. With the receptacle set up turn on the car and let it start pumping out the old fluid.
[gallery type="square" columns="2" size="medium" ids="7518,7520"]
Here I used a one gallon milk jug to approximate my removal amount. I found that two quarts at a time was enough to keep up a solid flow of ATF. To stop the flow of fluid turn off the car. This is where either a long enough length of hose or an assistant comes into play either allows you to monitor the output.
[gallery type="square" size="medium" ids="7519,7521,7522"]
After removing the first two quarts I measured out the replacement amount and let that enter through the dip stick. You'll need to repeat this about 6 times or until the fluid being pumped out becomes bright red. I used three gallons in total and it seemed to be just about right near the last three quarts going in / out. Feed the new fluid in slowly as the dip stick tube doesn't offer a high intake rate like the oil fill cap.
[gallery type="square" size="medium" ids="7524,7525,7526"]
The car didn't move in drive
With the fluid changed I had a little bit left over and upon trying to test drive the car I realized it was still low as the car didn't move when in drive while idling. I re-checked the fluid level and added an additional quart at which point normal operation was restored. Per the owners manual "Park the car on a level surface with the engine idling . Slowly move the gear selector lever through all the shift positions and then to position P. Wait 3 minutes before checking the oil level. The oil level should between the MIN and MAX marks. Wipe the dipstick with a clean cloth."
The level can be a bit finicky and it has been advised that it may be more helpful checking the level while warm. Starting the car and letting it circulate after filling it up can help as well.
After everything its put back together your can dispose of the ATF just like used motor oil.
About the Author: Anthony Peacock
 Anthony Peacock is a small business owner and Volvo DIY enthusiast. He is an experienced videographer and editor with a long running reputation for owning and promoting Volvo cars and their many excellent qualities.


