- 04/15/2015
- 1 Min Read
- By: Jay VanGorden
How to Install an ELEVATE Upper Torque Mount Bushing (Volvo)
As an engine runs it vibrates, yet your engine mounts are designed to handle that vibration while securing the engine firmly in the car. Over time, engine mounts deteriorate resulting in extra engine noise and a less enjoyable driving experience, and thus must be replaced. Being a Volvo owner, you should already be familiar with the upper engine torque mount for a few reasons:
First, it's usually the first thing that catches your eye once you open the hood. The torque rod mount is a big silver bracket with a rubber center that is used to attach your engine to the factory upper strut bar. Second, this mount commonly fails, producing an audible knocking sound every time you accelerate. This may also lead to excessive engine vibrations and you'll also tend to feel the engine a bit more when idle. Lastly, the rubber may start to disintegrate.
I couldn't wait to install one of these on my own S60
For those of us that are more performance oriented, we noticed that these factory rubber bushings allow for just too much play and tend to allow the engine to pivot and rock far too much for our liking. The good news is that ELEVATE has developed a solution for those of us looking to get a little more out of our Volvo and crave that sports car drive and feel.The ELEVATE Volvo S60 Upper Engine Mount Bushing is an ideal replacement for your worn out factory bushing, or for those looking for a performance edge by eliminating excessive engine movement. Its exclusive design uses premium quality polyurethane with molded in steel plates for added stability. Additionally, they offer it in both the earlier "Round" design or the late "Square" Design. As the Volvo Catalog Manager here at FCP, I just couldn't wait to install one of these on my own S60. I especially liked the way that it matched the factory black color and can hardly be noticed to the naked eye, that is, until you start driving...... Let's get started.
Installation
1. Loosen the nut from the center bolt that runs through the center of the mount and remove the bolt.
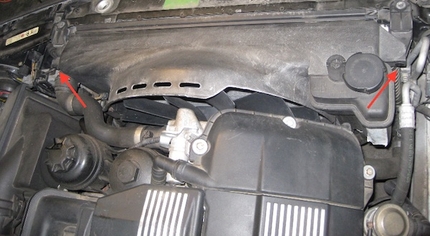
2. Loosen and remove two upper strut mount turret bolts on each side of the bar - 4 in total. There may also be a plastic clip on the passenger side turret which needs to be removed. Now you can lift the bar up and off the vehicle.
[gallery type="square" columns="2" size="medium" ids="9073,9074"]
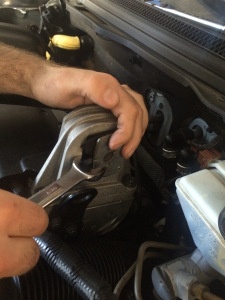
3. On the driver's side of the factory bushing will be a metal plate. This is pressed in place and will need to be removed. The plate isn't too difficult to remove and you can use a small flat head screw driver. I just happened to have an 18mm wrench available so I used that to pry the plate off which was almost effortless.
4. Slide the factory bushing out of the bracket housing towards the passenger side of the vehicle.
[gallery type="square" size="medium" ids="9066,9068,9069"]
5. Insert the Elevate Bushing into the factory bracket however pay close attention to the beveled edge of the bushing which will need to sit into the beveled recession of the bracket.
[gallery type="square" columns="2" size="medium" ids="9070,9071"]
6. Reinstall the strut bar and hardware.
[gallery type="square" columns="2" size="medium" ids="9075,9072"]

