- 02/01/2017
- 1 Min Read
- By: Michael Hallock
How to Replace a P1 Volvo Engine Mount (C30 S40 V50 C70)

On P1 Volvos, there are only three mounts which support the engine and transmission. A Volvo upper engine mount underneath the coolant reservoir, an upper transmission mount underneath the battery box, and Volvo torque mount which bolts to the back of the transmission.
Given time, all engine mounts will eventually fail. However, the upper engine mount experiences high stress and is often due for replacement as early as 100k miles. It is not necessary to simultaneously replace the other two engine mounts, as they are less likely to fail in such a short period of time.
How to tell if the upper engine mount if bad:
The upper engine mount is fluid filled, so the first step to diagnose a failed mount is check for any tears in the rubber or fluid leaks. If you push on the center mount, it should feel solid. If it has developed a tear on the top or bottom, it is likely to have collapsed or developed an air pocket.
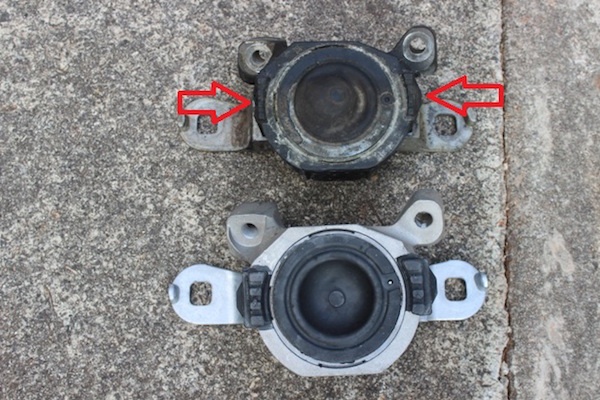
The second most important component of the mount are the two rubber side bumps. While the center mount absorbs impacts and prevents the engine from rattling against metal, these side bumps keep the engine in place and prevent it from shifting. It is very common for these bumps to wear away and allow the engine to shift back and forth when load is applied.
If either of these components are visually bad, the mount is due for replacement. Of course, a failed engine mount will also exhibit symptoms such as excessive engine noise, rattling when the load shifts, and rough idle, especially when parked on a hill.
Here is a worn engine mount next to a new part from FCP Euro. In my case, there was a tear on the bottom of the mount, which drained of fluid and developed an air pocket. You can also see that the side bumps are completely worn away.
FCP Euro offers a selection of factory and aftermarket engine mount replacement options:
Volvo Engine Mount Right (C30 S40 V50 C70)
Necessary Tools:
- Socket wrench with extensions
- 15mm and 17mm sockets
- Jack and a board of wood
Engine Mount Replacement:
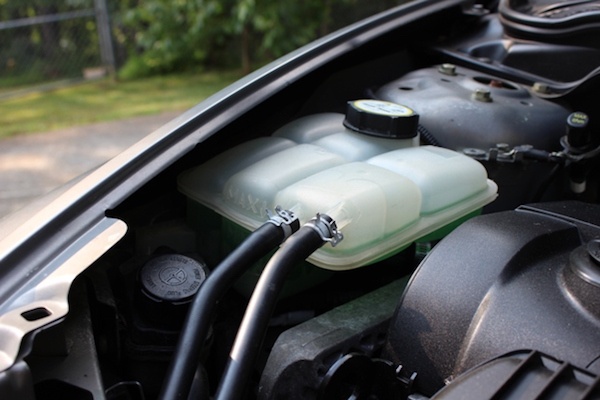
Step 1
Reposition the coolant reservoir. It does not need to be drained of Volvo coolant and the hoses do not need to be disconnected. Simply pull the reservoir straight up off the two mounting tabs and rest it off to the side.
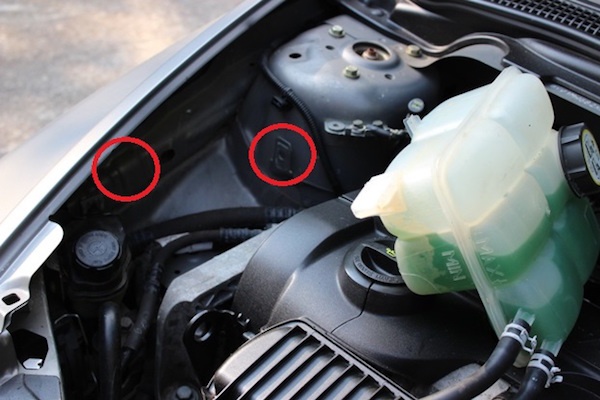
Step 2
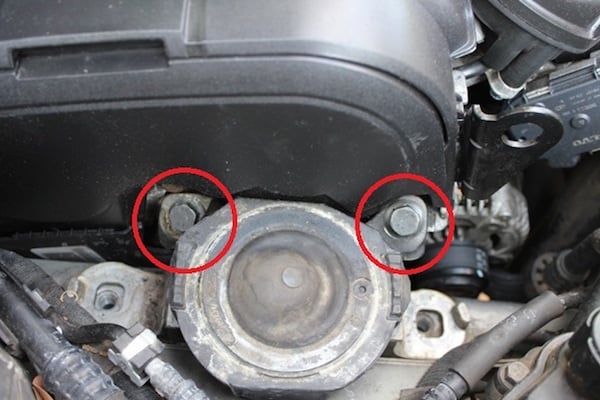
Remove the two 15mm bolts which hold the engine mount bracket in place.
Step 3
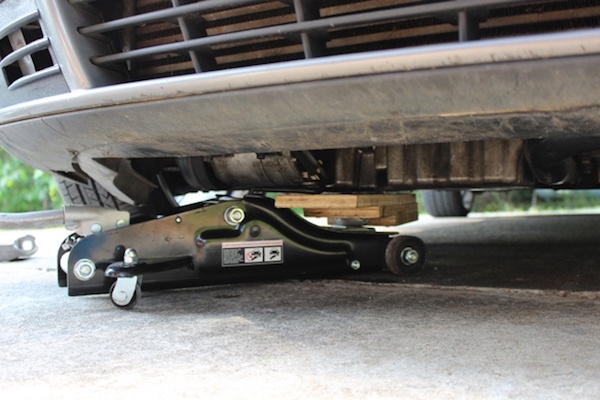
Using a board of wood between the jack and the oil pan, lift the engine so the mount is no longer resting on the frame of the car.
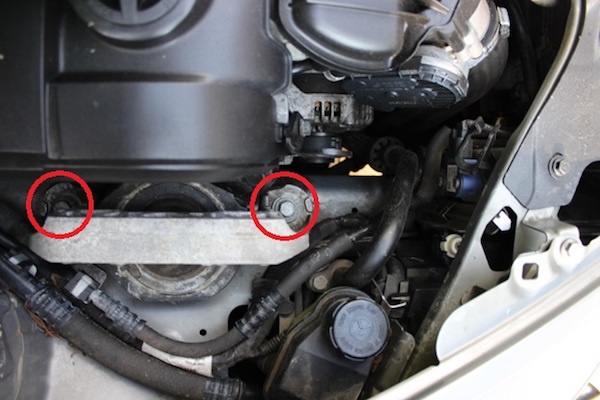
Step 4
Remove the two 17mm bolts which attach the mount to the engine. Ensure that the engine is properly supported before removing the mount from the car.

Step 5
To replace the mount, simply follow the instructions in reverse order. Before replacing the two 15mm bolts and bracket, make sure the engine mount is centered over the threaded bolt holes.