A reader asked if I could write a post on replacing a radiator (which I assumed would be for the 2004 Saab 9-3 Arc I usually write posts about). I wasn’t planning on replacing mine (yet) but figured I could outline what’s needed to complete the job for those that need to do it. I’ll be using a combination of actual pics I took and those from Saab’s Workshop Information System (WIS) since I wasn’t going to take the car apart just for this DIY and not actually replace the radiator:
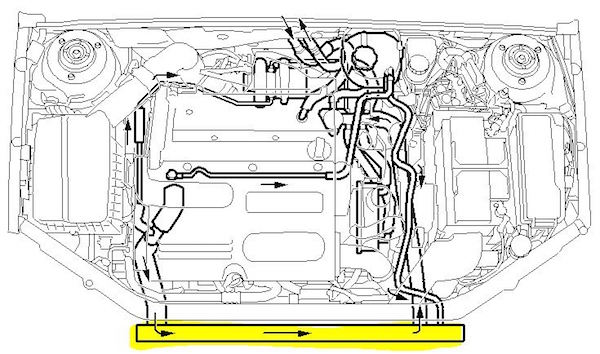
For those that aren’t familiar with vehicle cooling systems the radiator is usually found in the front of the car behind the grill and front bumper, and in front of the radiator fan. The picture below is for a 2004 Saab 9-3 Arc and also shows the flow direction of the coolant in the system (in case you were curious):
This job will require disconnecting components above and below the engine compartment such as air hoses, the radiator fan cowling and the intercooler and condenser attached to the radiator. Lastly, expect to use endless ratchet straps to hang up the fan cowling and charge air cooler while carefully lowering the radiator from underneath the car to remove it.
NOTE: You may want to consider other components to replace at the same time when replacing a radiator. It’s good preventative maintenance if you consider components that have seen many years+miles of use. In addition, usually when you change coolant components separately such as the water pump, thermostat or any of the hoses you’ll be losing/draining coolant each time in the process, which need to be topped off with new coolant each time.
Once I worked on a car where I recently changed the coolant only to find out I had to replace the water pump about 2-3 months later. The owner insisted that I re-use the coolant so I drained it with a cloth filter into a clean container and was able to minimize the amount of new coolant needed to top off the system. This isn’t something I recommend as I prefer flushing old stuff out and keeping the fluid’s protective additives fresh in the system with new coolant BUT I’m just saying that I did it once and it seemed to work in that situation.
Tools you’ll need:
- Drain pan
- Floor jack, jack stands + creeper (car ramps should be fine too)
- Wheel chocks (recommended, but optional)
- Ratchets, drive extensions + sockets
- Torque wrench
- Endless ratchet straps
Ready to replace the radiator?
Make sure your car isn’t hot when doing this job else you may get burned. I prefer warm to cool temps of the coolant which I can sense by touching the radiator hoses.
You’ll be working from above the engine compartment and underneath the front of the car so it would be ideal to park the car in a way that raising the front results in the car being mostly-level. This helps to drain most of the coolant while also getting an ideal position to top off the new coolant when refilling it later while also checking for leaks. I have a decline in my driveway so I can back it in, raise the hood, place wheel chocks at the rear tires, jack up the front and position the jack stands:

Slowly crack open the expansion tank cap to release any built-up pressure and remove the engine and battery covers. Also remove the black plastic battery cooling pipe after the battery cover is off and release it from its catch:
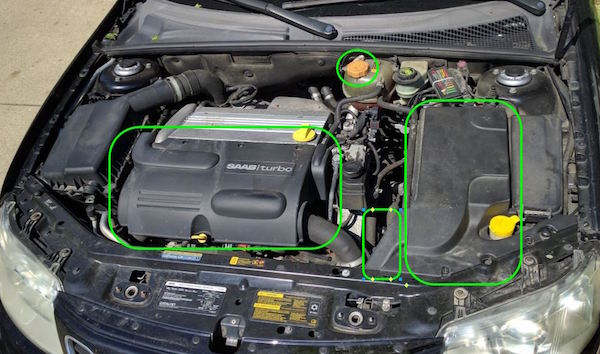
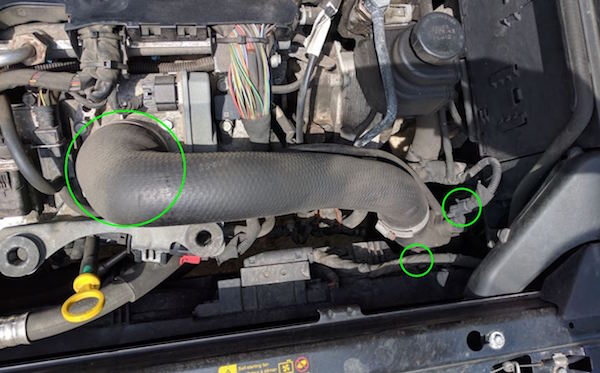
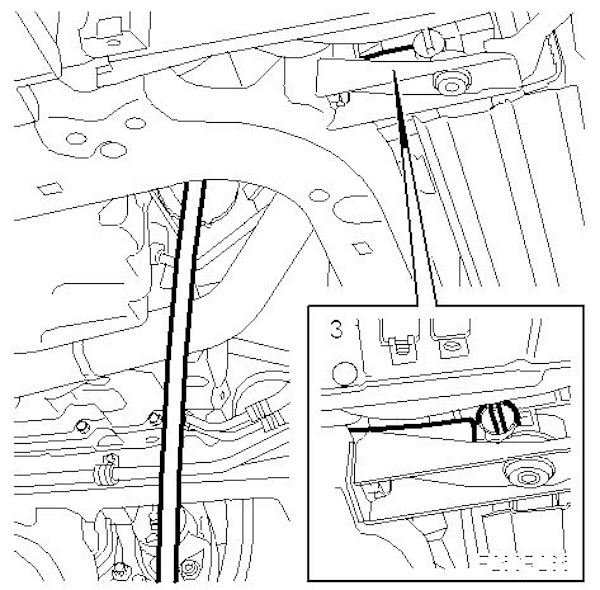
Disconnect the charge air pipe from the throttle body and the pipe’s upper mounting from the fan cowling. Then release the connector and hose from the pressure/temperature sensor on the charge air pipe:
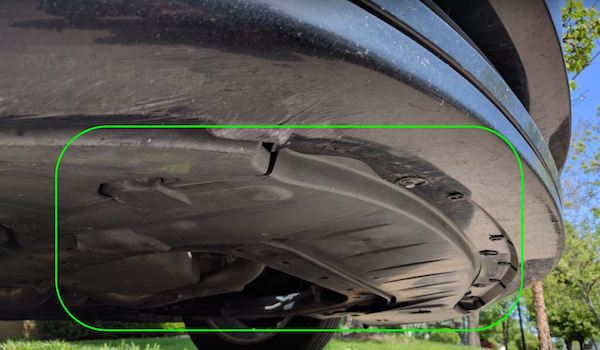
Go underneath the car and remove the front spoiler shield:
Position a drain pan underneath, connect a hose (if you’ve got one) and drain the cooling system:
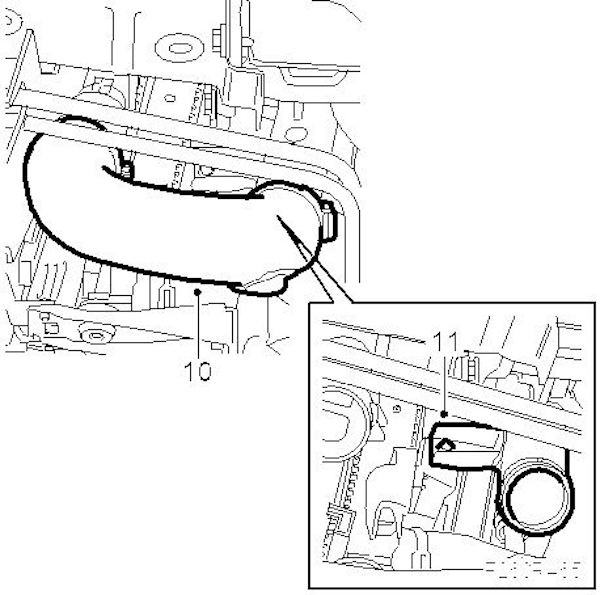
Disconnect the charge air hose from the charge air pipe on the left side (#10 in image). Then remove the lower charge air pipe bracket from the fan cowling (#11 in image):
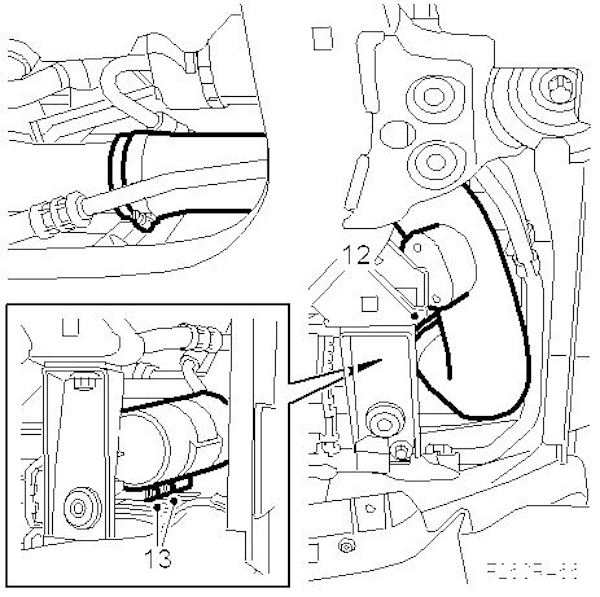
Disconnect the charge air hose from the charge air pipe on the right side and move it to the side (#12 in image). Then remove the dryer filter bolts from the radiator (#13 in image):
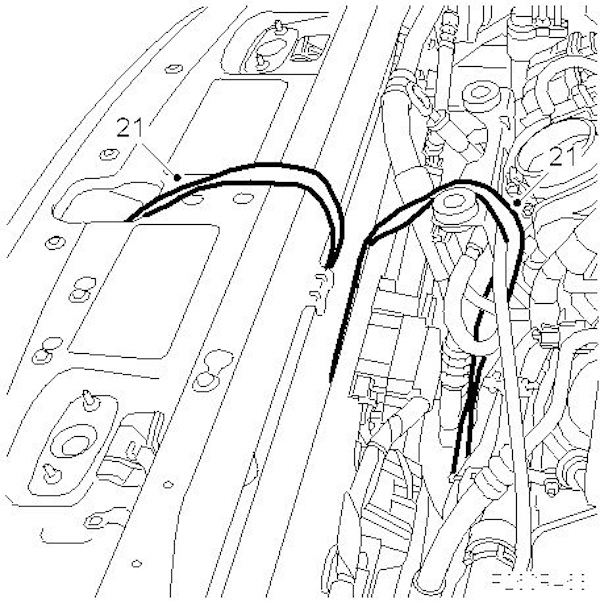
Go above the car and lift away the intake manifold with hose.
Disconnect the upper coolant hose from the radiator (#16 in image). Disconnect the expansion tank hose (#17 in image). Remove the upper fan cowling bolts (#19 in image). Then remove the upper bolts - intercooler - radiator (#20 in image):

Undo and fold up the cover over the radiator core. Guide down 2 tie-down straps to hang up the fan cowling and charge air cooler respectively together with the condenser, then tighten the straps:
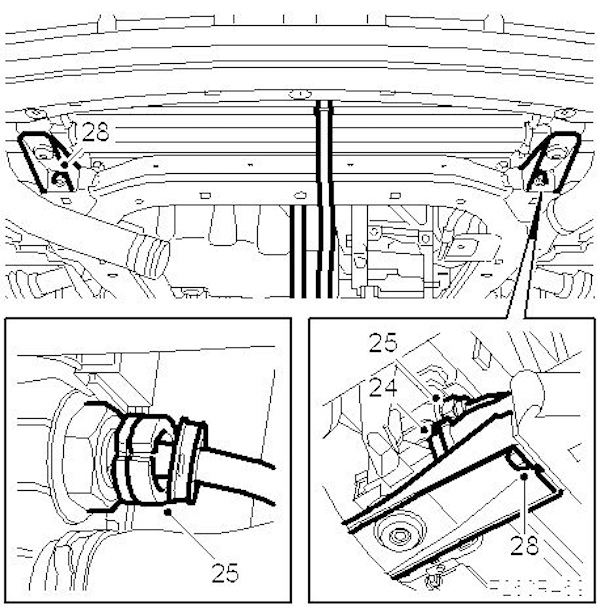
Disconnect the lower radiator connection (#24 in image). Unhook the intercooler and condenser from the radiator. Unhook the fan cowling from the radiator. Then remove the lower radiator mounting from the subframe (#28 in image):
Carefully lower the radiator and remove from the vehicle.
Reassembly!
Installation is essentially the reverse of removal. A few notes to highlight:
Be sure to transfer the upper rubber pads to the new radiator.
Torque the lower radiator mounting to subframe to 35 ft-lb.
Make sure the lower catches of the fan cowlings go into their mounting else the cooling system could be damaged.
When everything is hooked back up (except for the front spoiler shield) and you’re ready to fill the system with coolant:
Pour in fresh coolant into the coolant reservoir and put the cap back on.
Start the car and run the climate control system to full hot with the blower on high. This ensures that any air in the system gets vented into the coolant reservoir.
Carefully go under the car and check for leaks.
Reinstall the front spoiler shield.
Wait until the car is close to operating temperature (you can check by looking at the dashboard’s temperature gauge and the needle should be roughly in the middle).
Check the coolant reservoir level and add more as necessary.
Let the car run for several minutes until the radiator fan kicks on a few times and keep checking the coolant reservoir level to ensure no more is needed.
Turn off the car, lower the vehicle, clean up your tools, put them away and wash up.
Dispose of the used coolant by dropping it off at a recycler.
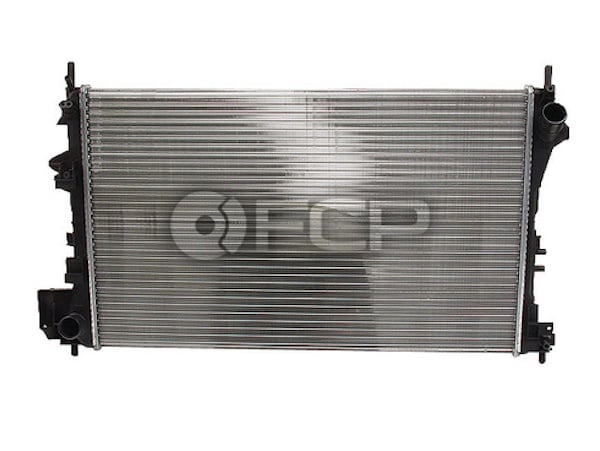
Shop 2004 Saab 9-3 Arc Radiators