- 07/10/2020
- 6 Min Read
- By: Christian Schaefer
How To Replace A Volkswagen/Audi Fuel Pump Controller, Fuel Pump, And Fuel Filter (GTI, A3, & More)

Your Volkswagen or Audi’s fuel system is as vital to its performance as it is in every car. If there is no gas, there is no go. Small problems in the fuel system can go unnoticed for a time, eventually causing problems for your car and your wallet. Due to the many components in the fuel system, an issue can be tricky to pinpoint. The fuel pump controller and fuel pump are often found to be the culprit of smaller problems, making their simultaneous replacement a smart investment.
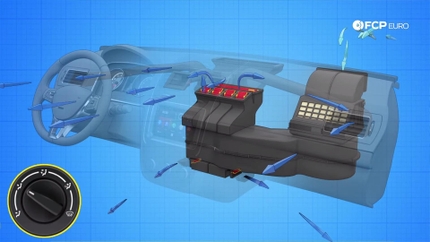
The Mk5 GTI has both a low-pressure and a high-pressure fuel pump. This DIY will tackle a replacement of the low-pressure pump only. Along with that, the fuel pump controller and fuel filter will be replaced, giving this GTI new fuel system components.
VW and Audi Models applicable:
Symptoms of failing fuel system components on a VW or Audi:
- Decreased fuel mileage
- A smell of fuel, outside the car
- Sudden dips in power
- Various engine codes related to fuel system components
There are many different components to the fuel system, and any issues related to that system can show a range of various symptoms. Most obvious would be any engine codes thrown by the computer. These will tell you what the problem is if not guide you to the possibly affected area.
How long will it take to replace the fuel pump, fuel pump controller, and fuel filter on a VW or Audi?
The fuel pump and controller are connected to each other, combining those two jobs into one. The fuel filter is under the car but is secured into a bracket by a single Phillips head screwdriver. Set aside forty-five minutes to get the job done and be as clean as possible.
Gasoline will destroy any paint it touches and will stick on your skin even after you wash it off. Wear gloves and have plenty of rags available to minimize and contact with the gas.
How much will it cost to replace the fuel pump, fuel pump controller, and fuel filter on a VW or Audi?
The price of parts for this job will run just shy of $340. Expect a shop to charge an hour or two of labor on top of the cost of the parts. Depending on the shop, the labor could double the total cost of the job.
Tools required to replace the fuel pump, fuel pump controller, and fuel filter on a VW or Audi:
- 10mm Socket
- 17mm Socket
- Flat-head Screwdriver
- Phillips-head Screwdriver
- Needle Nose Pliers
- Mallet
- Jack Stands
- Floor Jack
- Drain Pan
Parts required to replace the fuel filter, fuel pump controller, and fuel filter on a VW or Audi:
Steps required to replace the fuel filter, fuel pump controller, and fuel filter:
Step 1: Remove the rear seat
The rear seat cushion needs to be removed to get to the fuel pump and its controller. At the back of the cushion, next to the seat belt buckles, there will be four square plastic clips. Use a small flat-head screwdriver to push up on the inside of the clip and release them.
Once all four clips are removed, pull up on the front corners of the seat to free the two remaining clips. Finally, on either corner, push back then pull up and outward. Doing so will release the seat from the arresting hooks underneath.
Step 2: Remove the fuel pump assembly
To prevent any rogue sparks, disconnect the battery. Under the hood, pop the cover off of the battery and remove the negative battery cable with a 10mm wrench.
Next, move back to the interior of the car and pull back on the carpet on the passenger’s side rear seat base to reveal the fuel pump controller.
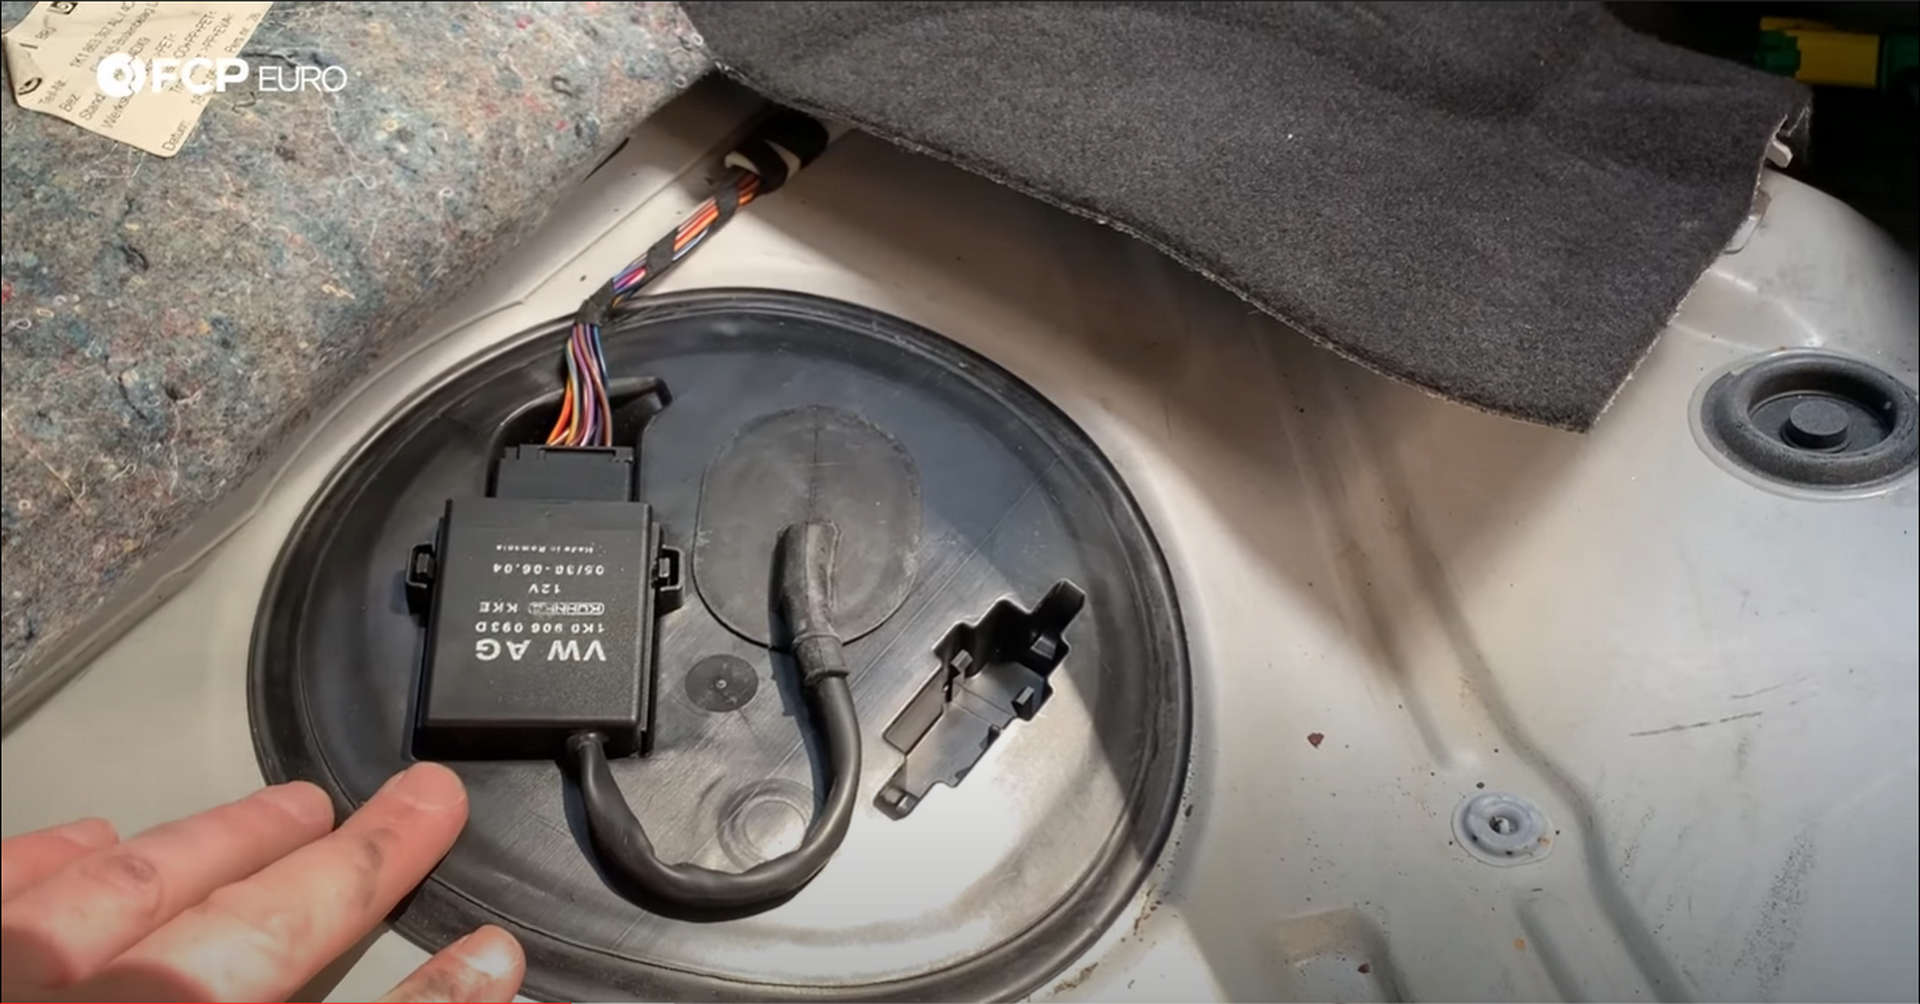
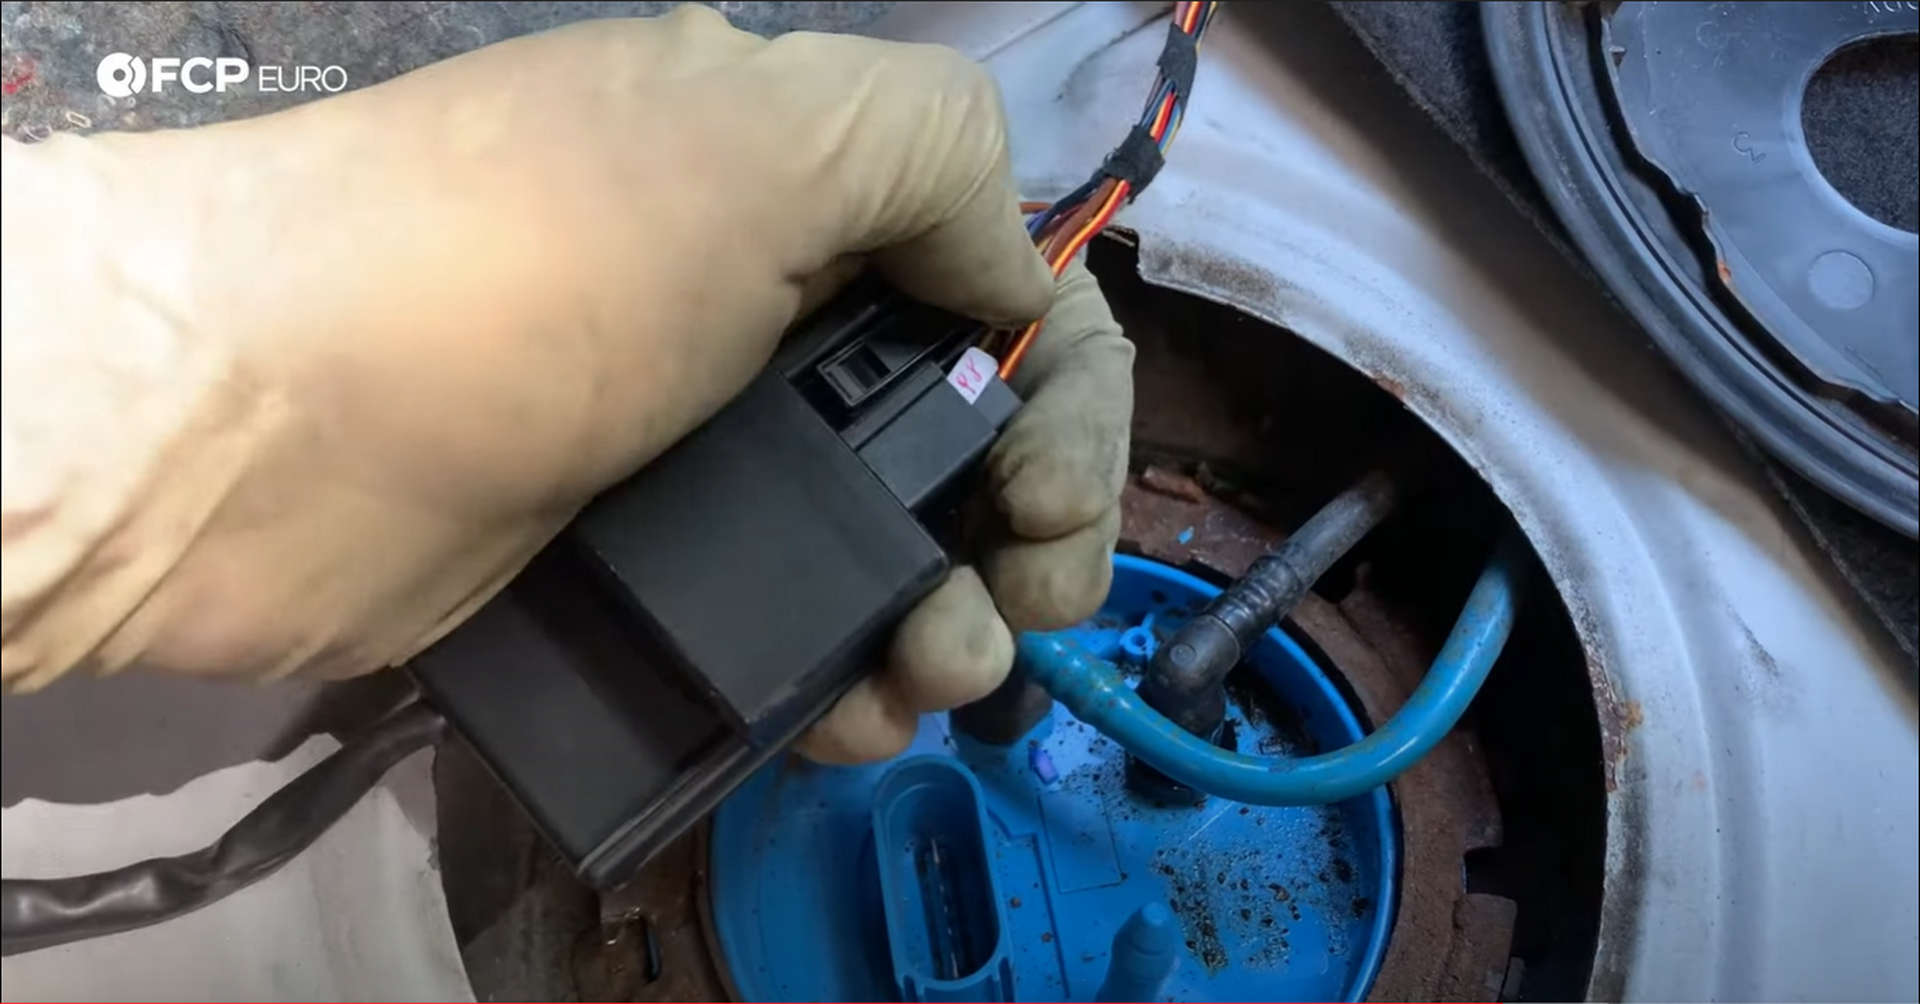
Use a small flat-head screwdriver or your fingers to pull back on the two tabs and release the fuel pump controller. Next, pop the wire’s grommet out of the plastic and hook your fingers inside. Pull up on the plastic cover to remove it and expose the fuel pump.
The fuel pump controller is plugged into the top of the fuel pump housing. Pull up on the red clip and push it in to free the plug.
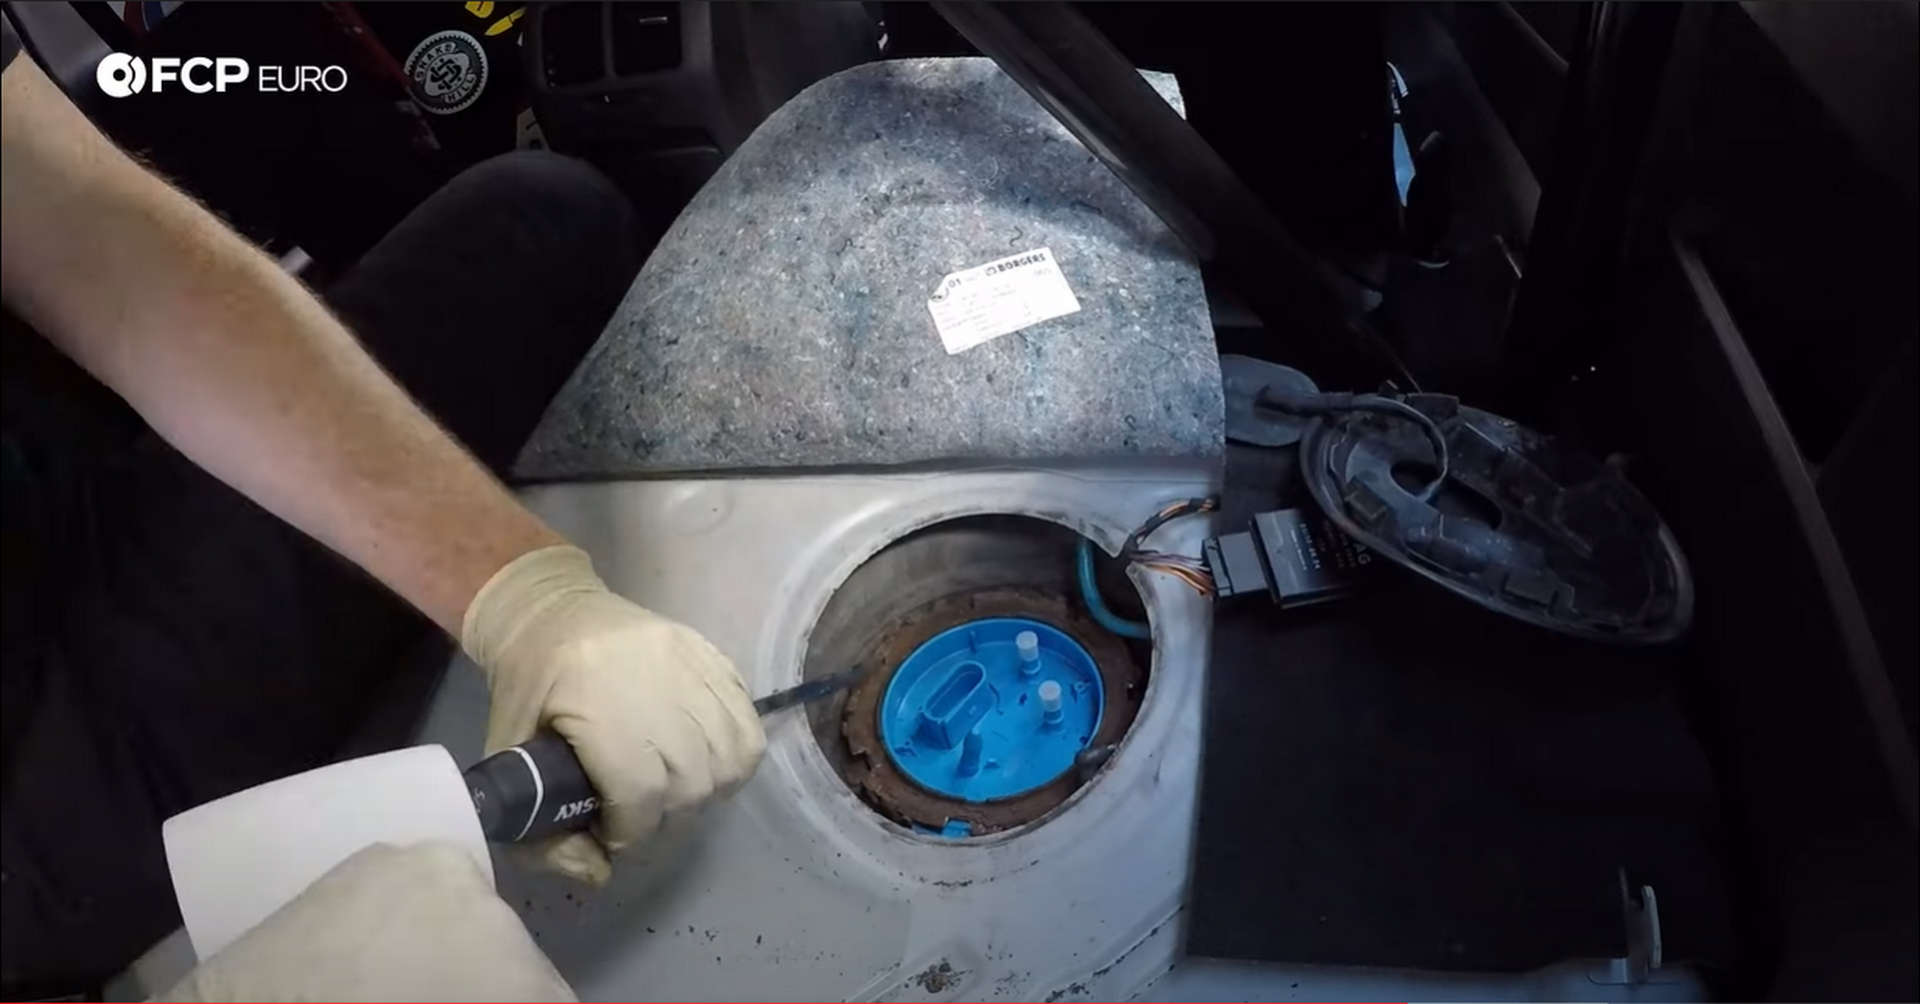
Take this time to vacuum out any debris from the top of the fuel pump housing. You don’t want any debris falling into the tank when the assembly is removed.
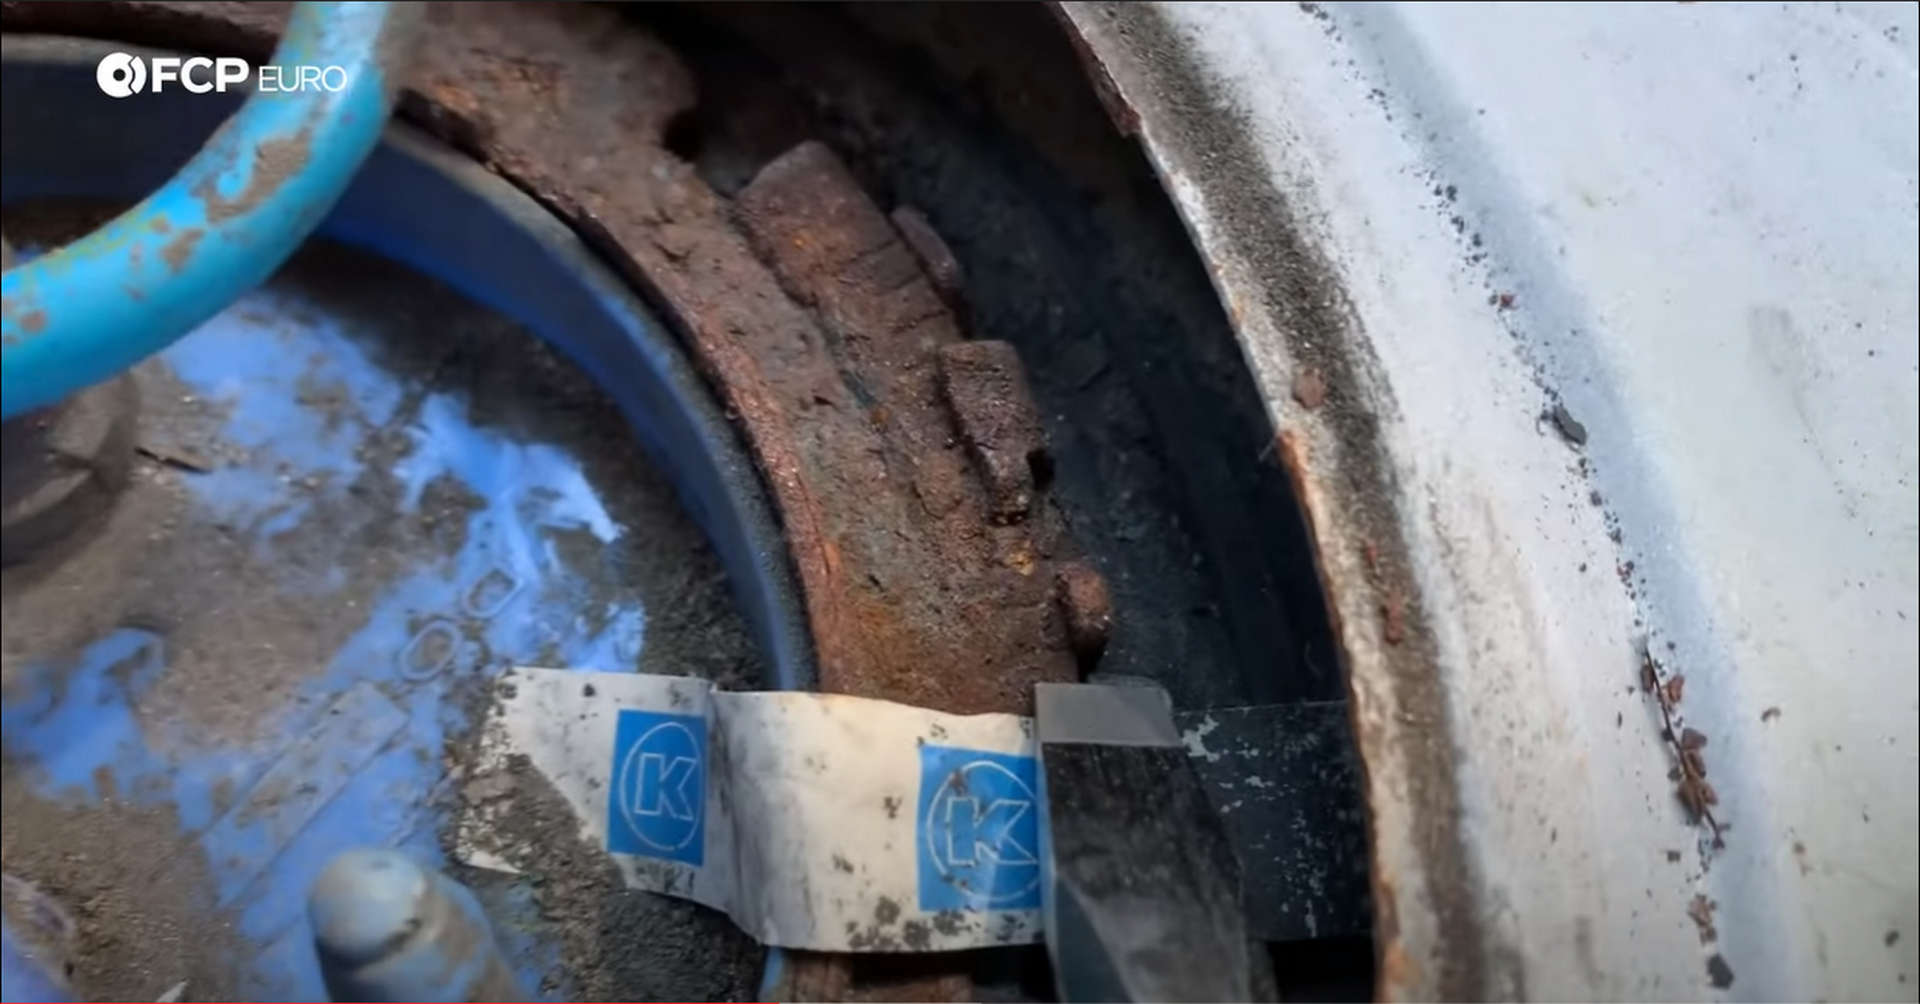
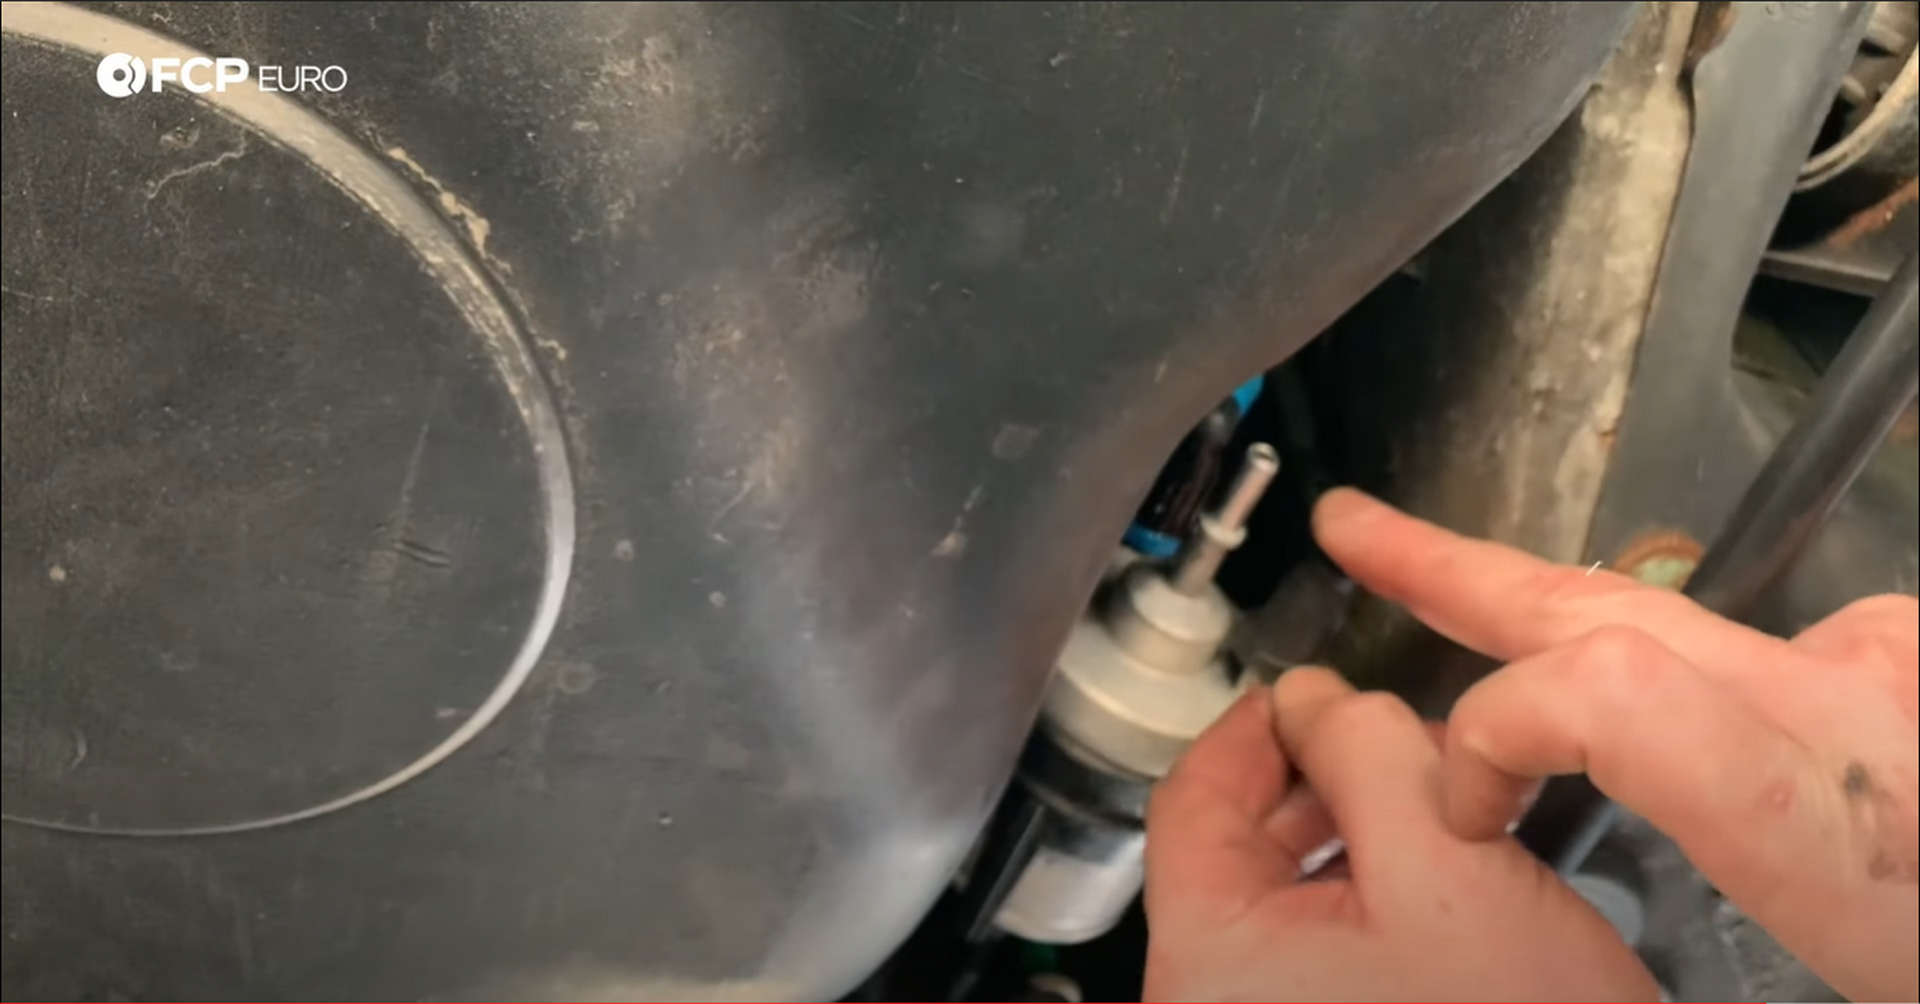
A locking ring seals the fuel pump assembly into the tank. Position a flat-head screwdriver on one of the ring’s nubs and hit the screwdriver with a mallet, rotating the ring.
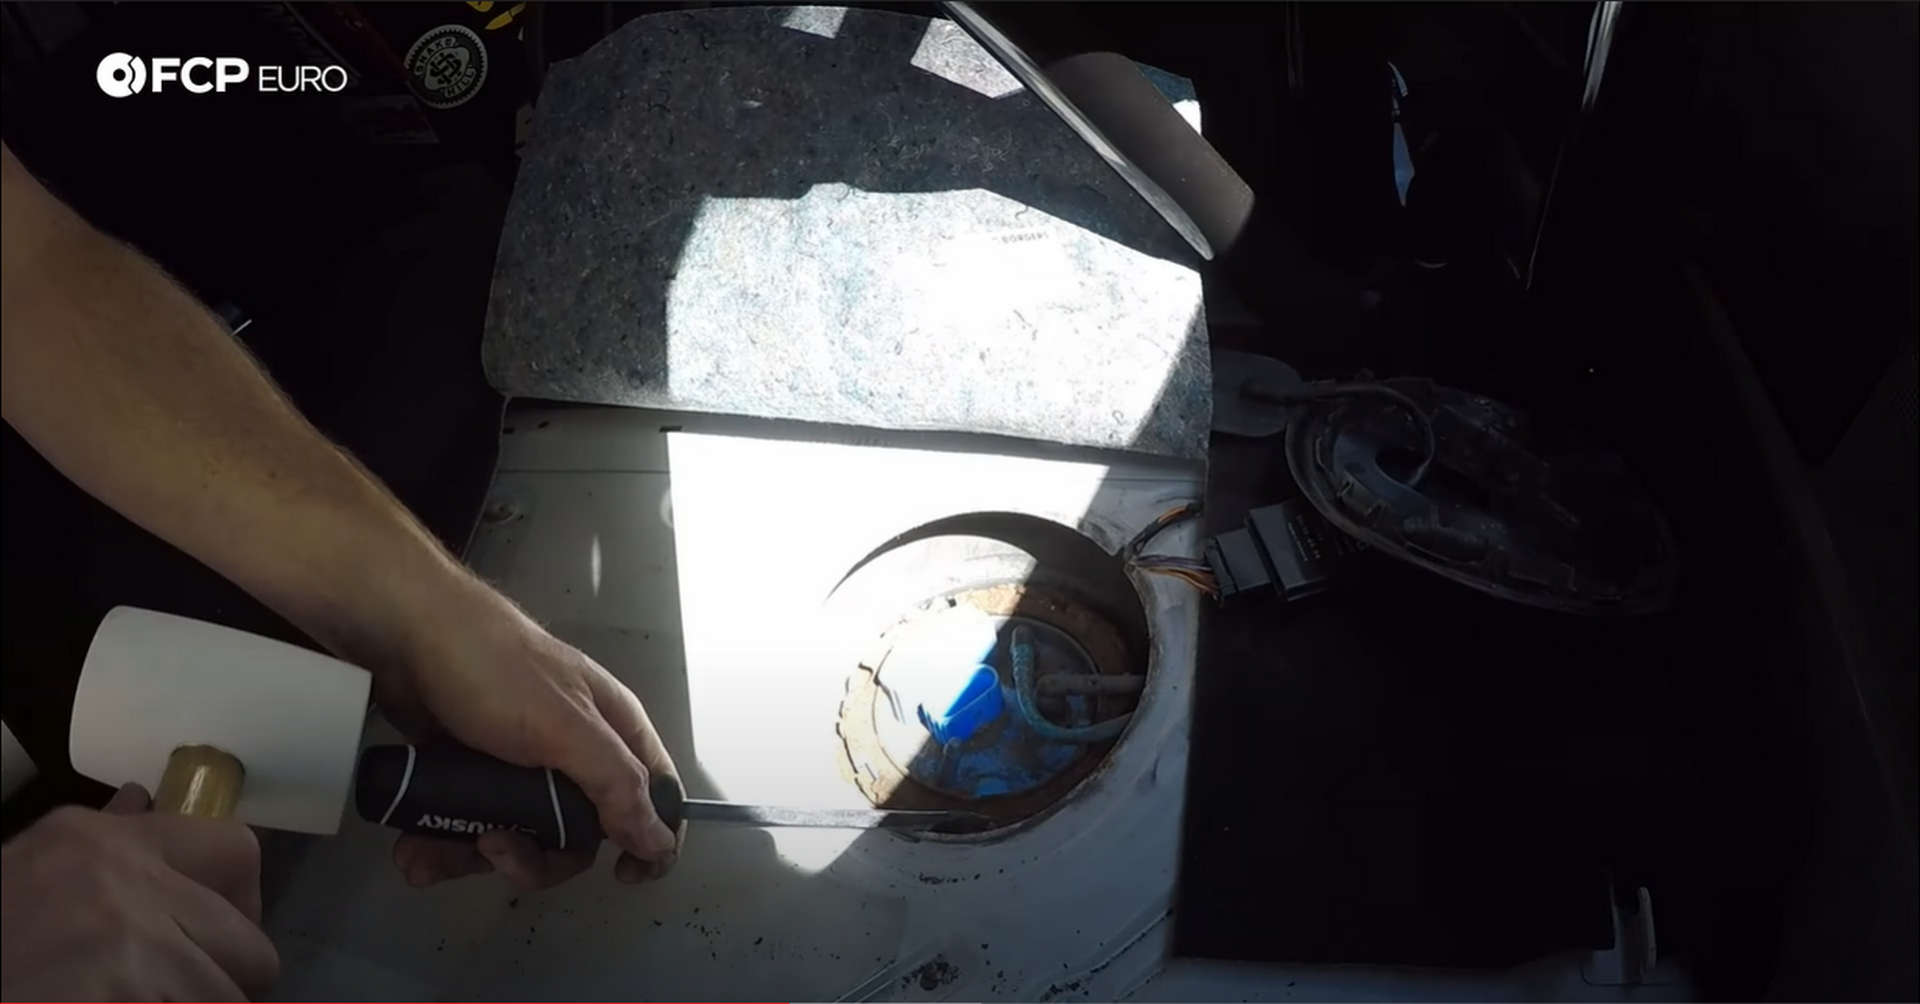
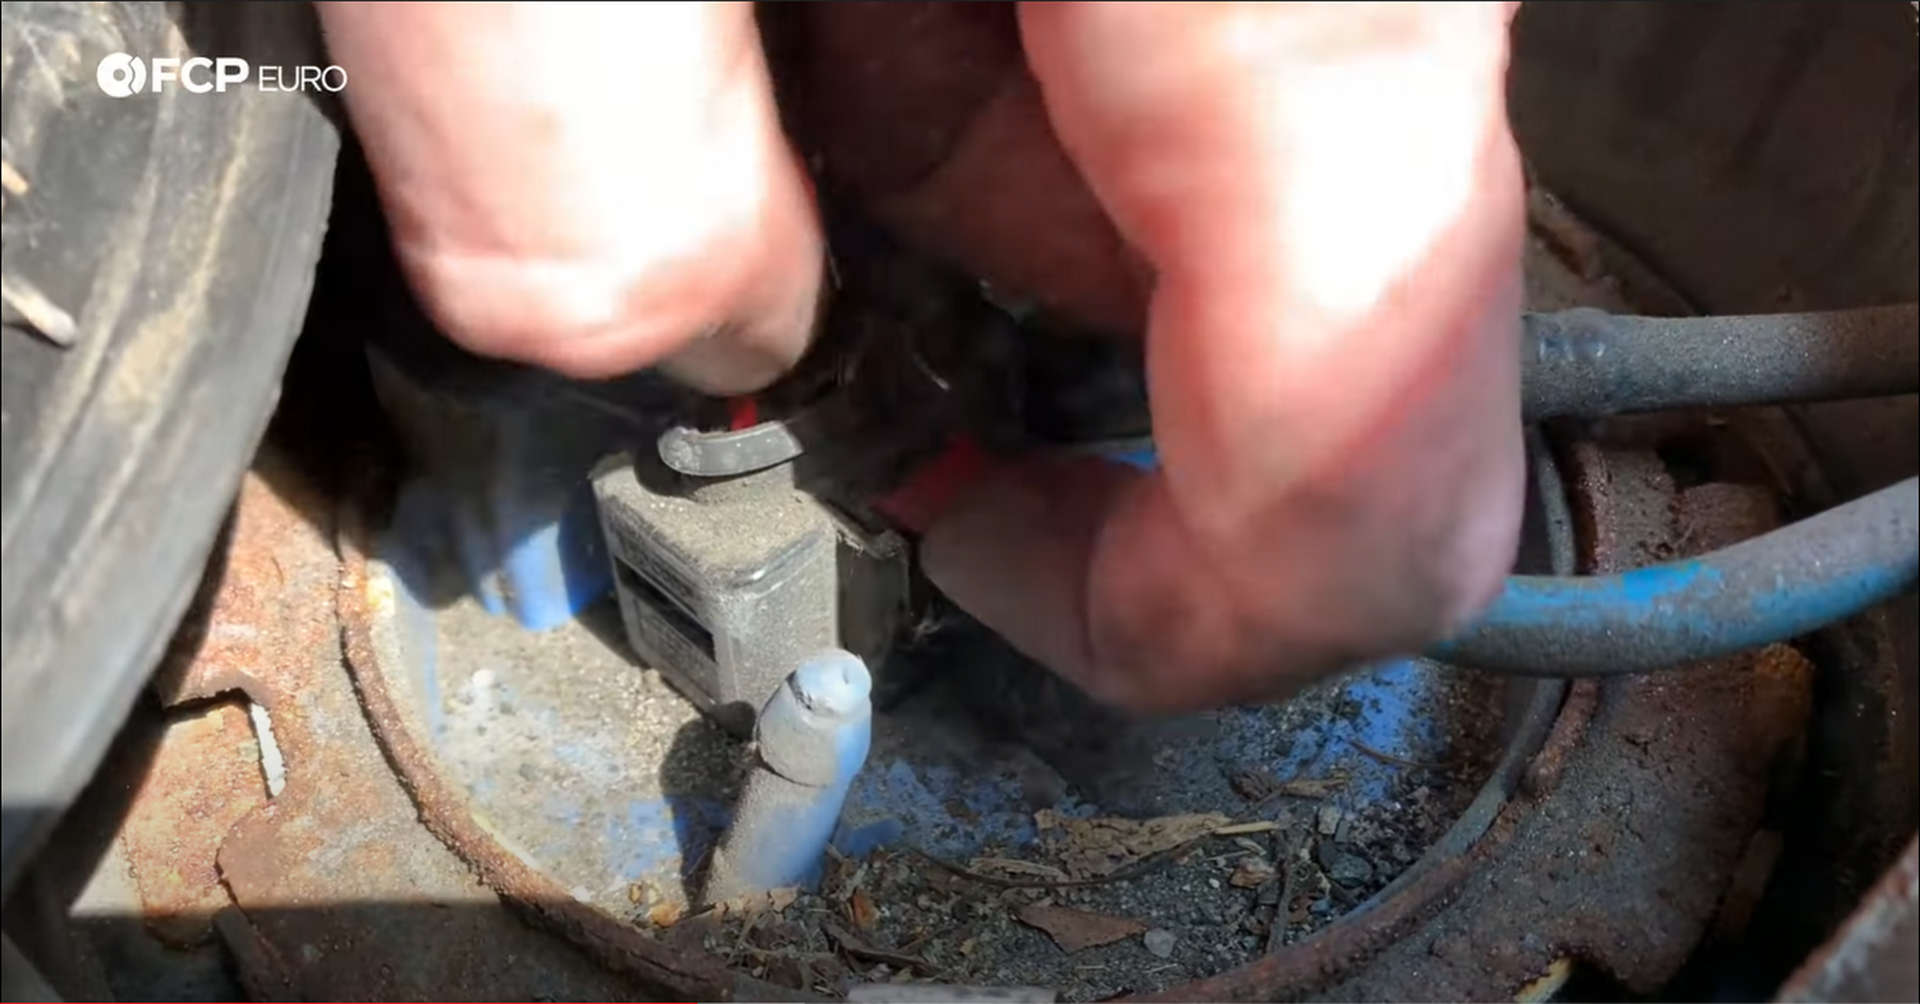
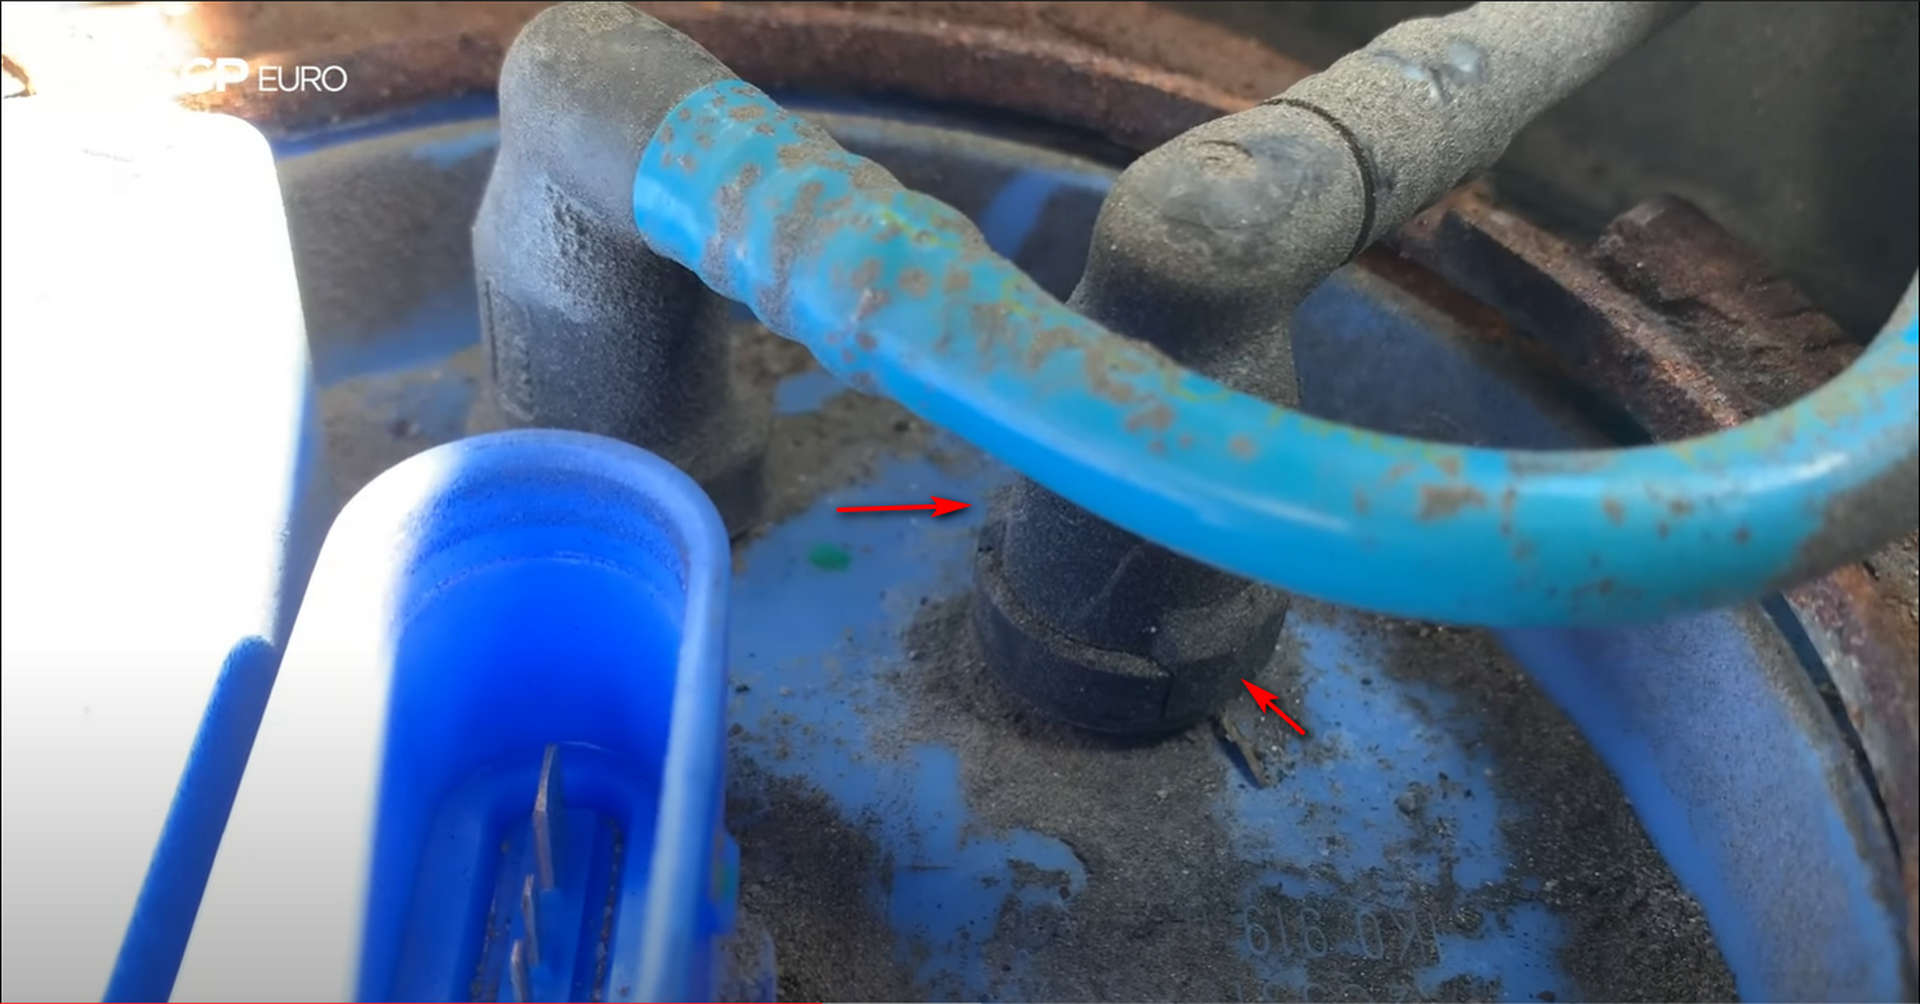
The hoses connected to the top of the housing are the last pieces to be removed. Press in on the two nubs on the hose connections and pull them off. A small amount of fuel will leak out of these hoses.
With the hoses released from the housing, tuck them aside. Finally, remove the locking ring and pull the fuel pump assembly out of the tank.
Step 3: Install the new fuel pump assembly
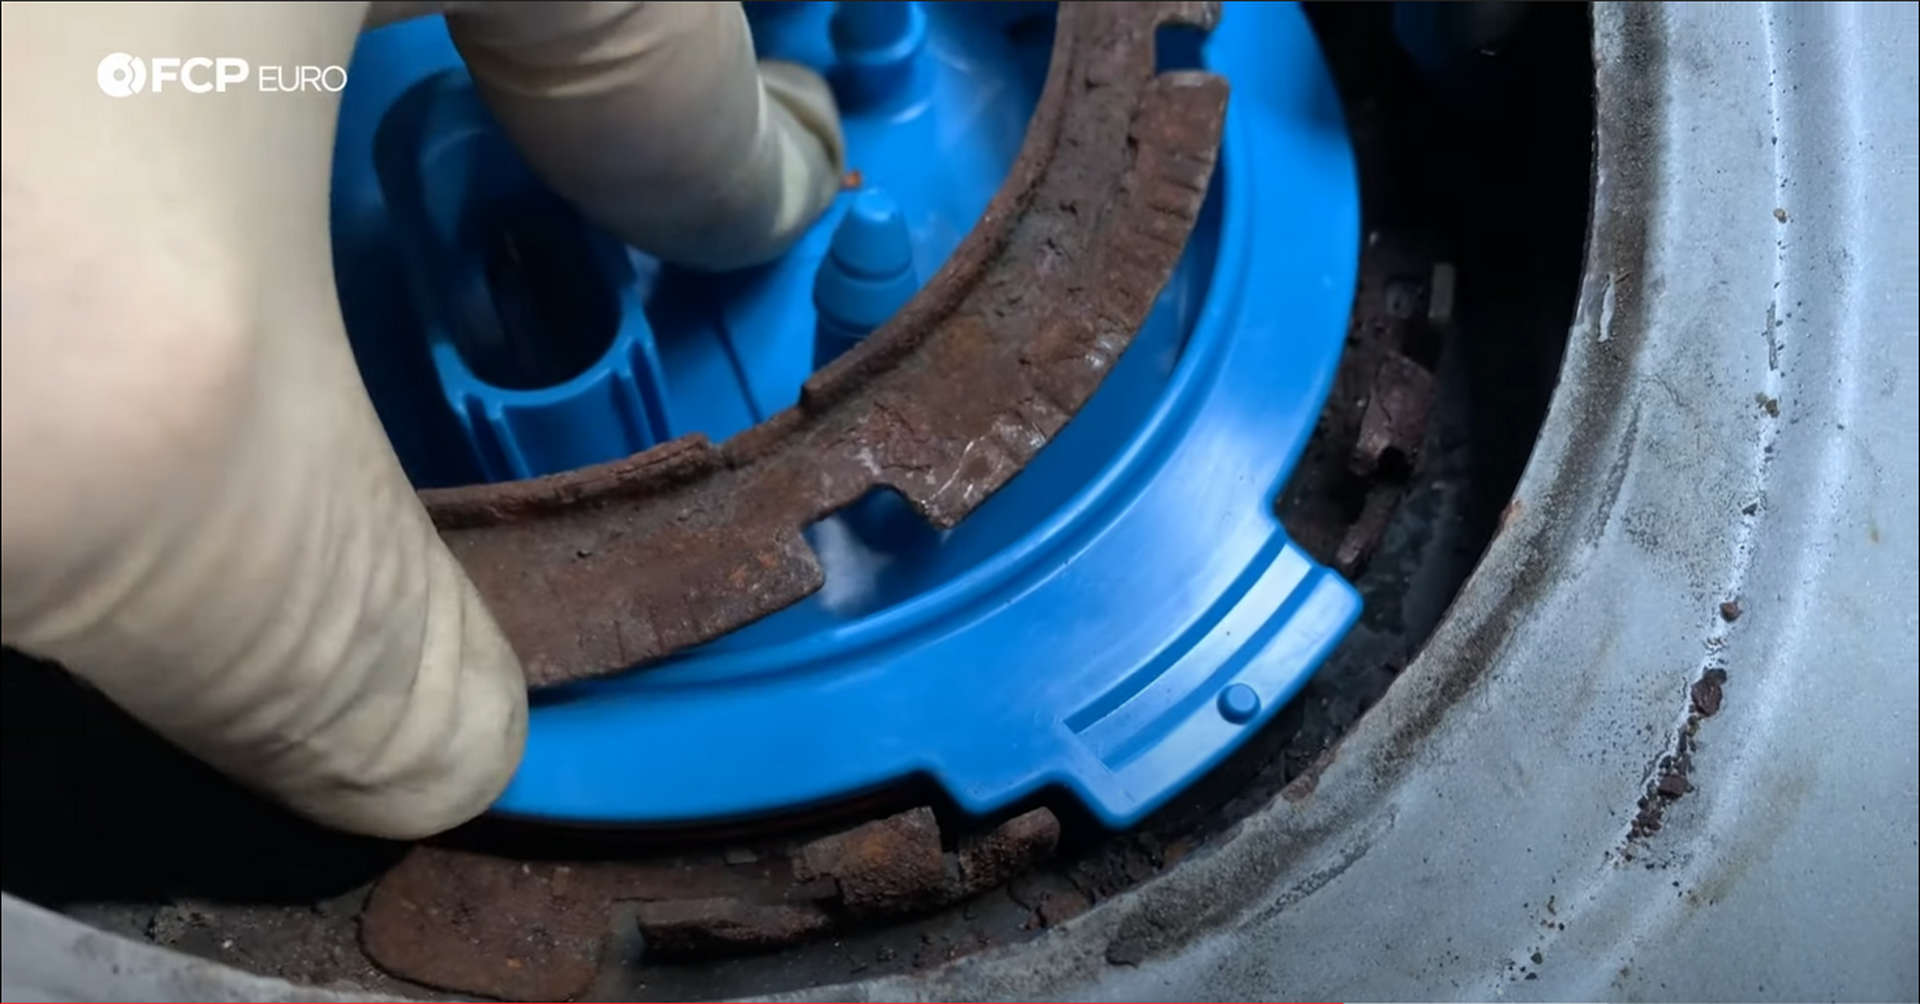
Start by replacing the red fuel pump assembly o-ring with the new one, installed in the same orientation. Next, drop the fuel pump assembly into the tank, getting the fuel level float in before the rest of the housing.
The top of the housing won’t sit flush when installed, instead, being raised up by spring pressure. Take the locking ring and push down on the top of the housing and twist the ring, locking it. Before tightening the ring, make sure the tabs on the housing are in the right place, and everything is fully seated.
Use the same chiseling method with the screwdriver and mallet to re-lock the fuel pump housing ring.
Remove the protective caps from where the hoses connect and refit the hoses. They will clip into place.
Step 4: Replace the fuel pump controller
Push down on the retaining clip on the large electrical connector and remove the fuel pump controller from the main wiring harness.
Next, connect the new fuel pump controller to the main wiring harness. Put the fuel pump housing connector through the black plastic cover and plug it in. Push the red pieces down on the plug to lock it on. The plastic cover can only be fitted back to the body in one orientation. Snap the cover on, seat the fuel pump controller into the cover, and then install the wiring’s rubber grommet into the cover.
Step 5: Replace the fuel filter
Jack up the rear passenger’s side of the car up and place it on jack stands. Remove the lug bolts with a 17mm socket and pull the wheel off.
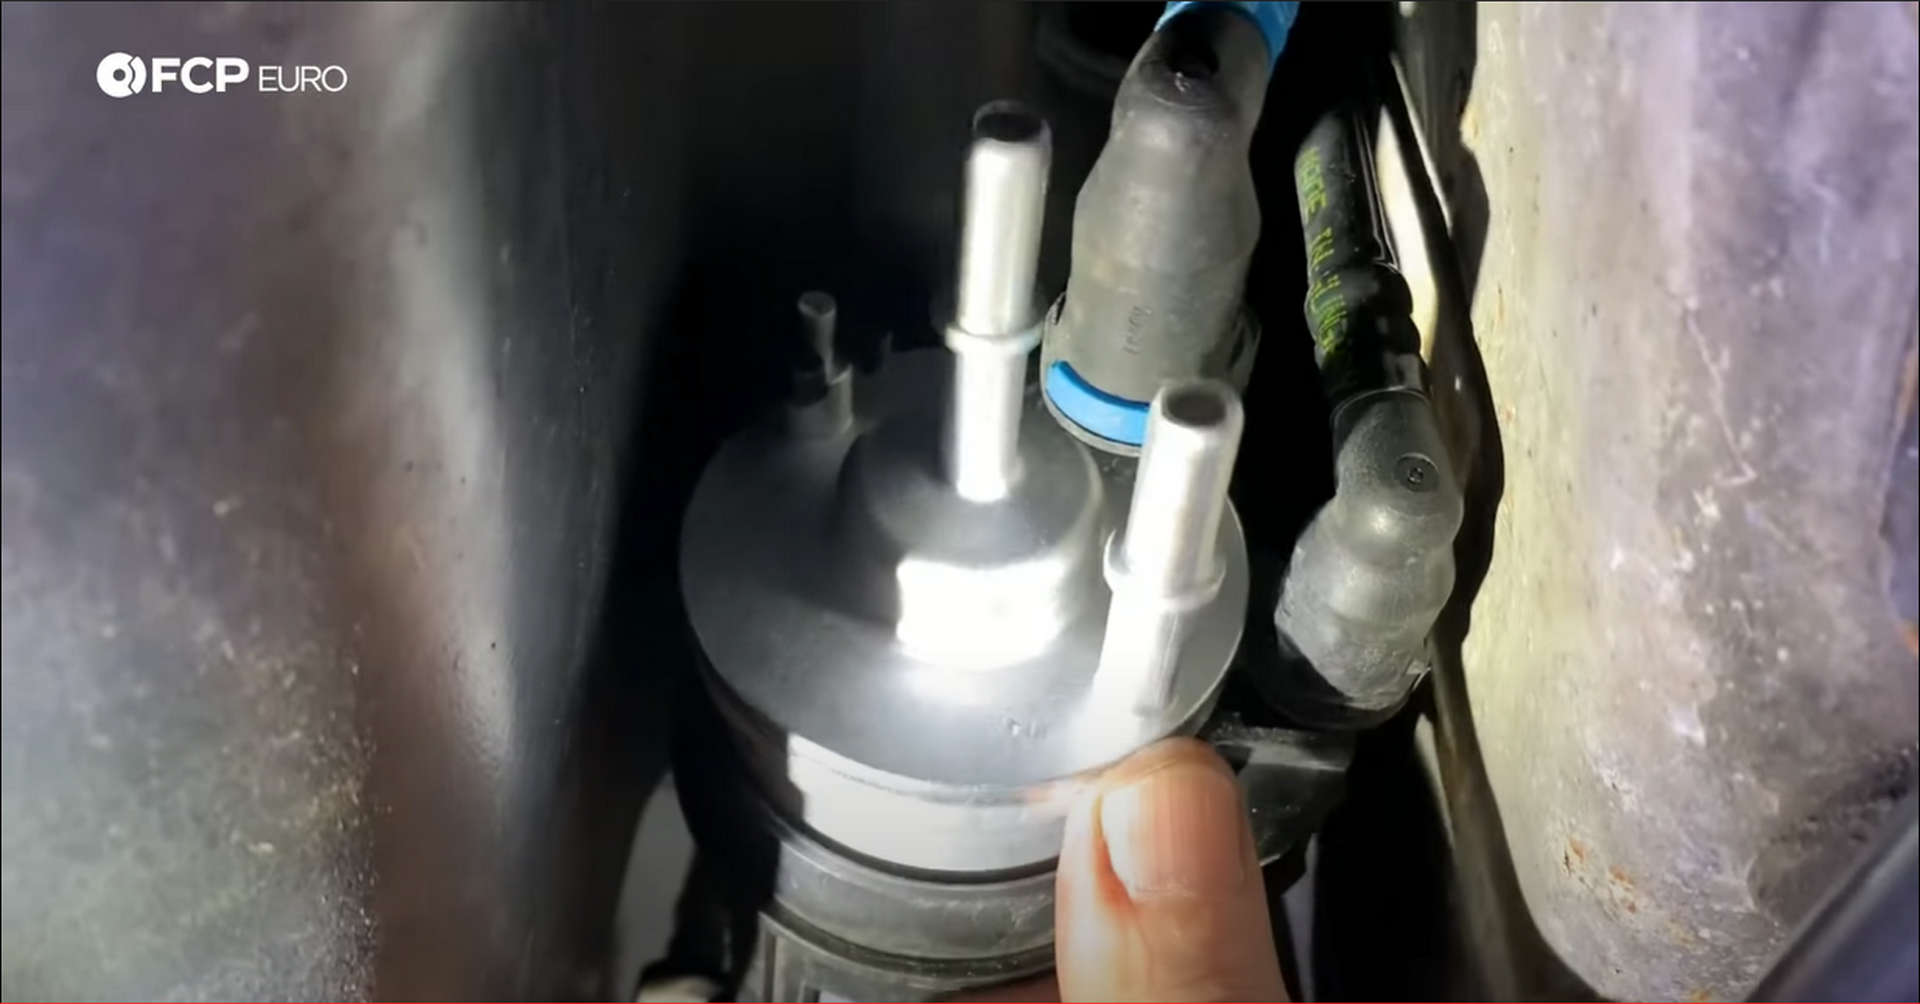
On the passenger’s side of the tank, tucked up against the frame rail, is the fuel filter. Remove the two hoses connected at the rear of the filter using the same technique used for the hoses on the fuel pump housing. The hose on the front of the pump is removed using the same method but can be tricky to get to. With the rear hoses removed, the filter can be rotated, giving you better access to the hose clips. Small amounts of fuel will run out of the blue hose and front side hose when they are removed.
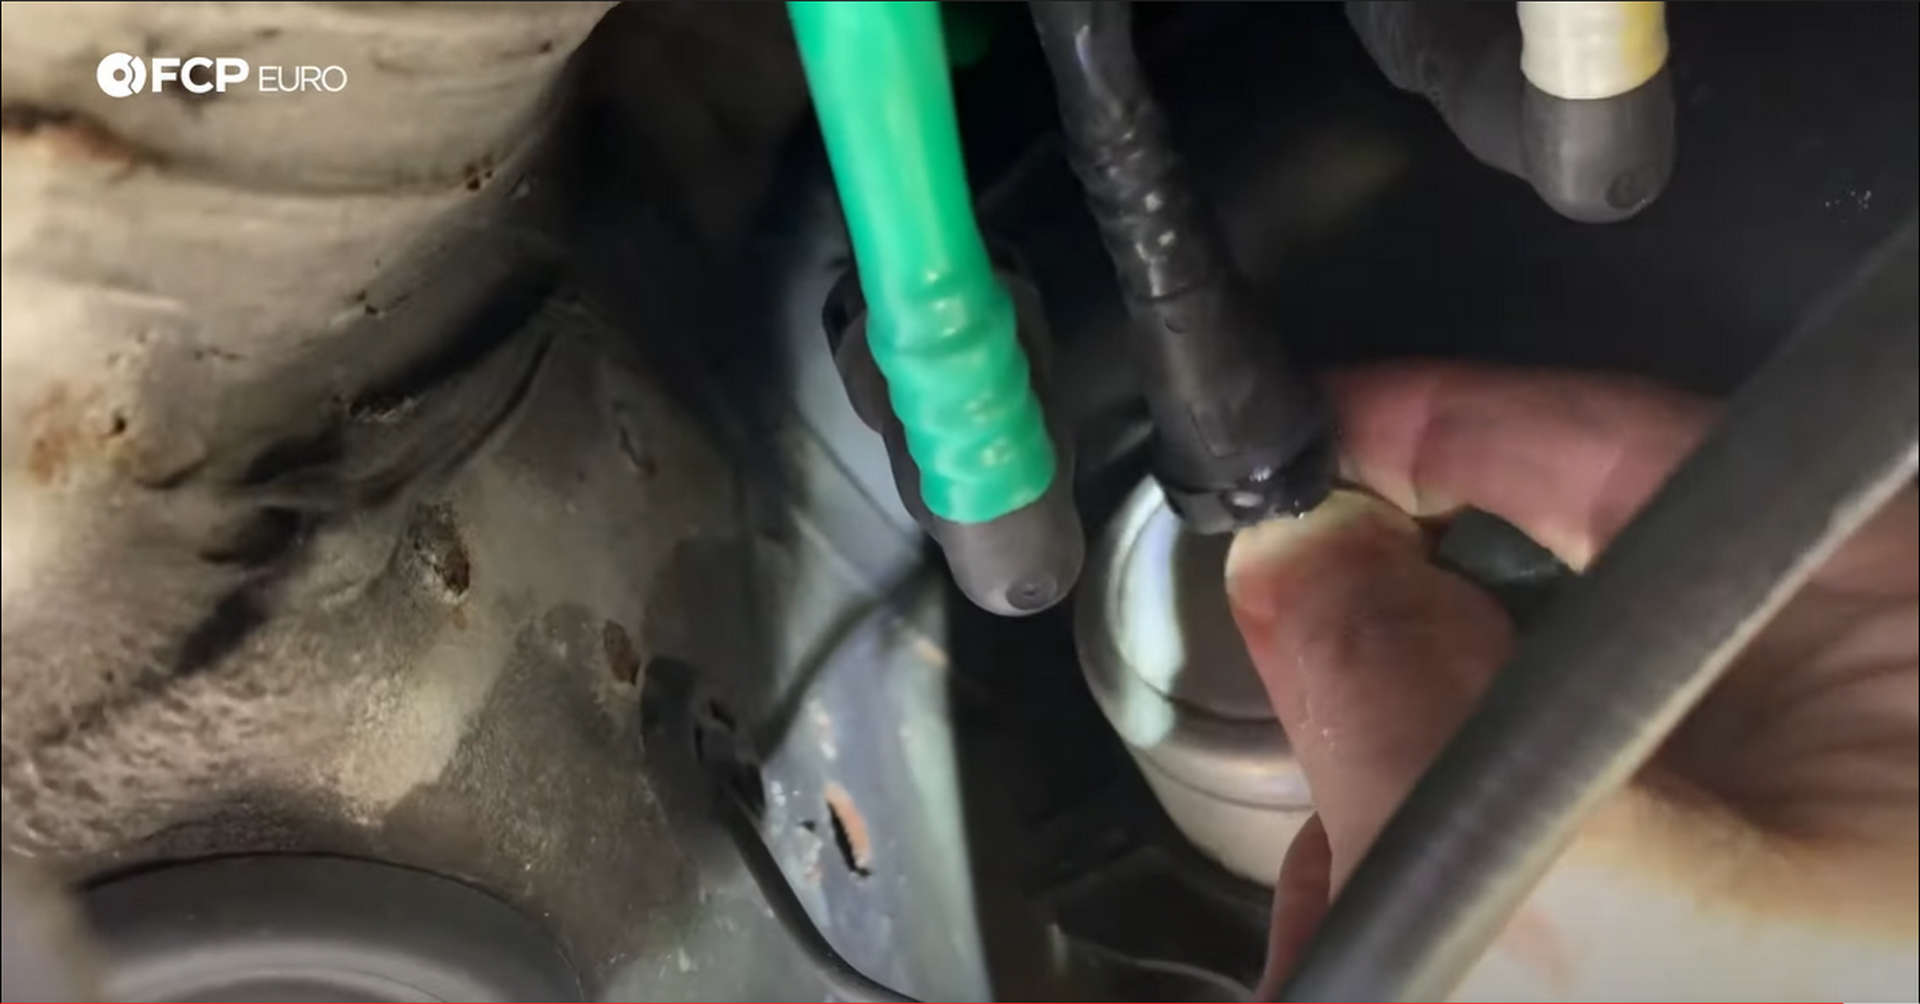
Remove the Phillips-head screw from the filter bracket and pull the old filter out. When installing the new filter, align the location pin with the tab on the filter bracket. Tighten the Phillips-head screw after the filter is appropriately aligned and reconnect the hoses.
Next, put the wheel back on the car and put it back on the ground.
Step 6: Button everything up
Head back under the hood and reconnect the battery. Now, the fuel system needs to be primed because several of the components have been changed. Turn the key to accessory power a few times, waiting five seconds each time, to allow the pump to refill the lines with gasoline. The car will start right up. If it doesn’t, recheck your work.
Once you know the car starts, put the rear seat cushion back in place and take your freshly repaired car for a drive.
If you’re interested in more DIYs for your Volkswagen, you can visit vw.fcpeuro.com and subscribe to our YouTube channel.