- 02/15/2015
- 2 Min Read
- By: Anthony Peacock
How to Replace a Volvo Upper Engine Torque Mount (99+)

A very common wear item on nearly all transverse engine Volvos is the top engine or torque mount. Common symptoms of a failing or failed mount is lurching when first accelerating or applying the brakes. To further verify when a mount is at the end of its life, inspect for visible cracks in the bushing's rubber. It isn't that this part is badly designed - it's just that it is under stress every moment the engine is in use. The 99+ style mount's design allows for simple removal and refitting in about 15-20 minutes when working quickly.
Parts needed:
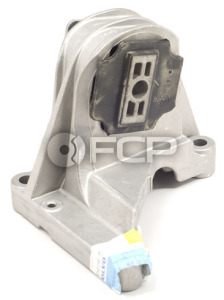 Volvo Torque Rod Mount (S60 S70 S80 V70 XC70) - Genuine Volvo 30680770
- Torque wrench
- 13mm wrench / socket
- 14mm wrench / socket
- 15mm wrench / socket
- 10mm wrench / socket
- T30 torx bit / driver
- Hammer (maybe)
- Assistant
Bushing replacement options
The first thing to decide is rubber or polyurethane. The stock bushing/aluminum housing is certainly the easiest to replace but there are advantages to polyurethane bushings as well. The stock mount will restore normal operation and is soft enough to not transmit any vibration into the cabin of the car. I've installed both types in multiple cars and I still favor the stock mount design for an everyday vehicle. There is a substantial amount of vibration transmitted into the car when using a solid mount and if your old car already makes some odd noises or worse yet has broken dash mounts, it is not recommended.
1998 and older S70/850 models utilize a replaceable bushing. While the removal is similar you will need a decent way of extracting the bushing. Some people use a socket and hammer. I did it myself with a hammer and a flat blade screwdriver by cutting away a 10cm section of the bushing and letting it collapse on itself.
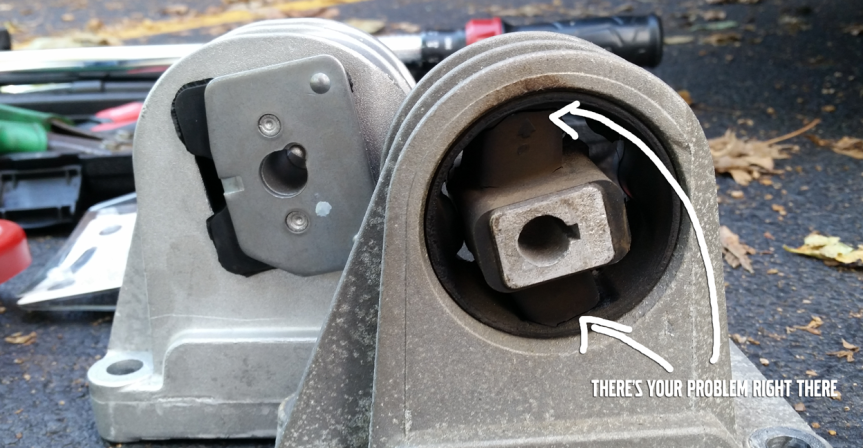
Revised mount (left) versus old 99+ style (right)\
Encouragement from a hammer will help
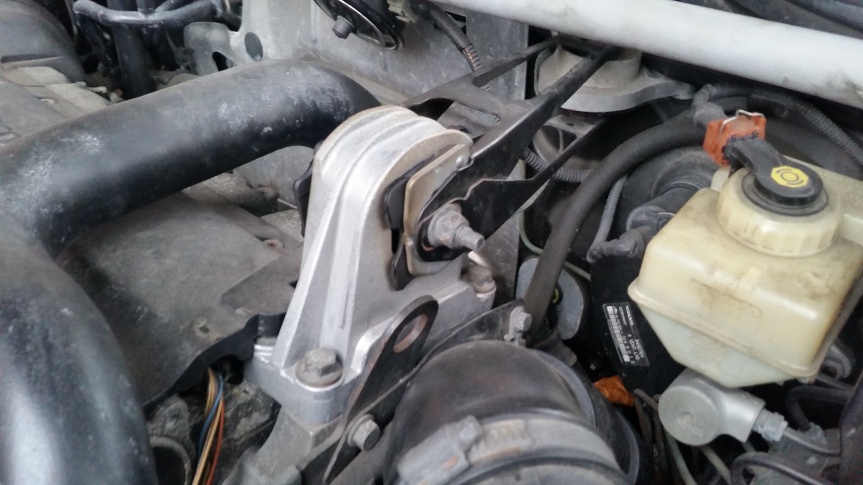
To remove the old mount, unbolt the torque arm from the mount using a 15 and 13mm pair of wrenches. If it seems stuck some encouragement from a hammer will help. The next thing you'll need to remove is the engine's spark plug/ignition coil cover. A T30 torx is needed, and some kind of electric driver really helps to speed the removal.
There are four 14mm bolts holding the body of the mount on to the engine block. These bolts vary in length so pay attention to what came from where. With all of the bolts removed undo the engine ground from the mount and place it out of the way. Now that everything is loose twist/slide/yank or do what you need to to free the old mount.
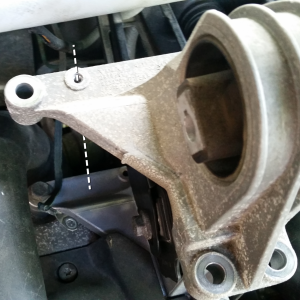
The ground strap is a pain
When ordering a new torque mount, it is likely you will receive the new revised style that is slightly different from what came from the factory on these vehicles. The ground strap is a pain to refit while the unit is fully bolted in, so affix this prior to installing the mount 100%. This bolt is self tapping and the steel bolt should cut into the aluminum pretty easily. If anything it is probably worth it to run the bolt through the hole just to get the threads made. When I did this it threw me for a bit of a loop as the hole in the revised mount didn't have any threads and is in a different place.
You will need a trusted assistant
Refit the four mounting bolts and tighten to 45Nm all around, finishing with an additional 90º turn. Install the torque arm and tighten the nut and bolt to to 35Nm + 60º. (25Nm for non-turbo)
If the torque arm is not fastened in the correct position, excess vibration may occur. Have an assistant place the car into drive with their foot firmly on the brake before tightening the torque arm pinch bolt. This will pull the engine back into the correct position and locate the bushing properly in the torque arm's adjustable slot. Then, torque appropriately before relieving your assistant of their duties.