- 07/14/2021
- 10 Min Read
- By: Christian Schaefer
How To Replace & Upgrade Porsche 996 Radiators (Carrera 3.4L & 3.6L)

Porsche's first foray into completely water-cooled engines for their 911 went strictly O.K. Their experience with their water-cooled front-engined models allowed them to work out most of the cooling system kinks before the 996 and 986 hit showroom floors, though their engines suffered in other areas. However, these engine issues have been worked out, and 996s are finding themselves as track rats that could use an upgrade in the cooling department.
The stock radiators with their plastic end tanks are fine for street driving but find themselves out of place on a race track. Thankfully, radiator manufacturer CSF provides the perfect upgrade for those looking to prep their 996 for light track duty with a pair of all aluminum radiators. The full aluminum construction provides a 40% increase in cooling capacity and a 15-25% increase in cooling efficiency over the stock radiators.
Porsche Models and Years applicable:
- Porsche 996 911 (1999-2005) - All Normally Aspirated models
Symptoms of a failing Porsche 996 radiator:
- Vehicle overheating under usual driving conditions
- Coolant leaking from the front of the vehicle
There isn't much to look out for with a failing radiator. Once radiators start to go, they make themselves apparent. Leaking coolant will often be your earliest sign that something needs to be replaced. Keeping the coolant inside the cooling system is critical to keep the engine at its standard operating temperature.
Overheating an engine can be disastrous for the health of an engine. Extended periods at too hot a temperature will damage the head gasket and warp the cylinder head. Fixing both of those issues requires a significant engine teardown, costing you lots of time and money. The best way to avoid that is to get your vehicle checked immediately upon discovering a coolant leak.
How much will it cost to replace a Porsche 996 radiator?
The kit we used comes with upgraded all-aluminum radiators from CSF, giving our 996 better cooling during spirited driving. The kit includes new hoses, hardware, and coolant to make it all you need to buy for the radiator replacement. However, because of the upgraded radiators, this kit will cost you about $1150.
Regular OE-style radiators go for about $210 a piece. So, with the required hardware and coolant, replacing the radiators will cost you around $850 with the standard style radiators.
How long will it take to replace a Porsche 996 radiator?
Replacing the radiators isn't the simplest job in the world. The bumper needs to come off, and you'll have to bleed the cooling system, which will be challenging. We recommend setting a half-day aside to give yourself time to perform the job carefully.
Parts required to replace a Porsche 996 radiator:
Tools required to replace a Porsche 996 radiator:
- Flathead Screwdriver
- Phillips-Head Screwdriver
- Ratchets
- Extensions
- T25 Torx Bit Socket
- 10mm Socket
- 16mm Socket
- 19mm Socket
- Pick
- Trim Clip Tool
- Pliers
- Vacuum Coolant Filler
Steps required to replace a Porsche 996 radiator:
Step 1: Remove the front bumper cover
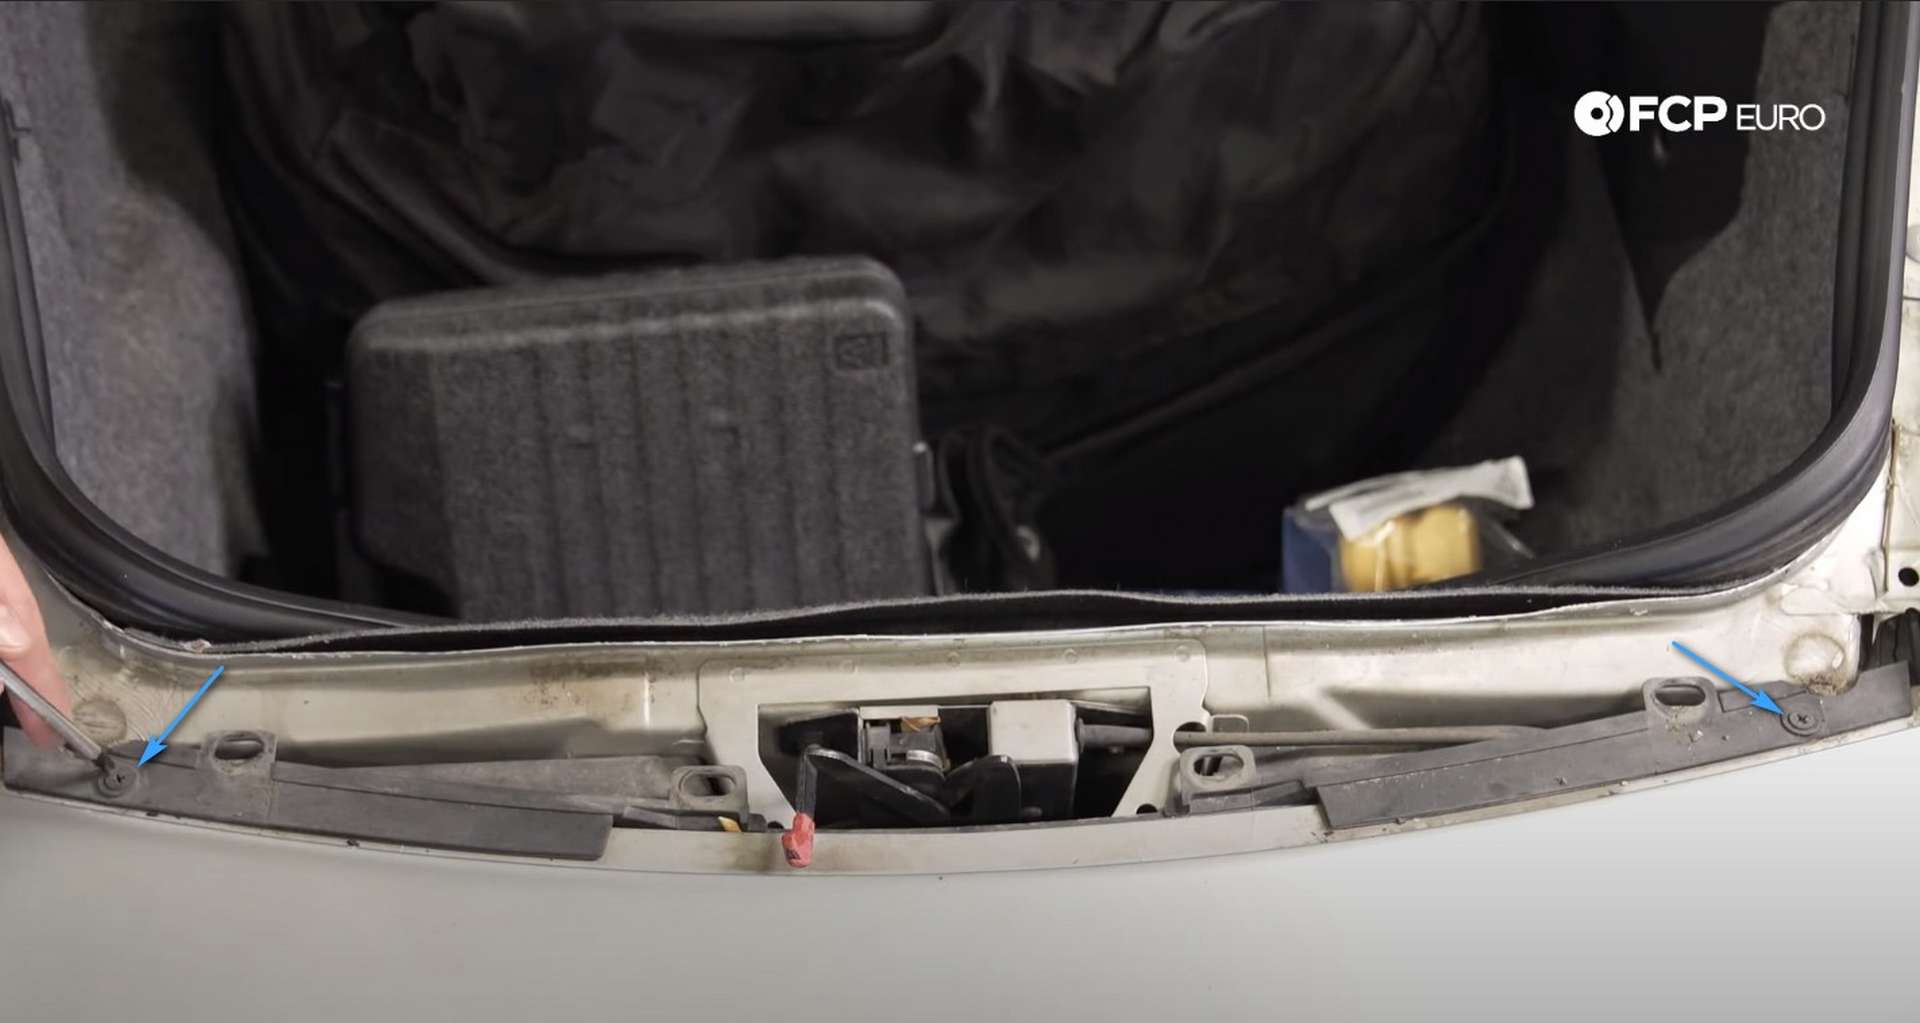
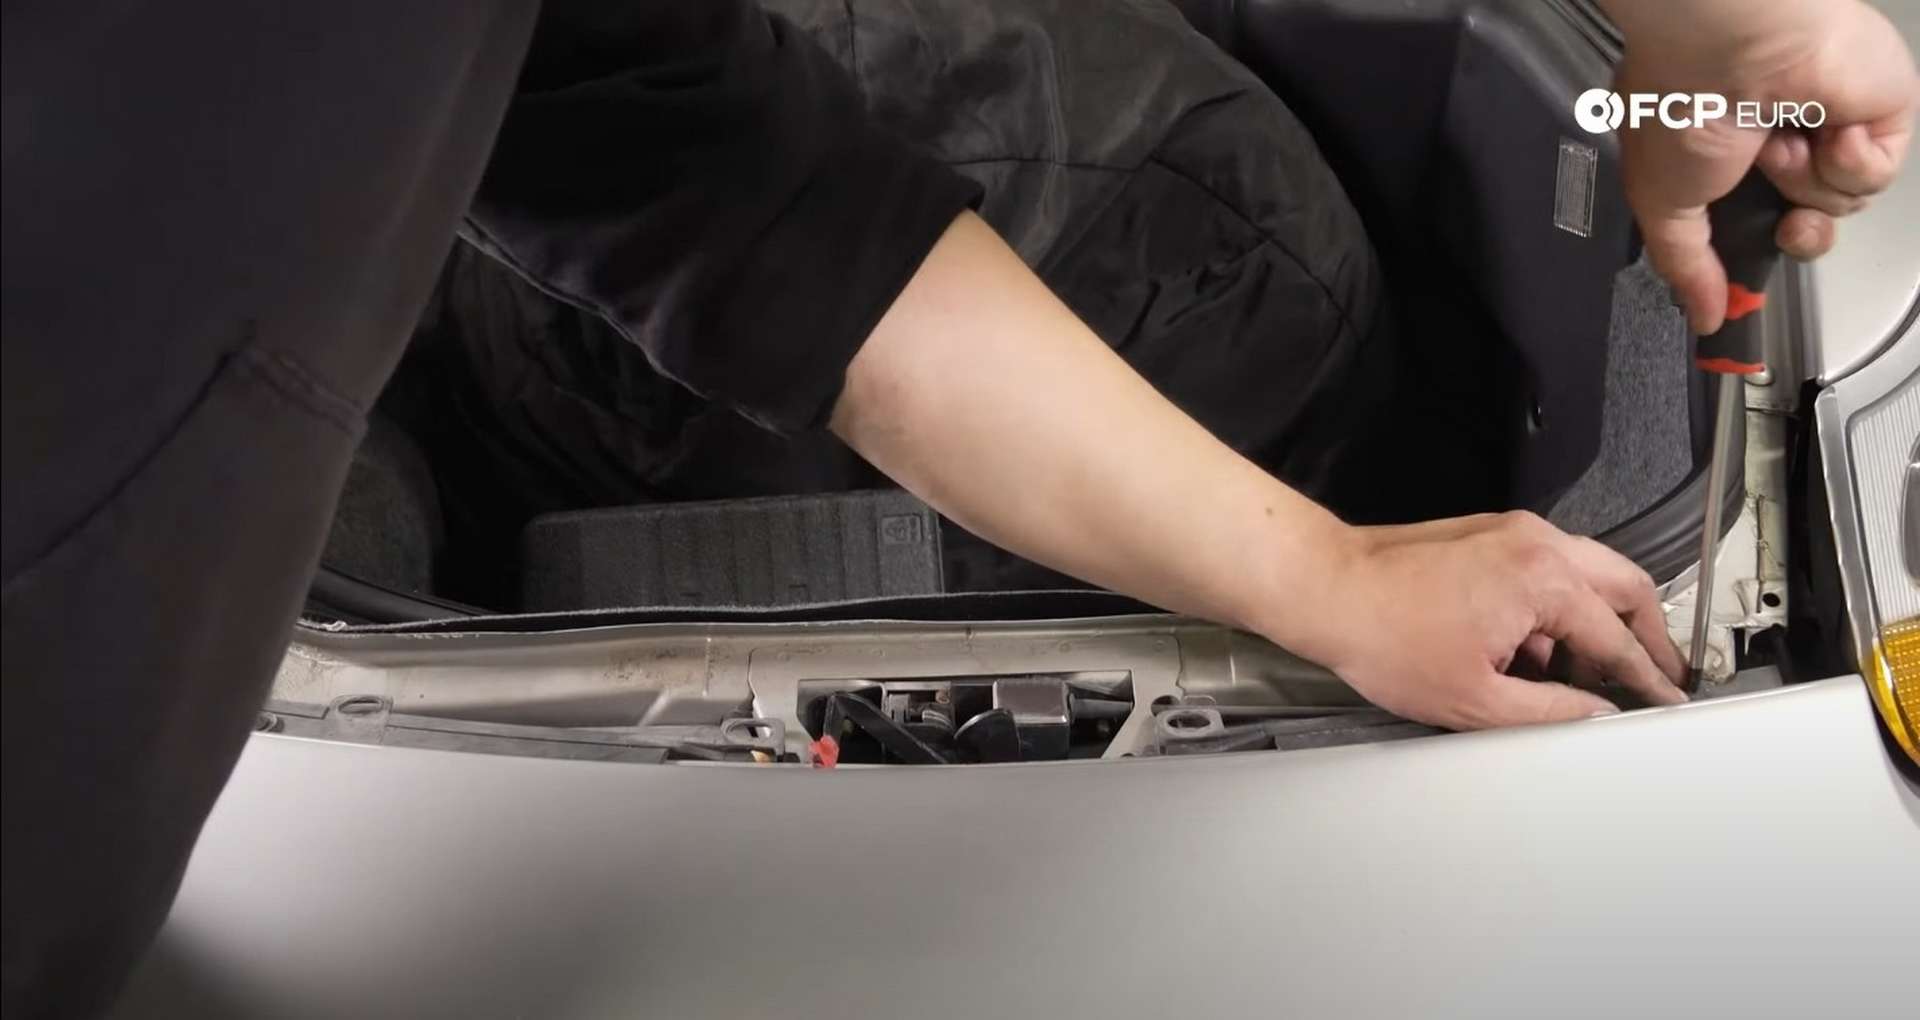
First, open the trunk and undo the clips for the latch trim panel. Use a flathead screwdriver to rotate the clips 90° to the left to unlock them.
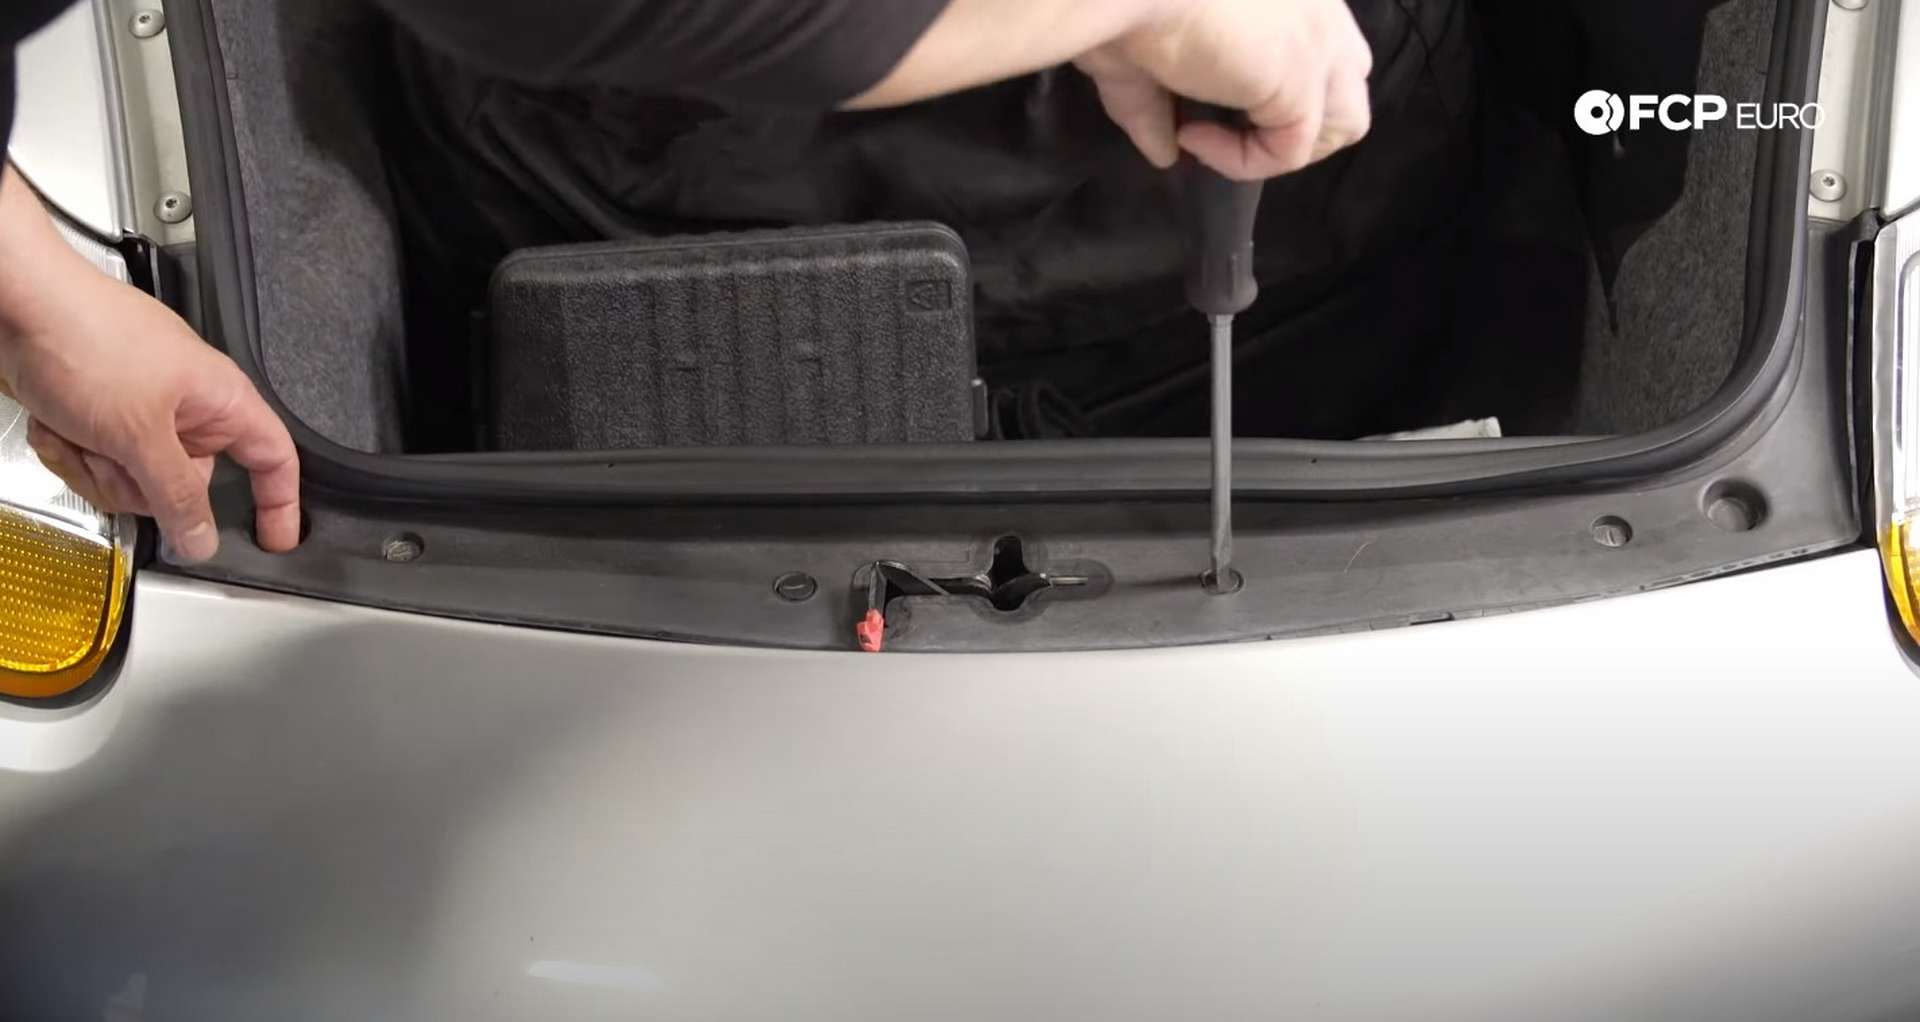
Pull the trunk's weather stripping out of the way and then pull out the panel. Finagle the panel around the hood release latch and off of the car. The rivets aren't attached to the panel, so set those aside in a safe place.
Next, remove the two Phillips-head screws from the black trim beneath the latch panel. Then, lift the car's nose into the air and remove the wheels.
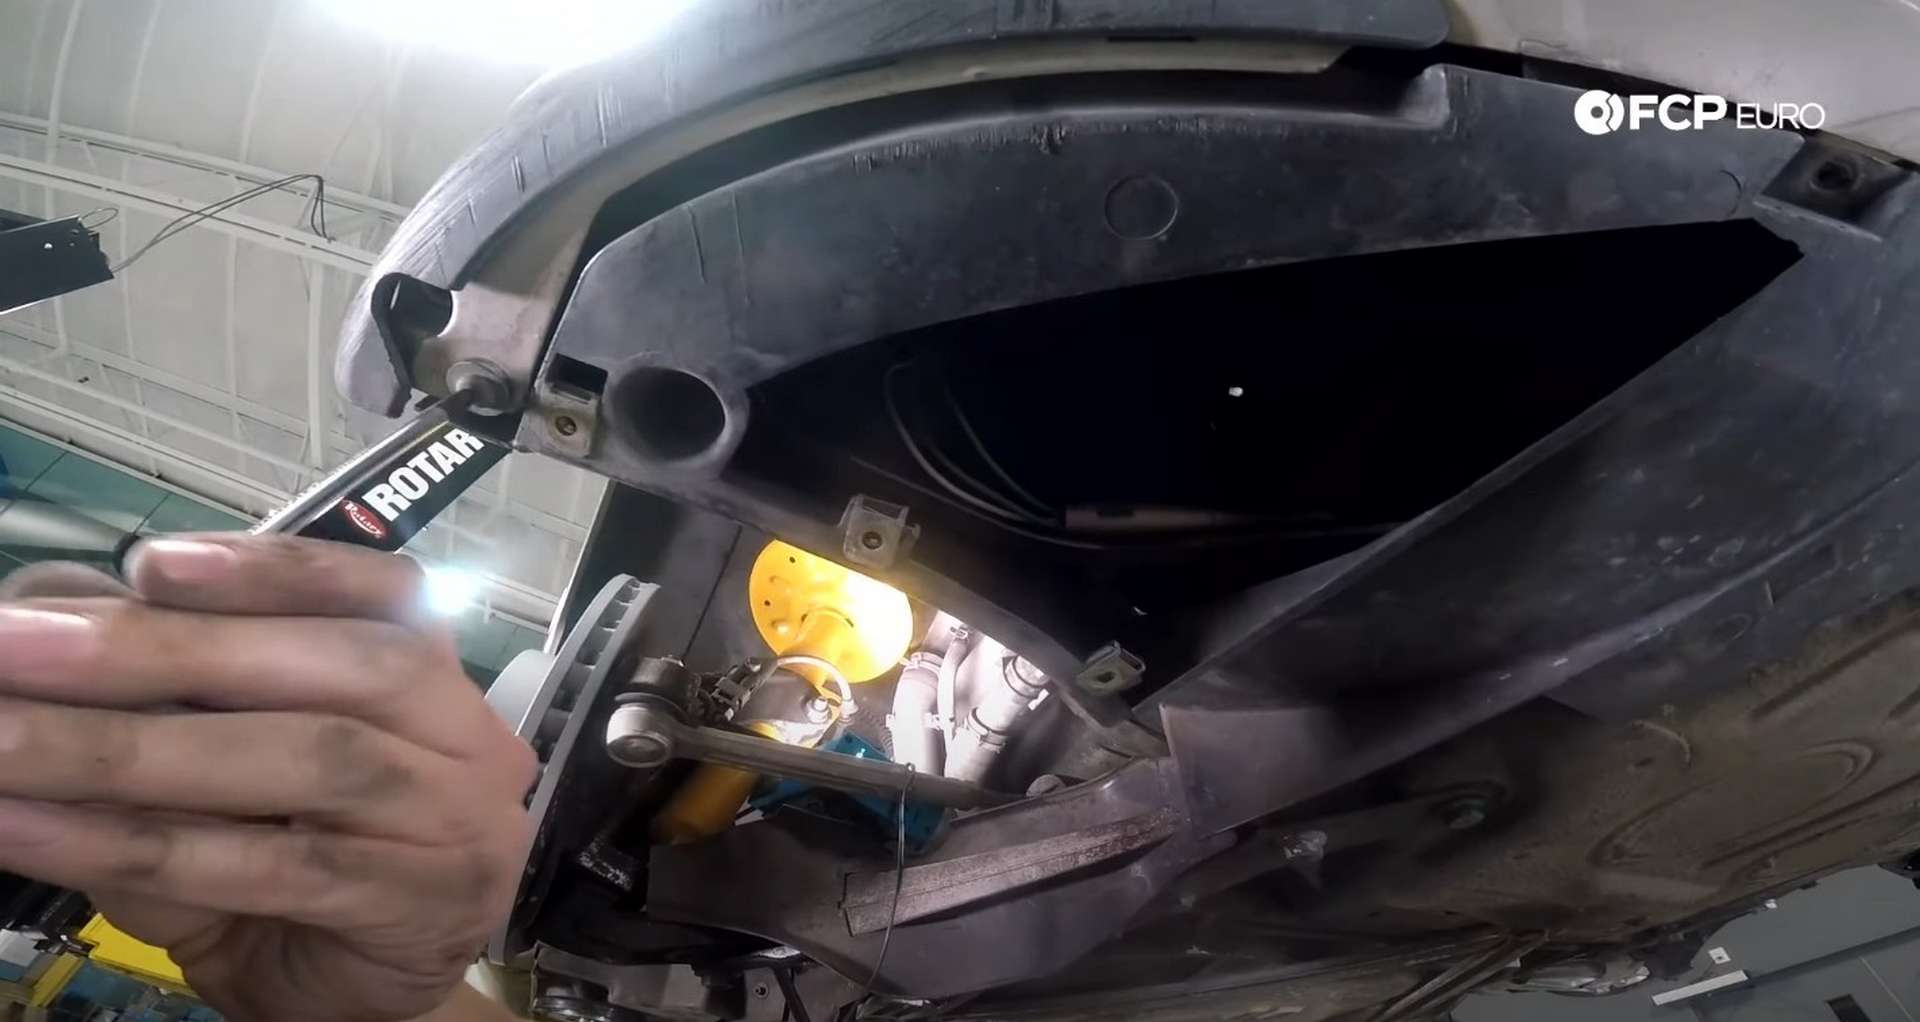
Use a 19mm socket to remove the lug bolts from the wheel. Be careful while removing the last bolt as the wheel will fall from the hub. Then turn your attention to the passenger's fender liner.
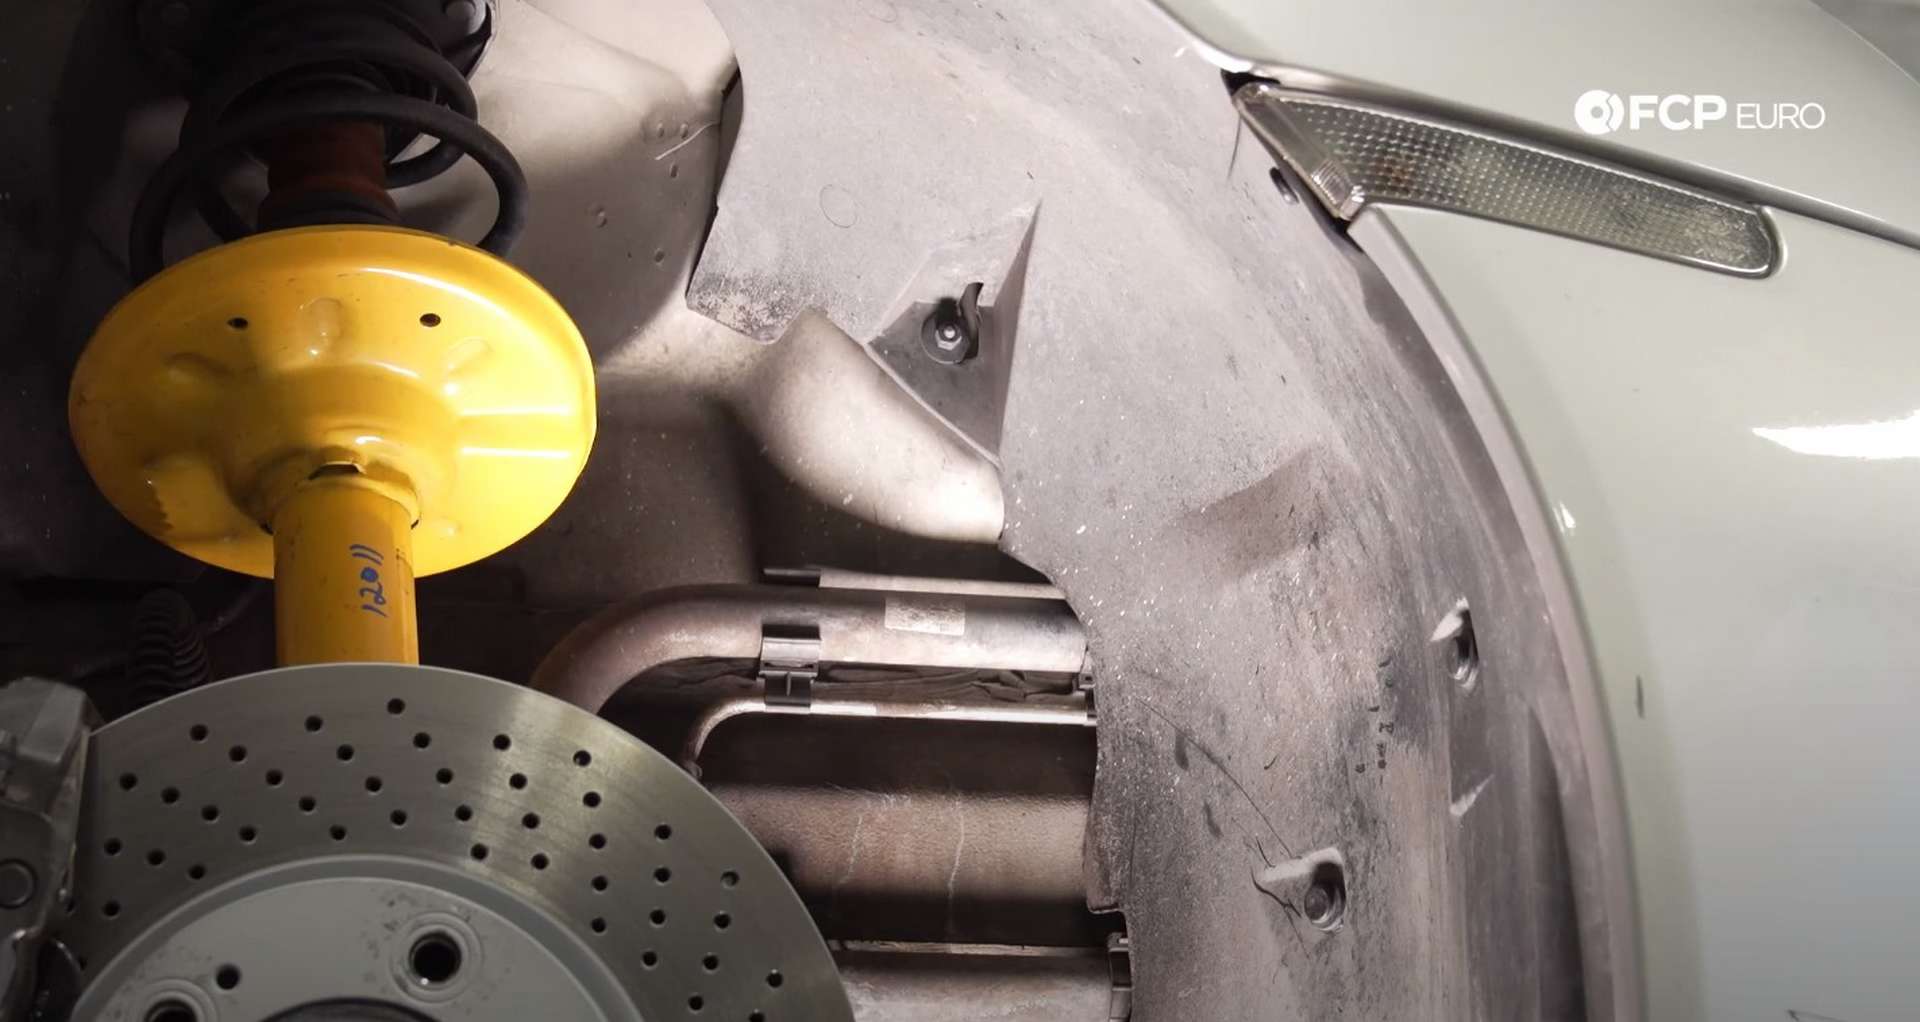
The front of the fender liner has a plastic nut and three rivets. Use a 10mm socket to remove the nut and some pliers to pull out the rivets. Then, move to the fender liner aft of the suspension. There, remove the plastic nut with a 10mm socket and pull out the last rivet by the rocker.
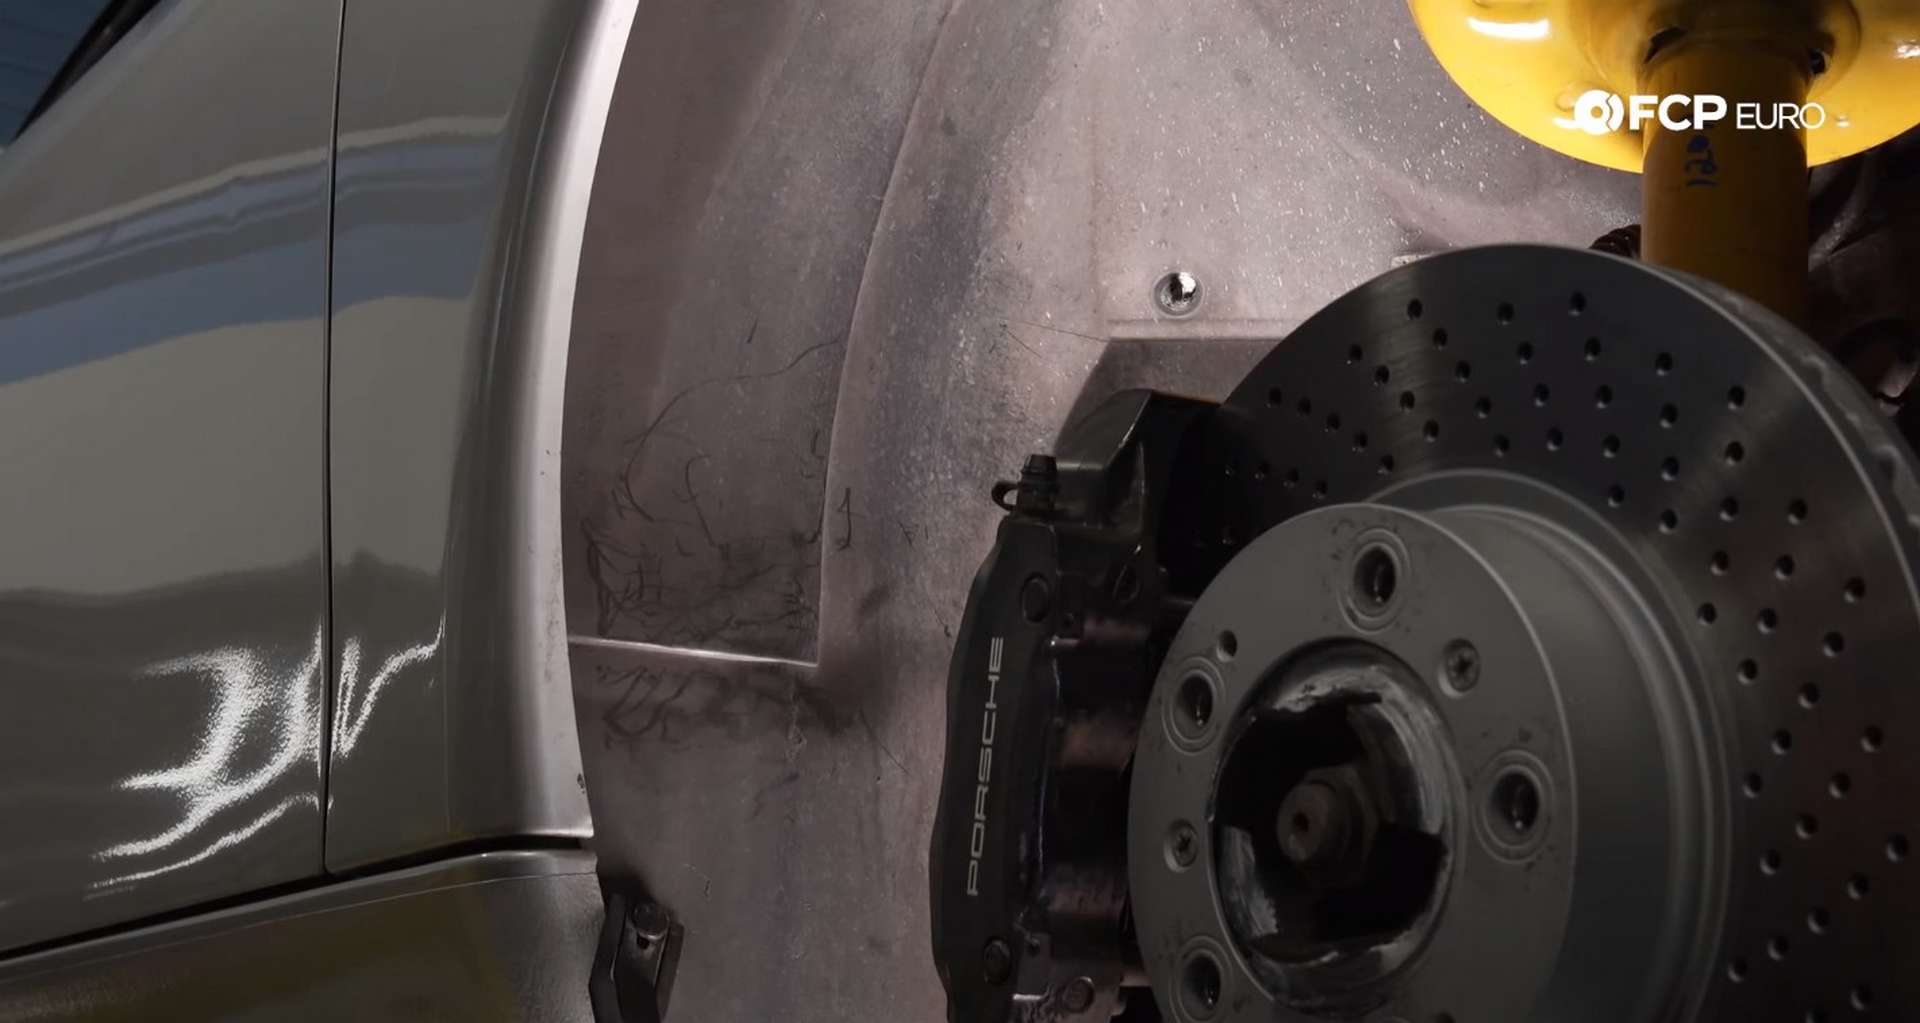
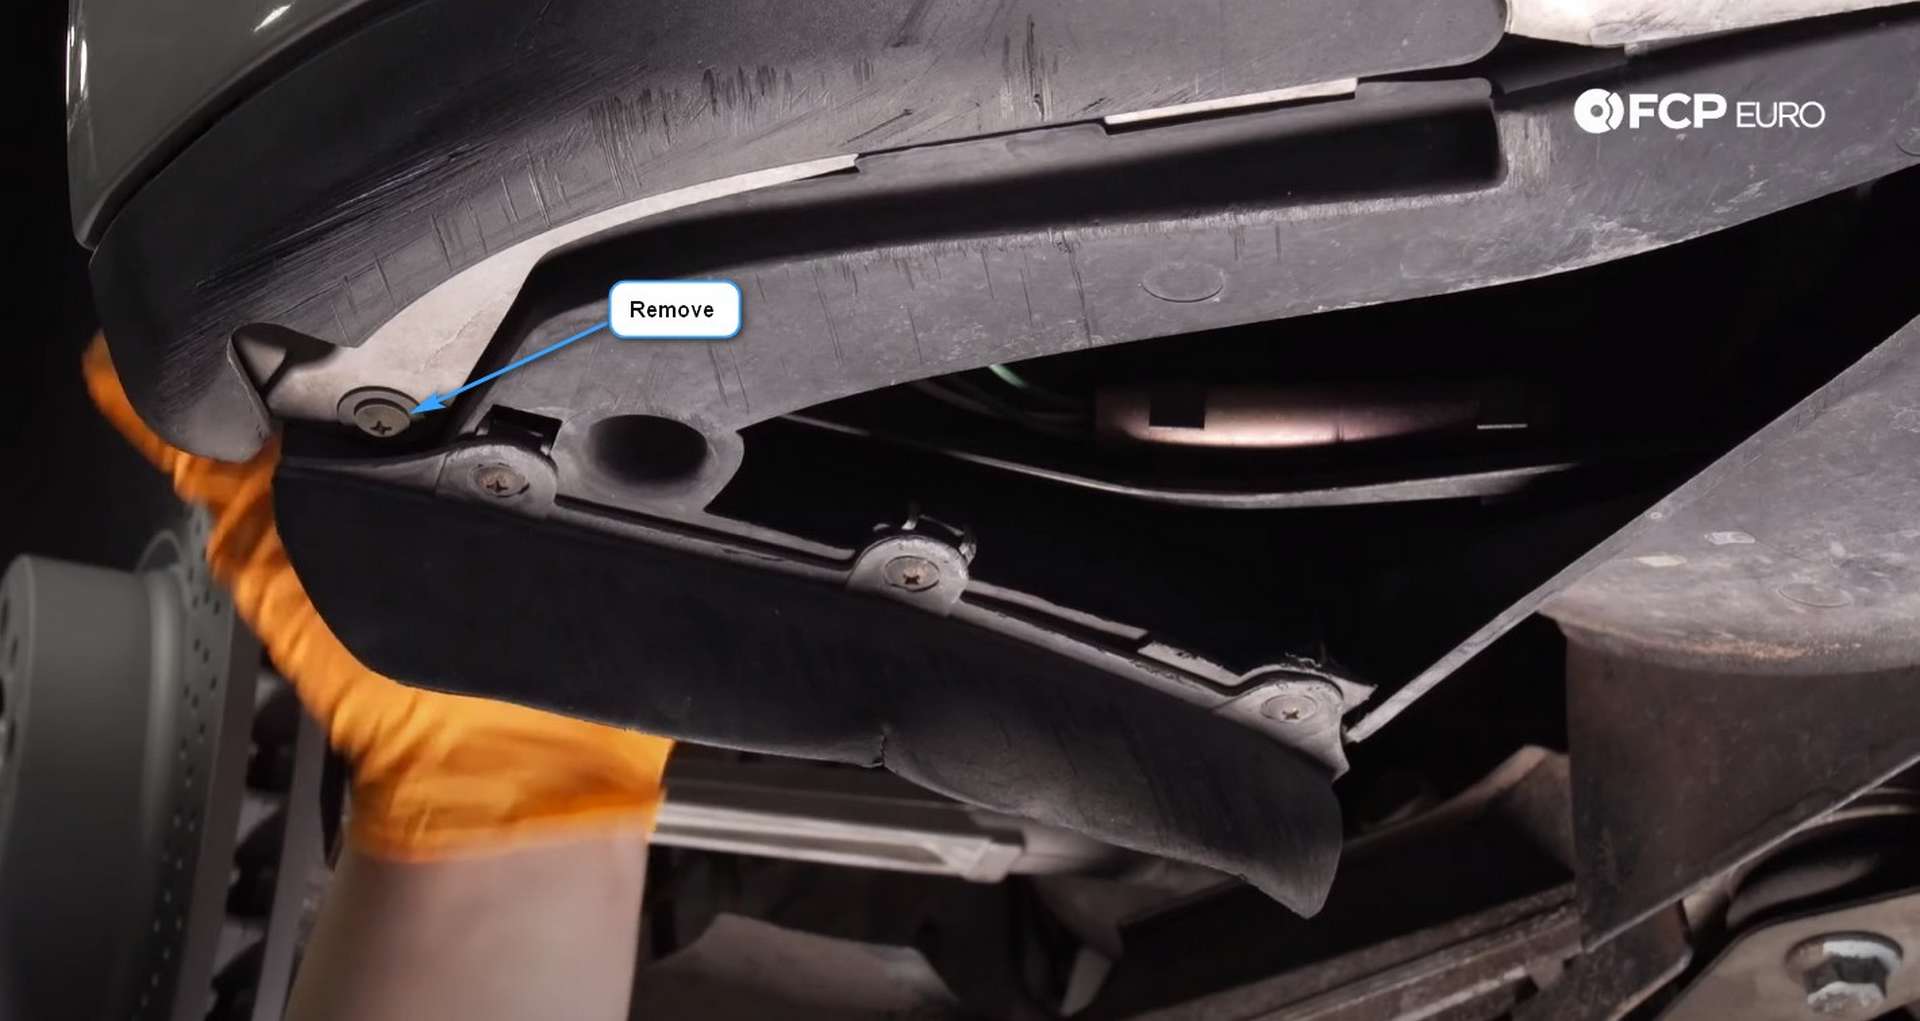
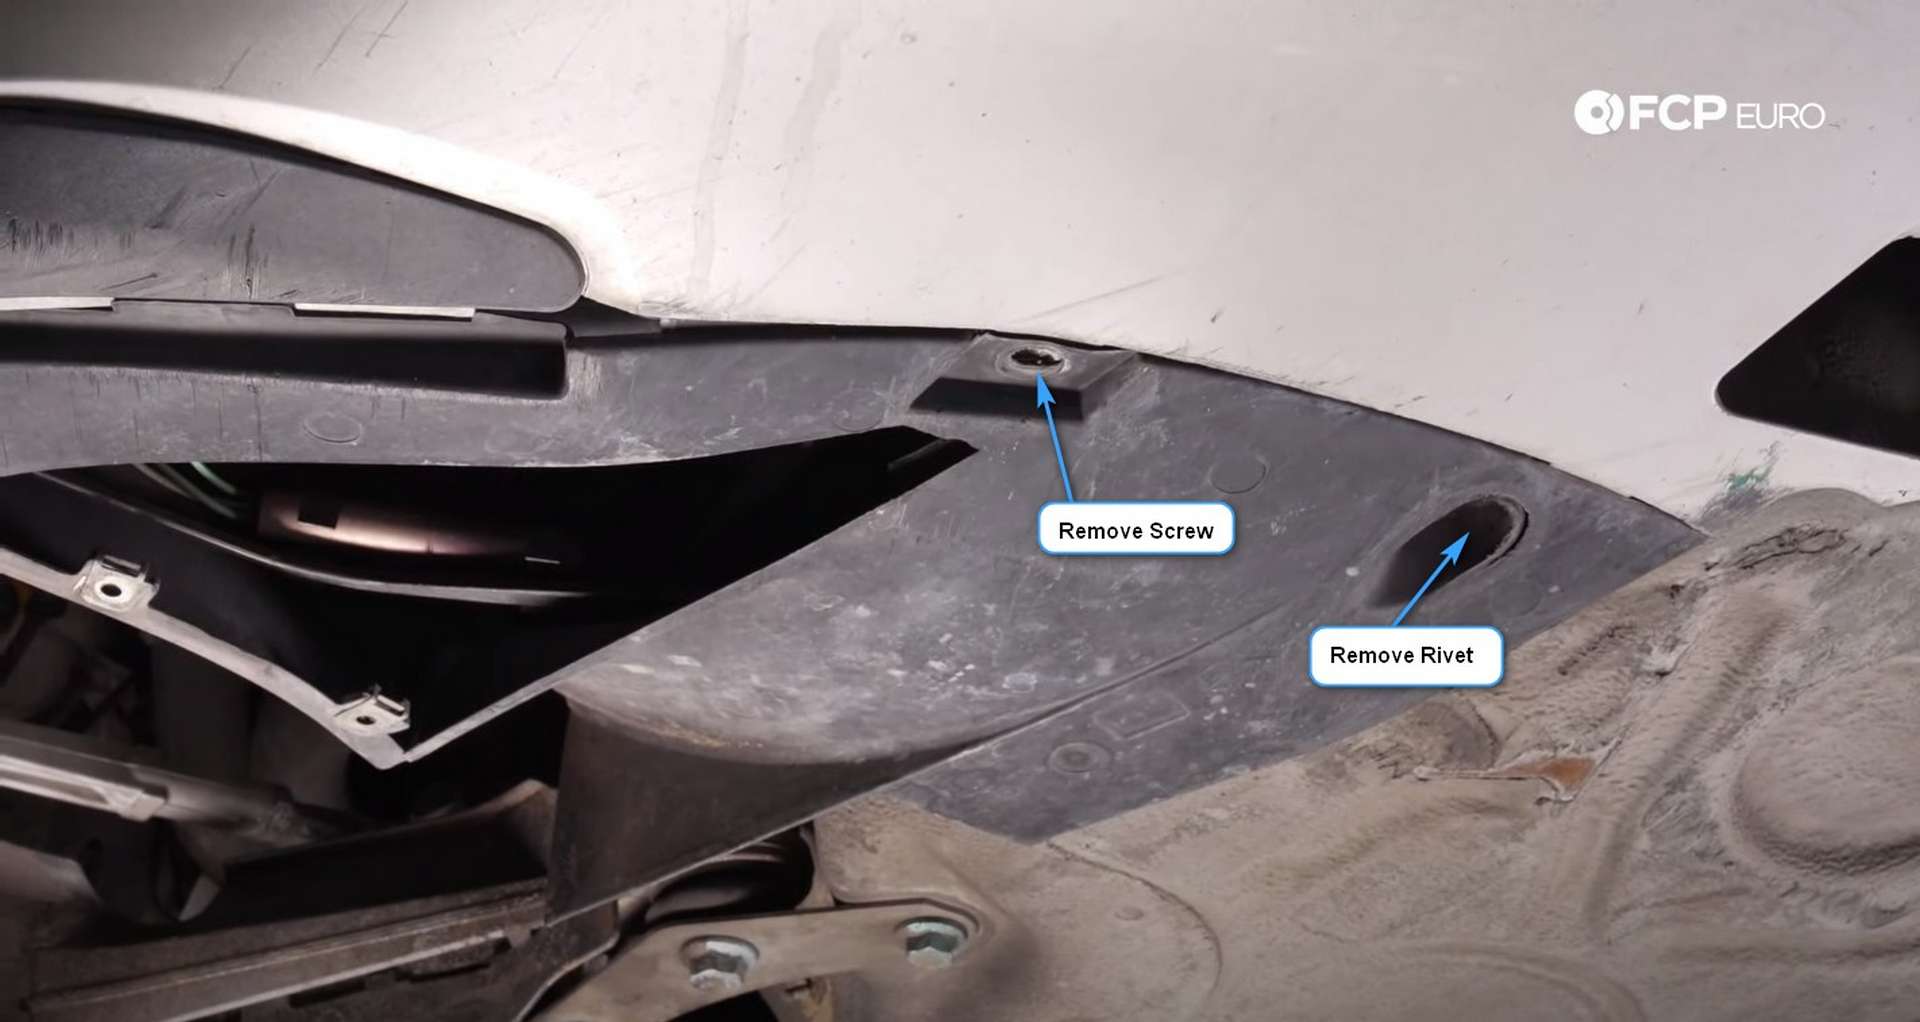
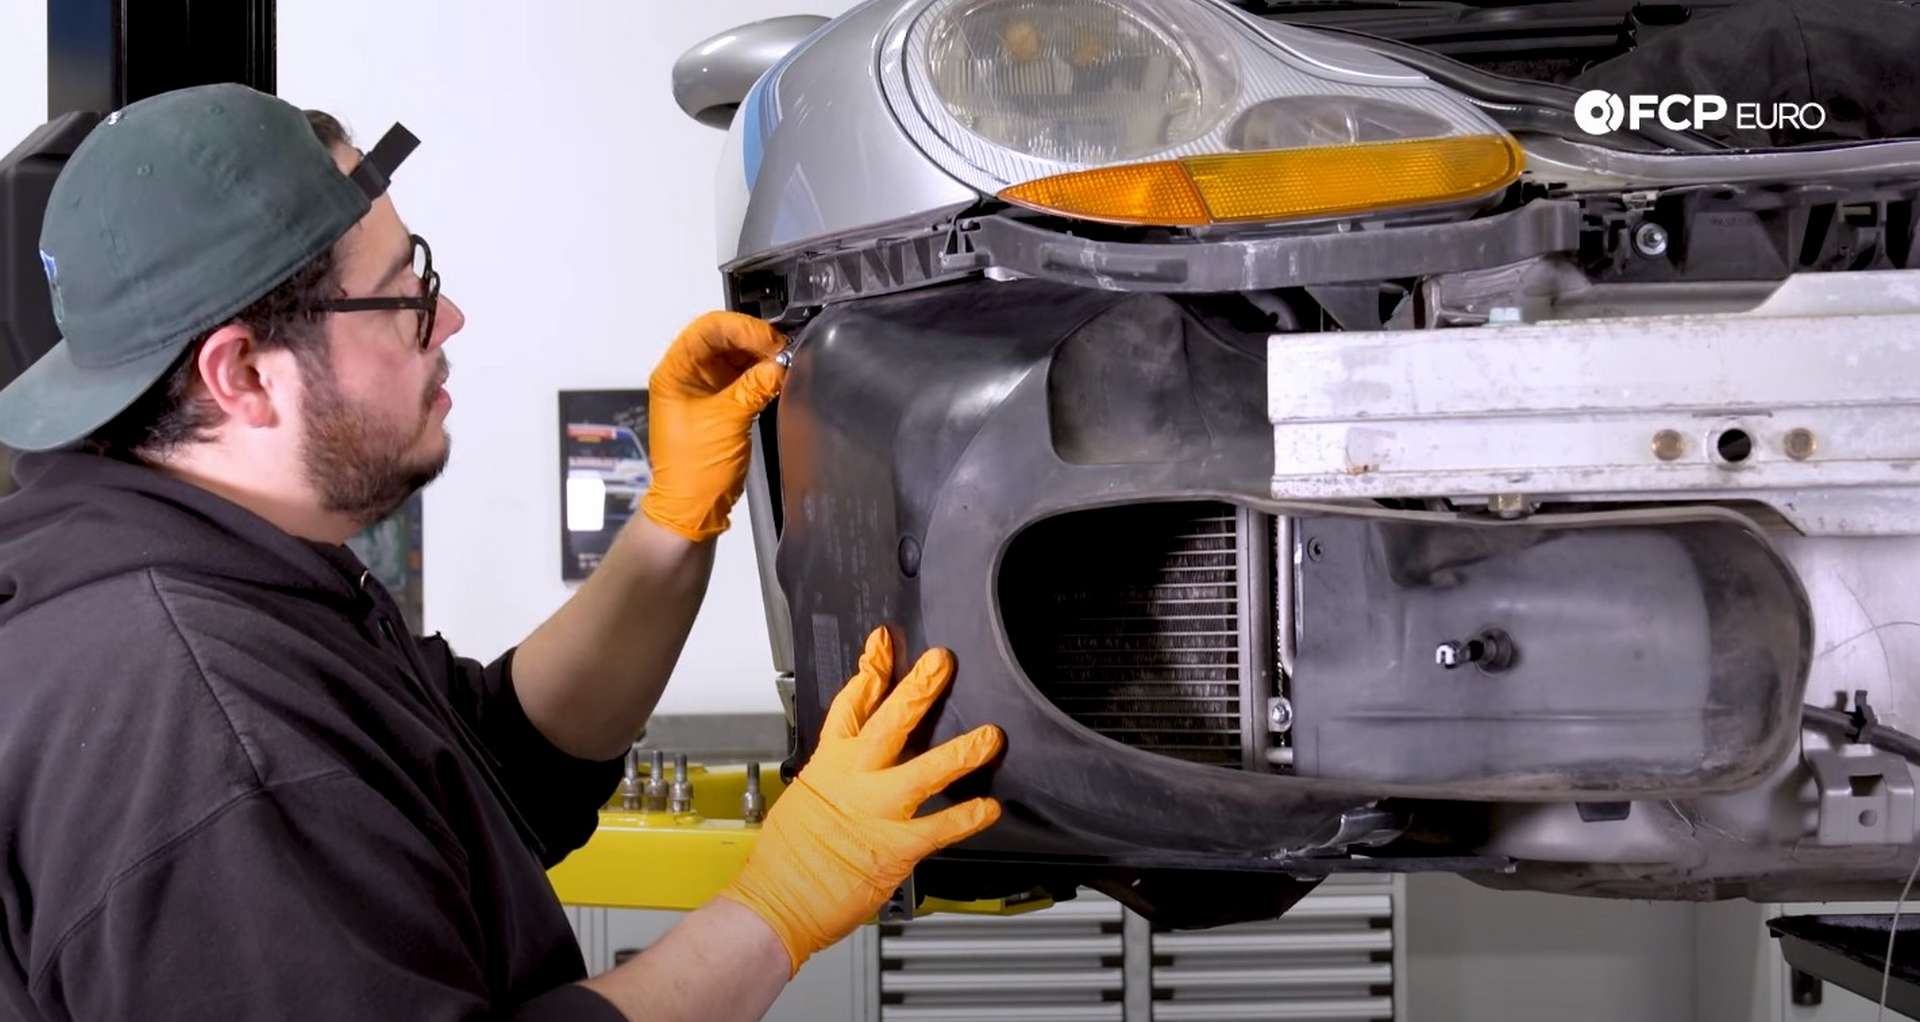
After that, head under the bumper cover on the passenger's side. Use a Phillips-head screwdriver to remove the left-most screw. The other three only mount the air deflector to the liner. Then, head a little more inboard, remove the screw from the edge of the liner, and the rivet from the recessed hole.
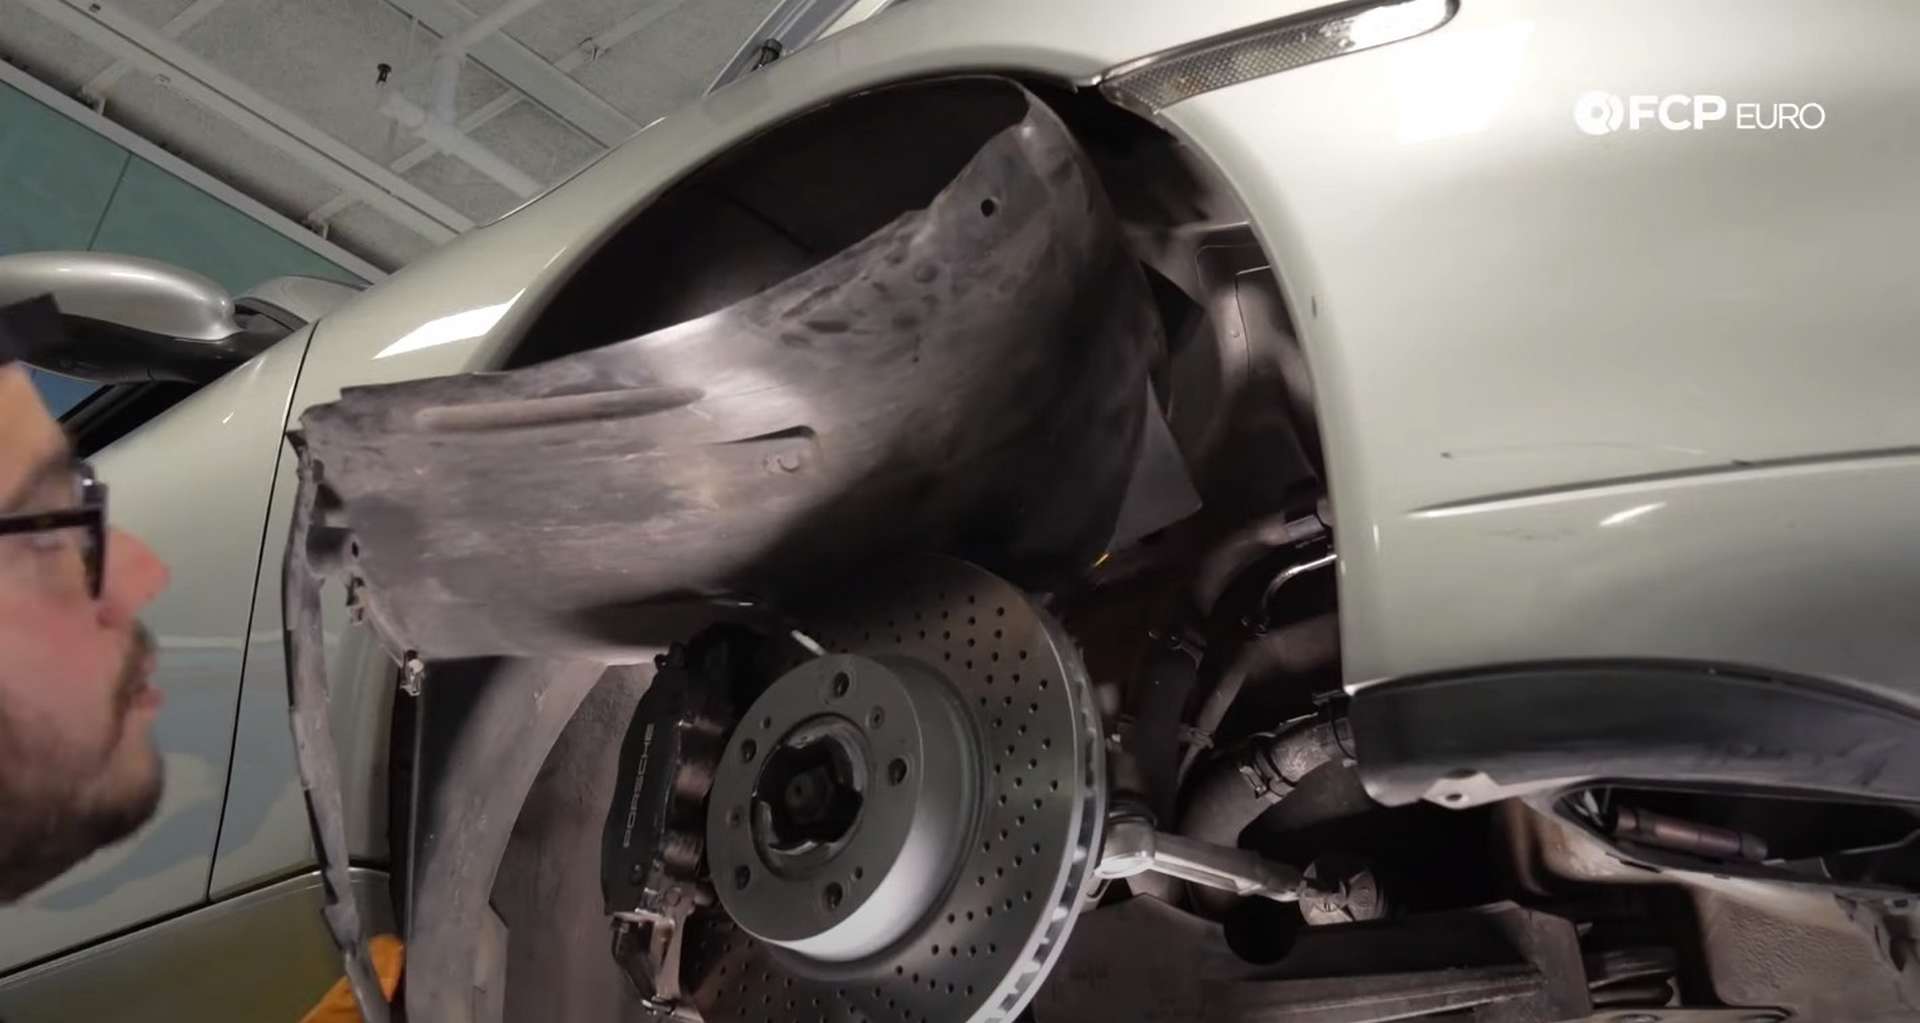
With all of that hardware removed, pull the fender liner off the bumper cover and tuck it behind the wheel assembly.
Next, remove the turn signal from the bumper cover. Use a finger or two to push the signal from behind to pop it out of place. Then, push in on the electrical connection's metal tab and disconnect the signal from the harness.
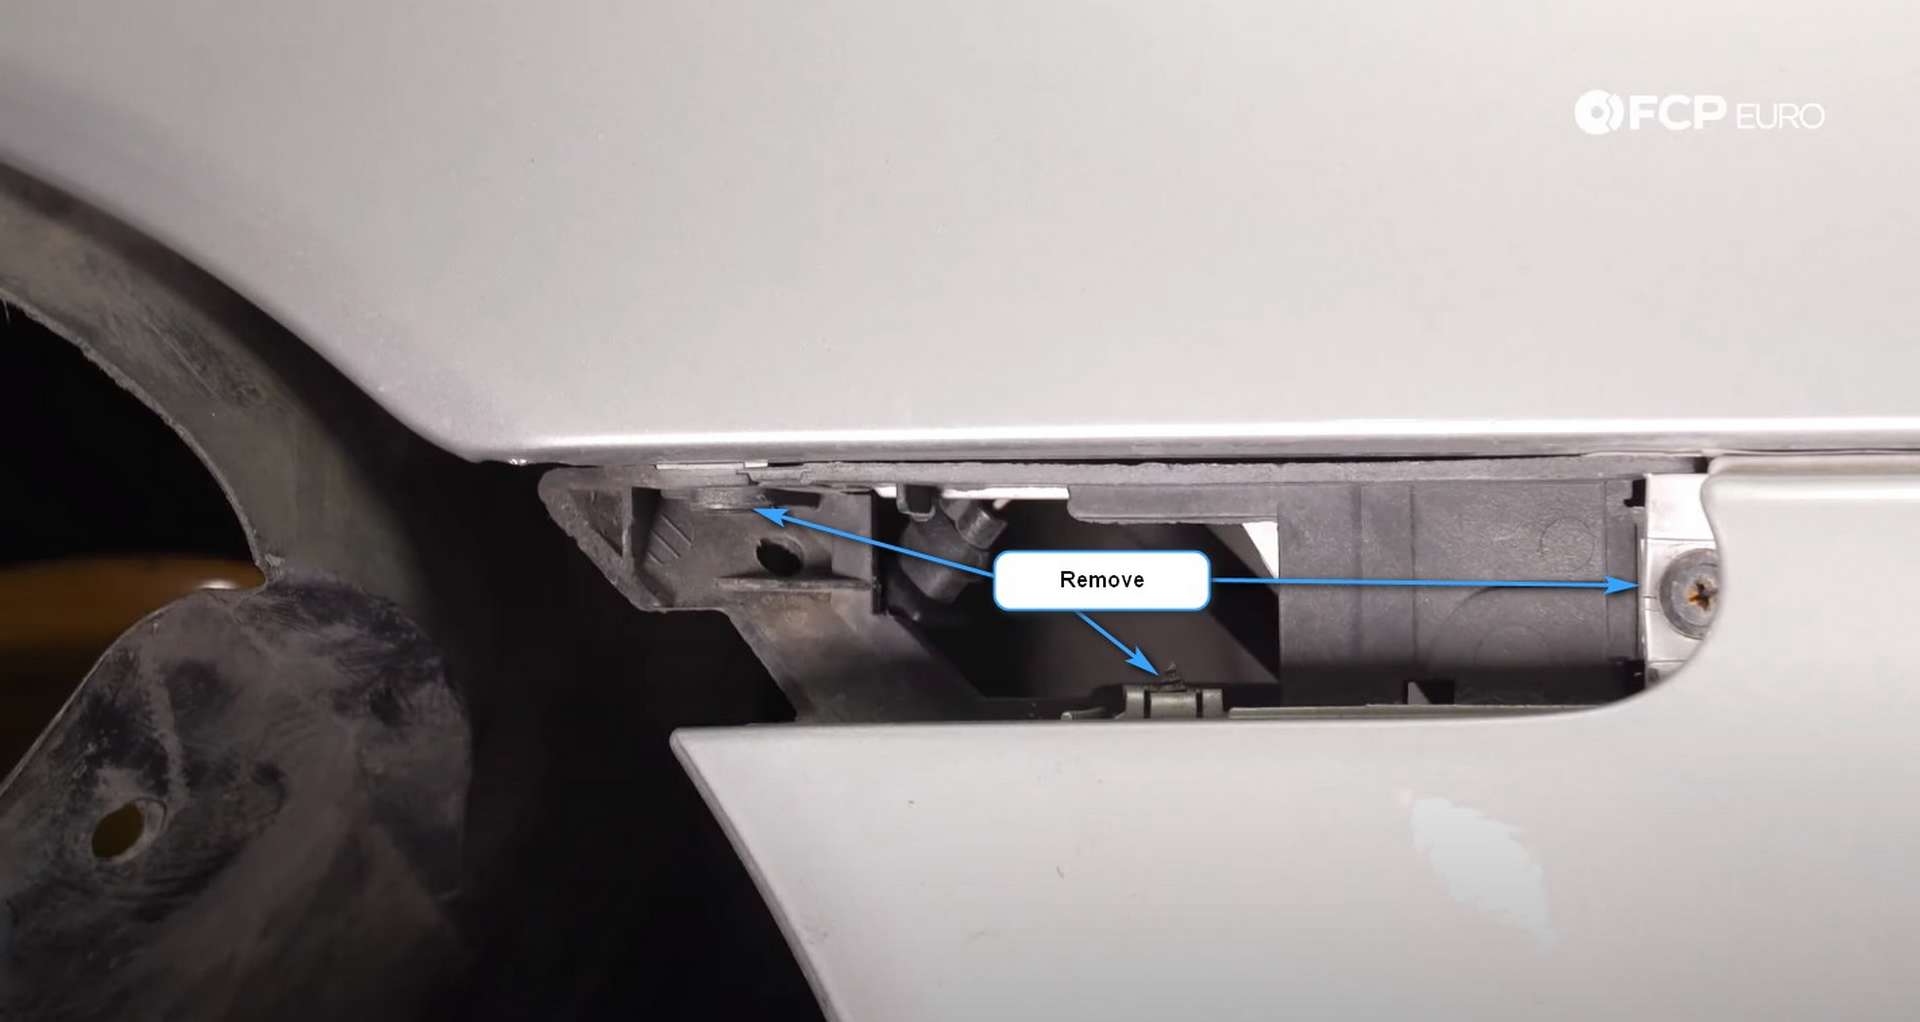
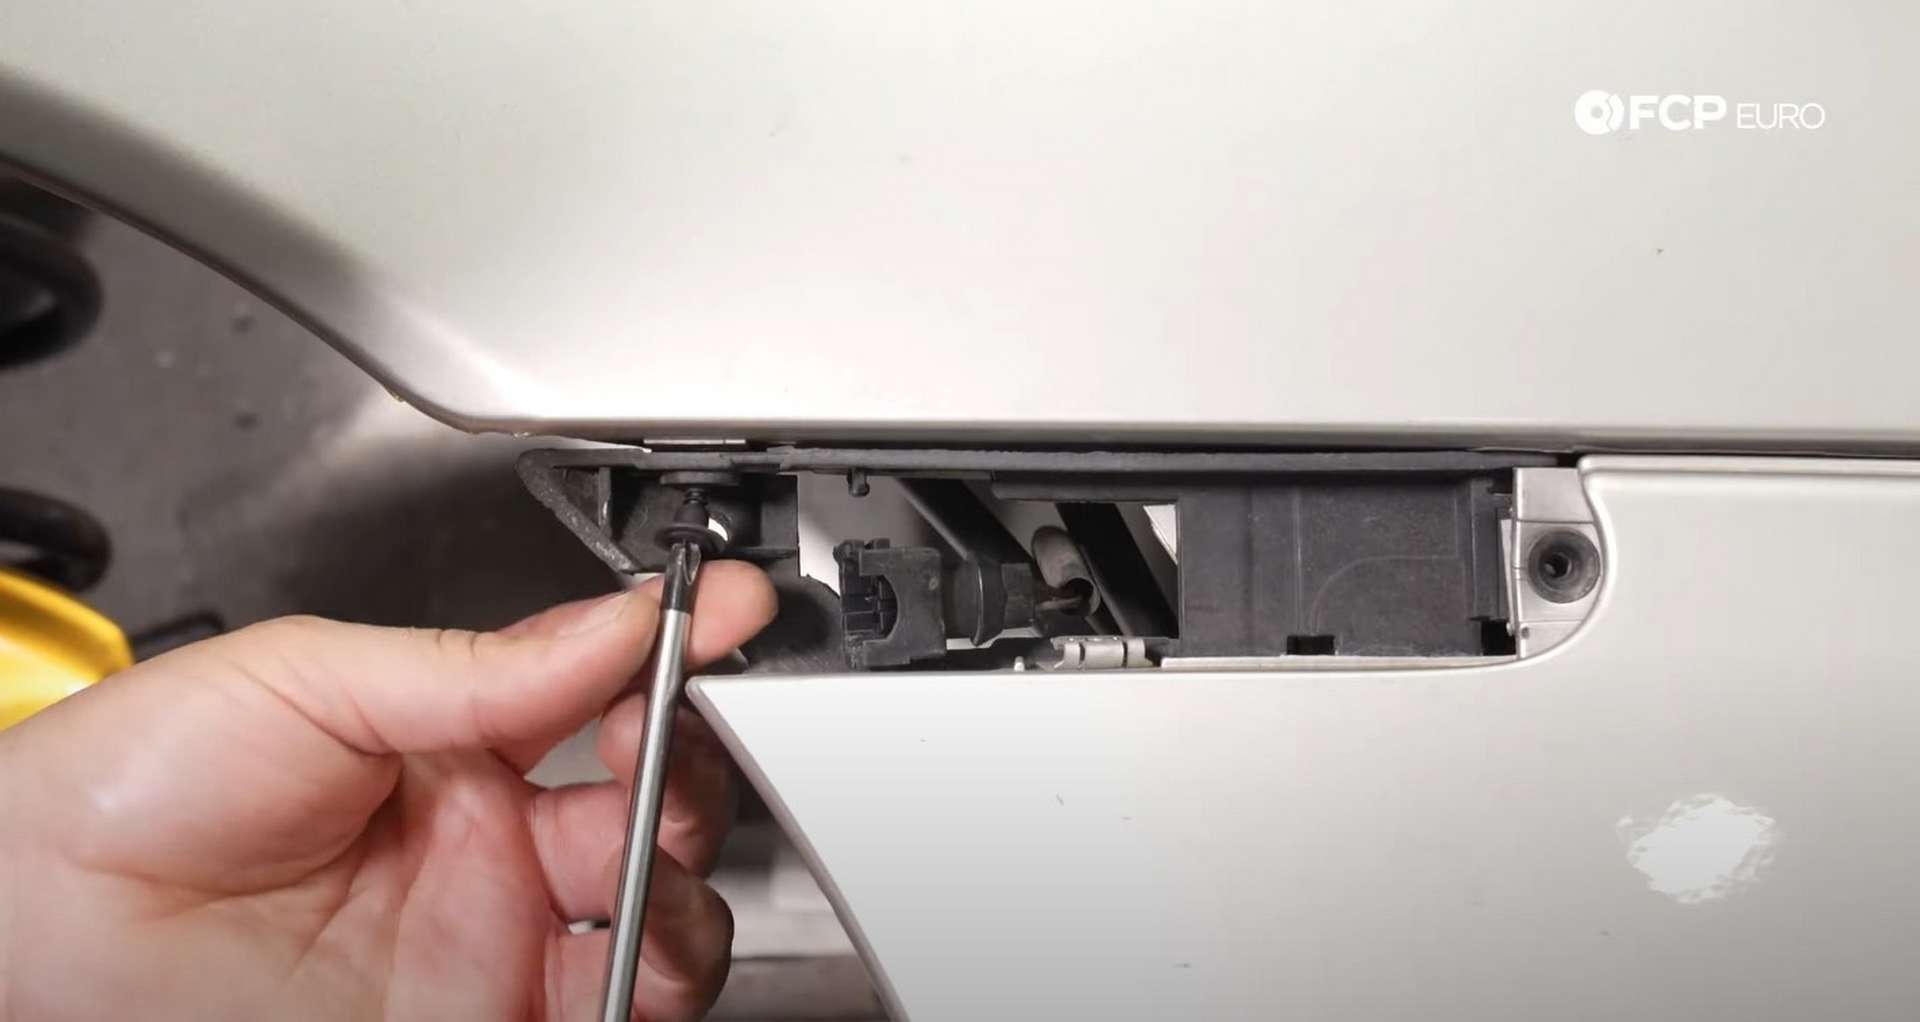
The last three screws for the passenger's side of the bumper cover sit behind the signal. Use a Phillips-head screwdriver to remove them. After that, swing over to the driver's side and repeat that process.
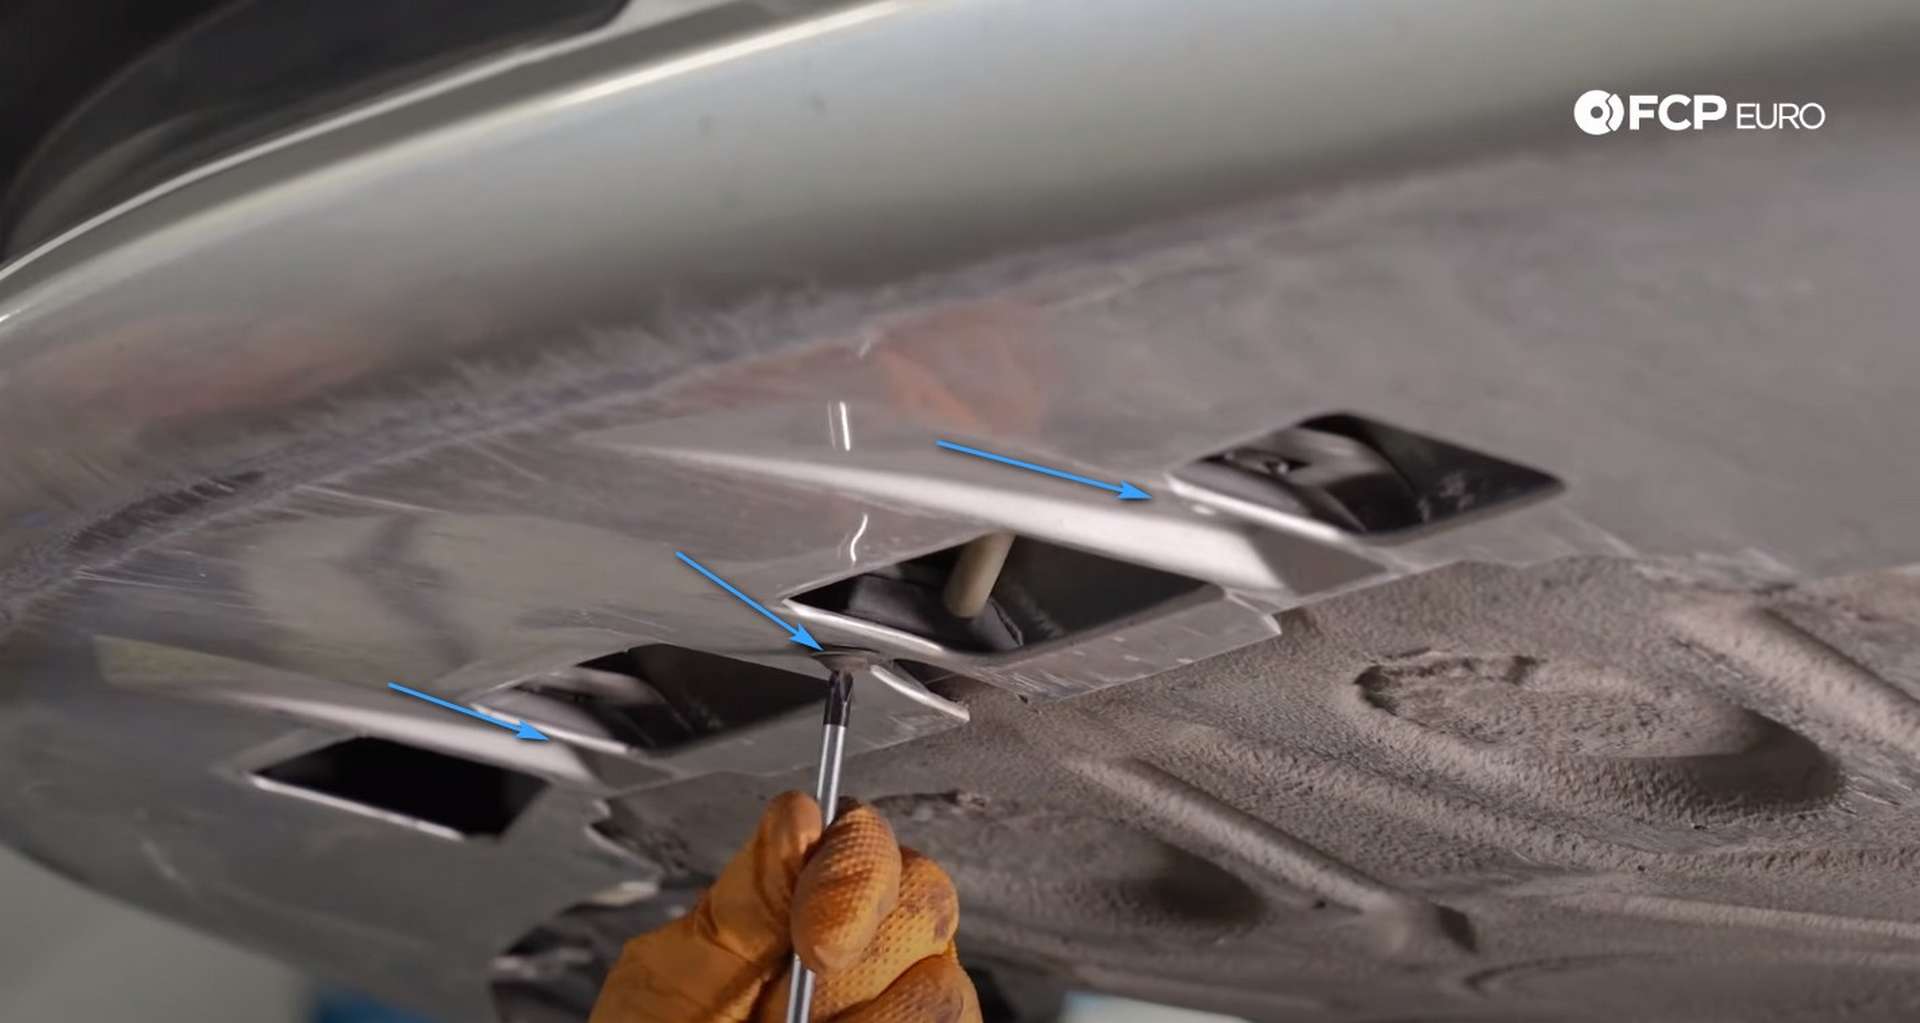
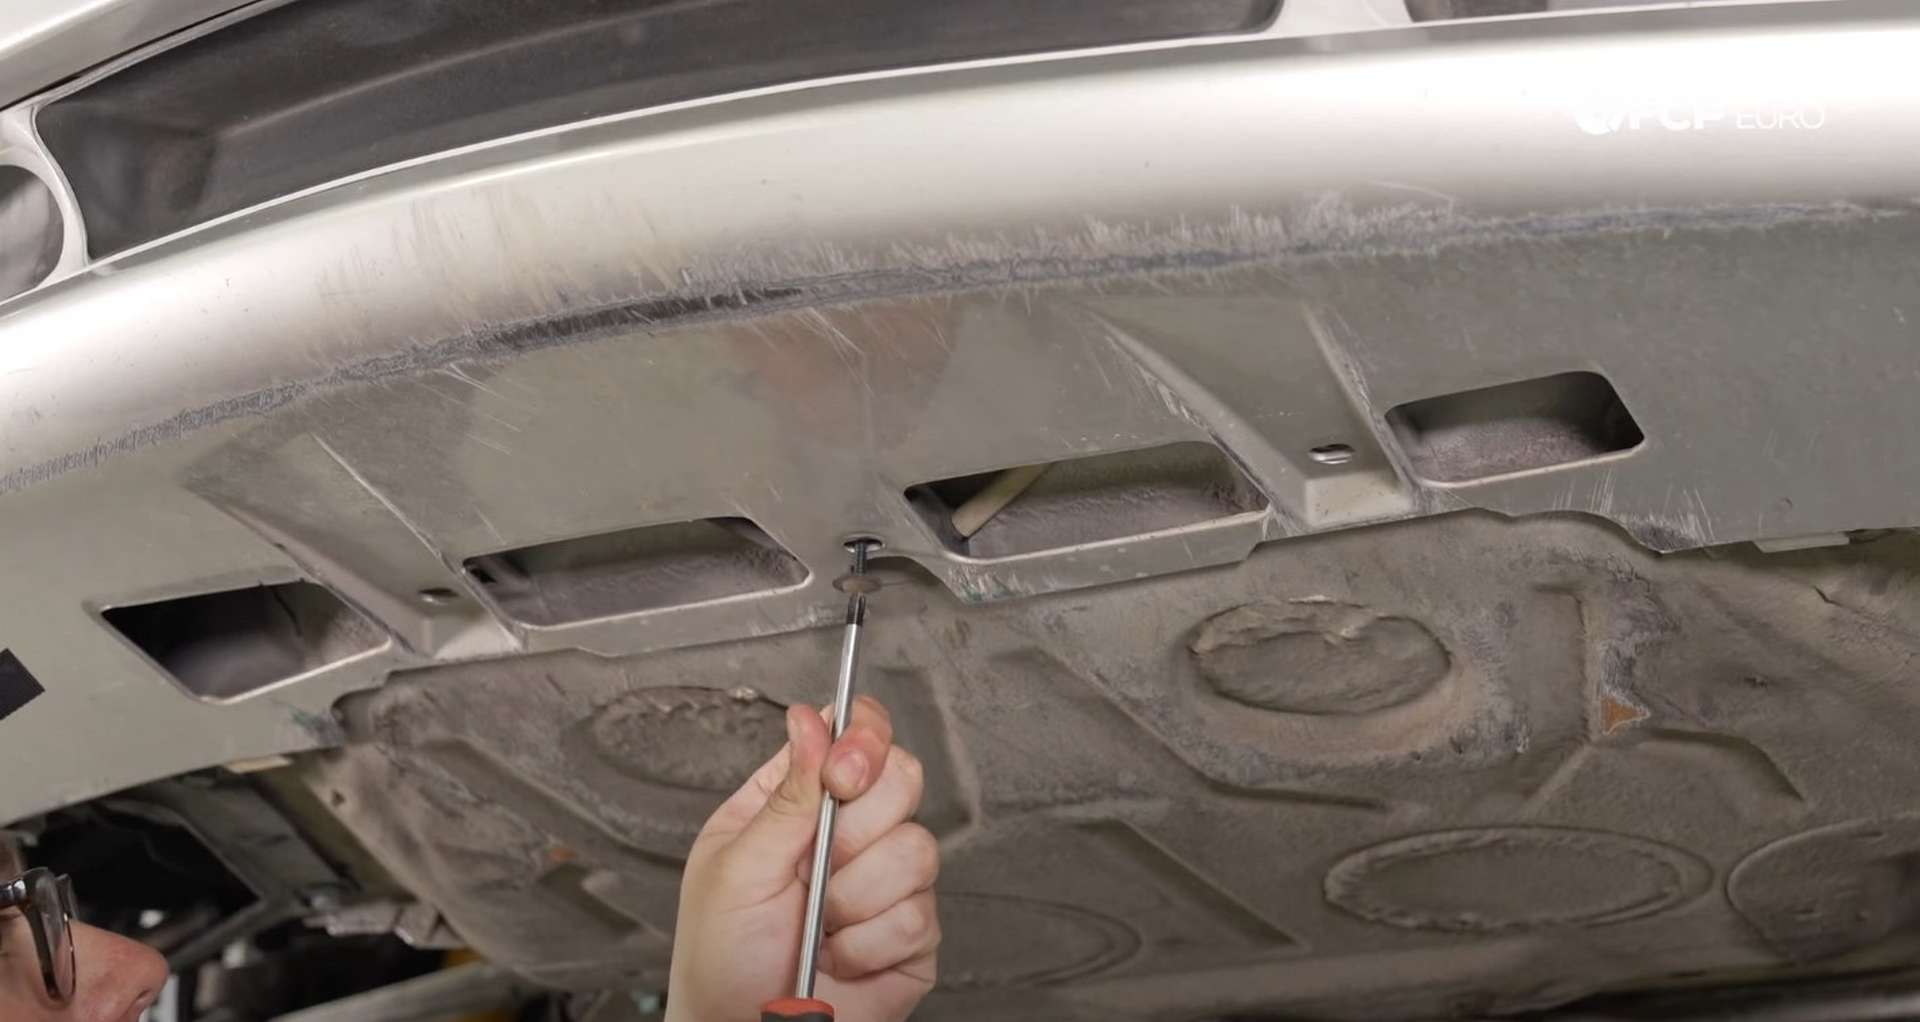
Lastly, the bumper cover is held on by three more screws underneath the car. Use a Phillips-head screwdriver to remove them.
Now, remove the bumper cover and set it aside to prevent any damage. The outside air temp sensor sits in the lower passenger's side grill, so be careful not to pull that out with the bumper cover.
Step 2: Remove the radiator ducting and A/C condenser
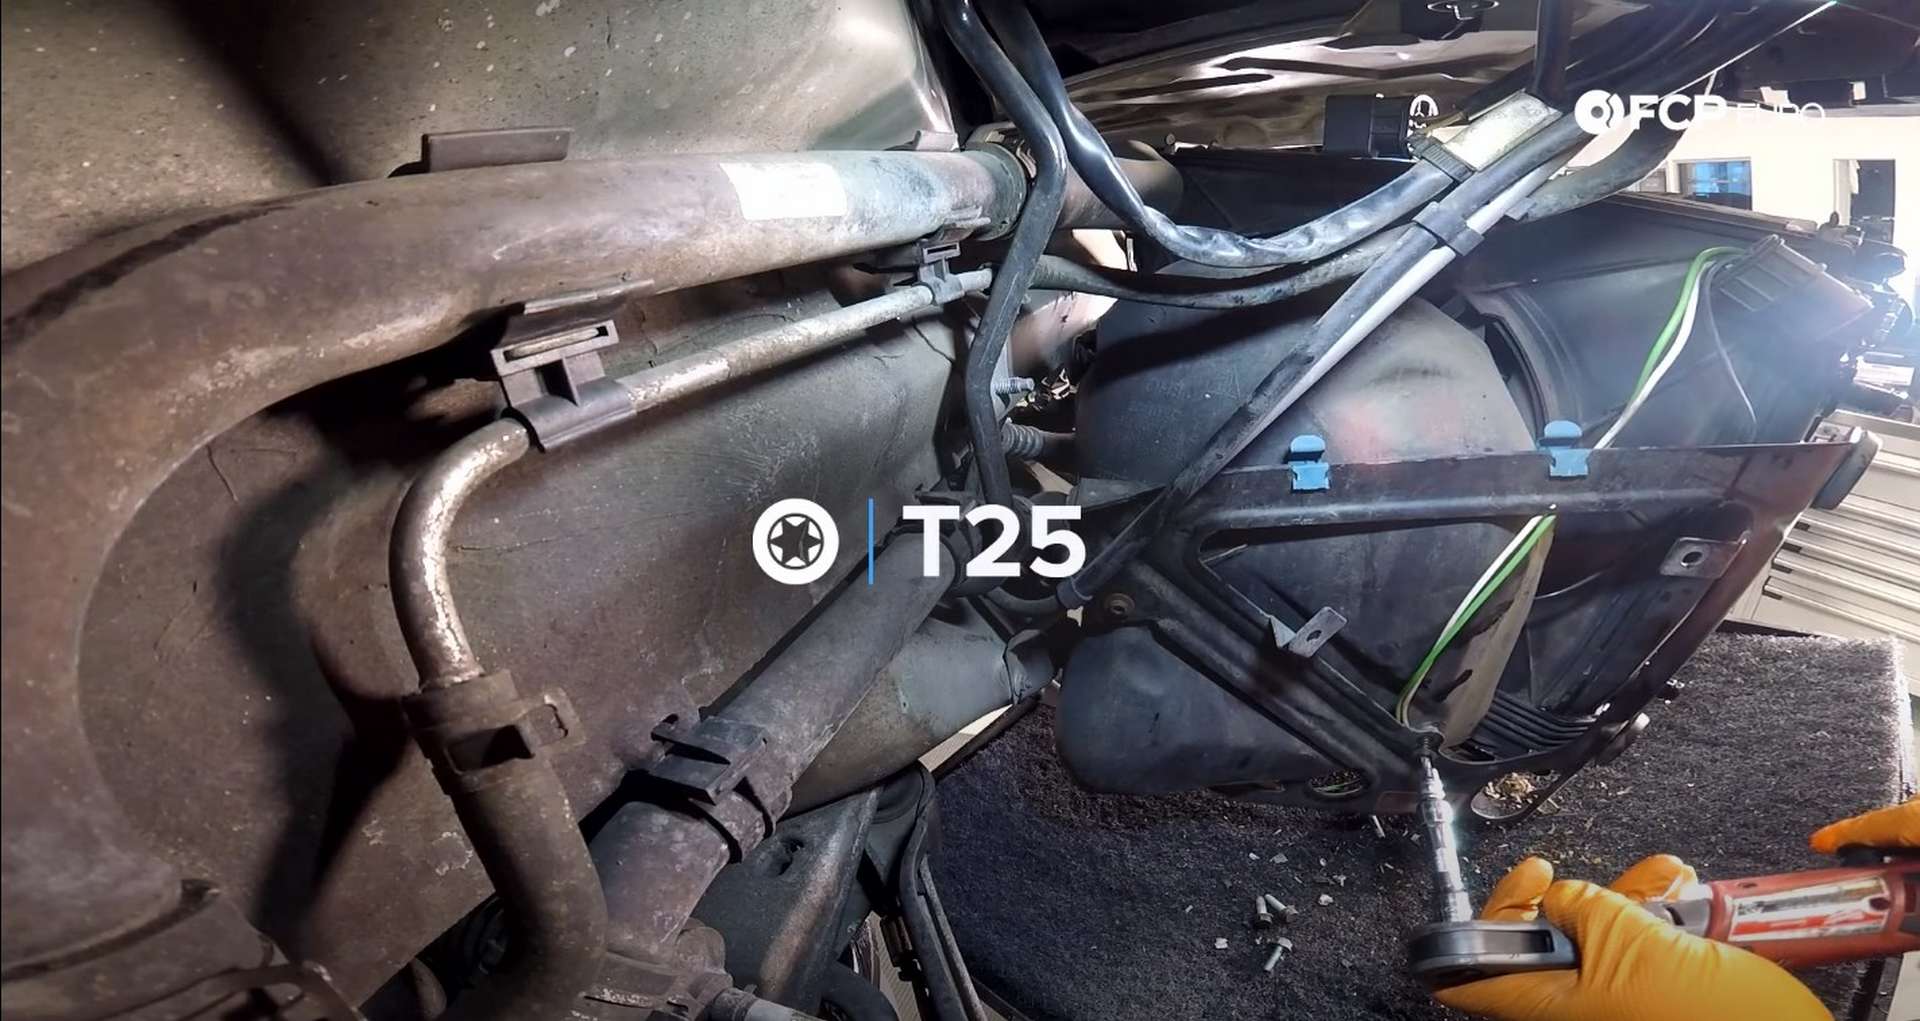
First up, disconnect the outside air temp sensor. Push down on the connector's tab and pull off the sensor. Then, use a T25 Torx bit socket to remove the radiator ducting's five mounting fasteners.
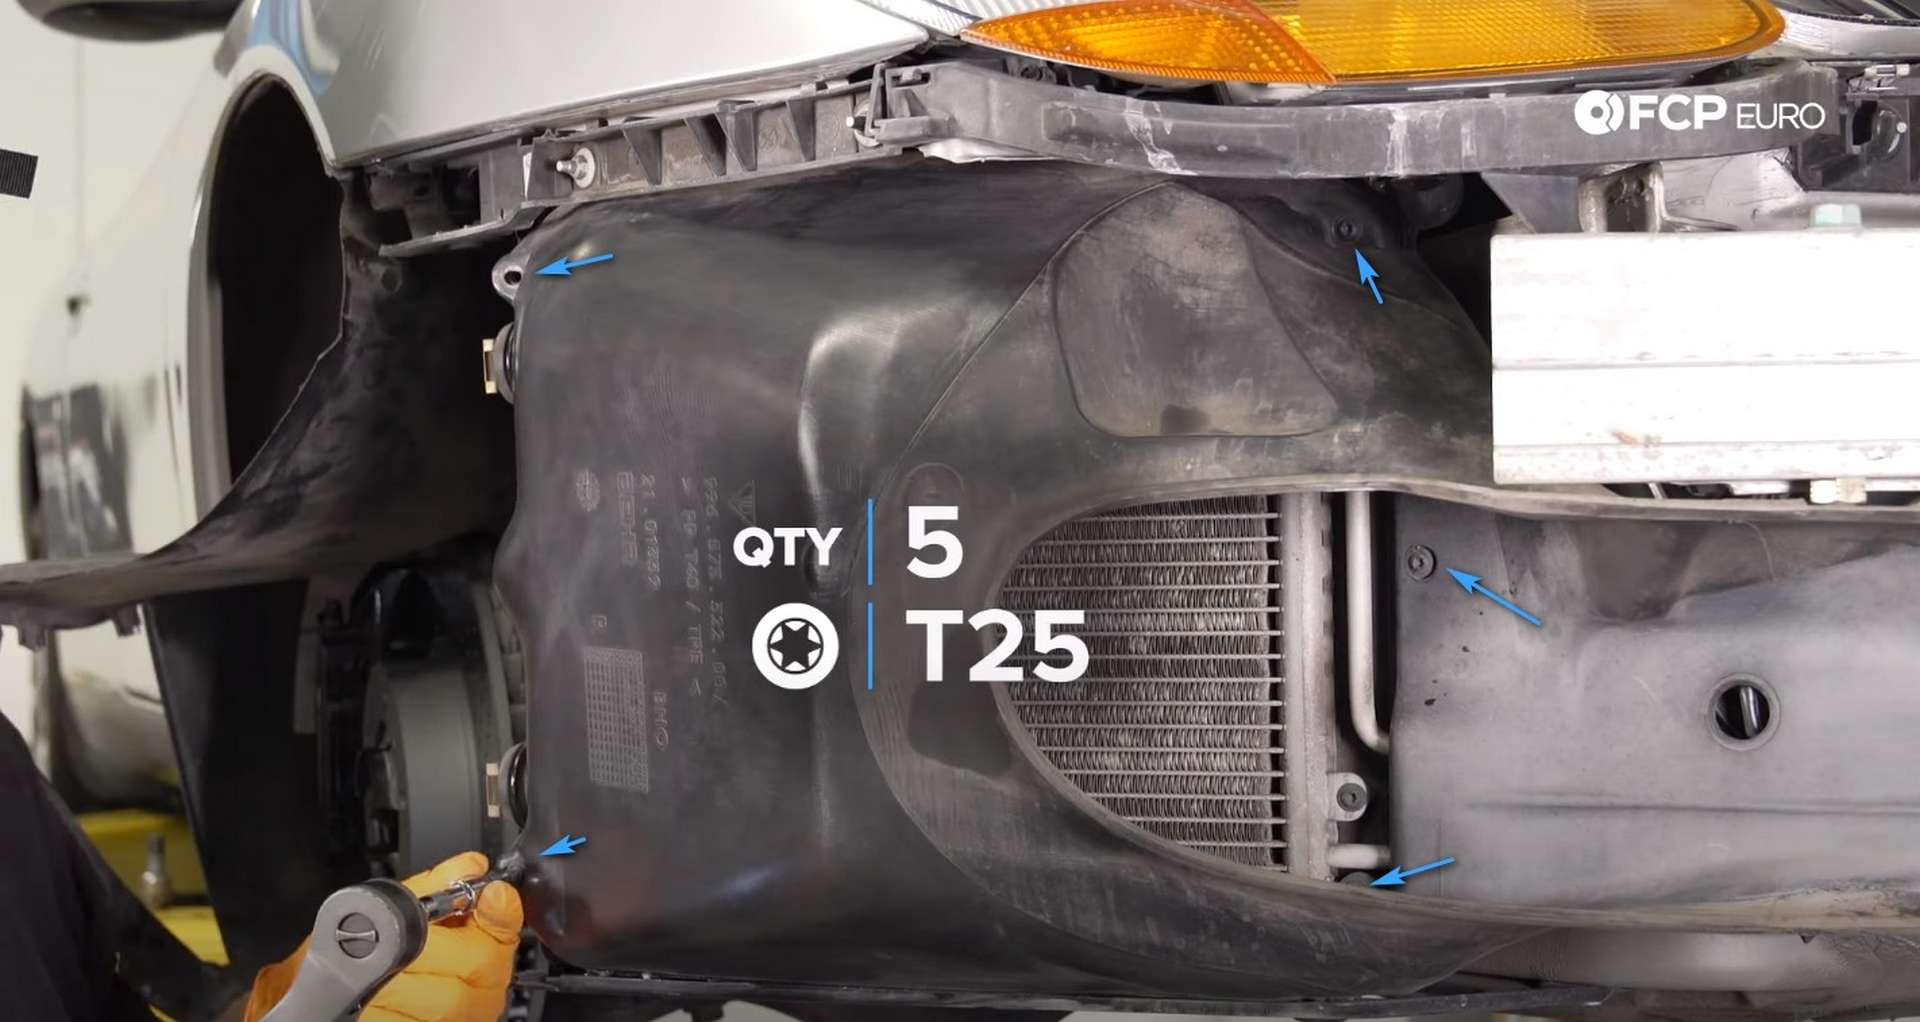
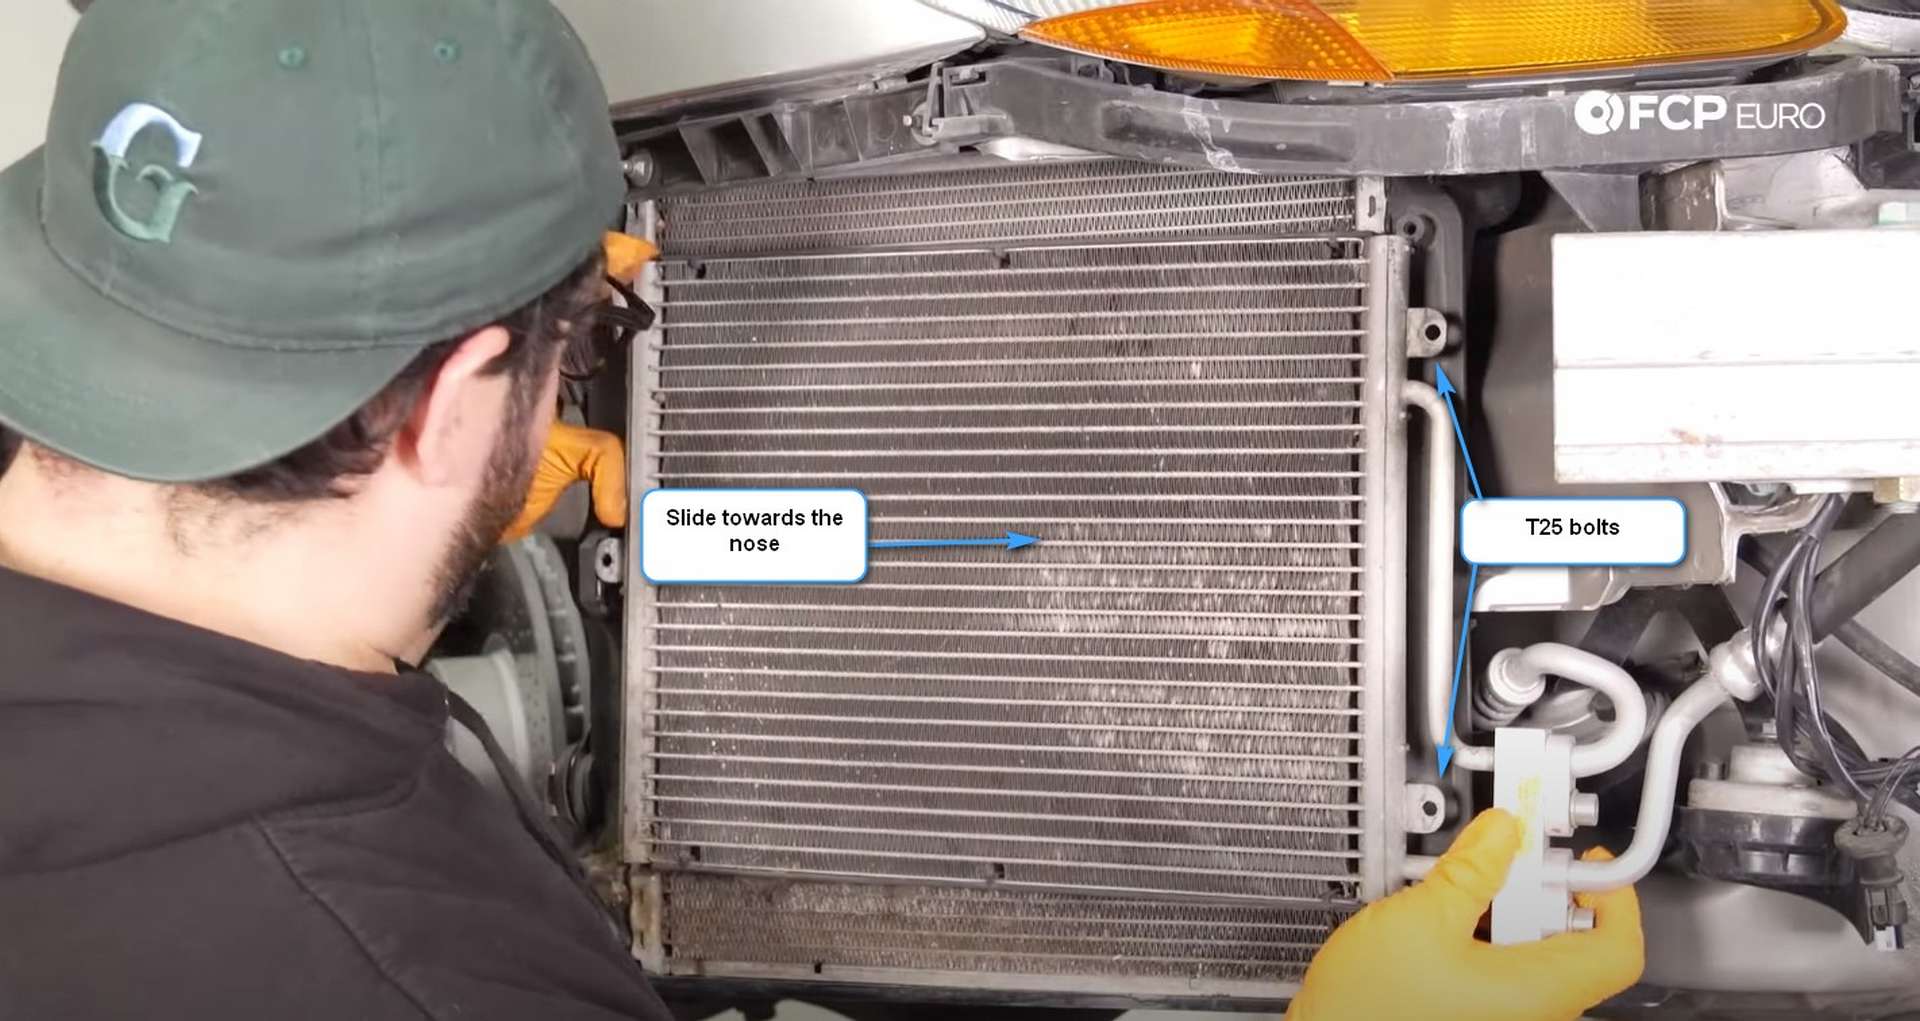
Remove the fasteners and pull off the ducting. Debris will fall out of the ducting as you pull it off, so be ready for that. After that, remove the A/C condenser's two mounting bolts and slide it towards the nose of the car, out of the way.
At this point, you can continue with the steps to replace one side before the other, or you can repeat this step on the other side before moving on.
Step 3: Remove the radiator
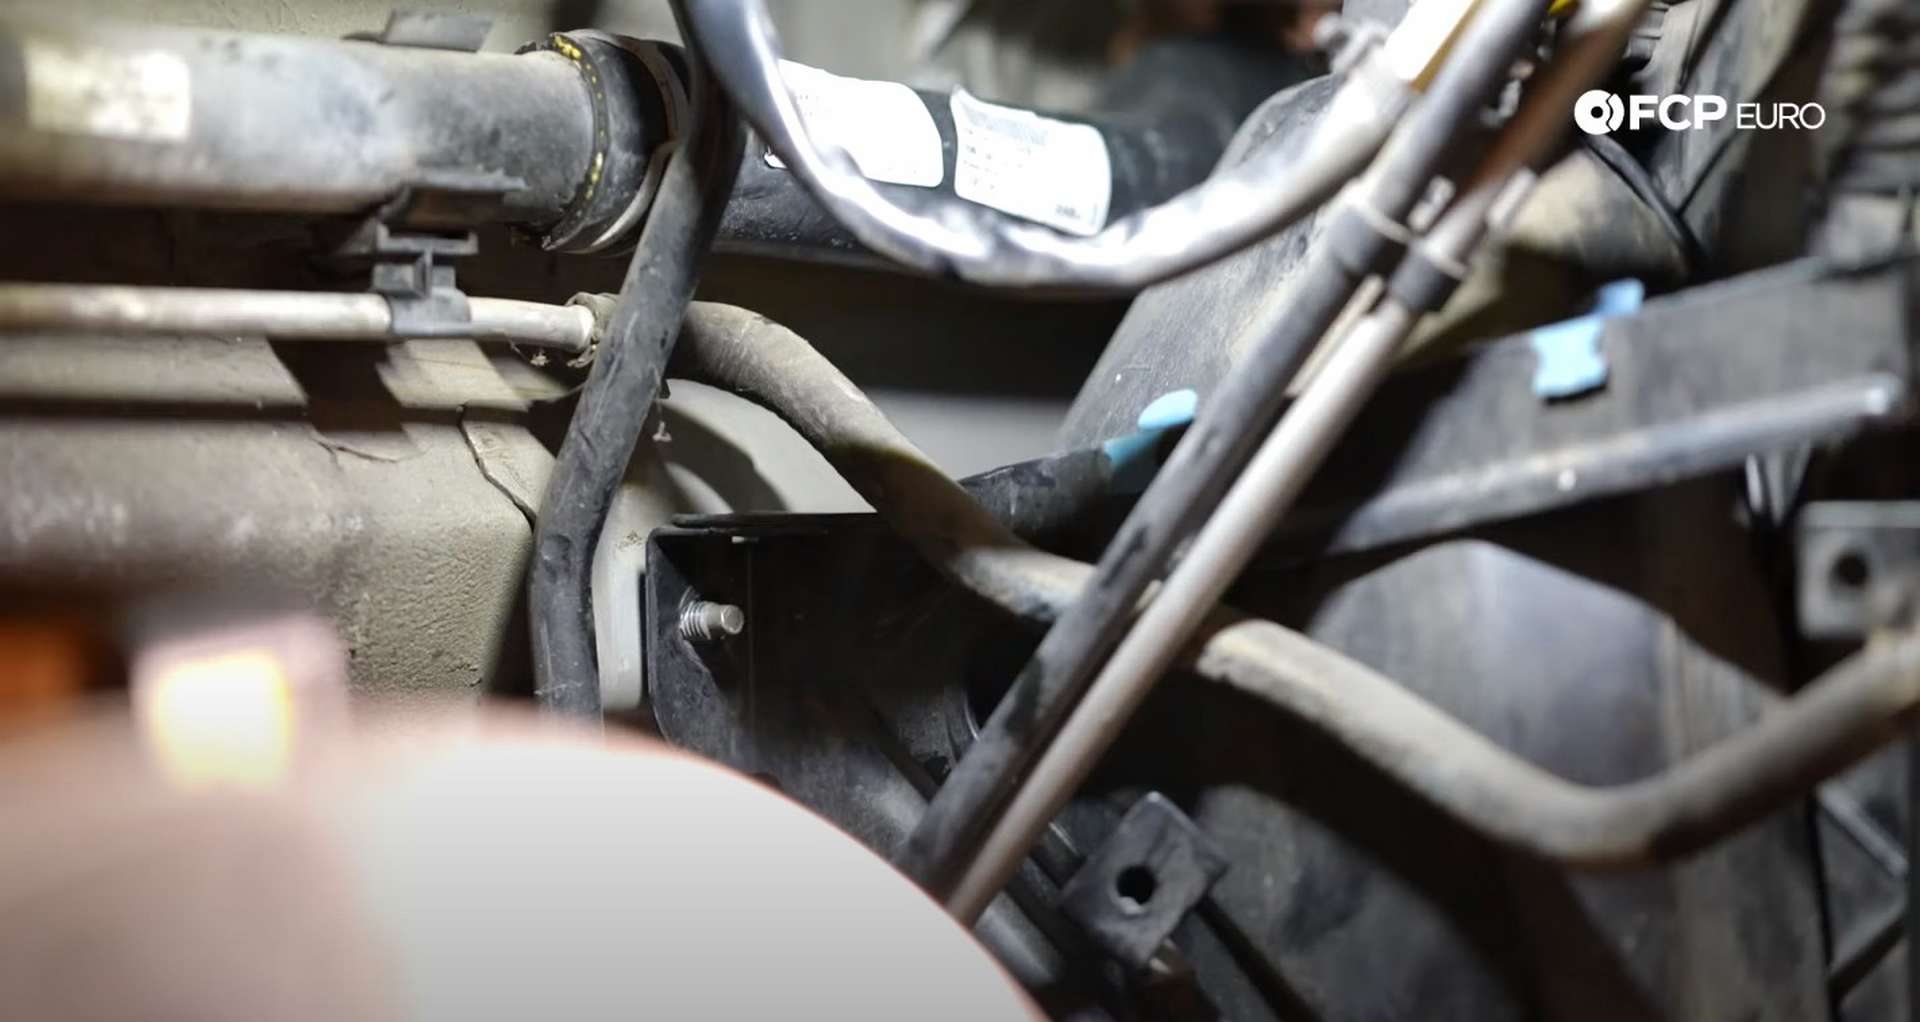
Start at the back of the radiator by disconnecting the fan. Depress the two tabs on the electrical connector before pulling it apart. The large connector has two wires, a white and a green, running into it—Tuck the body side of the harness out of the way.
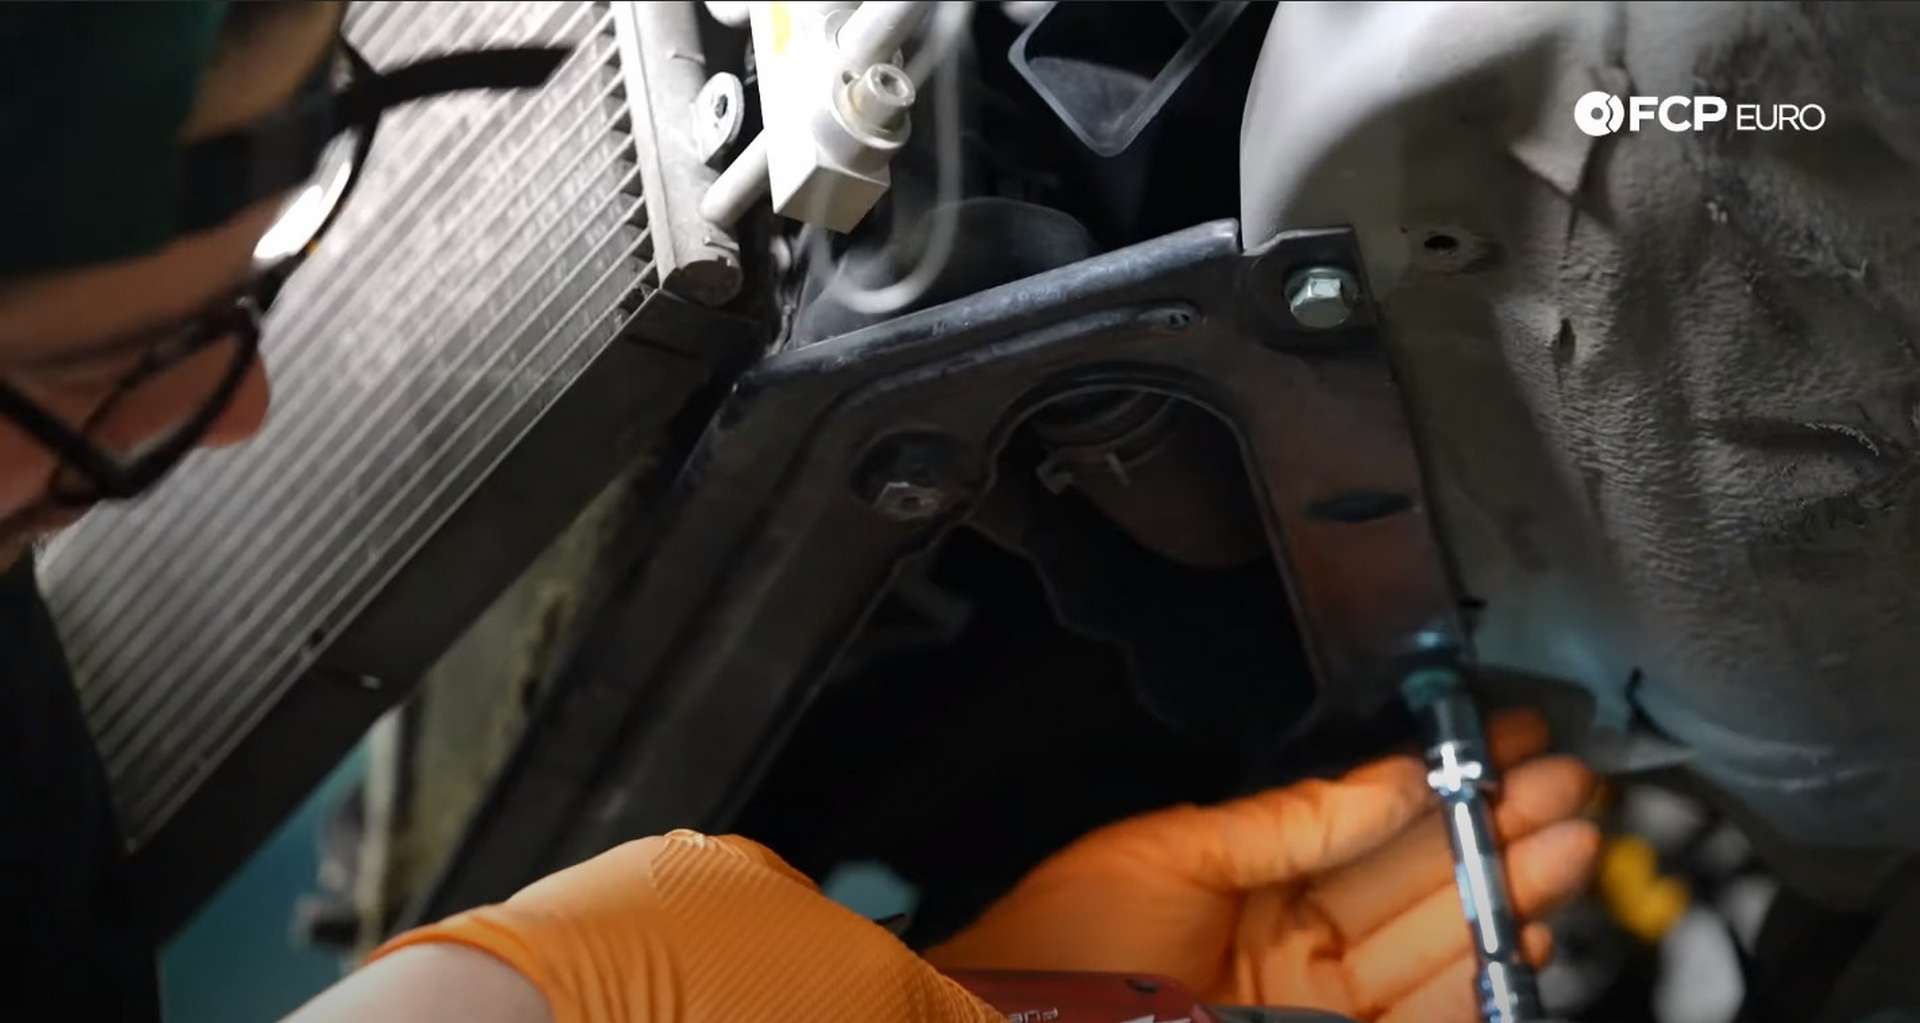
Next, use a 13mm socket to remove the fan bracket's lower mounting bolts. Then head behind the fan and remove the 13mm nut mounting the bracket to the body.
After that, remove the two gold clips that mount the bracket to the radiator. Use a flathead screwdriver to push them off the radiator; keep their gold washers with them. Then push the radiator out of the bracket.
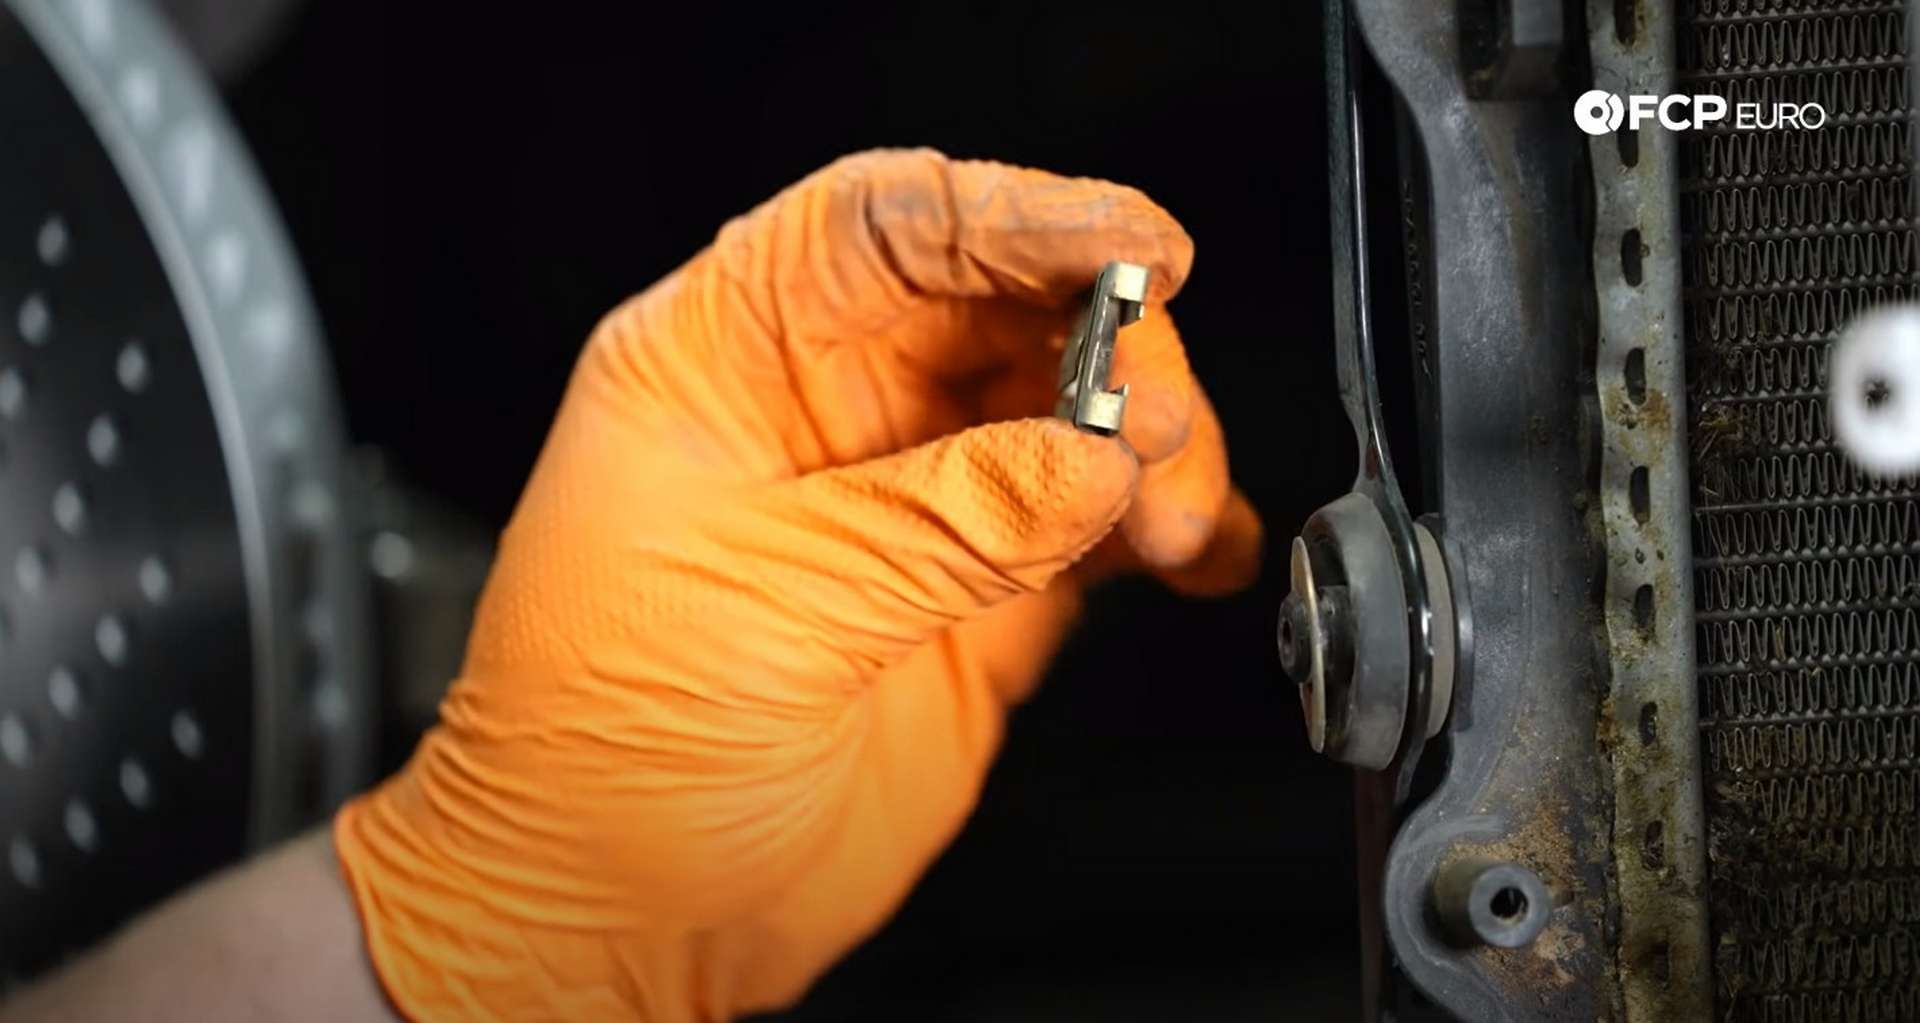
Push the nipples that the clips sat on out of their rubber, locating grommets in the bracket. Move on to the small radiator hose at the outer top corner next. Use a pair of hose clamp or slip-joint pliers to remove the hose from the radiator. Have a drain pan or catch-can underneath to collet the coolant that'll come out.

The small radiator hose clips into the top of the rad fan bracket. Pull the hose from its retaining clips and tuck it aside. Then lastly, remove the outer-lower screw from the fan shroud.
With that fastener out of the way, pull the wiring out from behind the fan shroud. Unseat the resistor from its clip, and then pull the bracket and shroud out of the car.
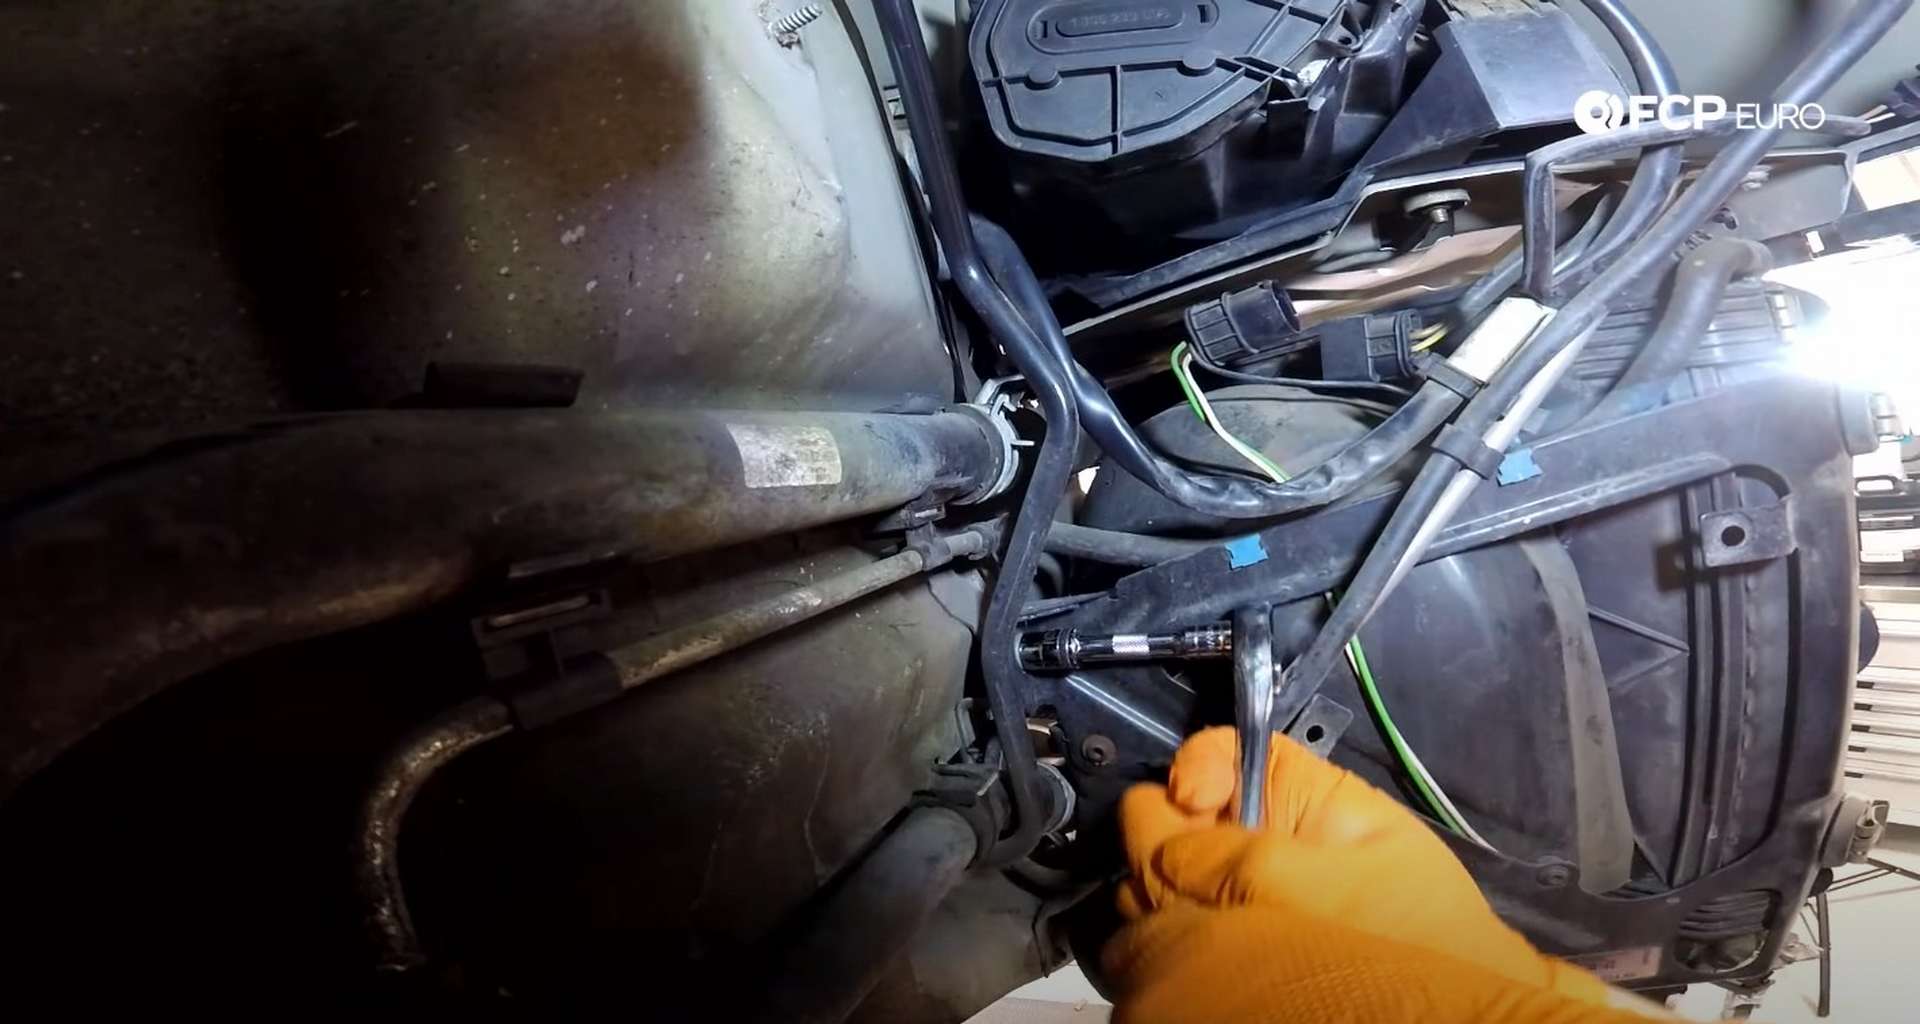
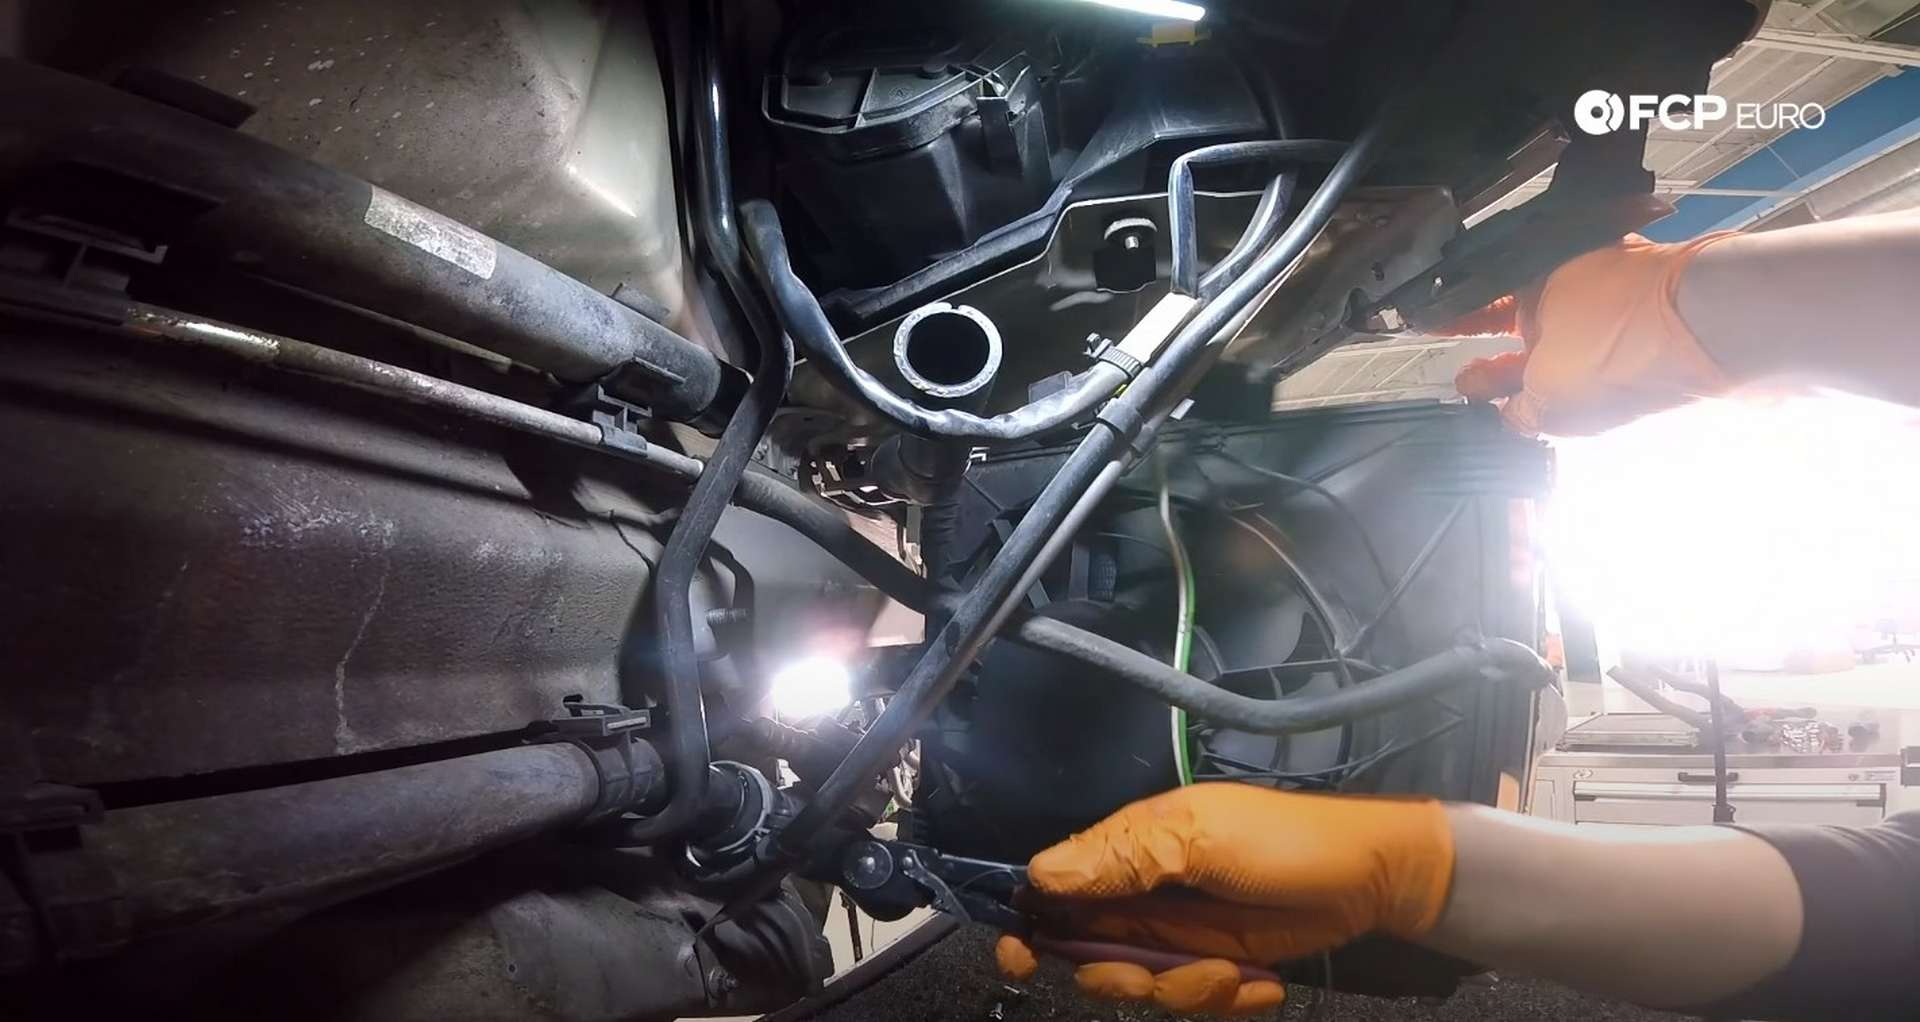
Next, hose some pliers to move the main radiator hoses' clamps. Slide the clamps down the hose and off of the pipe the hoses sit over. Then, remove the coolant hoses from their respective pipes.

Porsche uses plastic coolant pipes, so cracking one of those is possible while you remove the coolant hoses. Use a pick to break the hose's seal over the pipe to lessen the strain you will put on those pipes. Twisting the hoses back and forth while pulling them off will aid in their removal. Have the drain pan or catch-can underneath to catch all of the coolant that'll run out.

At this point, the radiator is held in by only its inner locating grommet. Pull the radiator assembly away from the car and back from the nose to release it from the grommet. Then repeat this process on the other side if needed.
Pour the radiator's remaining coolant into the drain pan, then set it onto a work surface.
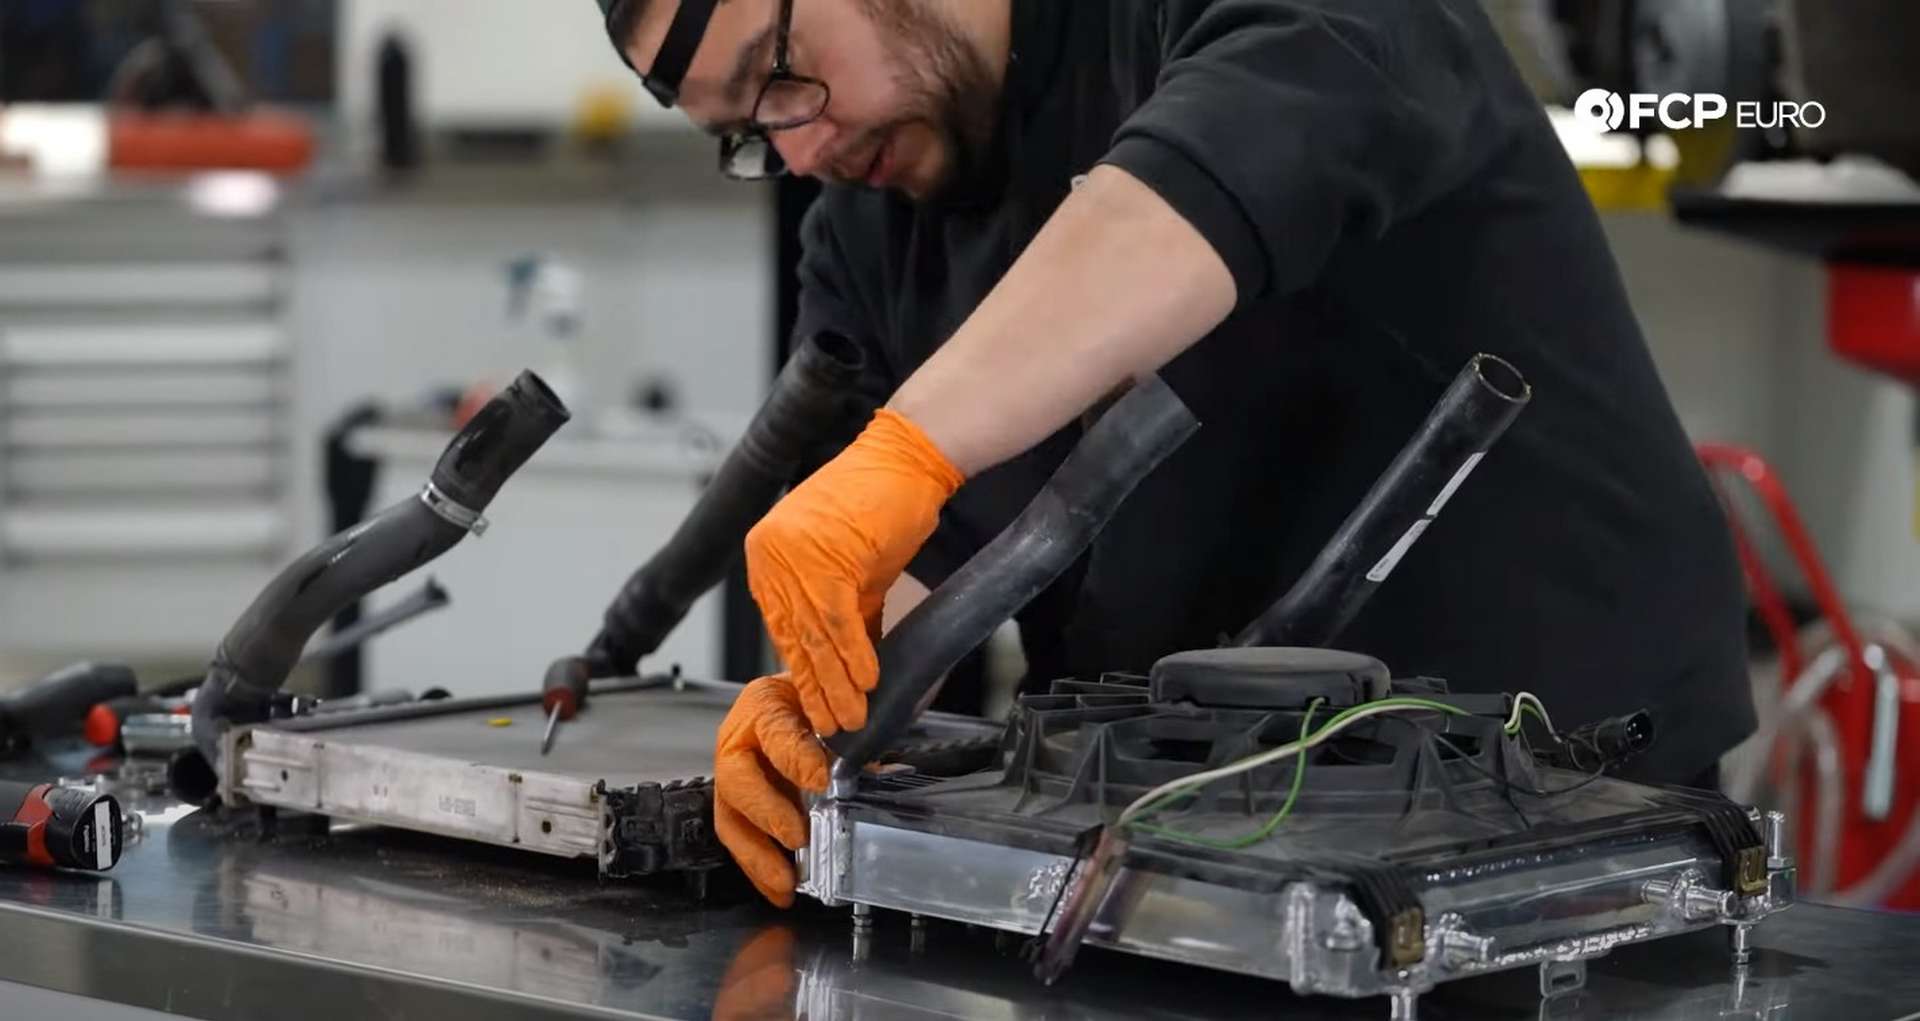
Step 4: Prepare the new radiator
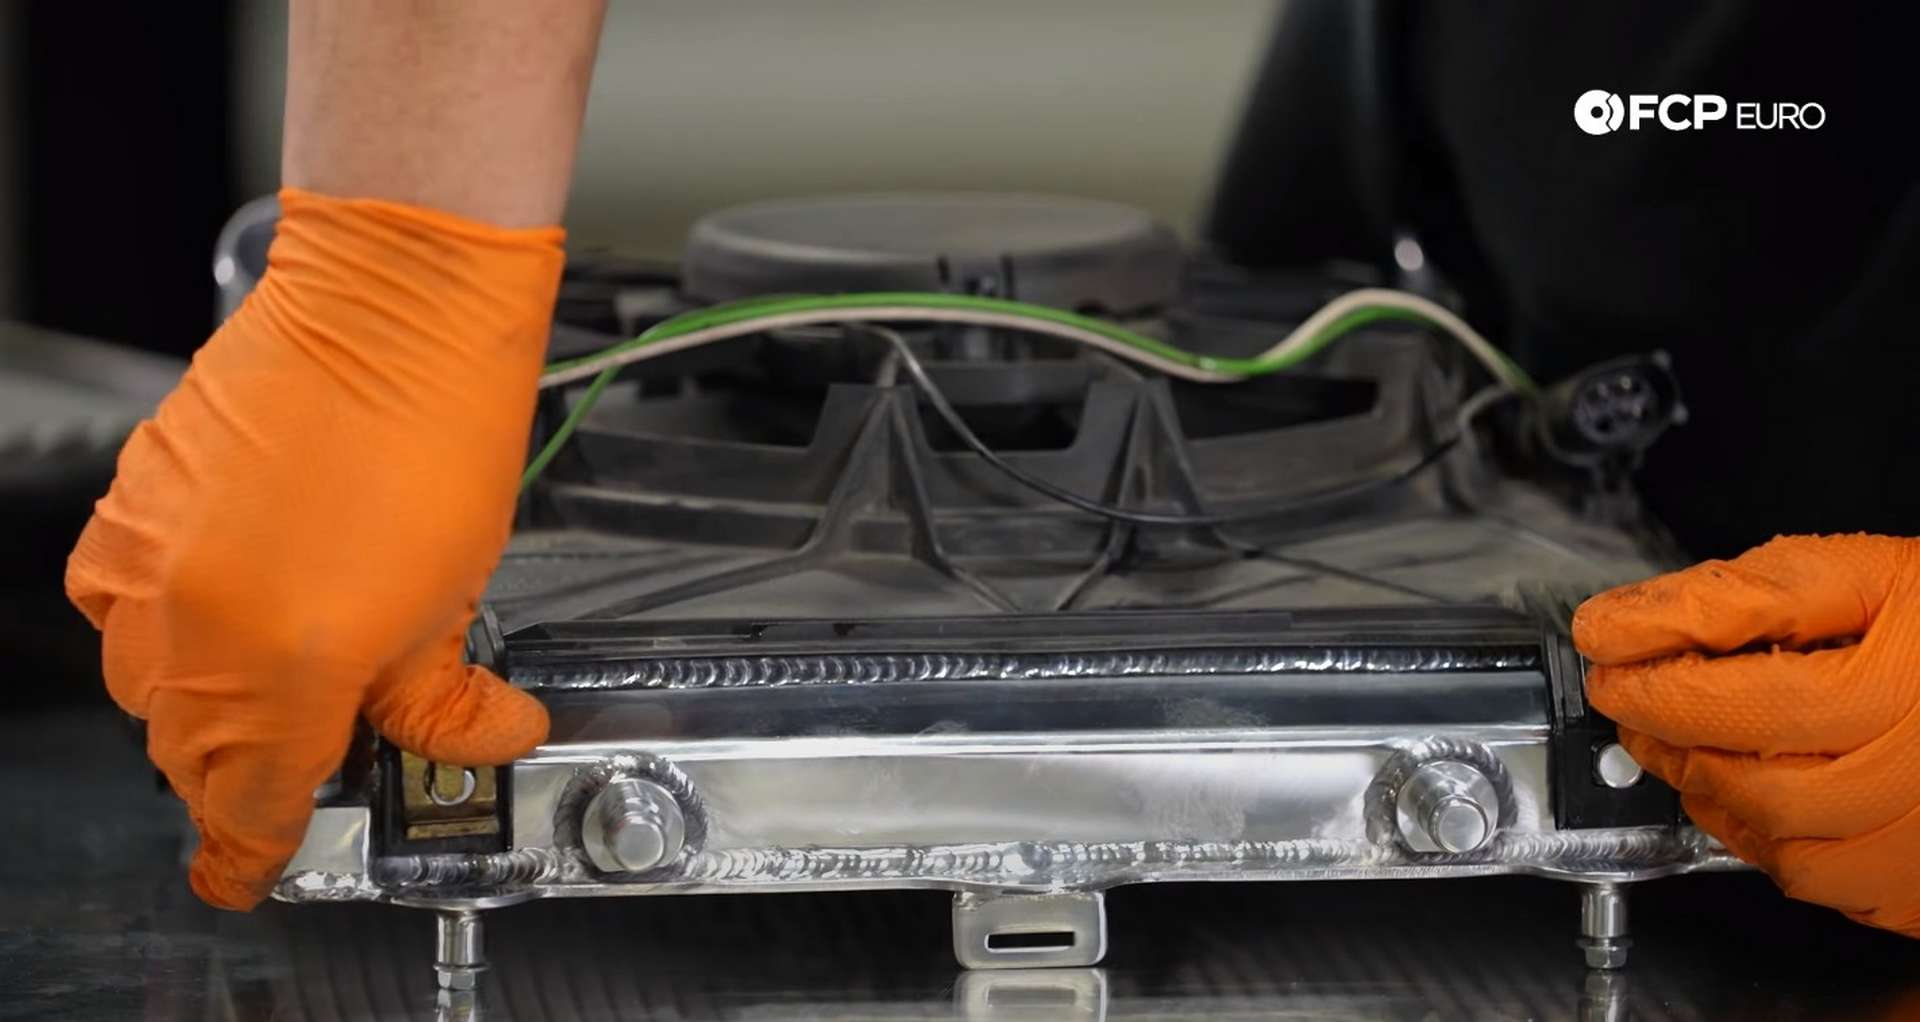
We use upgraded CSF aluminum radiators for this DIY, but the process will be mostly the same regardless of which radiator you choose. Particular to the CSF units is that they can be used on either side of the vehicle. The nipple for the small upper rad hose is threaded into the side tank, so you may have to move it depending on which side it is being used. Use a 19mm socket to remove the nipple and a 16mm socket to remove the other hole's plug.
The nipple needs to be on the top of the radiator so swap the plug and nipple as needed. OE-style radiators with plastic end tanks are side specific so moving the nipple isn't necessary. Thread the plug and nipple into the end tank by hand before using their respective sockets to tighten them.
After that, transfer the fan assembly over to the new radiator. Use a flathead screwdriver to remove the clips from the side of the radiator.
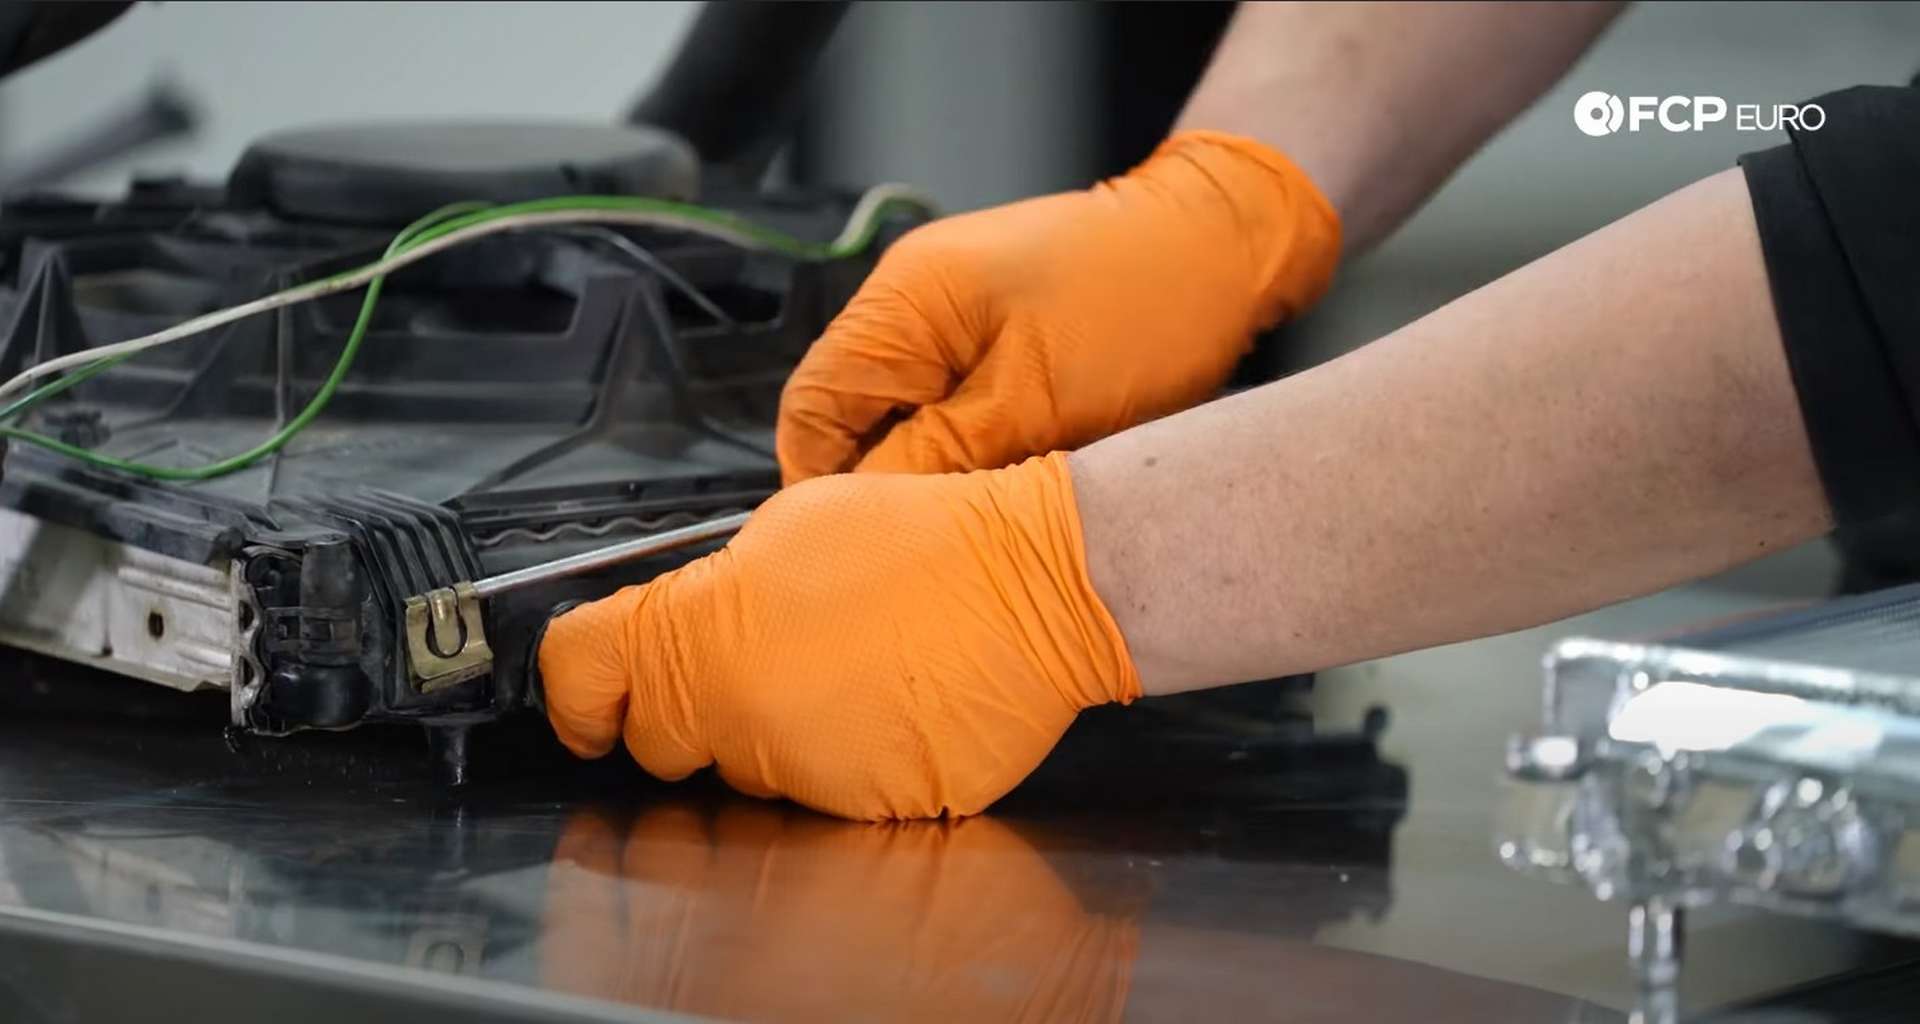
After removing the clips, slide the assembly away from the hose-side and remove it from the radiator. Clean off any debris before placing the assembly onto the new radiator. Then, slide the assembly into position on the new radiator and secure it with the two retaining clips.
New hoses are supplied in the kit. Use some coolant to lubricant the inside of the hoses before installing them on the radiator. Try to clock the hoses as close to the factory as possible to make the reinstallation easy on yourself.
New clamps are supplied in the kit, but you can reuse the factory clamps if you prefer them. It's genuinely the dealer's choice. Set the other end's clamps on the hose, too, about halfway down.
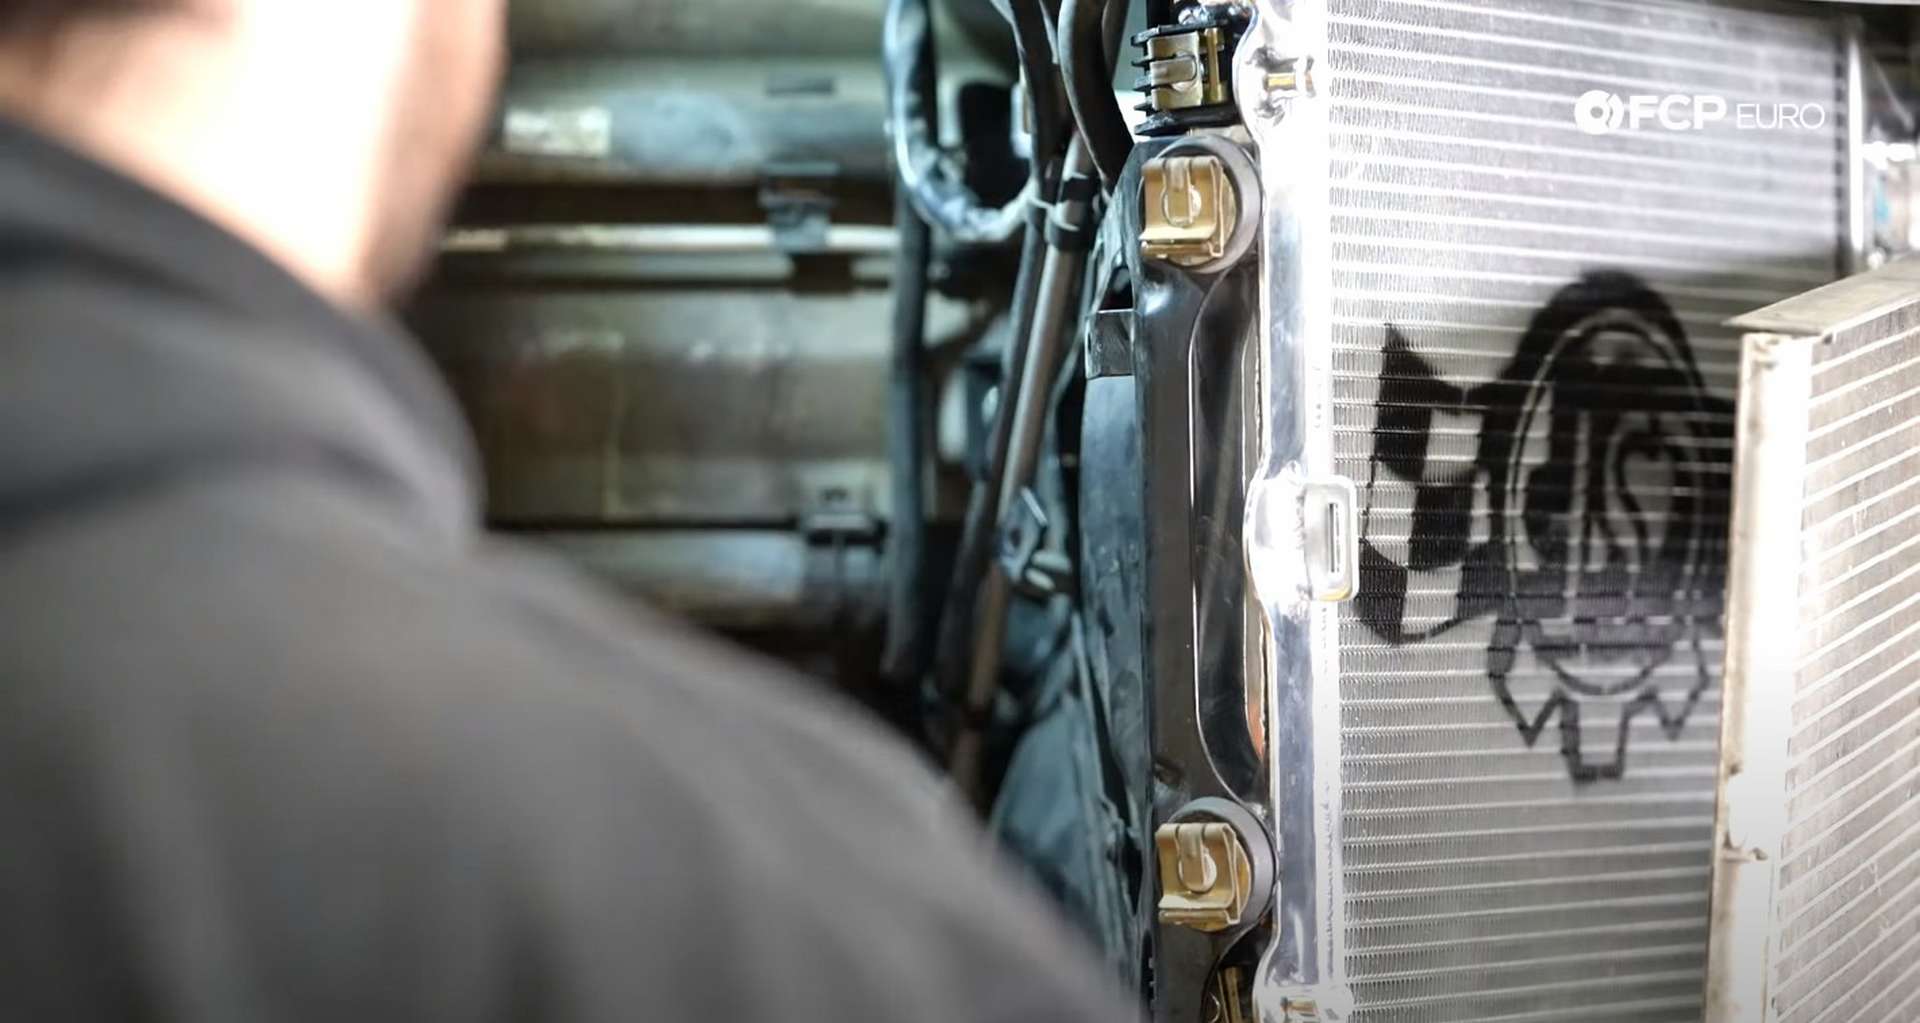
Step 5: Install the new radiator
Fit the radiator into its locating grommet and attach the new hoses.
Then, fit the shroud and bracket assembly. Start by refitting the fan's resistor to the bracket before fitting the bracket over the pins on the outer side of the radiator. Ensure the fan wiring isn't trapped in the fan shroud, and then get the bracket sitting on the mounting stud on the chassis.
Thread on the nut loosely, and then thread in the bracket's two mounting bolts. Thread those bolts in by hand before using a 13mm socket to tighten the bolts and the nut.
Next, refit the small radiator hose to the nipple on the upper corner. Slide the hose onto the nipple, secure it with its hose clamp, and then fit the hose into its retaining clips on the bracket. Then lastly, secure the bracket to the radiator with the two large clips. Fit the washers over the pins before fitting the clips.
Step 6: Refit the condenser and ducting
First, slide the condenser's alignment tab through the slot on the radiator. Then, thread in the condenser's two fasteners. Use a T25 Torx socket if you reuse the original hardware. The new bolts included with the CSF kit require a 10mm socket.
Fit the ducting after you mount the condenser. First, pass the outside air temp sensor's wiring through the ductwork. Then, fit and fasten the ducting to the radiator. Thread in all of the bolts by hand before tightening any of them. Use a 10mm socket for the CSF hardware or a T25 Torx bit for the factory hardware.
Step 7: Bleed the cooling system
Porsche recommends using a vacuum filler to bleed the cooling system, and so do we. The coolant has to travel from the engine to the radiators at the front, creating many potential spots for air pockets. Using a vacuum filler will be the easiest and quickest way to ensure that no air pockets are present while the coolant is filled to the proper level.
Mix the supplied Porsche coolant with a gallon of water and use that mixture to fill the cooling system.
Step 8: Refit the bumper cover
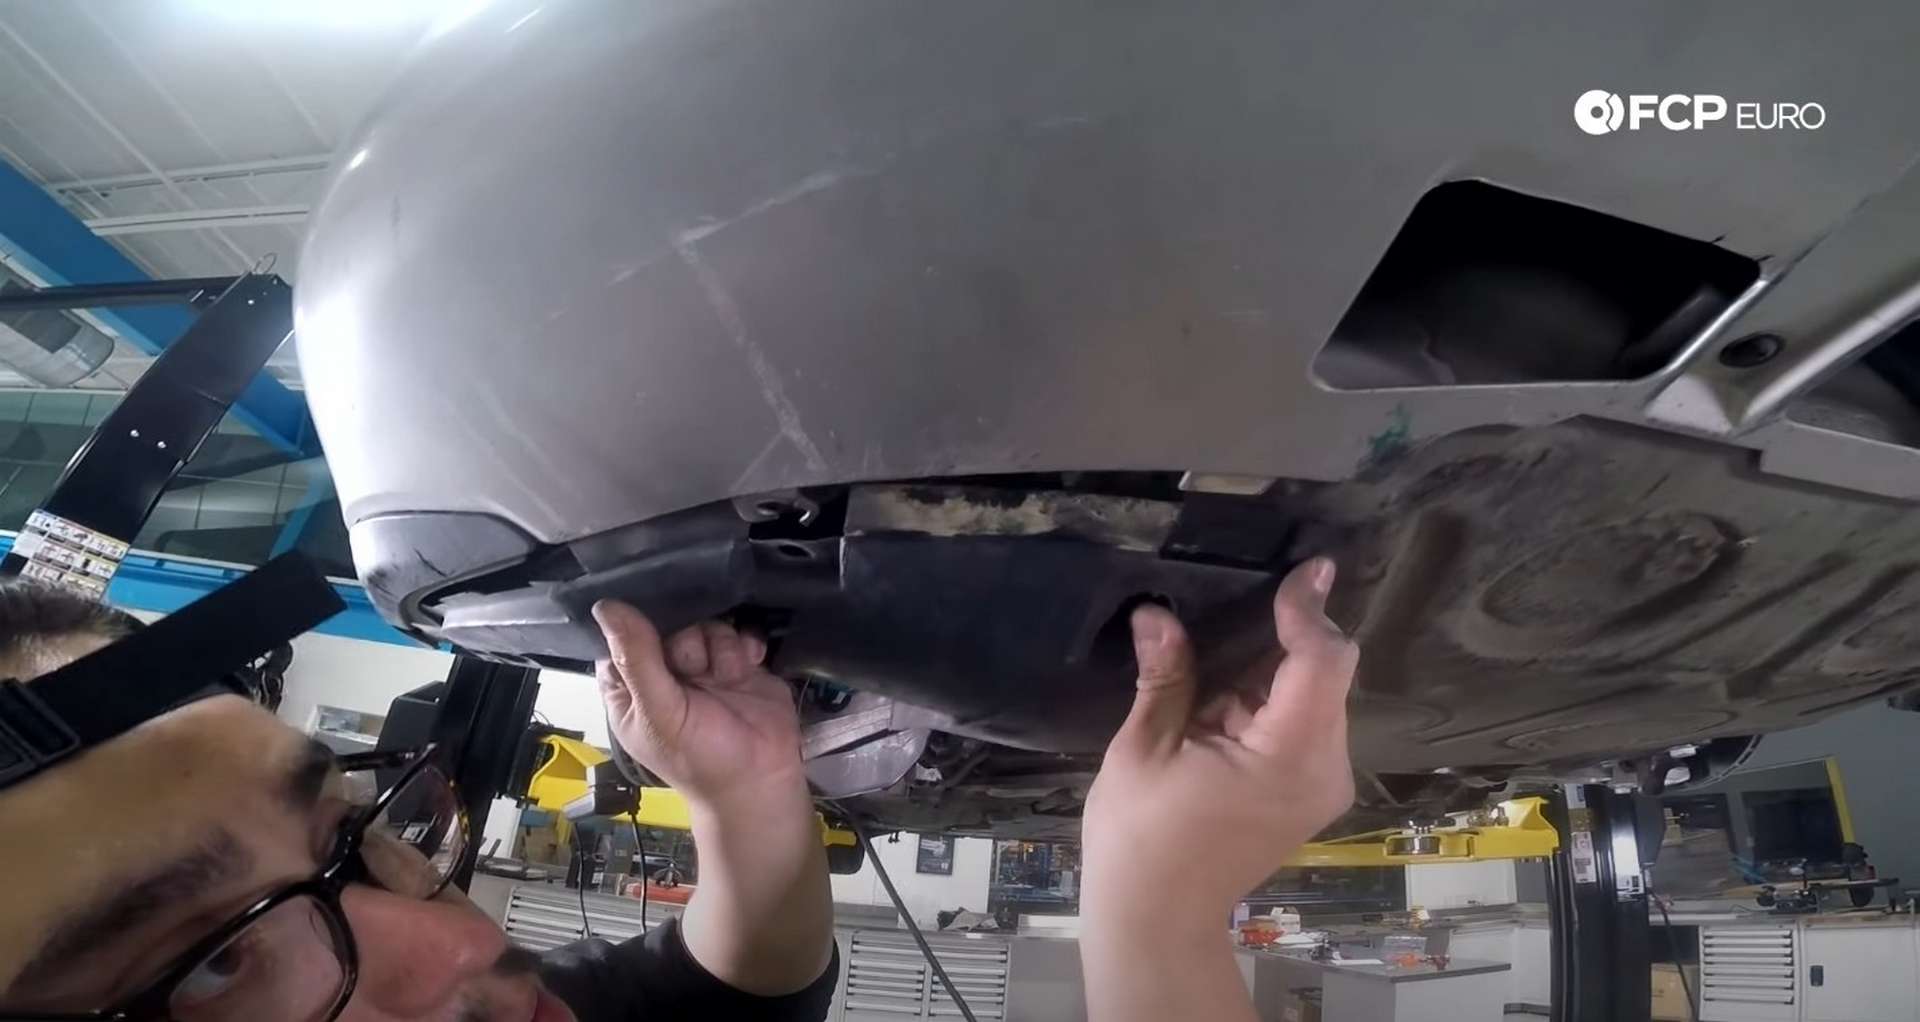
Grab the bumper cover and fit it to the front of the 996. However, don't force it, as the last thing you want to do is ruin the bumper cover after all of that work. The cover will loosely hold itself in place once it's in position.
After you have the cover roughly in place, start installing its retaining fasteners. First, install the tree screws used for the bottom of the cover. Use a T25 Torx bit driver or Socket to install the longest fastener in the middle hole and the smaller fasteners in the outer holes.
Next, head to one of the bumper's corners and install the hardware behind the turn signal. They're screws that require a T25 Torx bit.
After that, refit the turn signal. Hook the leading side of it into the bumper before pushing in the trailing side. Once you have that installed, refit the fender liner. Thread on the plastic nuts before tightening them with a 10mm socket, then press the plastic rivets.
Slide under the corner of the cover and fit the fender liner into the bumper cover. Install the plastic rivet and two fasteners once you have the liner in position. Use a Phillips-head screwdriver to tighten the fasteners. After that, head over to the bumper's other corner and repeat.
Head up to the hood latch area after securing the corners. First, install the two screws that secure the bumper cover to the nose with a Phillips-head screwdriver.
Next, refit the trim panel to the latch area. Get the panel into position before using the plastic locks to secure it. Use a flathead screwdriver to rotate the locks 90° clockwise to lock them in place. Then, refit the hood seal and shut the hood.
All that's left is to refit the wheels and lower the car. Thread the lug bolts by hand before using a 19mm socket to torque them to 96 ft-lbs.
Porsche 996 Radiator Torque Specs:
- Porsche 996 Wheel Lug Bolts = 130Nm or 96 ft-lbs, of torque
That's all there is to it. With either the upgraded CSF units or a new set of OE-style ones, your 996 is about to run cooler than ever. If you're interested in more DIYs for your Porsche, you can visit fcpeuro.com and subscribe to our YouTube channel.