- 02/11/2021
- 9 Min Read
- By: Christian Schaefer
How To Replace BMW X5 & X6 Brake Pads & Rotors (BMW F15 & F16)

Big SUVs require big brakes to slow them down effectively, and BMW's X5 and X6 are no exception. These sister models share the same brake components, and their service processes are identical. Because there isn't an M-badge attached to the end of their name, they use the same style single-piston slider caliper just as every other non-M BMW. This brake caliper style is a simple and effective way to get your 2-ton SUV hauled down to a stop without breaking the parts-cost piggy bank.
The brakes on your BMW are the most significant factors in determining how effective it stops. Checking on the condition of your brakes is as easy as looking at them, and changing them can be done with simple hand tools by those with little experience. By following the steps below, you can ensure that your brakes will back to full strength.
BMW model and years applicable:
|
|
Symptoms of worn front brake pads and rotors on your BMW X5 & X6:
- A grinding coming from the front, under braking
- Juddering or a vibration coming from the front, under braking
- Deep grooves on the rotor surface
- Dark-colored deposits on the rotor surface
- The vehicle's steering pulling to one side, under braking
All disc brake systems have a front bias, meaning that the front brakes do most of the braking. Their increased braking responsibility will lead to more frequent replacement intervals when compared to the rears. However, driving with excessively worn rear brakes still creates reduced stopping ability.
Once the brake pad material is completely worn away, the pad's metal backing plates are forced against the rotor, destroying it. You'll hear an intense grinding noise under braking when this happens. Additionally, metal shavings will come off of the rotors and cover your wheels. If these shavings get wet, they'll coat your wheel in rust.
How long will it take to service the brakes on a BMW X5 & X6?
The service length will depend on what you choose to do. Replacing the pads and rotors is a straightforward process that doesn't require removing and reinstalling too many parts. This part of the job should take 30 minutes per corner.
To completely service the brakes, you'll need to flush the brake fluid as well. Having a pressure bleeder simplifies this process and significantly speeds it up. If you don't have a pressure bleeder, you'll need another person to help you out. Either way, bleeding the brakes shouldn't take longer than 20 minutes.
To be safe, put aside two to three hours to service the brakes.
What will it cost to service the brakes on a BMW X5 or X6?
The bracket service kit we offer costs just shy of $400. For that, you'll receive the front and rear pads, front and rear rotors, new brake pad wear sensors, and some anti-squeal paste. Beyond this kit, you'll need to buy brake fluid if you decide to bleed the system. You should pay around $10 for a bottle.
Expect to pay upwards of $1500 to have this service performed at a dealership. You'll be paying more for the parts because they have BMW stamped on them, and you'll be paying for the labor. Our brake kit parts are OE and are of no less quality than the BMW stamped parts.
Parts required to service the brakes on a BMW X5 & X6:
- BMW Brake Kit
- Ate Brake Fluid (Optional)
Tools required to service the brakes on a BMW X5 & X6:
- 8mm Socket
- 17mm Socket
- E18 Socket
- 6mm Hex Bit Socket
- 7mm Hex Bit Socket
- Trim Tool
- Screwdriver
- Ratchet
- Hammer
- Torque Wrench
- Piston Compressor
- Pry Bar
- Pressure Bleeder (Optional)
- CTA Brake Bleeder Wrench (Optional)
Steps required to service the brakes on your BMW X5 & X6:
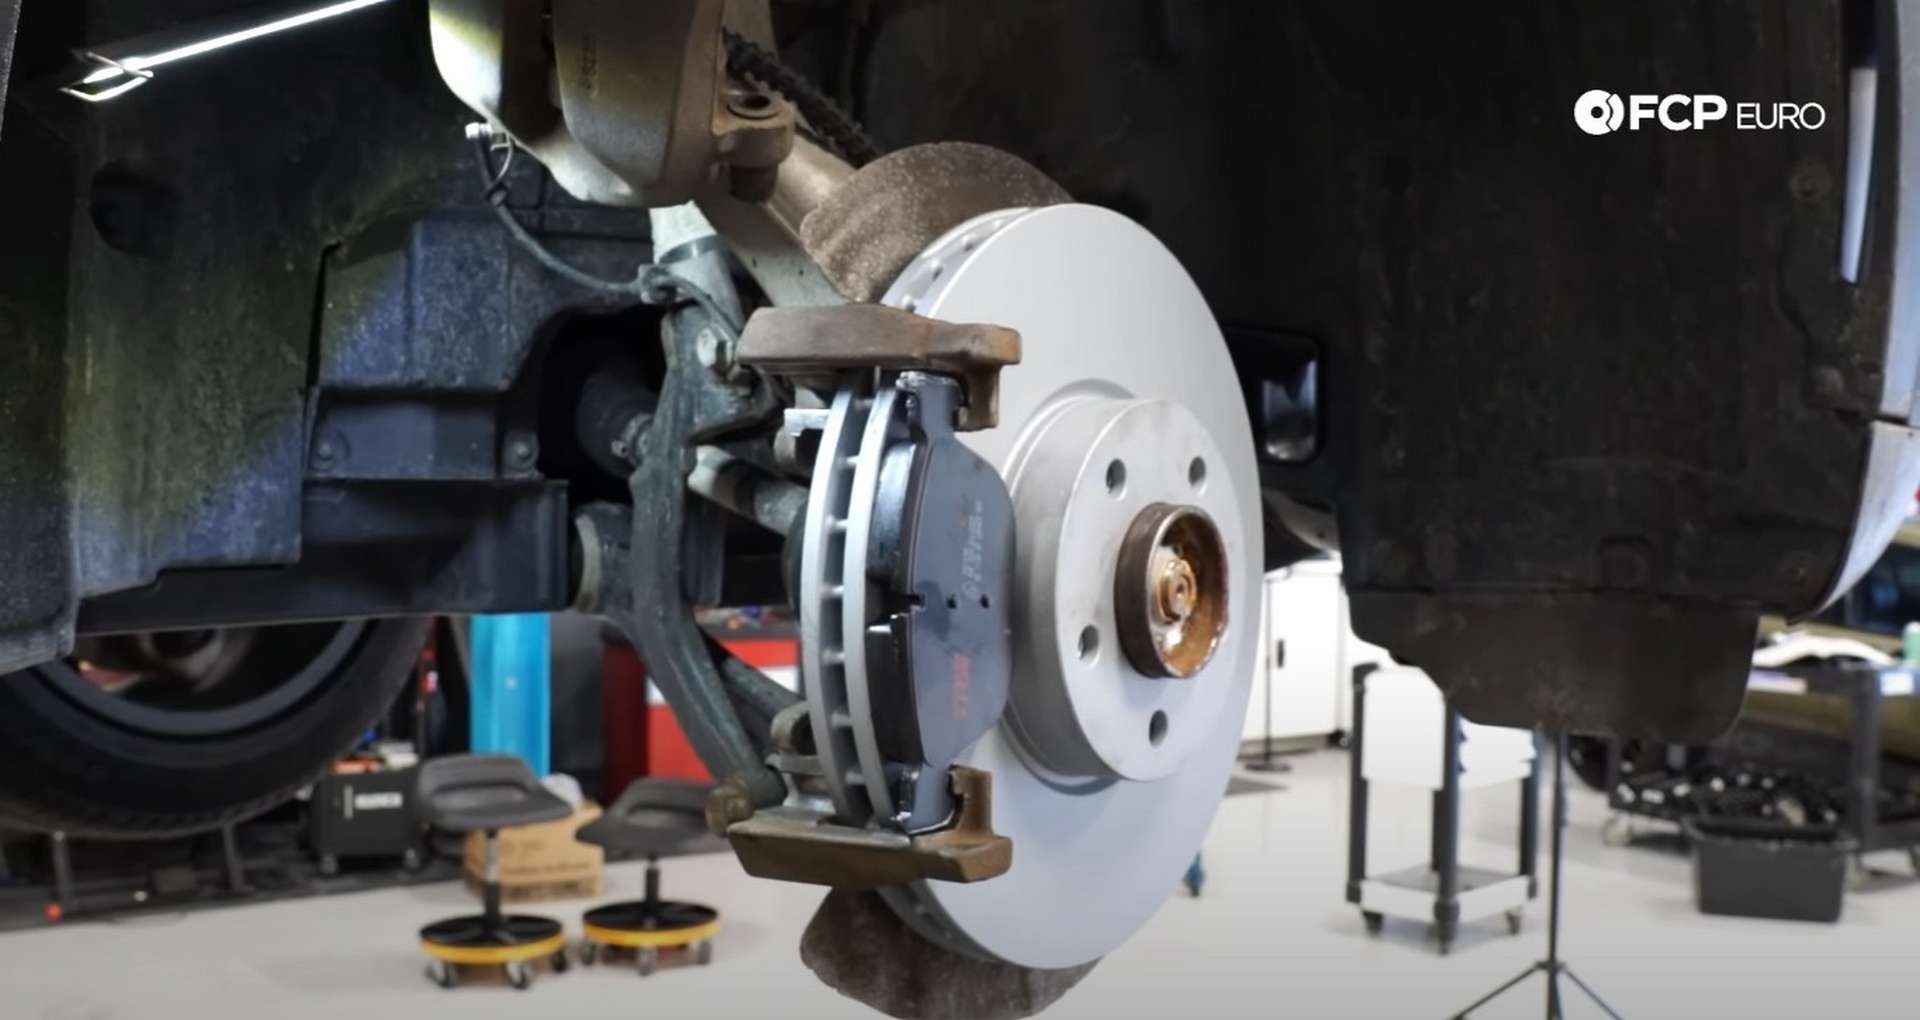
Step 1: Remove the front caliper
Jack up the front of the car and place it onto jack stands. Then, use a 17mm socket to remove the lug bolts so you can remove the wheel.
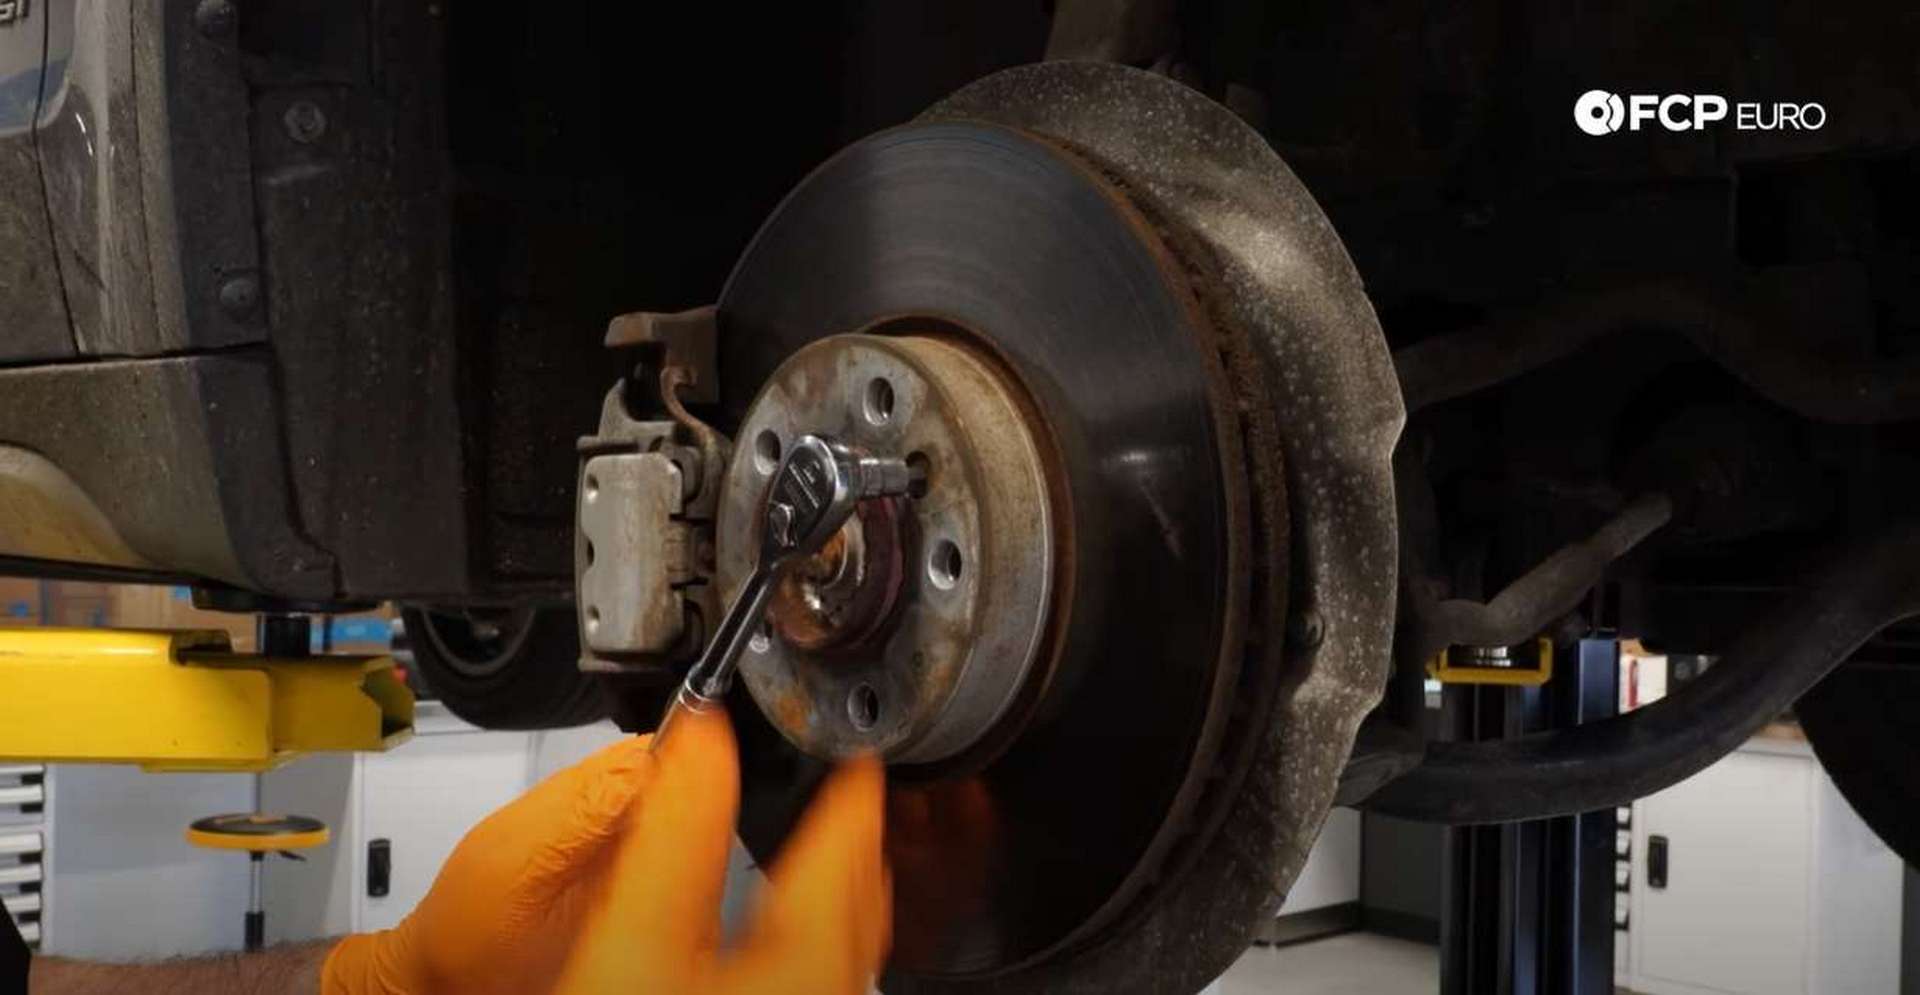
First, use a 6mm hex bit socket to remove the set screw from the rotor. Ensure that the bit is fully inserted into the screw to prevent it from being stripped. Next, remove the anti-rattle clip from the front of the caliper. Push the bottom of the clip away from the hub and use a screwdriver to pry the top of the clip away from the caliper.
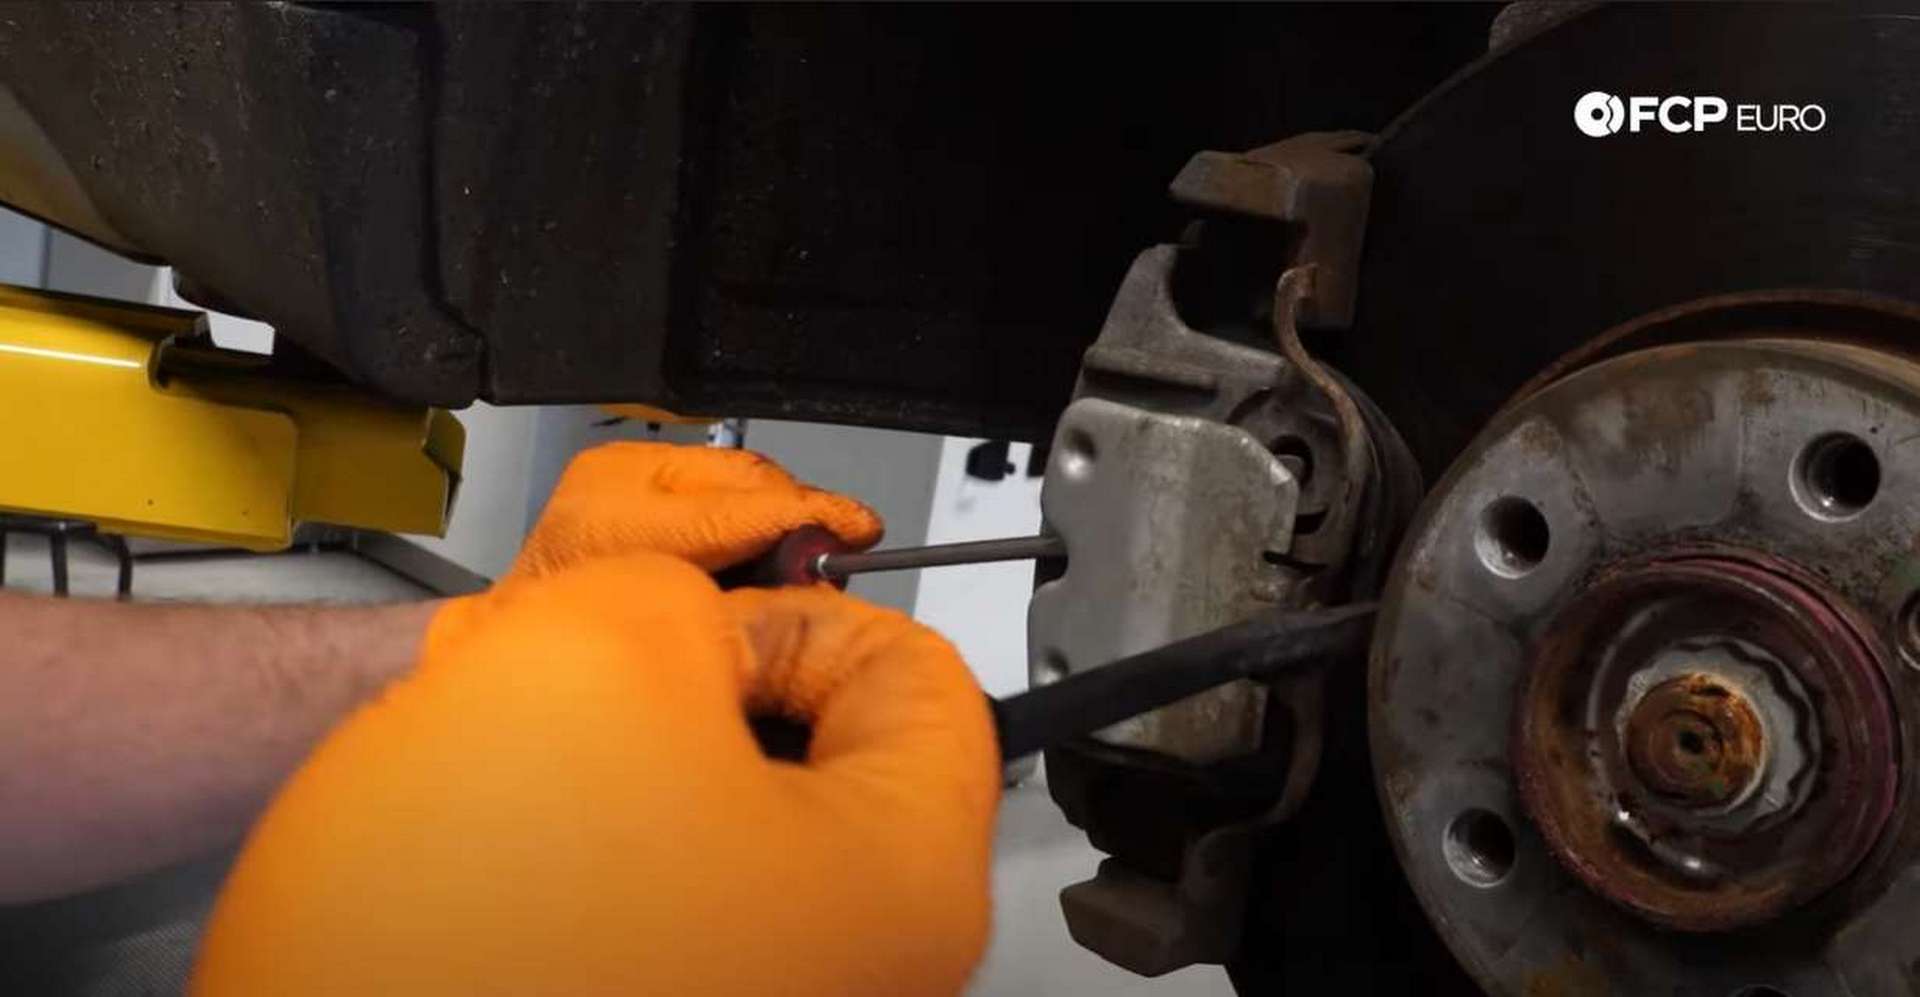
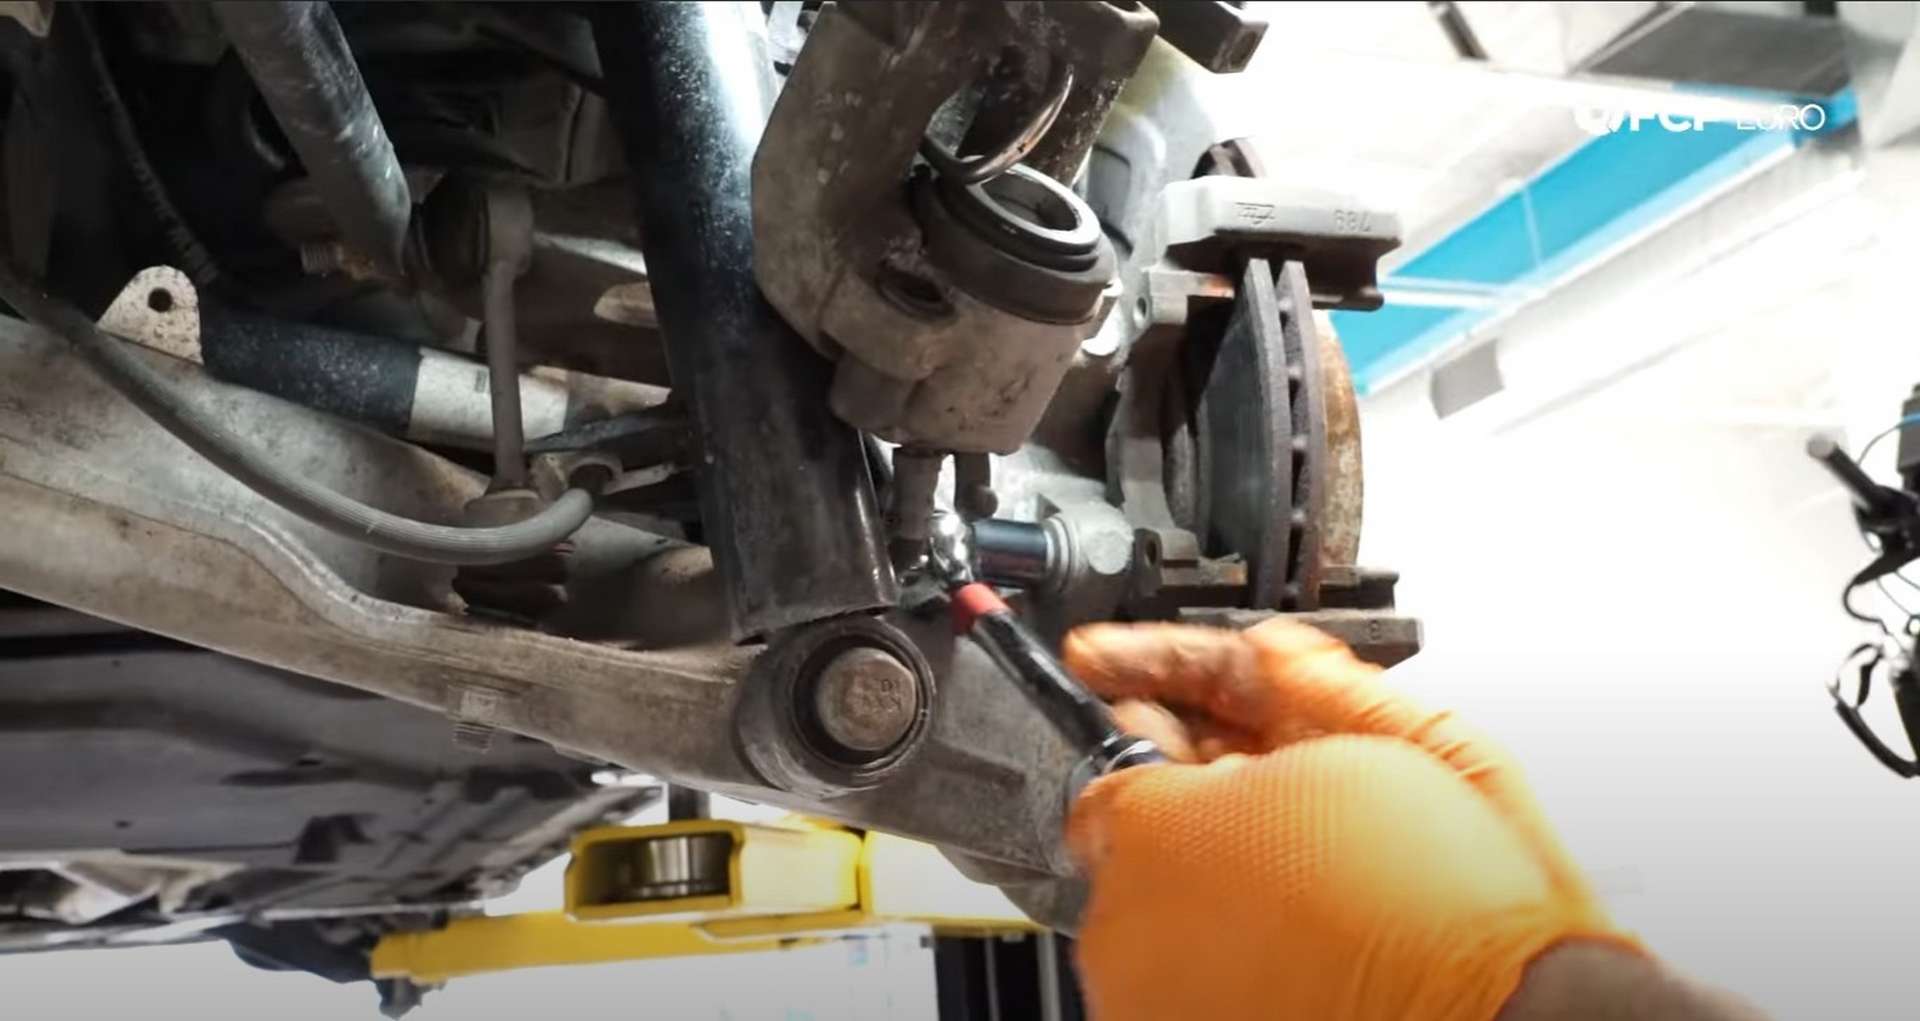
To give yourself better access to the back of the caliper, unlock the steering wheel and turn it to whatever side you aren't working on. Then, remove the dust caps from the caliper's guide pins and use a 7mm hex bit socket to remove the guide pins.
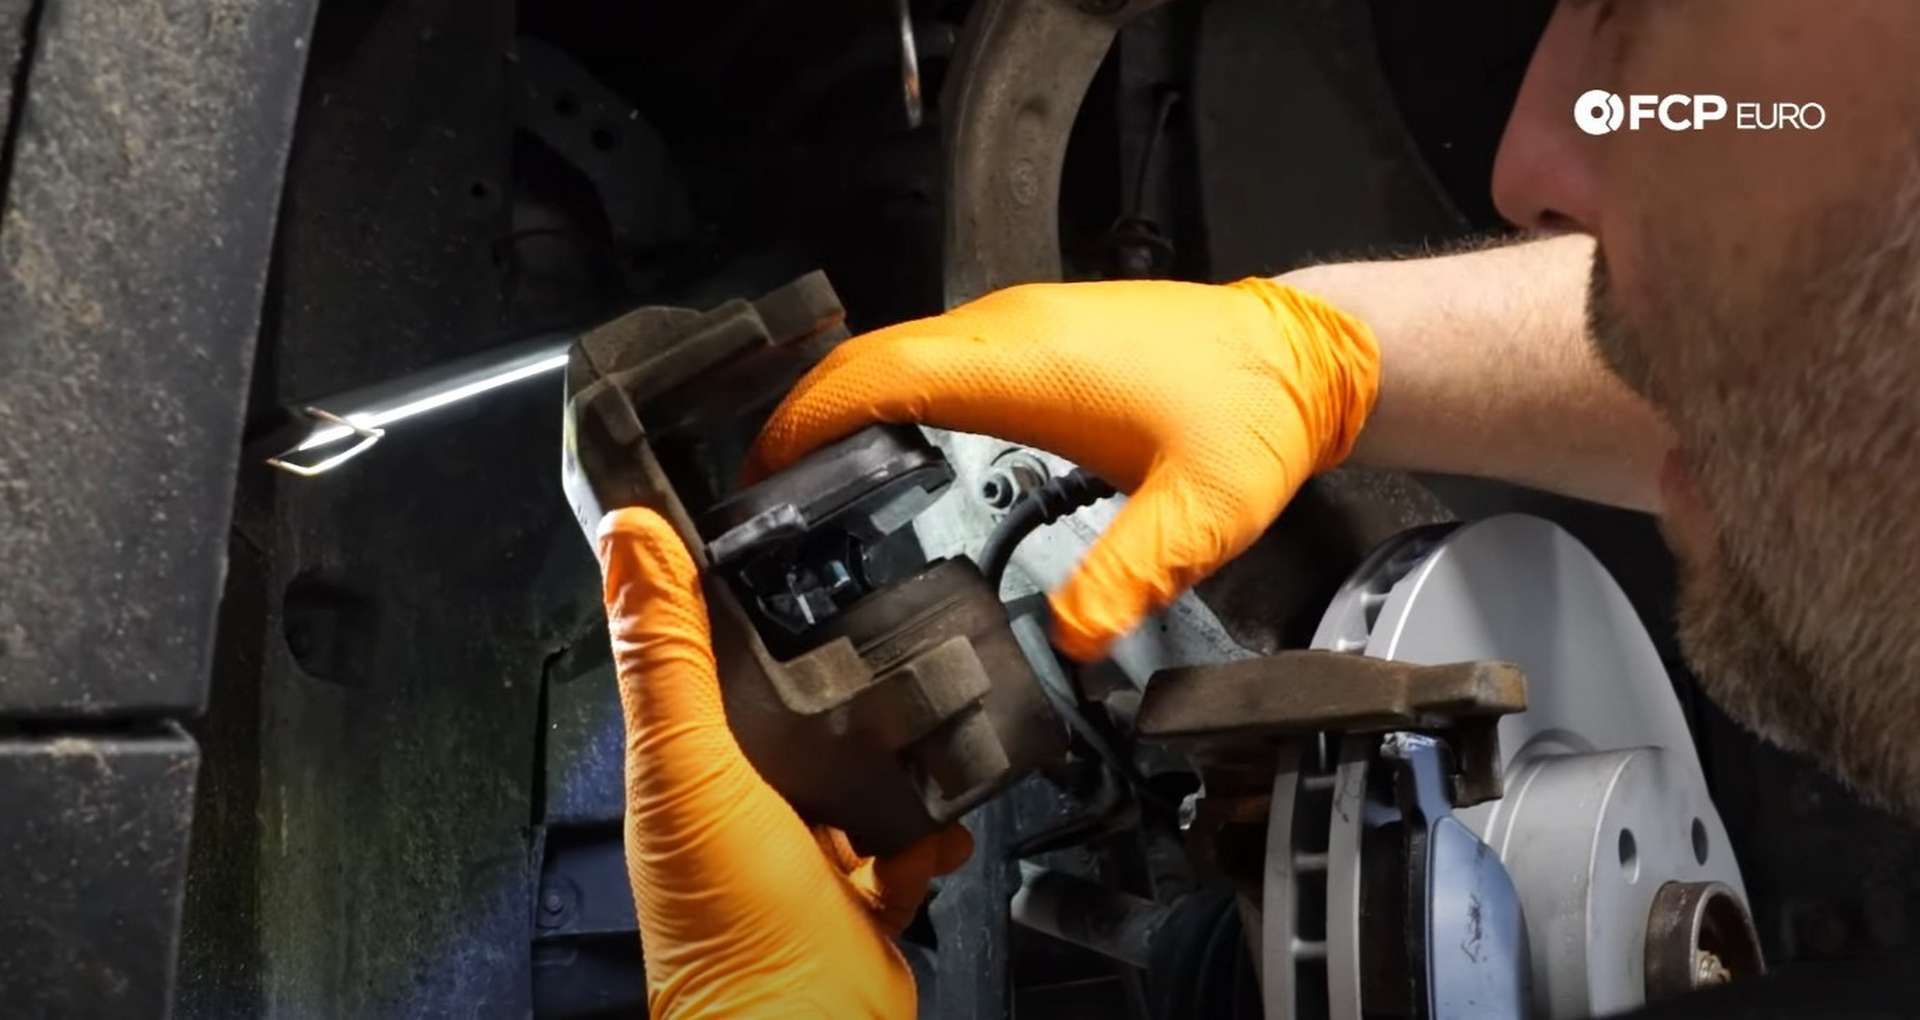
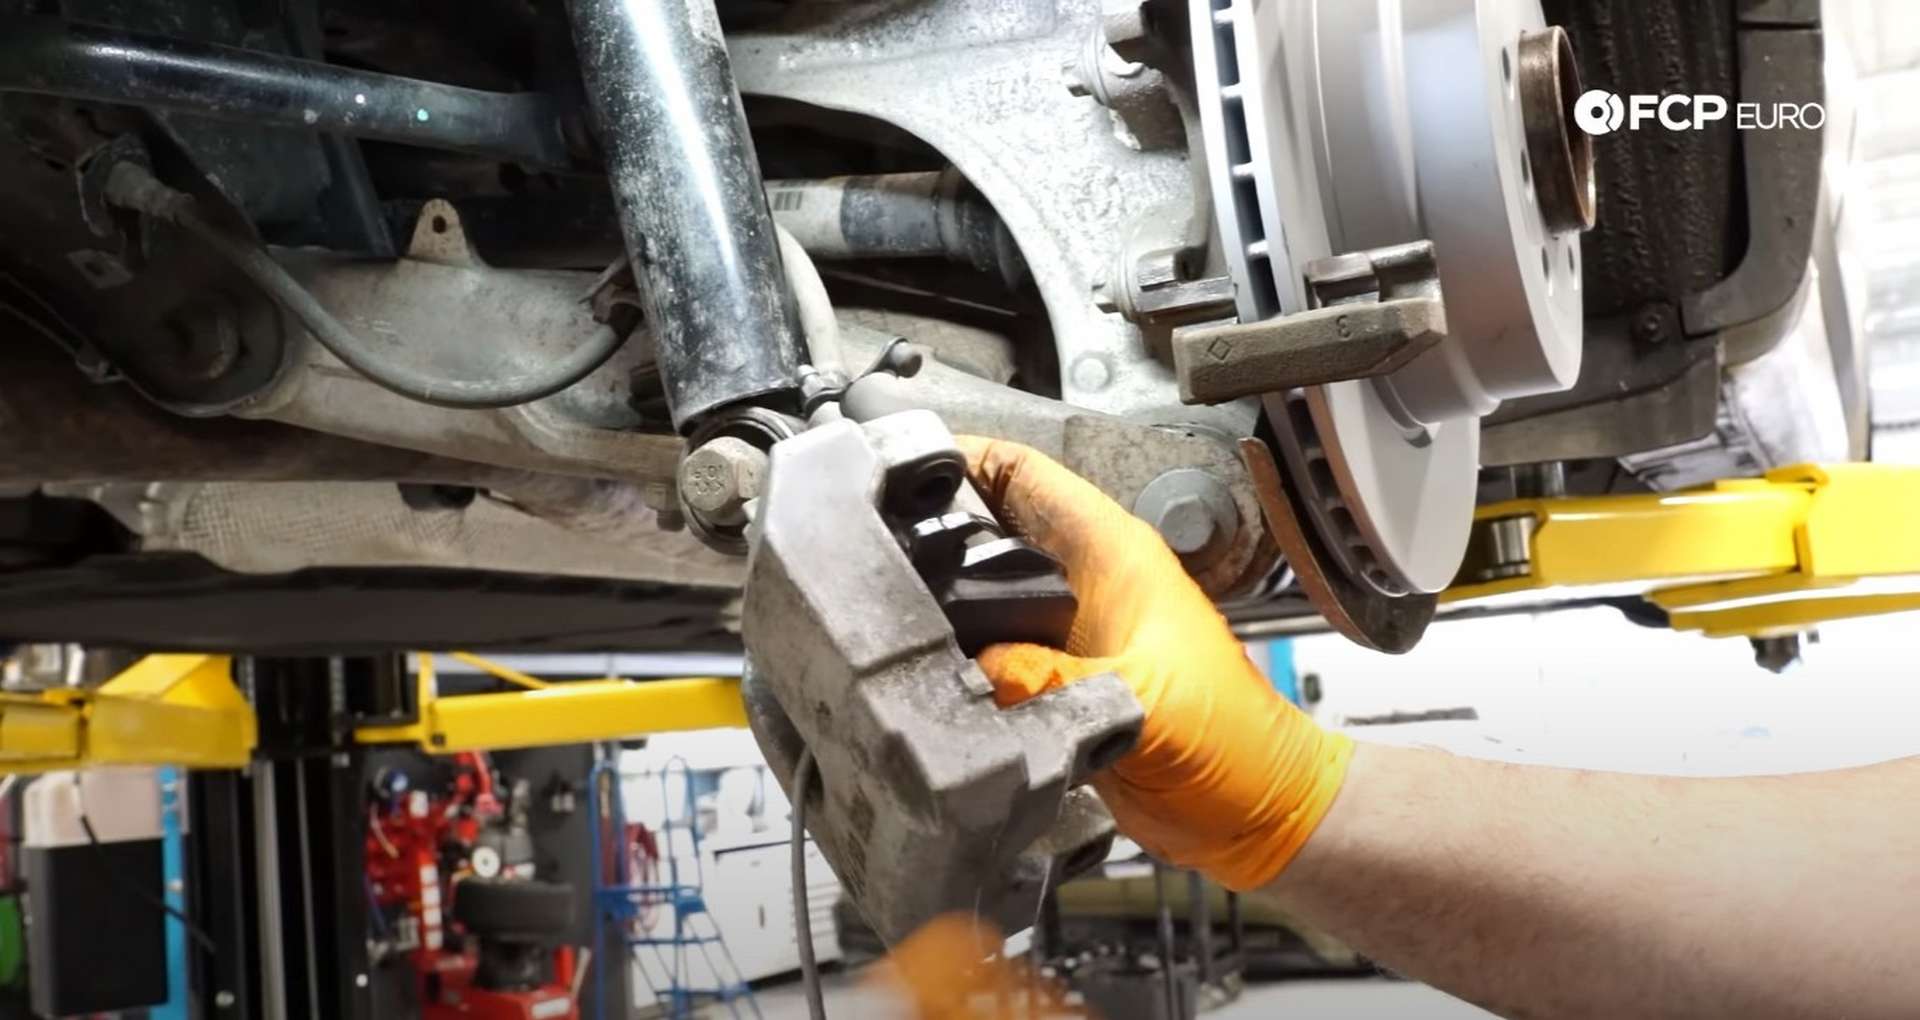
Pull the caliper away from the car to depress the piston. Doing this will create space between the pads and the rotor, allowing you to pull the caliper off more easily. When you remove the caliper, don't let it hang by its brake line. The caliper's weight will put a large strain on the rubber line and can cause it to tear. You can use zip-tires, wire coat hangers, or bungee cords, among other things, to hang the caliper out of the way.
If you're working on the left front corner, pull the pad wear sensor's wire off the inner brake pad.
Step 2: Replace the rotor
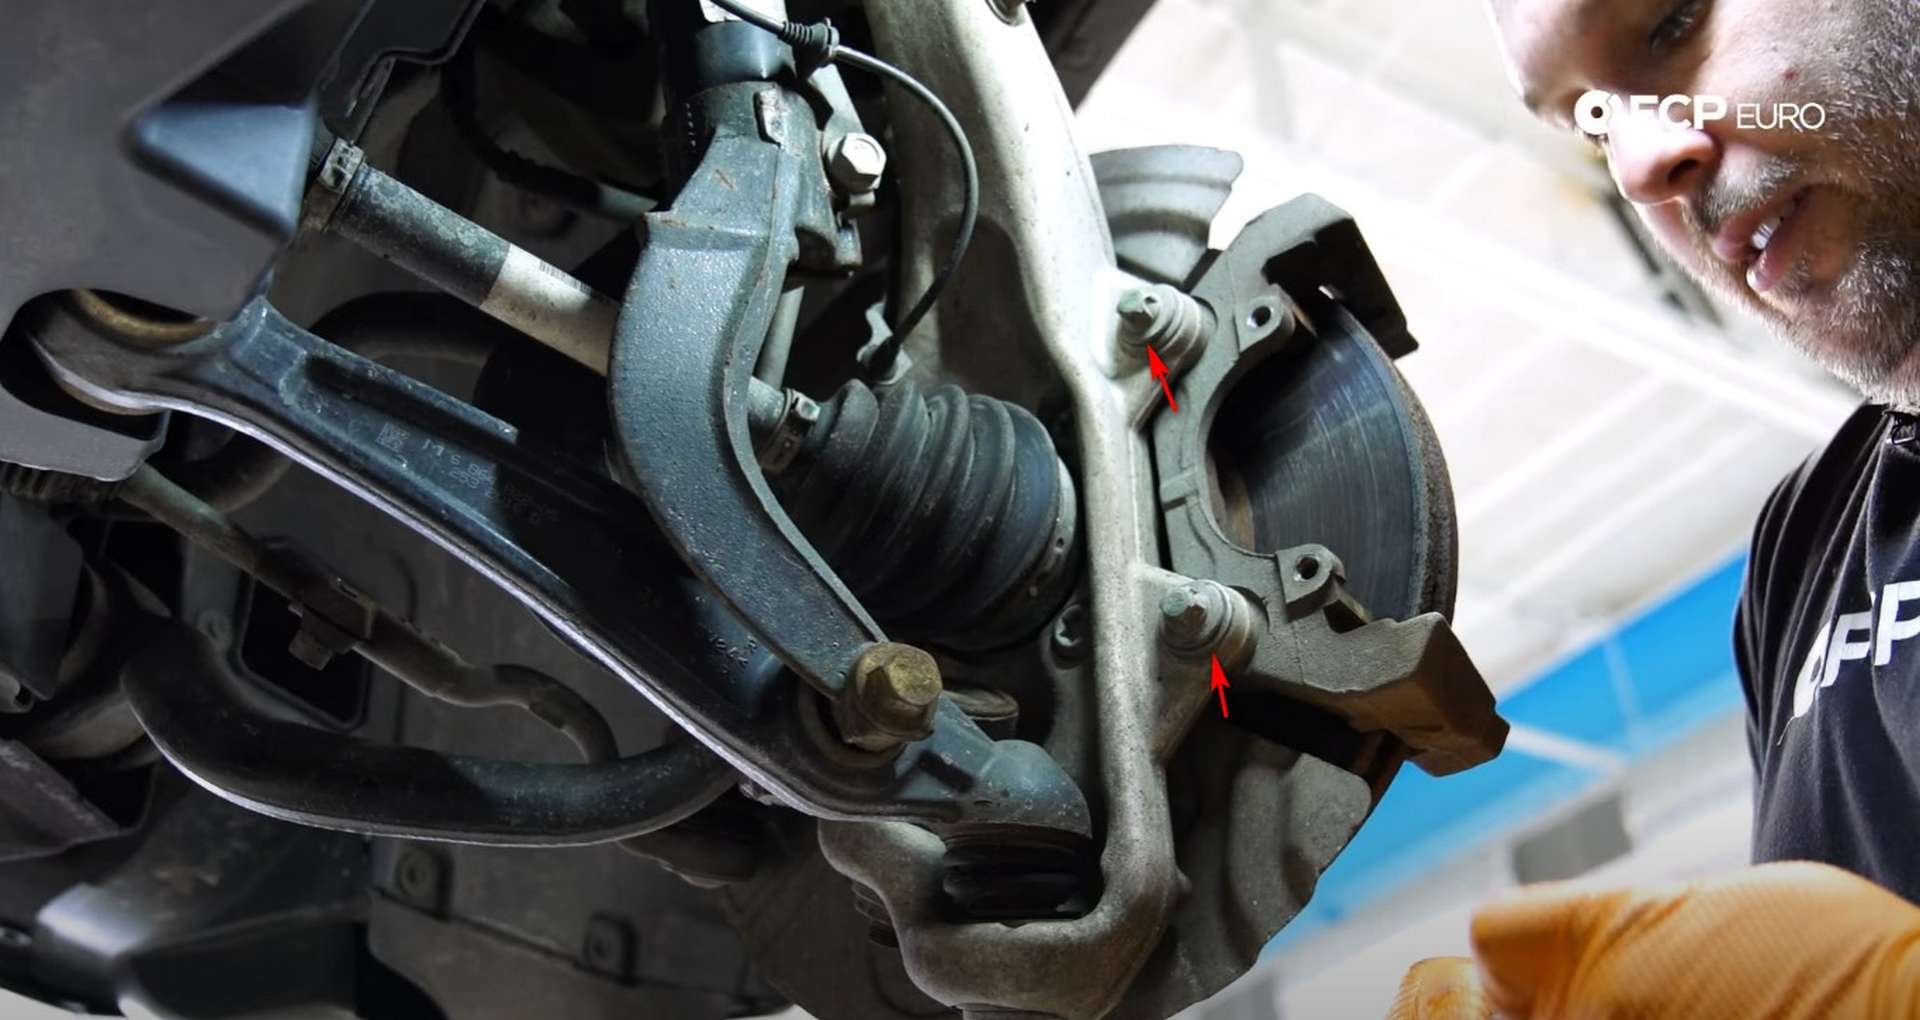
Use an E18 socket to remove the caliper bracket's bolts.
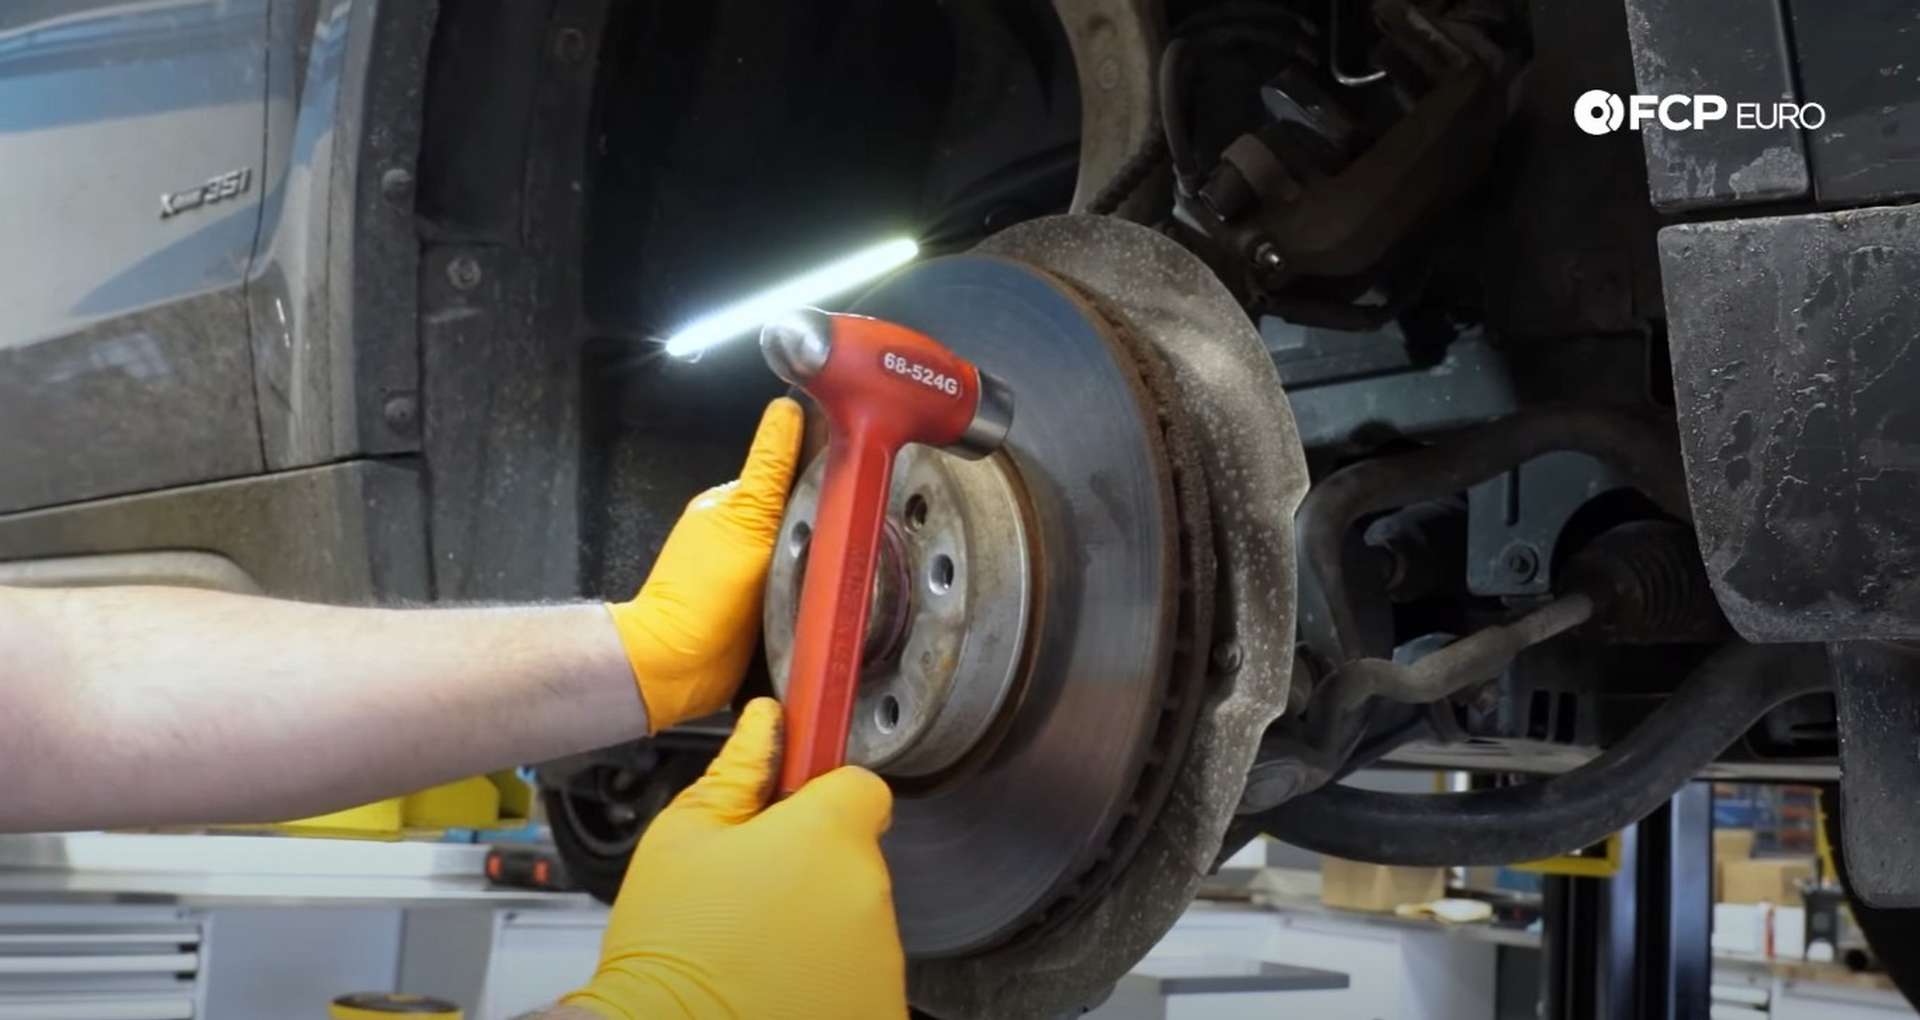
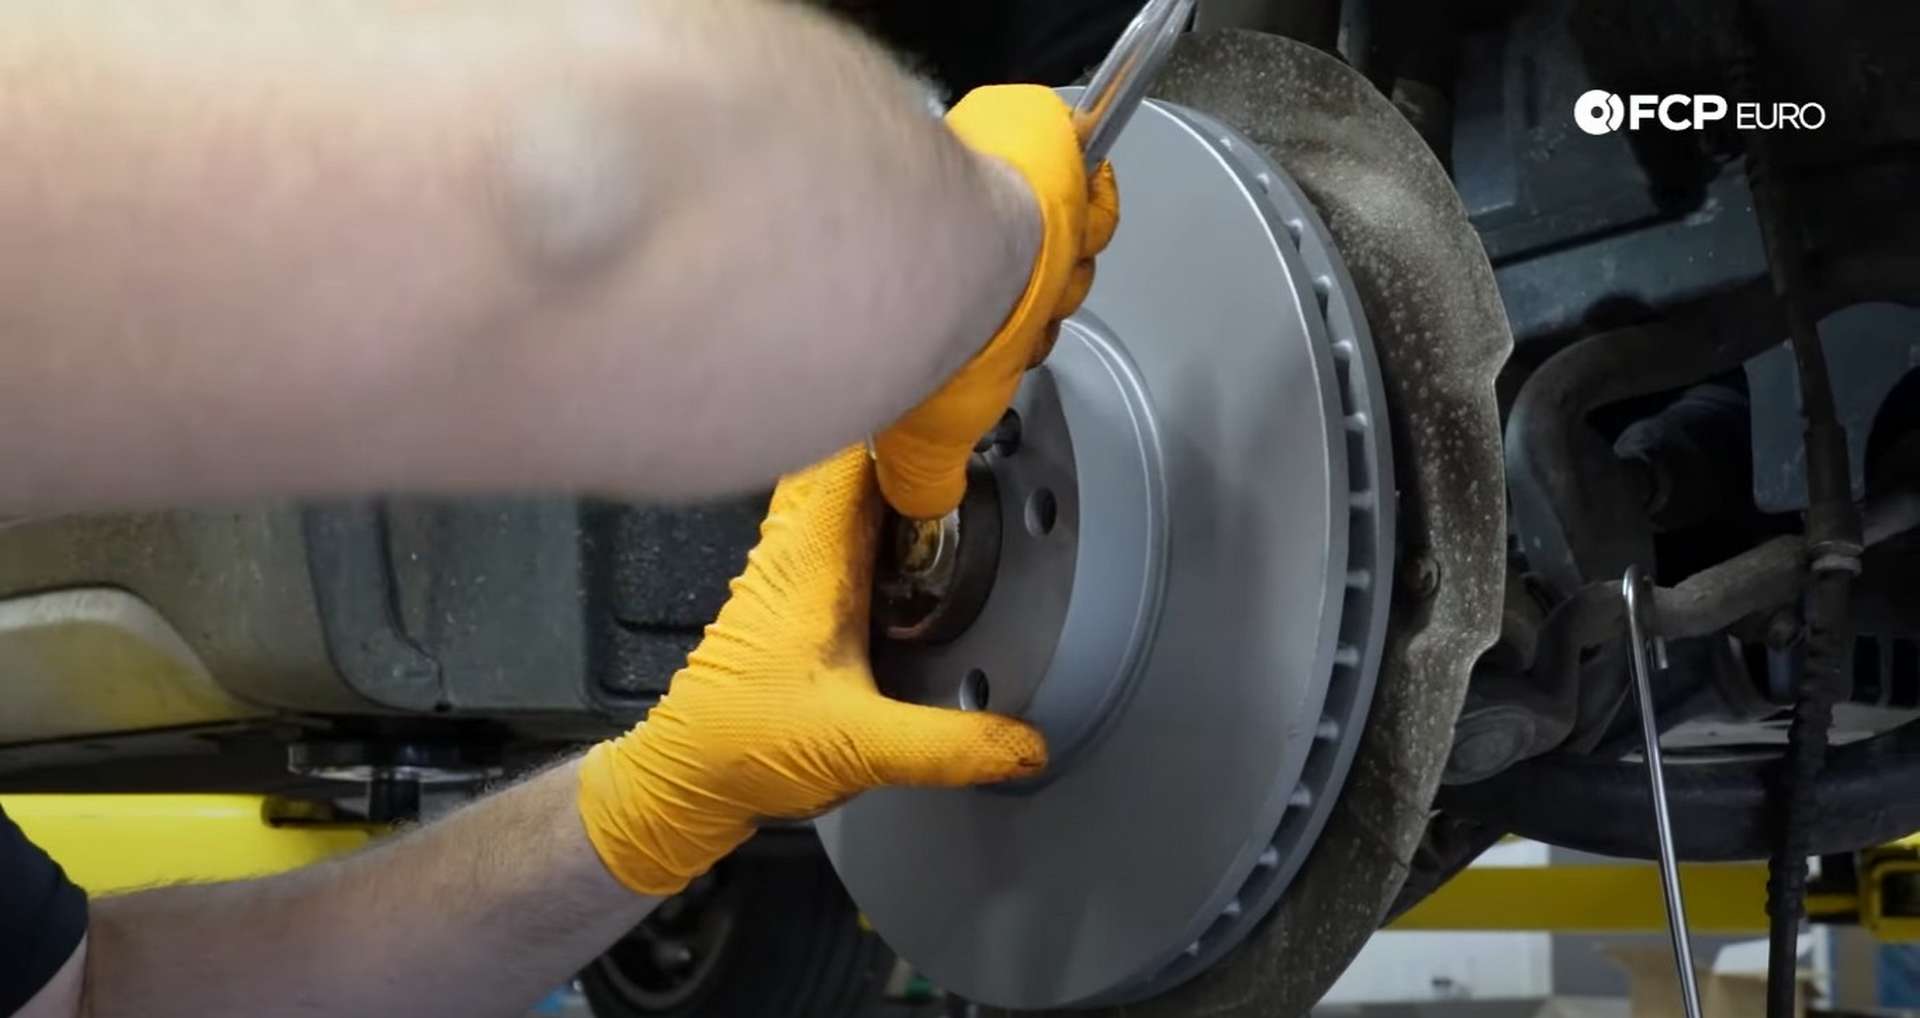
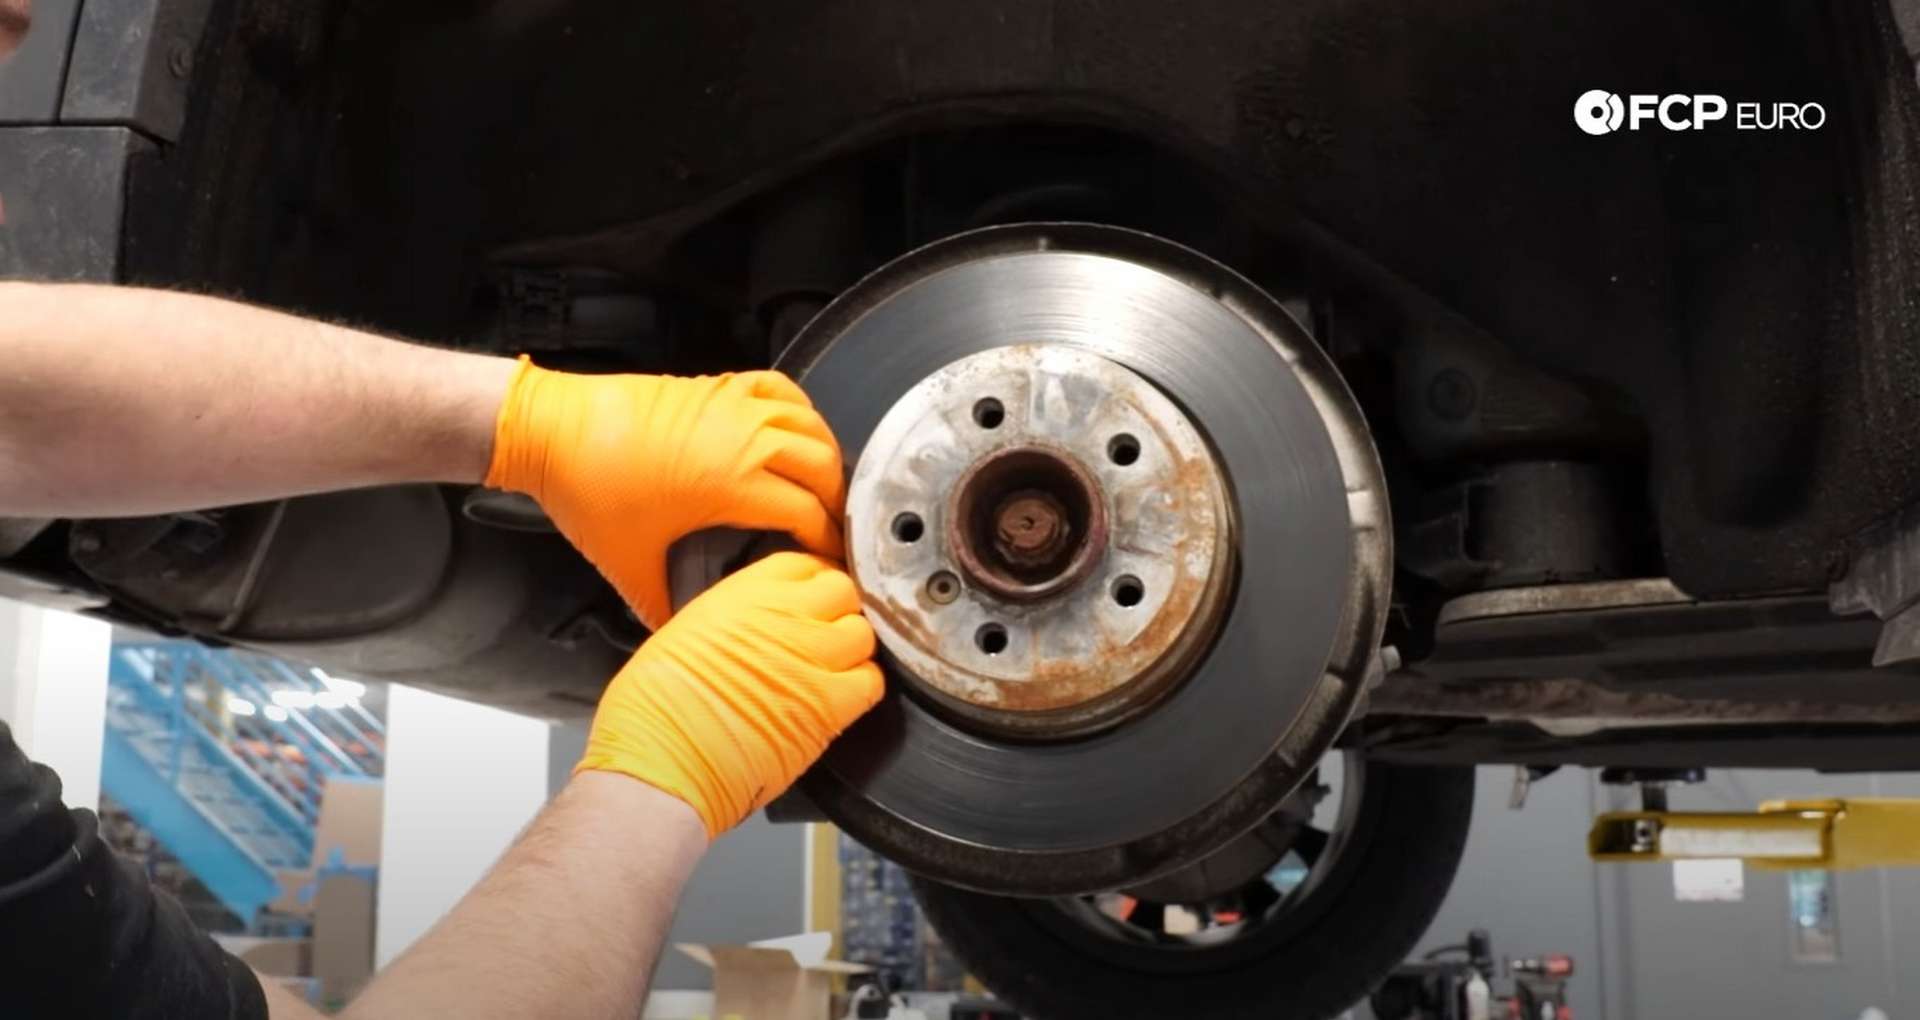
You can now pull off the rotor with the bracket out of the way. If corrosion is present on the hub, you may have a hard time removing the rotor. Hit the rotor with a hammer to break the rotor free of corrosion.
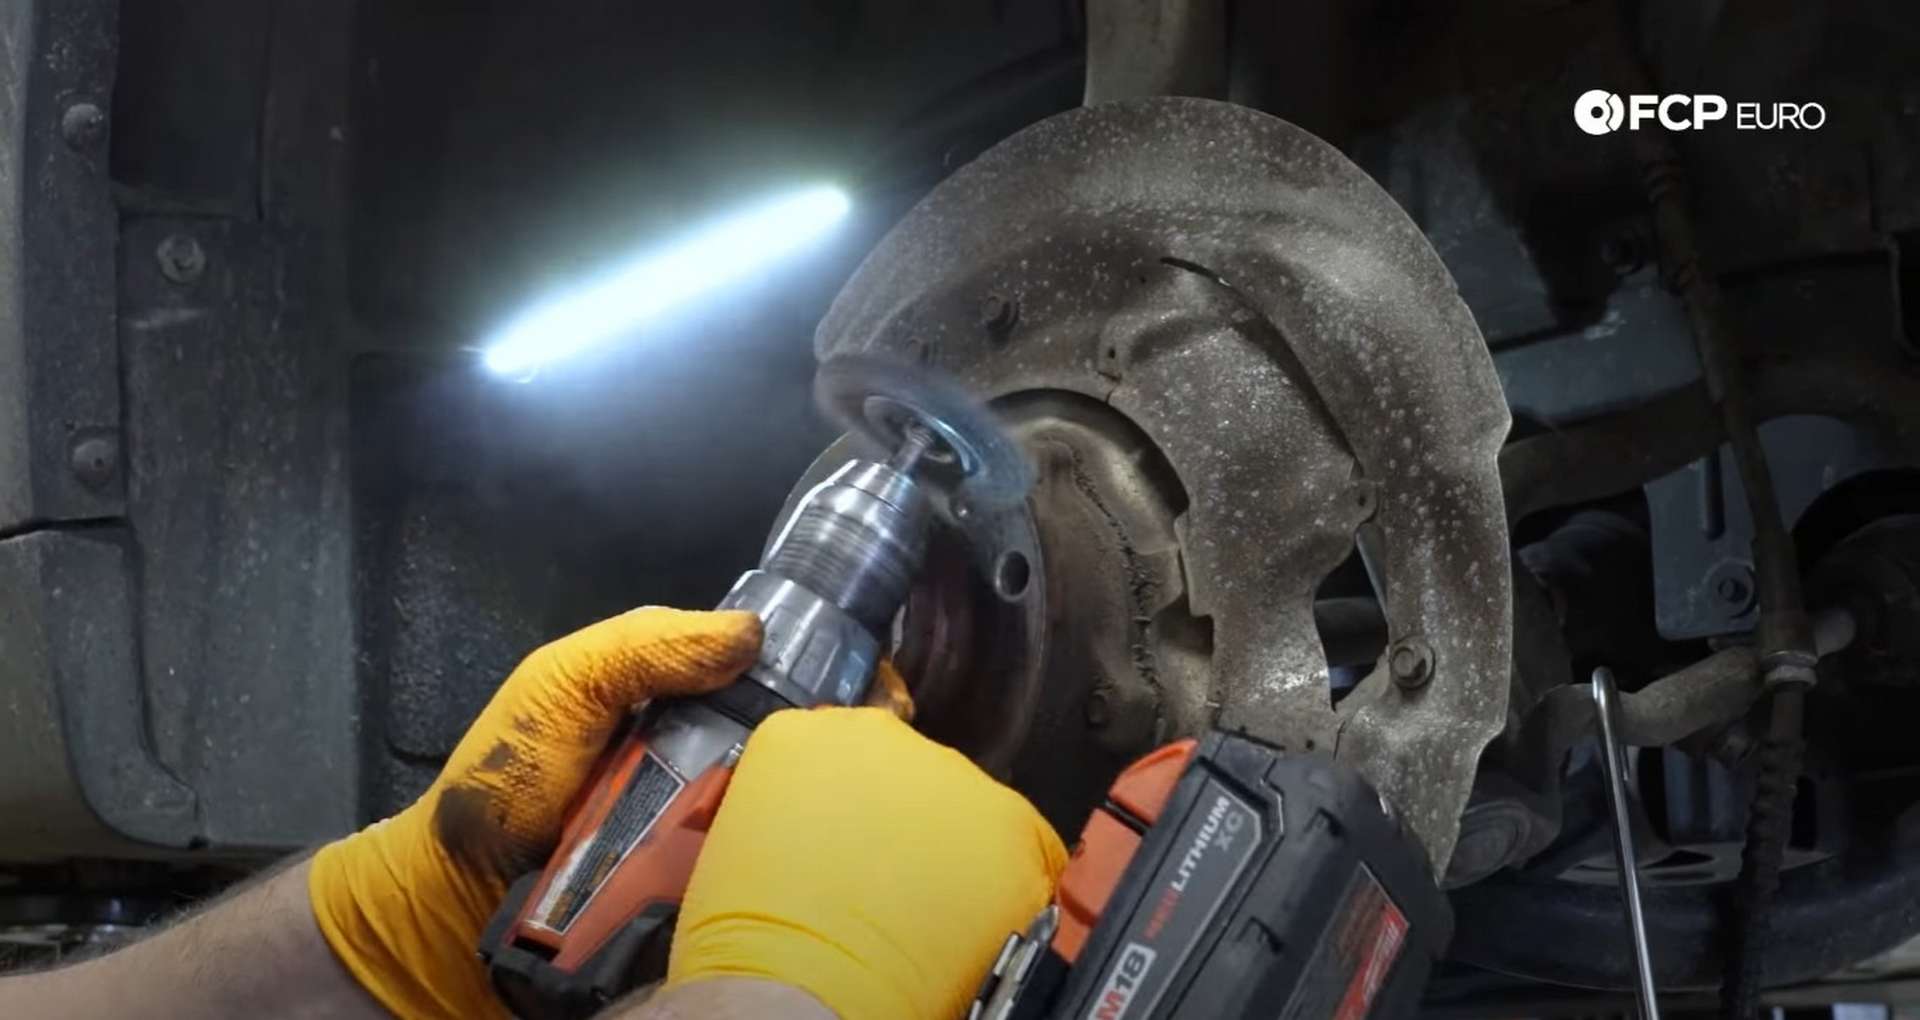
Inspect the hub with the rotor off. Use a steel bristle brush or a wire wheel to remove as much rust and corrosion as you can from the hub's mating surface.
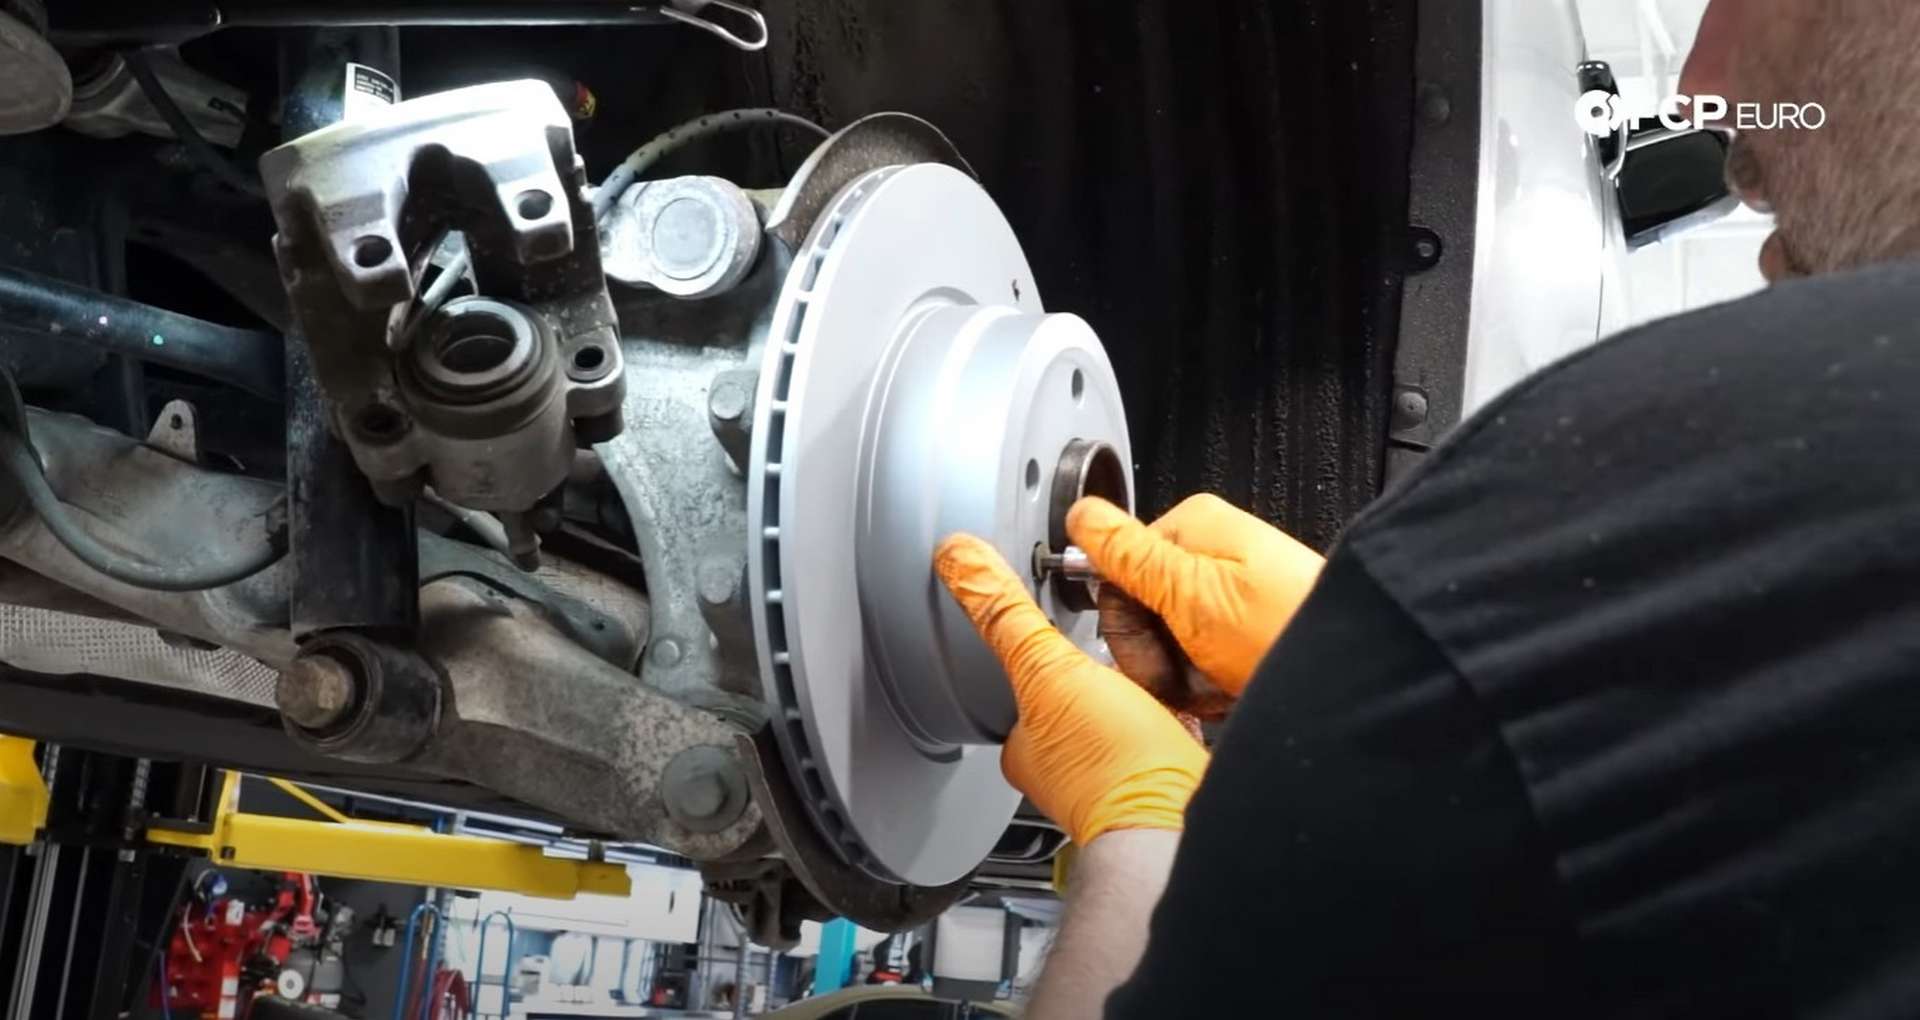
Next, install the new rotor onto the cleaned hub, and secure it in place with the set screw. Use a 6mm hex bit socket to tighten the set screw.
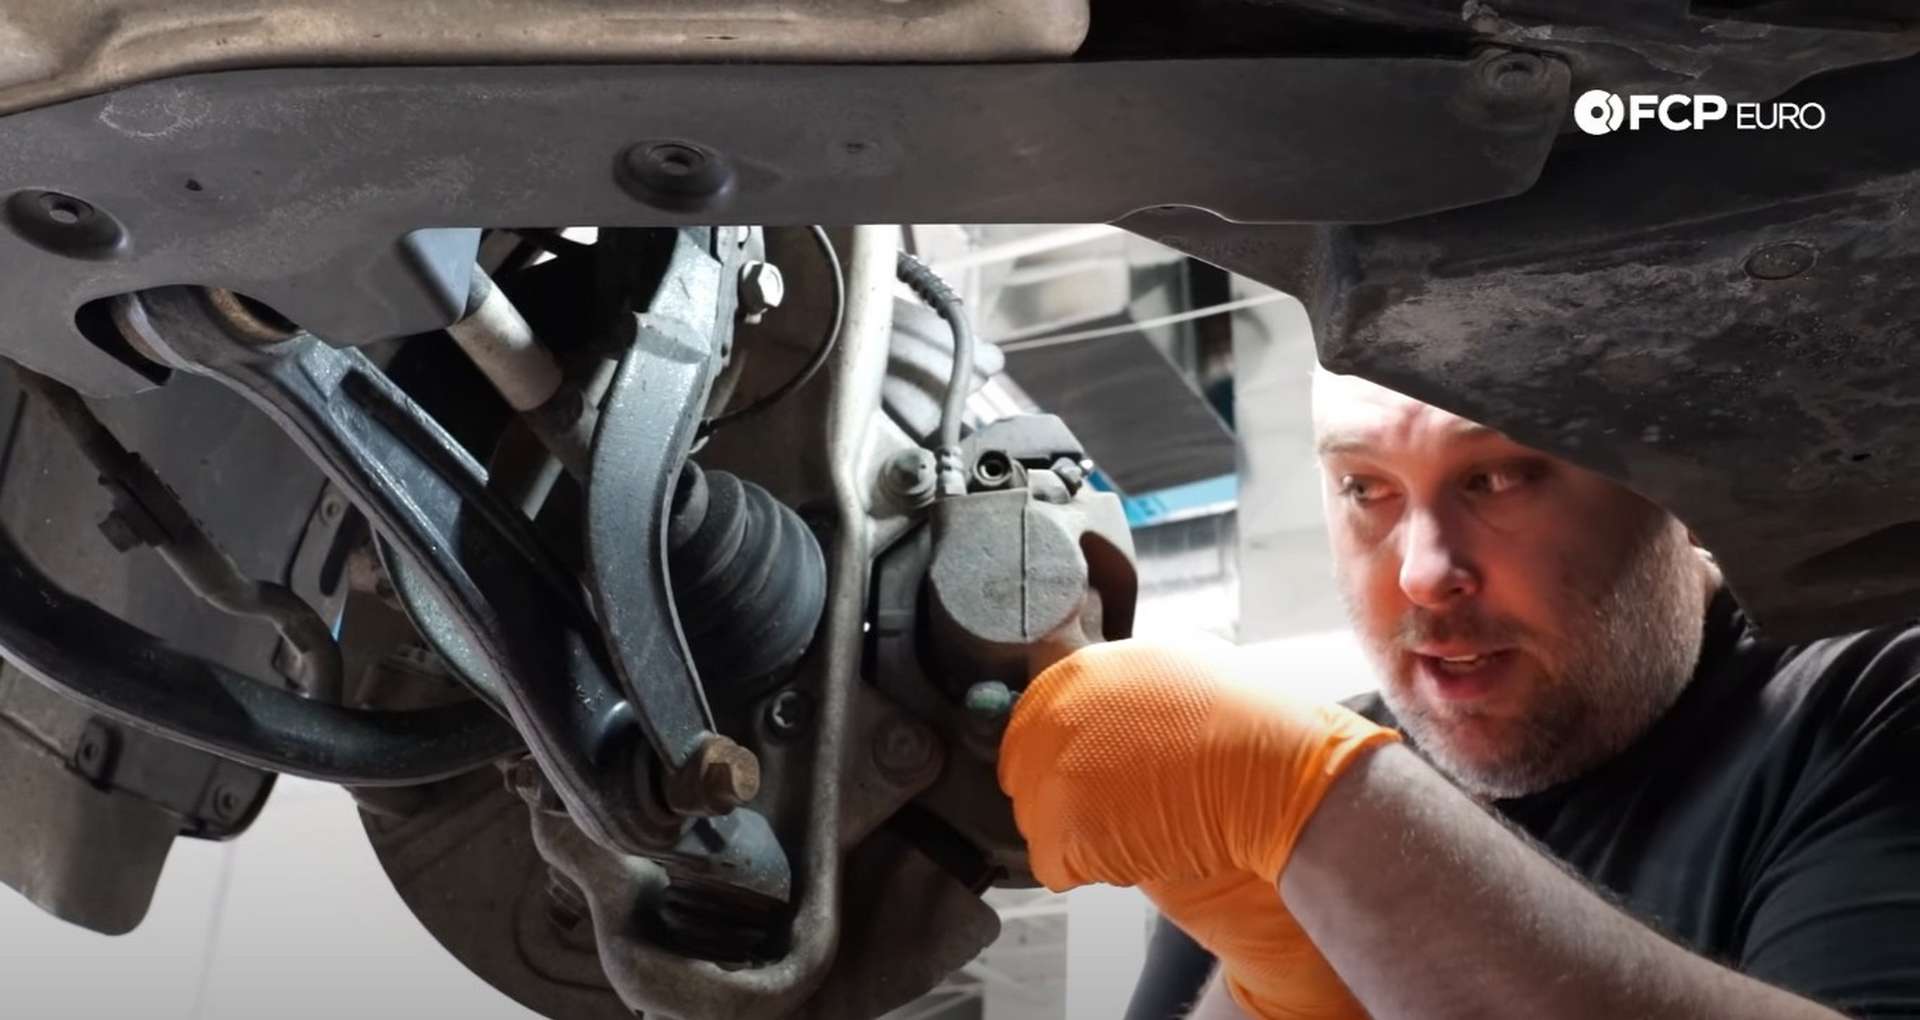
Clean the caliper bracket before refitting it to the knuckle. Use brake clean and a steel bristle brush to remove old brake dust and any corrosion.
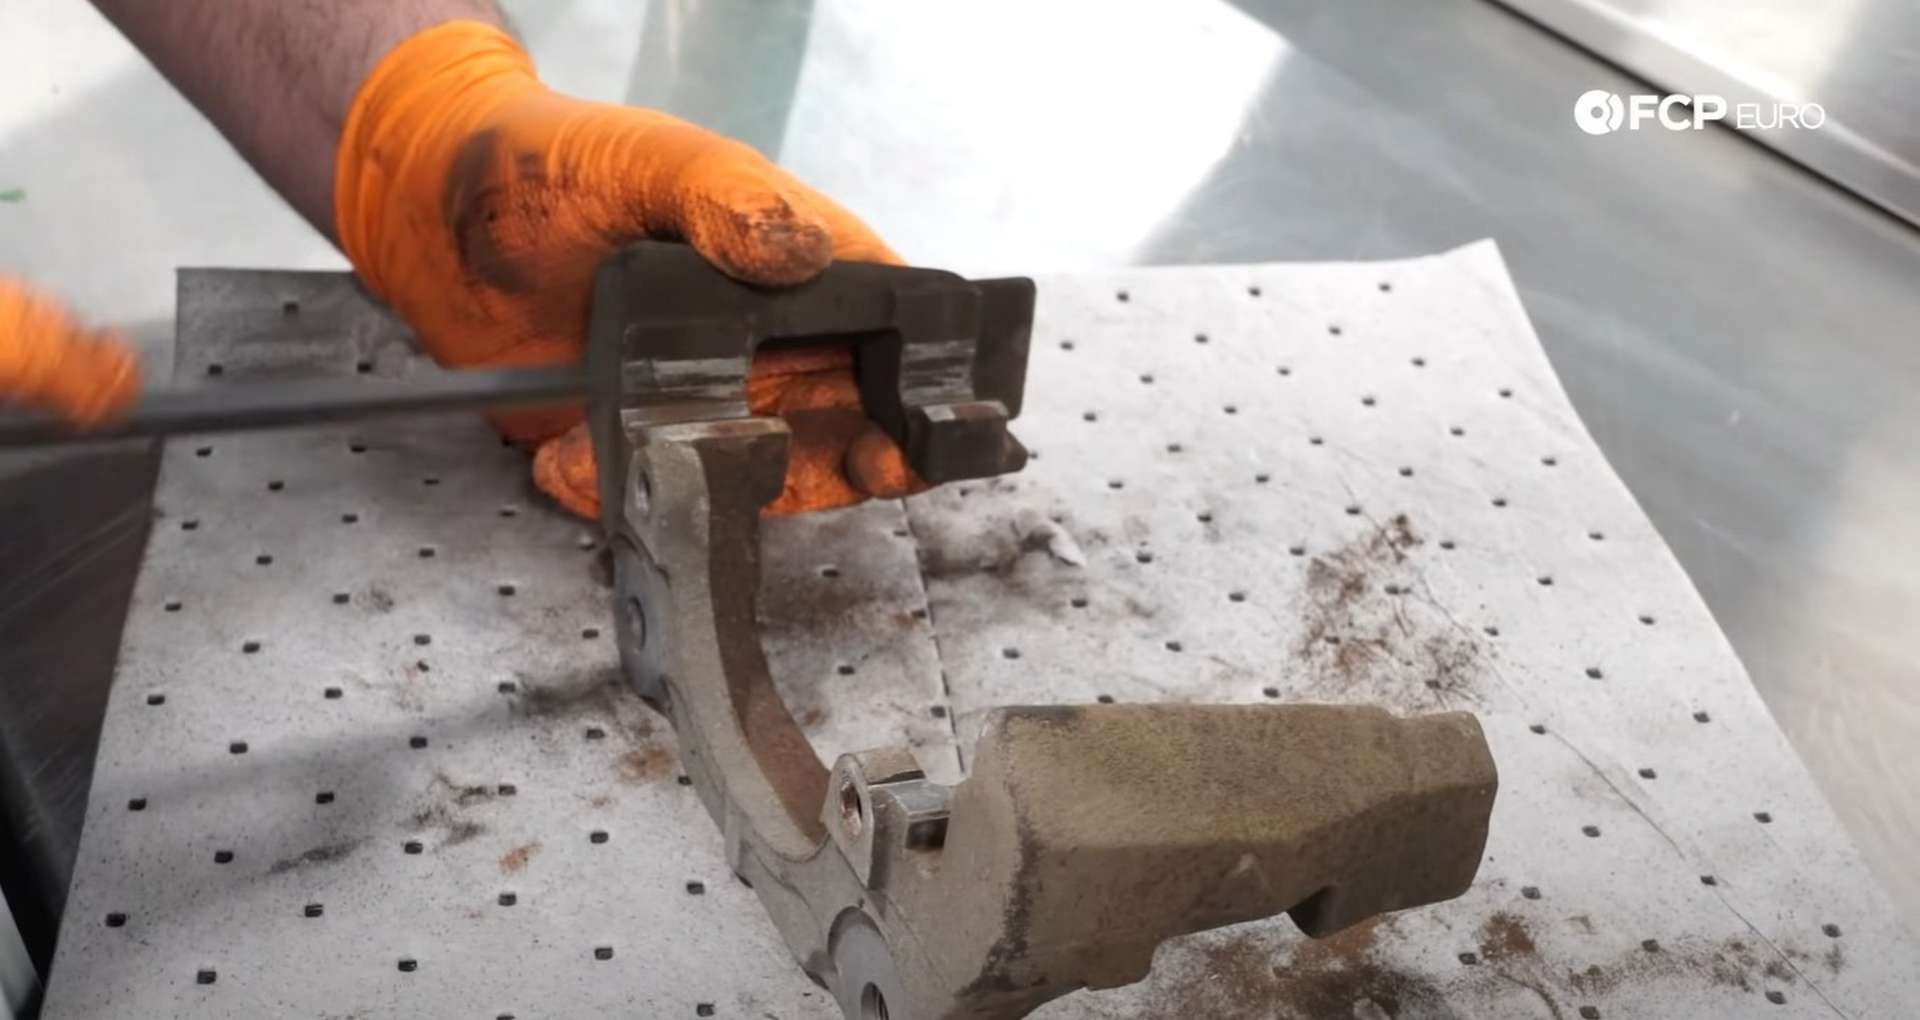
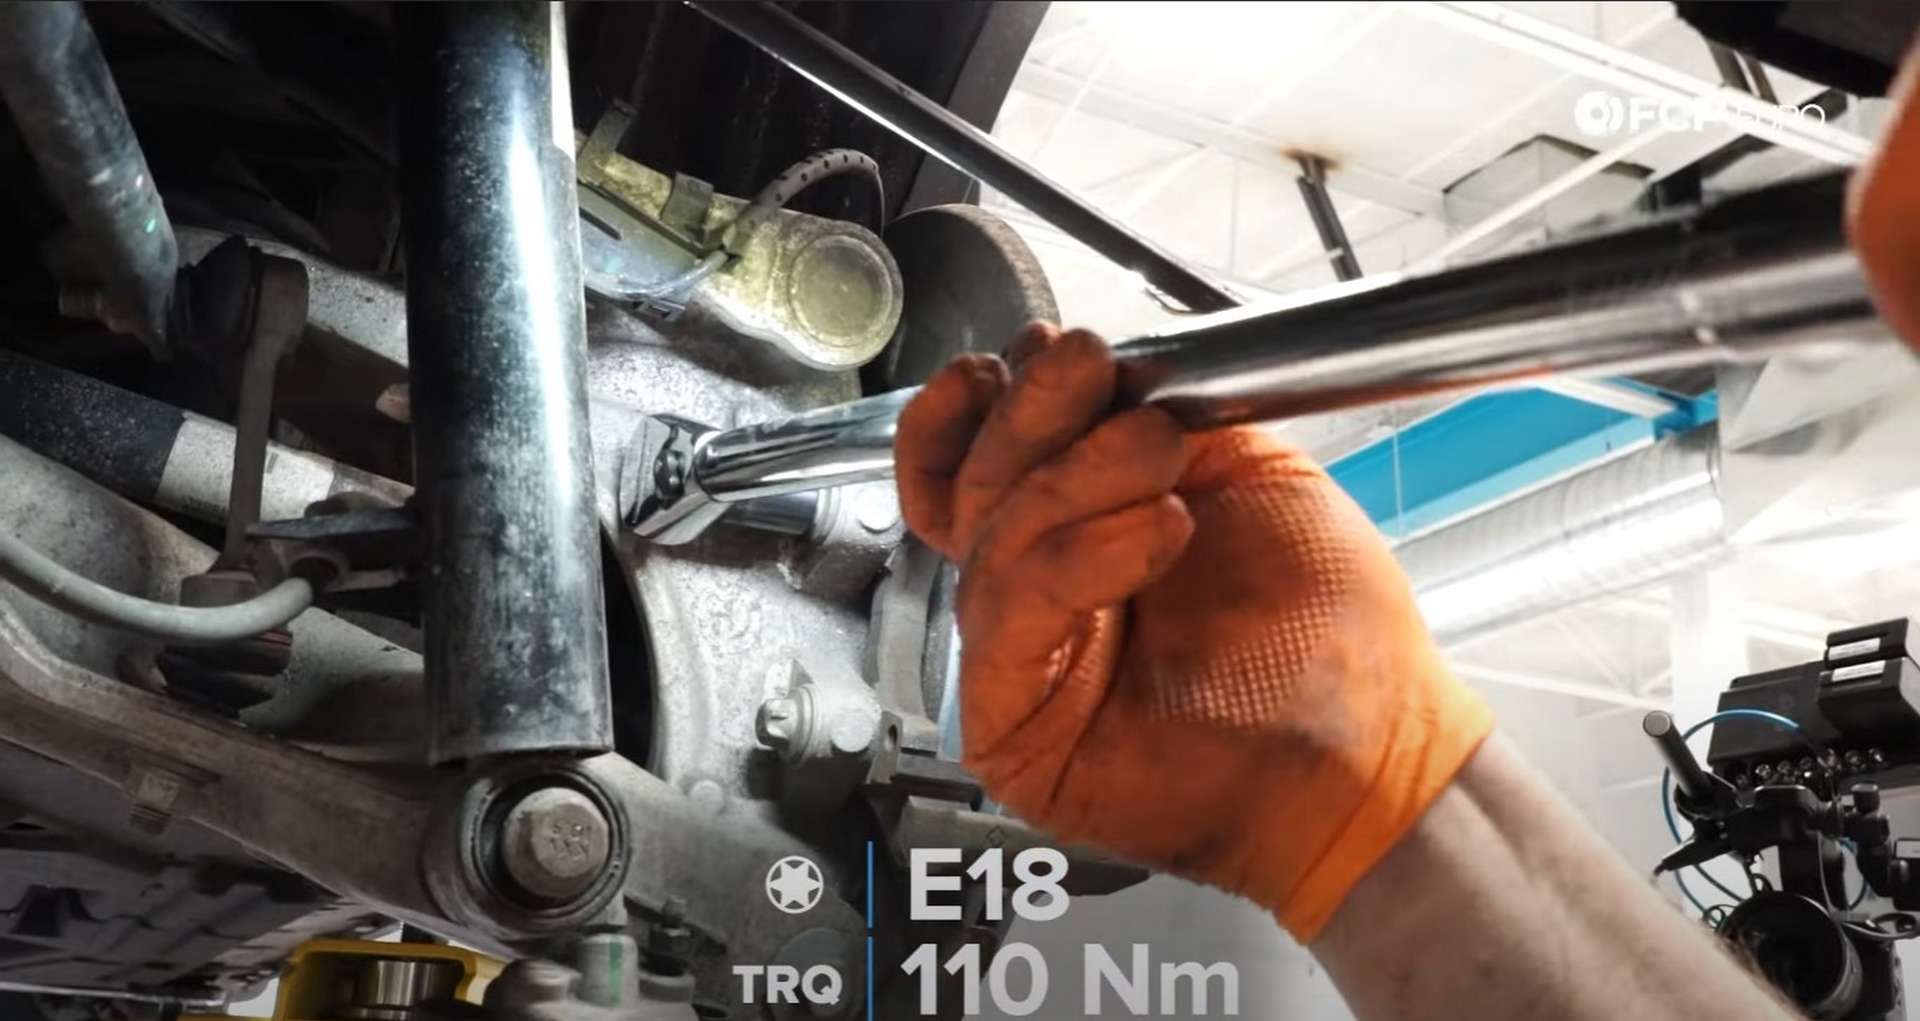
Next, reinstall the bracket to the knuckle. Thread in both mounting bolts by hand to prevent cross-threading before using an E18 socket to torque the bolts to 110Nm.
Step 3: Install the new pads and reinstall the caliper
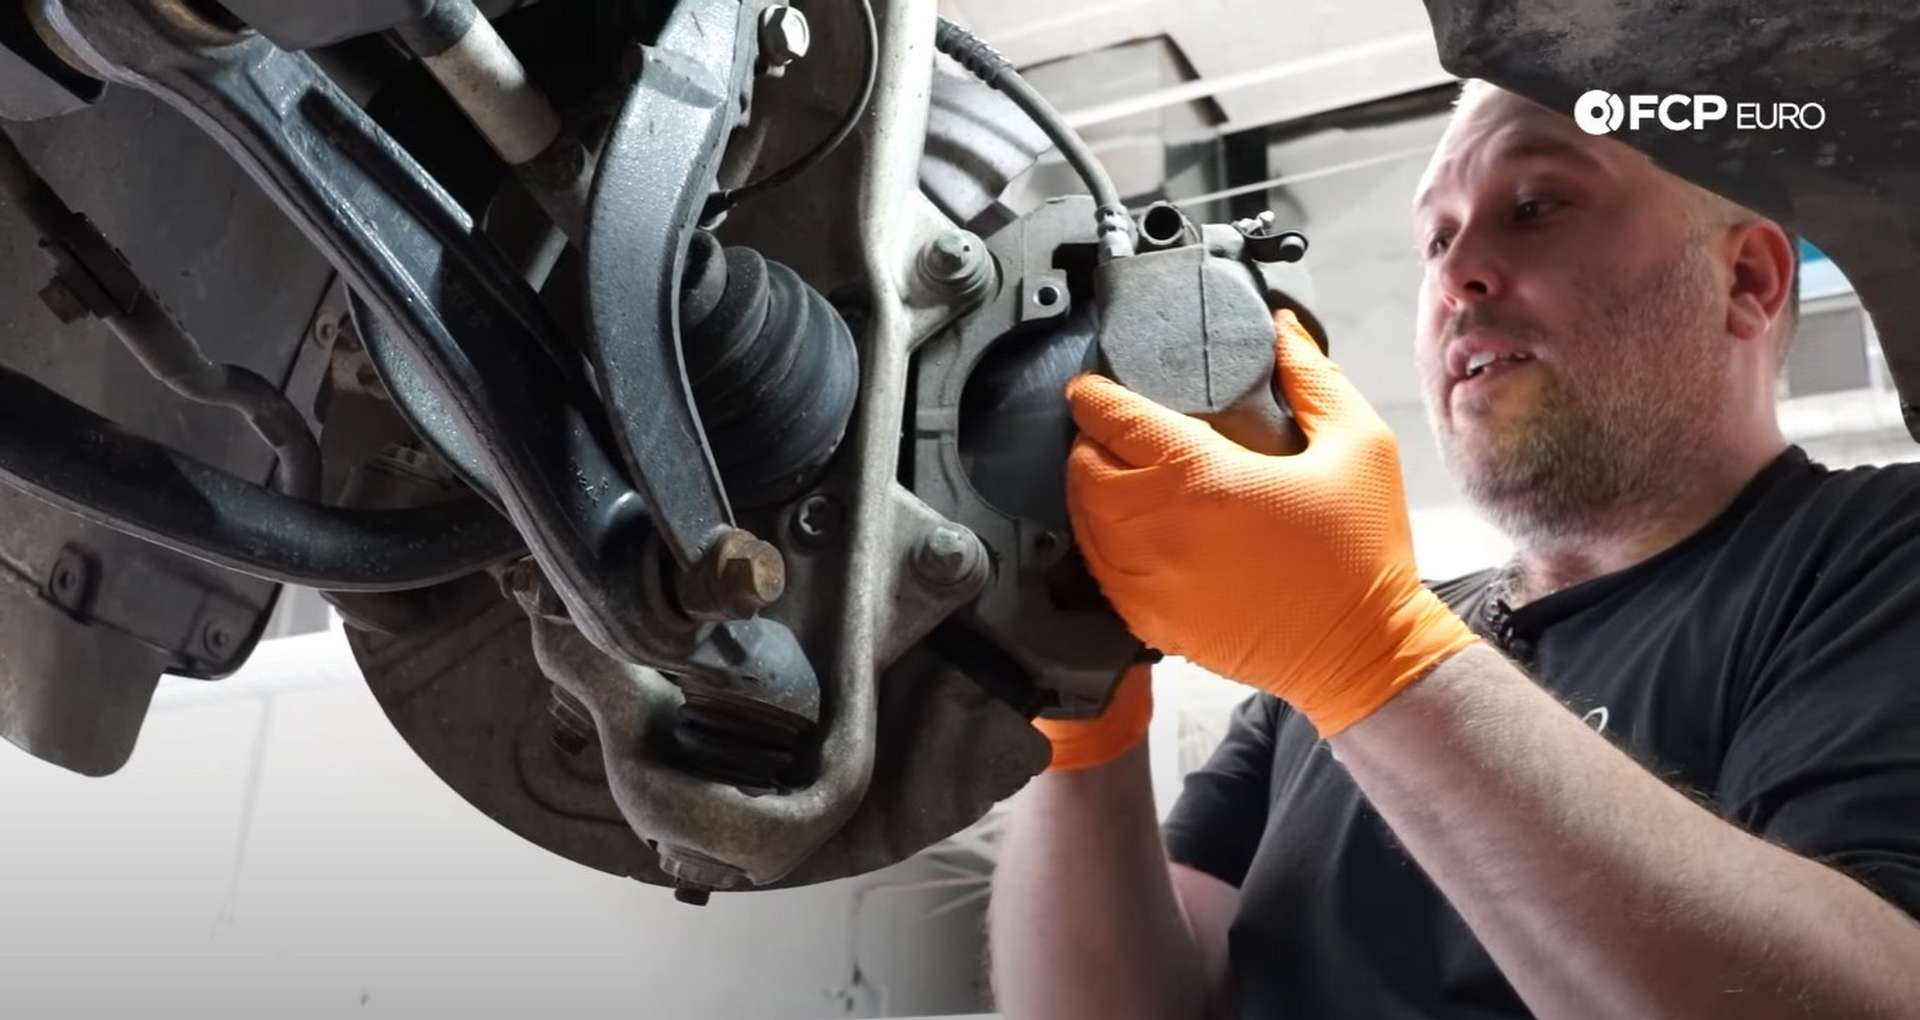
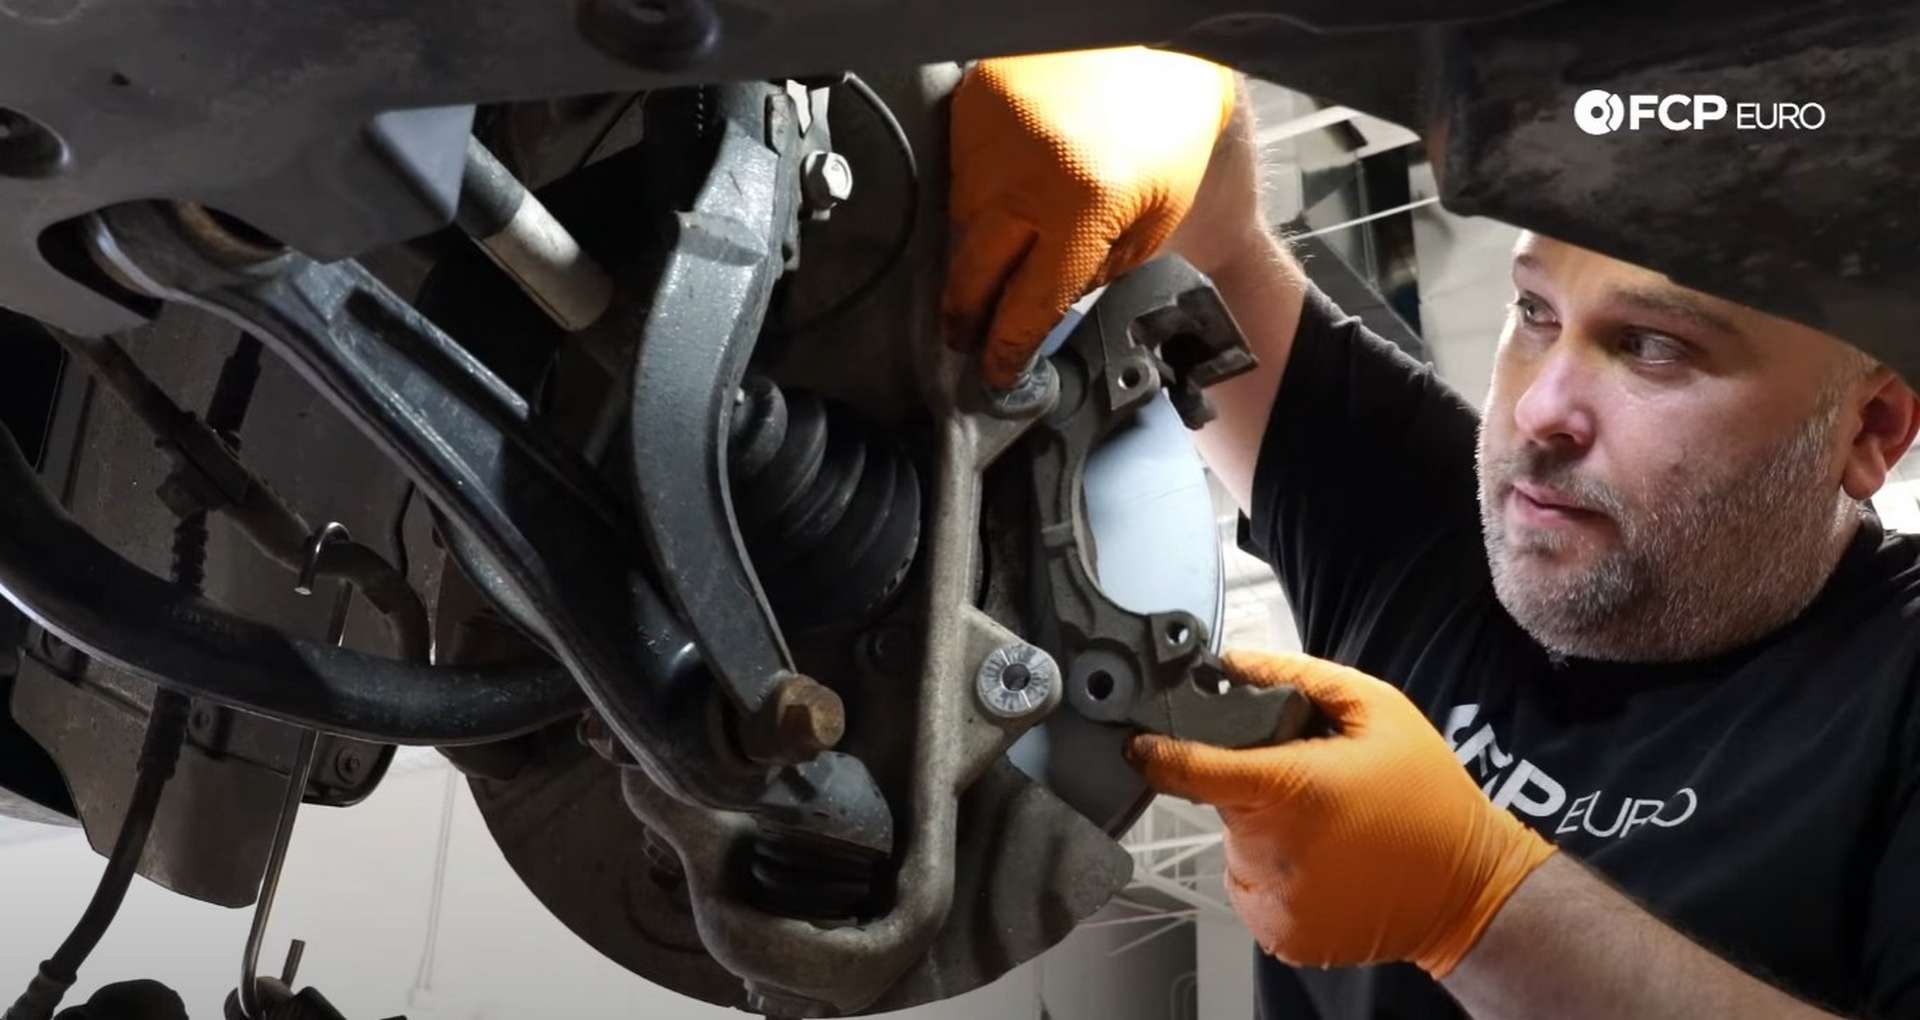
Use the ceramic paste included with the brake kit and apply some to the ears on the outside pads. The paste will help prevent the pad from seizing to the bracket from corrosion. Then, place the pad into the bracket.
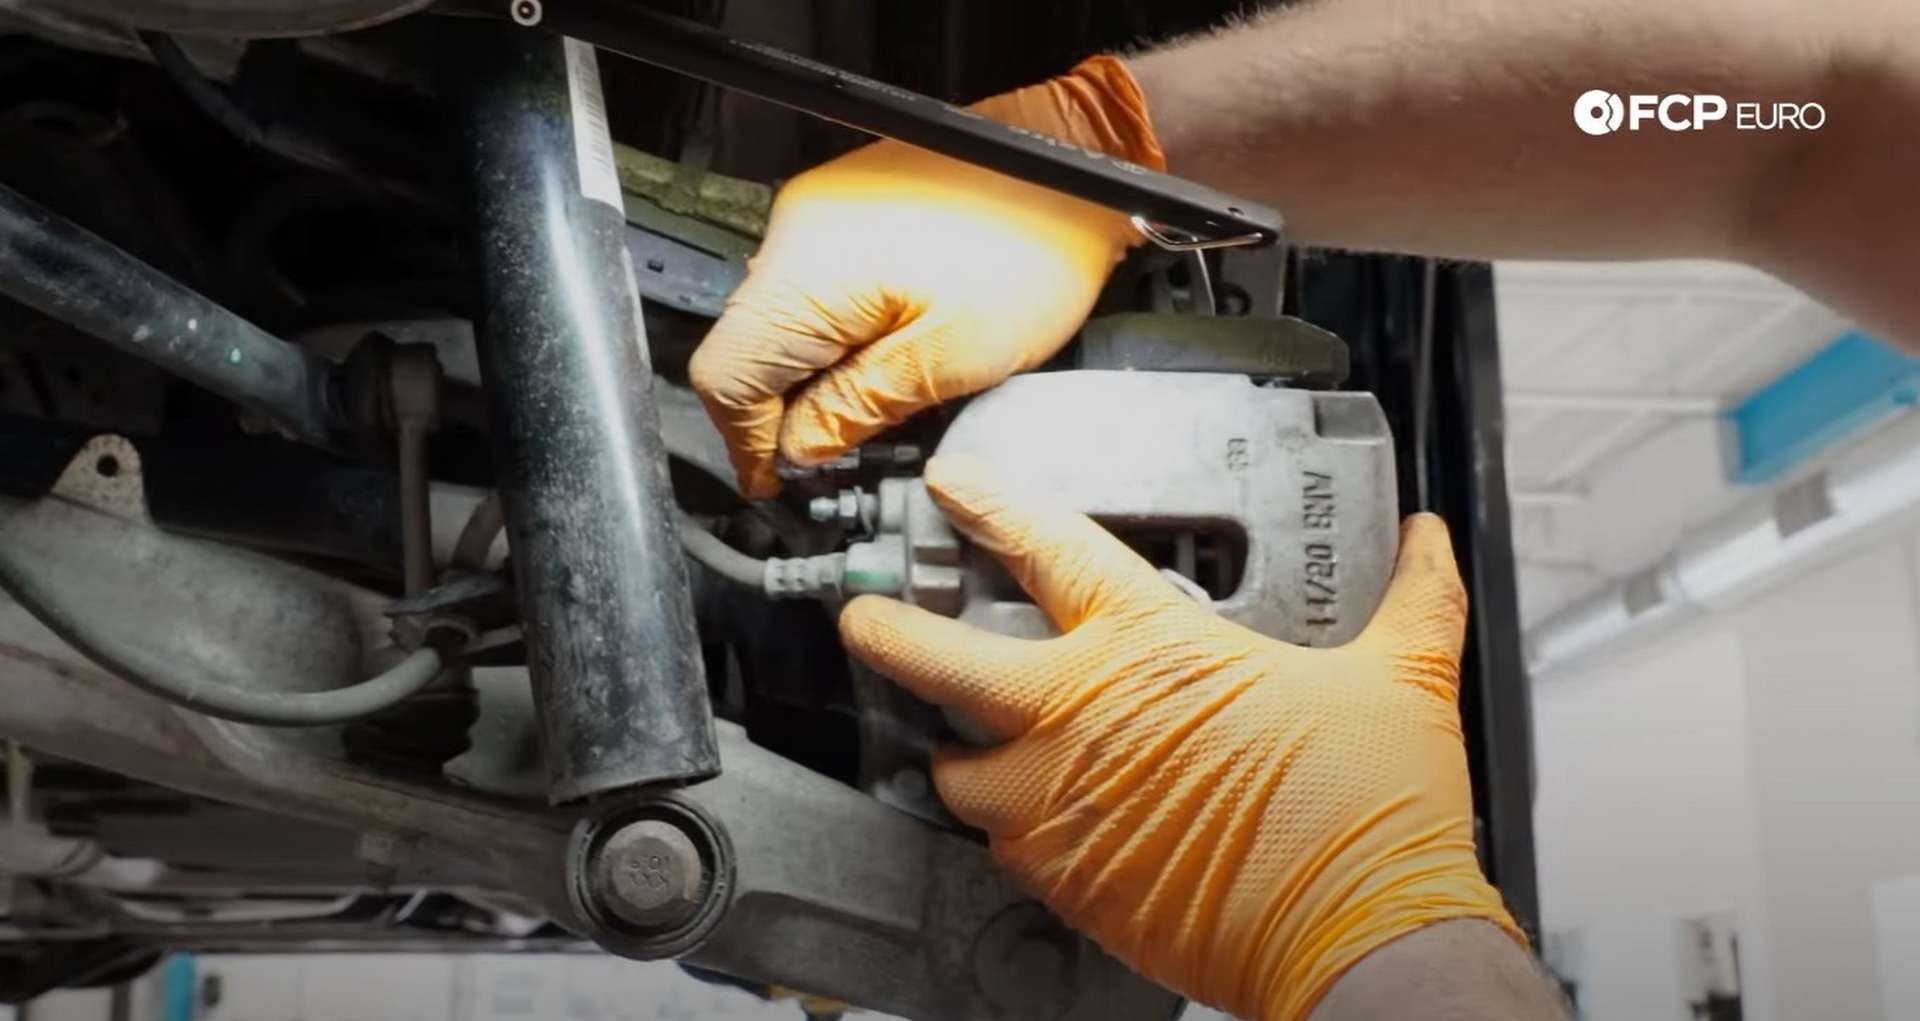
Next, fit the inner pad into the caliper. Press the prongs on the back of the pad into the caliper's piston. Then slide the caliper over the rotor and into place on the bracket.
![DIY BMW F15 X5 F16 X6 Brake Service reinstalling the caliper]](https://images.contentstack.io/v3/assets/blt75c85f063ac4ae63/blt33bf7991a4fccb6c/65f91a9a037532638f3d01b3/15-DIY-BMW-F15-X5-Brake-Service_Reinstalling-Caliper.jpg)
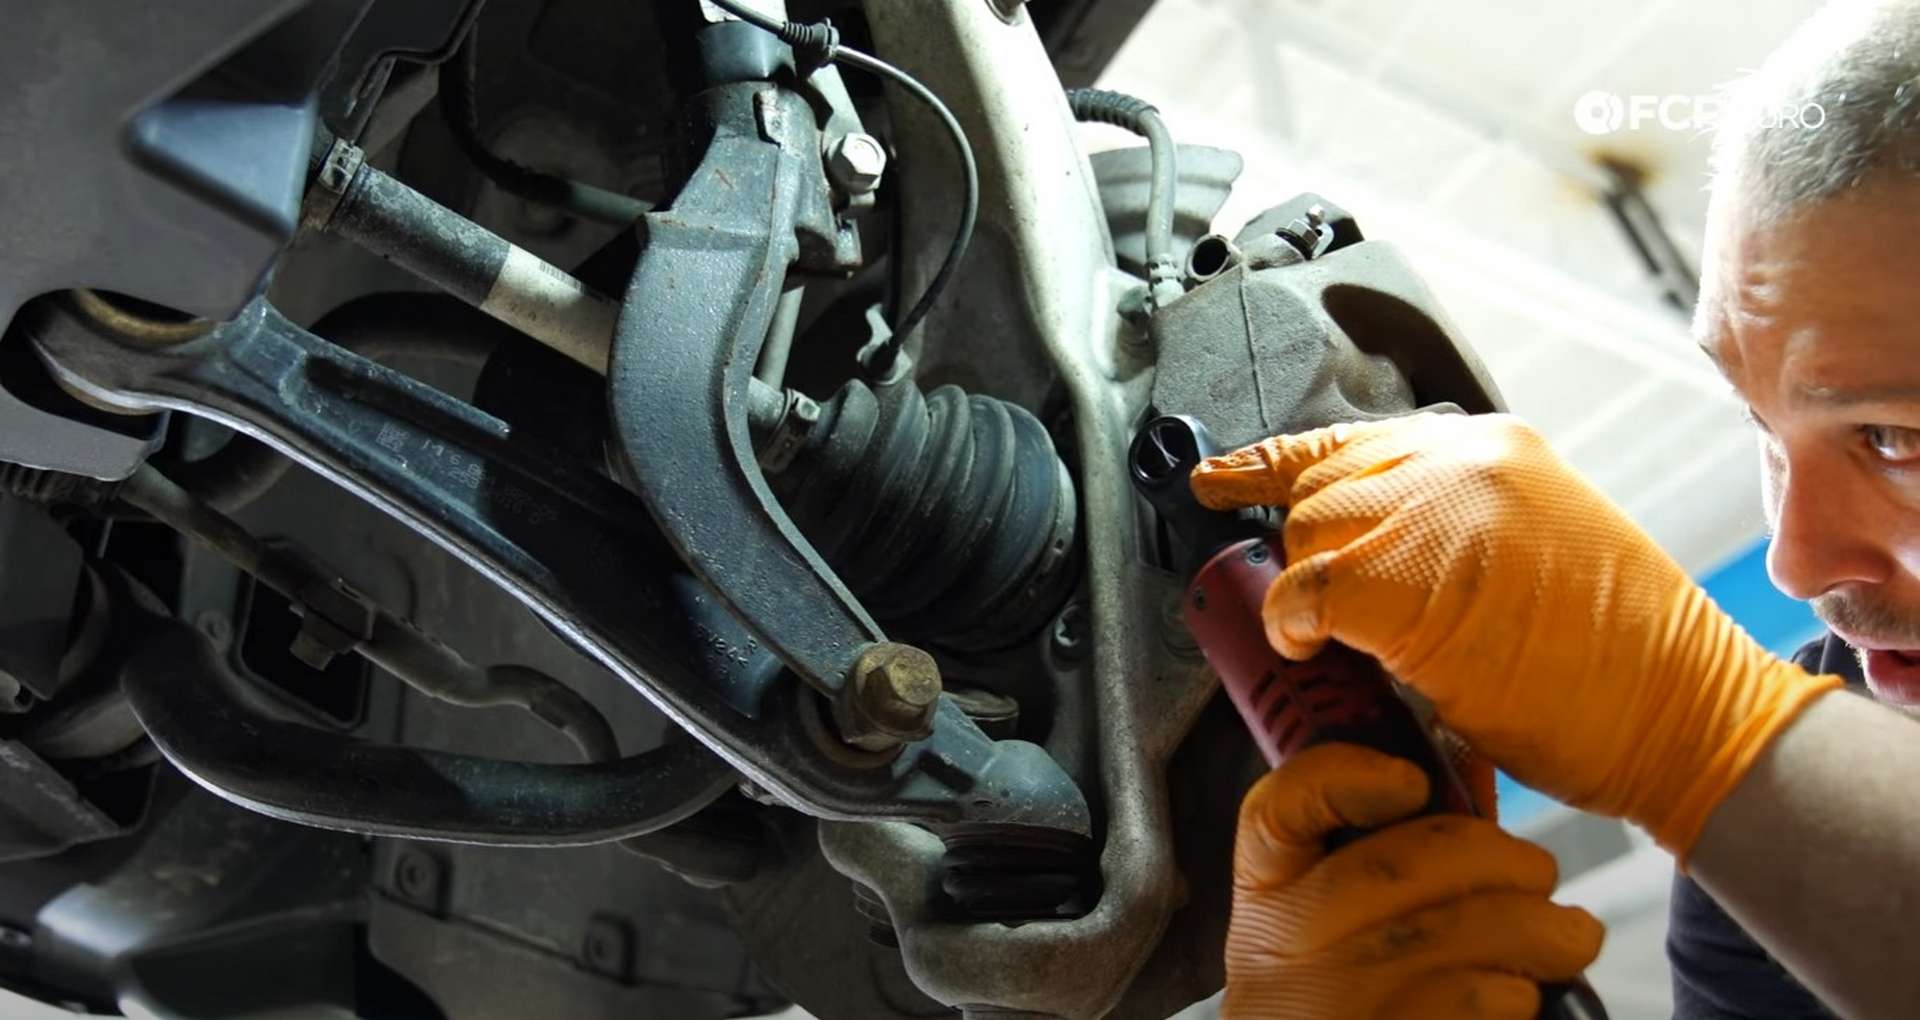
Thread in the guide pins once the caliper is in place. Use a 7mm hex bit socket to torque the guide pins to 30Nm. Then, refit the dust caps to the pins.
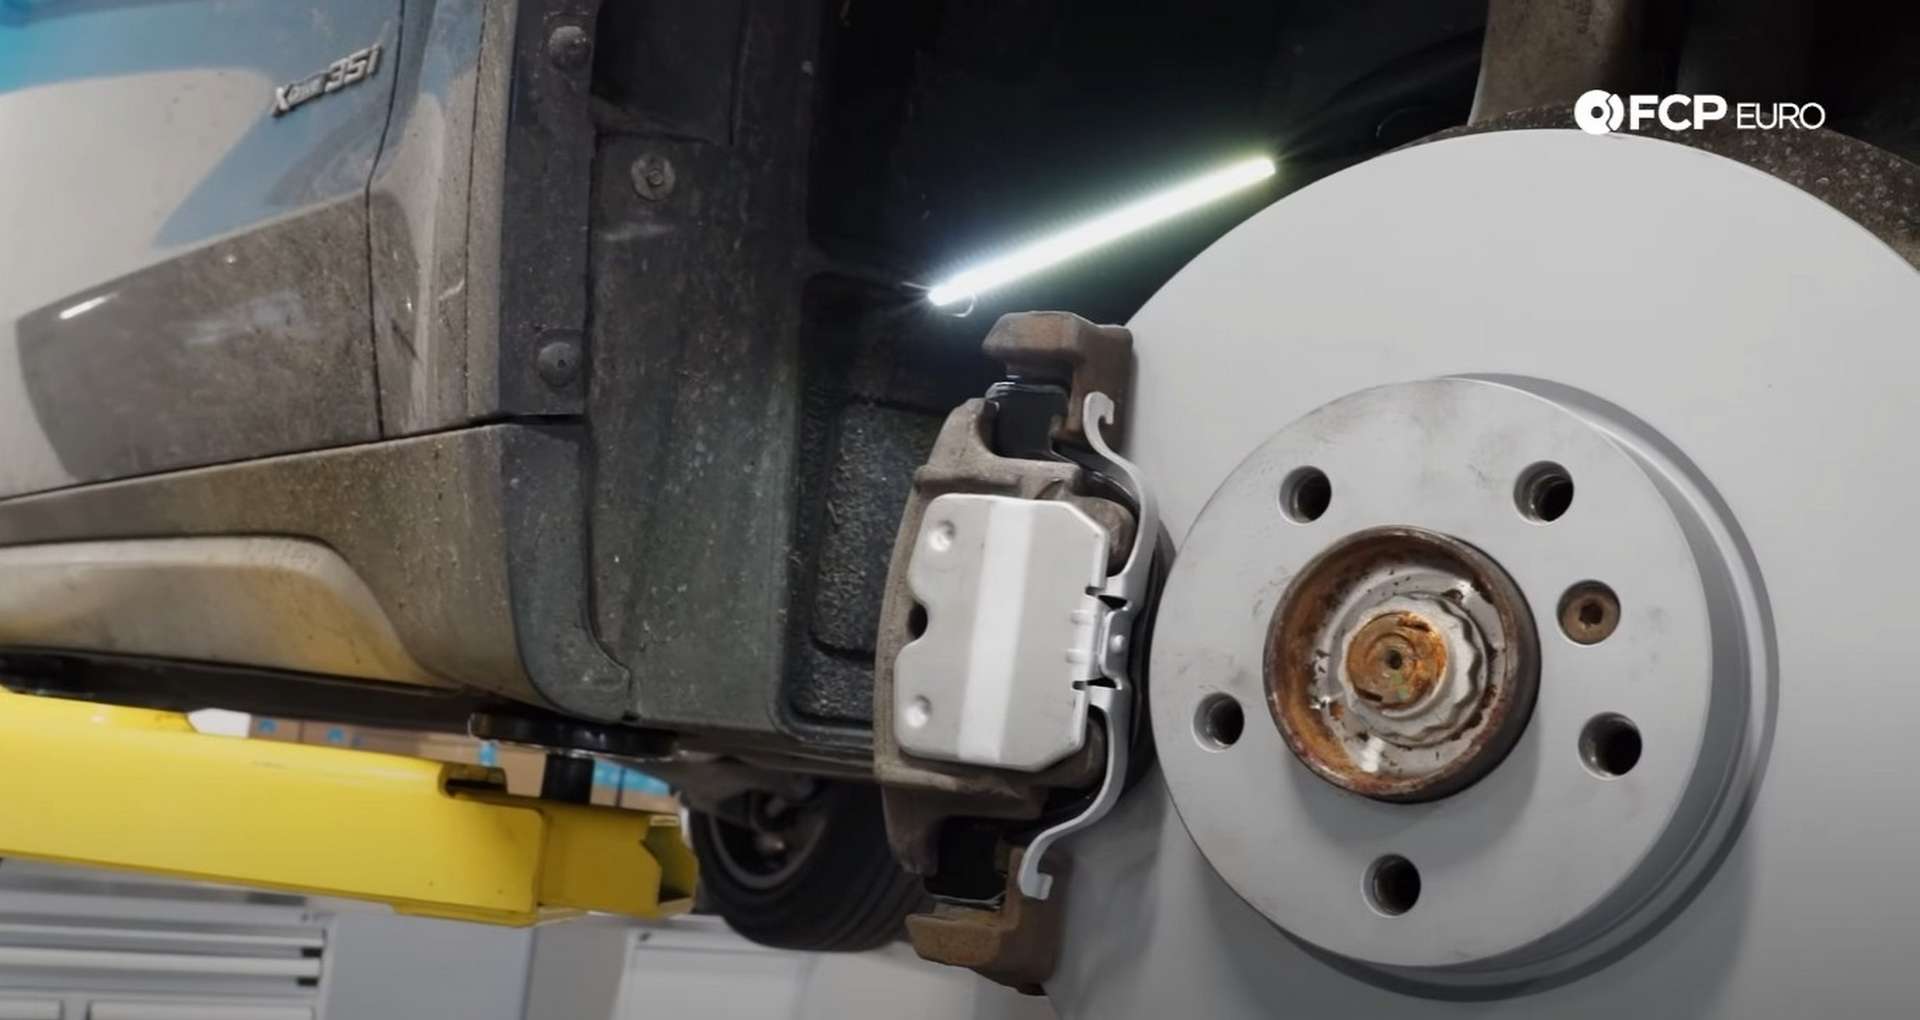
Get the ears of the anti-rattle clip below the bracket and then push outward from the hub and inward towards the caliper to seat it in place.
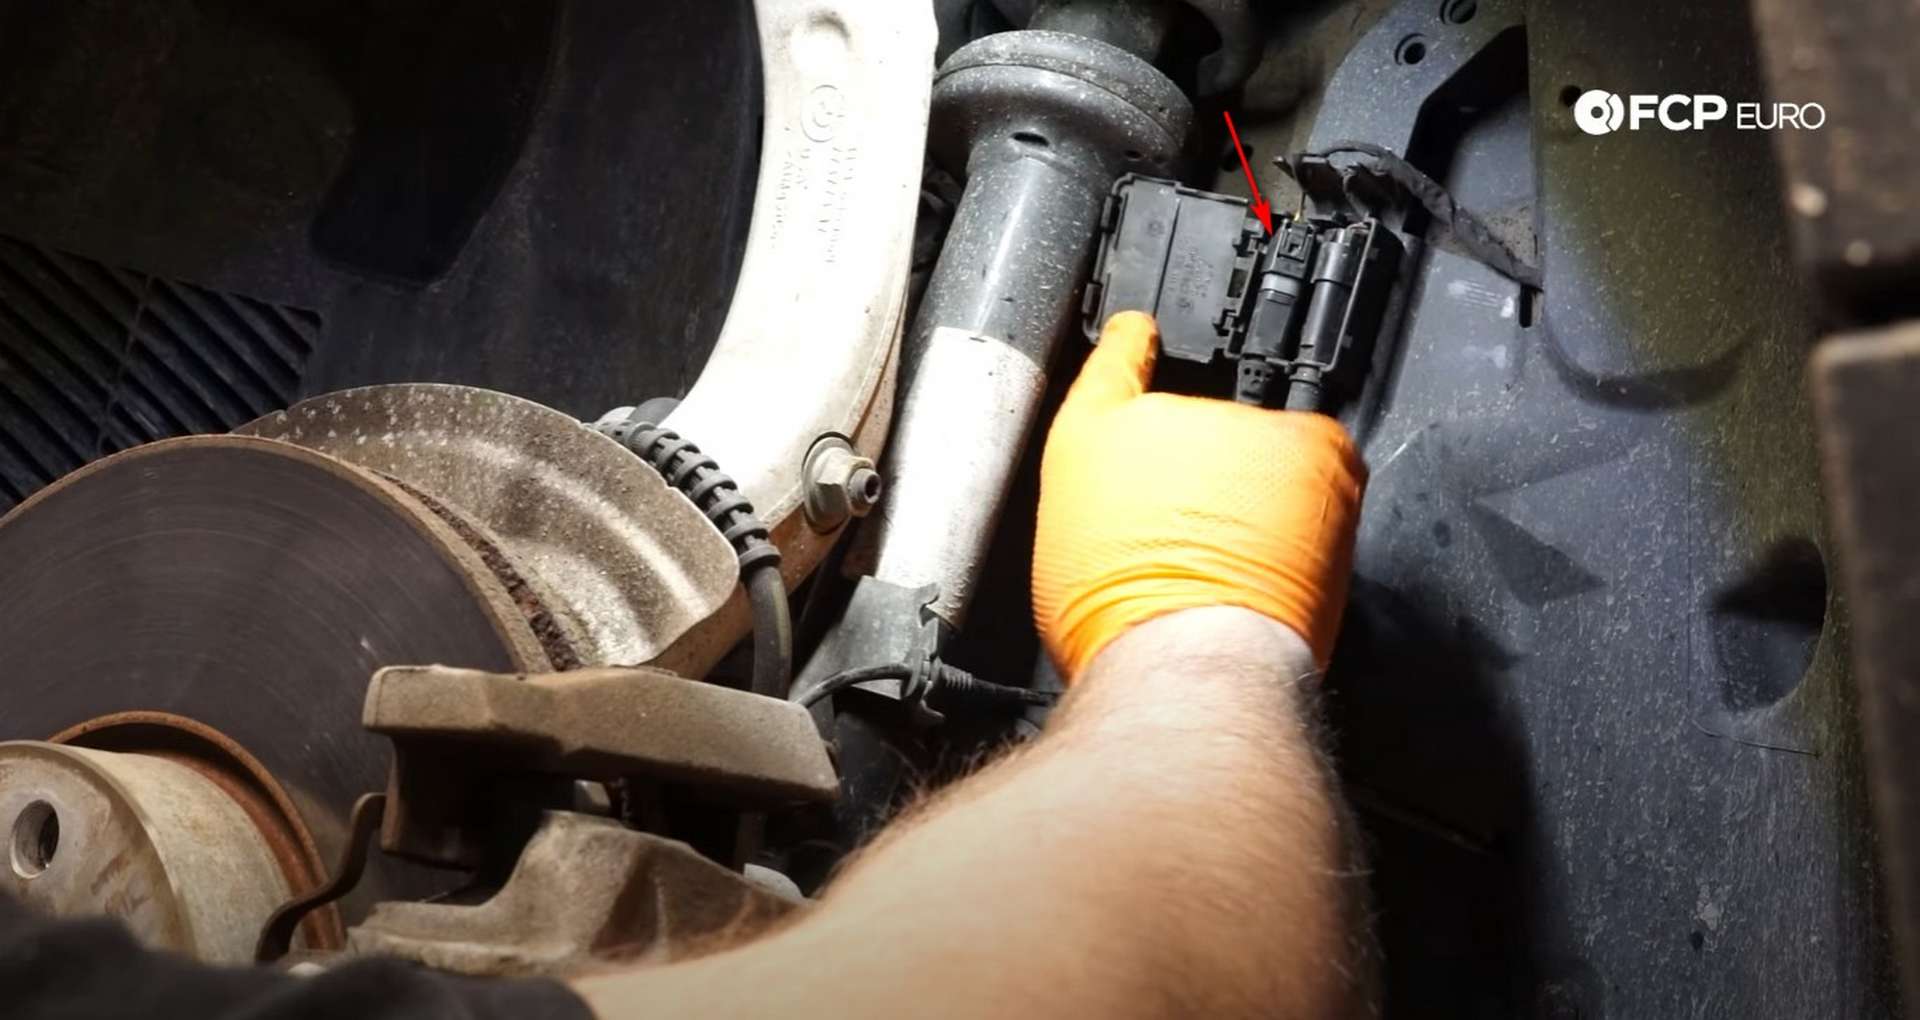
The brake kit comes with a new pad wear sensor for the front, which you'll replace now. Follow the sensor wire up to the small box on the inner fender. Open the box, pull out the connection for the wear sensor, and disconnect it. Plug the new sensor in, and resecure it in its box. Then, refit the sensor wire to its mounting bracket and plug it into the new rear pad.
If you aren't going to bleed the brakes, refit the wheel and set the front of the vehicle onto the ground.
Step 4: Remove the rear caliper
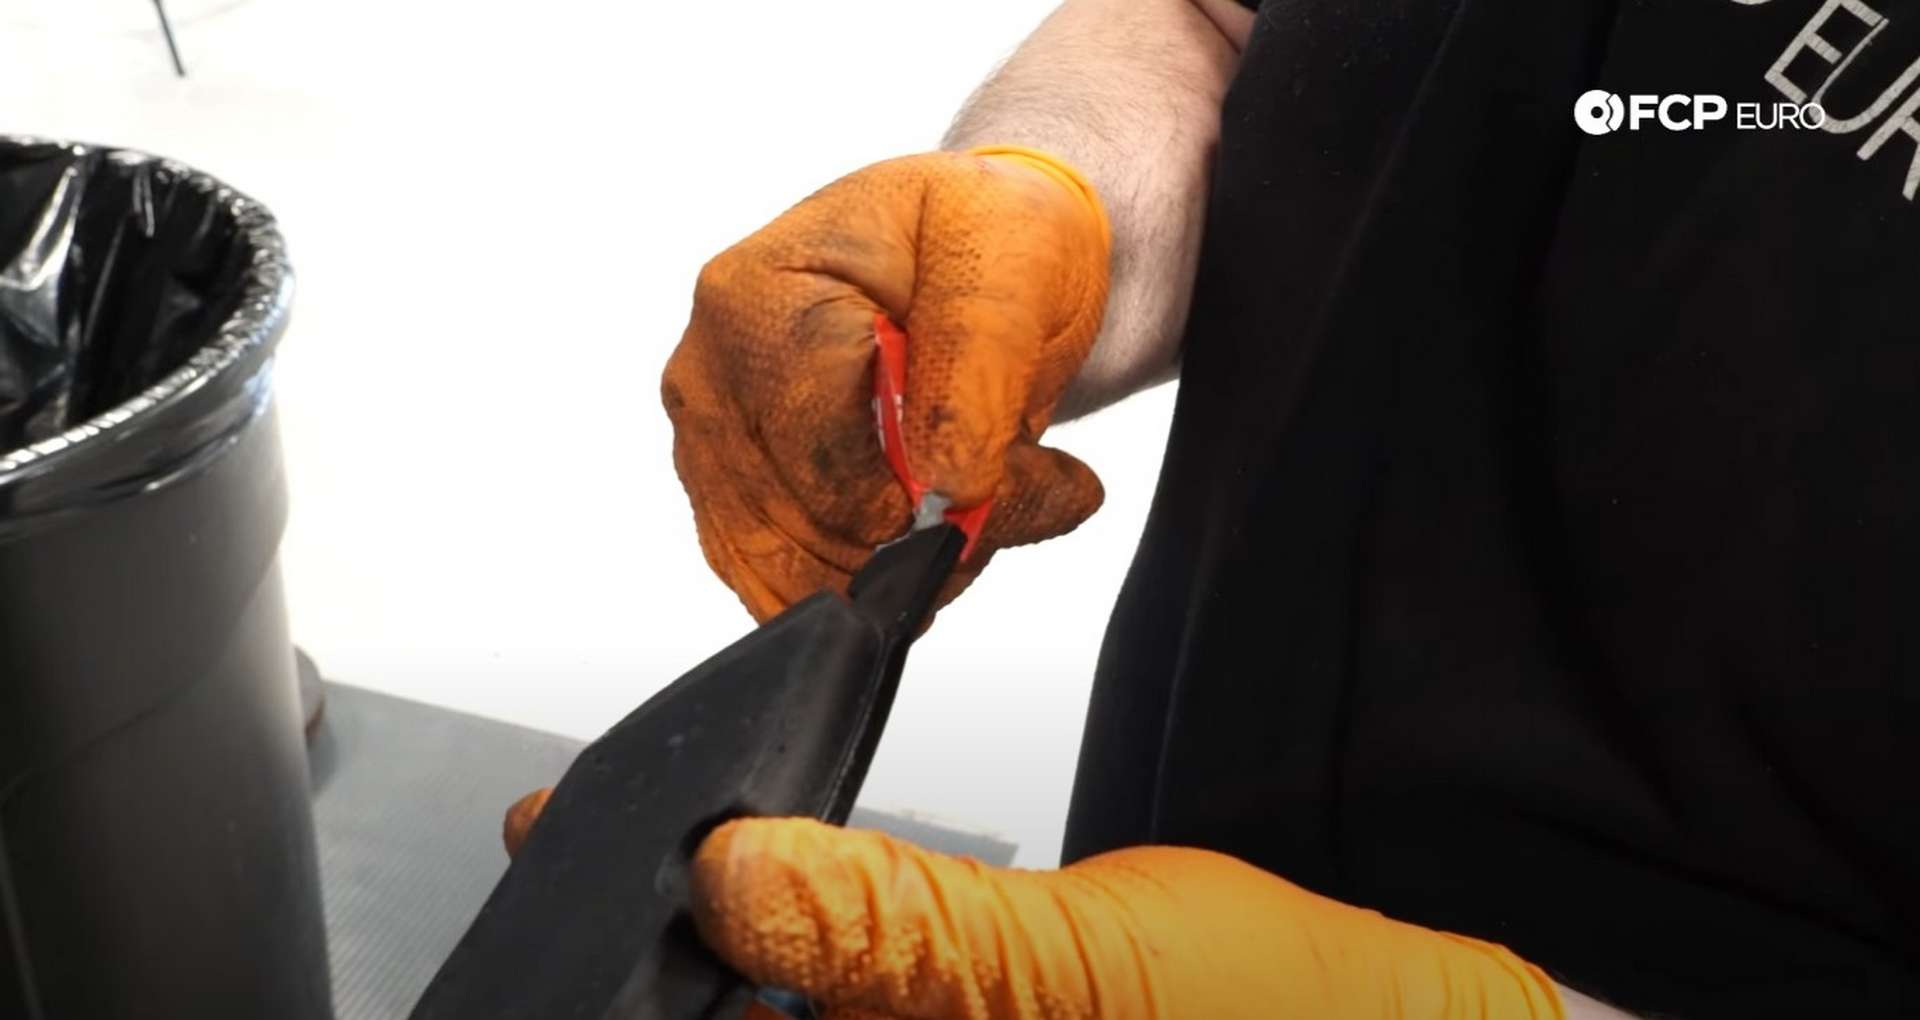
The rear spring clip has significantly less tension on it than the front, allowing you to remove it with your hands. Grab the bottom of it and pull it up and off of the caliper.
Next, remove the dust caps with a flathead screwdriver and use a 7mm socket to remove the guide pins. Then, pull the pad wear sensor wire from the inner pad and pull off the caliper. Like the fronts, hang the caliper to keep the strain off of the rubber brake line.
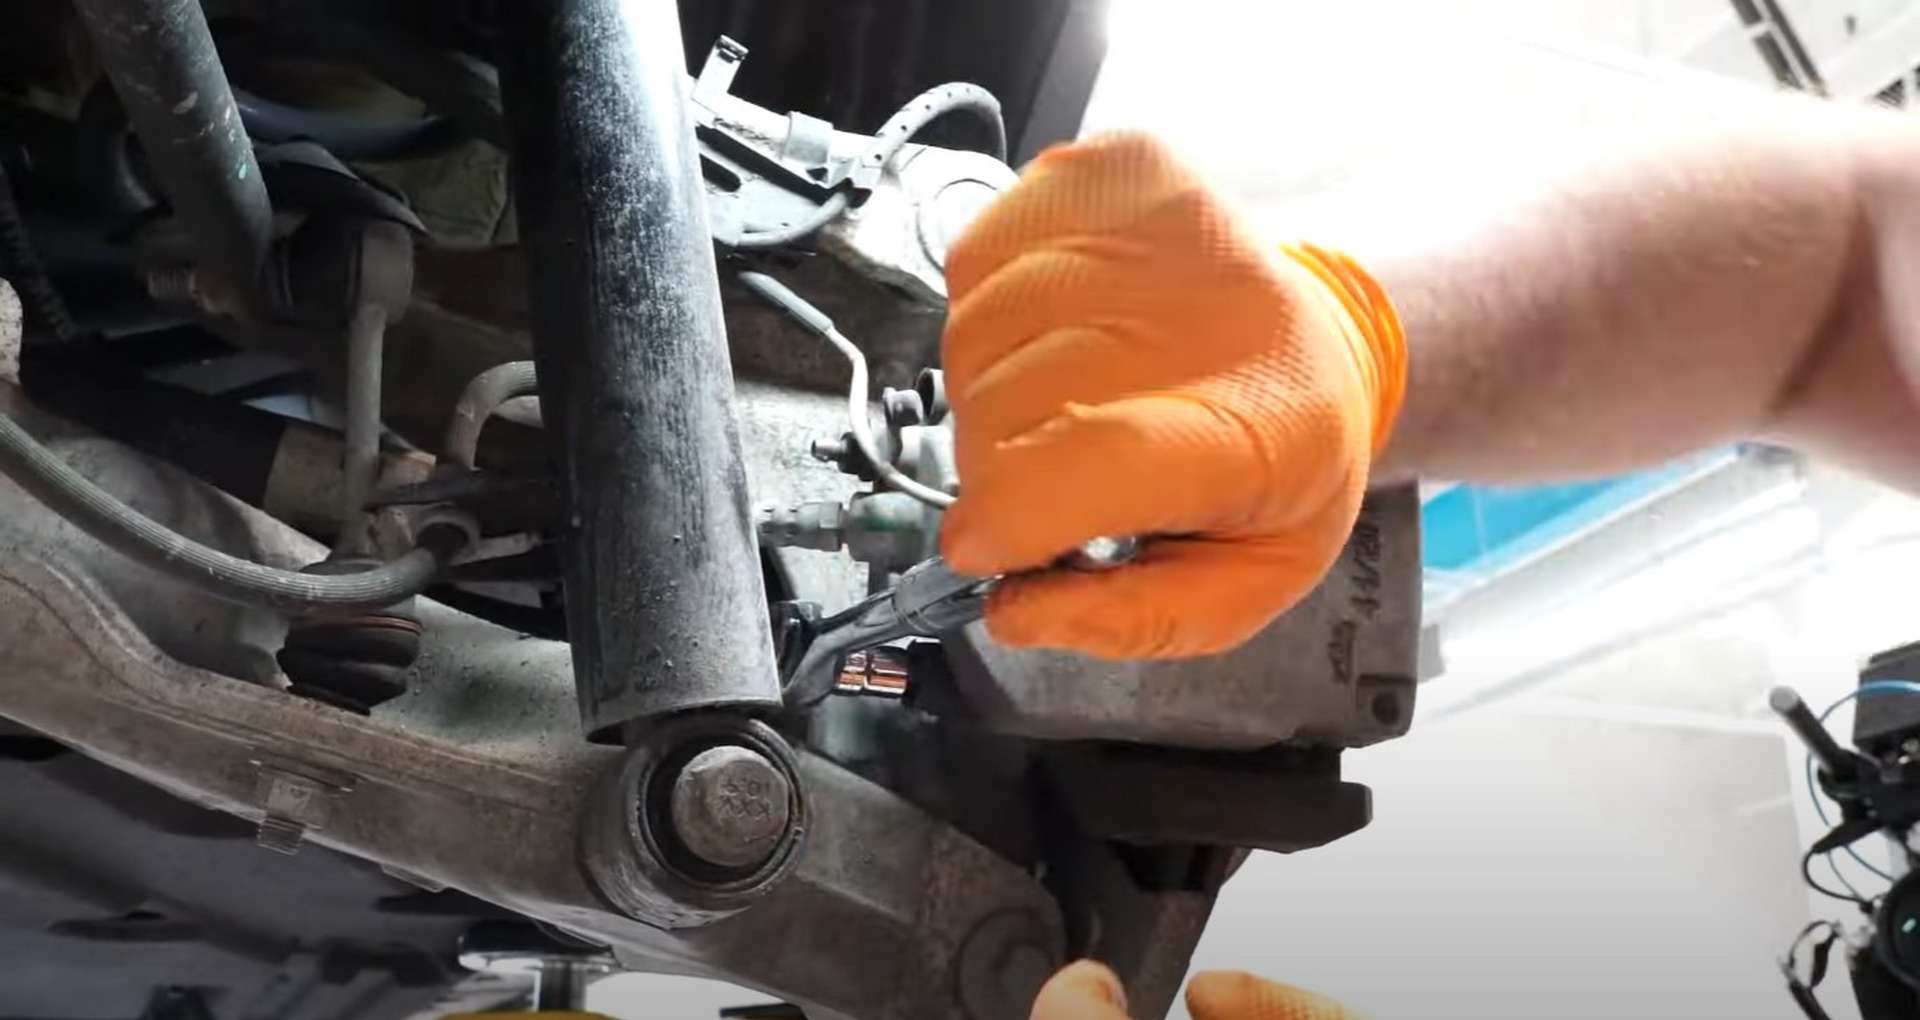
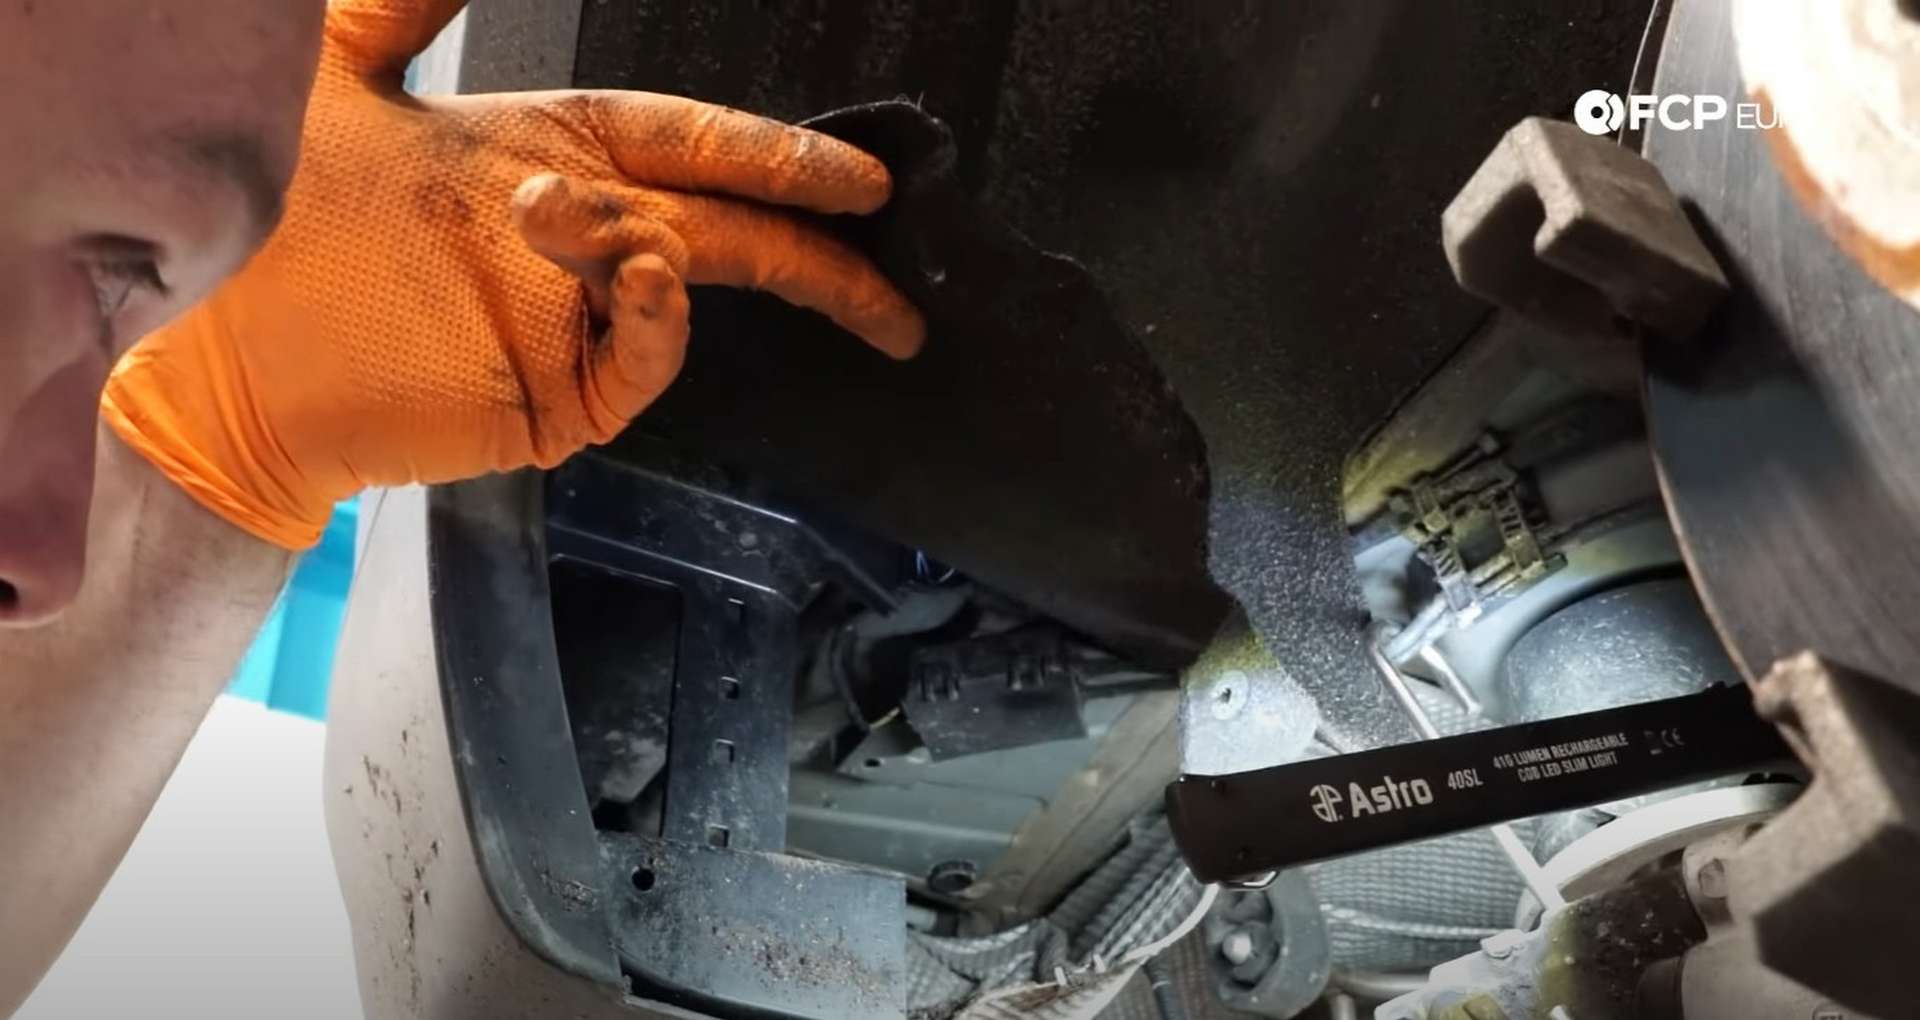
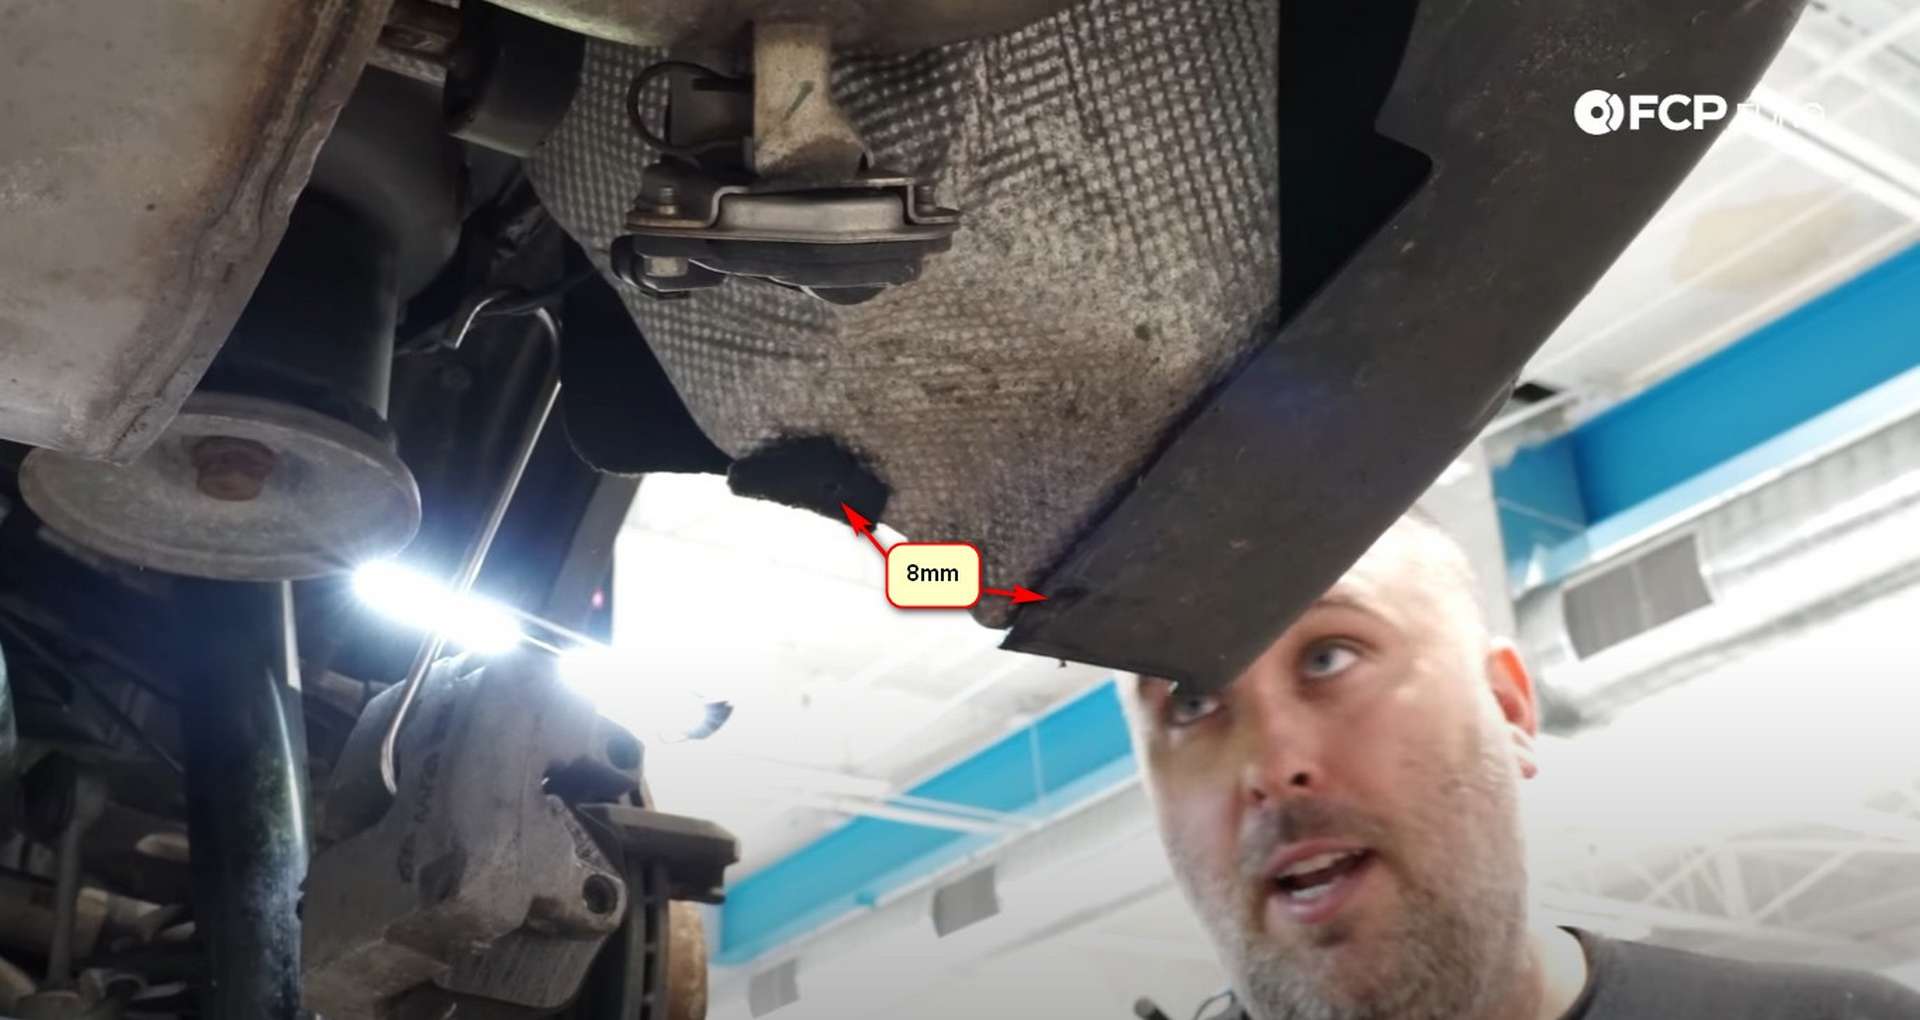
The connection box for the rear pad wear sensor sits inside the bumper. Use an 8mm socket to remove a couple of fasteners that secure the exhaust heat shield to the bumper and the trim tool to remove a couple of plastic rivets. Then pull the fender liner back and expose the connection box.
Disconnect the old sensor and replace it with the new one.
Step 5: Replace the rear rotor
Use an E18 socket to remove the two caliper bracket bolts.
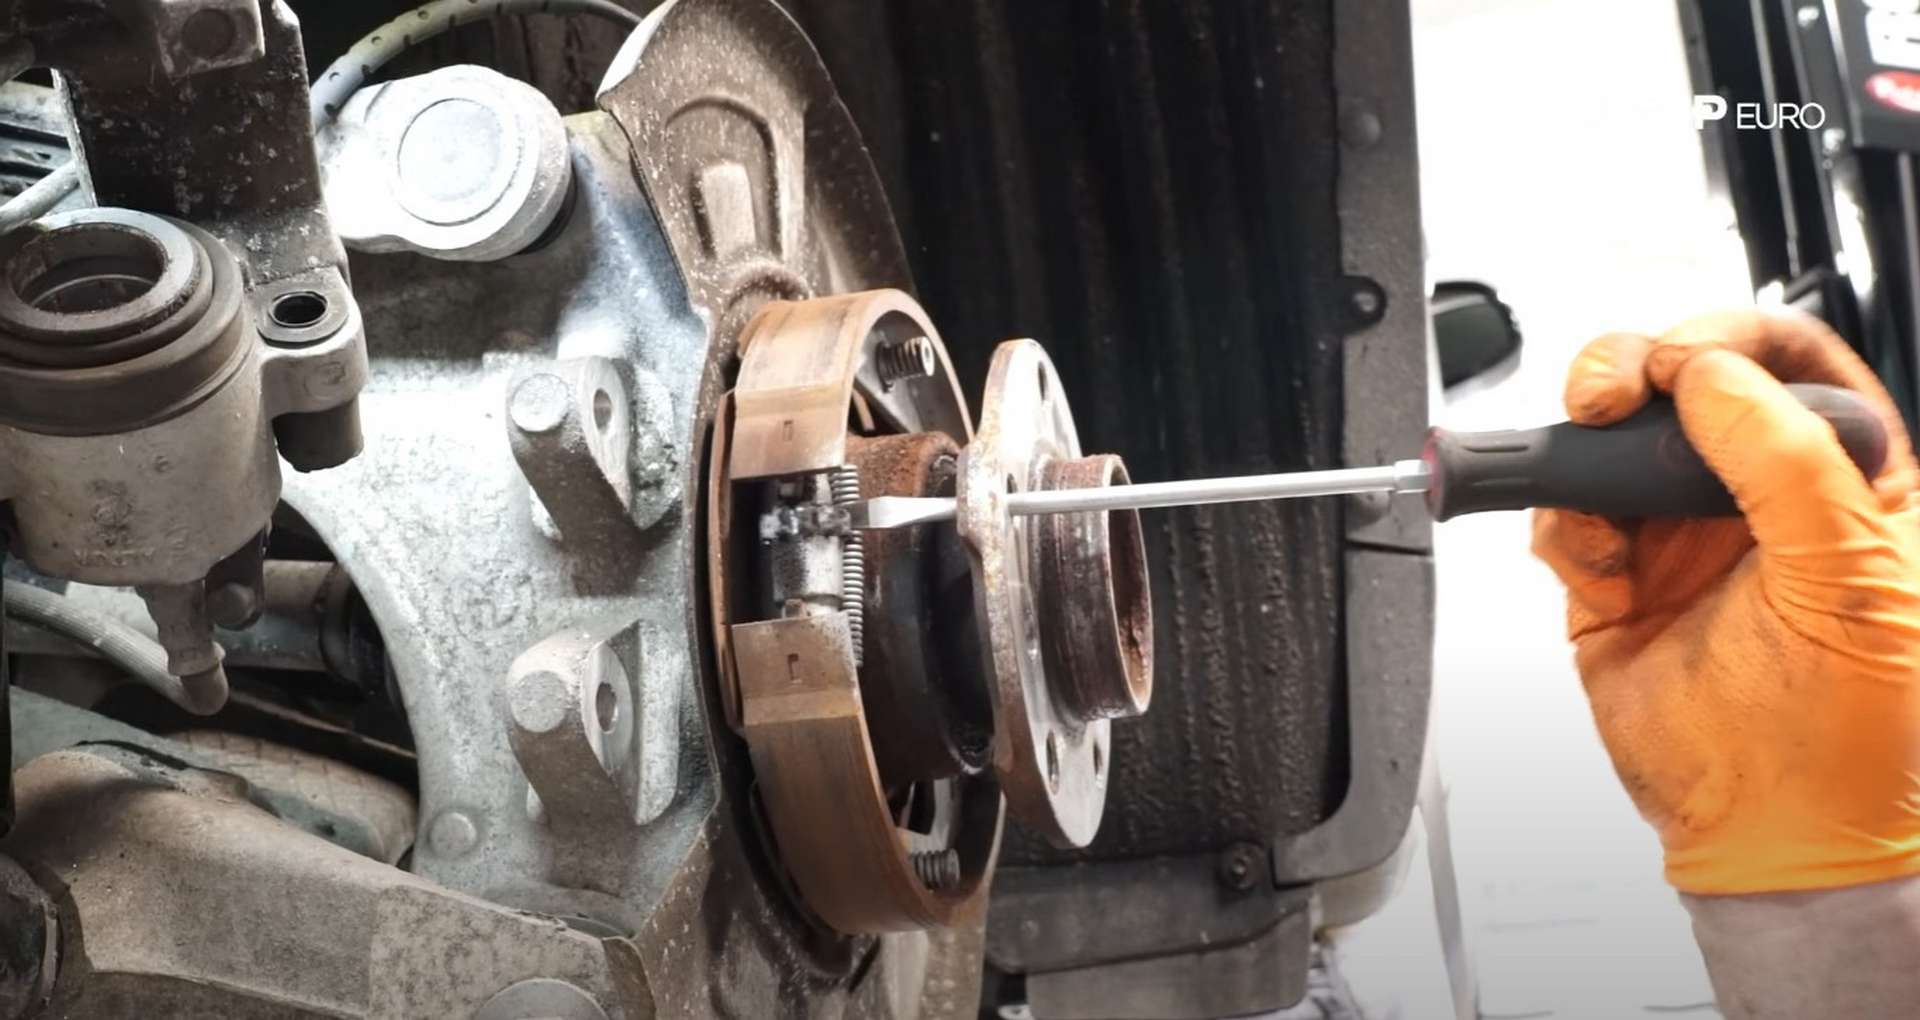
Then, use a 6mm hex bit socket to remove the seat screw from the rotor. Tap the rotor with a hammer to free it from any corrosion and remove it. If the rotor doesn't come off, use a flathead screwdriver to adjust the parking brake shoes through the lug bolt holes.
Next, clean the hub and caliper bracket using the same process for the fronts. After that, slide on the new rotor and secure it with its set screw.
Then, reinstall the bracket to the knuckle. Thread in both mounting bolts by hand to prevent cross-threading before using an E18 socket to torque the bolts to 110Nm.
Step 6: Install the new pads and refit the caliper
Take the new pad wear sensor and plug it into the top of the pad. Then pull the sensor wire through the top of the caliper and install the inner pad into the caliper's piston.
Use the rest of the ceramic paste and apply it to the outer pad's ears before putting it in place on the caliper bracket. Then, fit the caliper onto the bracket, over the rotor and pad. Thread in the guide pins with a 7mm hex bit socket and torque them to 30Nm. Refit the dust caps, too.
Follow the old pad wear sensor wire to the connection box to understand how you need to route the wire. Then, unplug the old sensor wire and connect the new one. After the, refit the heat shield and fender liner with their respective plastic rivets and fasteners.
Finally, reinstall the anti-rattle clip to the caliper in the same orientation as the fronts. If you aren't going to bleed the brakes, refit the wheel and set the vehicle onto the ground.
Step 7: Bleed the brakes
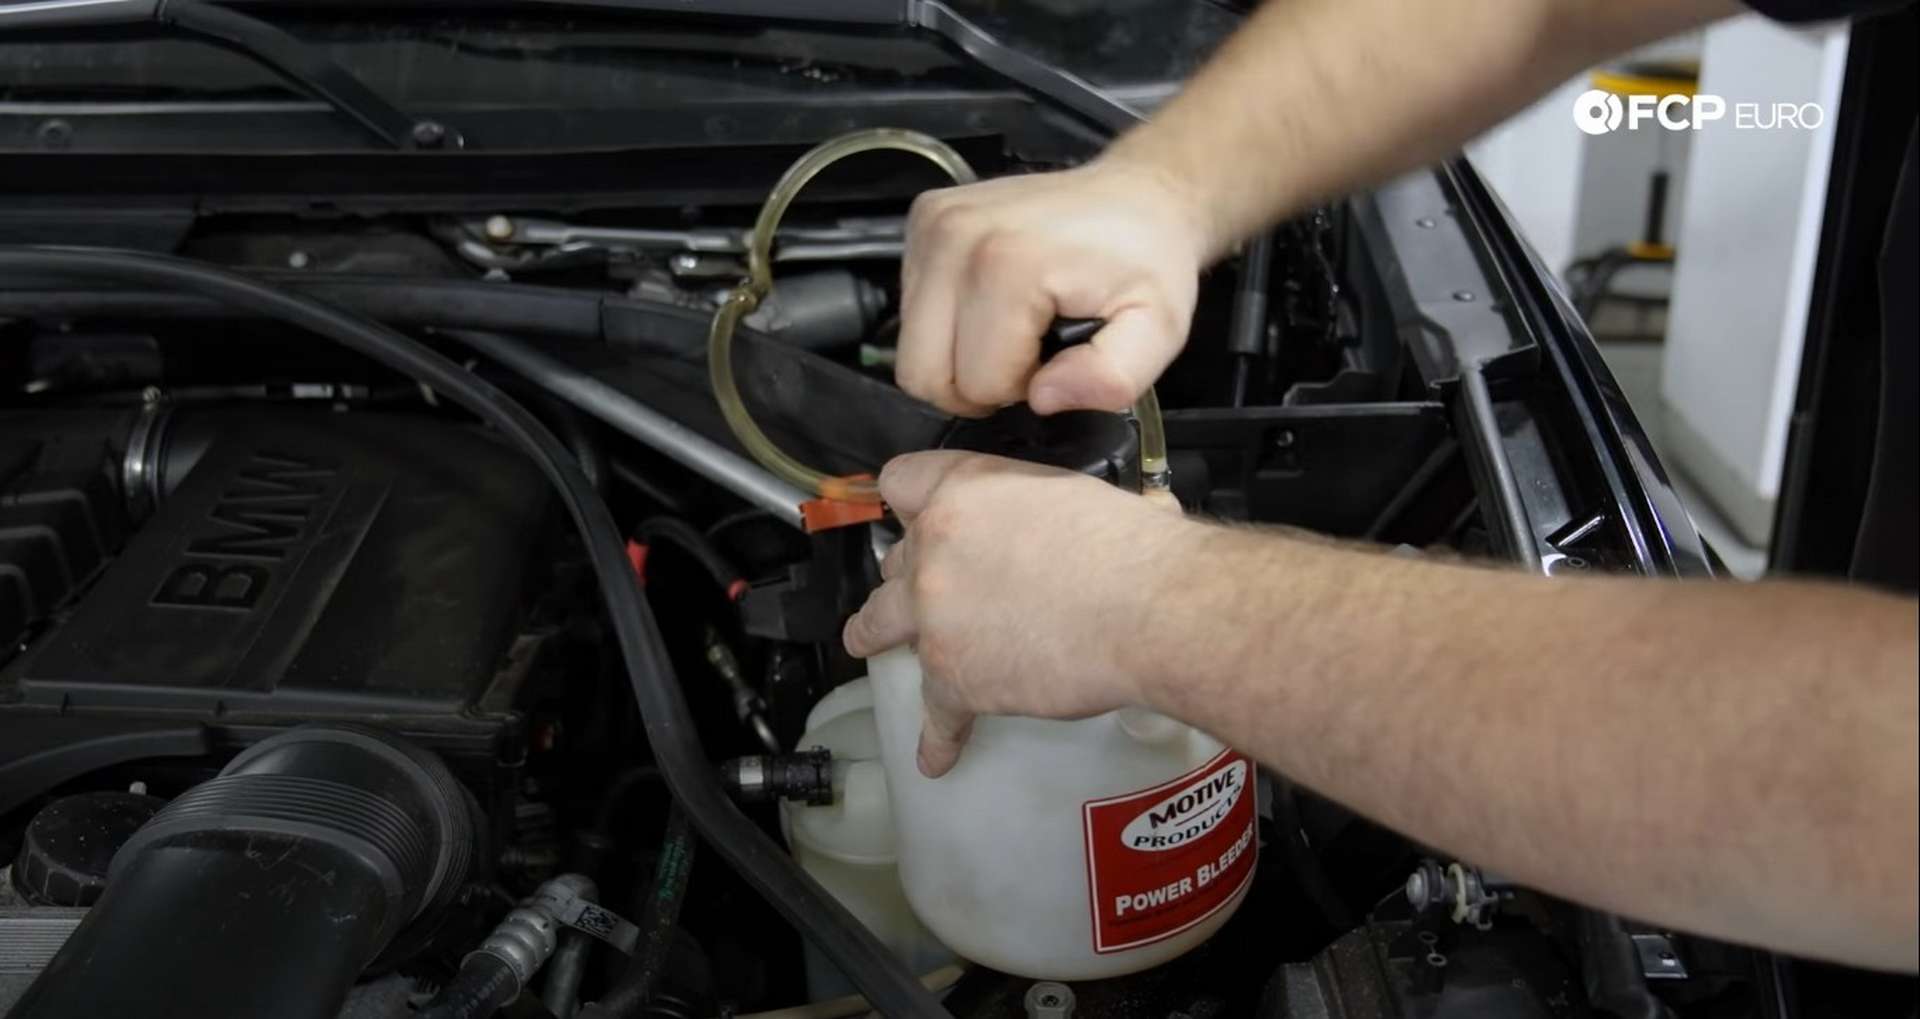
We highly recommend picking up a power bleeder if you plan on bleeding the brakes yourself. This tool makes bleeding the brakes a one-person job, simplifying several steps.
Start by filling the power bleeder with brake fluid, then remove the cap from the brake fluid reservoir and connect the power bleeder to it. After that, pump up the bleeder to pressurize it.
Starting at the farthest caliper from the fluid reservoir, attach the bleed bottle to the nipple, then crack open the bleed nipple on the caliper with an 11mm wrench.
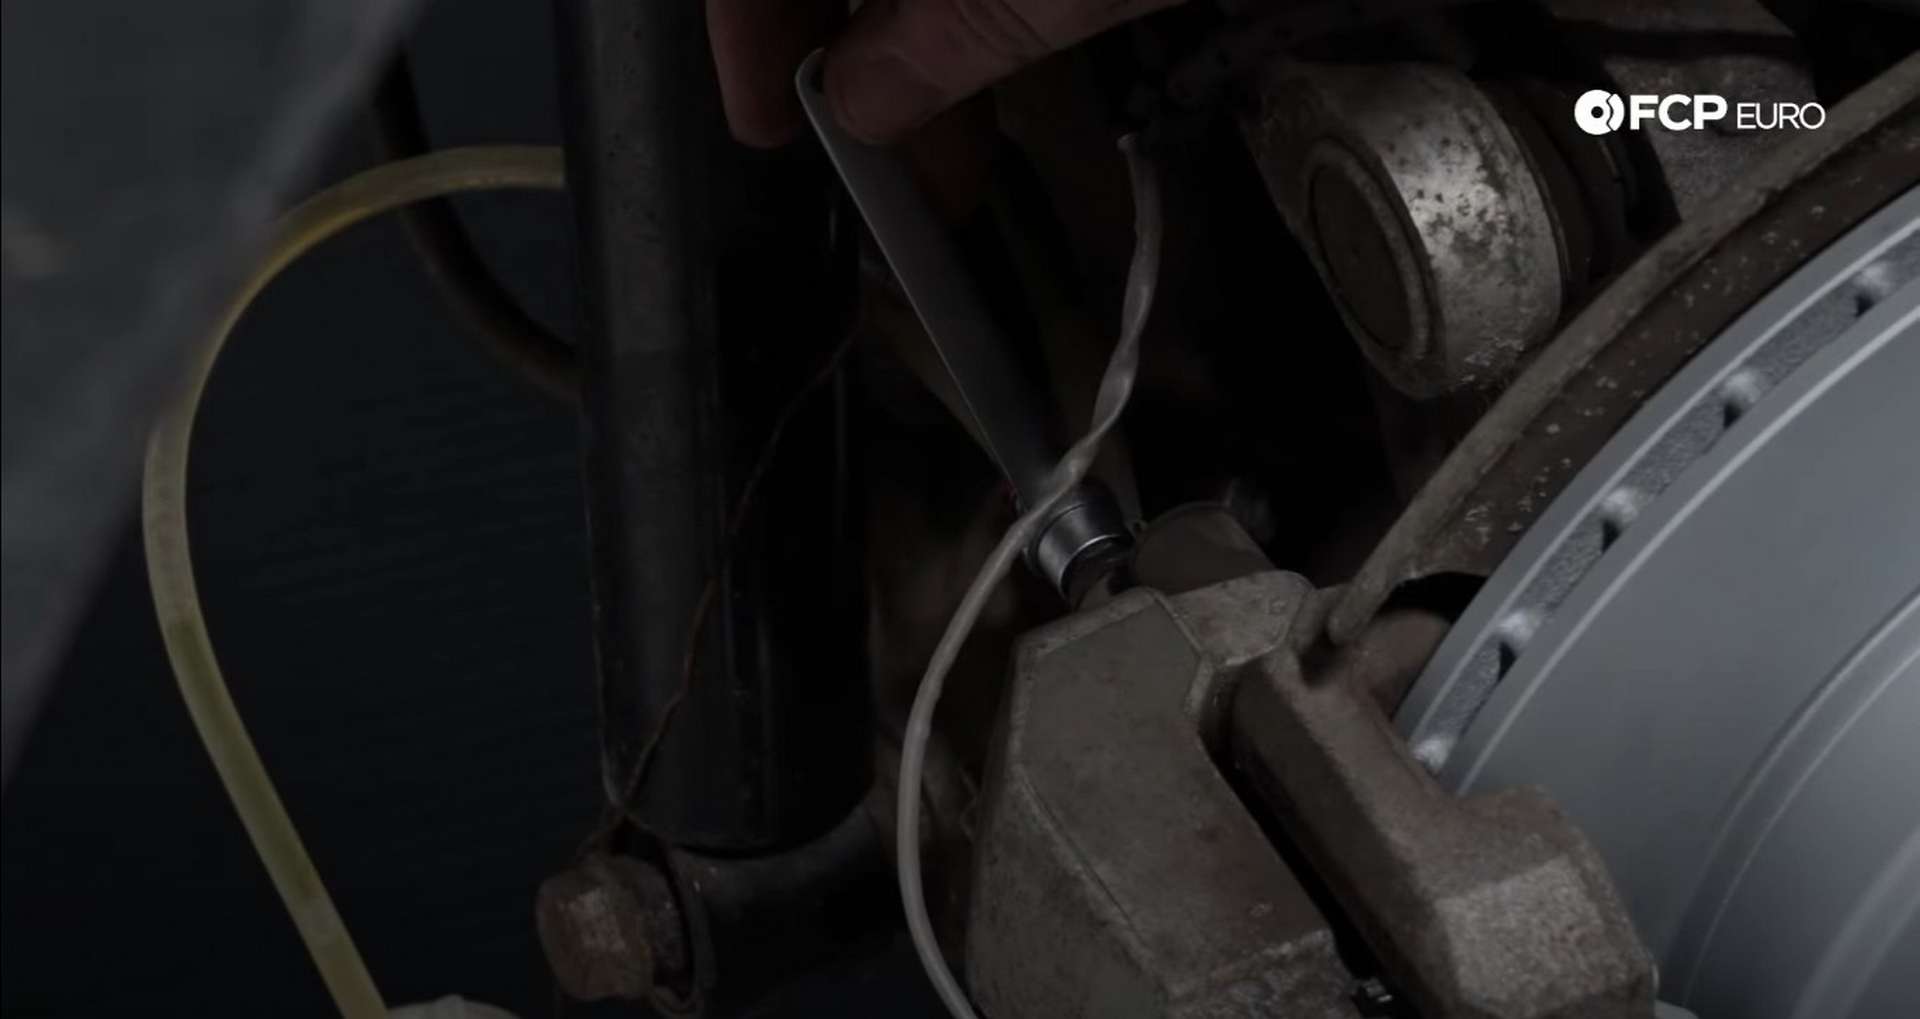
Let the old fluid come out until you can start to see the cleaner, new fluid. Then, tighten the bleed screw and repeat this process at the driver's rear, then passenger front, then driver's front.
BMW X5 & X6 (F15 & F16) torque specs:
- BMW Caliper Bracket Bolts = 110Nm or 81 ft-lbs of torque
- BMW Caliper Guide Pins = 30Nm or 22 ft-lbs of torque
So, that's how you completely service the brakes on your BMW X5 and X6. At this point, all there is left to do is reset the service intervals on your instrument cluster. If you don't know how to do that, click here. If you're interested in more DIYs for your BMW, you can visit bmw.fcpeuro.com and subscribe to our YouTube channel.