- 06/21/2019
- 9 Min Read
- By: Jose Martinez
How to Replace Brake Pads on an Air-Cooled Porsche 964 911

Are you getting ready for your next track day, spirited mountain drive, or are your brake pads just worn out? By replacing your brake pads you can regain the optimal braking performance that your car once had.
One of the most clever design features of your air-cooled Porsche 964 911 is that the brake pad and caliper design allow you to make quick pad changes without having to remove the calipers. This is perfect for swapping out your street pads to race pads easily when you arrive at the track. This short and simple guide below walks you through how.
Model Years Applicable:
All Porsche 911 cars up to 1989, except 911 Turbo (930) and turbo-look (M491 option) cars as they have a unique caliper design with a different installation procedure.
Tools Needed To Complete This Repair:
- Brake cleaner
- Anti-seize paste
- Gloves
- Safety glasses
- Dust mask
- Small brush
- Pliers
- Phillips screwdriver
- Small hammer
- Plastic trim remover tool
Parts Needed:
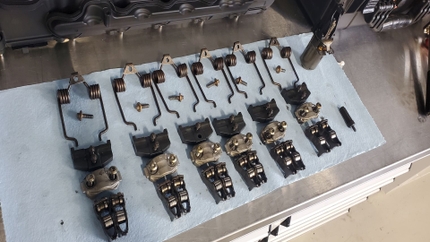
- Brake pads (2 pads per caliper, 4 per axle)
- Retaining hardware kit (usually kitted for 2 calipers)
Caution:
- Wear gloves, safety glasses, and appropriate respiratory protection to prevent contact and inhalation with brake dust.
- Always replace both pads on both of the front wheels and/or rear wheels. Never replace just one side (left or right) as dangerous uneven braking can occur.
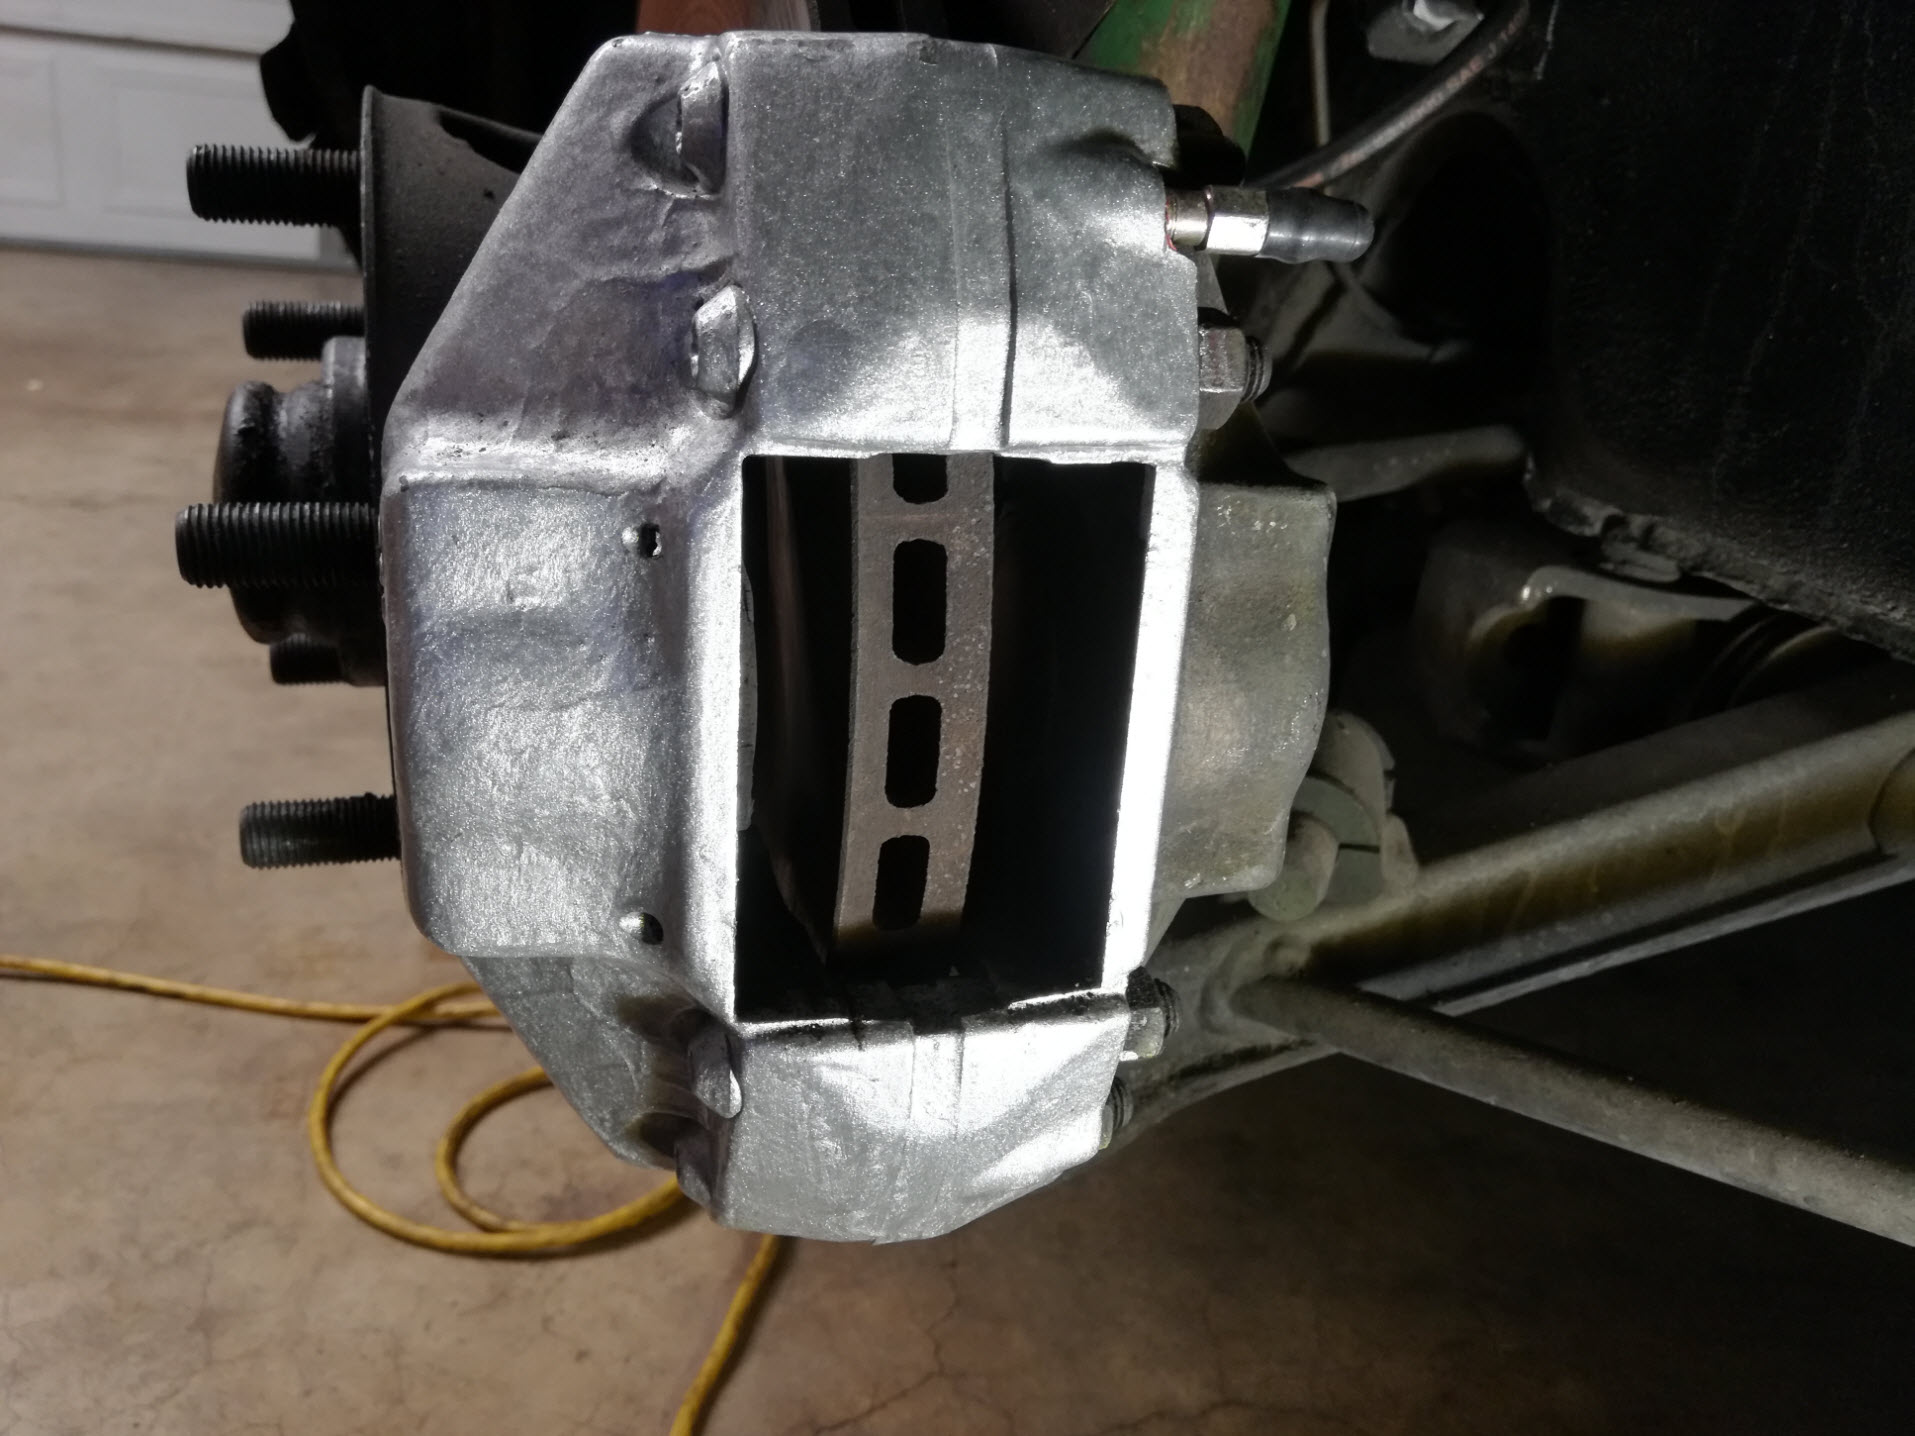
Step 1: Lift Car and Remove Wheels
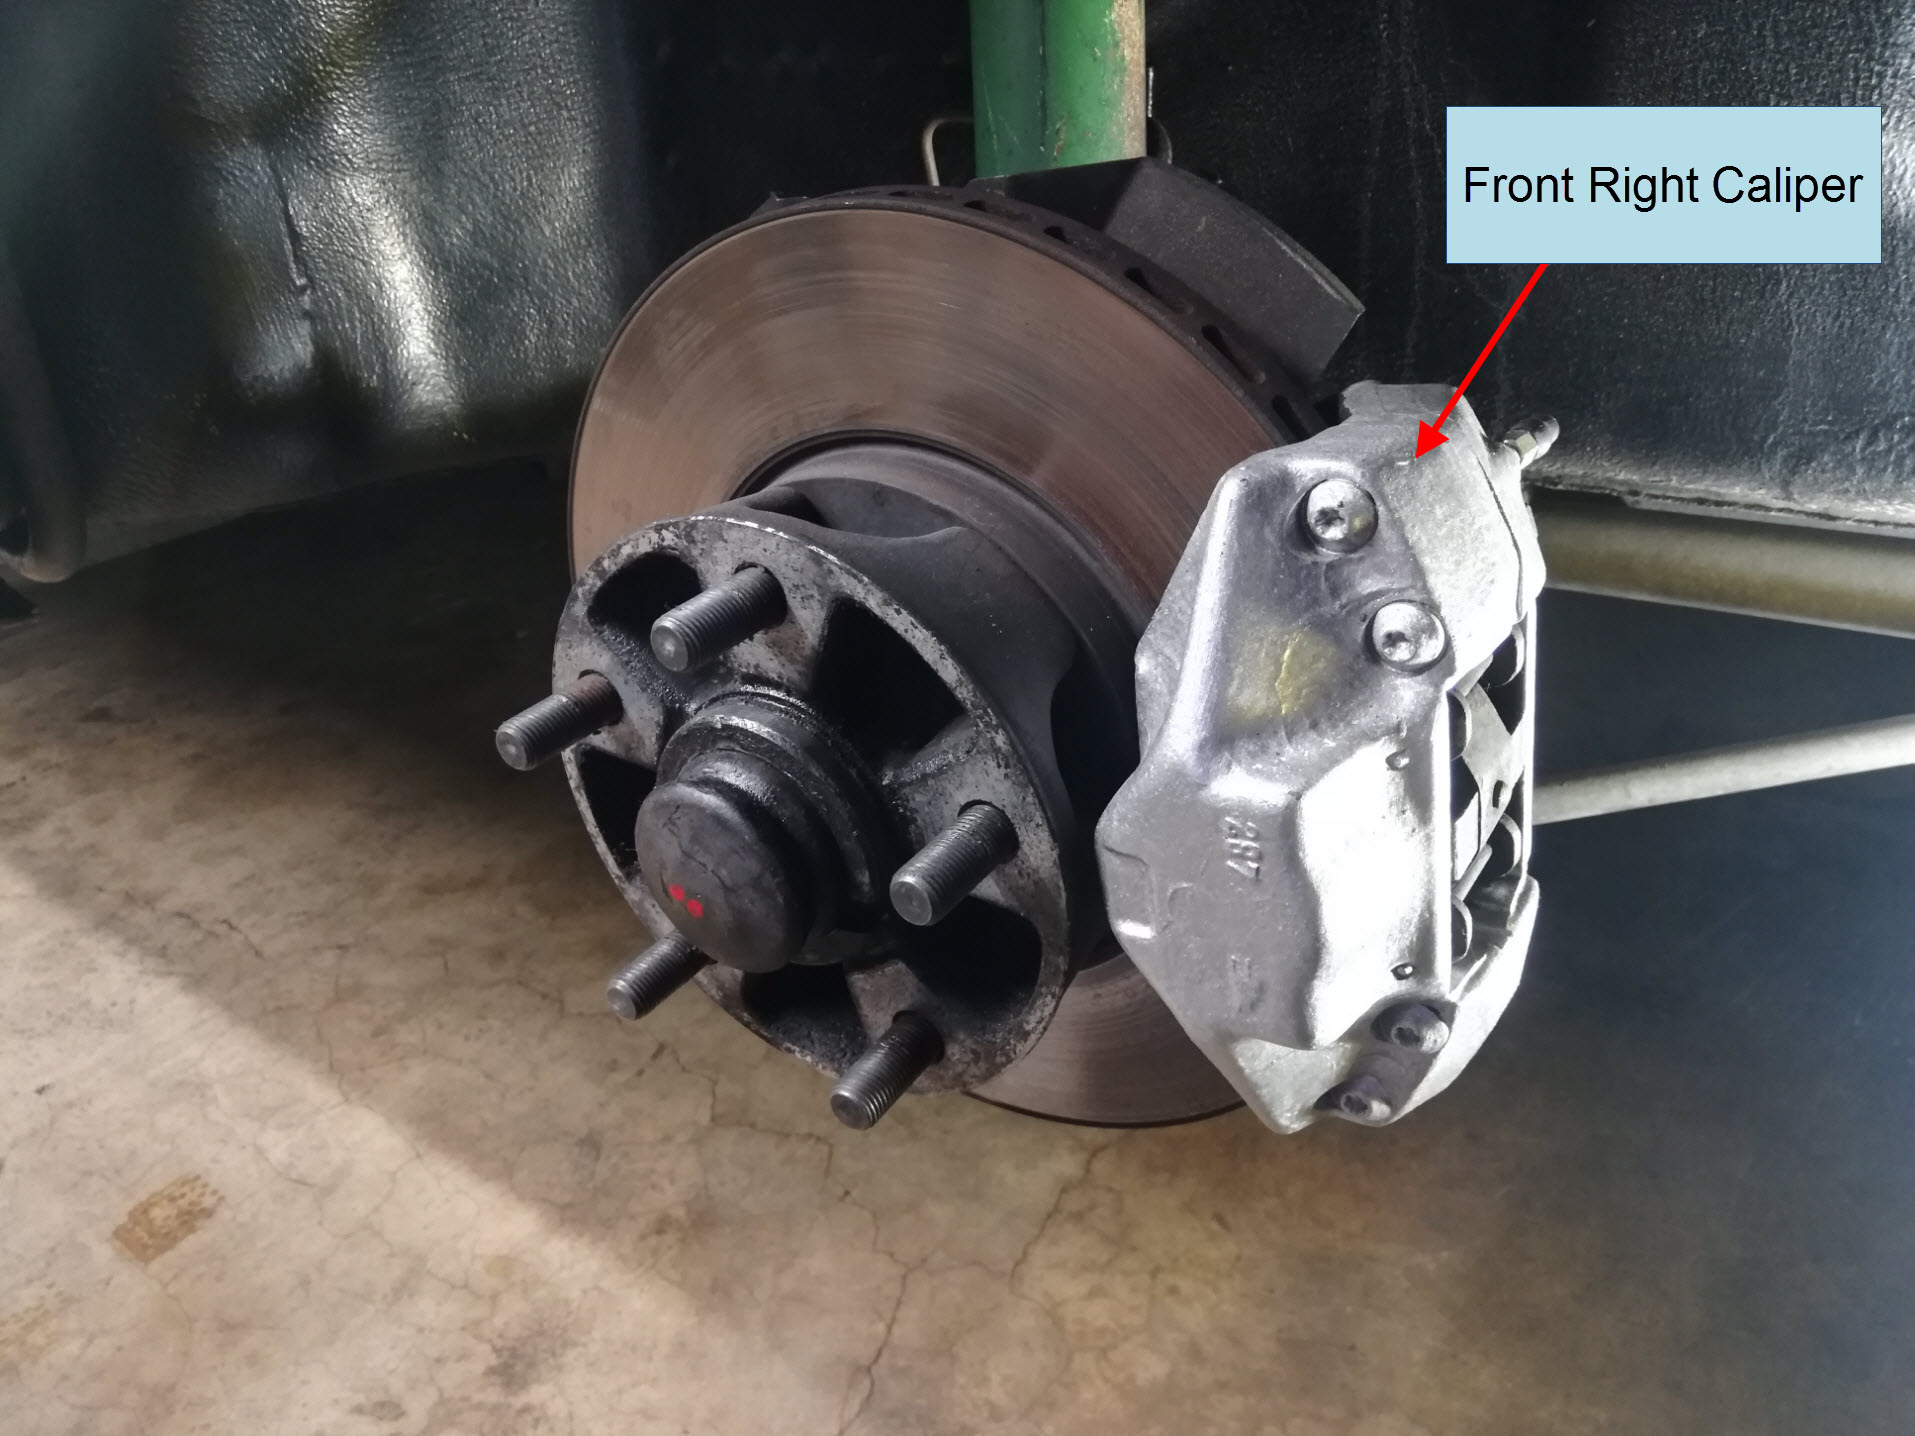
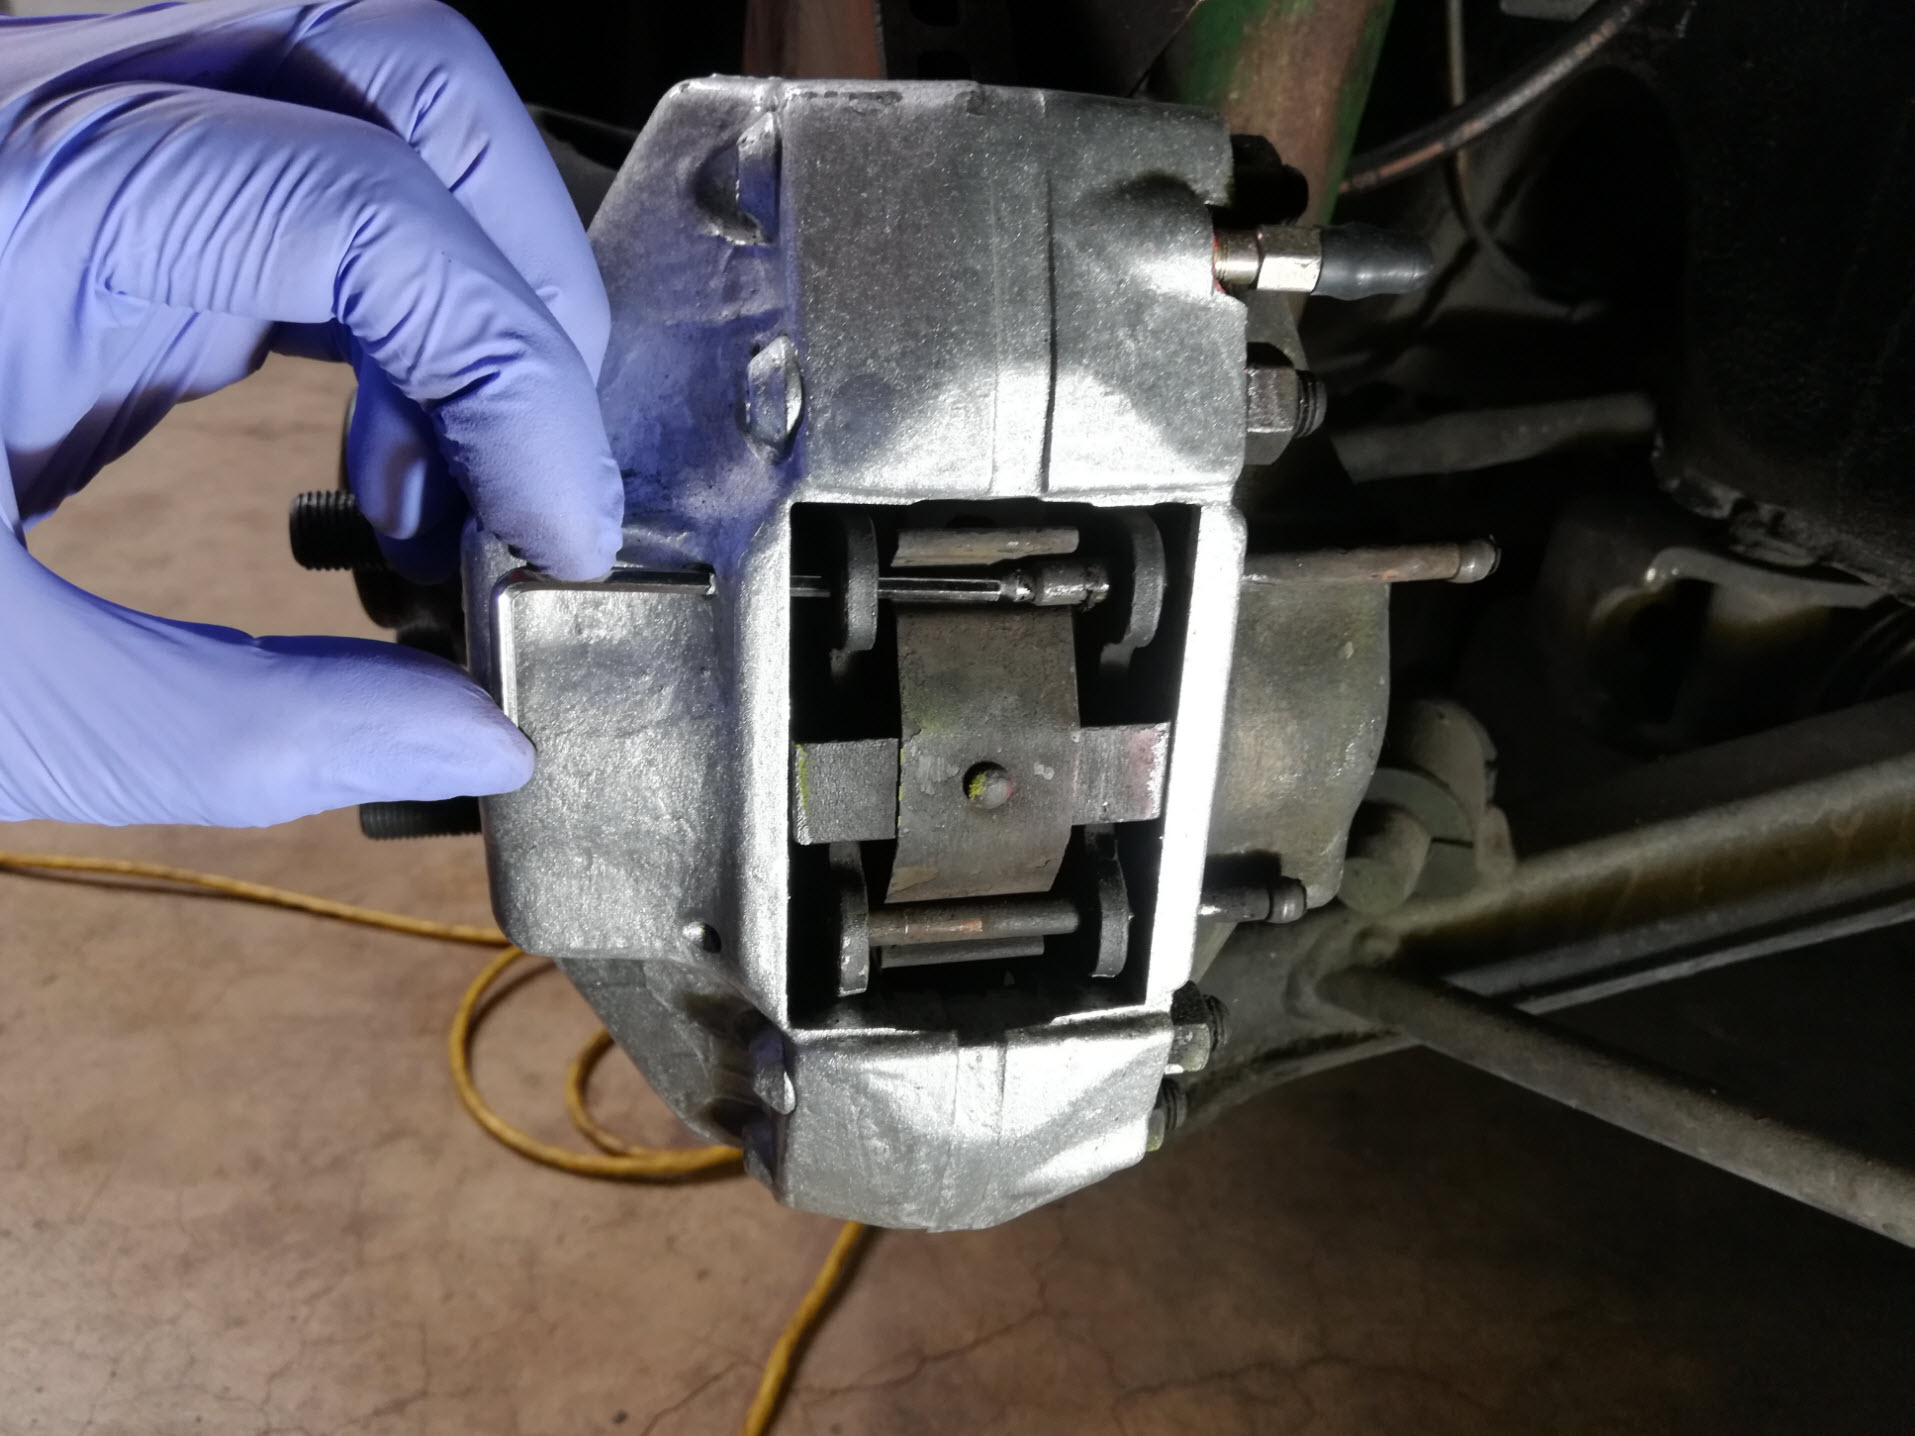
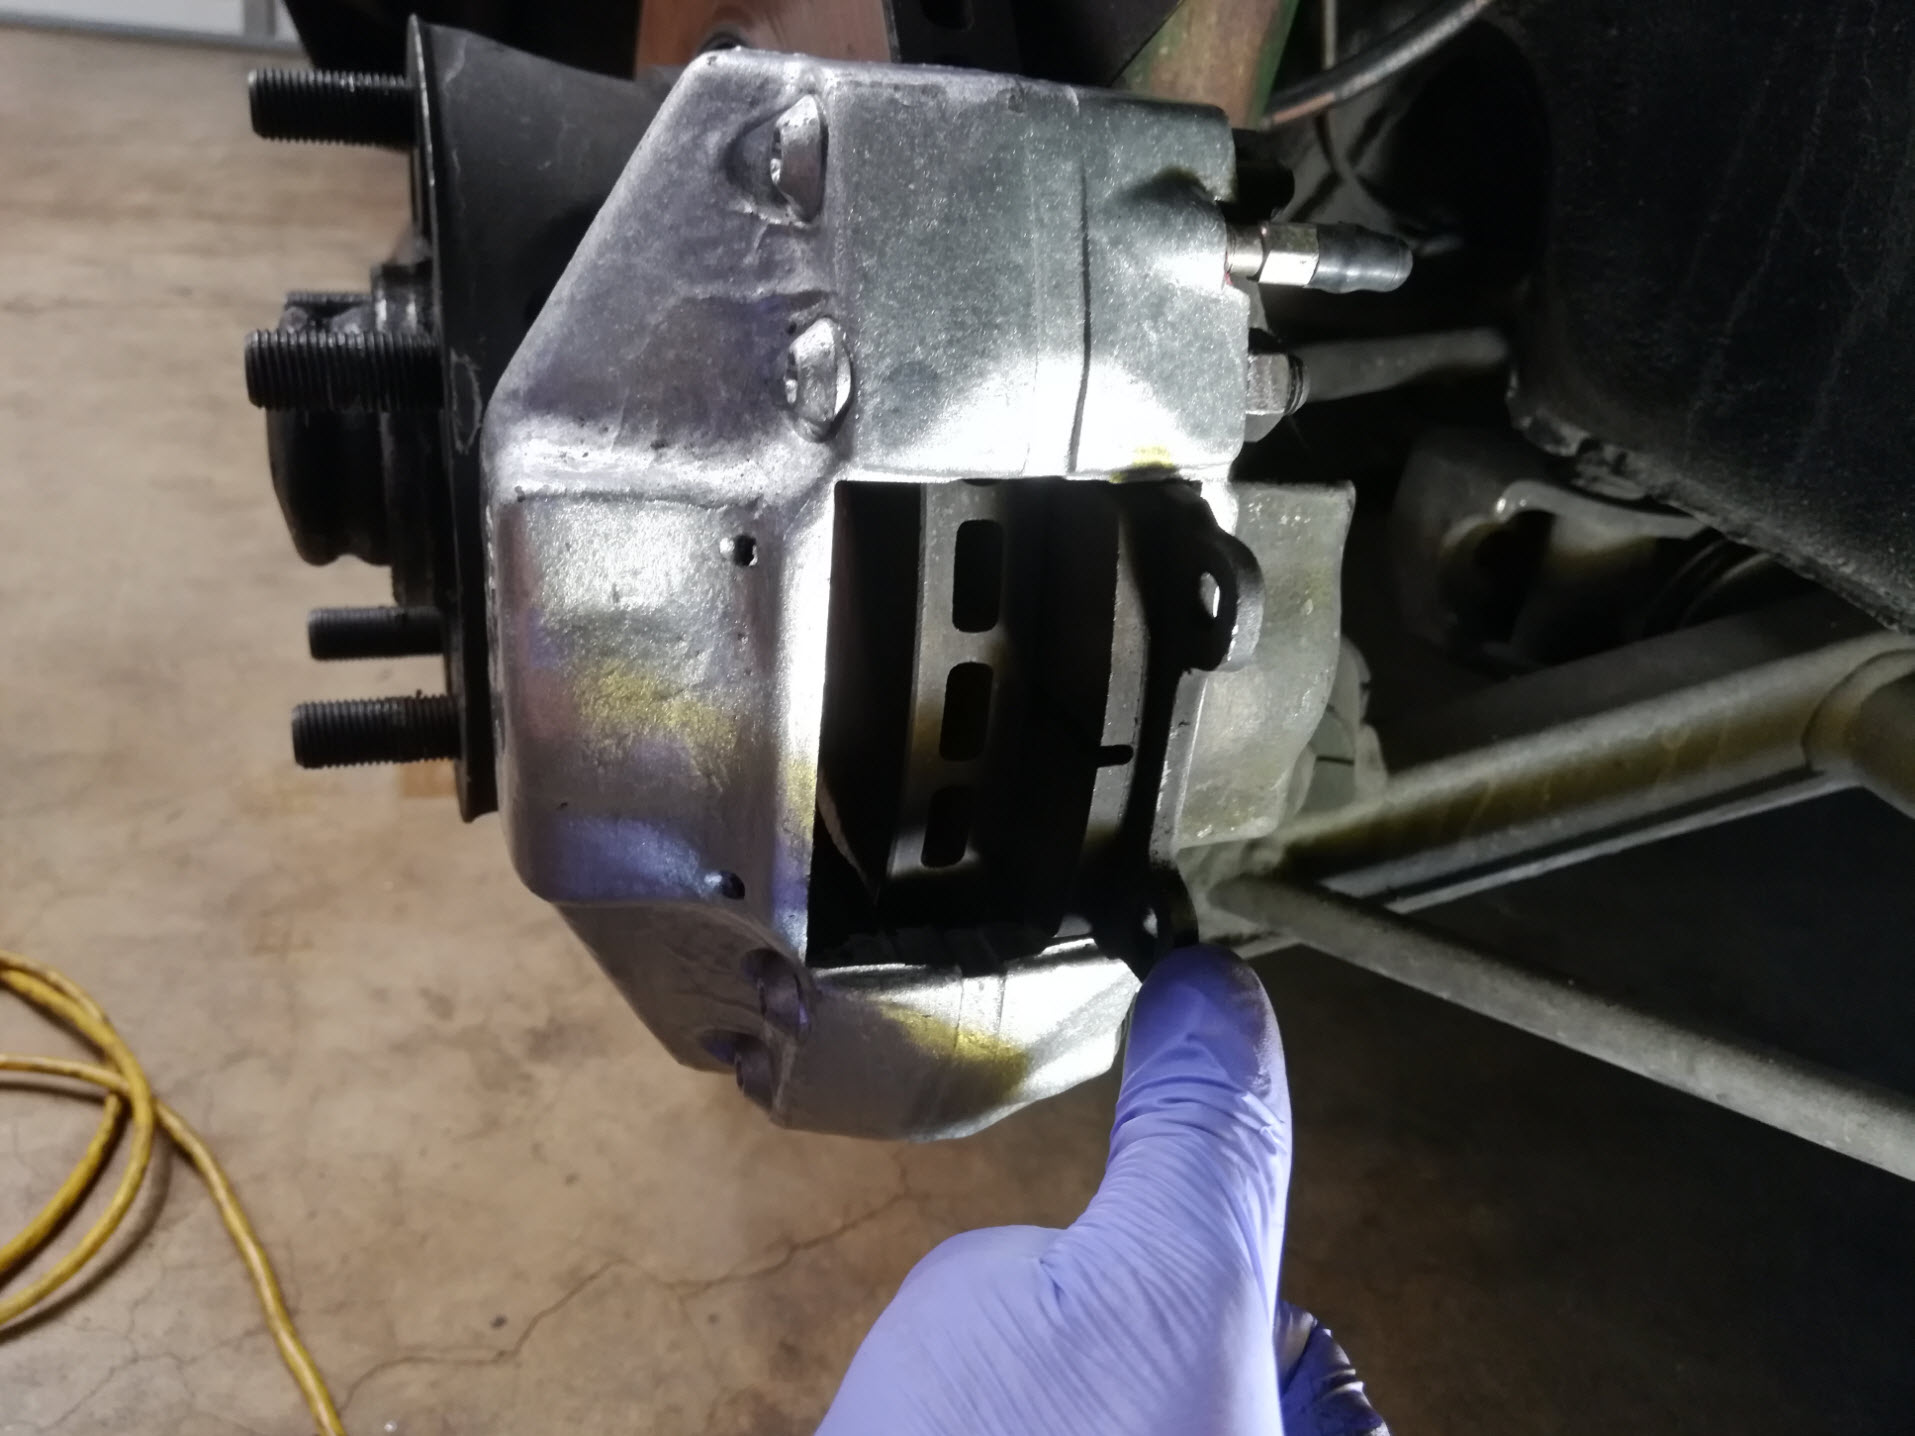
Raise whichever end of your Porsche 964 911 that you'll be changing the pads on, or all four corners of the car, using this procedure. Remove the wheels and locate the pads on the brake caliper. They are accessible from outside the caliper and the caliper does not need to be removed. If the brake assembly is excessively dusty, spray some brake cleaner on it to remove as much dust as possible. In this example we will be replacing the pads on the front right caliper of a 1983 911SC.
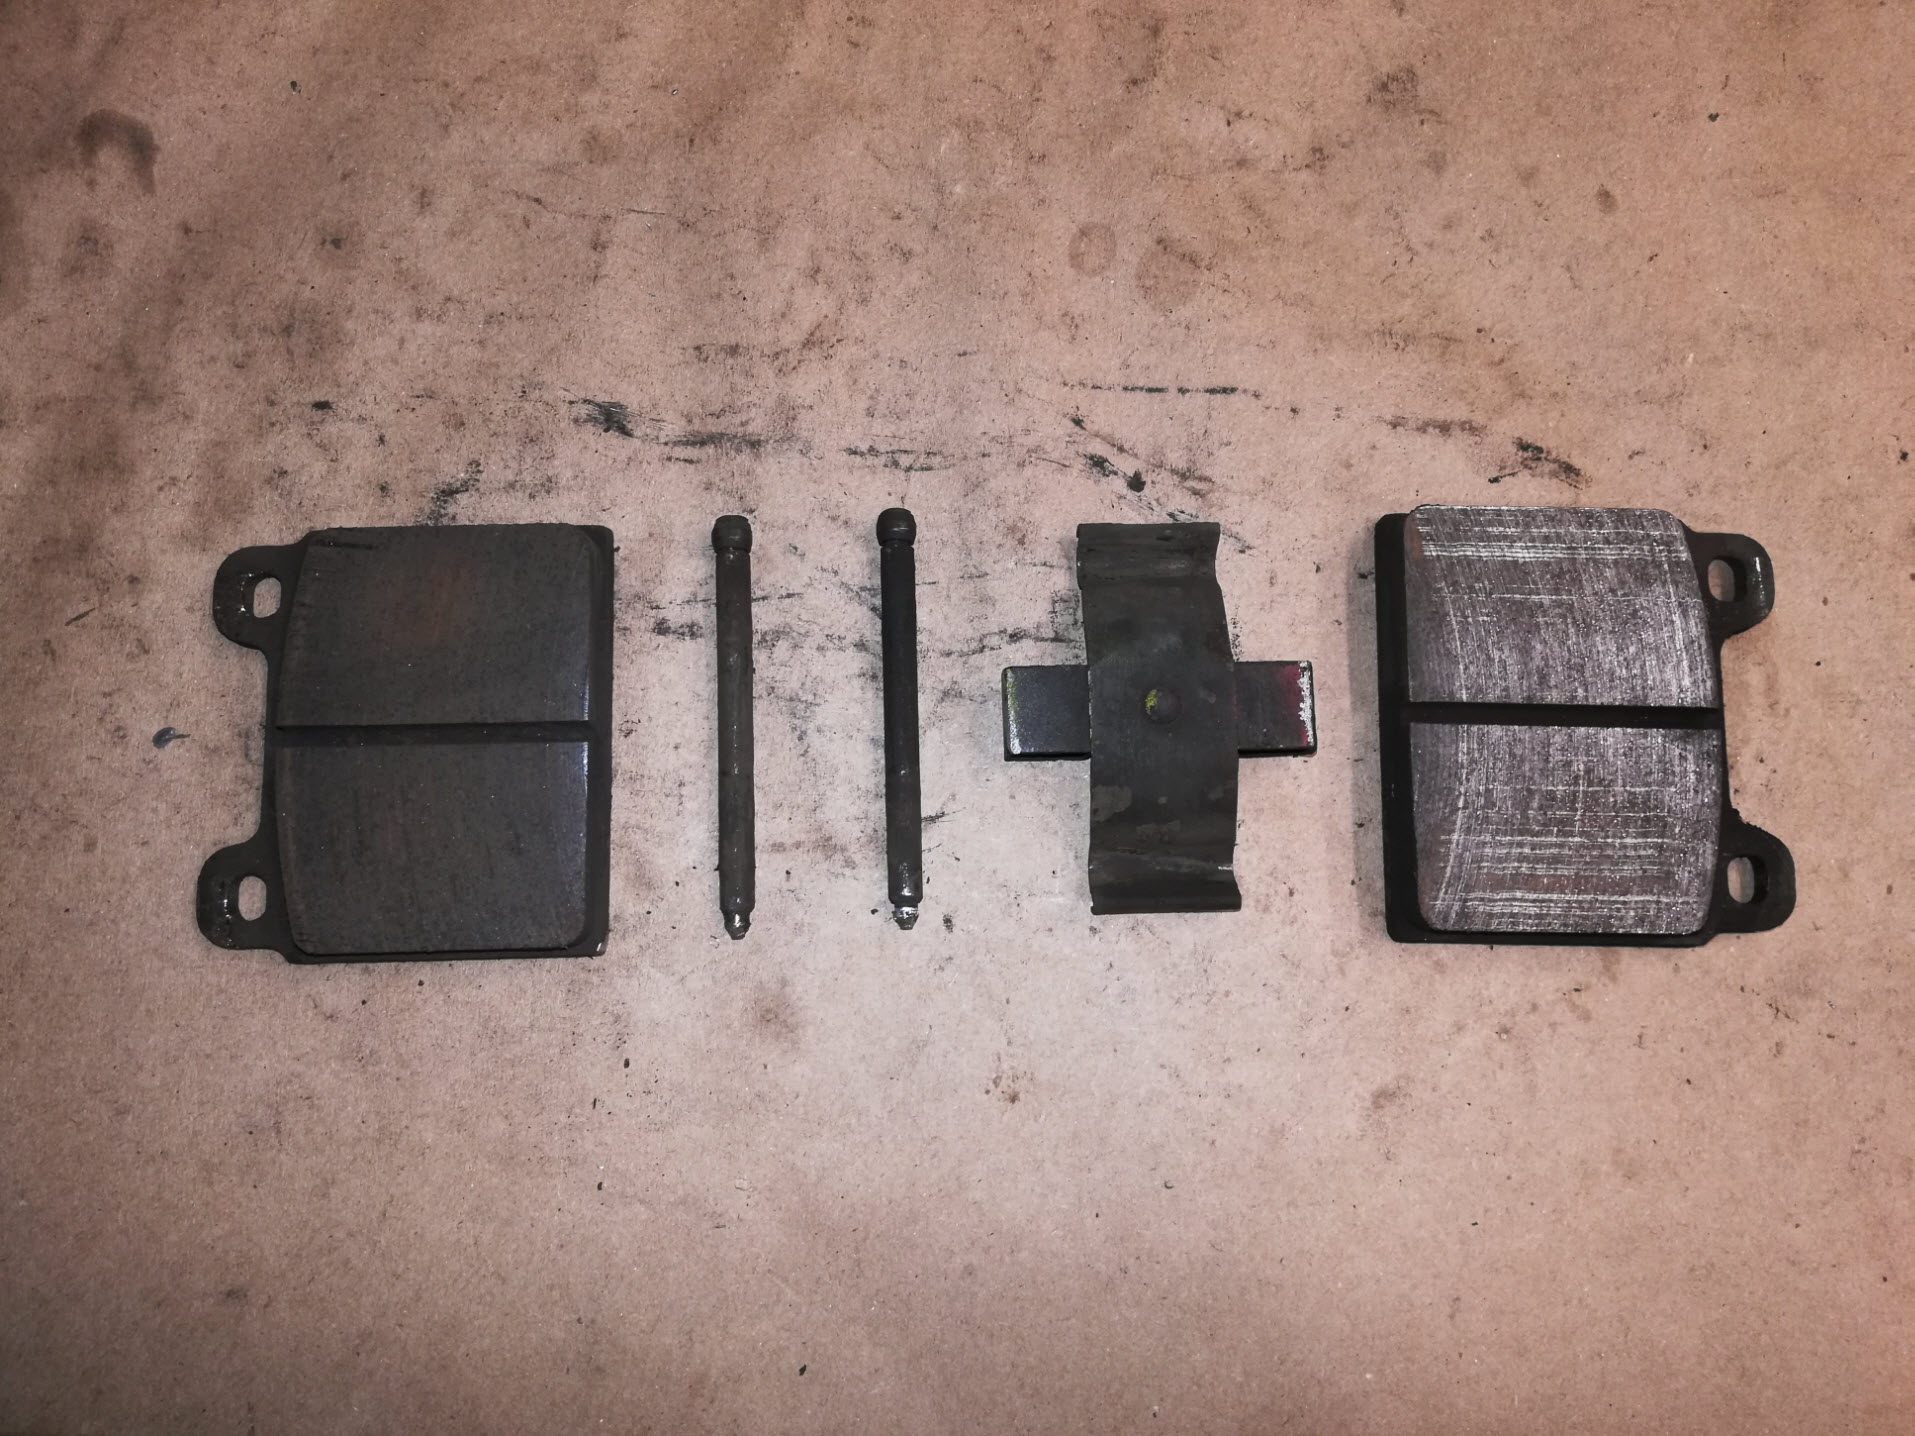
Step 2: Remove Retaining Hardware and Pads
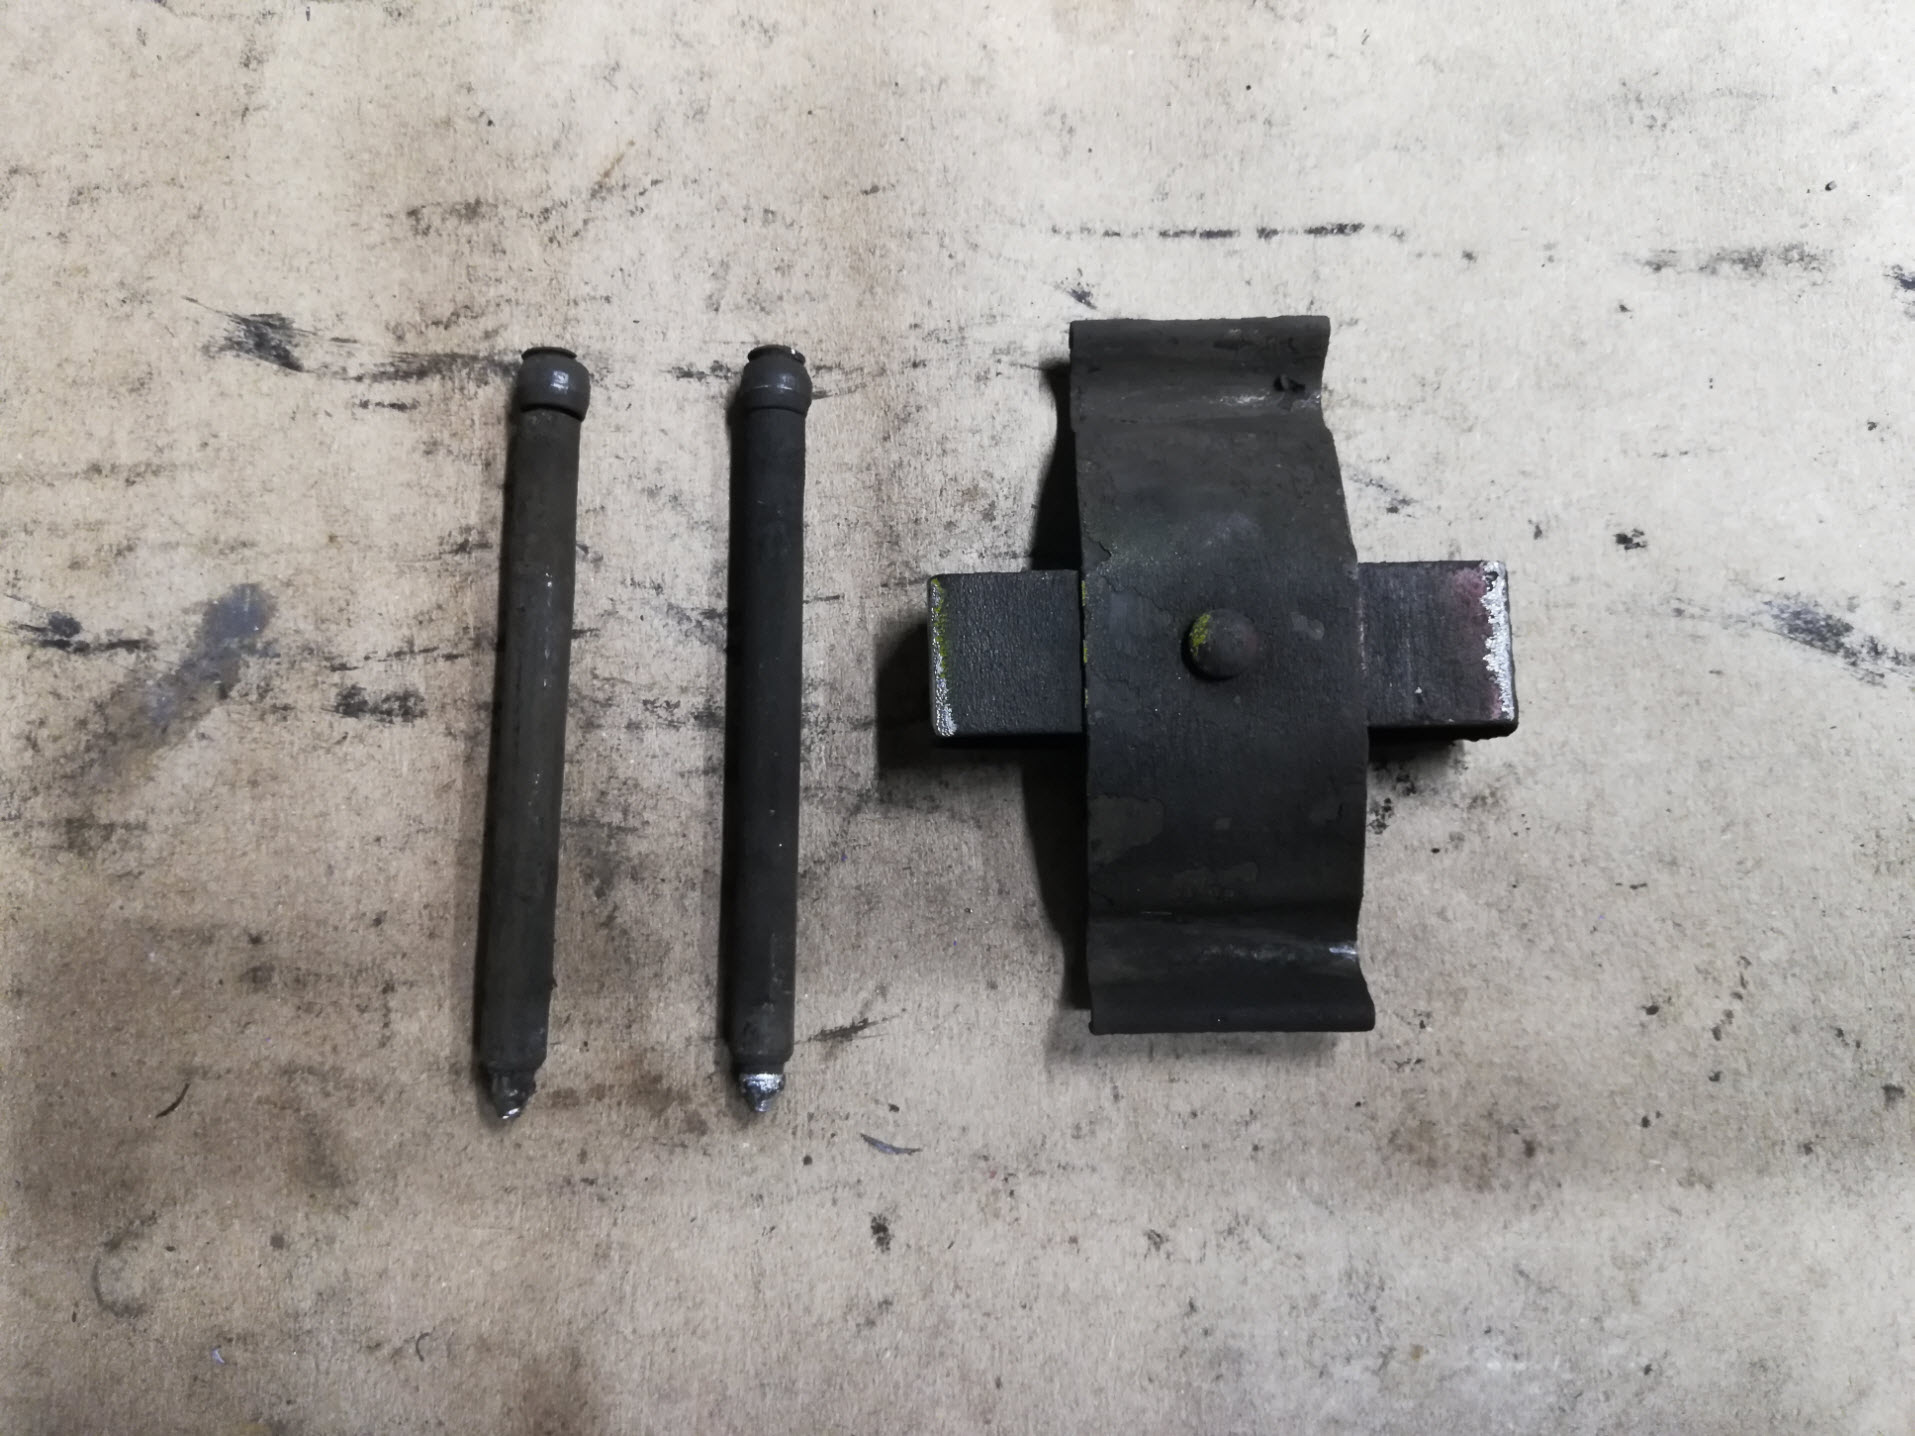
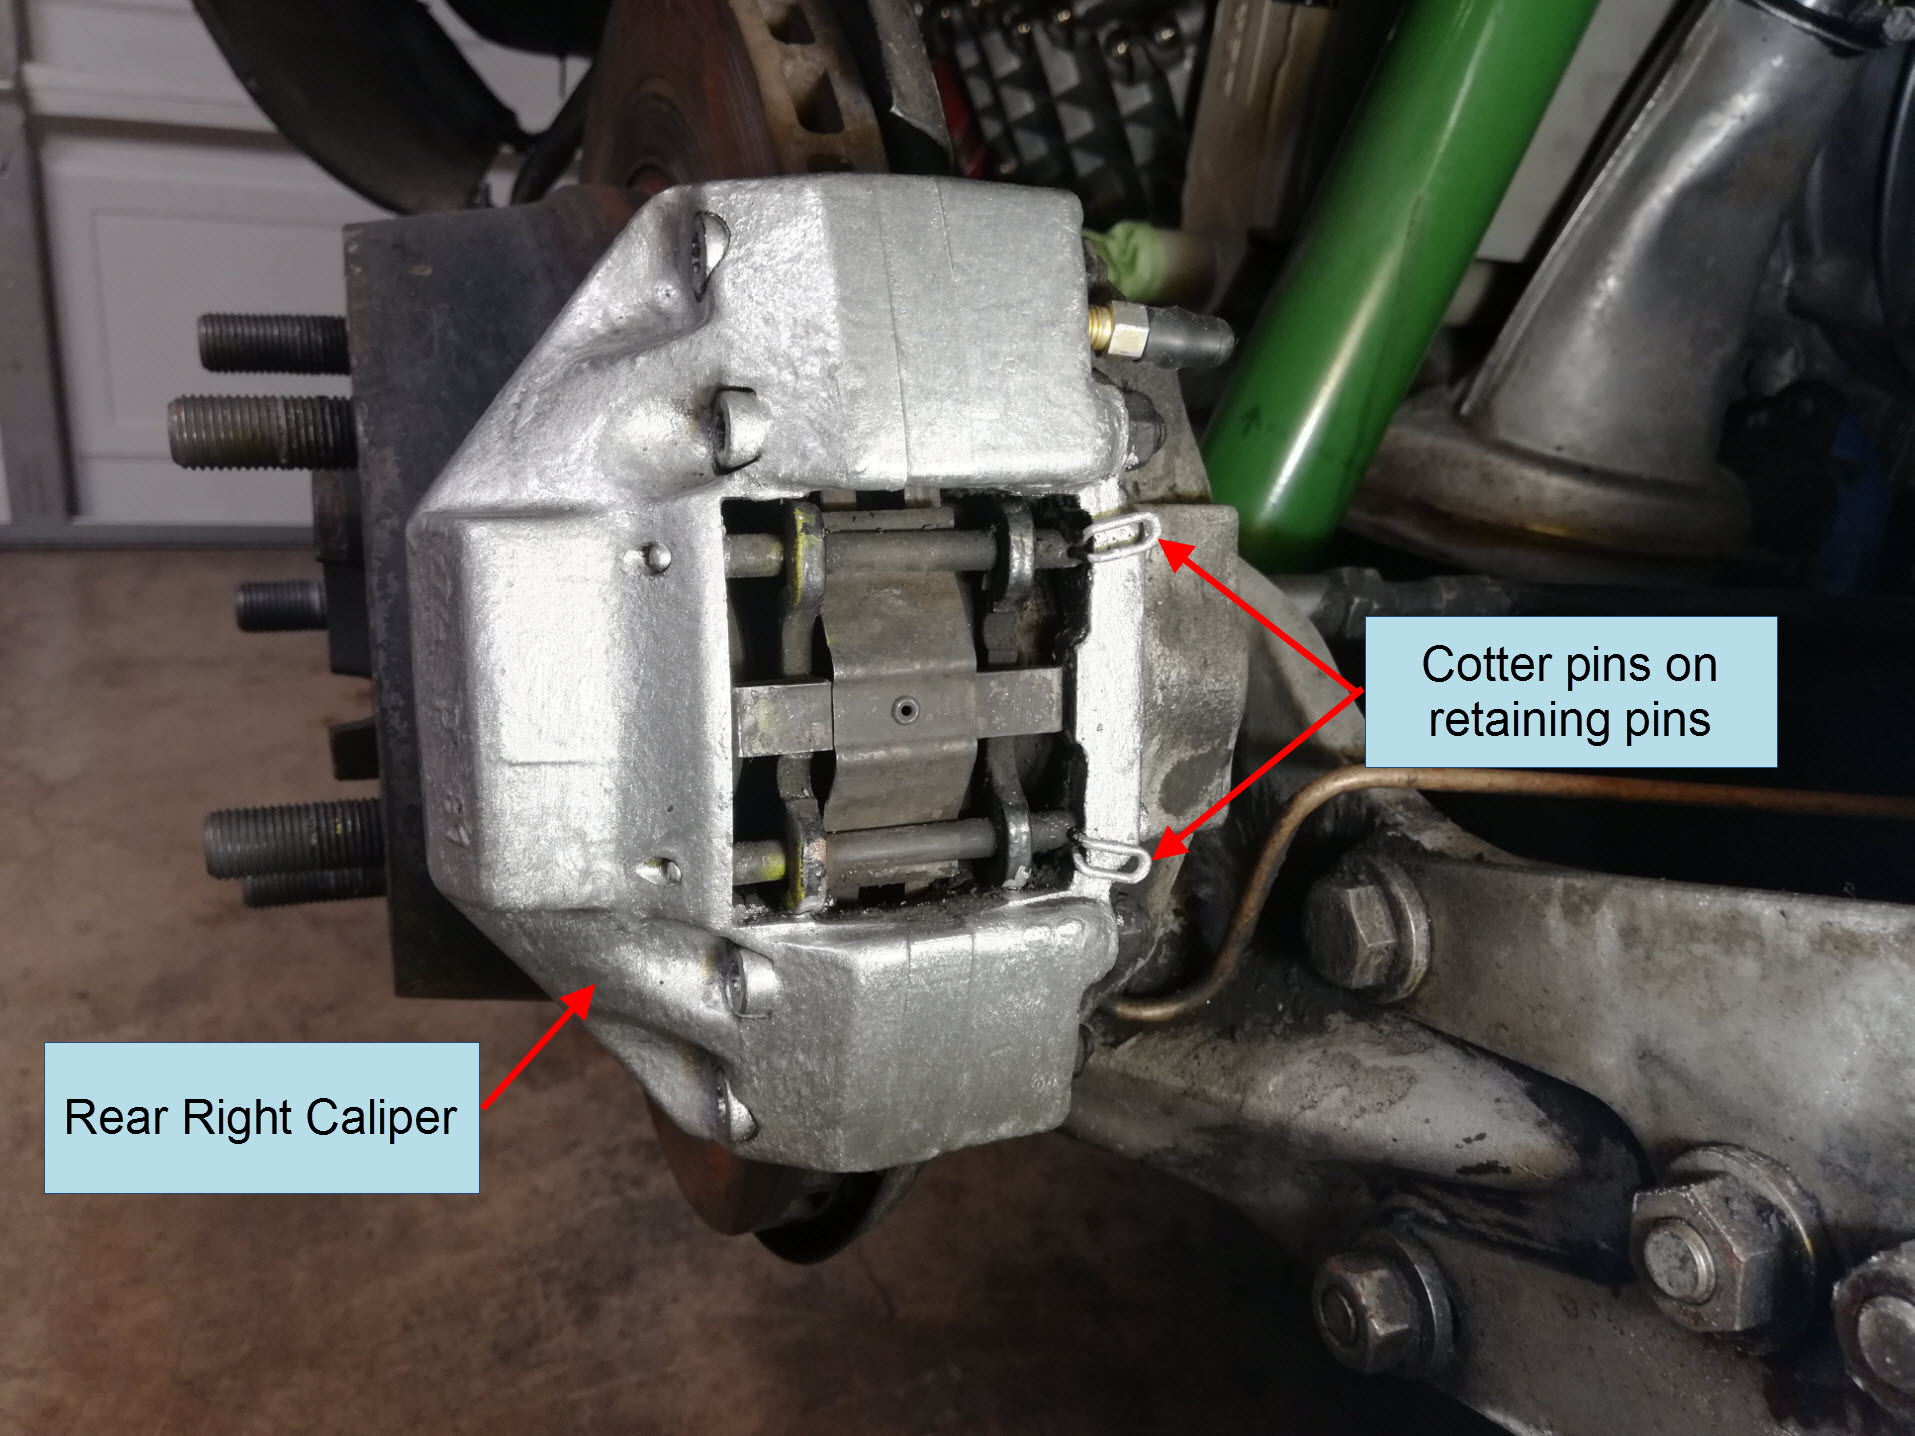
Both pads are secured in place by two pins and a retaining spring. Some cars have tiny cotter pins on the retaining pins to prevent them from backing out. If cotter pins are present, pull those out at this time. Using a small diameter drift punch, tap out the retaining pins from the outside of the caliper.
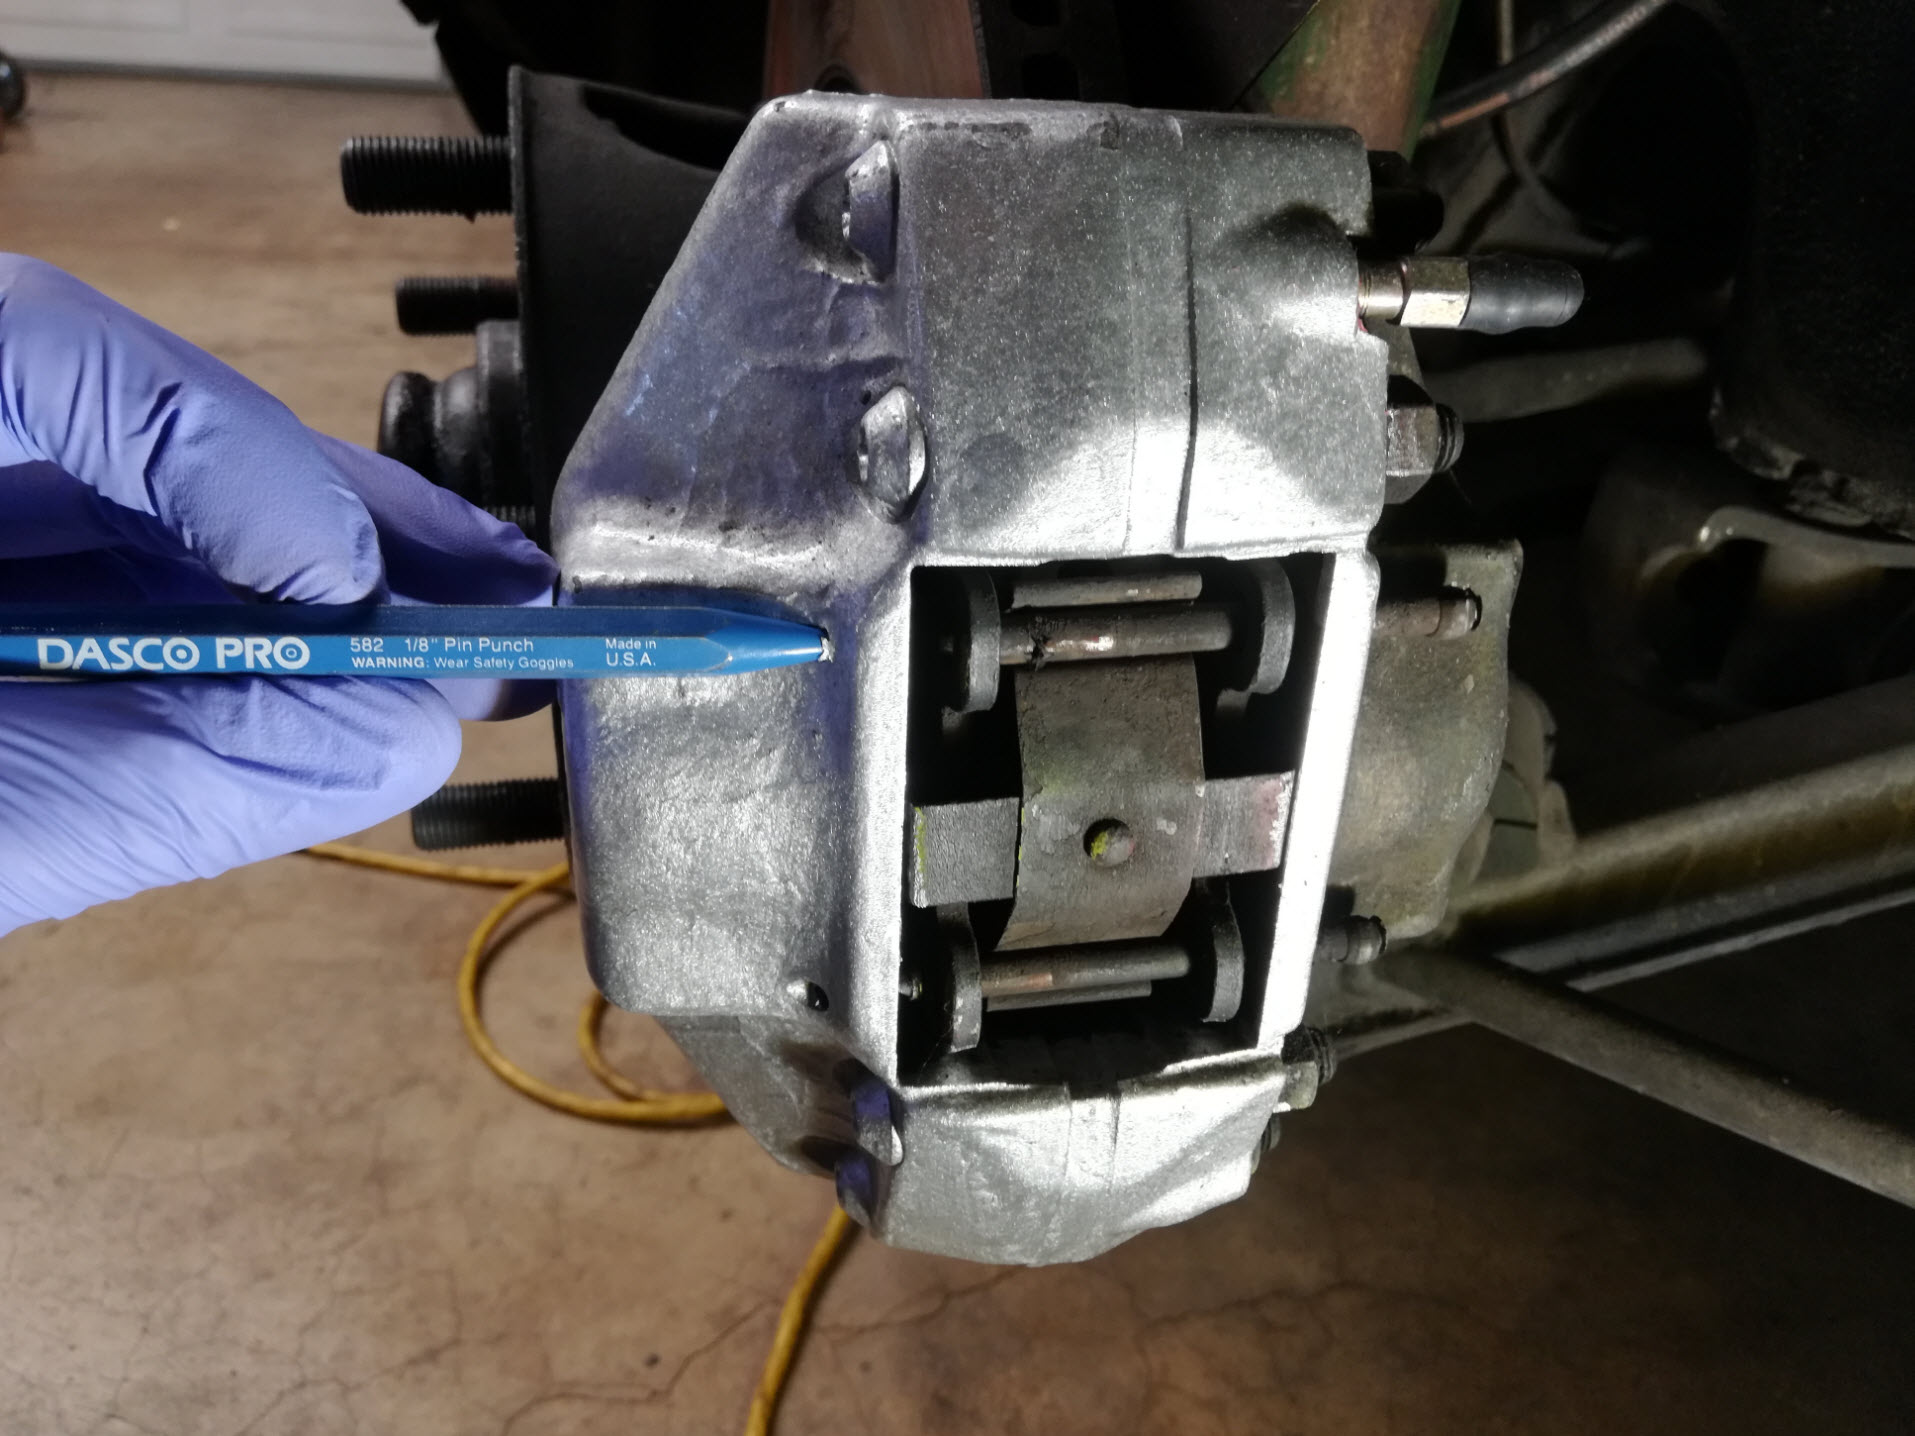
If your punch is not long enough, use a small hex wrench or similar pin-shaped tool to push the pins out the backside of the caliper.
Once the pins slide past the brake pads, the retaining spring will come loose.
Set the retaining spring and pins aside and inspect them for damage. If they are corroded or damaged, replace them with new ones.
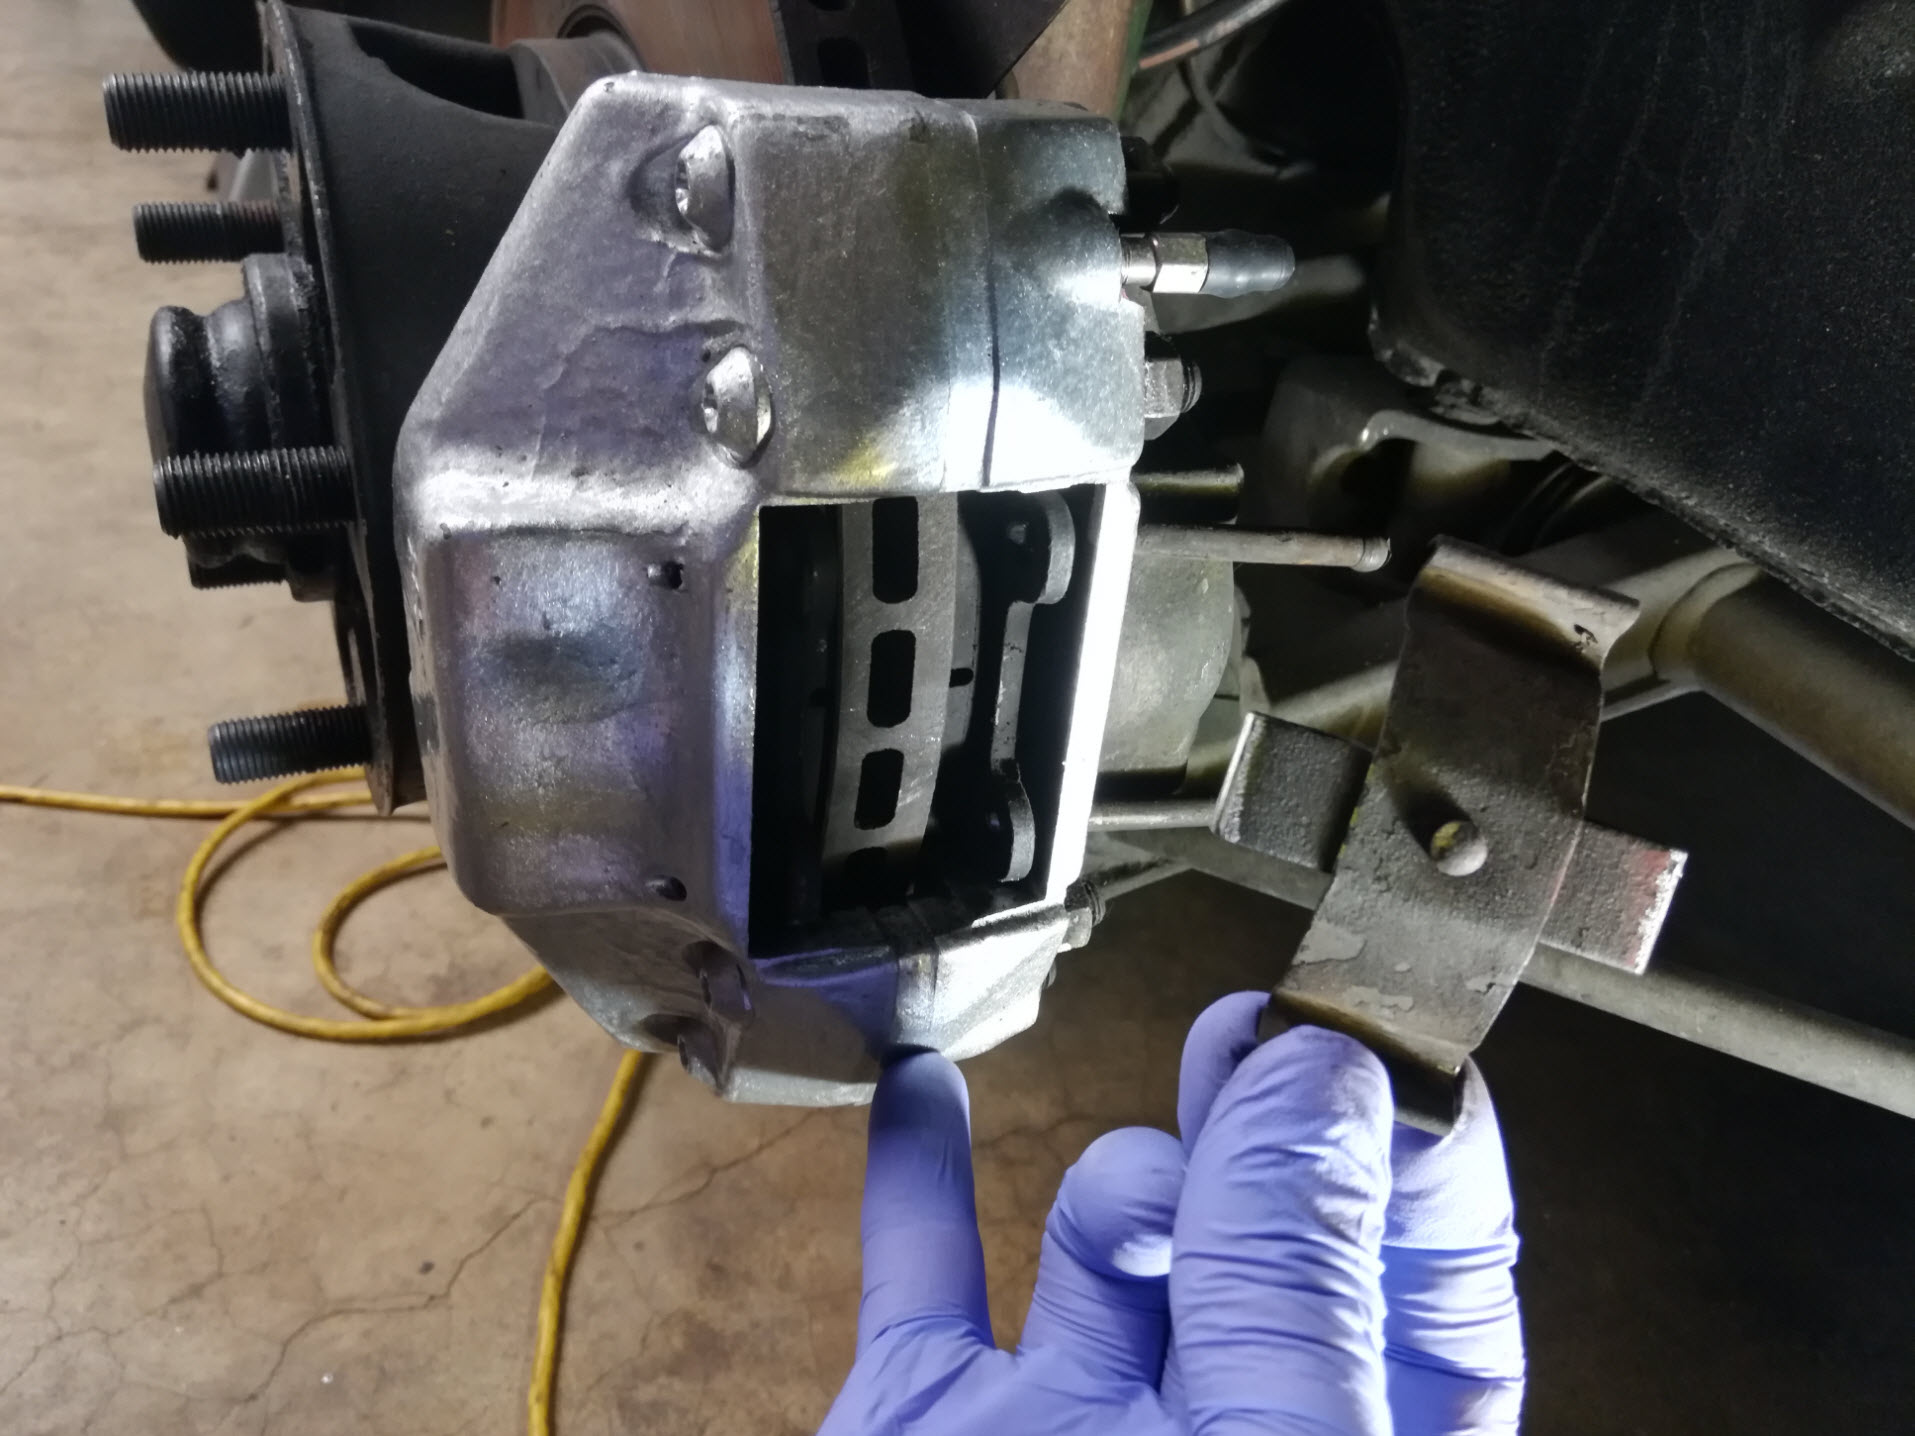
Using a small screwdriver, walk each brake pad out alternating between the pad mounting holes until you can pull it out by hand. Be careful not to scratch the surface of the caliper. My tool of choice is a junk Phillips screwdriver with the end ground off into a solid round shape.
If you are swapping race pads in for a track day and then going back to street pad,s or are simply reusing old pads, label each pad with its location as you remove them. This way you can re-install them in the same orientation as they will have bedded in that specific location. A permanent marker on the piston side of the pad works well. You can now set the pads aside.
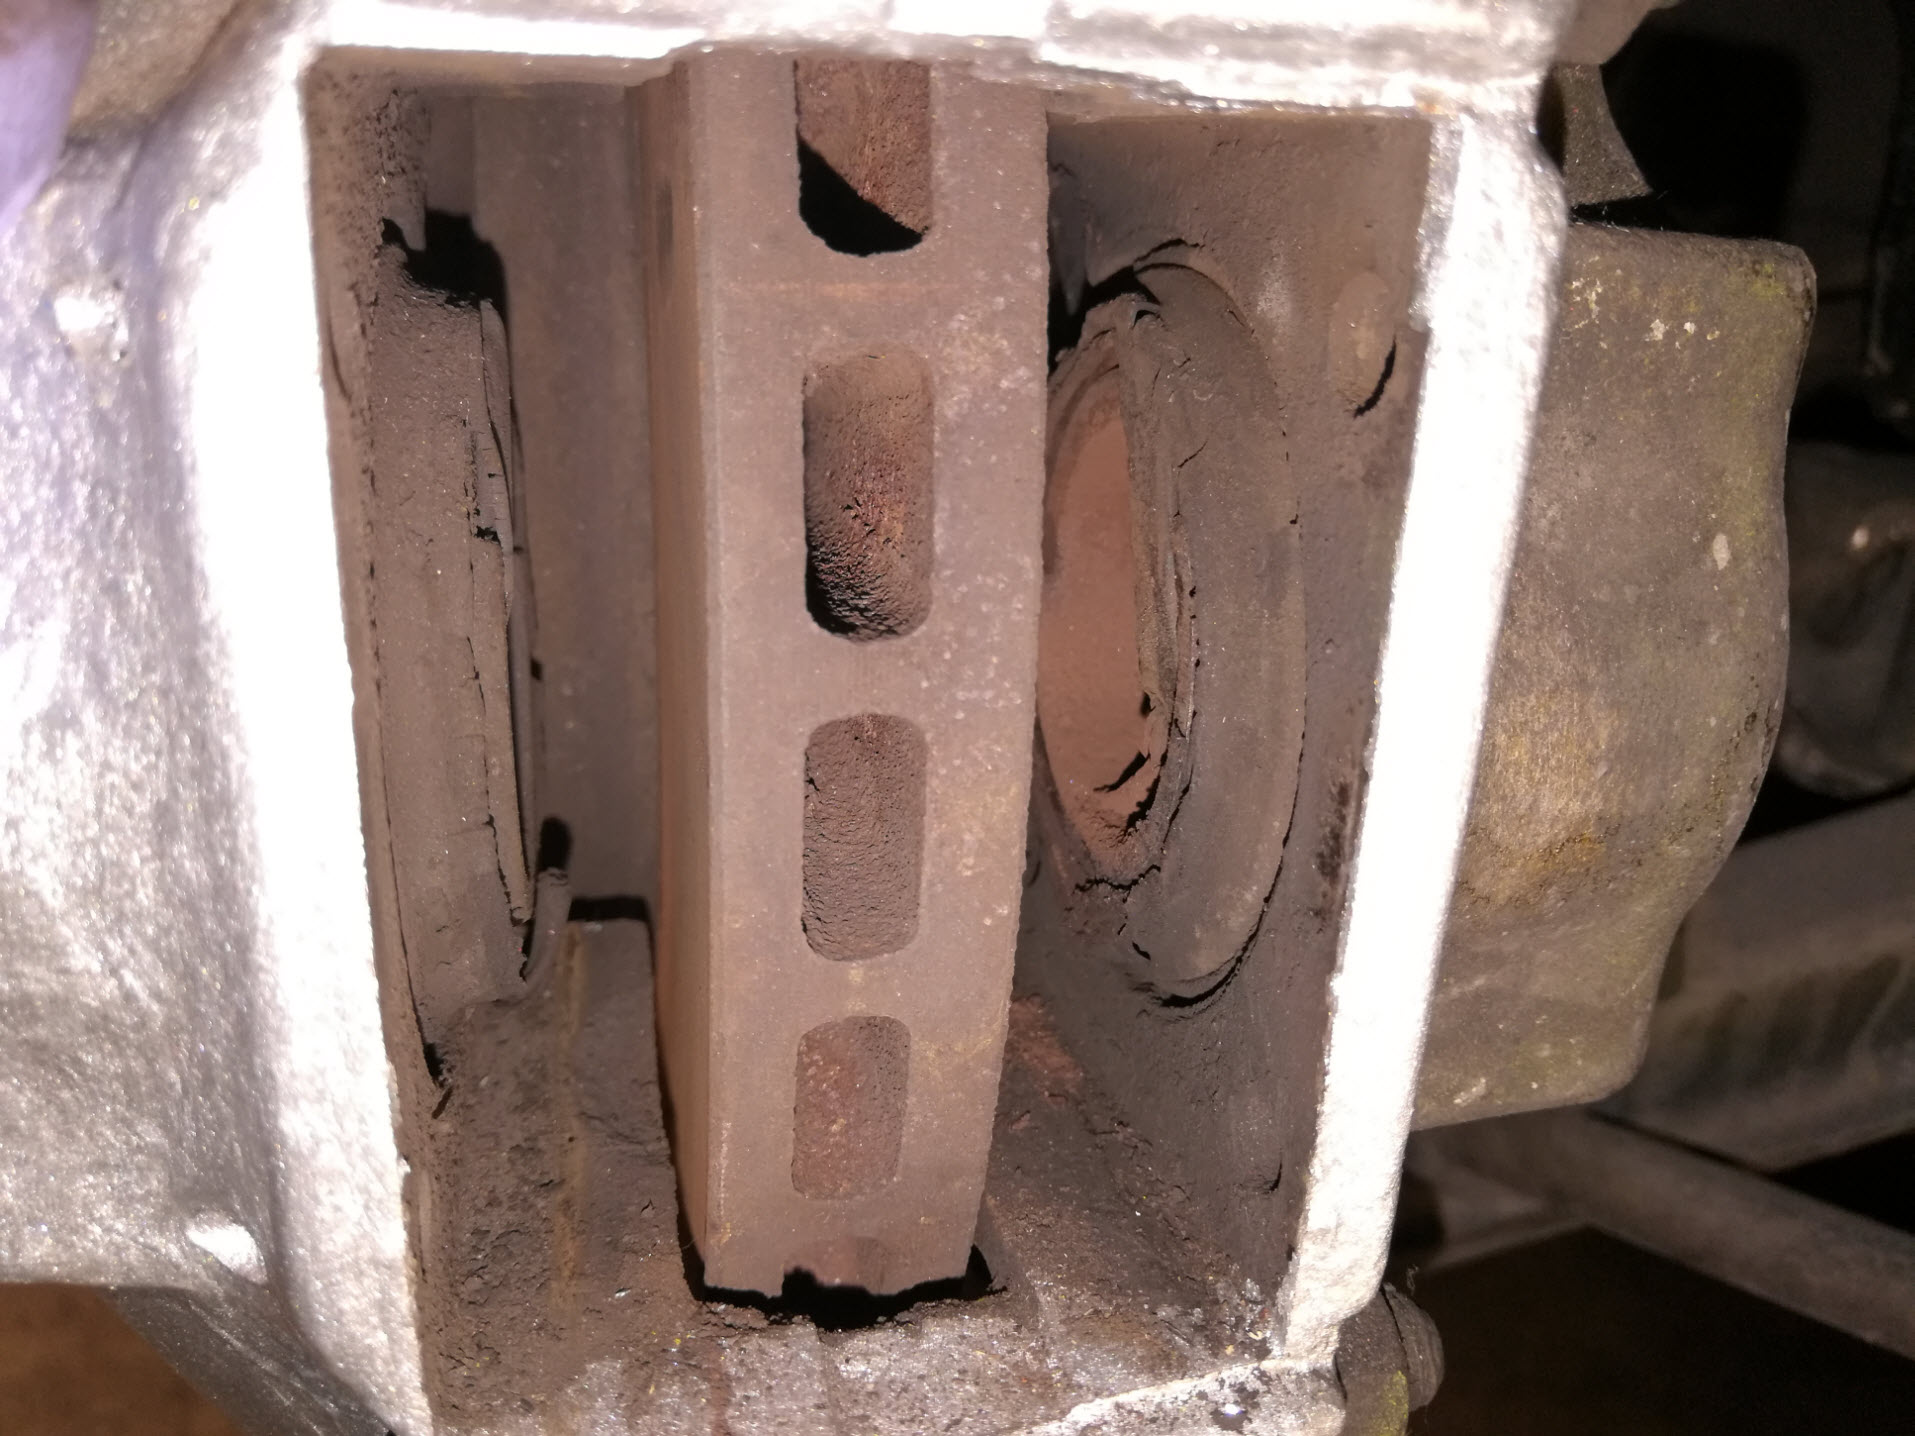
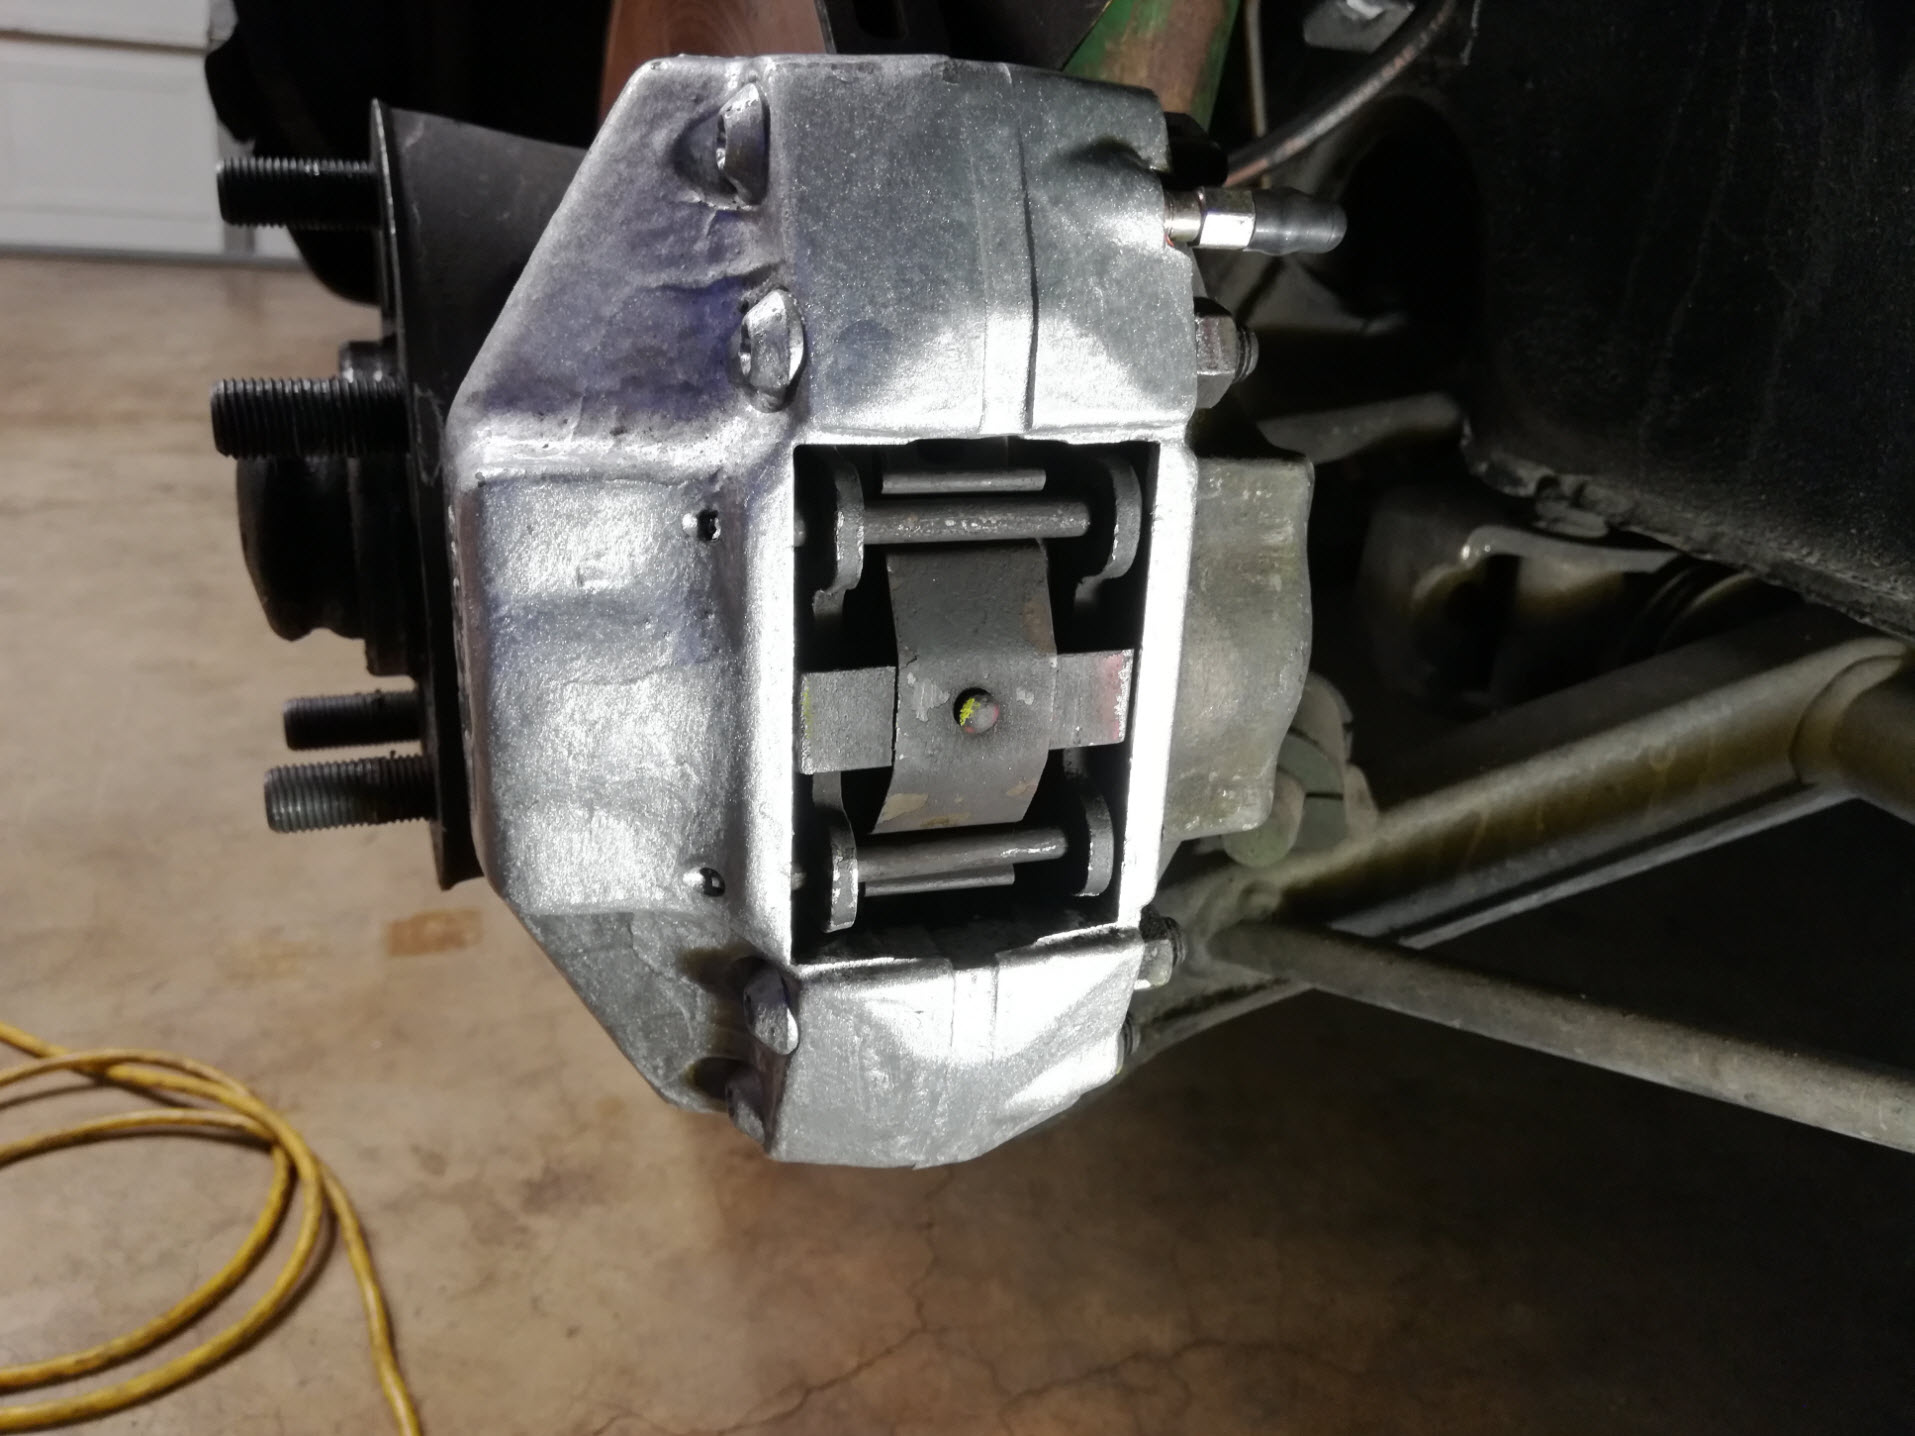
Step 3: Clean and Evaluate Calipers and Pads
Use a stiff brush to scrub out all the brake dust and debris from inside the caliper.
Inspect the pistons and surrounding dust boots for damage or brake fluid leaks. If your dust boots are old and damaged (like the ones shown here) but there is no brake fluid leakage yet, consider replacing the brake calipers in the near future.
Lastly, check the orientation of the pistons by looking for the raised ledge that's on the bottom half of each piston. In this example it's difficult to see due to the damaged dust boots but the raised ledge is indicated by the yellow line. This is the surface that contacts the back of each brake pad.
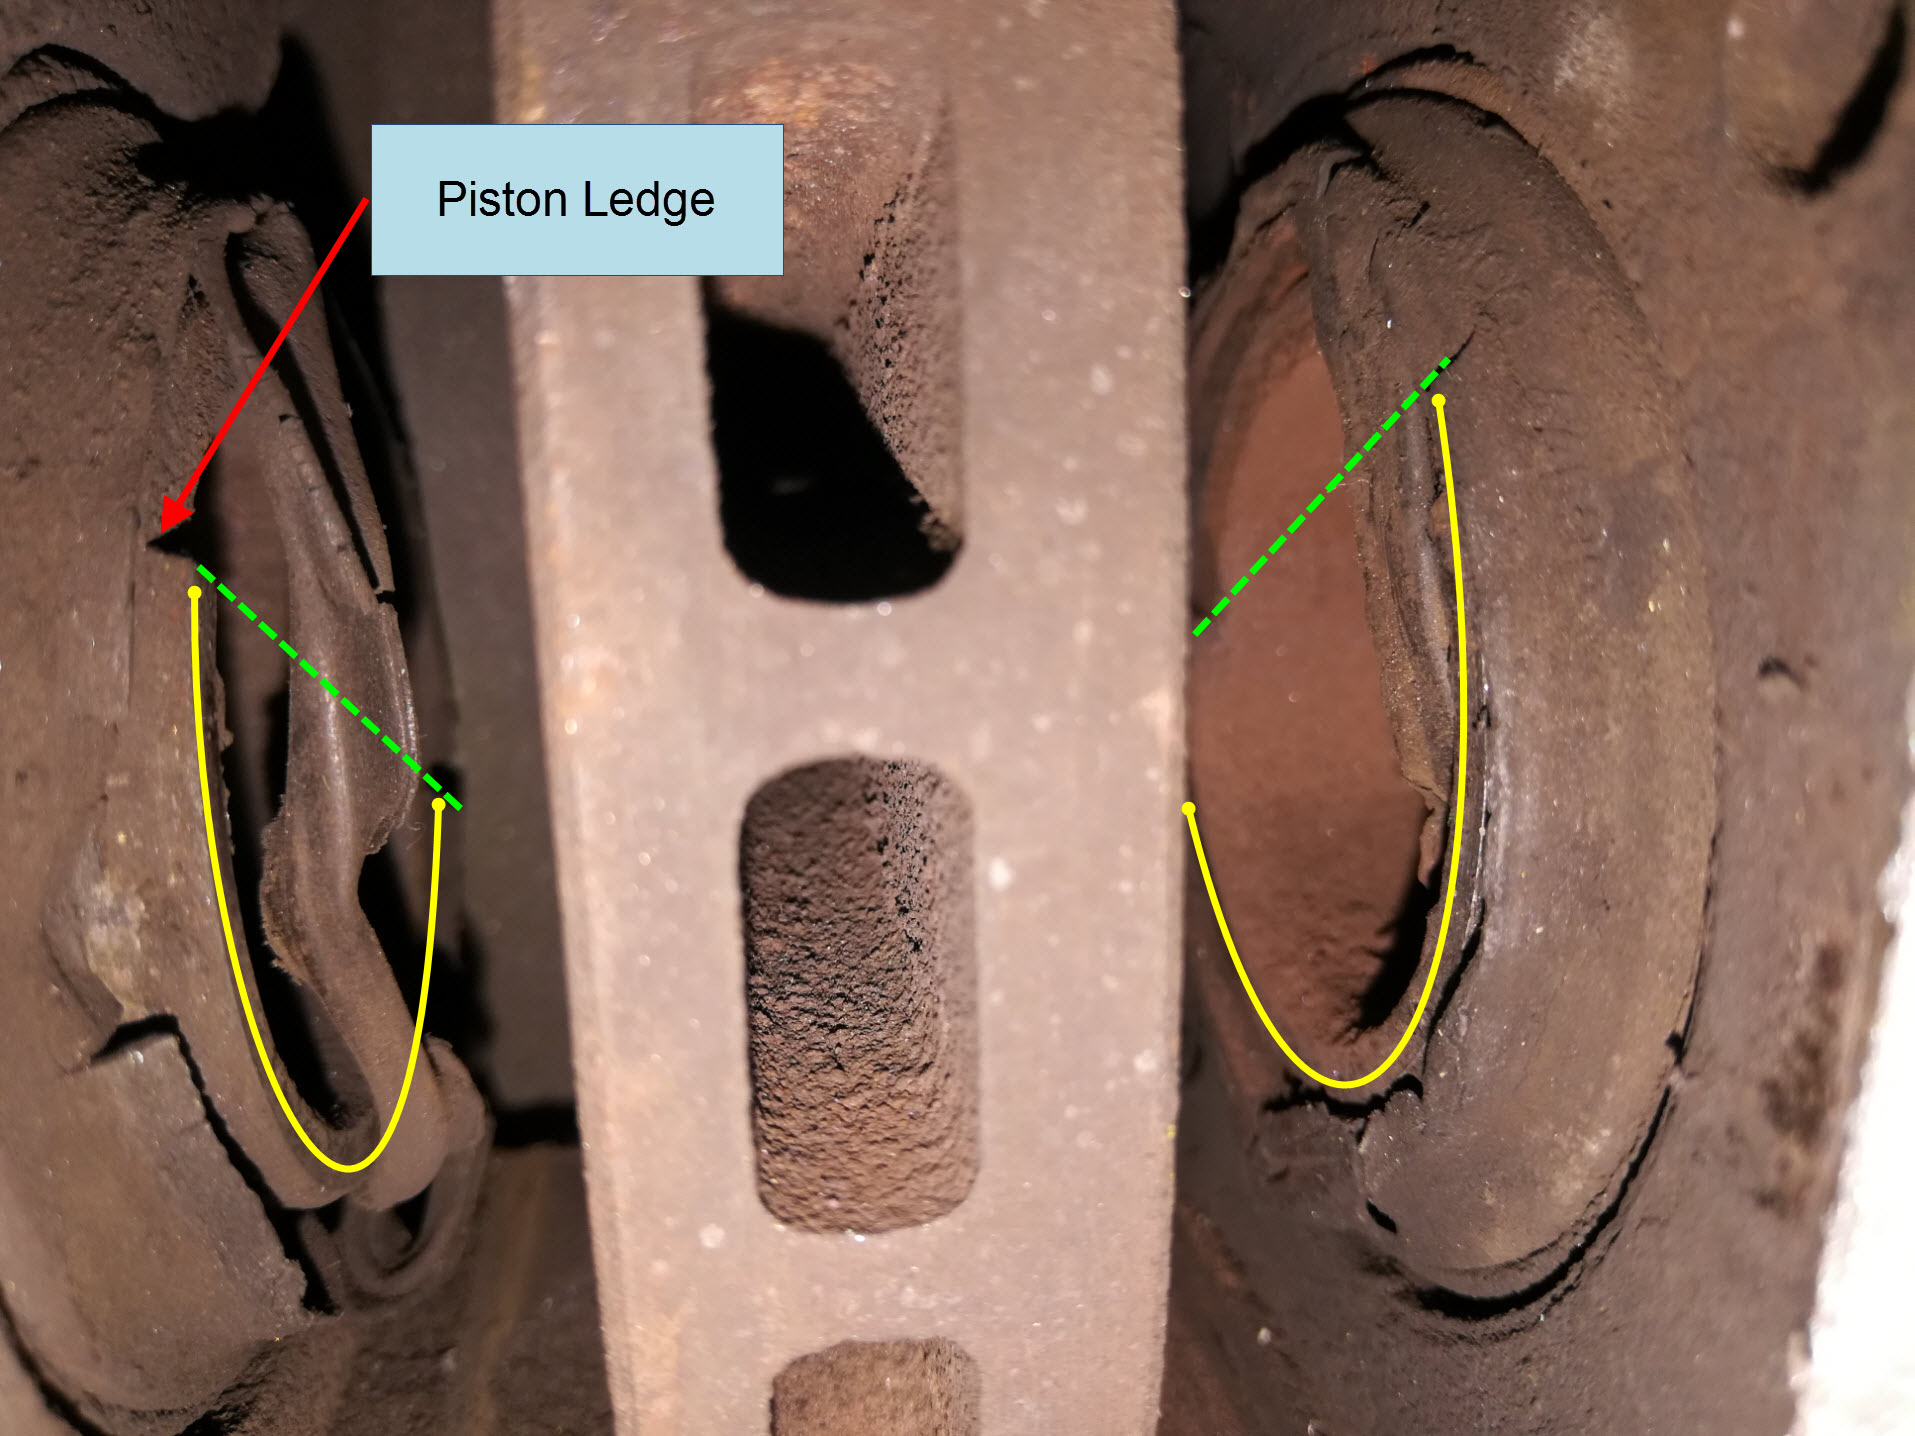
Mentally draw a straight line between the ends of each raised ledge as indicated by the green line. The ends of the raised ledge need to be at approximately 20 degrees to the upper flat surface inside the caliper that guides the brake pad as shown below. If necessary, you can cut out a 20 degree triangular wedge out of cardboard or thin plastic sheet to place inside the caliper and check the orientation.
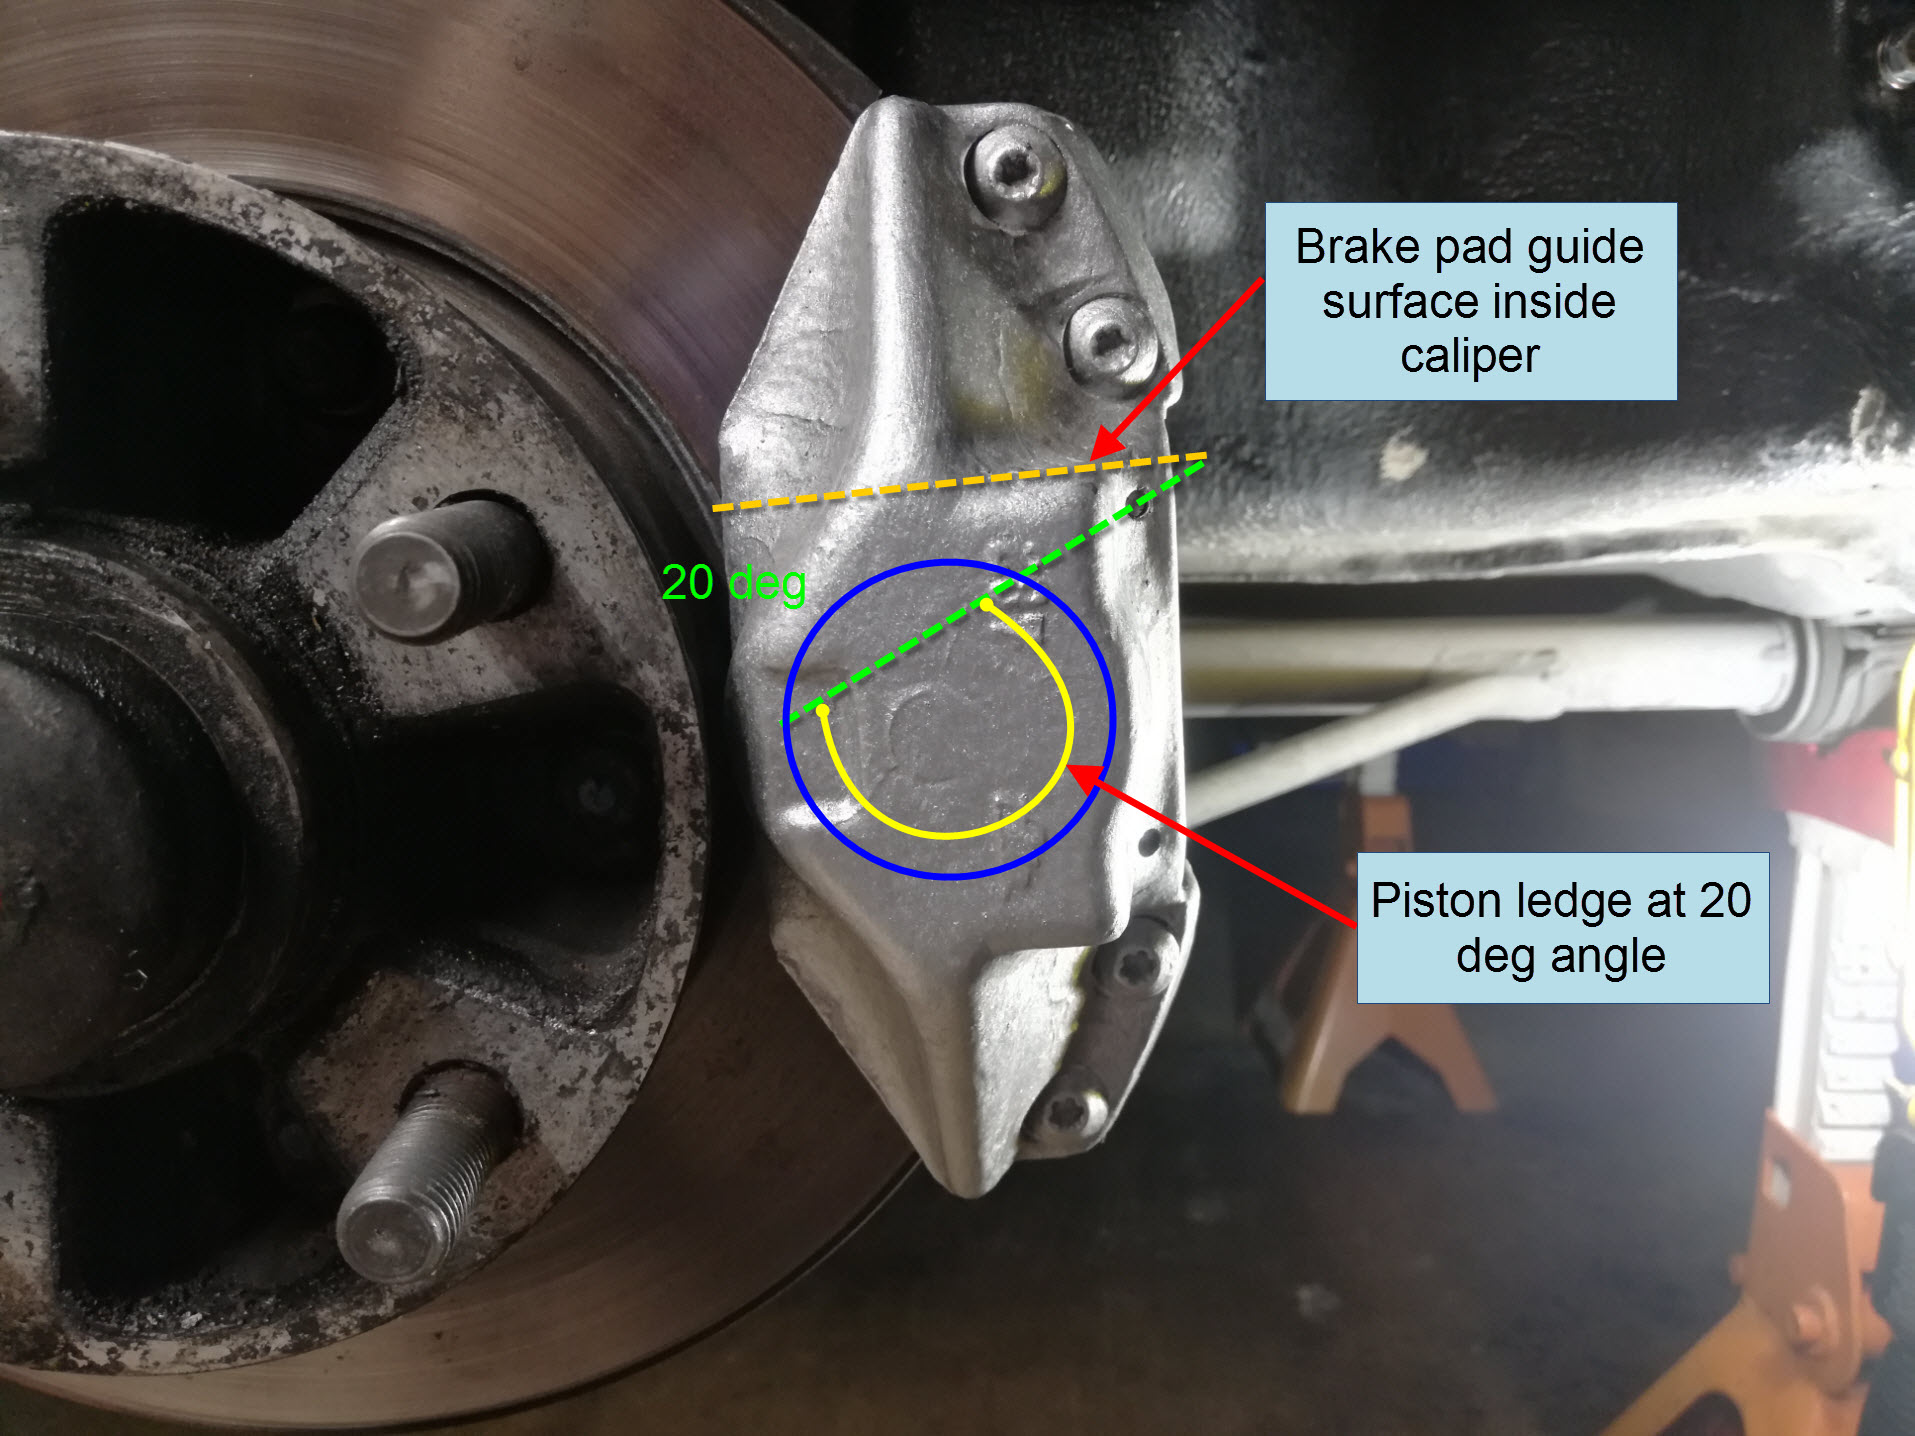
If you need to adjust the orientation you can use a set of pliers with tape over the jaws to protect the pistons, or some circlip pliers to grip the interior cavity of each piston and gently rotate them to spec. Be careful not to scratch the pistons or damage the rubber dust boots.
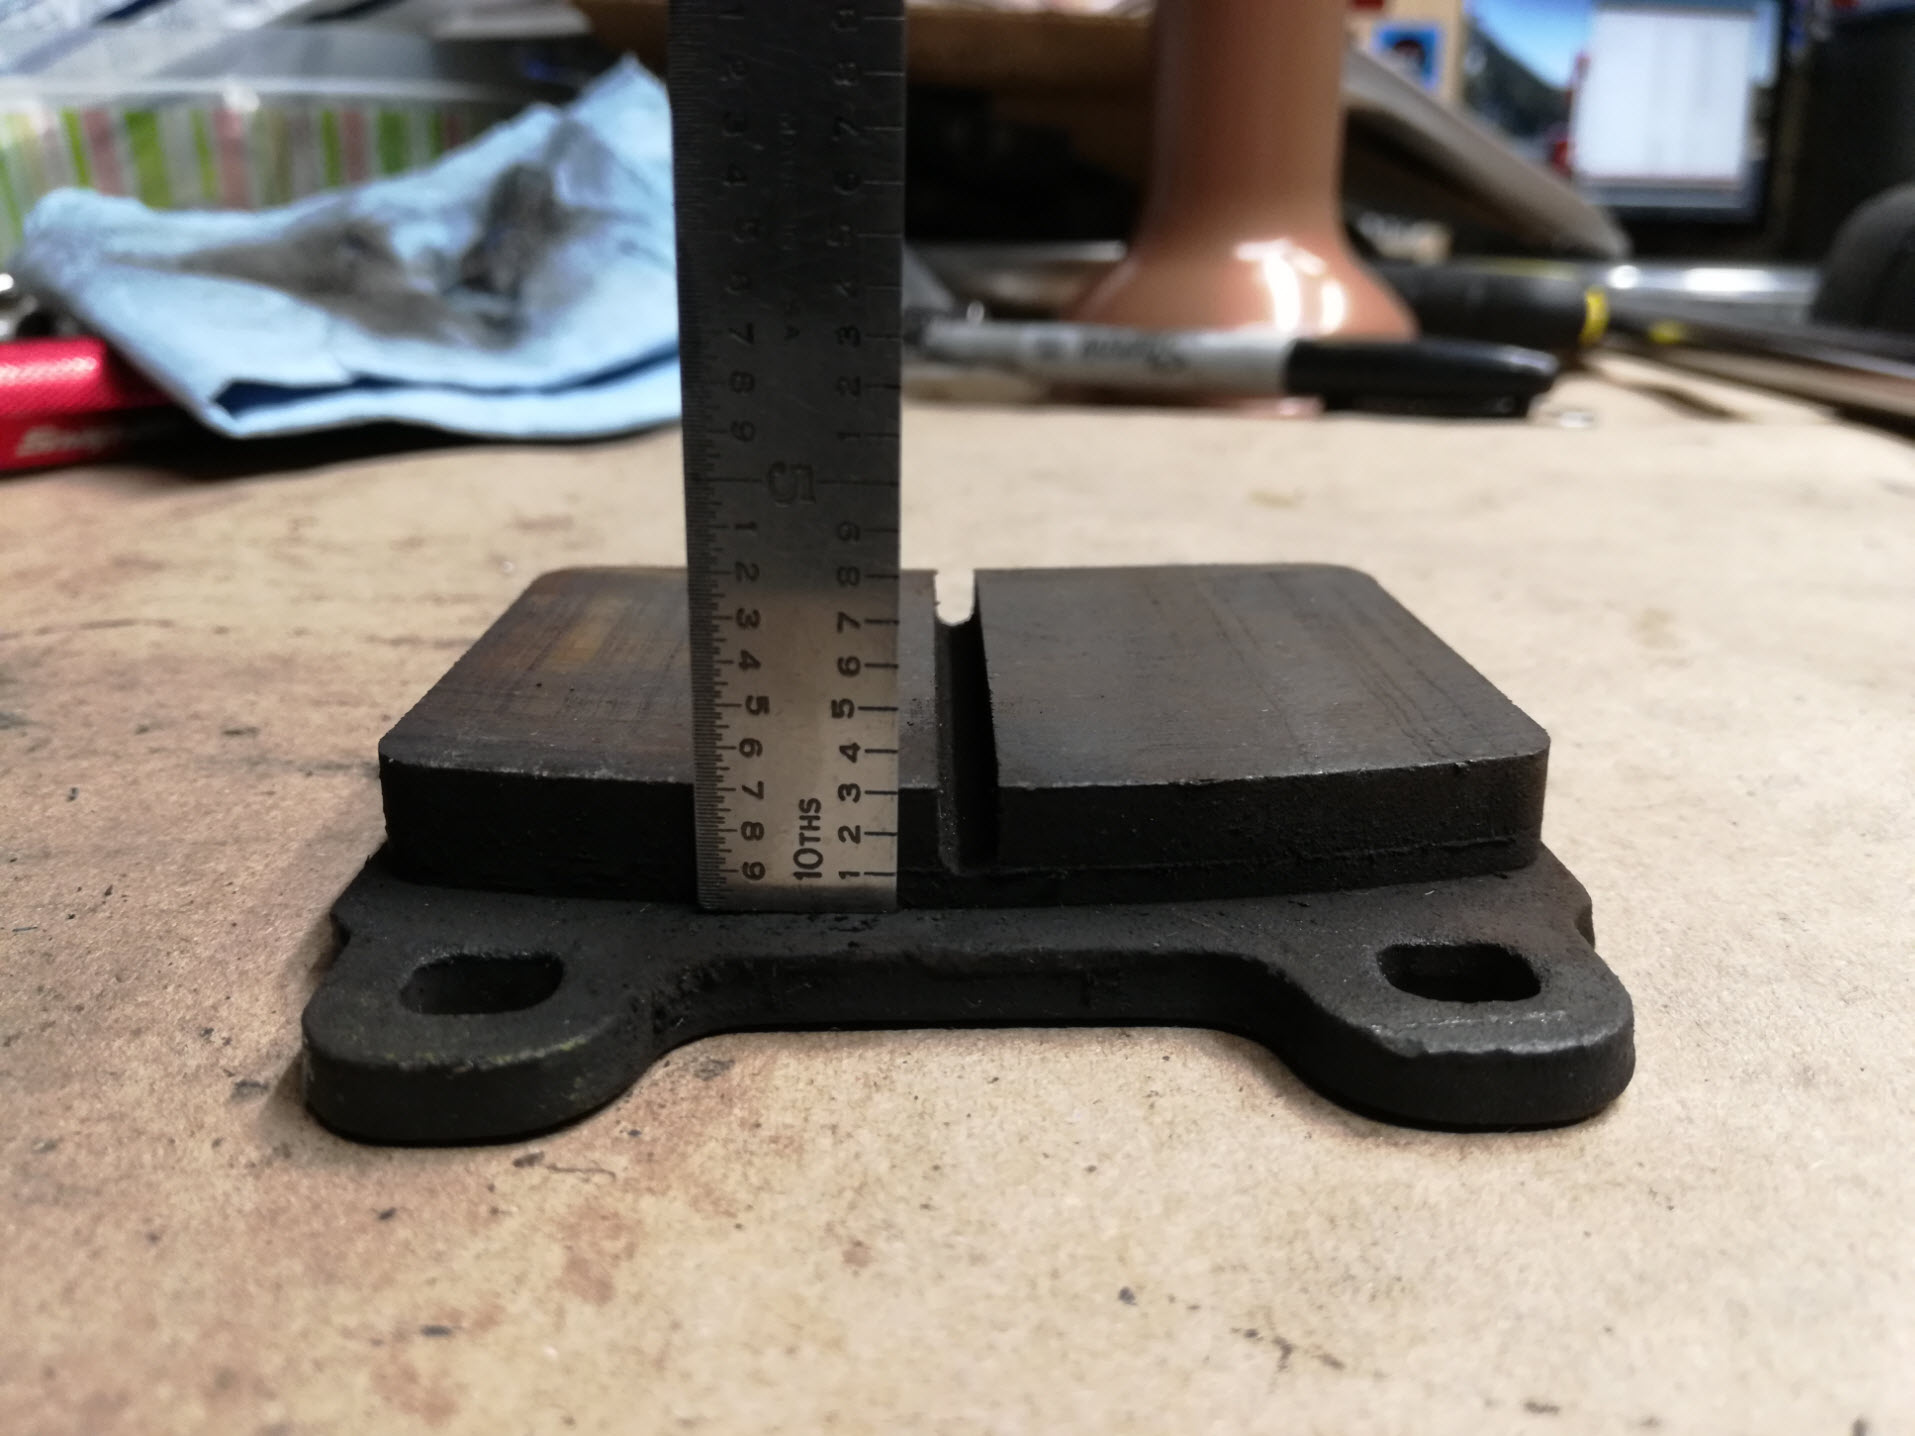
If you intend on re-using your pads, inspect them at this time. They should have a minimum of 2mm of pad material left, although if they are anywhere near this minimum spec you should just go ahead and replace them. The pads in the photo below have .300 inches or 7.6 mm left so they still have some life left in them.
Step 4: Push Pistons Back In
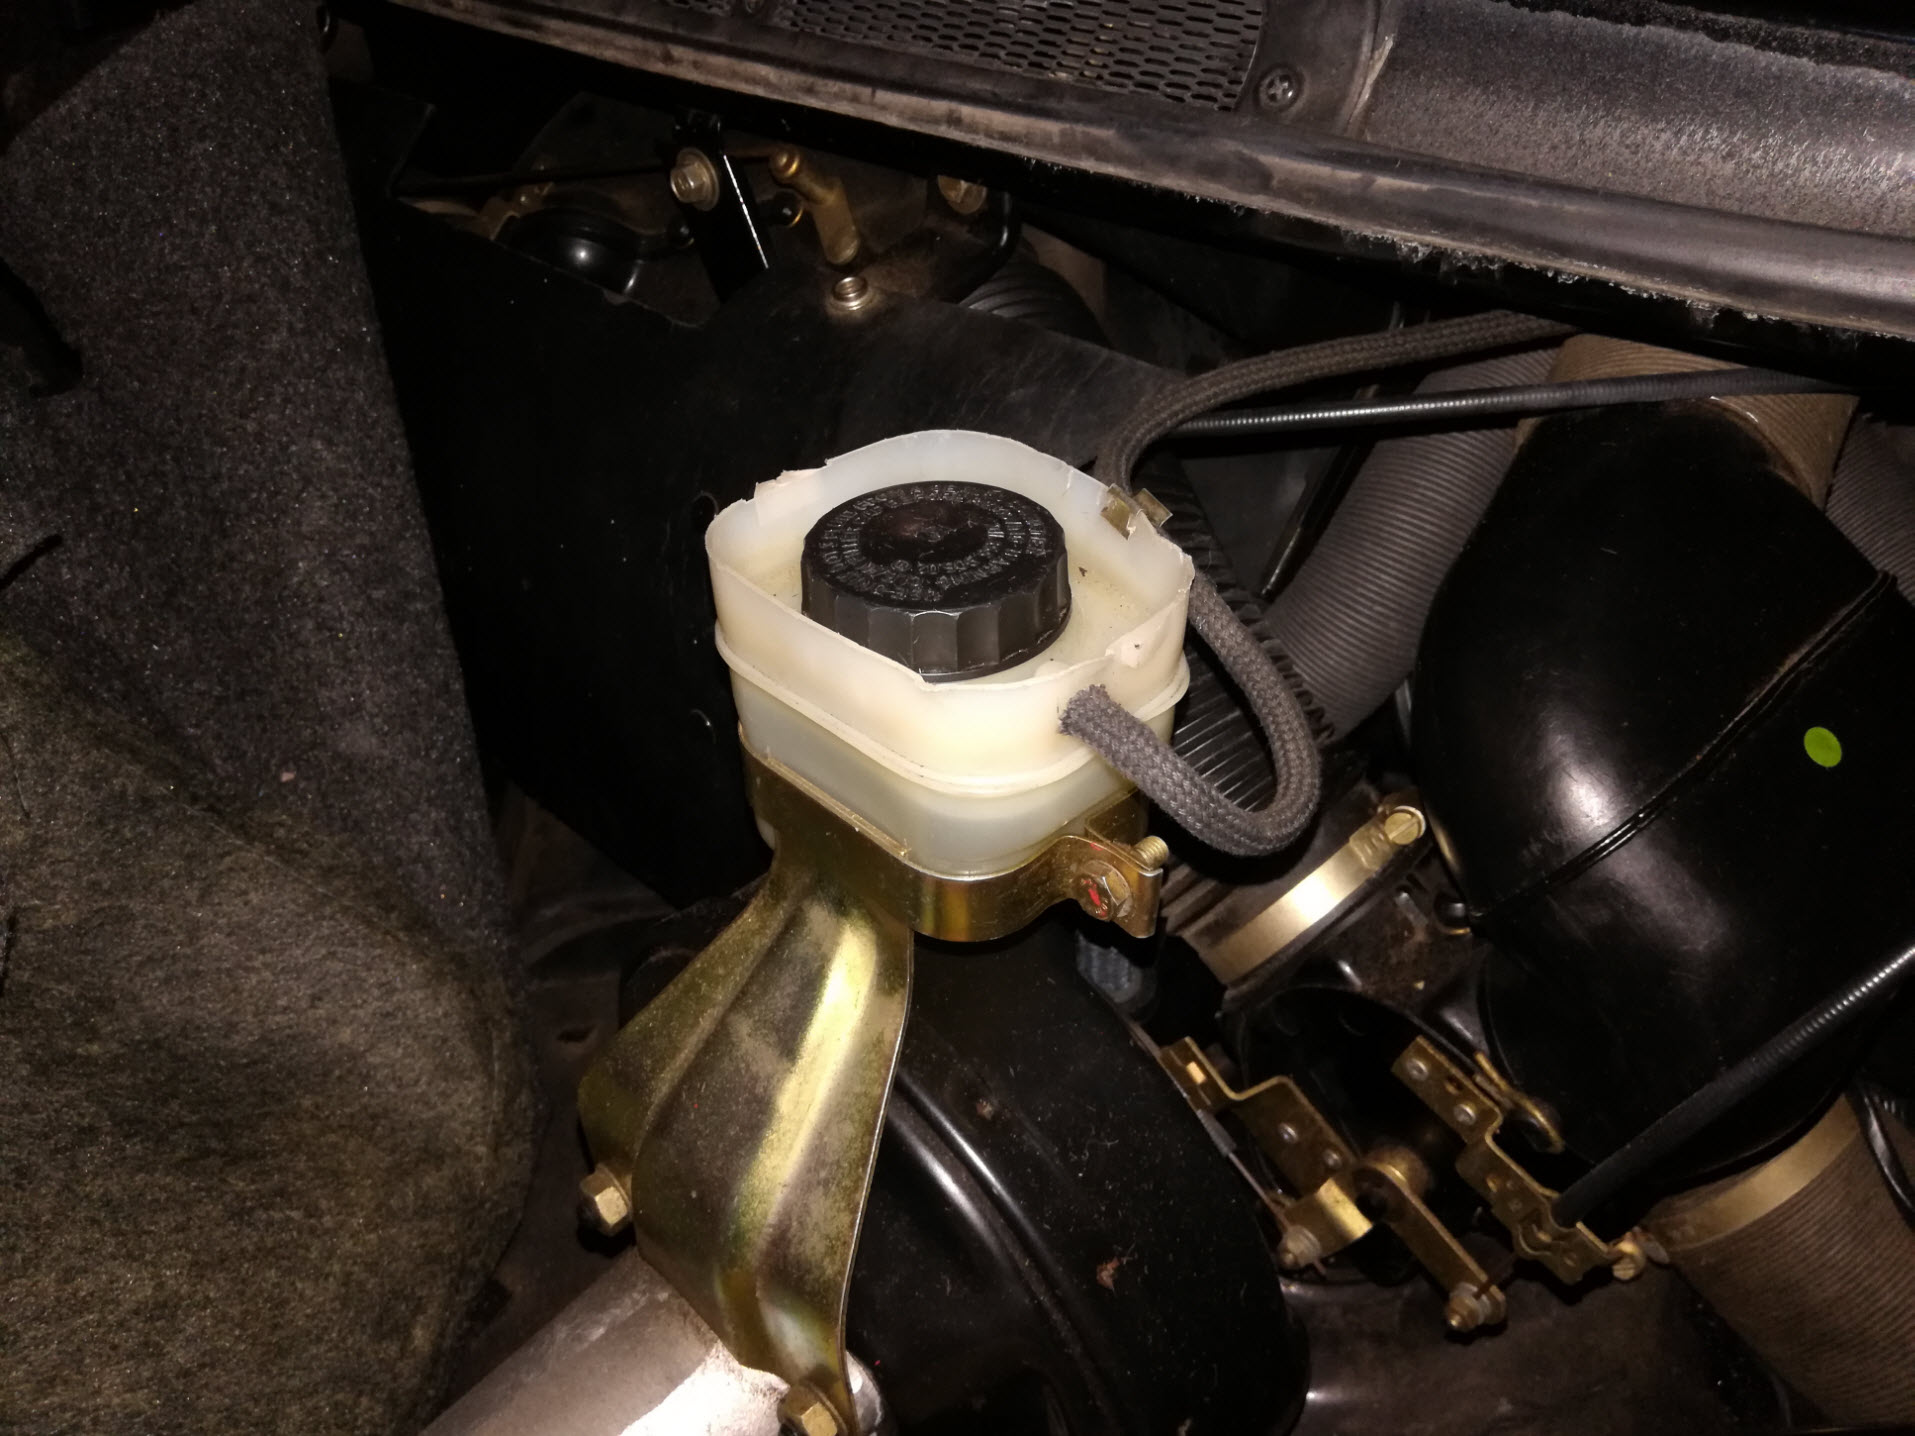
Next you will have to push the pistons back in slightly to create more clearance for the thicker new pads. Since this will cause brake fluid to flow back into your master cylinder and brake fluid reservoir, make sure there is empty space in the reservoir for the fluid level to rise. If your brake fluid reservoir does not have an overflow vent, unscrew the cap and gently place it on top to allow air to escape and prevent dirt from entering.
Using a block of wood or a plastic trim tool, gently push the pistons back in just enough to let you slip the new pads in. Do not use a metal tool as this could damage the piston or dust boot.
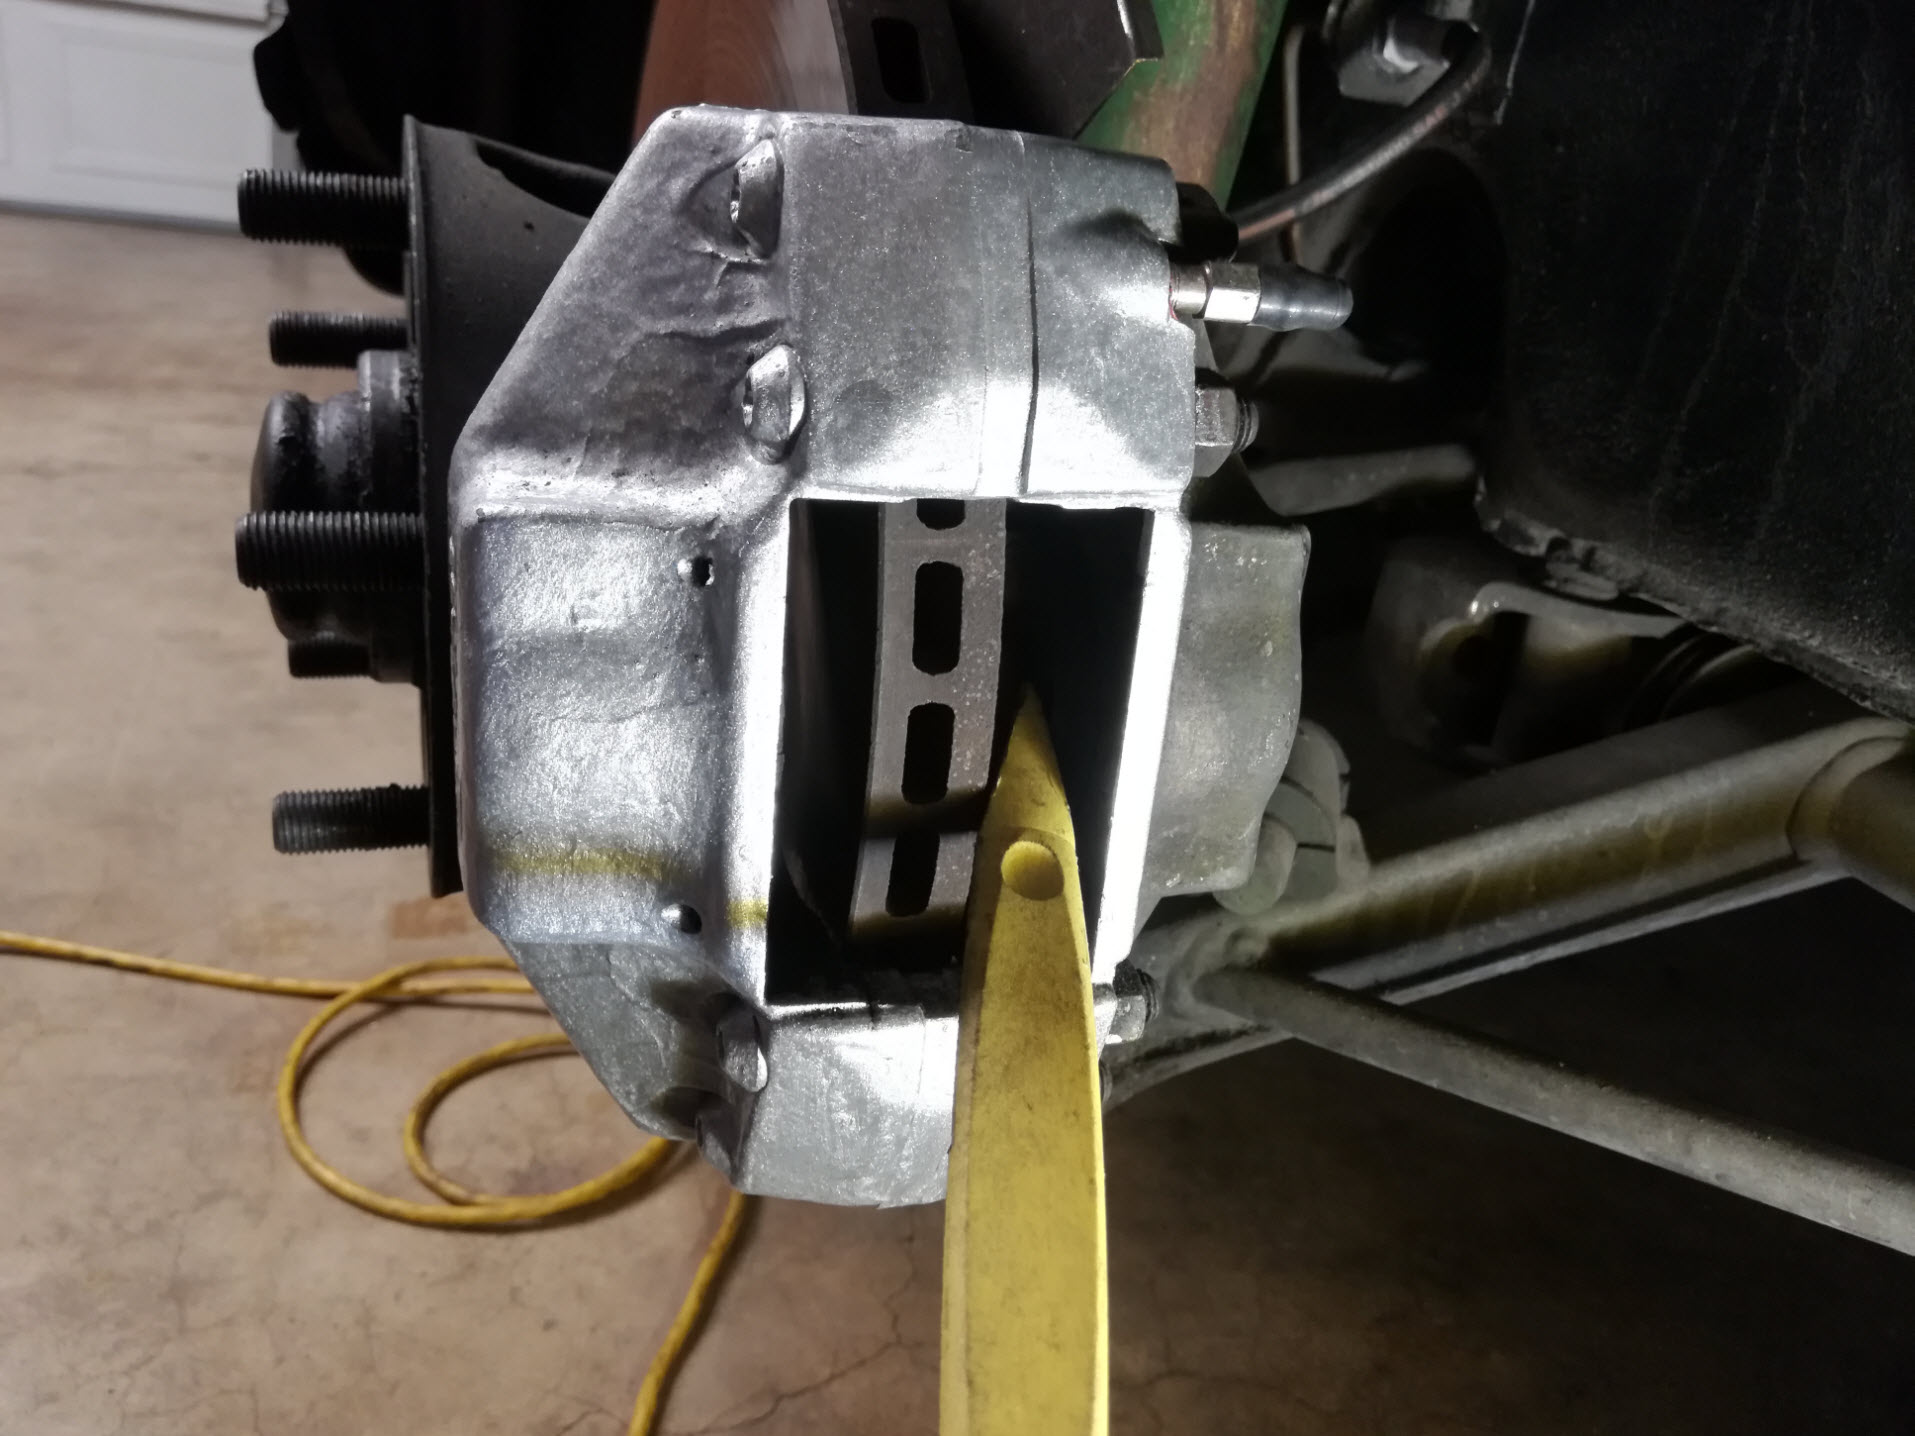
Keep your brake pads nearby to insert them and check pad clearance. Do not push the pistons in farther than is needed to install the pads.
Step 5: Re-install Pads and Retaining Hardware
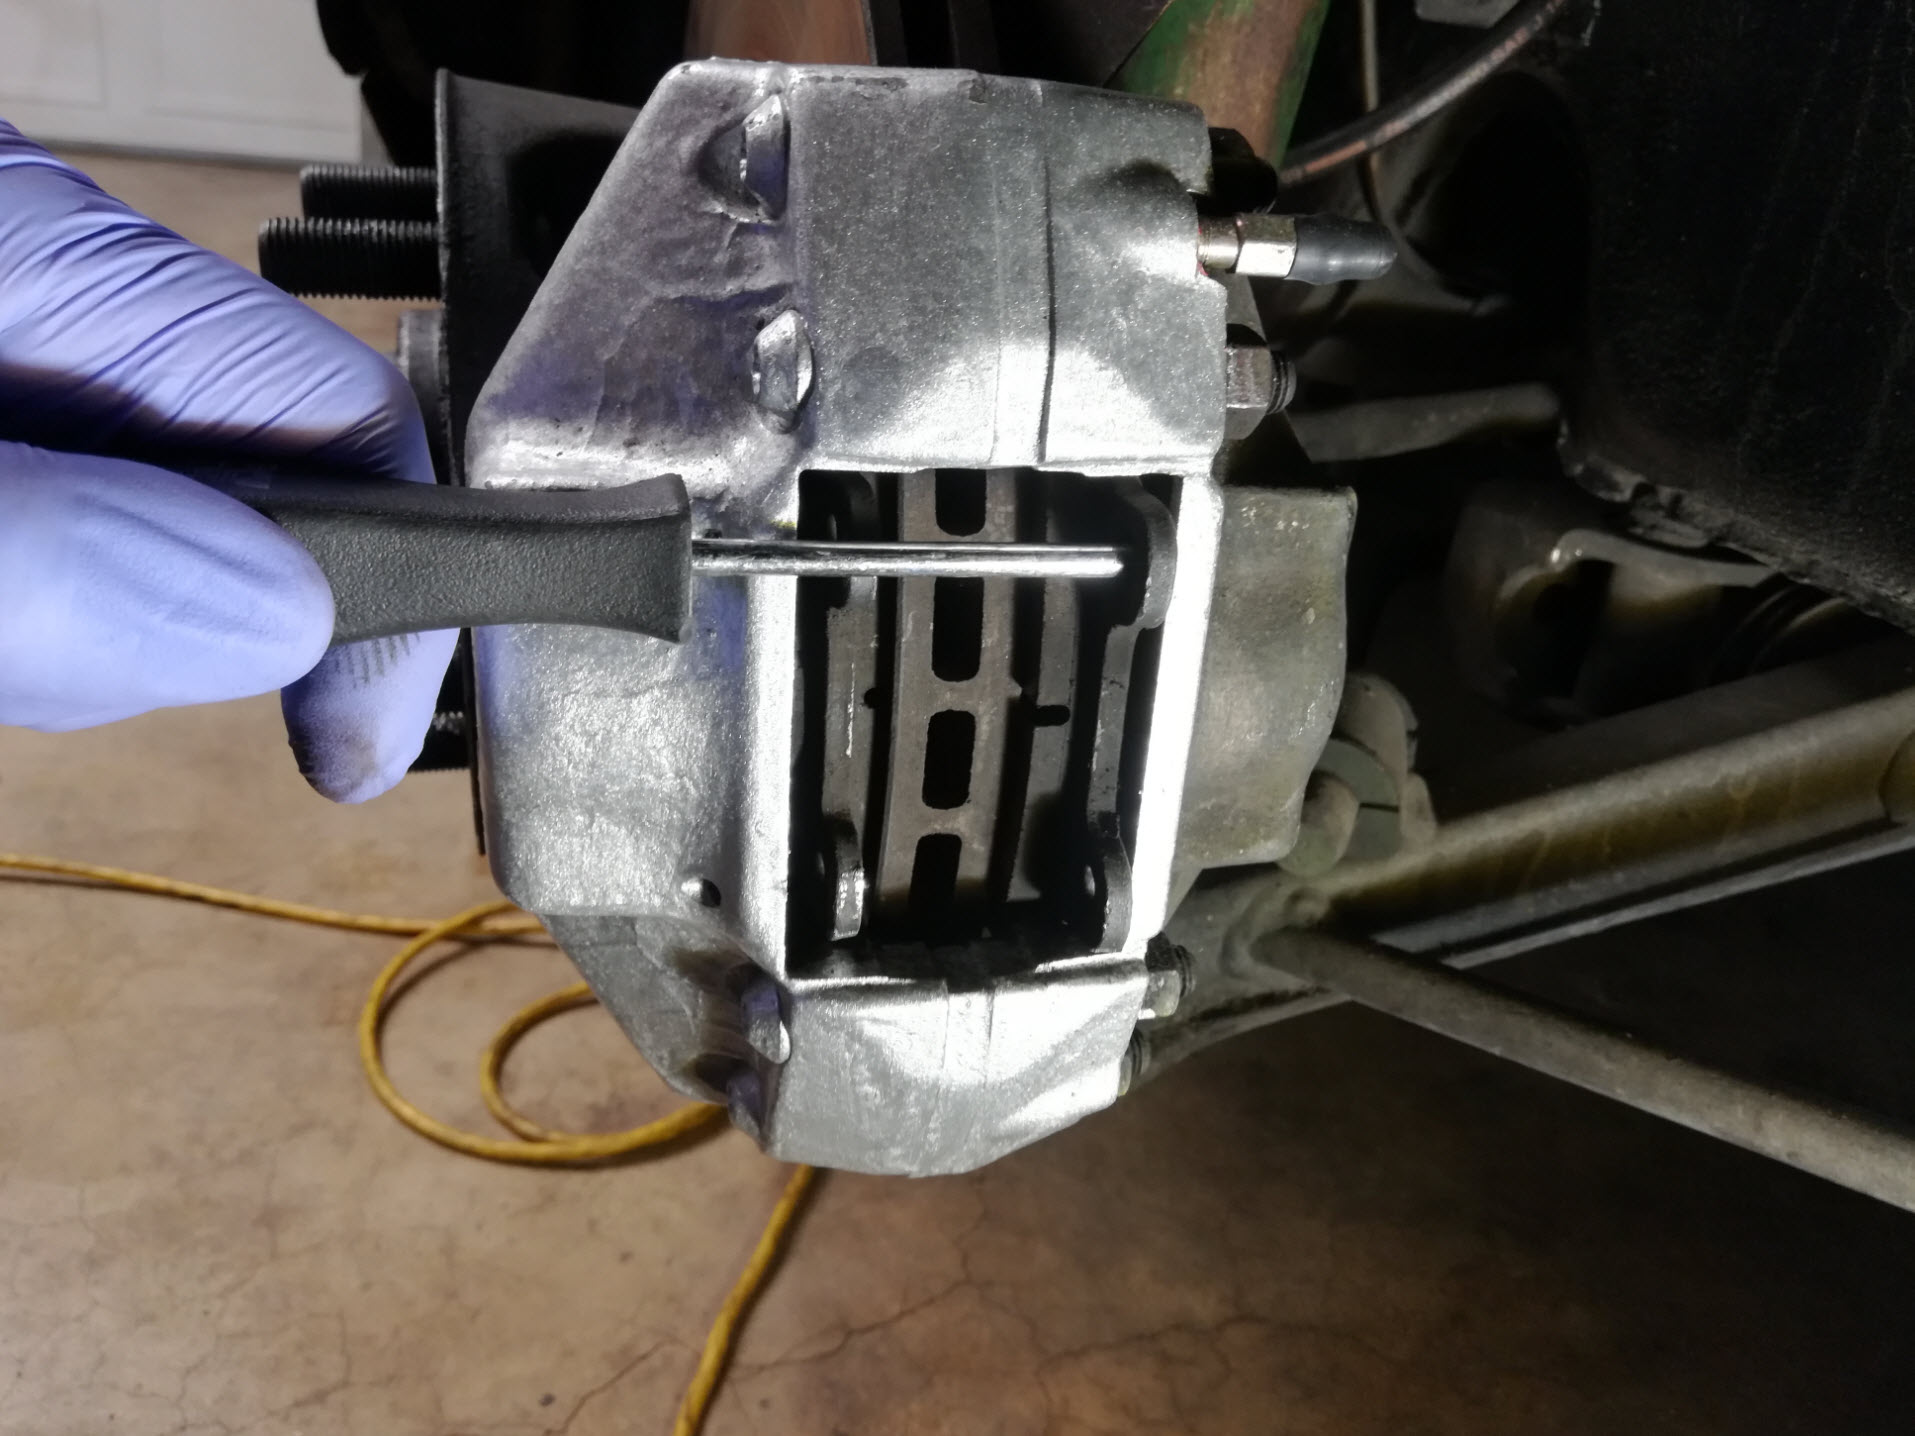
Apply a very thin layer of anti-seize to the edges of the pads that will slide against the caliper. Insert the pads into the caliper, lining up the holes in the pad ears with the holes in the caliper for the retaining pins.
Reinstall the pins from the inside face of the caliper and slide them over the retaining spring to hold it in place against the pads. Once the ends of the retaining pins engage into the caliper holes on the outer face gently tap them into place with a hammer until they are fully seated. If your retaining pins used cotter pins, install those now.
Pad installation is now complete for this axle. You may now repeat steps two through five to replace the pads on the second axle.
Below is a rear brake assembly on the same car. For reference, note that on this particular car only the rear brake retaining pins have cotter pins.
Step 6: Check Brake Function
If you loosened your brake fluid reservoir cap put it back on and tighten it.
Before putting the wheels back on, press on the brake pedal. The first time it may drop a short distance to take up the slack between the pistons, pads, and rotors but should be very firm from then on. Check your brake fluid level once more and top it off if necessary.
Do one last check around the floor near all four calipers to make sure there are no brake fluid leaks. Re-install wheels and put the car back on the ground. After completing a few stops in your driveway, take the car for a short, low speed test drive to test brake function.
Note: If the brake pads don’t state a specific bedding procedure they make take several hundred miles to break-in on their own.
If you found this DIY useful, you can find my previous air-cooled Porsche 911 projects here. For upcoming projects, make sure to check back here or subscribe to our YouTube channel.