- 02/07/2020
- 6 Min Read
- By: Jose Martinez
How To Replace The Front Brake Calipers & Rotors On A Classic Air-Cooled Porsche 911

The front brakes of your Porsche 911 do most of the hard work. If your front rotors are worn or you have less than ideal stopping performance, it is not difficult to replace your front rotors and calipers for instant improvement.
Your air-cooled Porsche 911 has fairly standard front rotors and calipers. Old age and high mileage will often mean the caliper piston seals are toast or may contain a frozen piston. In order to regain braking performance follow this procedure to replace your calipers and swap out your rotors while you are in there.
Porsche Model Years Applicable:
All Porsche 911 cars through 1989 except Turbos, which have different calipers and rotors. The photos and parts shown here are on a 1983 911SC but the general procedures apply to all years within this range. Consult a service manual for detailed information on your particular model year’s part numbers and torque specs.
Tools Needed To Replace Porsche 911 Front Brake Calipers & Rotors:
- Jack stands
- Floor jack
- Jack pad
- Rubber gloves
- Safety glasses
- Paper towels
- Penetrating oil
- Socket set
- Ratchet
- Breaker bar
- Flare nut wrench set
- Hex (Allen) wrench set
- Claw hammer
- Rubber mallet
- Plastic trim removal tool
- Lithium-based wheel bearing grease
- Brake clean
- Service manual for your car’s model year
Parts Needed To Replace Porsche 911 Front Brake Calipers & Rotors:
- Front right caliper
- Front left caliper
- Front brake rotors
- Front brake pads
- Because this procedure covers an extensive model year range it is recommended that you search the catalog for your car’s specific parts.
Procedure To Replace Porsche 911 Front Brake Calipers & Rotors:
Step 1: Raise Car on Jack Stands
Raise the front of the car on jack stands using this procedure.
Step 2: Remove Brake Pads
Remove the front brake pads and retaining hardware using this procedure.
Step 3: Remove Front Brake Caliper
Place an oil drain pan under the front brake assembly to catch any spilled brake fluid.
Loosen the two caliper bolts behind the caliper; you may need a breaker bar for this. Now, using a flare nut wrench, loosen the hard brake line going into the caliper.
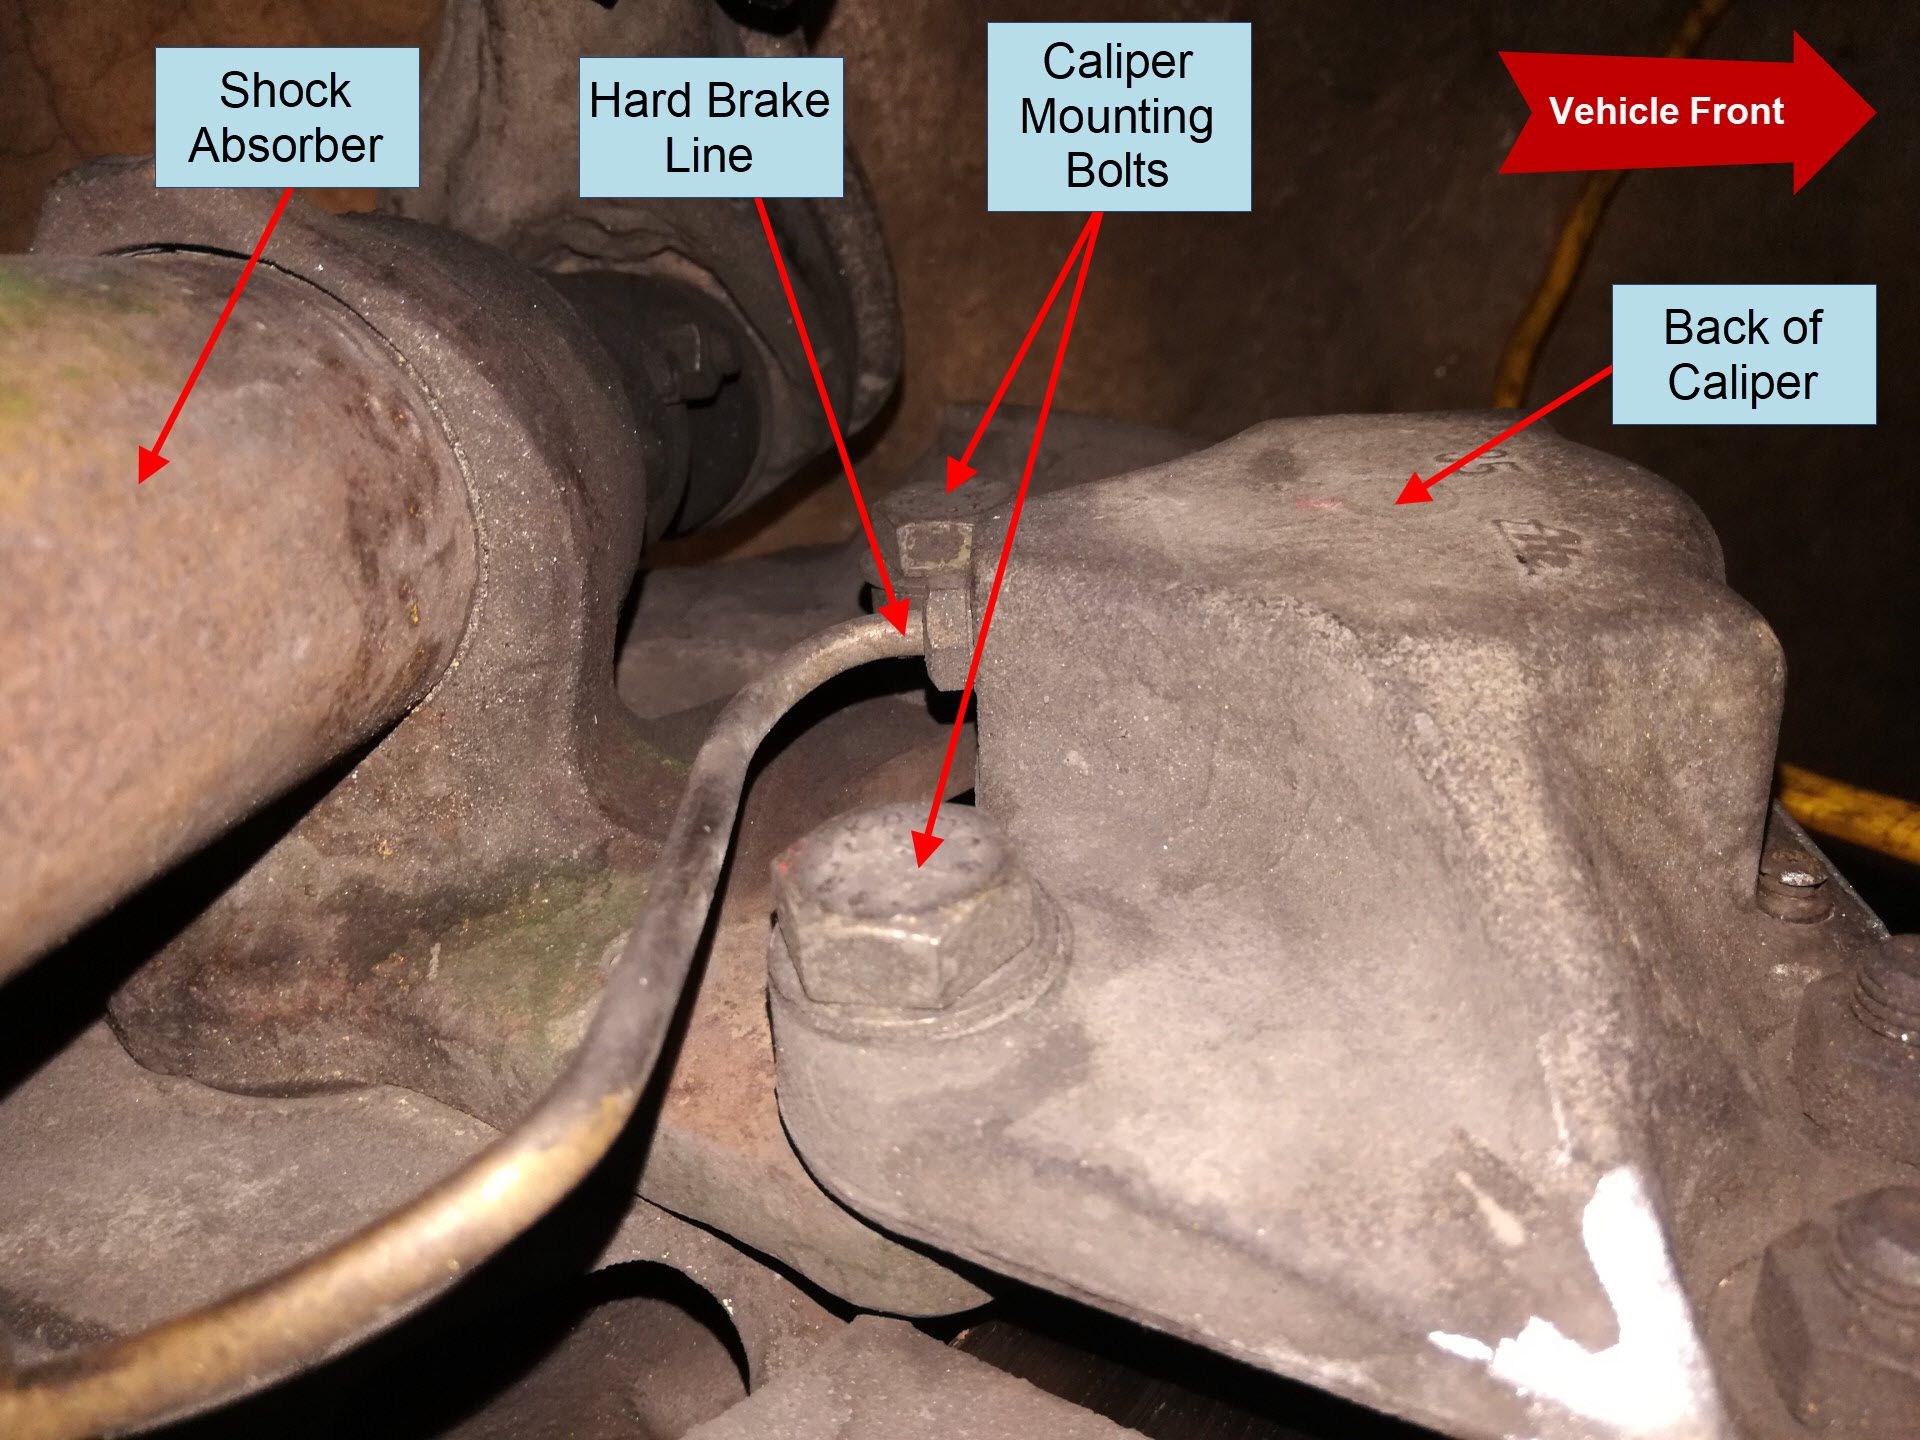
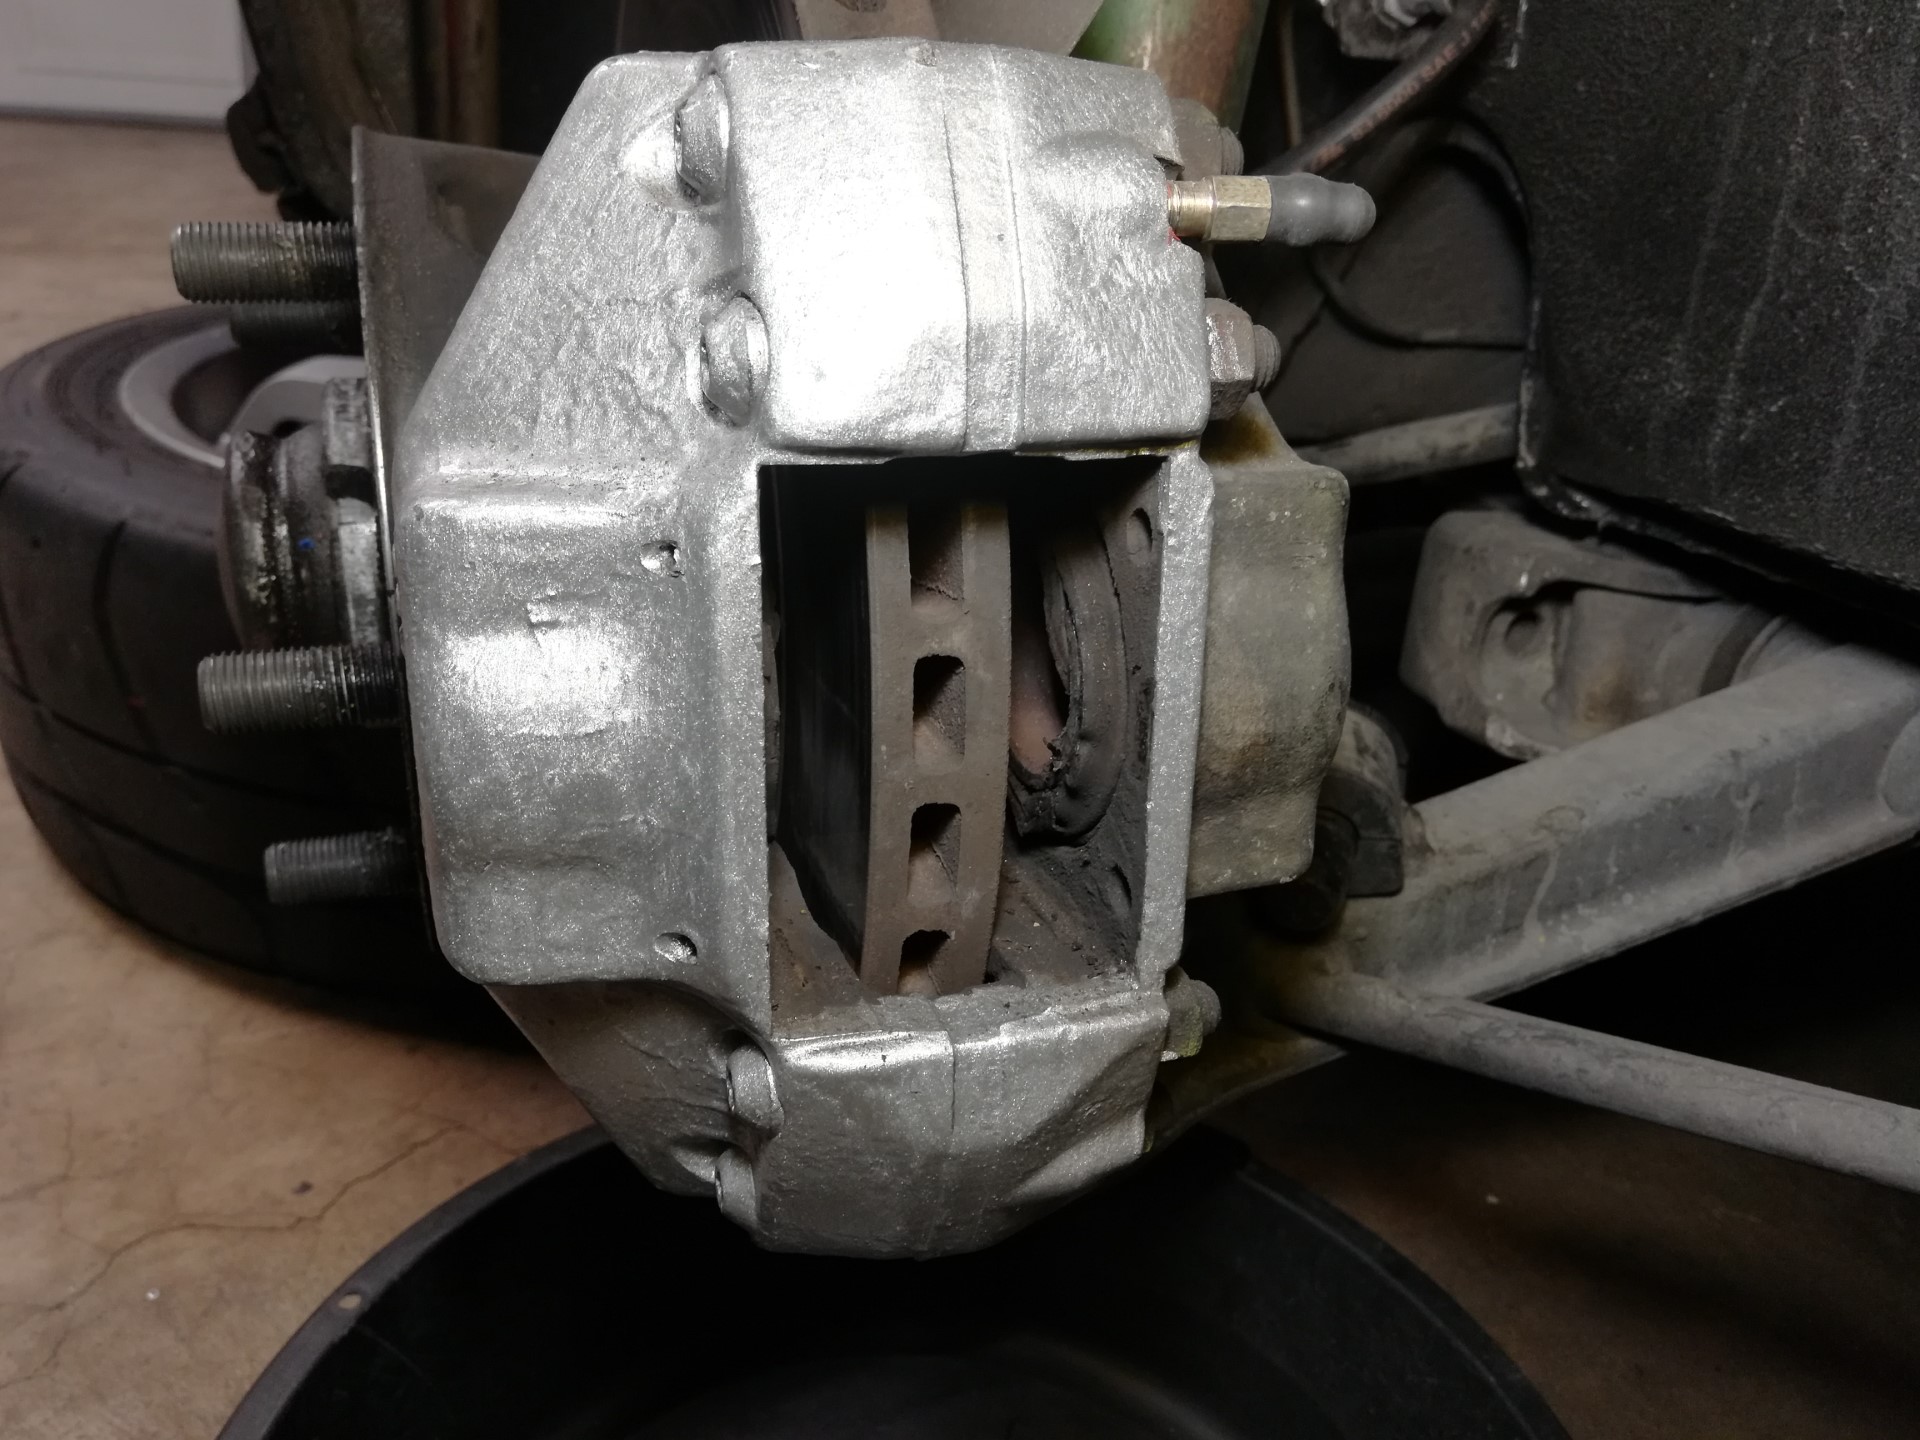
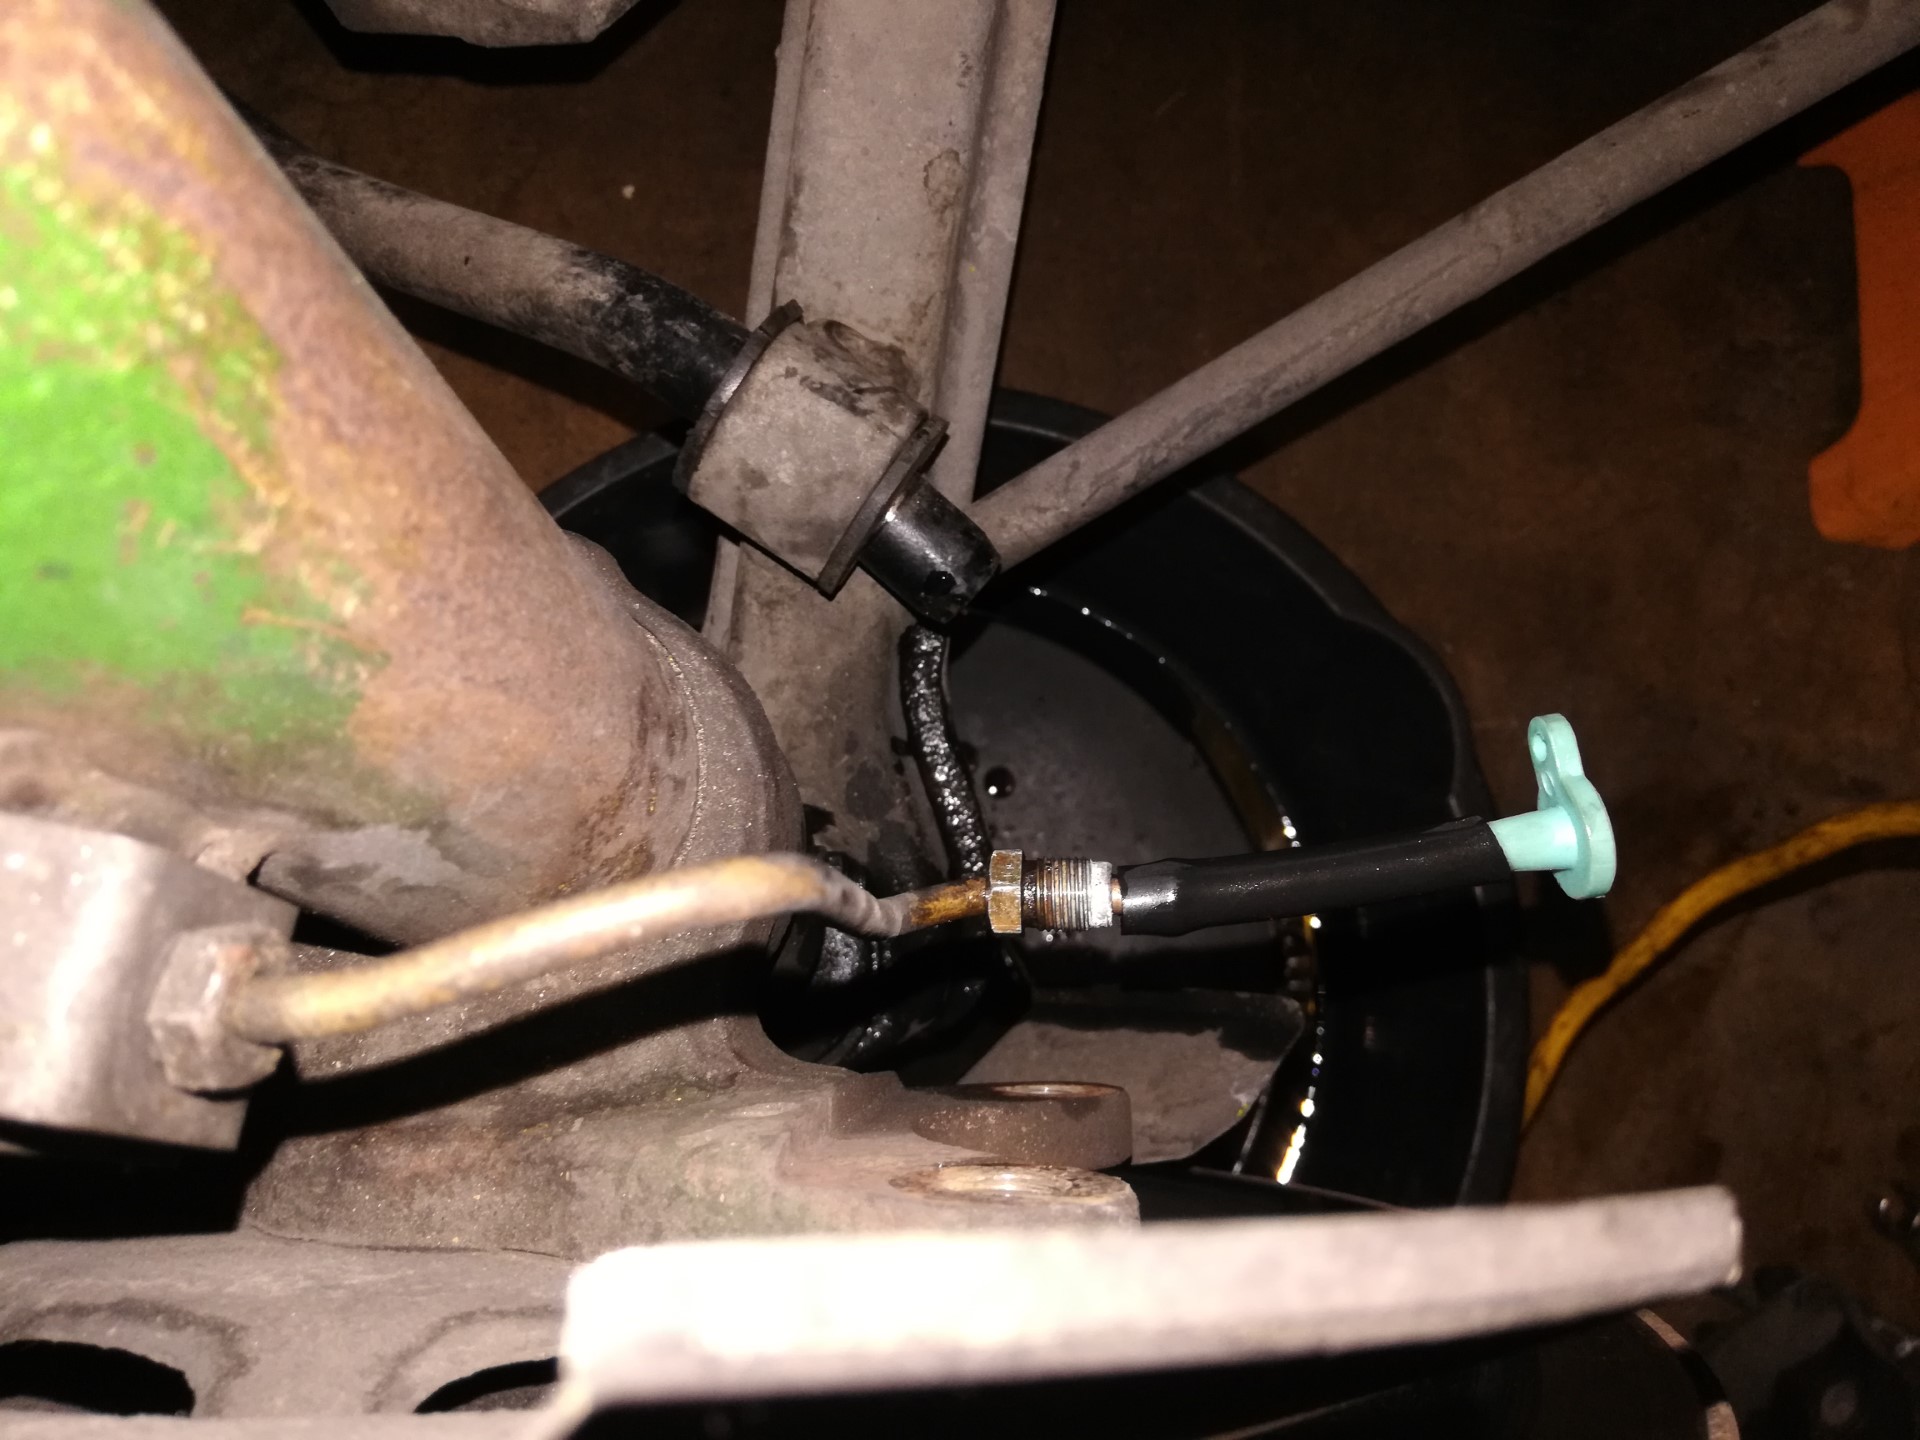
Support the weight of the caliper with one hand and remove the 2 bolts with the other hand. Be very careful not to damage the hard brake line. Unscrew the hard brake line fitting with your fingers and plug the brake line opening with your finger while you lower the caliper to the ground. Plug the brake line fitting so you don’t lose brake fluid while you replace the caliper. Use a vacuum line cap, or a brake bleeder screw cap. I used a junk piece of vacuum line and a rubber plug.
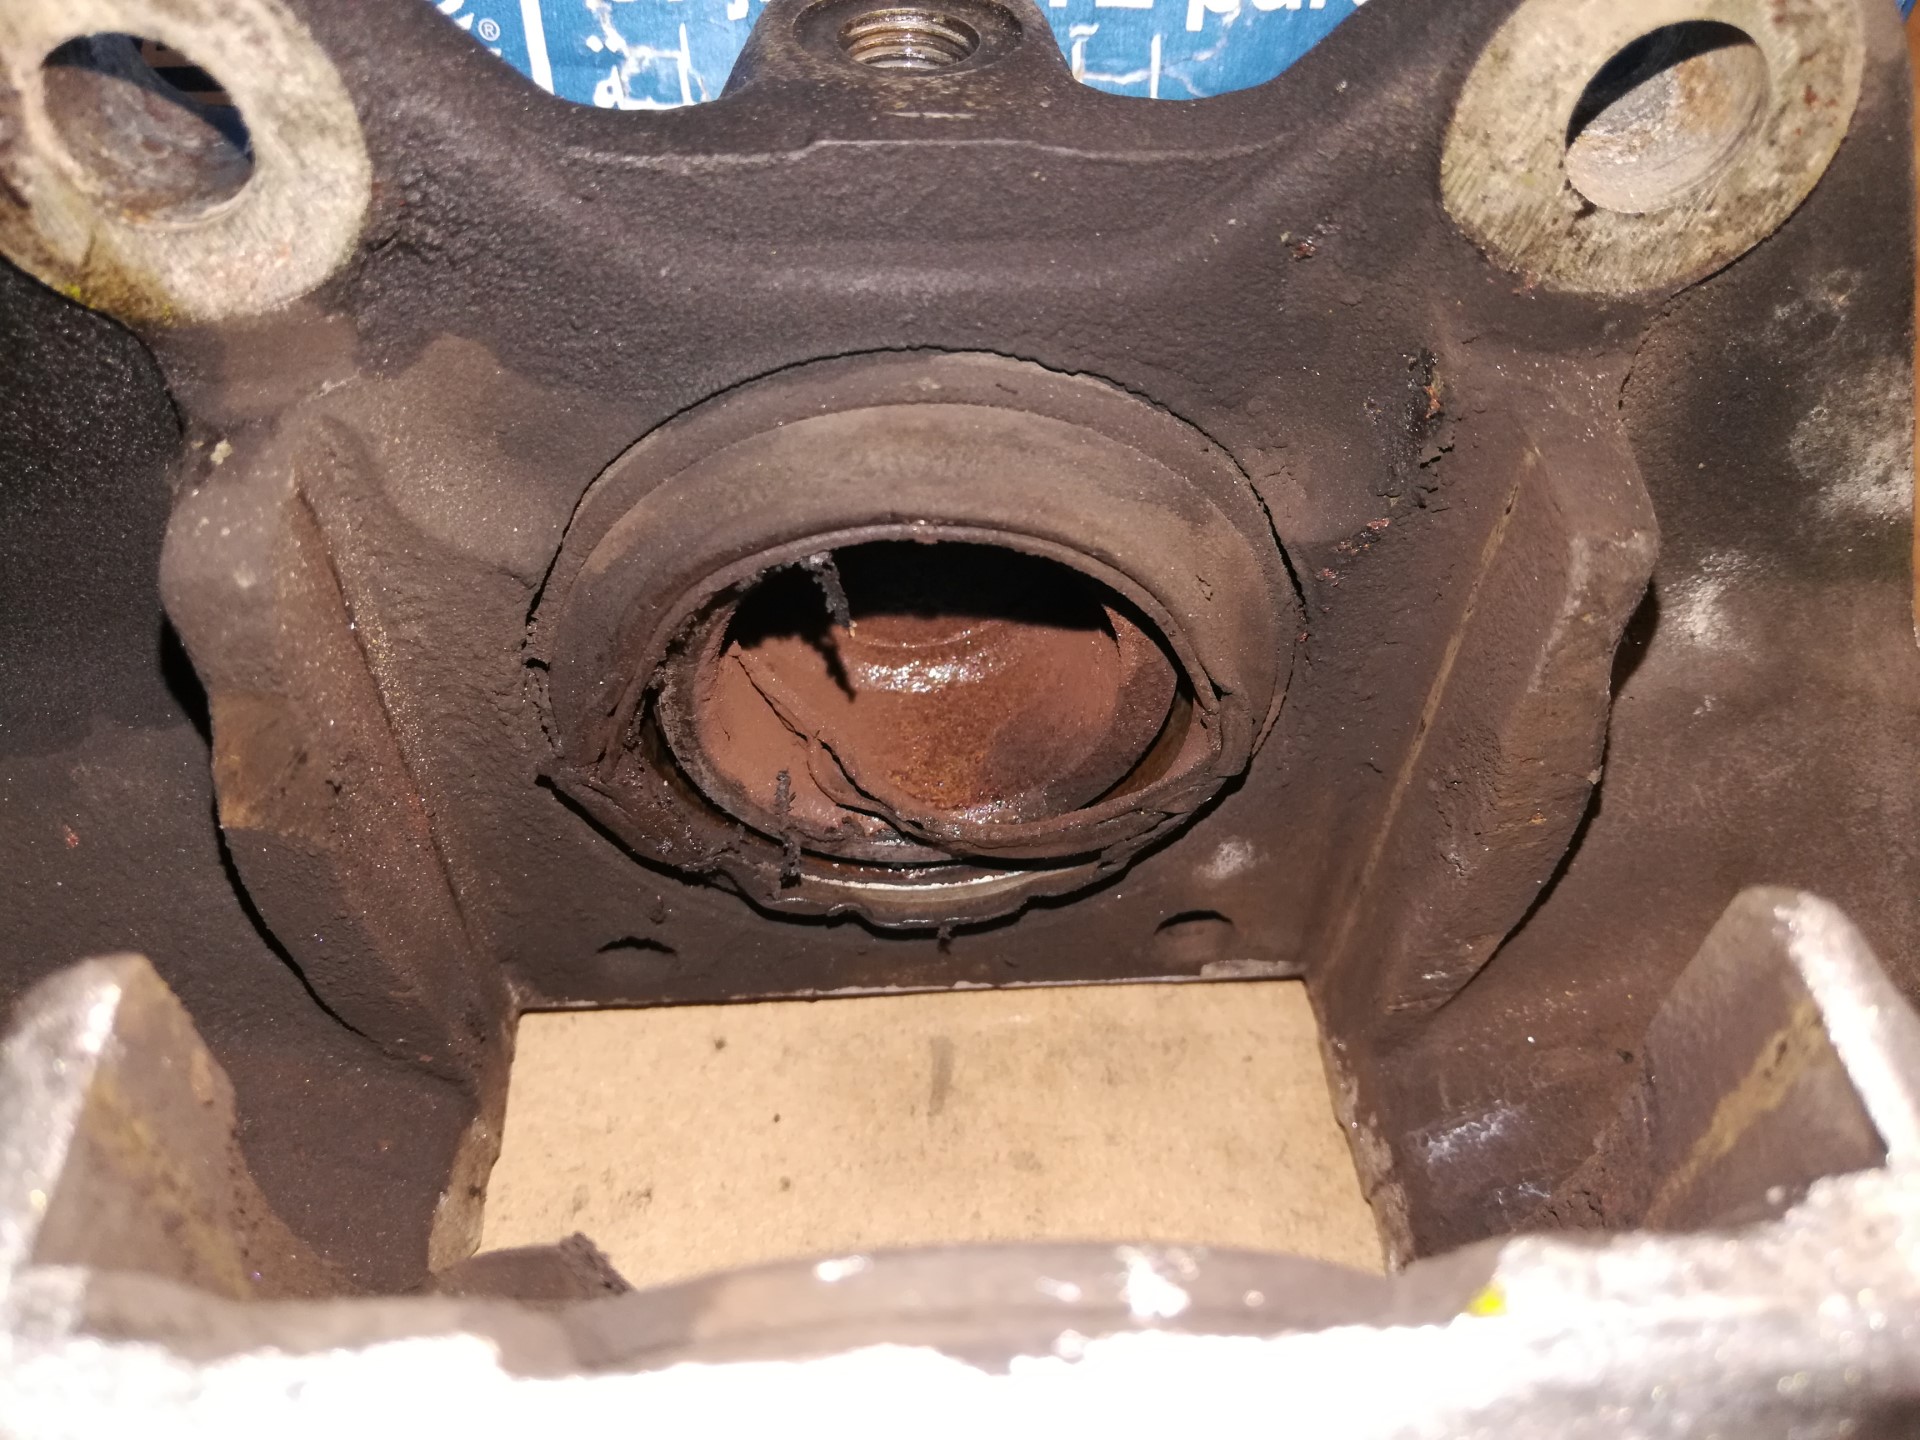
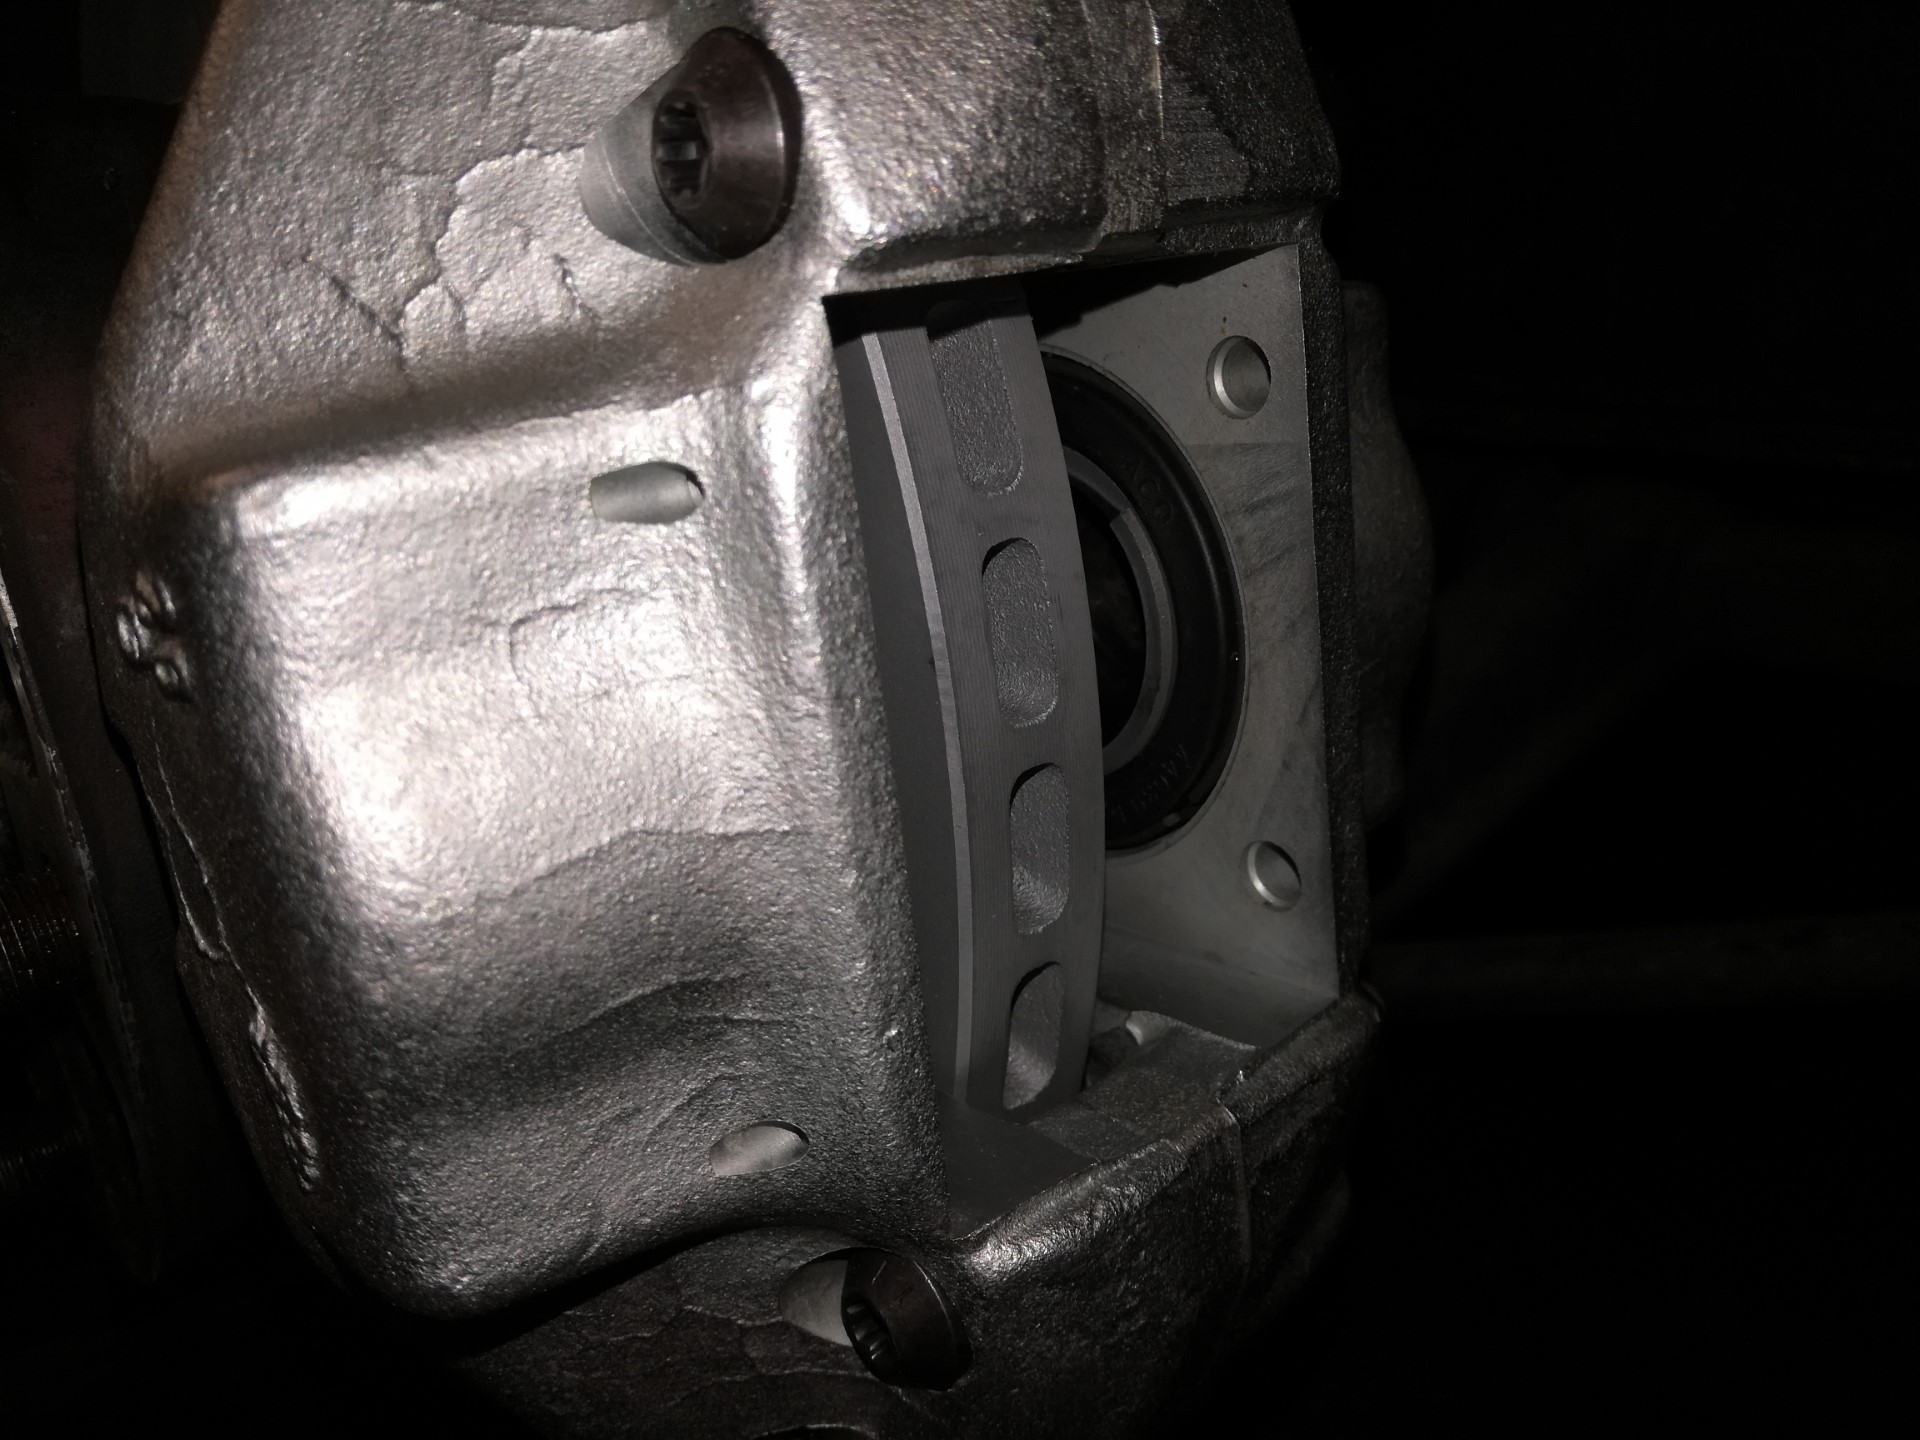
Drain whatever fluid you can from the caliper into the drain pan below and set the caliper on a bench. You can see here how bad my piston seals were. This caliper had one piston frozen in its bore.
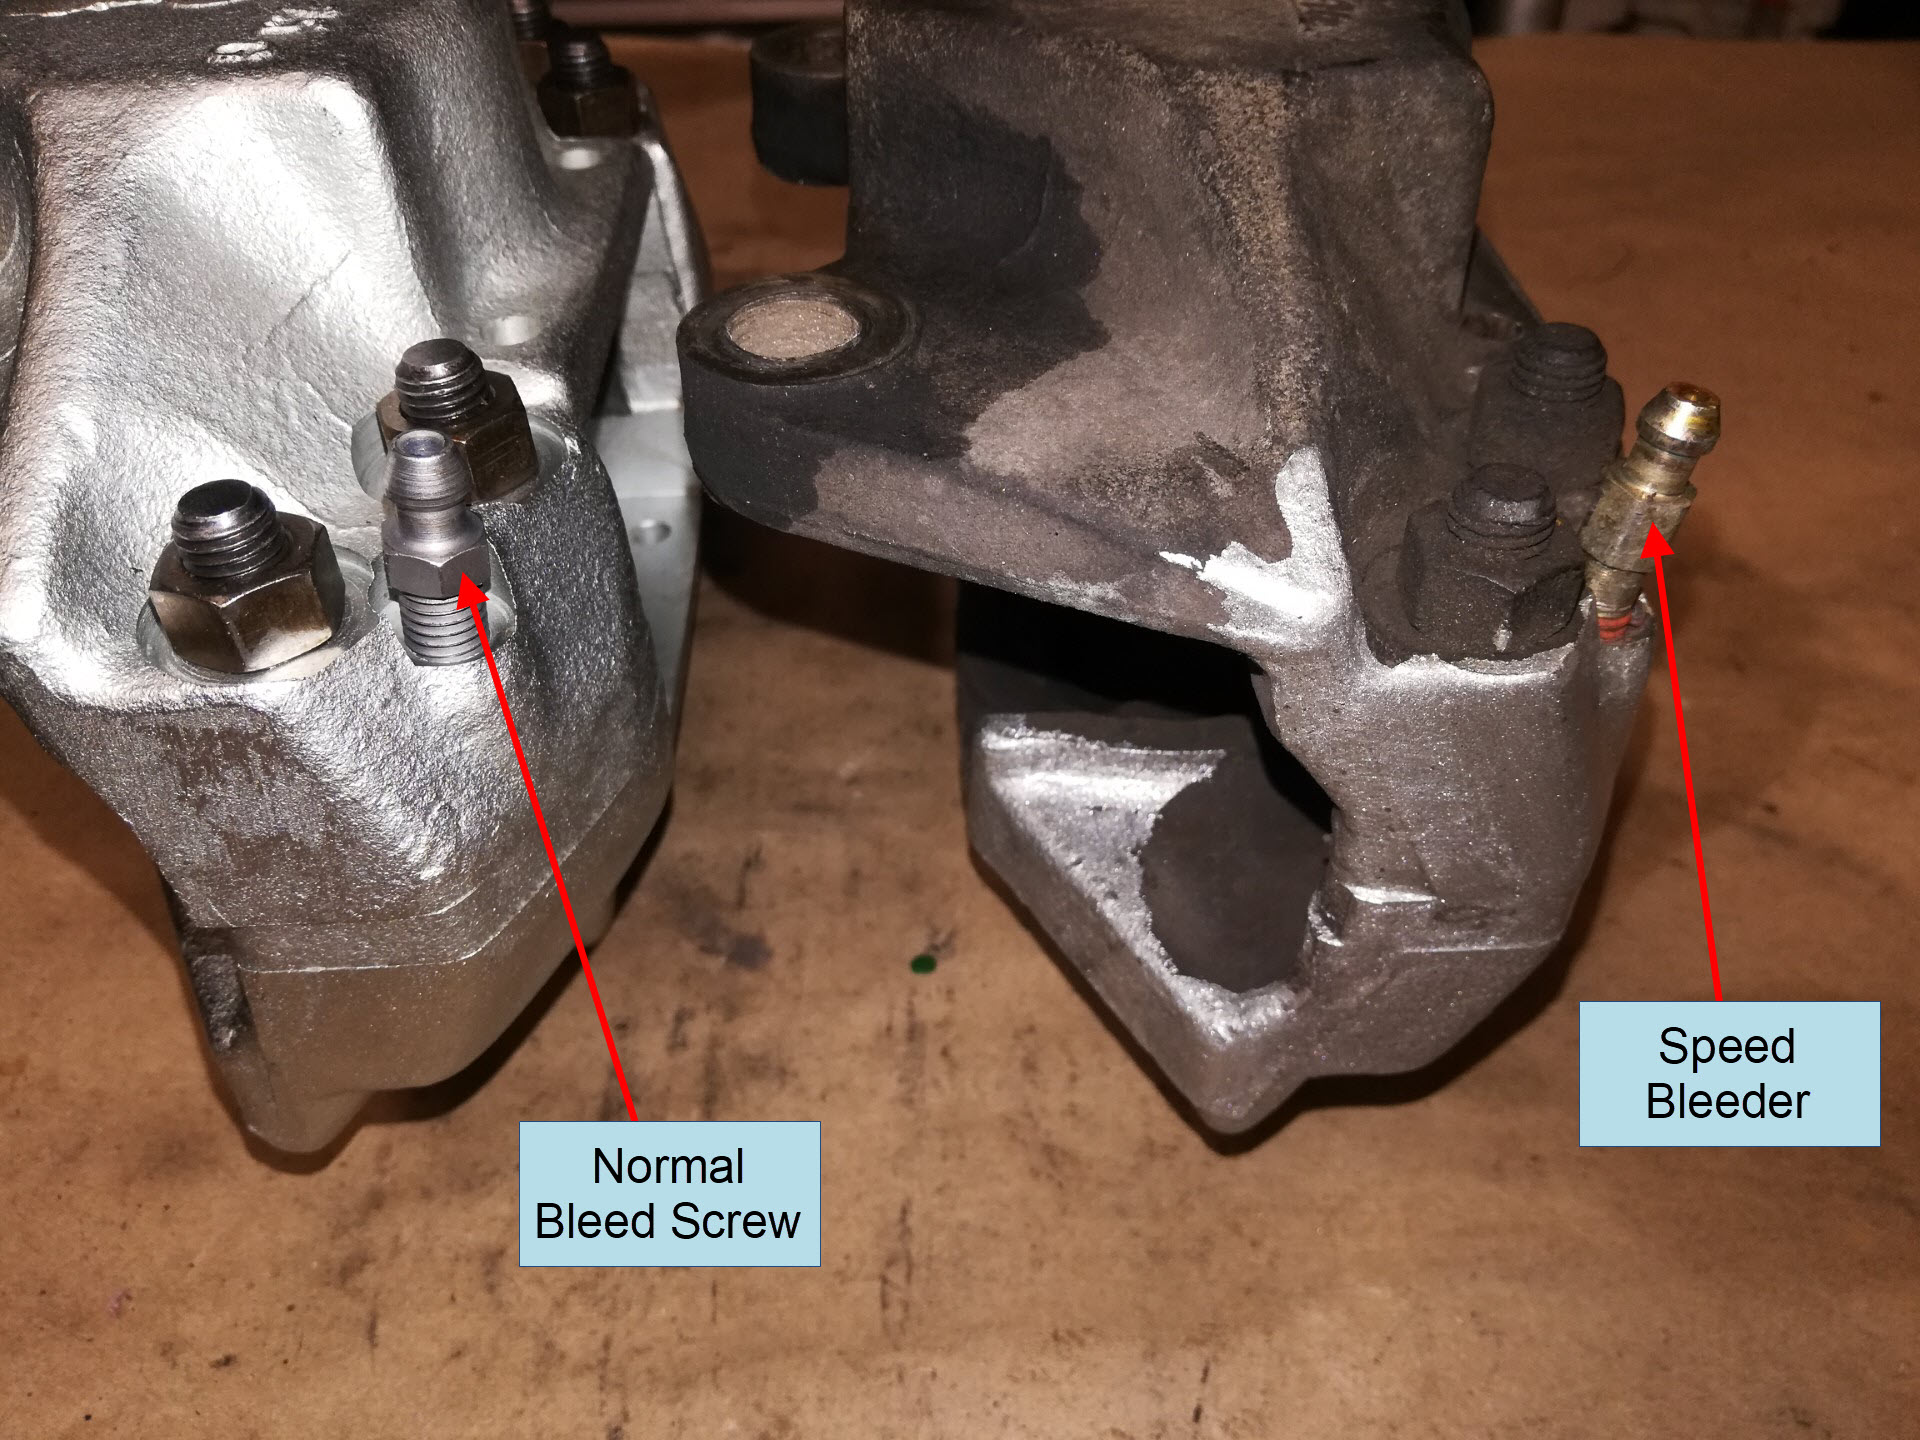
If your old calipers have speed bleeders, unscrew the bleed screw on the new caliper and replace it with the speed bleeder from the old one. If not leave the bleed screws alone.
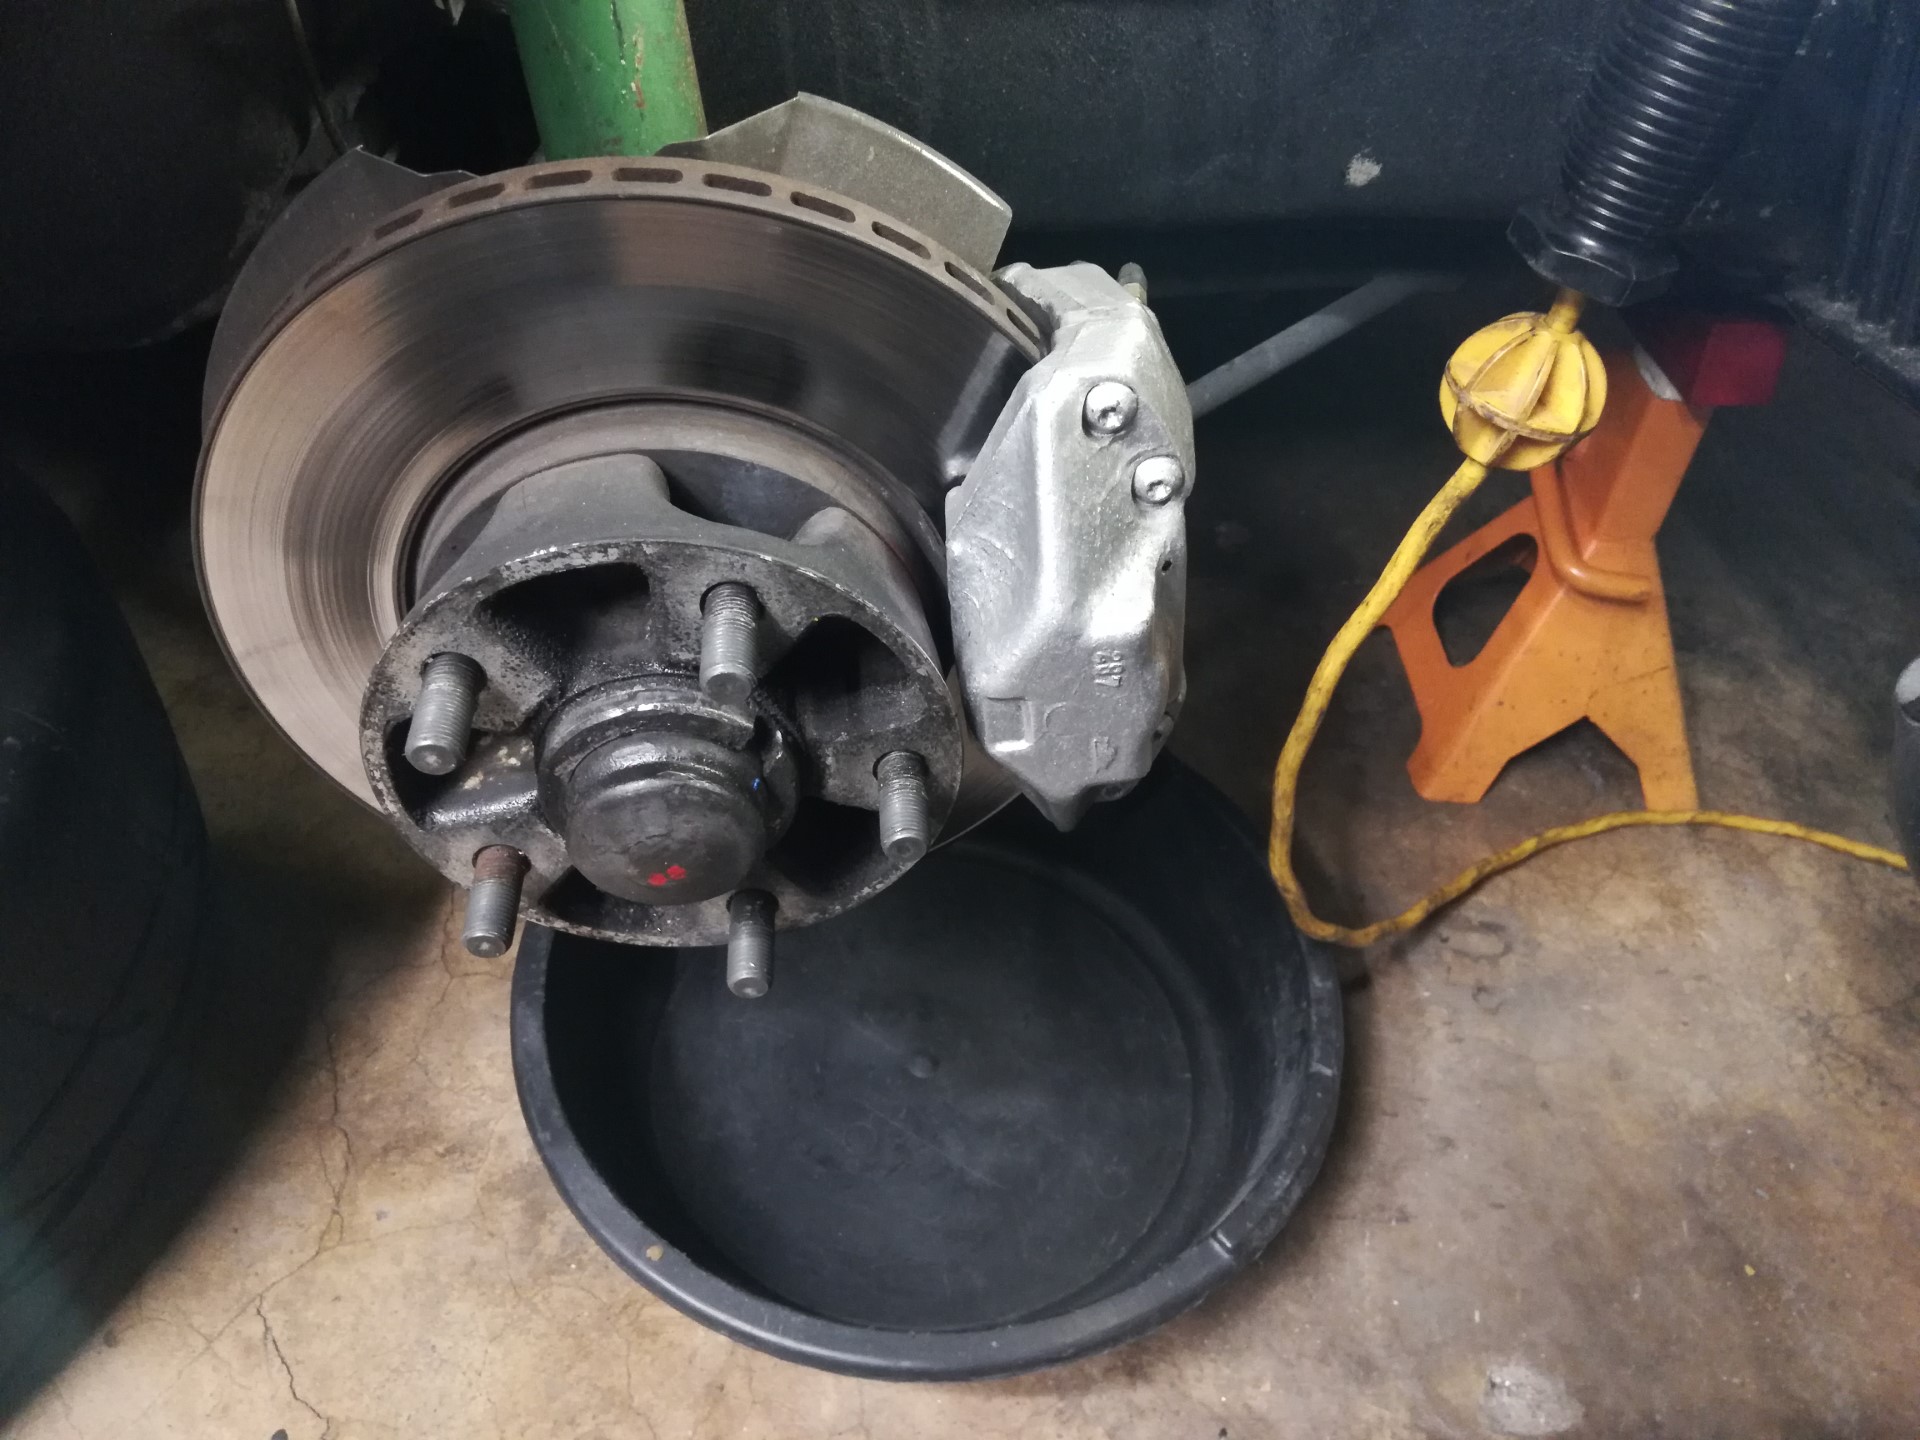
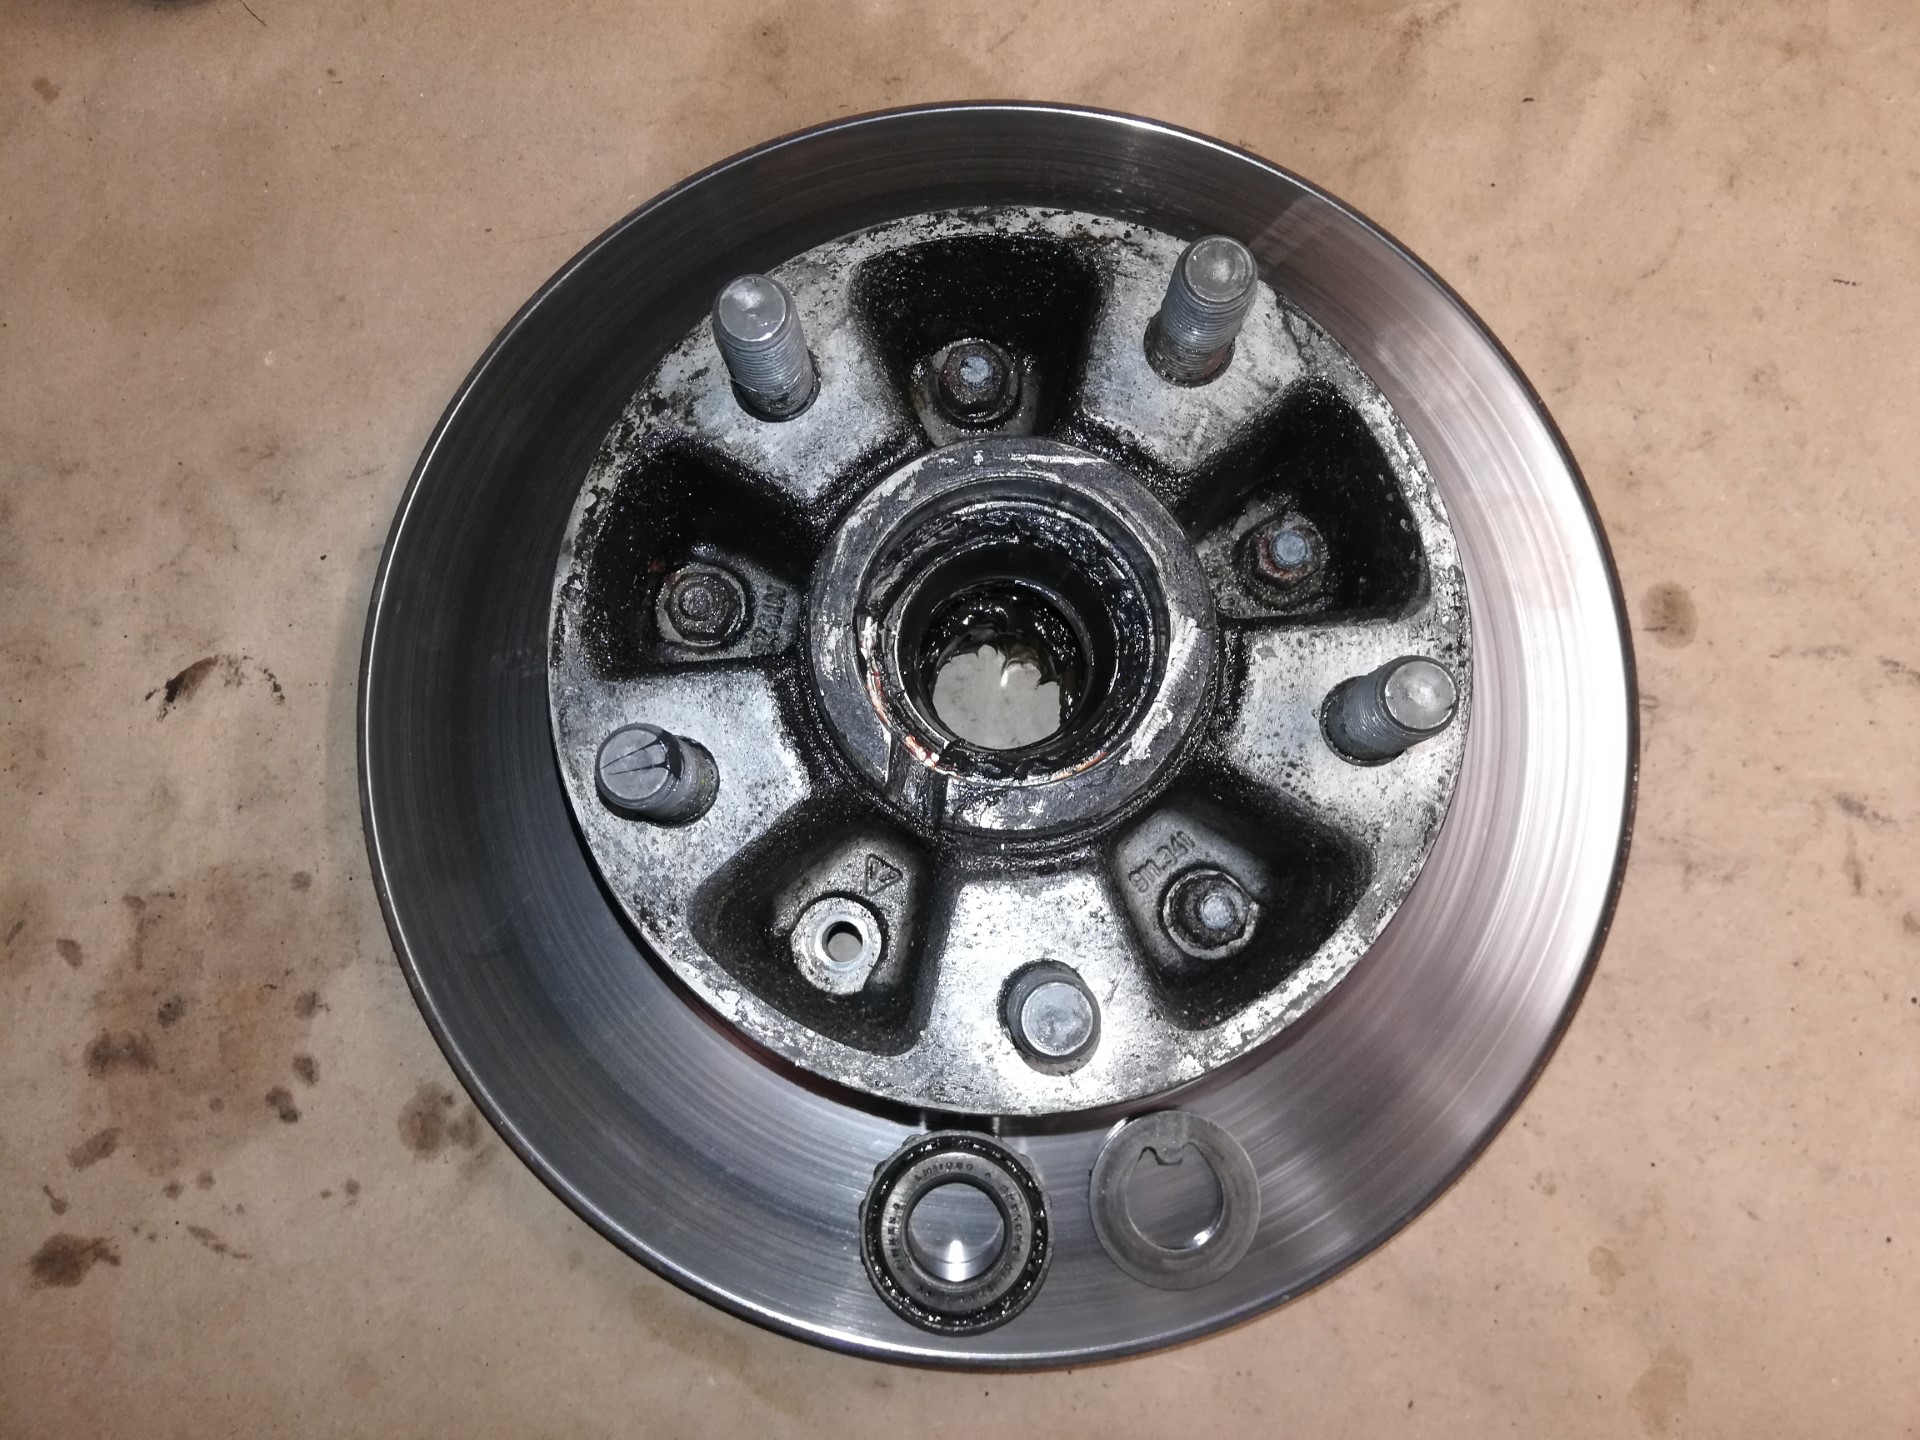
Step 4: Remove Front Rotor
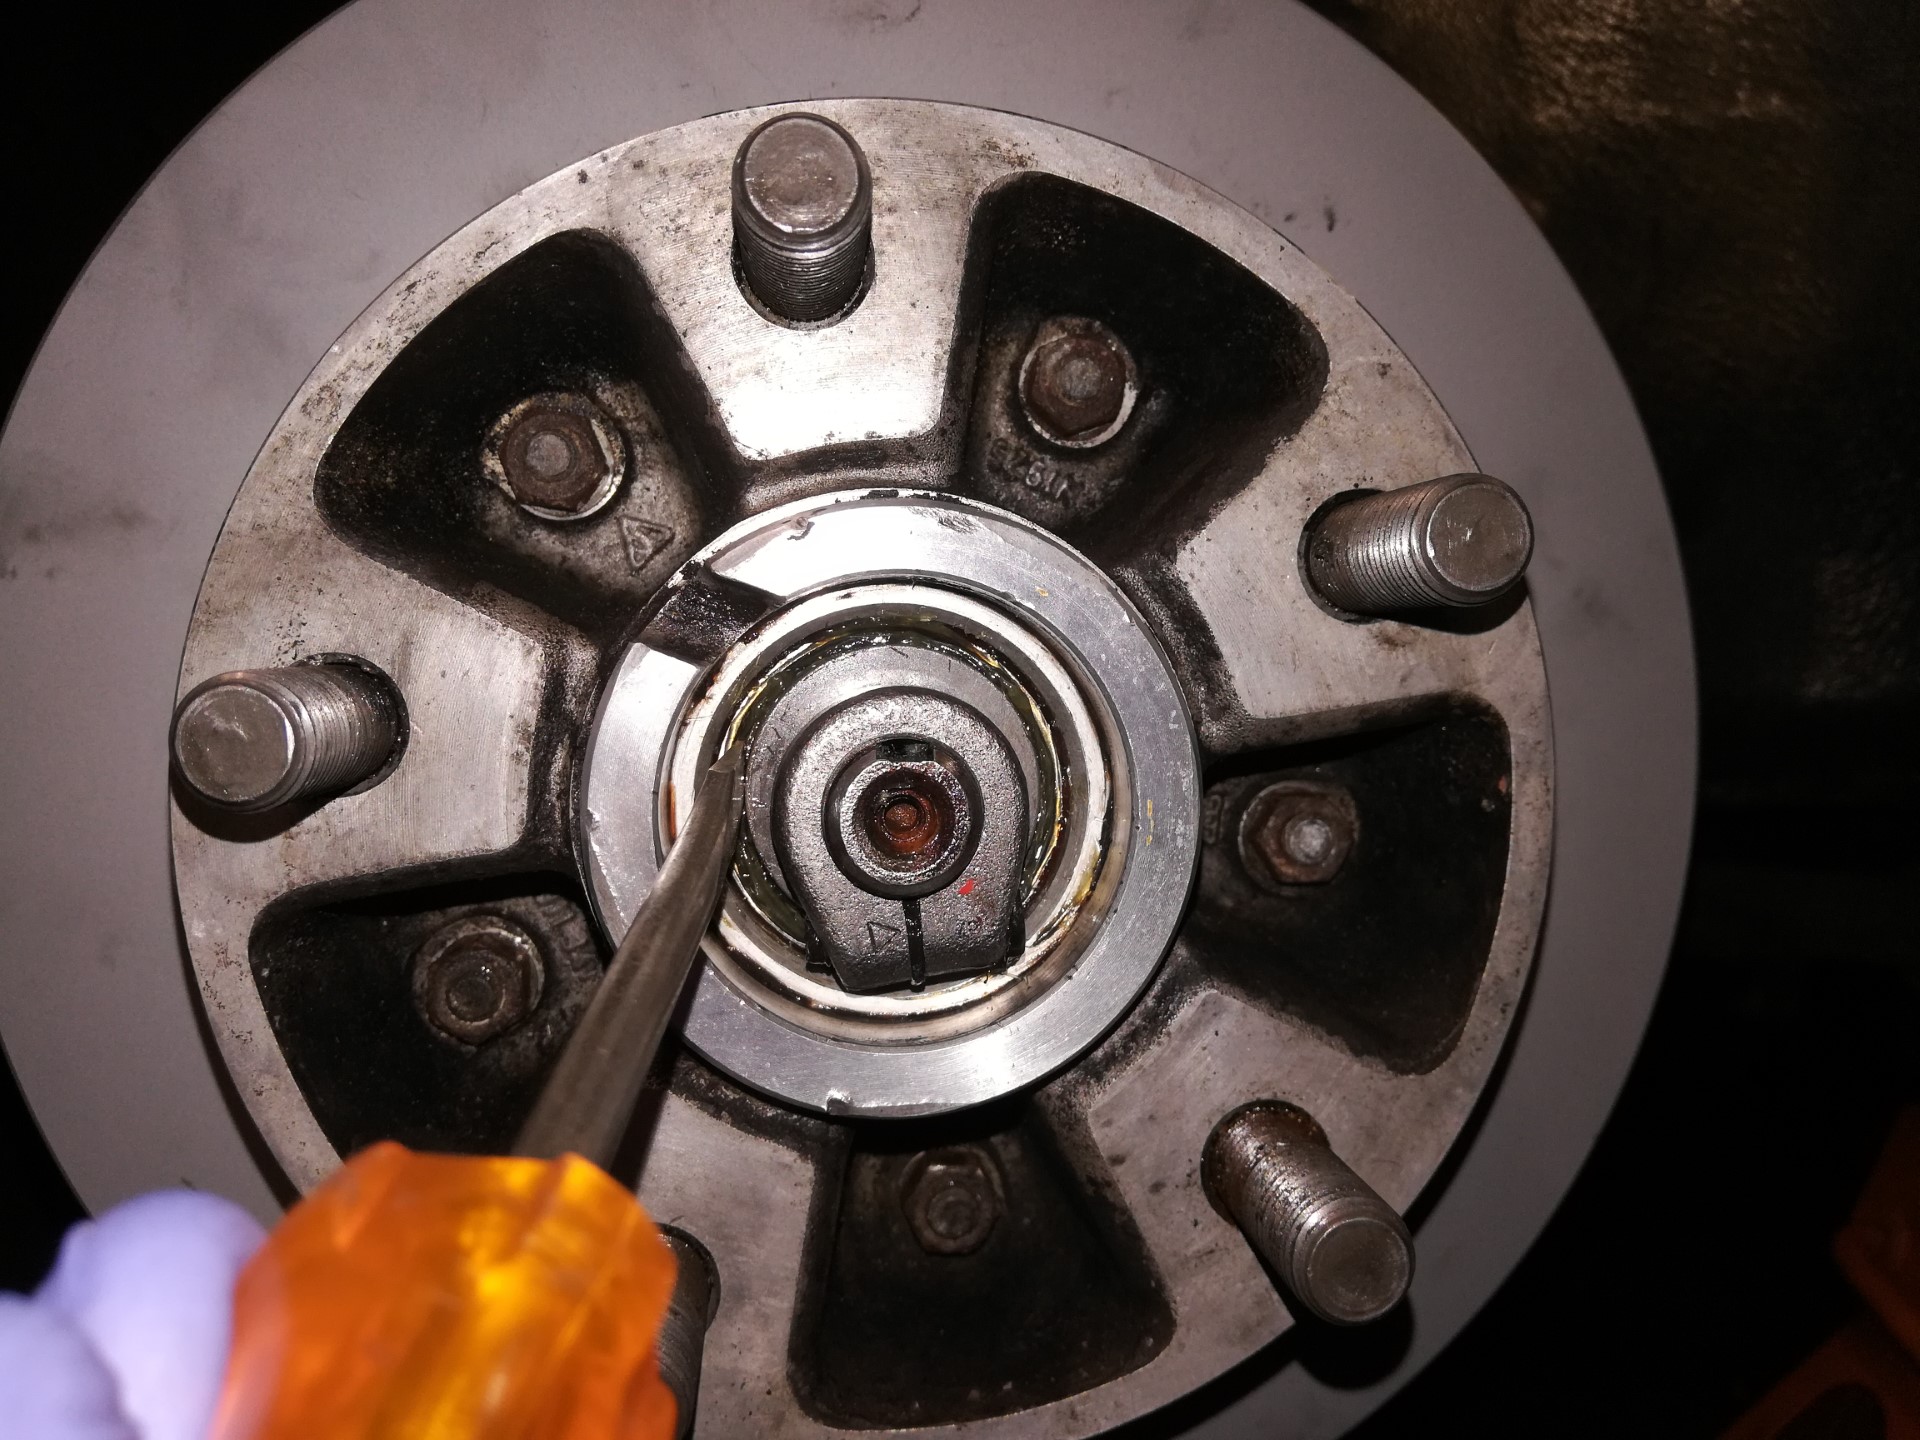
To remove the front rotor, start by prying off the center dust cap. An easy way to do this is to use a claw hammer and put the claw end in the dust cap groove and the head of the hammer on a wheel stud to gently pry up on the dust cap.
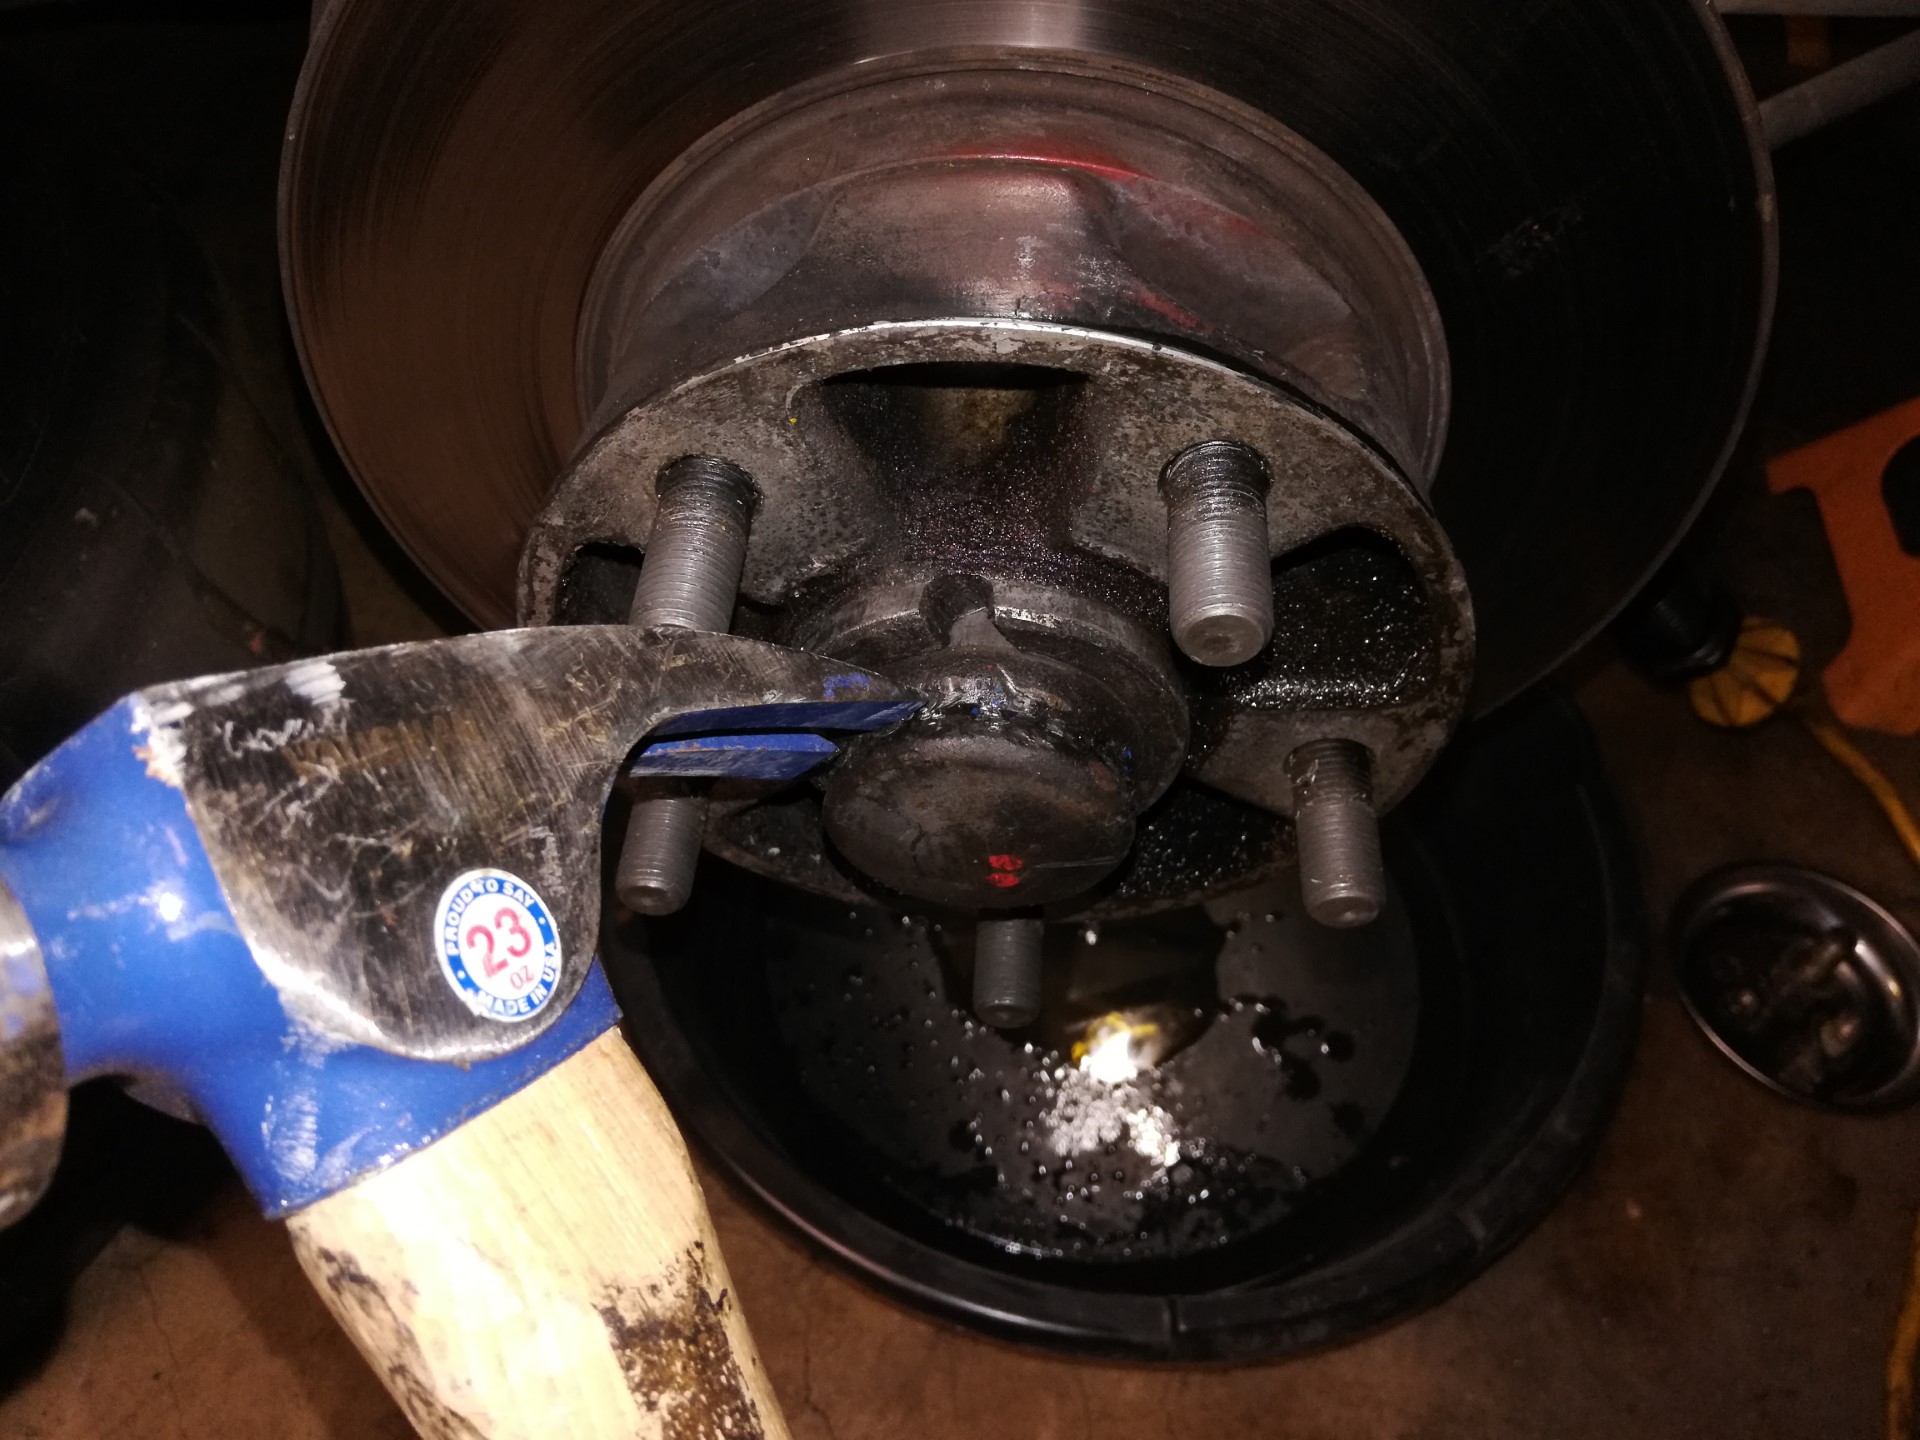
Rotate the brake rotor and keep prying up at different spots on the cap until it pops off.
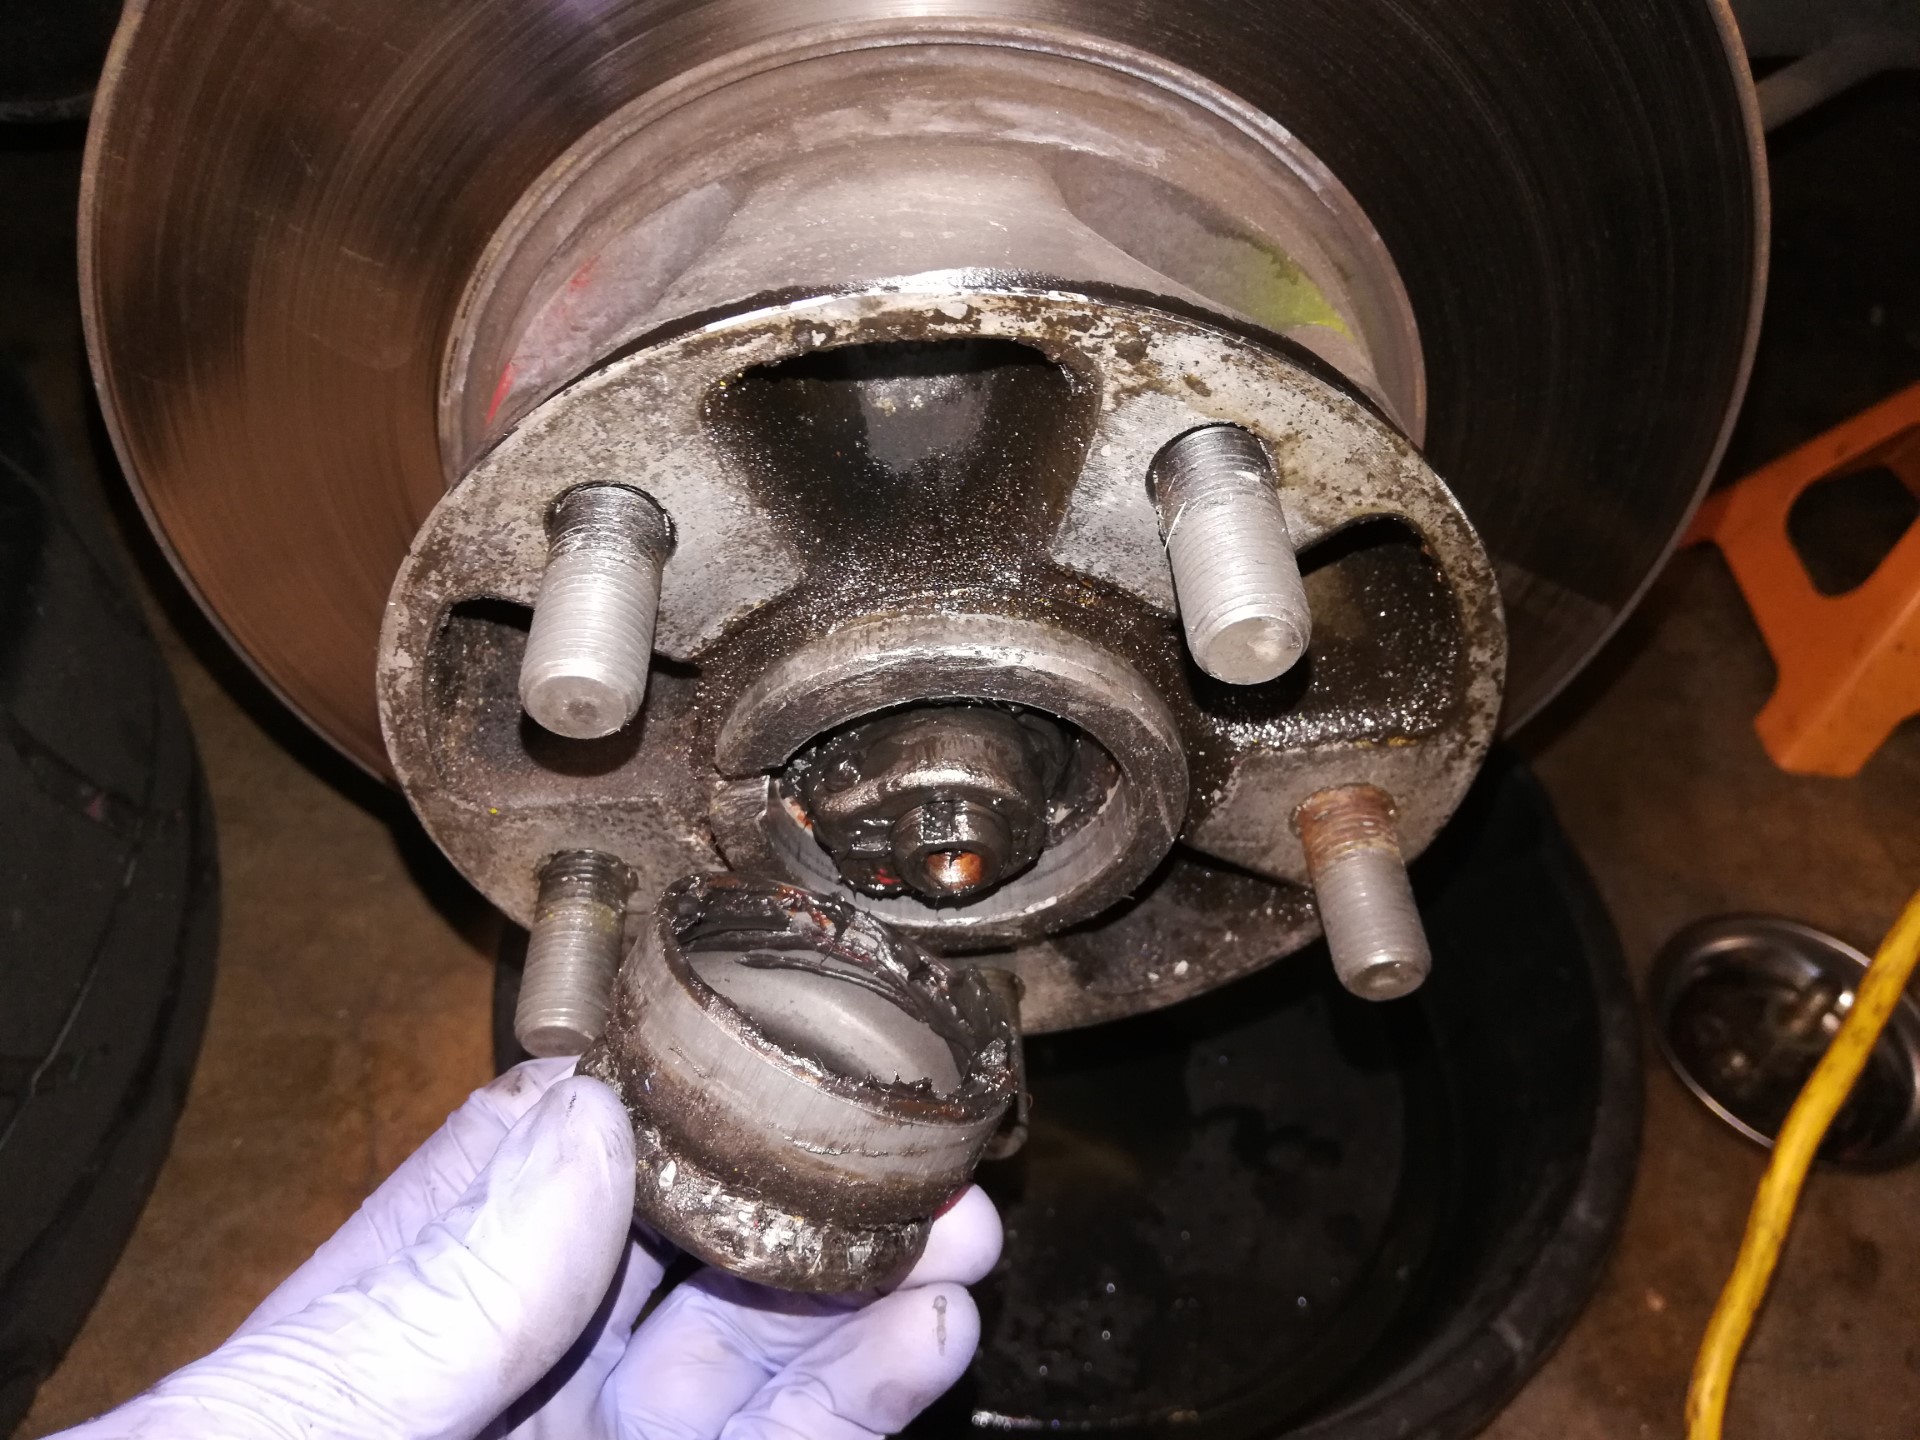
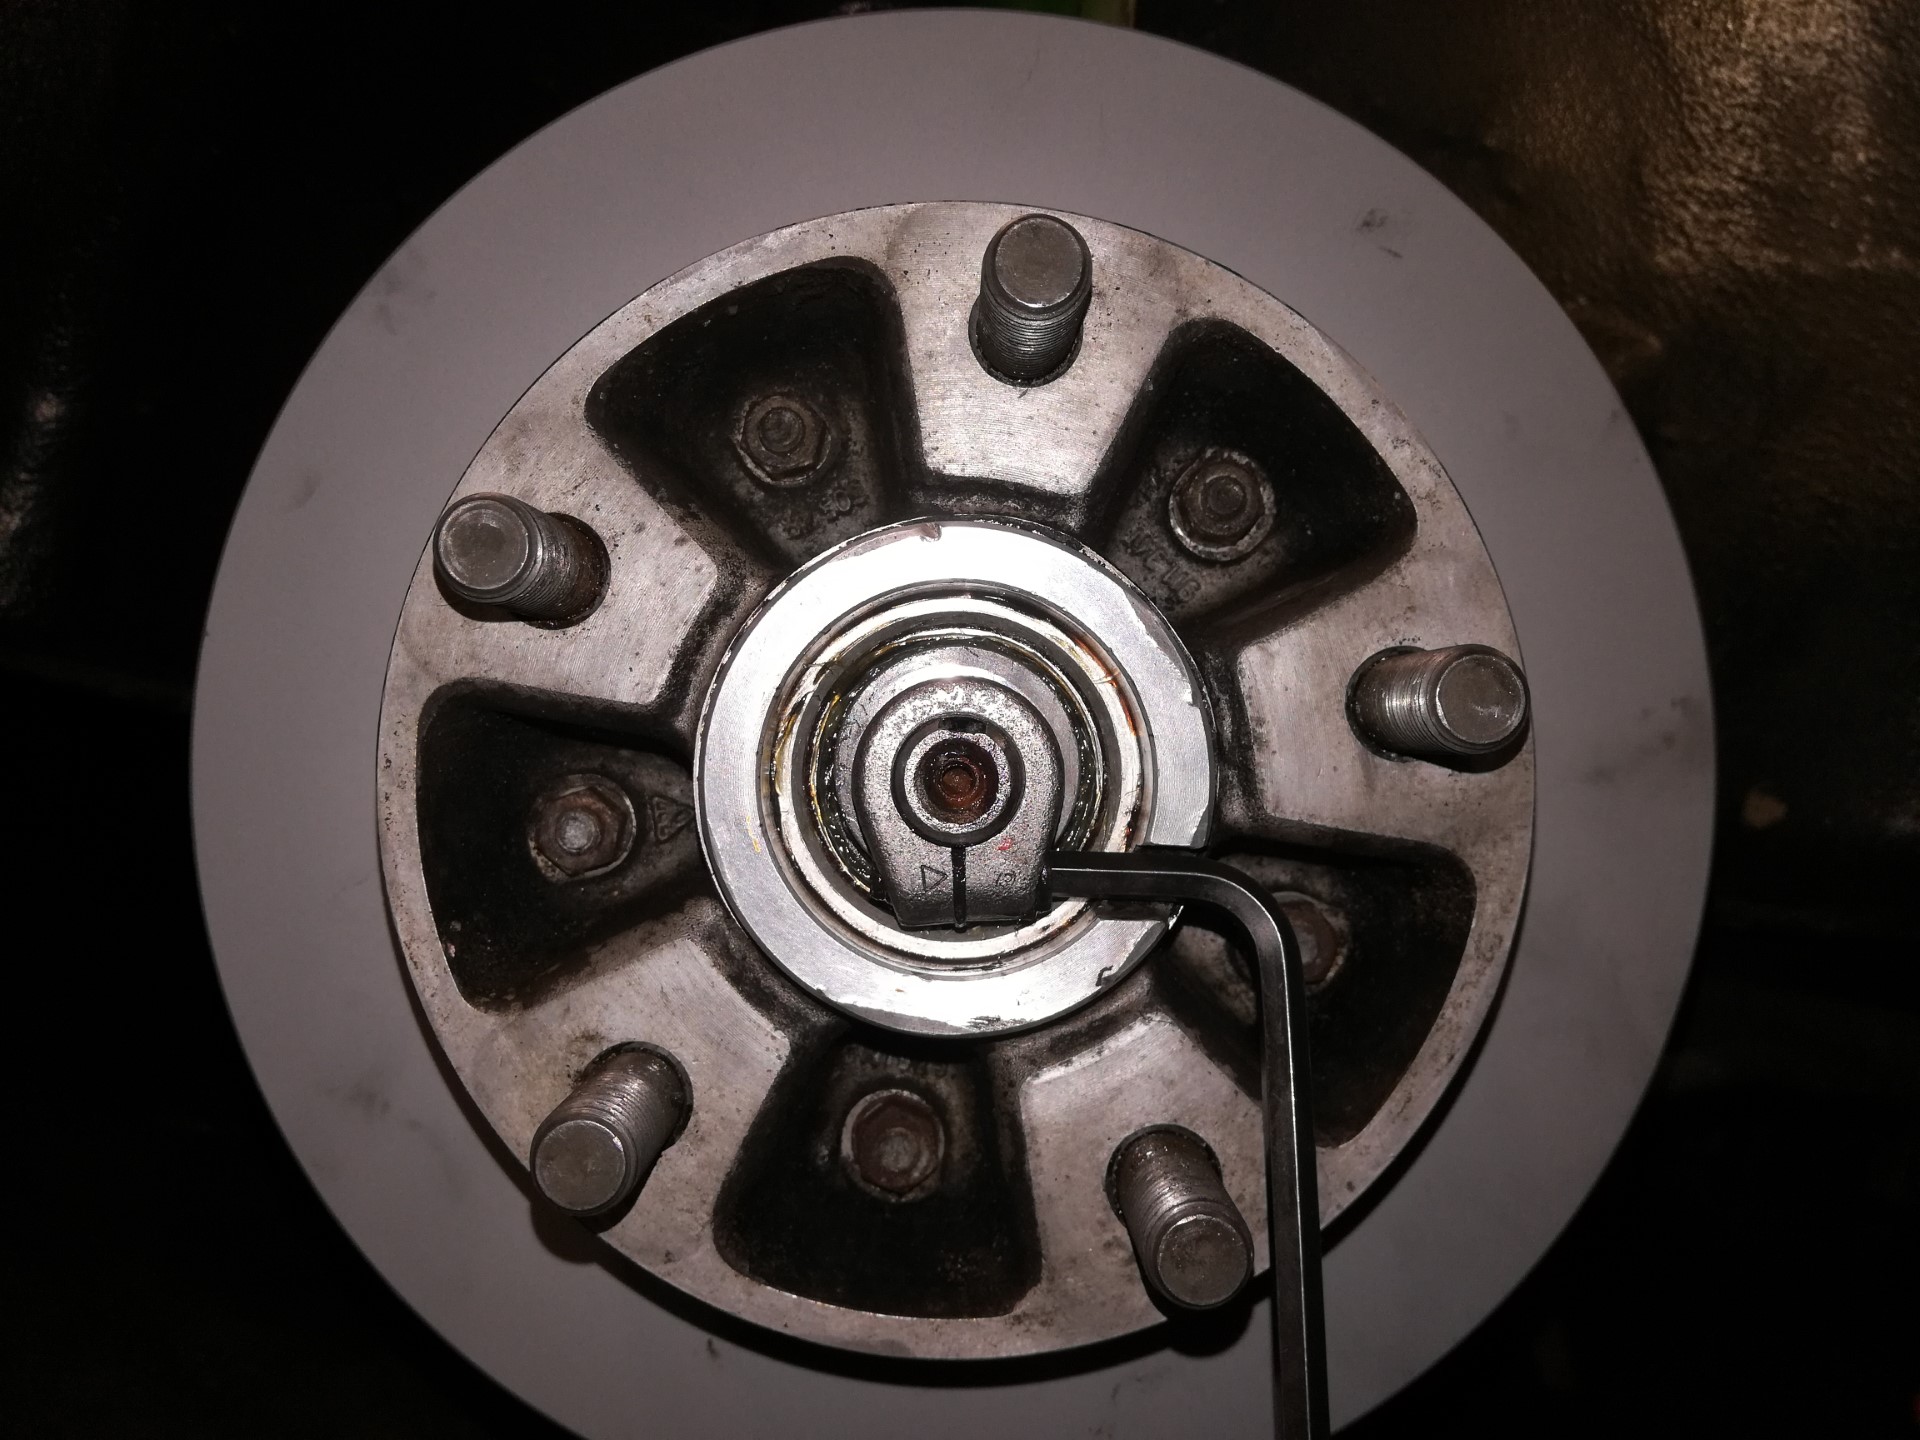
Use a hex wrench to loosen the screw on the clamping nut and spin the clamping nut off. To insert the wrench you need to rotate the hub until the slot in the hub lines up with the screw.
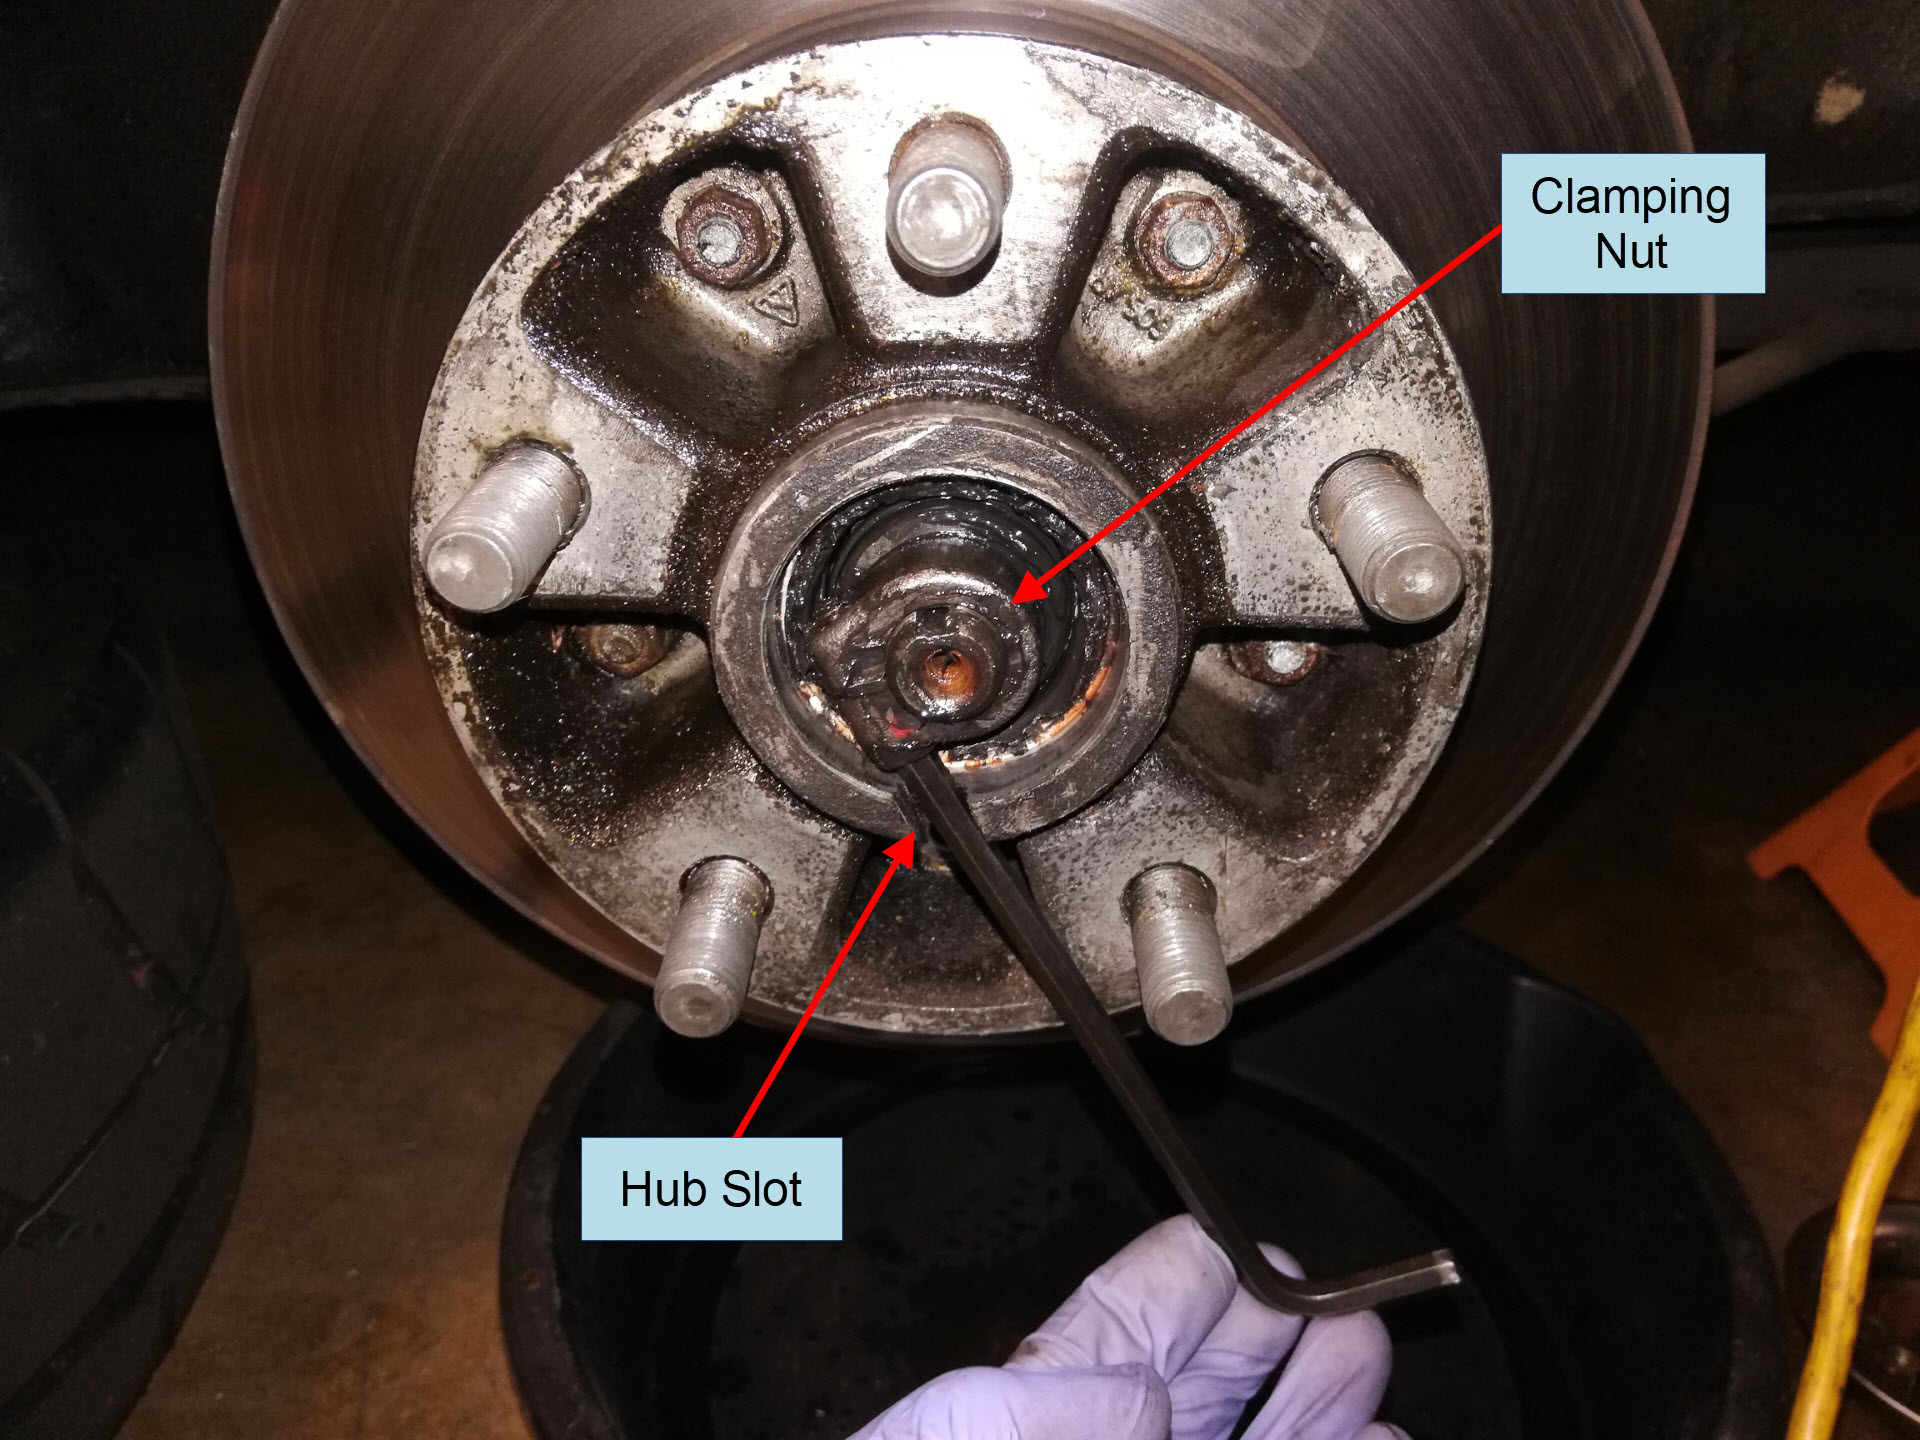
Once the clamping nut is off, there is a keyed washer below it holding the outer taper roller bearing in.
Pull off the rotor and hub assembly and put them on a bench face up. Pull the washer and roller bearing out with your finger.
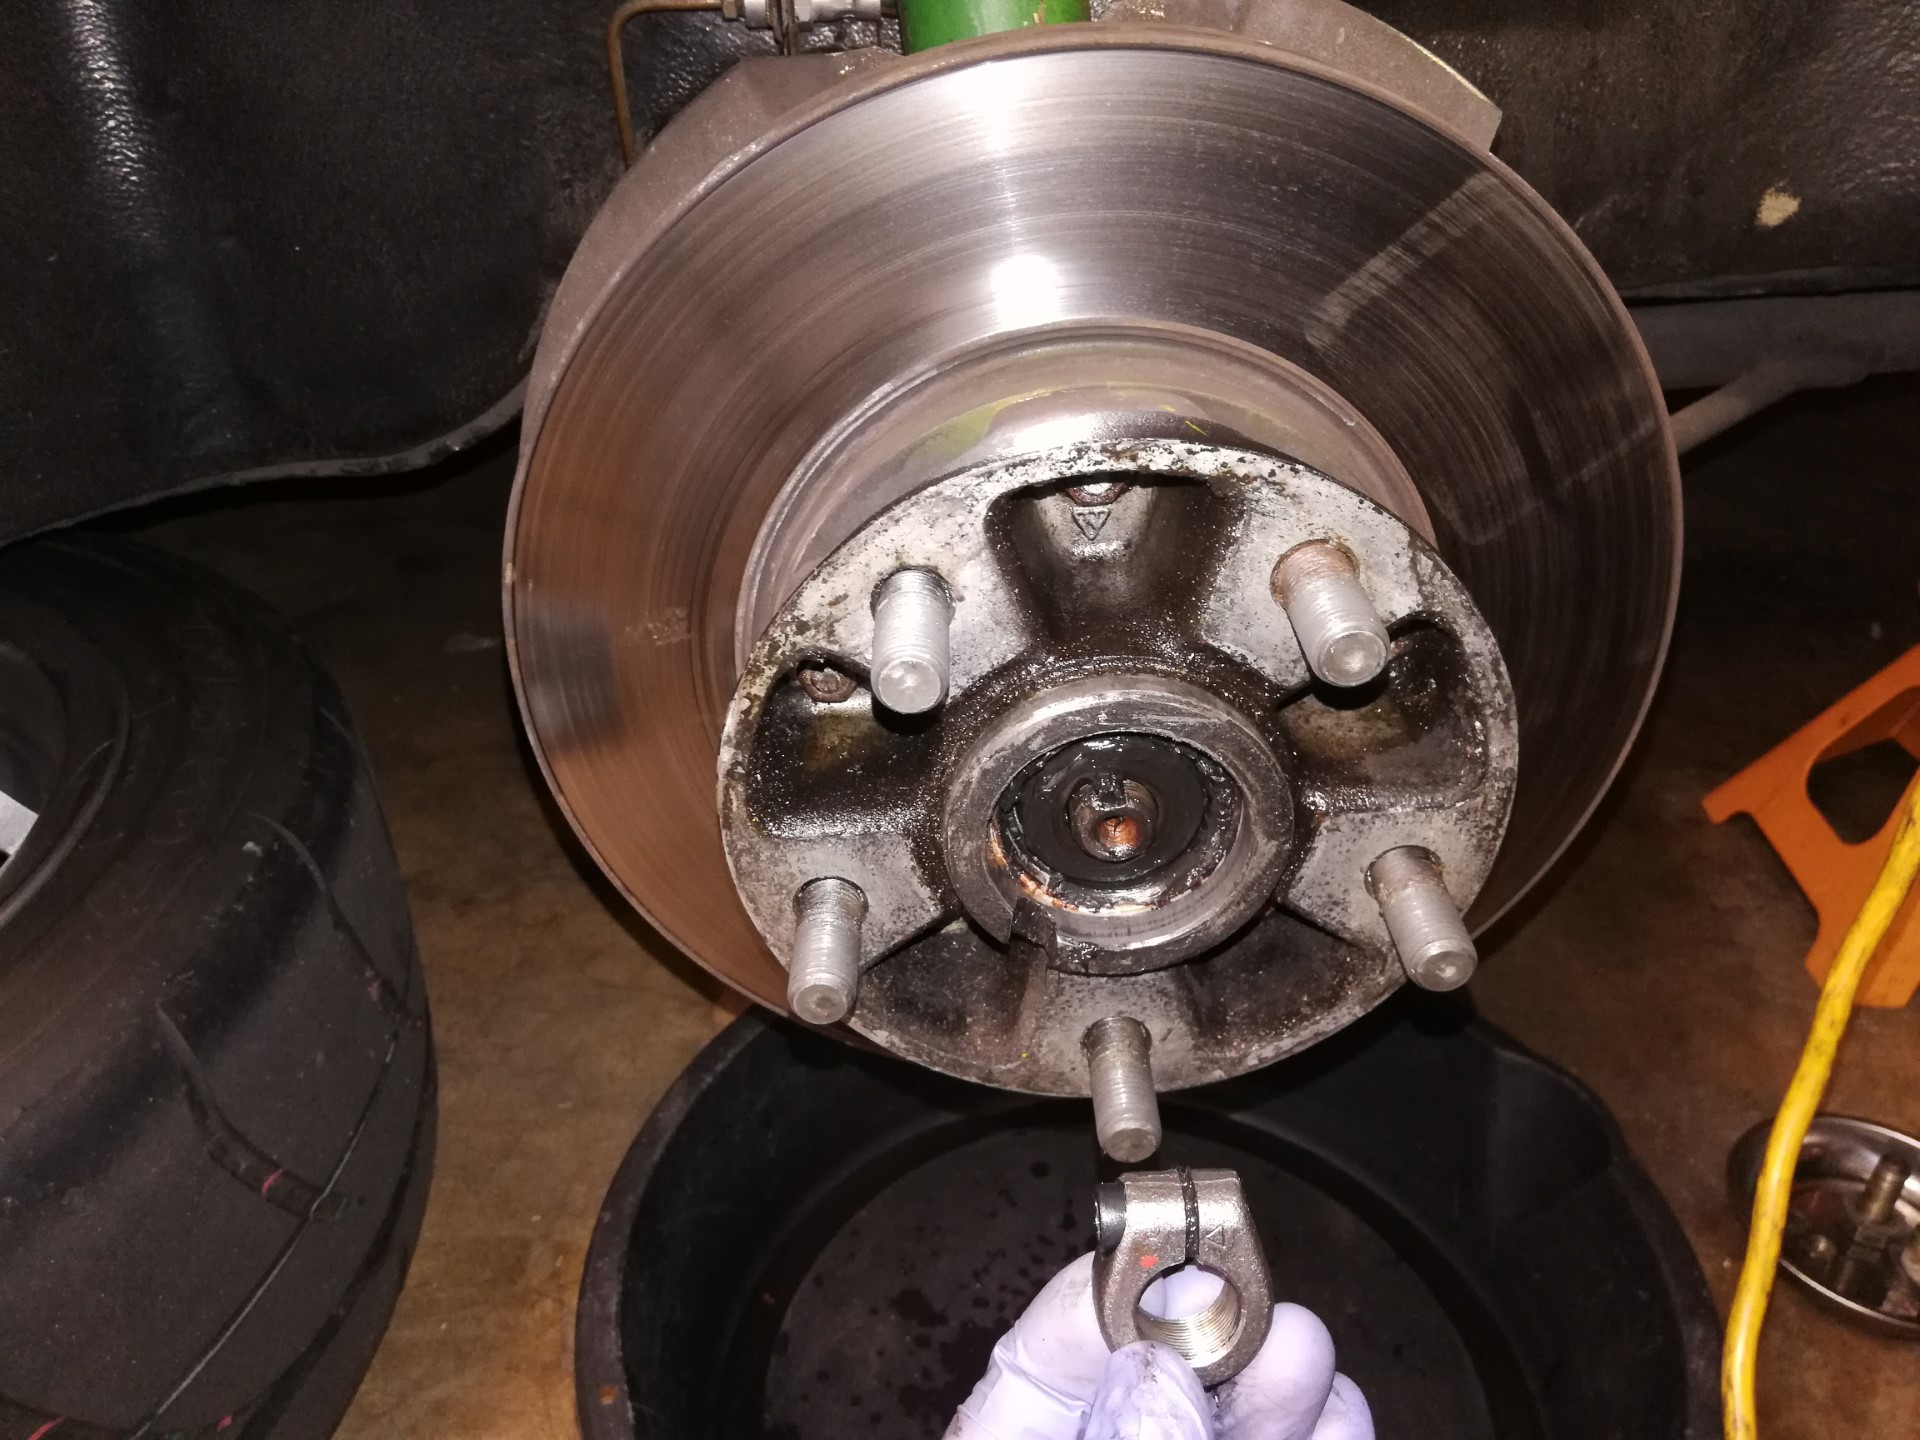
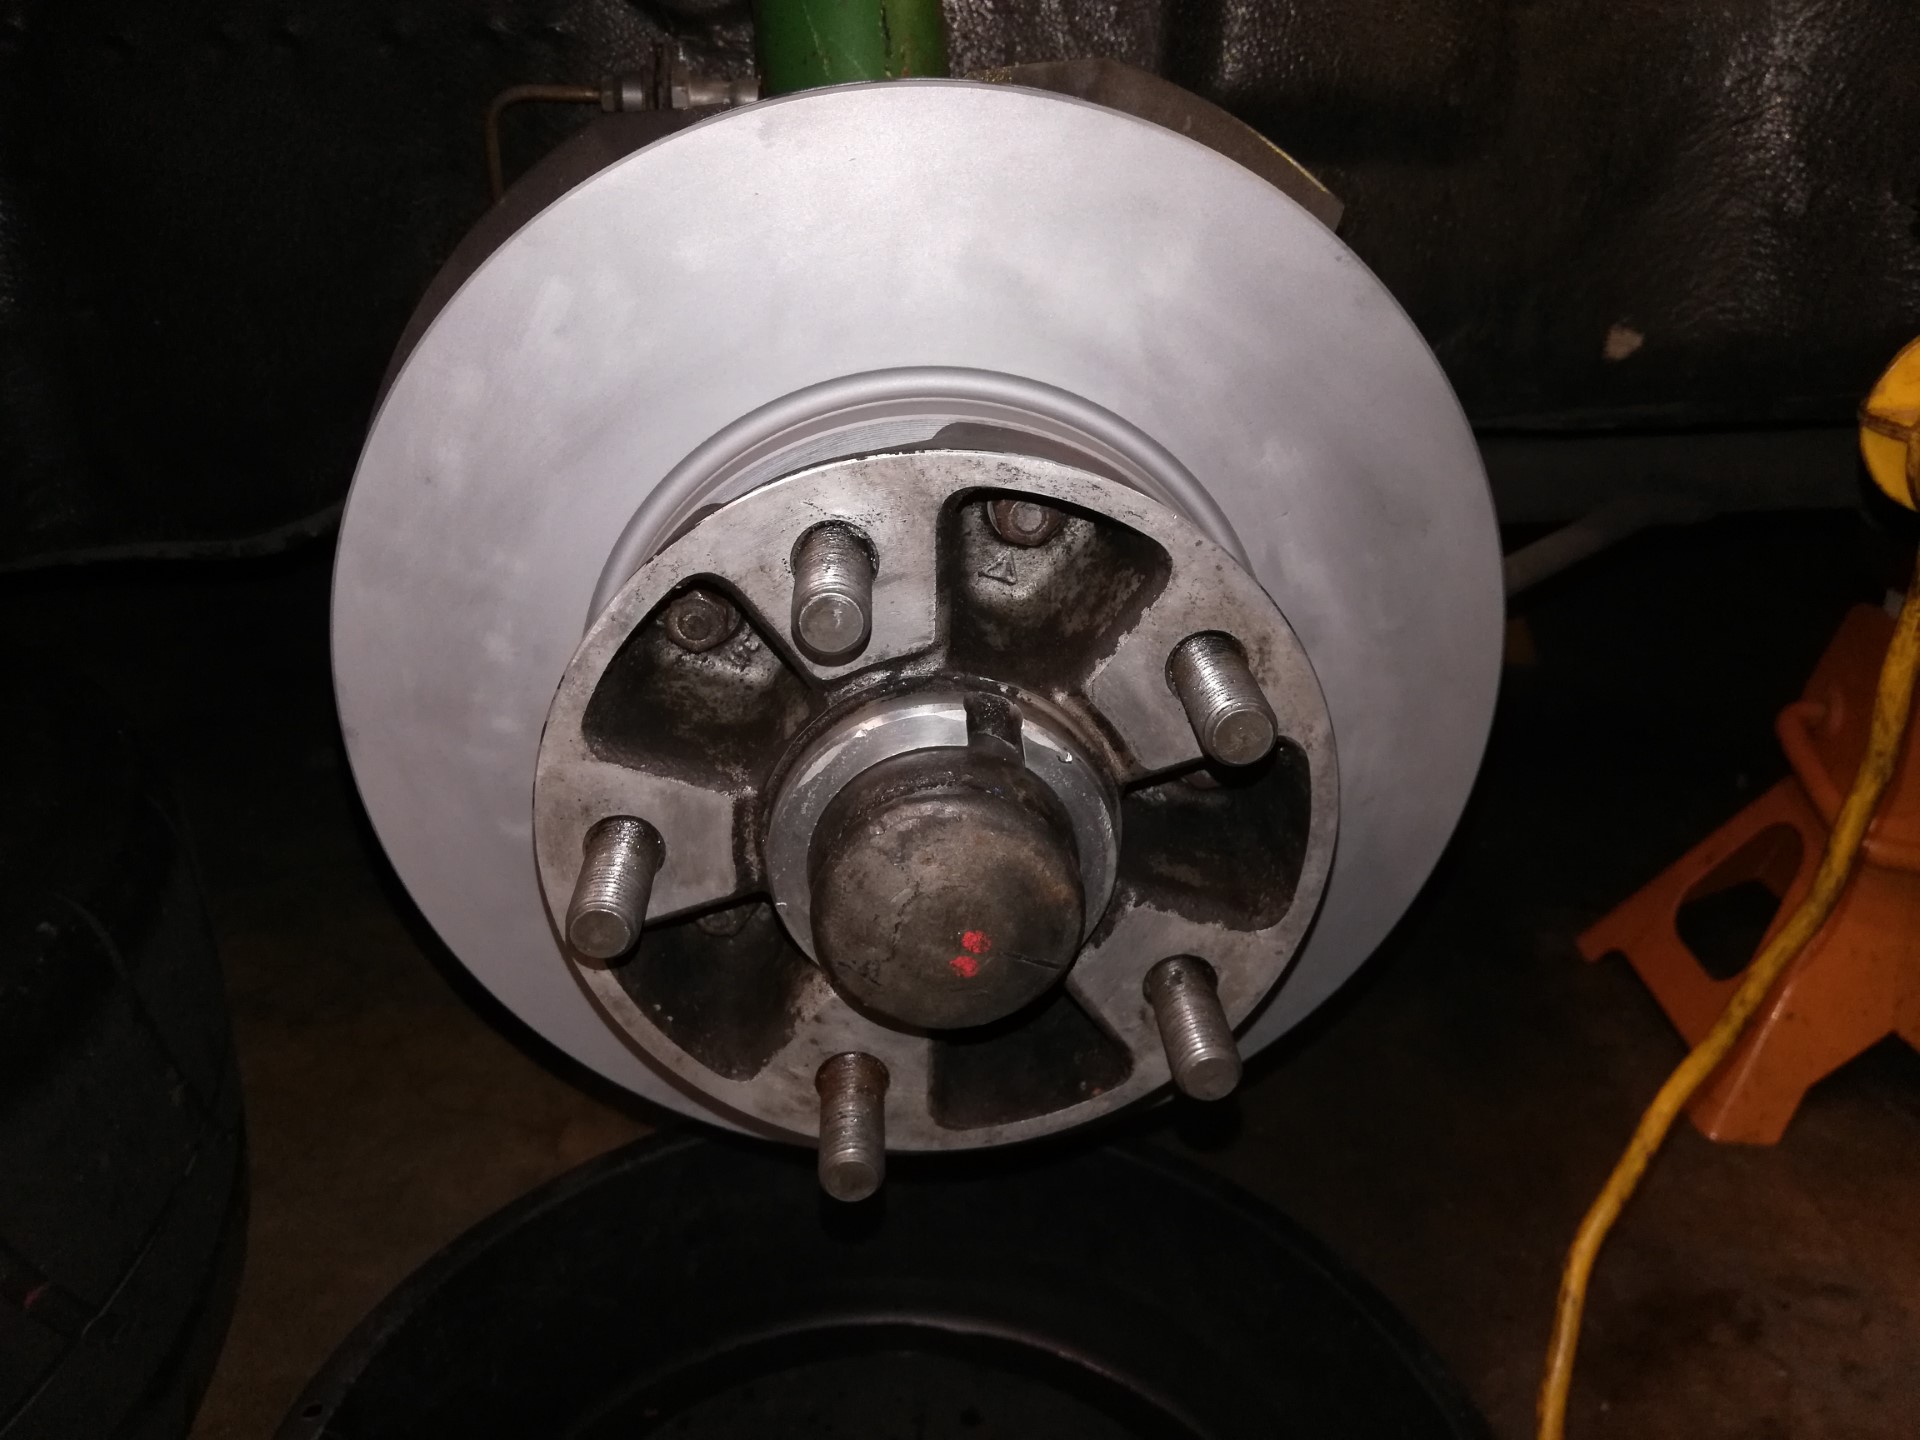
Step 5: Disassemble Rotor and Hub
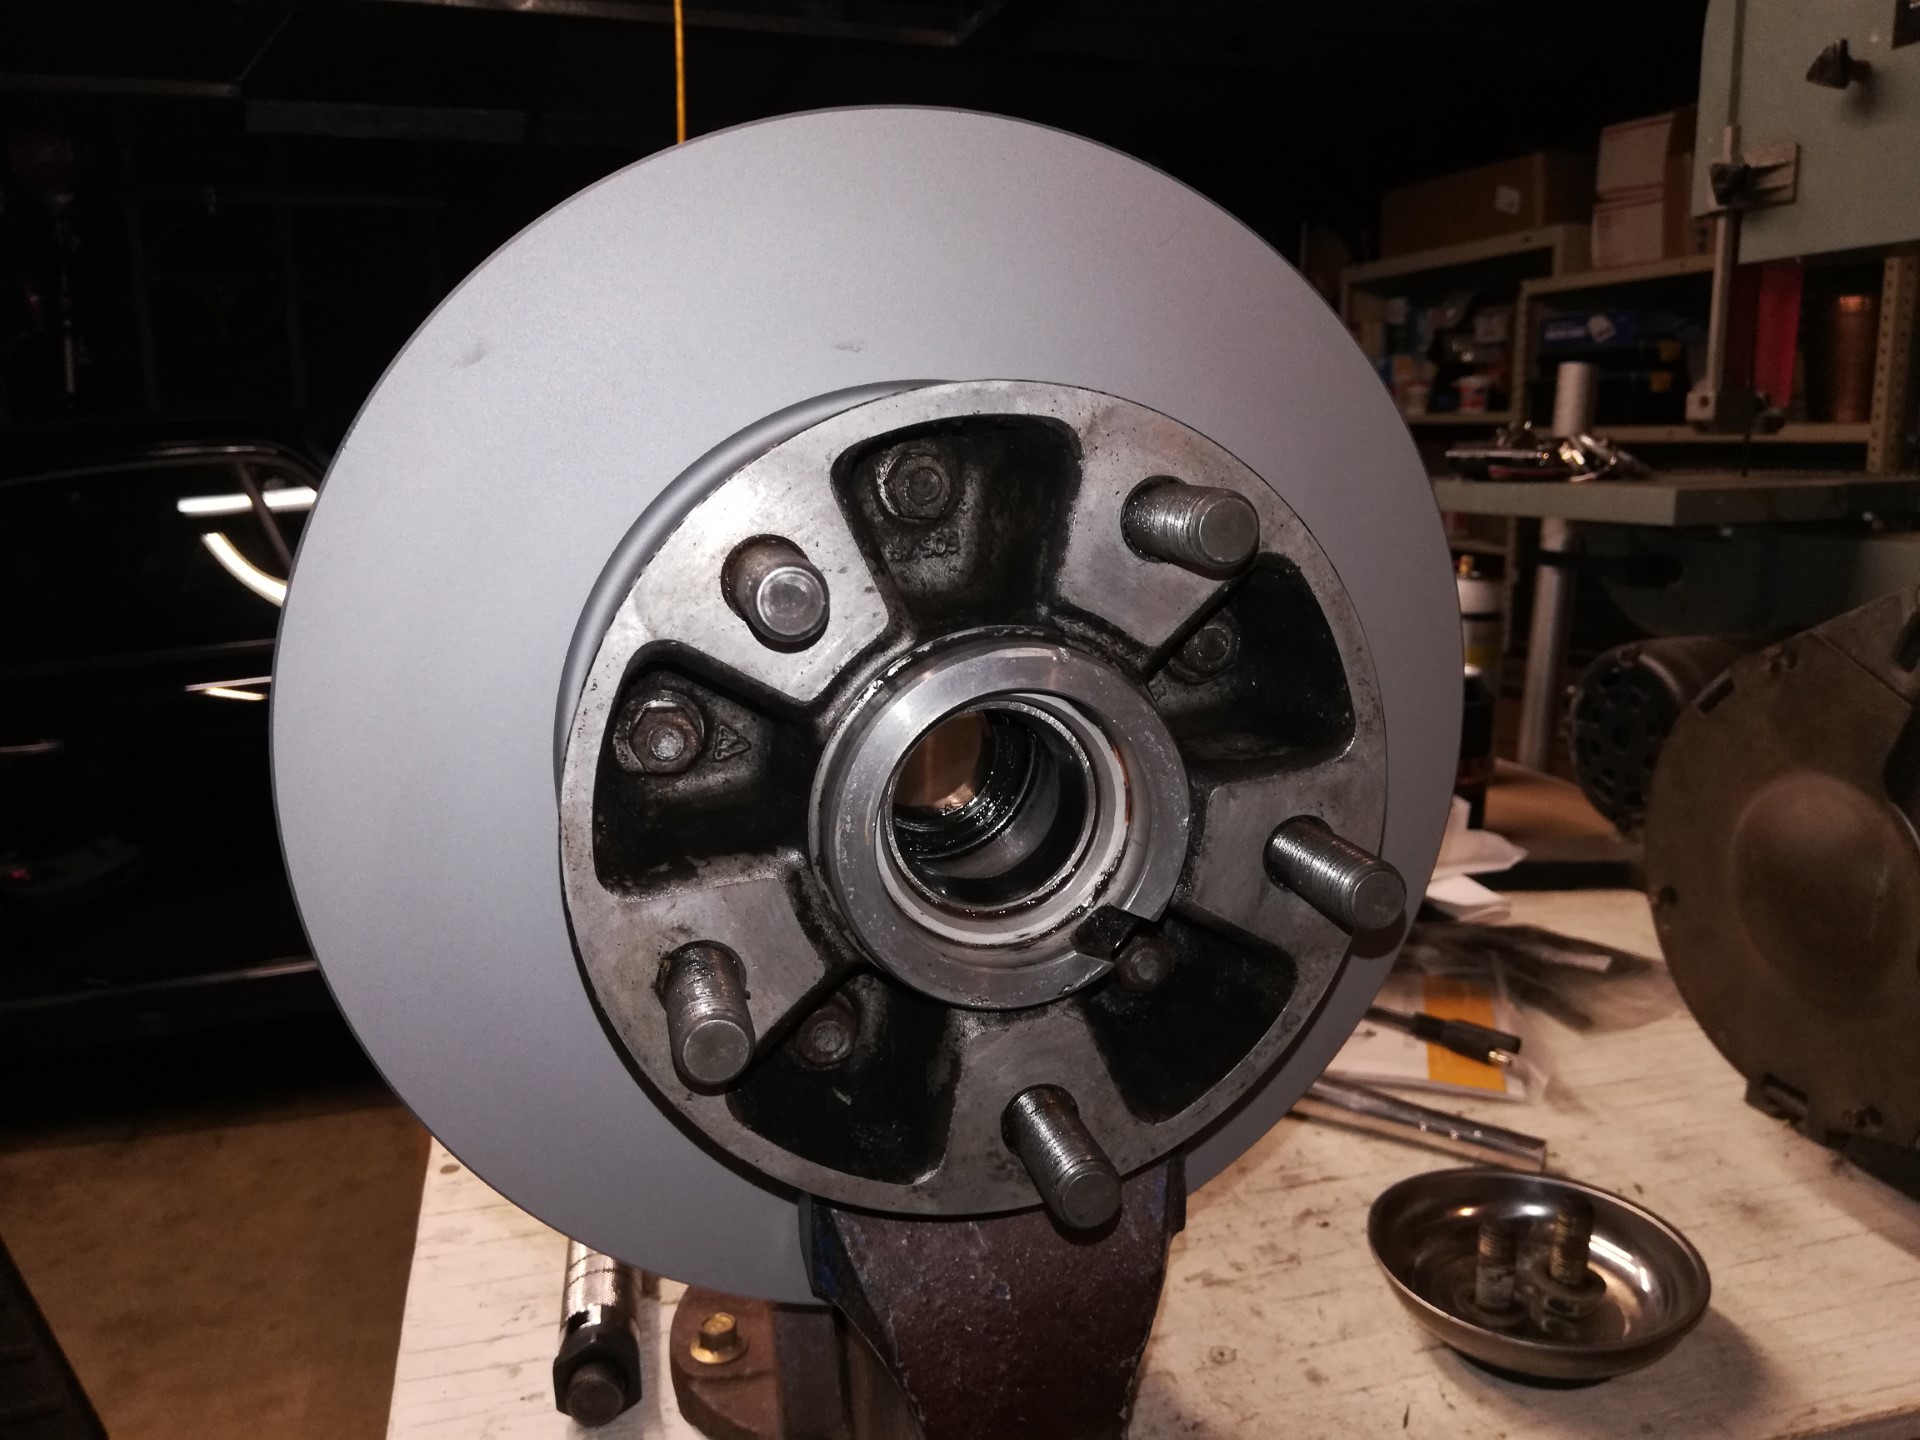
Remove the 5 bolts, lock washers, and nuts holding the hub to the rotor. Clamping the rotor in a bench vise helps.
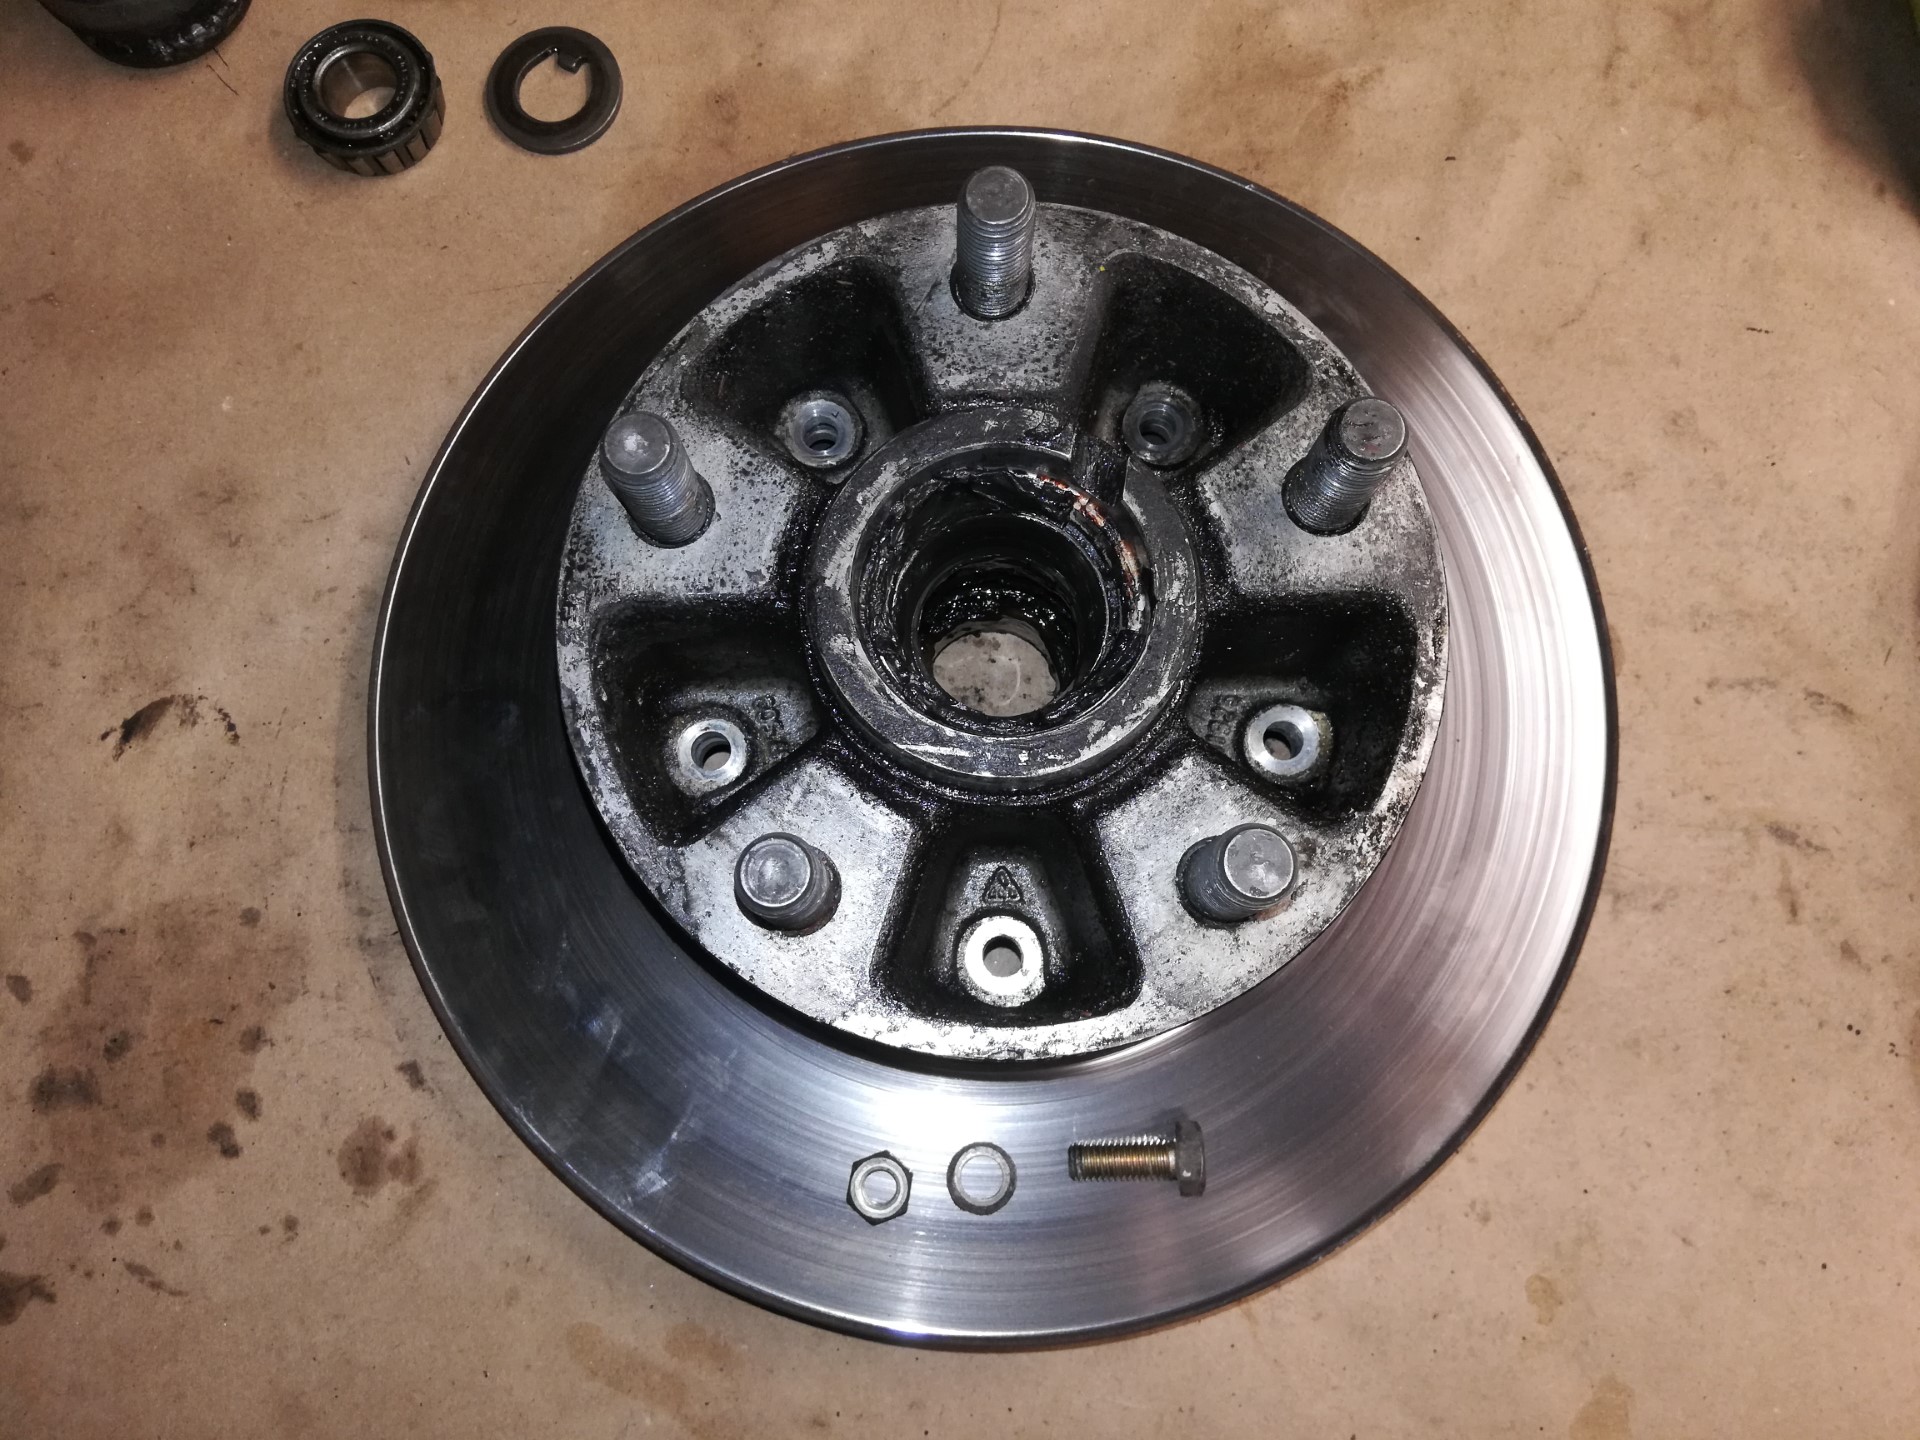
Give the hub a couple of gentle taps with a rubber mallet from the backside and it should release from the rotor.
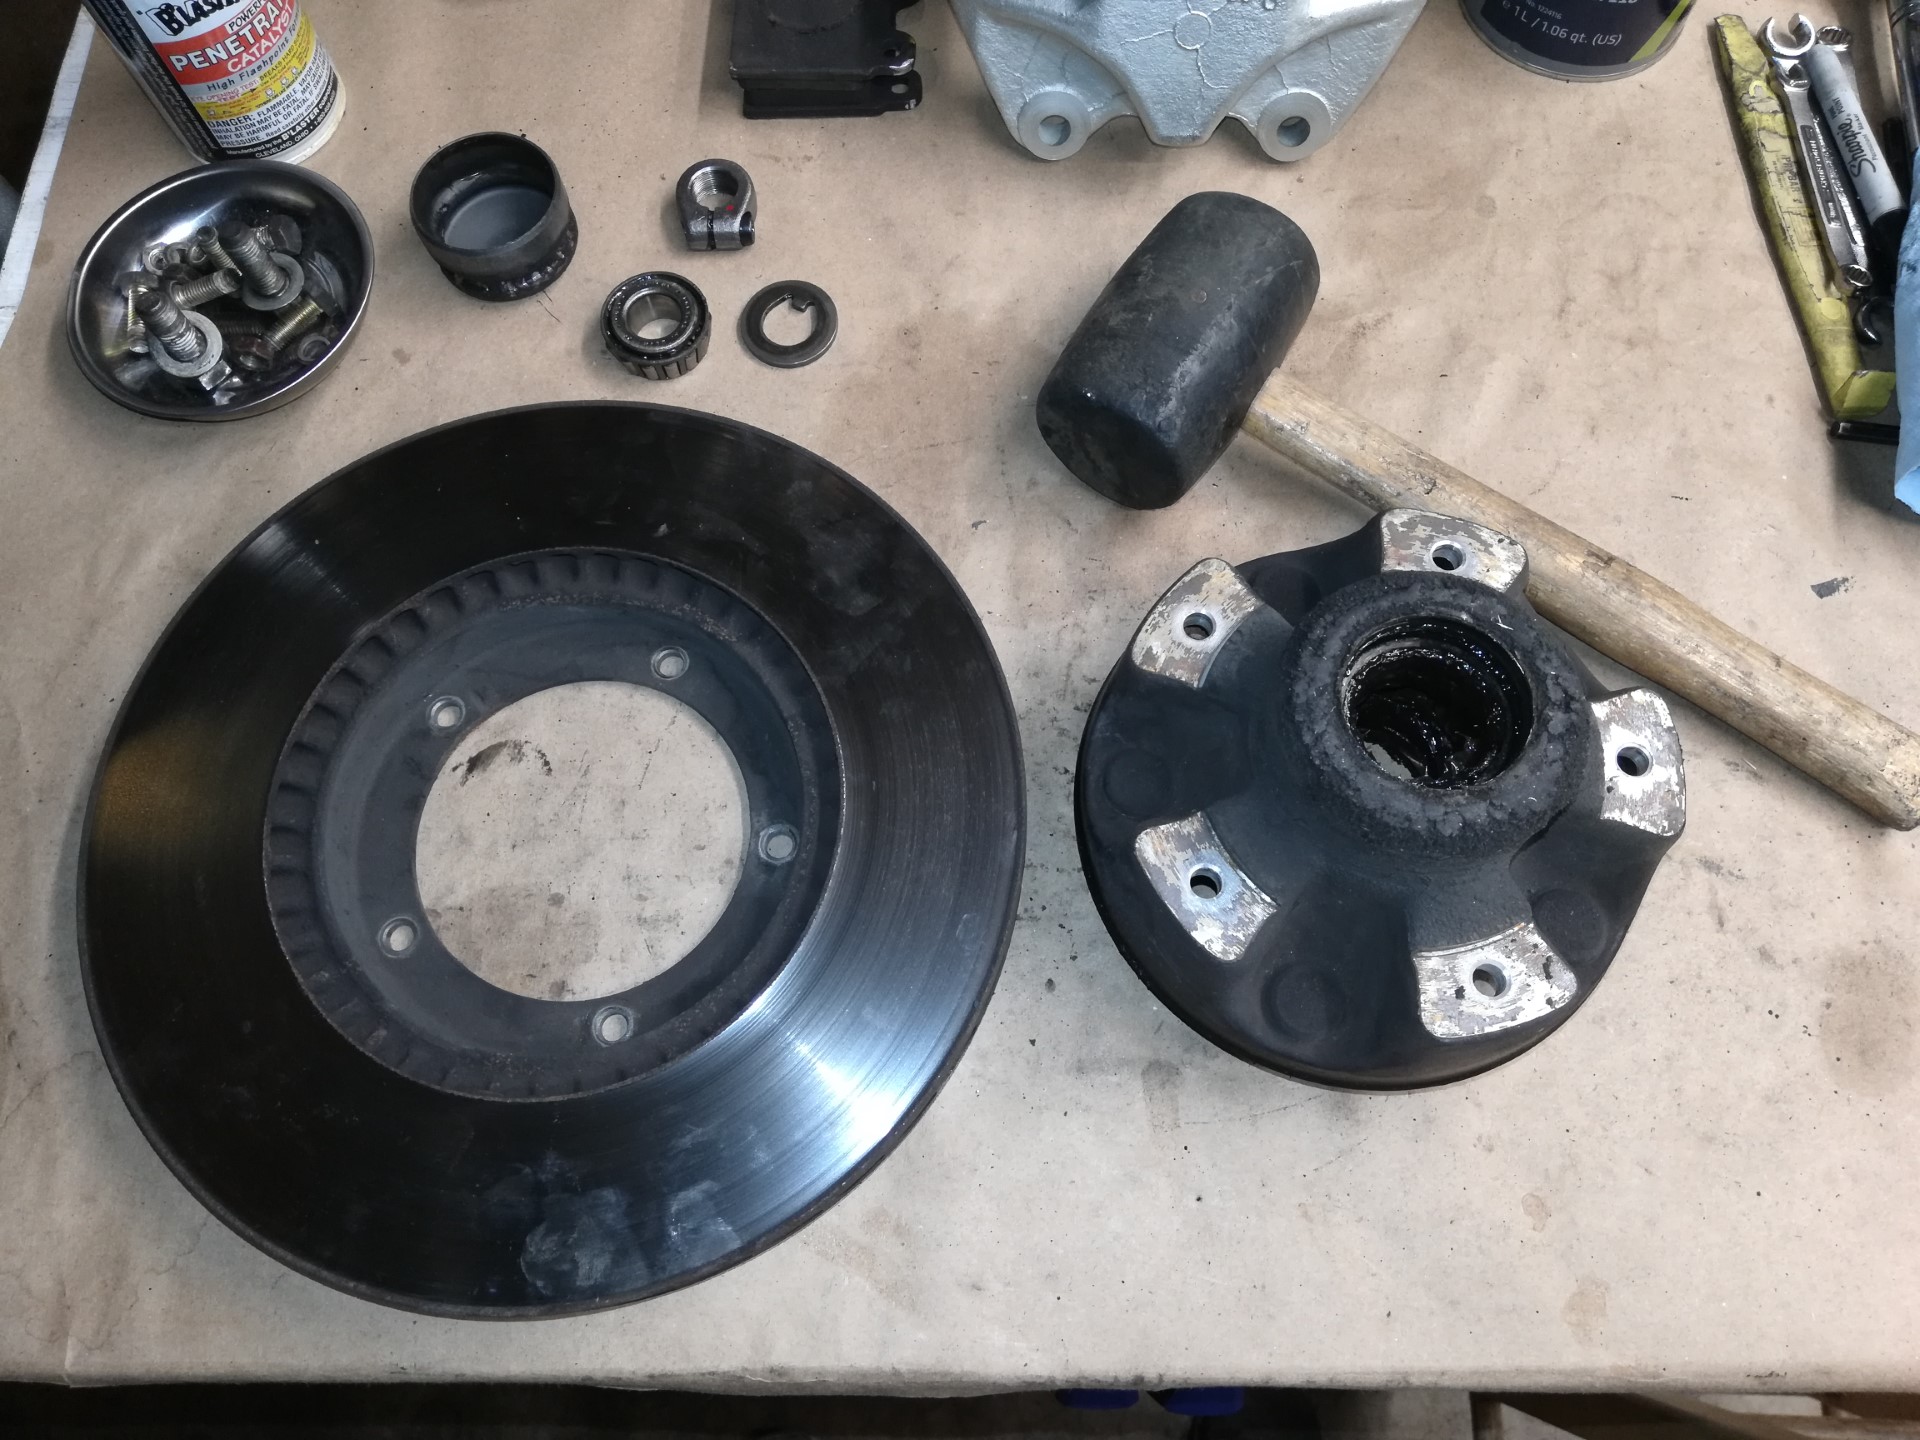
Step 6: Clean Hub and Replace Rotor
Clean the exterior of the hub with brake clean or degreaser as much as possible. Scrub the mating surface of the hub where the rotor is mounted. If the grease inside the hub is old, scoop out as much as you can with paper towels. Take care not to disturb the inner grease seal.
Mount the new rotor onto the clean hub and seat it as much as you can by hand. Insert a couple of the bolts from the backside outward and secure with the old lock washers and nuts finger tight.
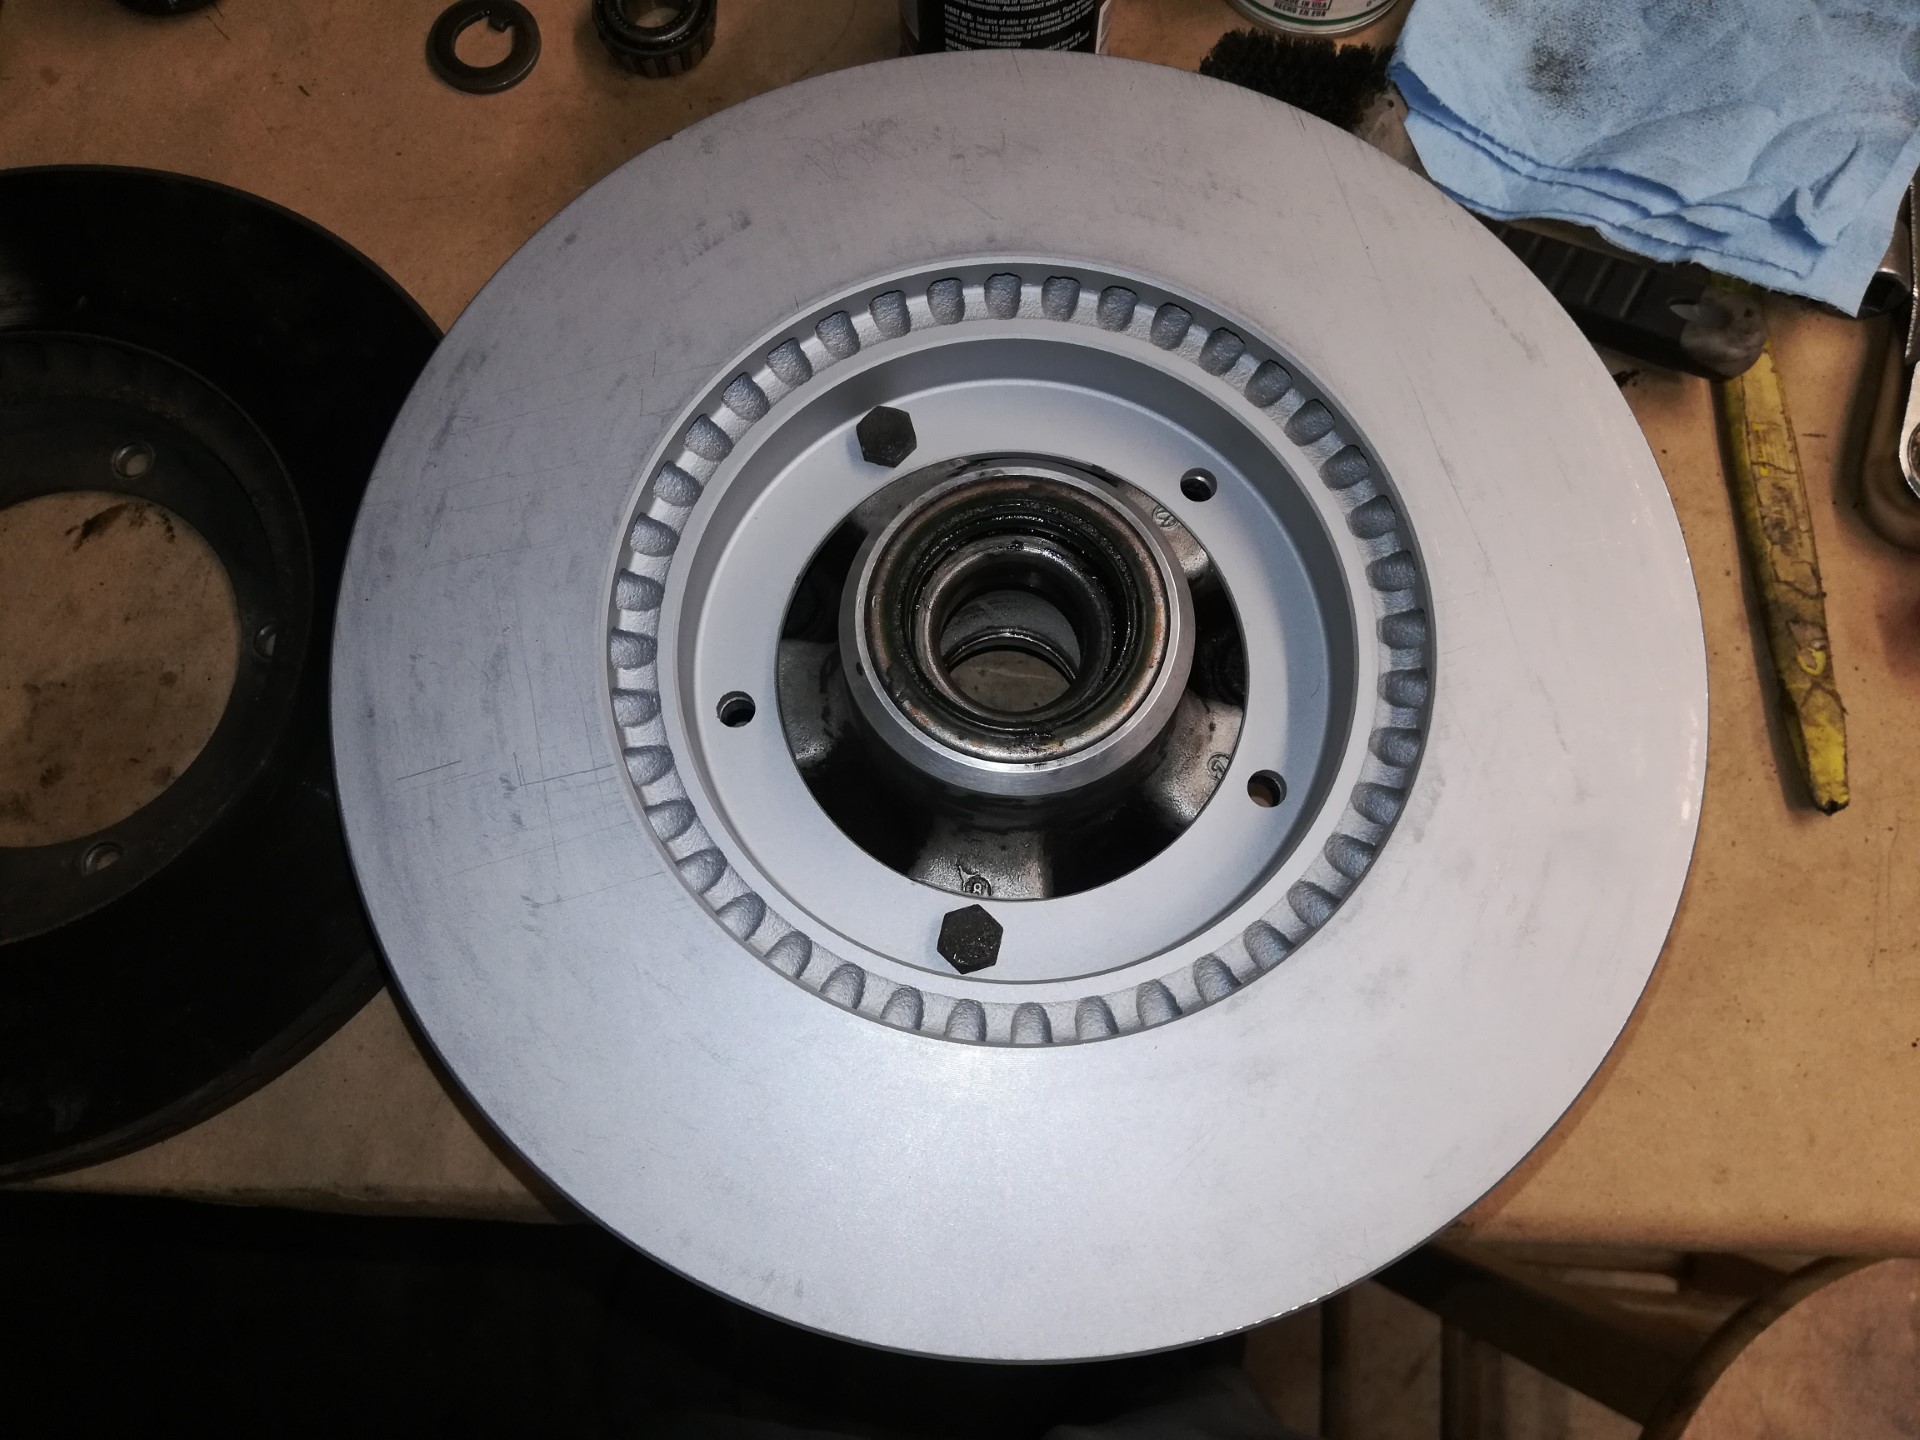
Finish installing the rest of the bolts, lock washers, and nuts and torque to spec. On the SC this is 23 N-m (17 ft-lbs). If you clamp the new rotor in a bench vise make sure you protect the rotor surface against damage by using soft jaws or small wood blocks in the vise.
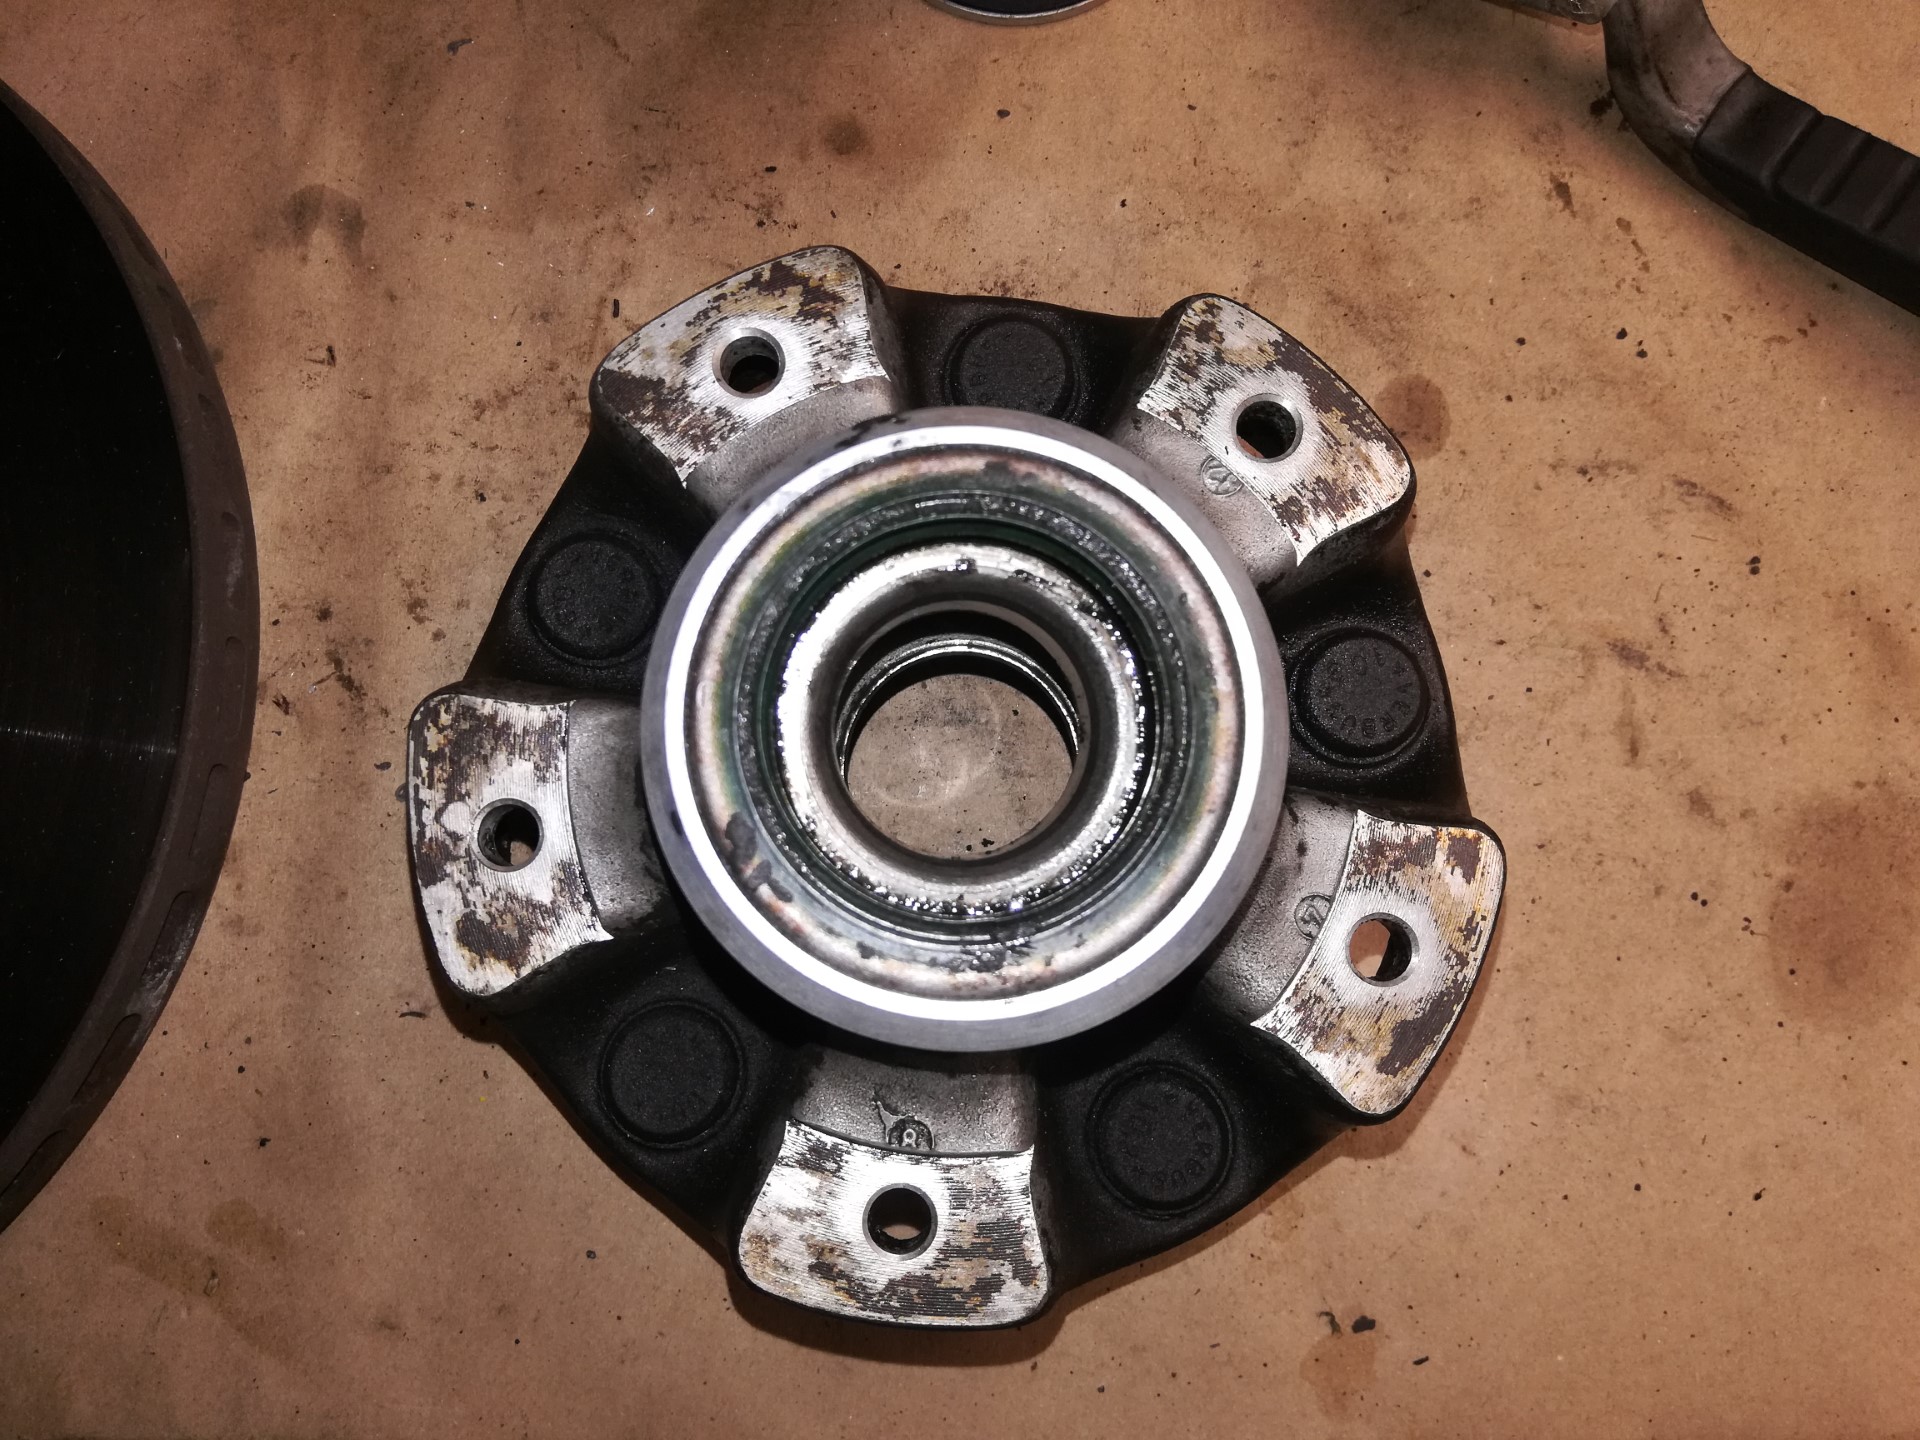
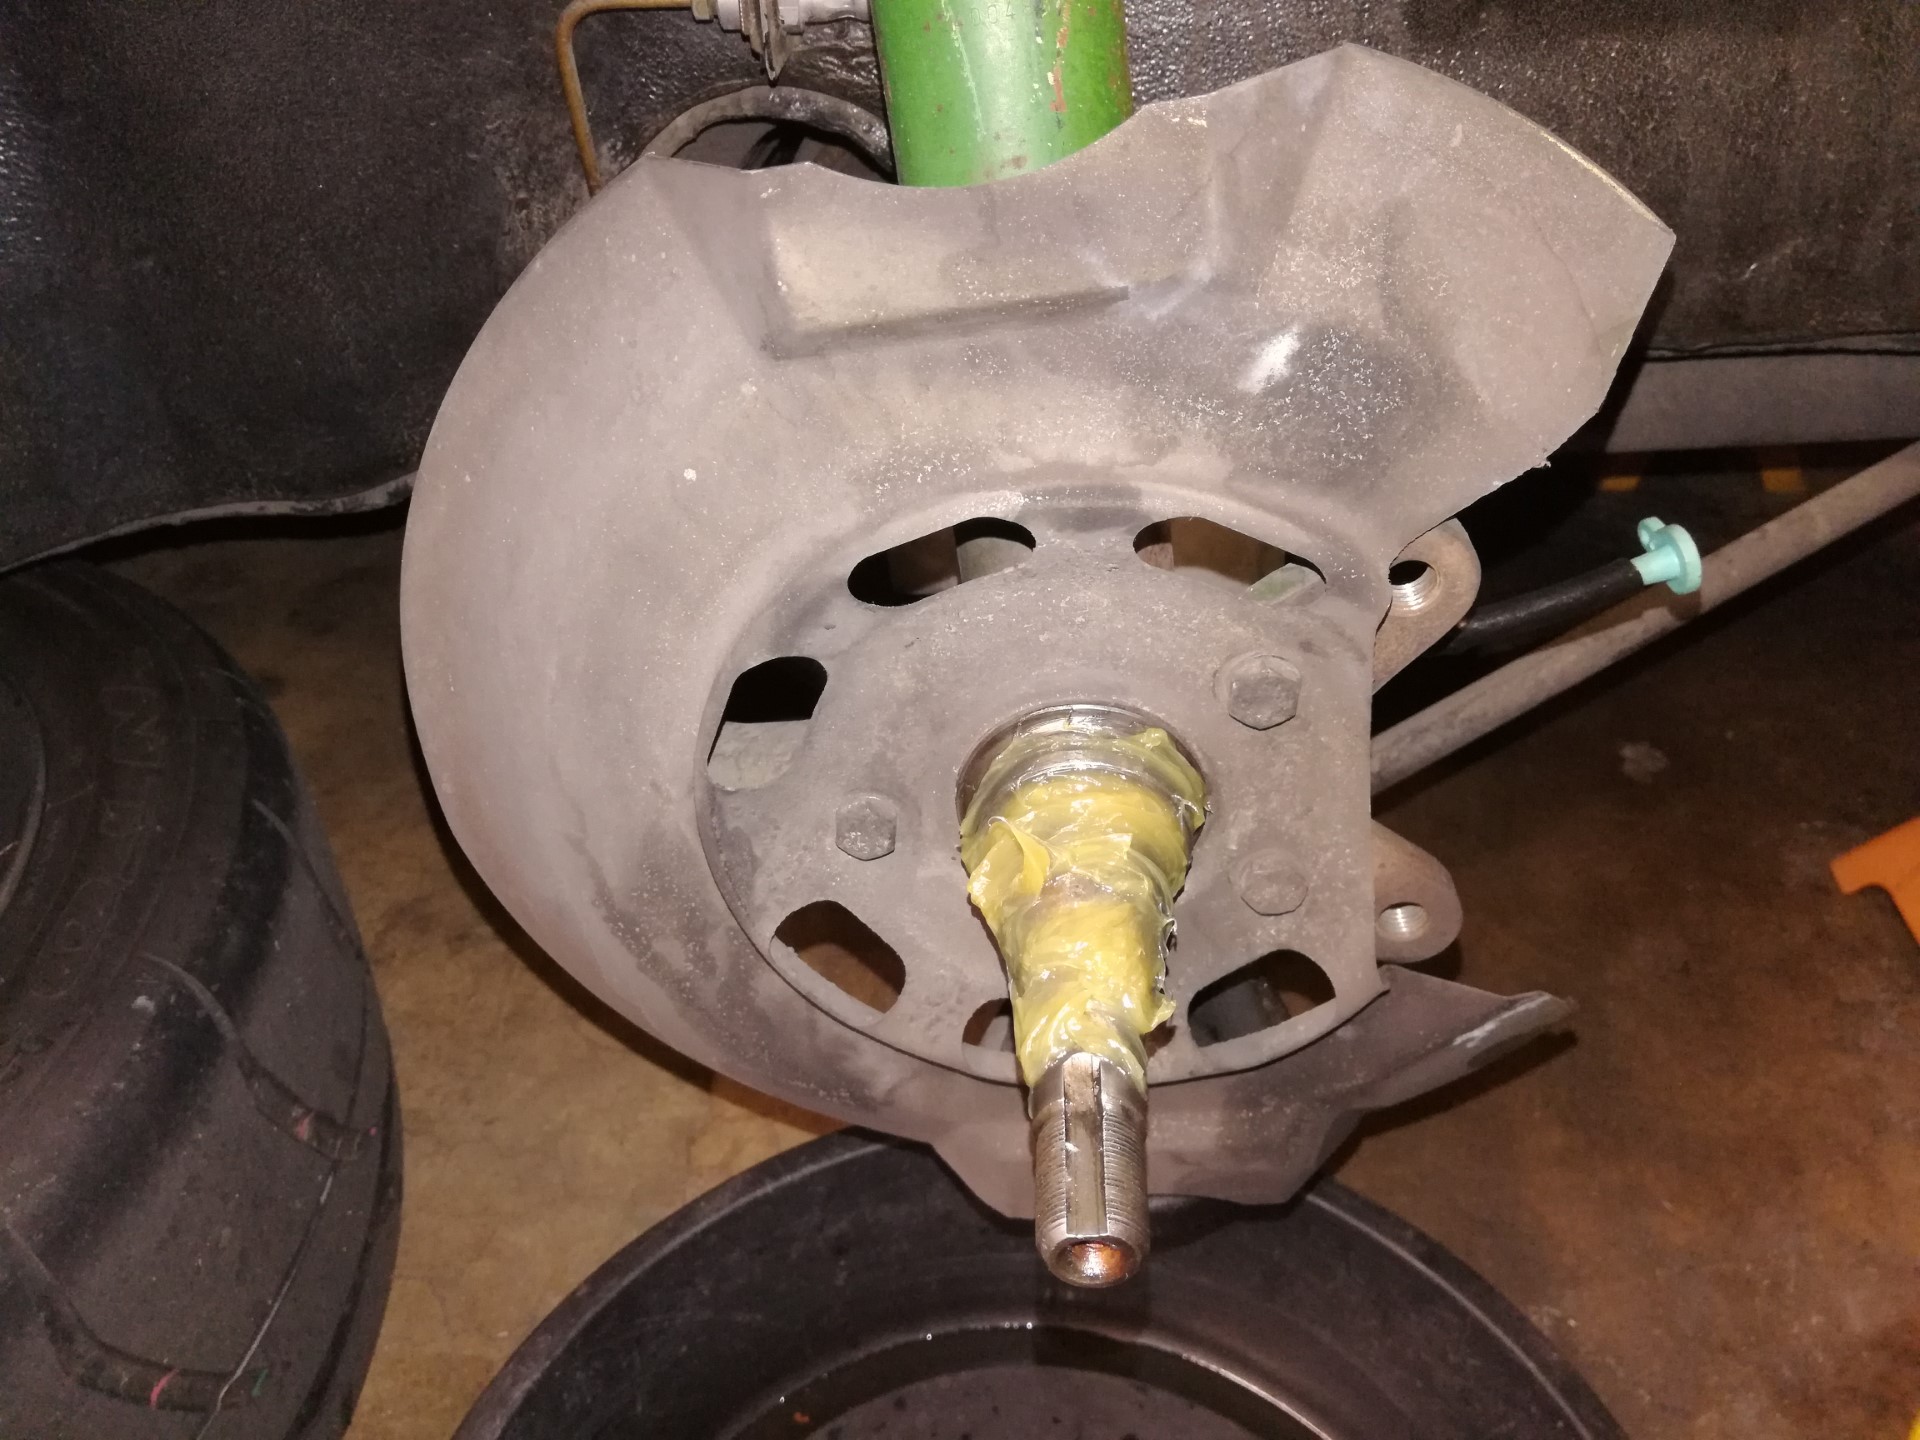
Step 7: Clean the Spindle and Re-Grease the Hub
Clean the brake shield and spindle and re-apply wheel bearing grease.
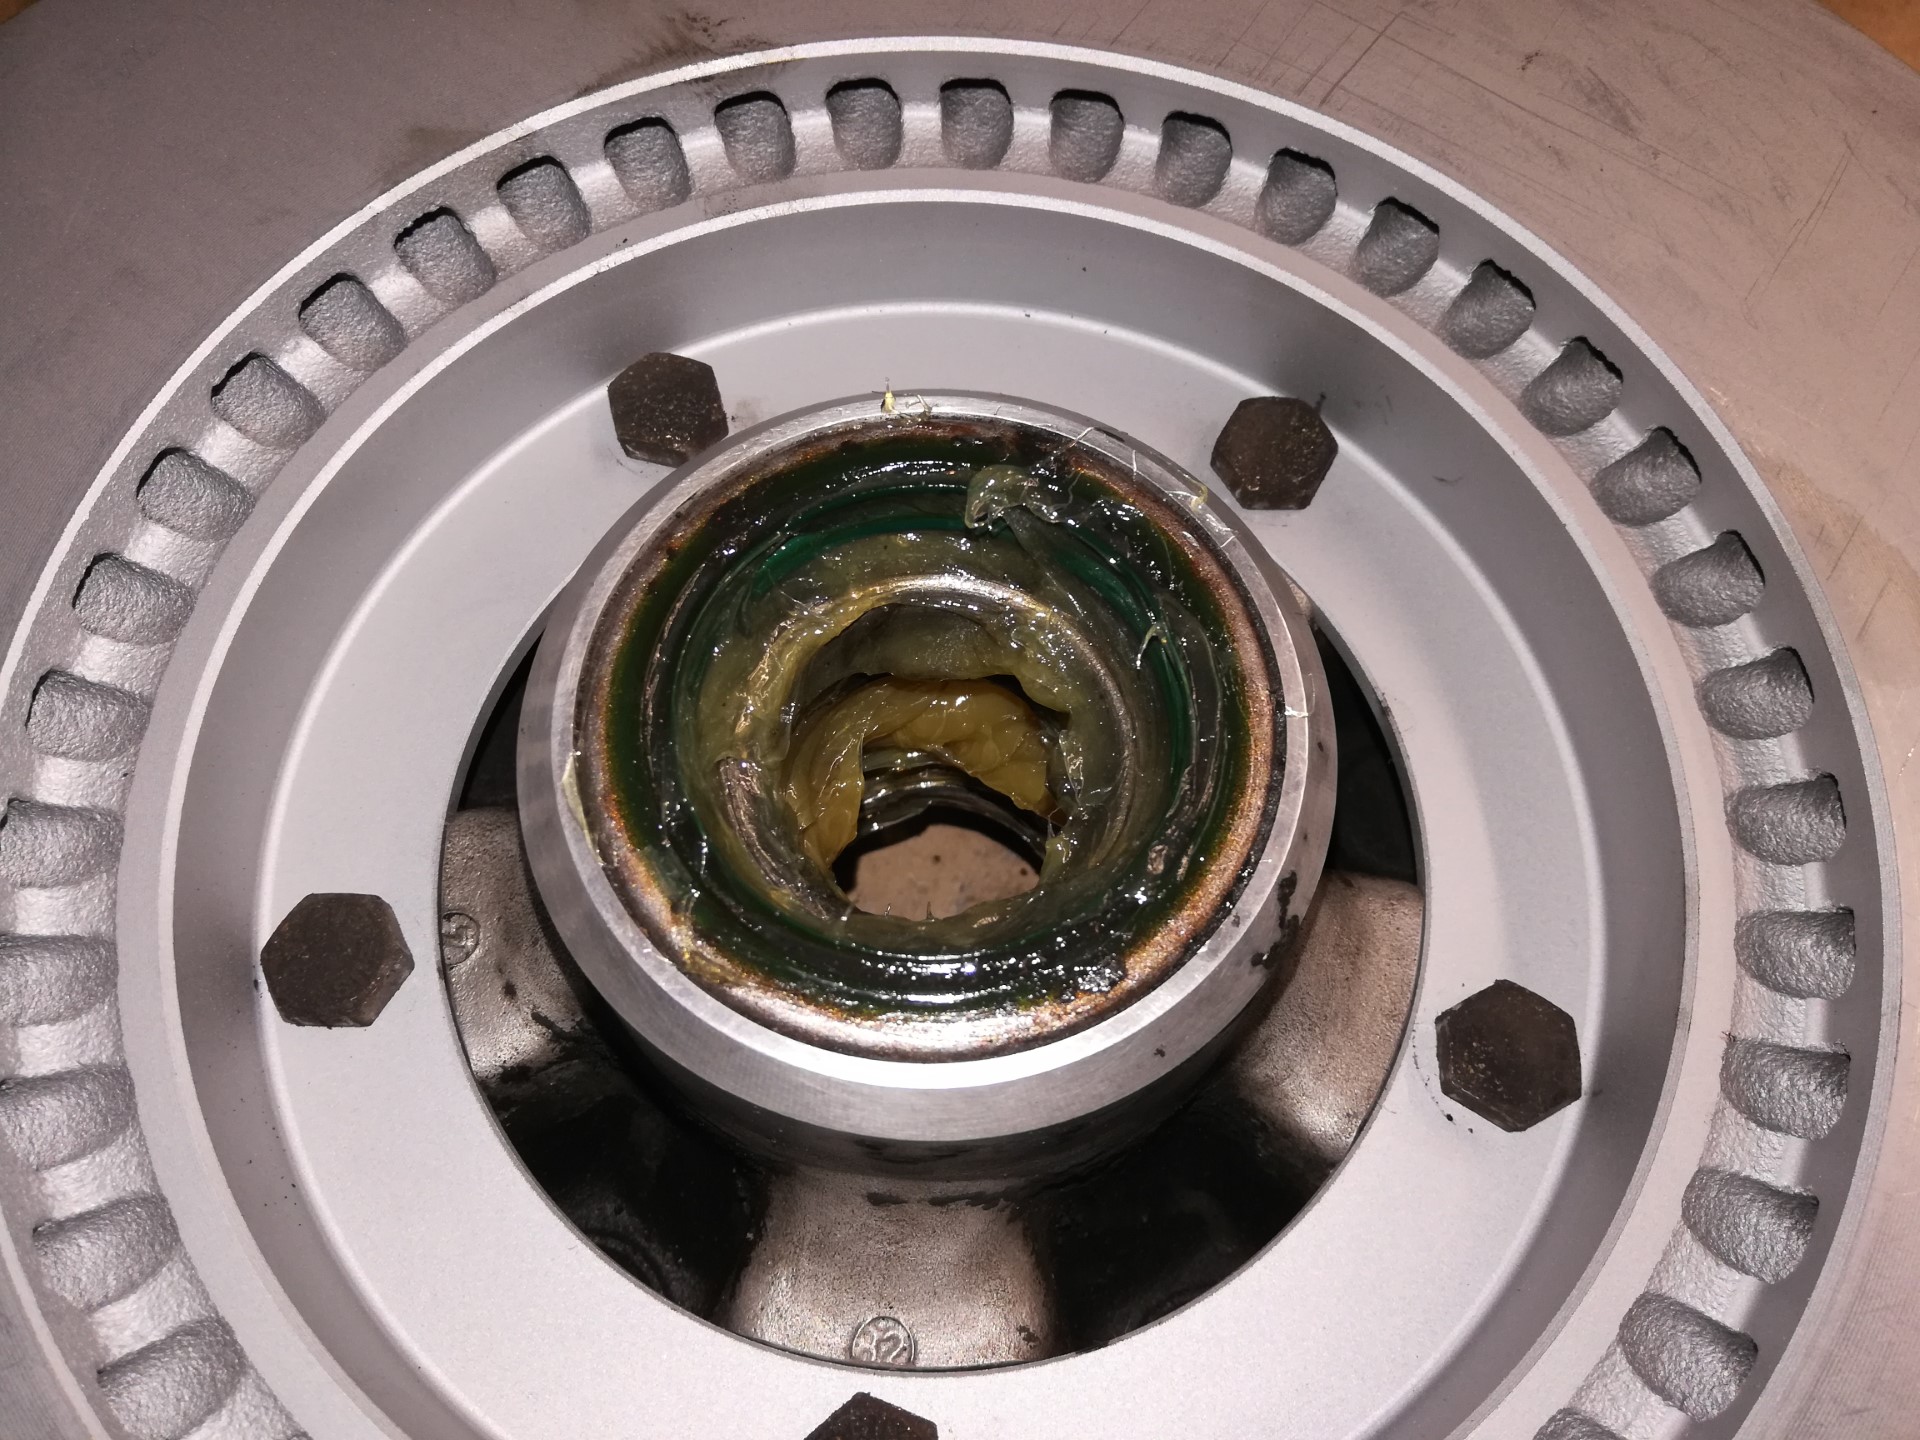
Re-pack the interior of the hub with new grease. Re-grease the inner roller bearing in the hub and the outer tapered roller bearing. Wipe off any traces of grease from the rotor surface with brake cleaner or solvent.
Step 8: Re-install the Front Rotor and Adjust the Wheel Bearing
Drop the outer tapered roller bearing into the center of the outer hub. Install the new rotor and hub assembly onto the spindle, followed by the keyed washer engaged into the spindle slot, then spin on the clamping nut. Using a flat screwdriver push the edge of the washer to see if it will slide between the clamping nut and the roller bearing. Do not lever or pry the screwdriver tip. Just use the very tip of the screwdriver to put a lateral load on the washer to get it to slide.
Once you set this condition, tighten the screw on the clamping nut to clamp it into position. Verify that the washer still just slides. The front wheel bearing is now properly adjusted.
Lastly, gently tap on the dust cap with a rubber mallet. Wipe both sides of the rotor clean again with solvent.
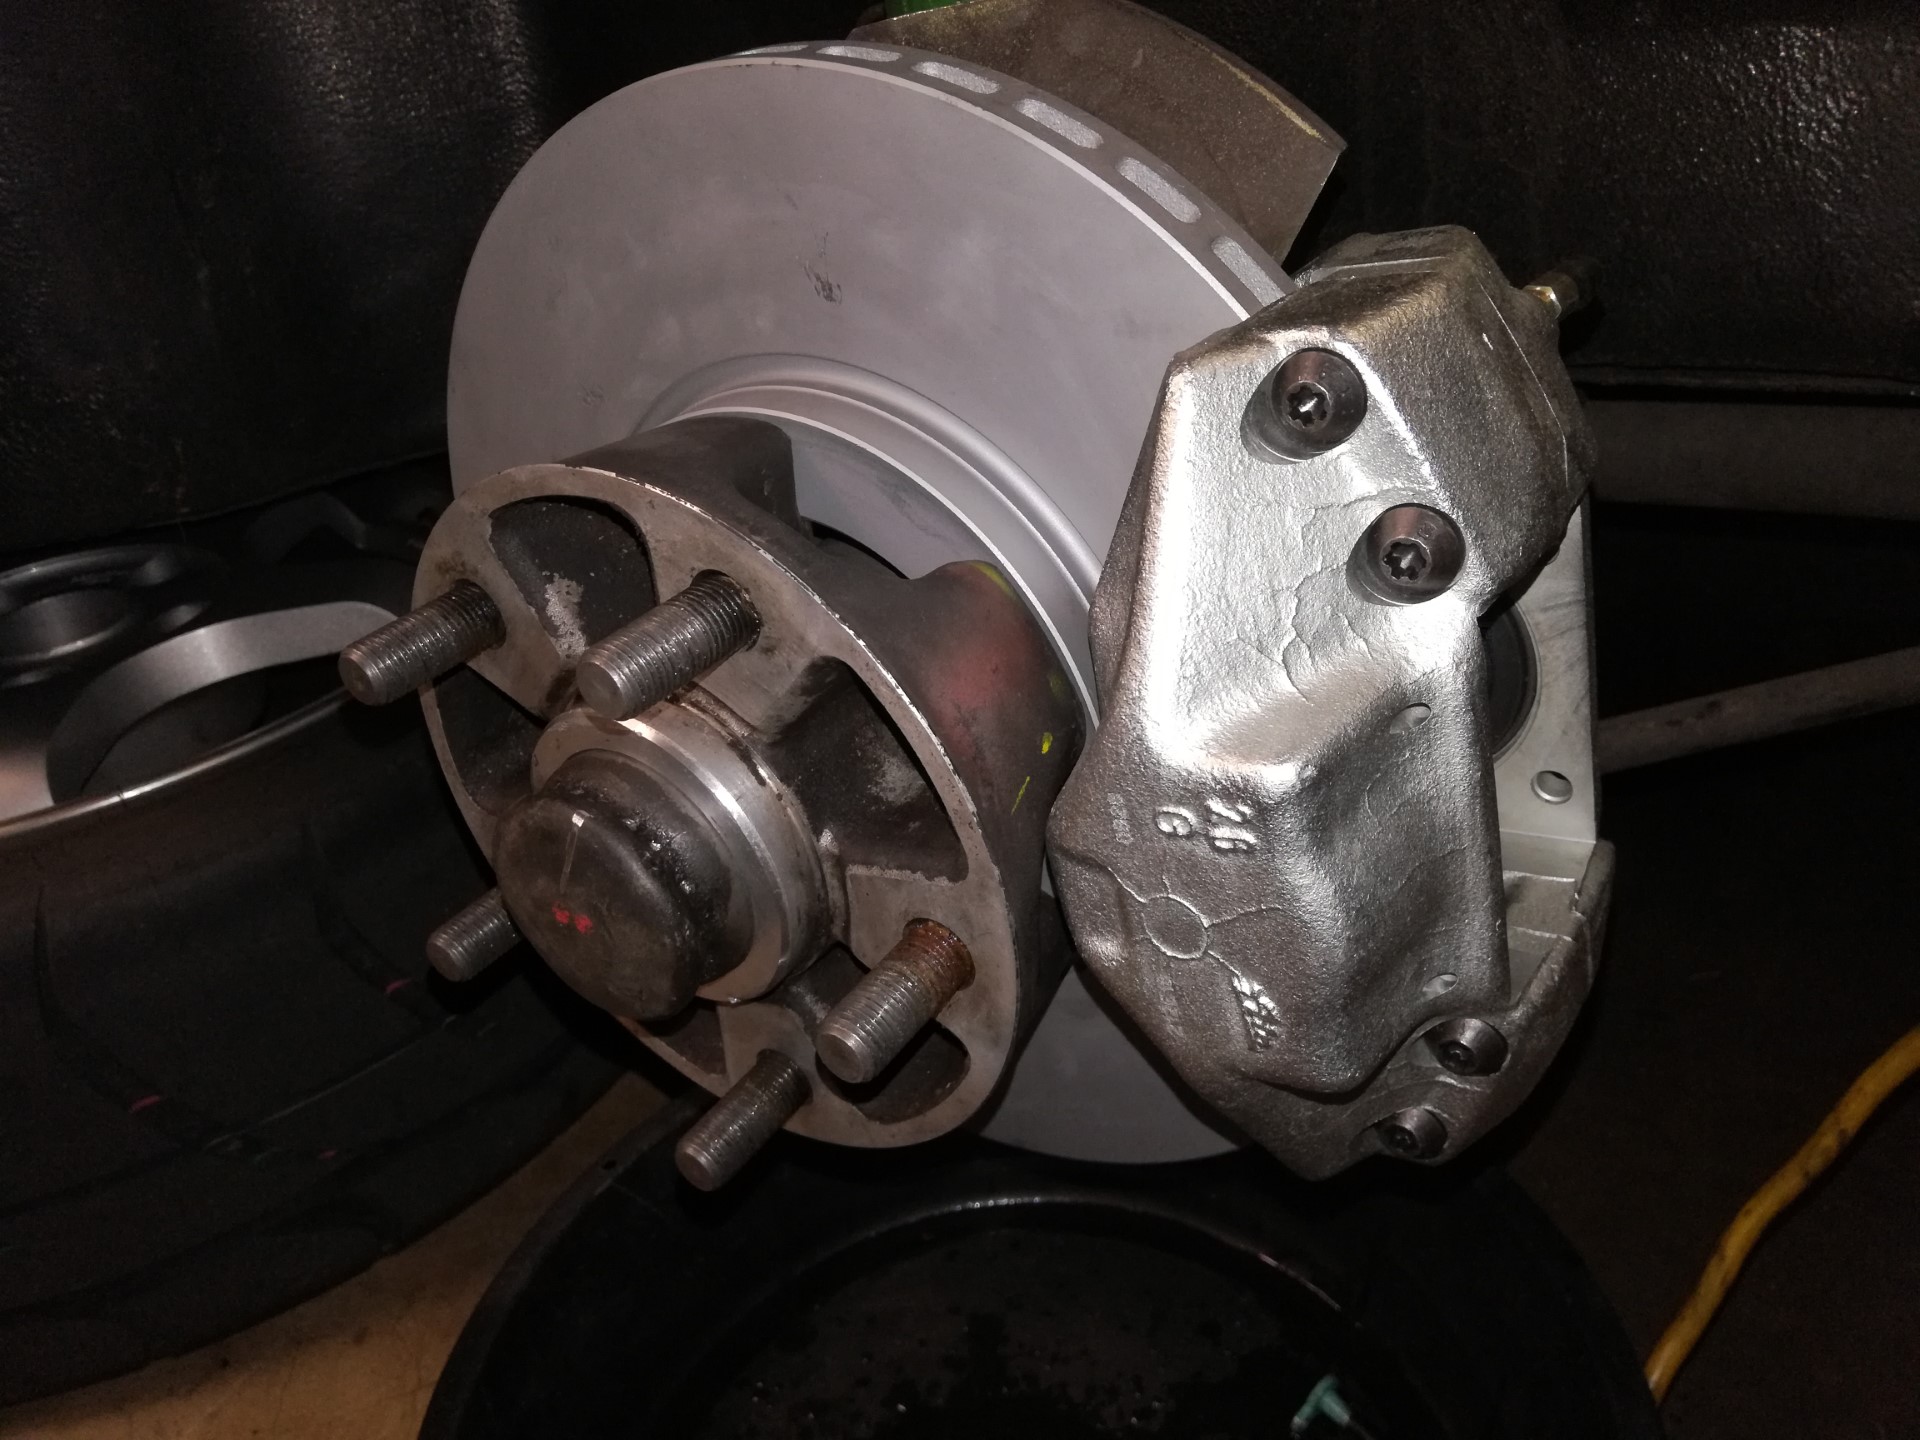
Step 9: Re-install Caliper and Pads
Maneuver the new caliper into position and get both mounting bolts started by hand as much as possible. Thread in the hard brake line and just snug it tight. Finish tightening the caliper bolts and torque to spec. On the SC this is 70 N-m (52 ft-lbs). Gently tighten the hard brake line with a flare nut wrench.
Use step 4 of this procedure to push the pistons in slightly in the caliper to clear the thickness of the new brake pads.
Re-install new brake pads and retaining hardware per steps 5 and 6 of this procedure. You can get by temporarily with the old pads but you really want new ones so they don’t wear our your new rotors unevenly.

Repeat steps 2 through 9 on the other side to replace the rotor and caliper.
Step 10: Bleed Brakes
Note: Please finish replacing rotors, calipers, and brake pads on both sides before proceeding.
Bleed the front brakes per step 4 of this procedure. If you have recently bled your rear brakes you should be ok just bleeding the front circuit, but if has been a while you may as well bleed all 4 corners for peace of mind.
Put the front wheels on and lower the car back on the ground. If you found any issues with your old caliper pistons you should have significantly improved braking performance. Your front brakes are now set for many years and tens of thousands of miles of trouble free driving.