Are you getting a humming or grinding noise coming from one of your front wheels while turning or cruising down the highway? If so, there is a good chance that you need a new wheel bearing or two. If you are capable and confident enough to do your own brake job, replacing the wheel bearing on an E36 isn't much more work. Below is a quick DIY on how to replace the front wheel bearings on an E36 with minimal effort and basic tools.
You don't have to wait for the wheel bearings to make noise before replacing them, as it's a good idea to do them as preventive maintenance. If you plan on racing the car at all, you will want to make sure your wheel bearings are in tip-top shape. For example, I bought a 1989 BMW 325i that I decided to enter into a winter autocross a few years ago. The car had been fairly neglected by its previous owner so I went through the car and replaced/upgraded suspension parts as necessary. The wheel bearings at the time were tight and made zero noise so I didn't even think twice about replacing them. After about half of a day of auto crossing the car, my left front wheel bearing failed to where I had to baby the car the rest of the day and then drive it home. Being proactive and replacing the bearings ahead of time would have prevented this failure.
Make sure you follow all safety precautions such as safety glasses, wheel chocks, jack stands, and working on a level surface. If in doubt, stop and consult a professional!
I am doing this procedure on a bench but it is the same as it would be as if it was in a car.
Tools needed:
- Flat-blade screwdriver that you're willing to use as a chisel (shhh, we wont tell)
- Hammer
- Small Punch
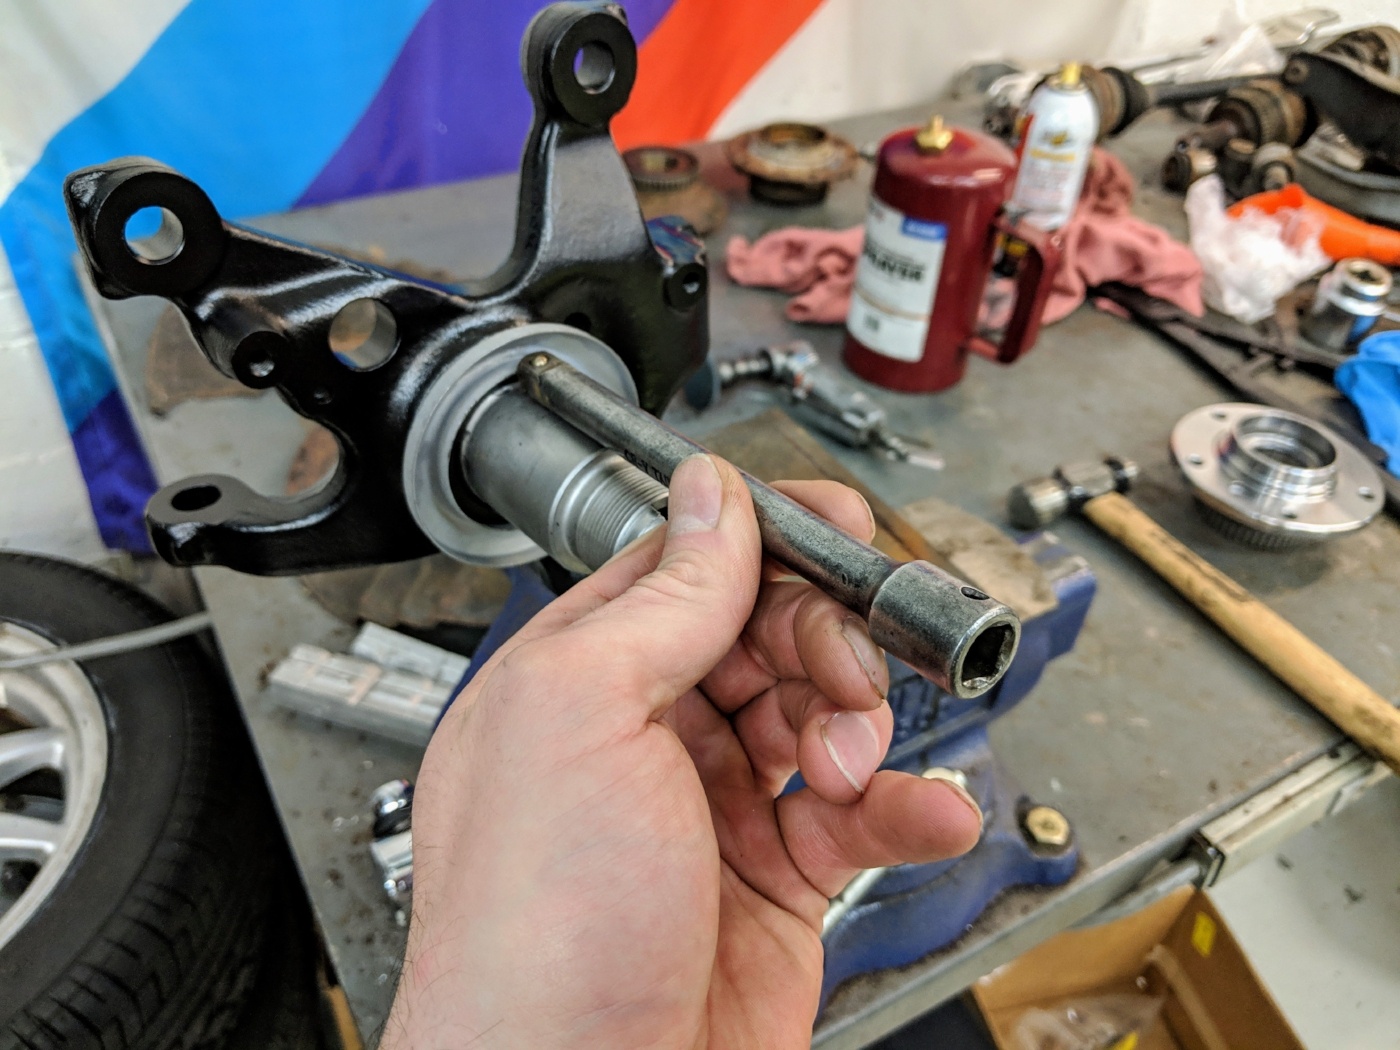
- 46mm Wheel Bearing Nut Socket
- 10-12" long 3/8" extension
- Torque wrench
- Impact gun or a 1/2" breaker bar
- Air Hammer (optional)
Parts needed:
- BMW Wheel Hub Assembly Kit - 31226757024KT (It is recommended to replace wheel bearings/hubs in pairs but it's not always 100% necessary.)
Step one: Remove the front dust cap.
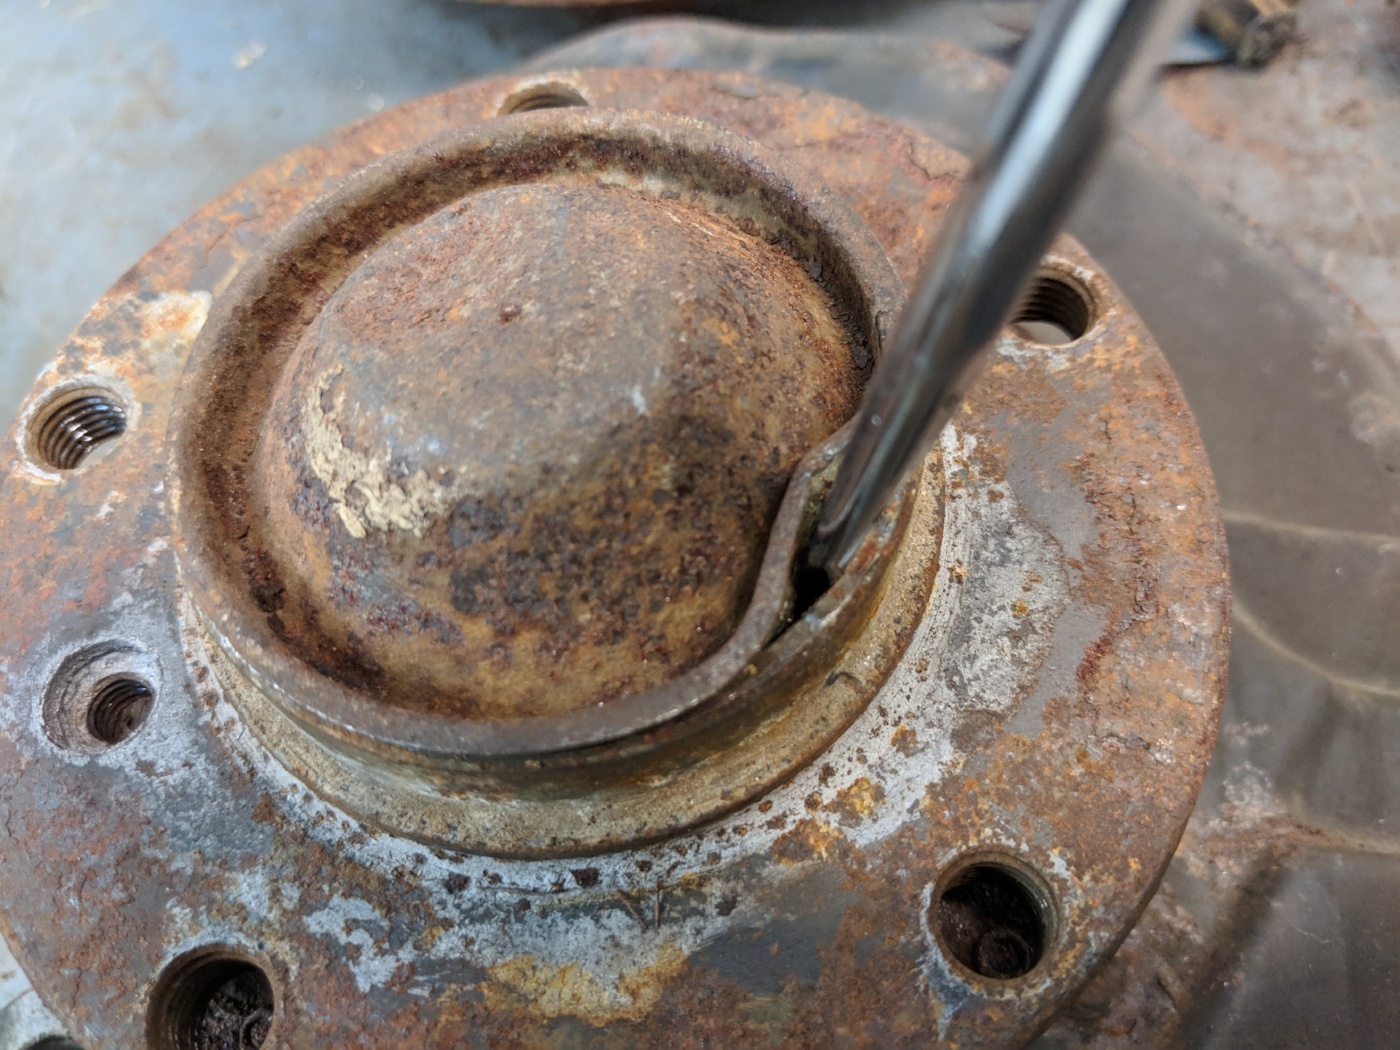
For this I used a flat-blade screw driver and a hammer. Place the tip of the screwdriver on the seam where the dust cap meets the hub and tap the screwdriver end with the hammer, wedging the screwdriver tip between the dust cap and hub. Once you have tapped it in, push the screwdriver handle inwards, towards the center of the hub in order to bend in the edge of the dust cap. Then you should be able to pull back on the screwdriver to pop the cap off, exposing the hub nut.
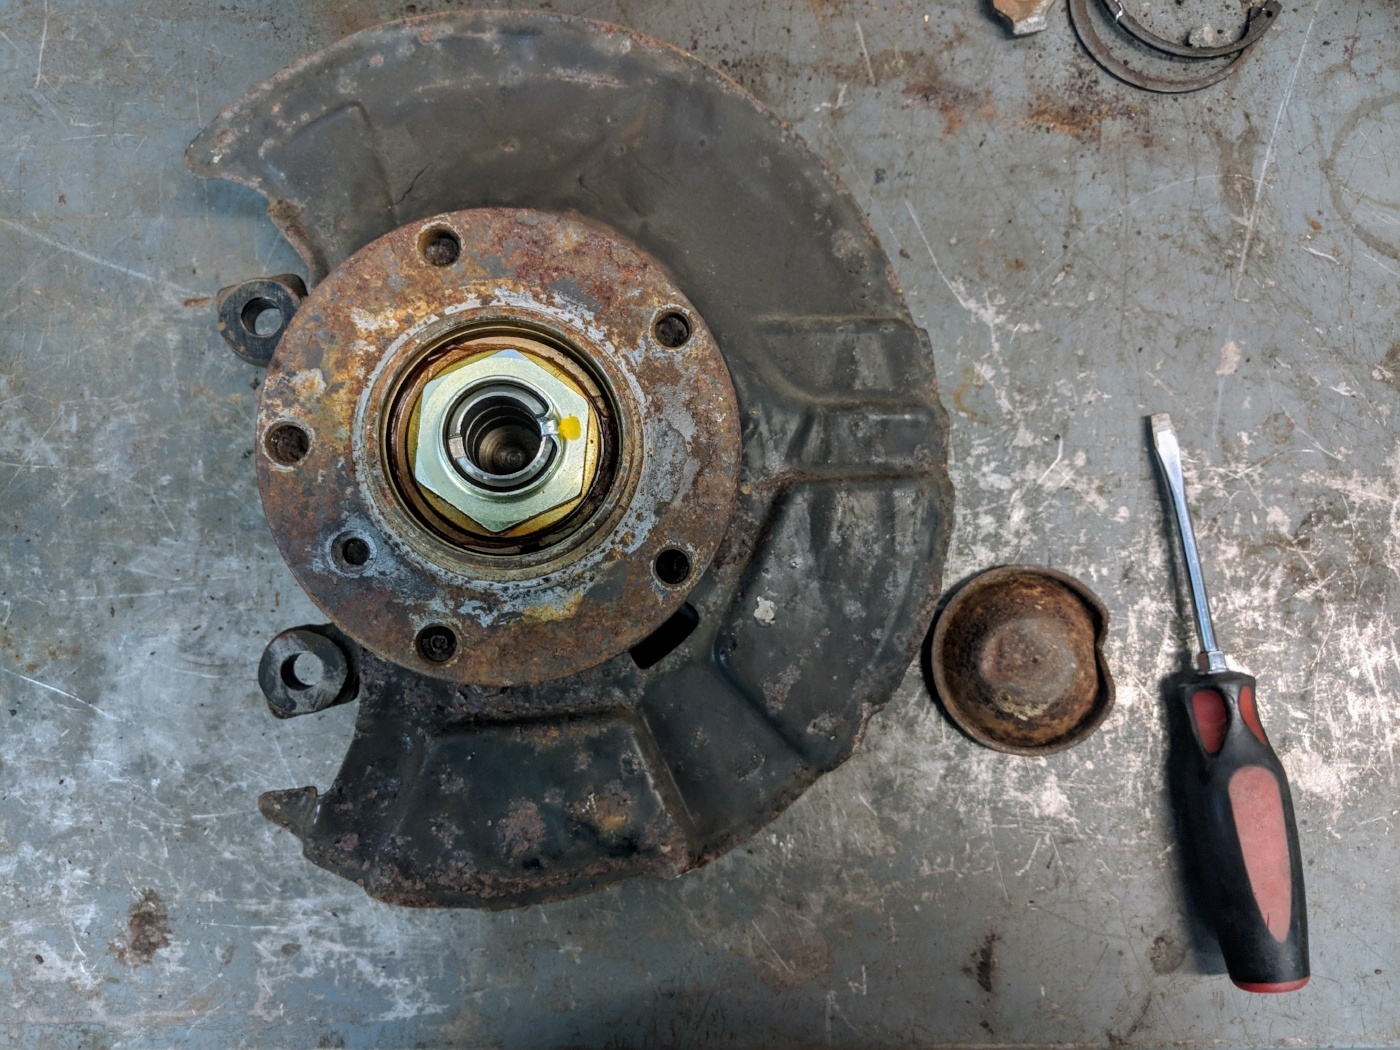
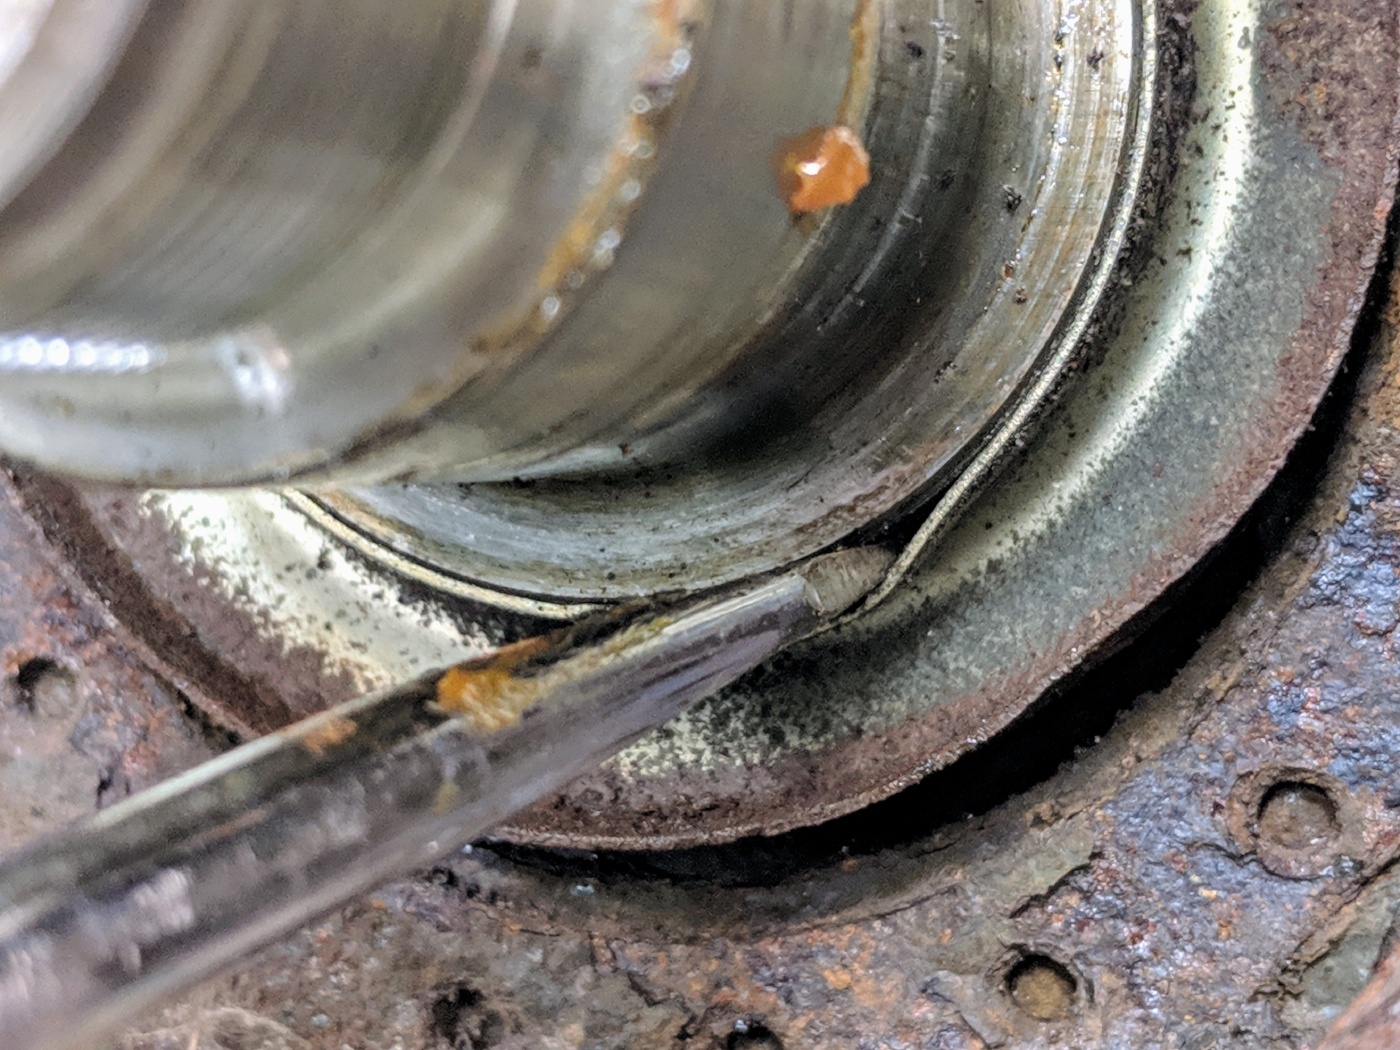
Step two: Remove the hub nut.
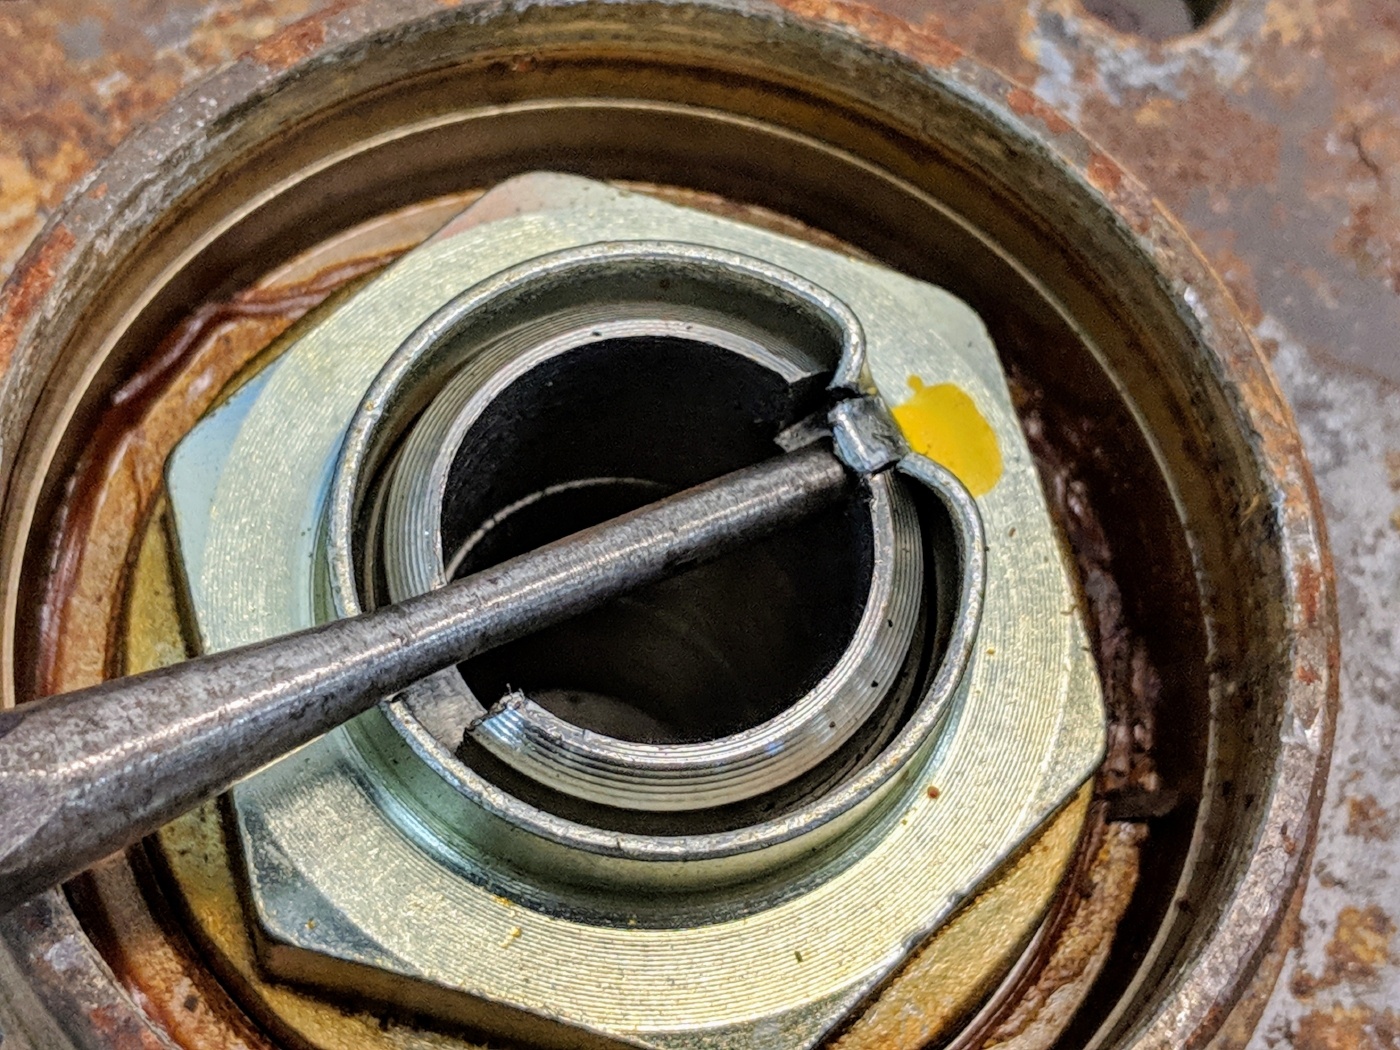
To remove the hub nut, you will first have to un-stake it. To un-stake the nut, place a punch or a screw-driver on the seam where the bent in tab and king pin meet. Tap the punch or screwdriver end with a hammer to bend the tab far enough to clear the king pin nose so that it doesn't hang up while removing the nut. I first used the screwdriver to bend the tab up and then finished the job with the punch. Next, place the 46mm socket on the nut and remove it. I used a 1/2" electric impact gun but this can be done with a 1/2" breaker bar or long handled ratchet.
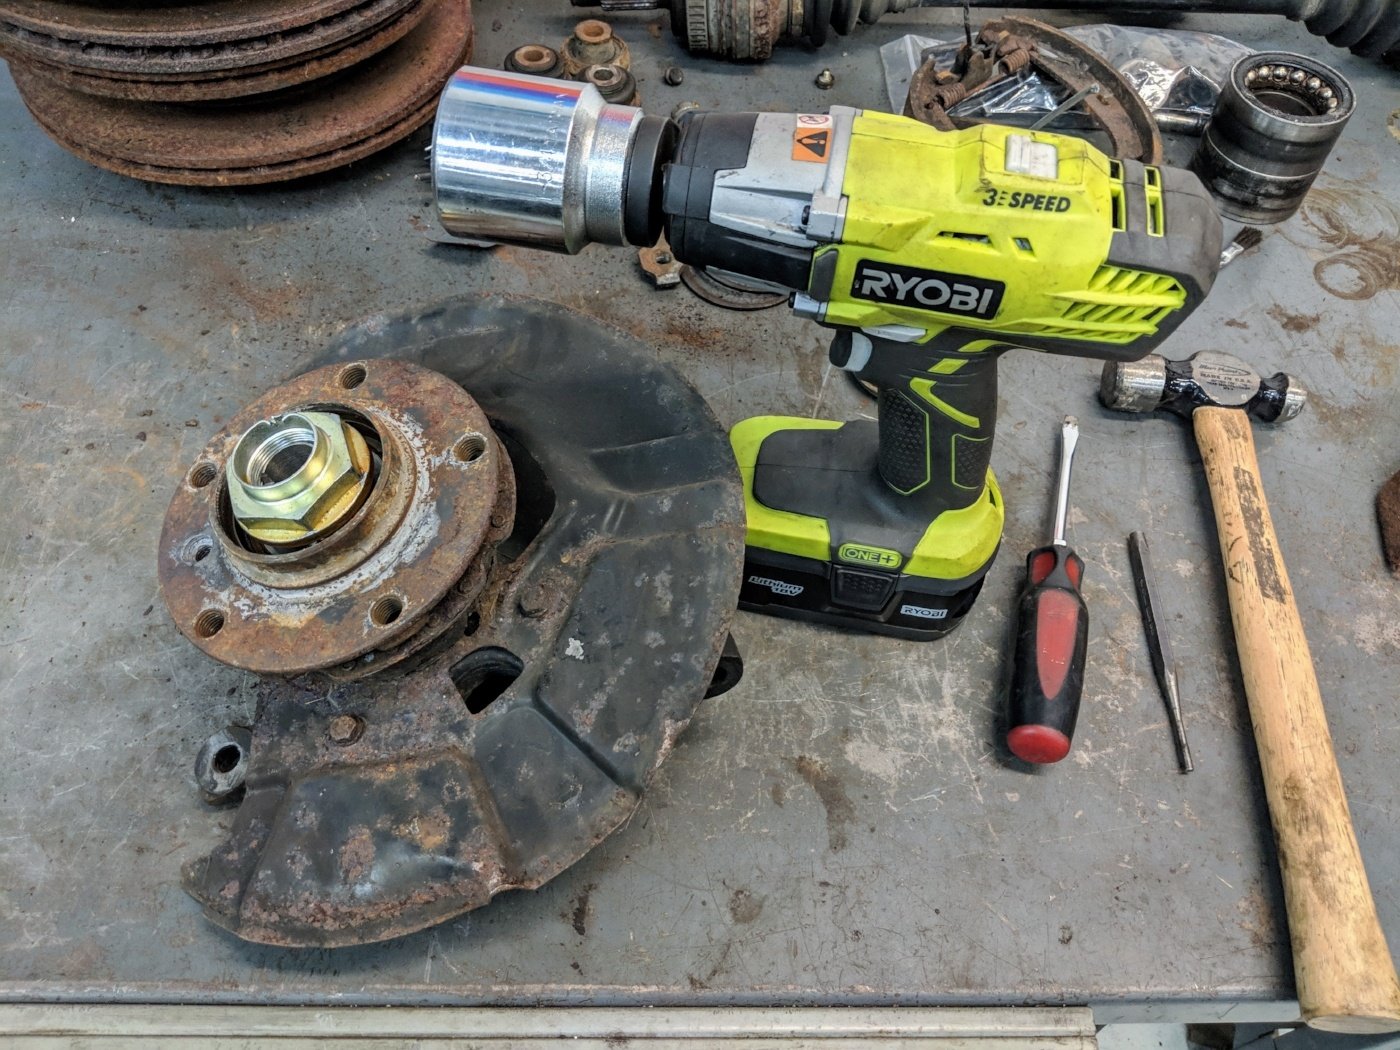
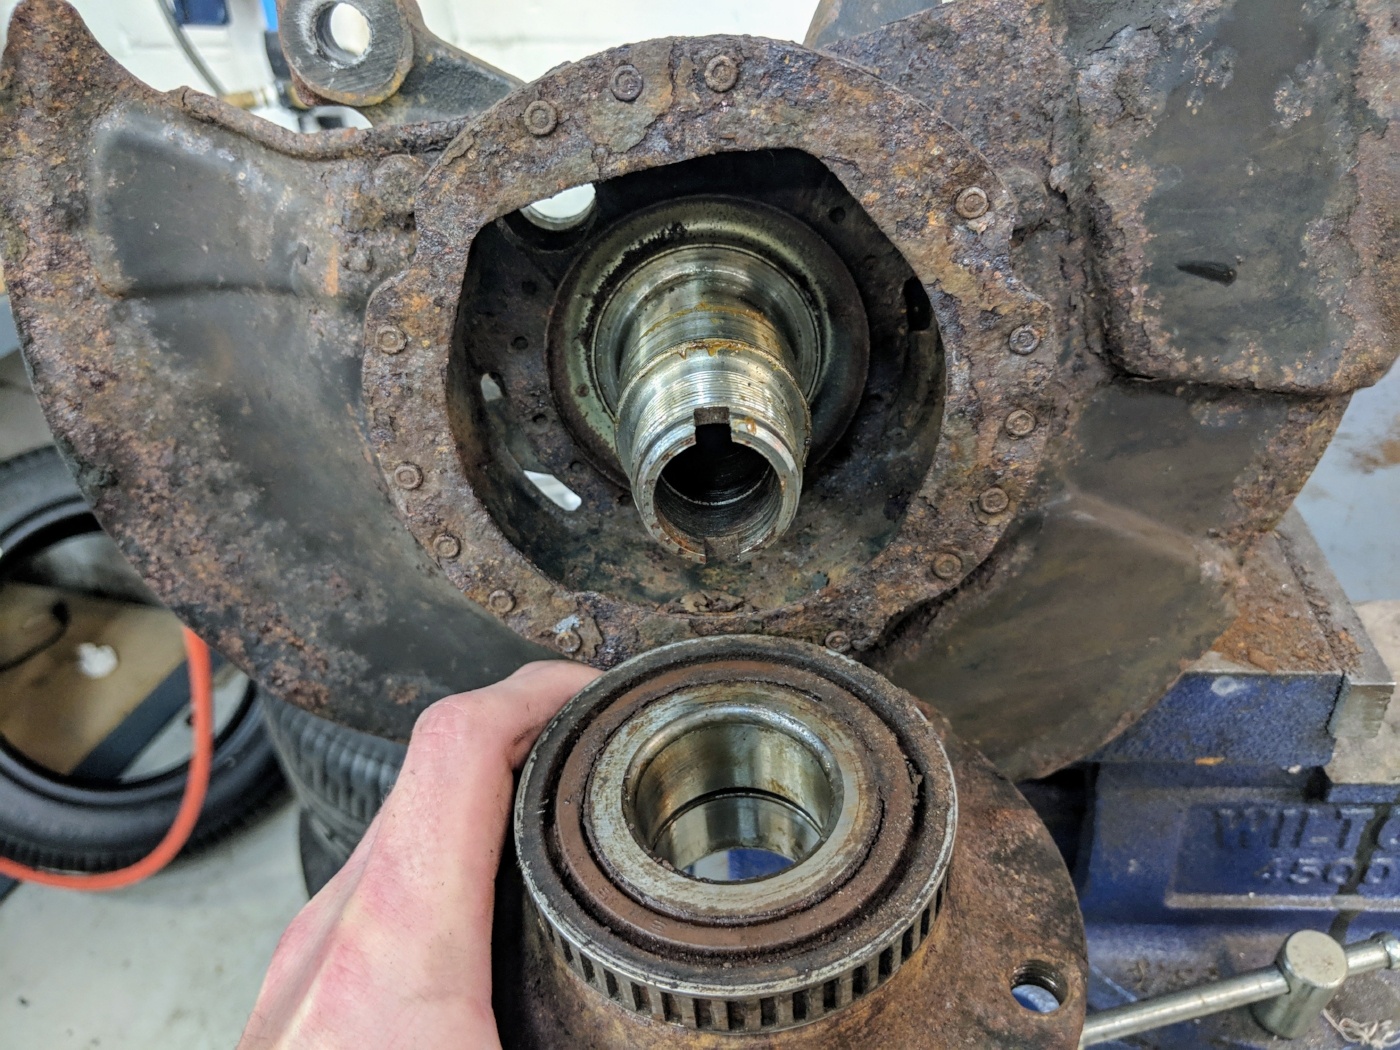
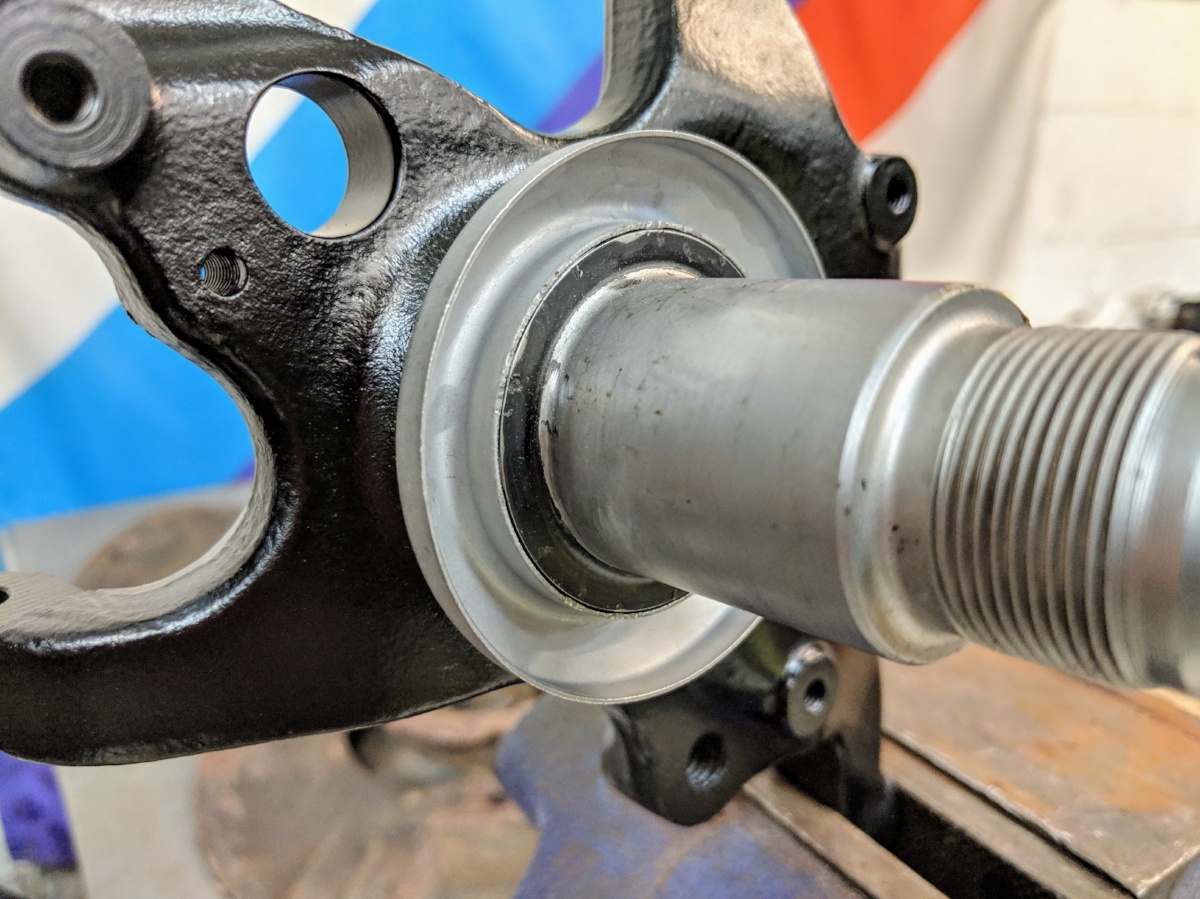
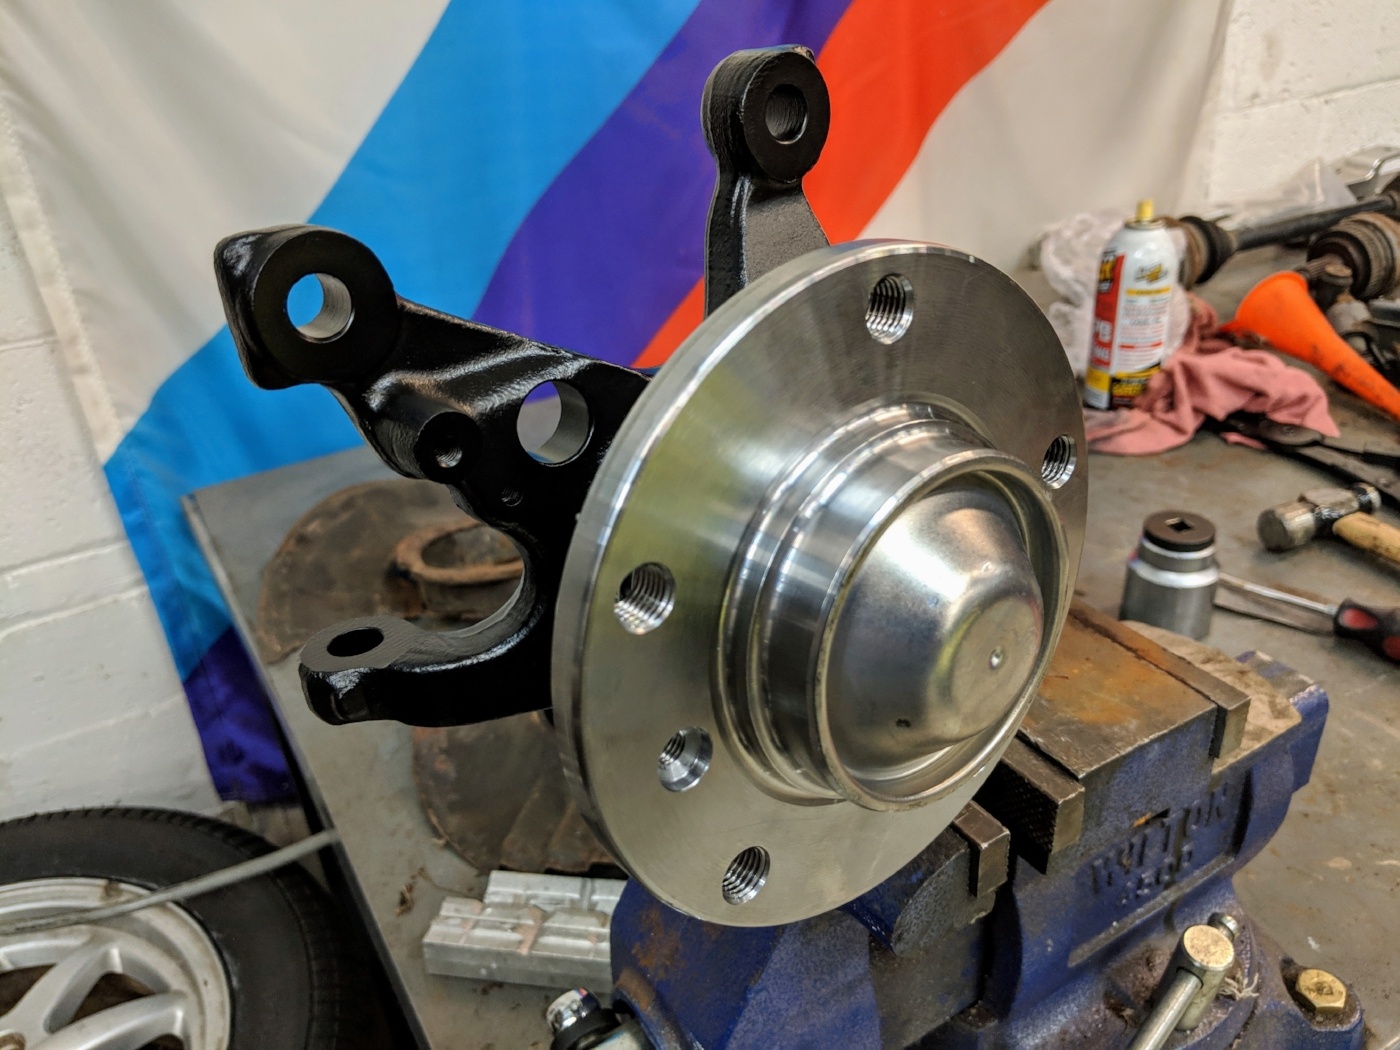
Step three: Remove the hub assembly.
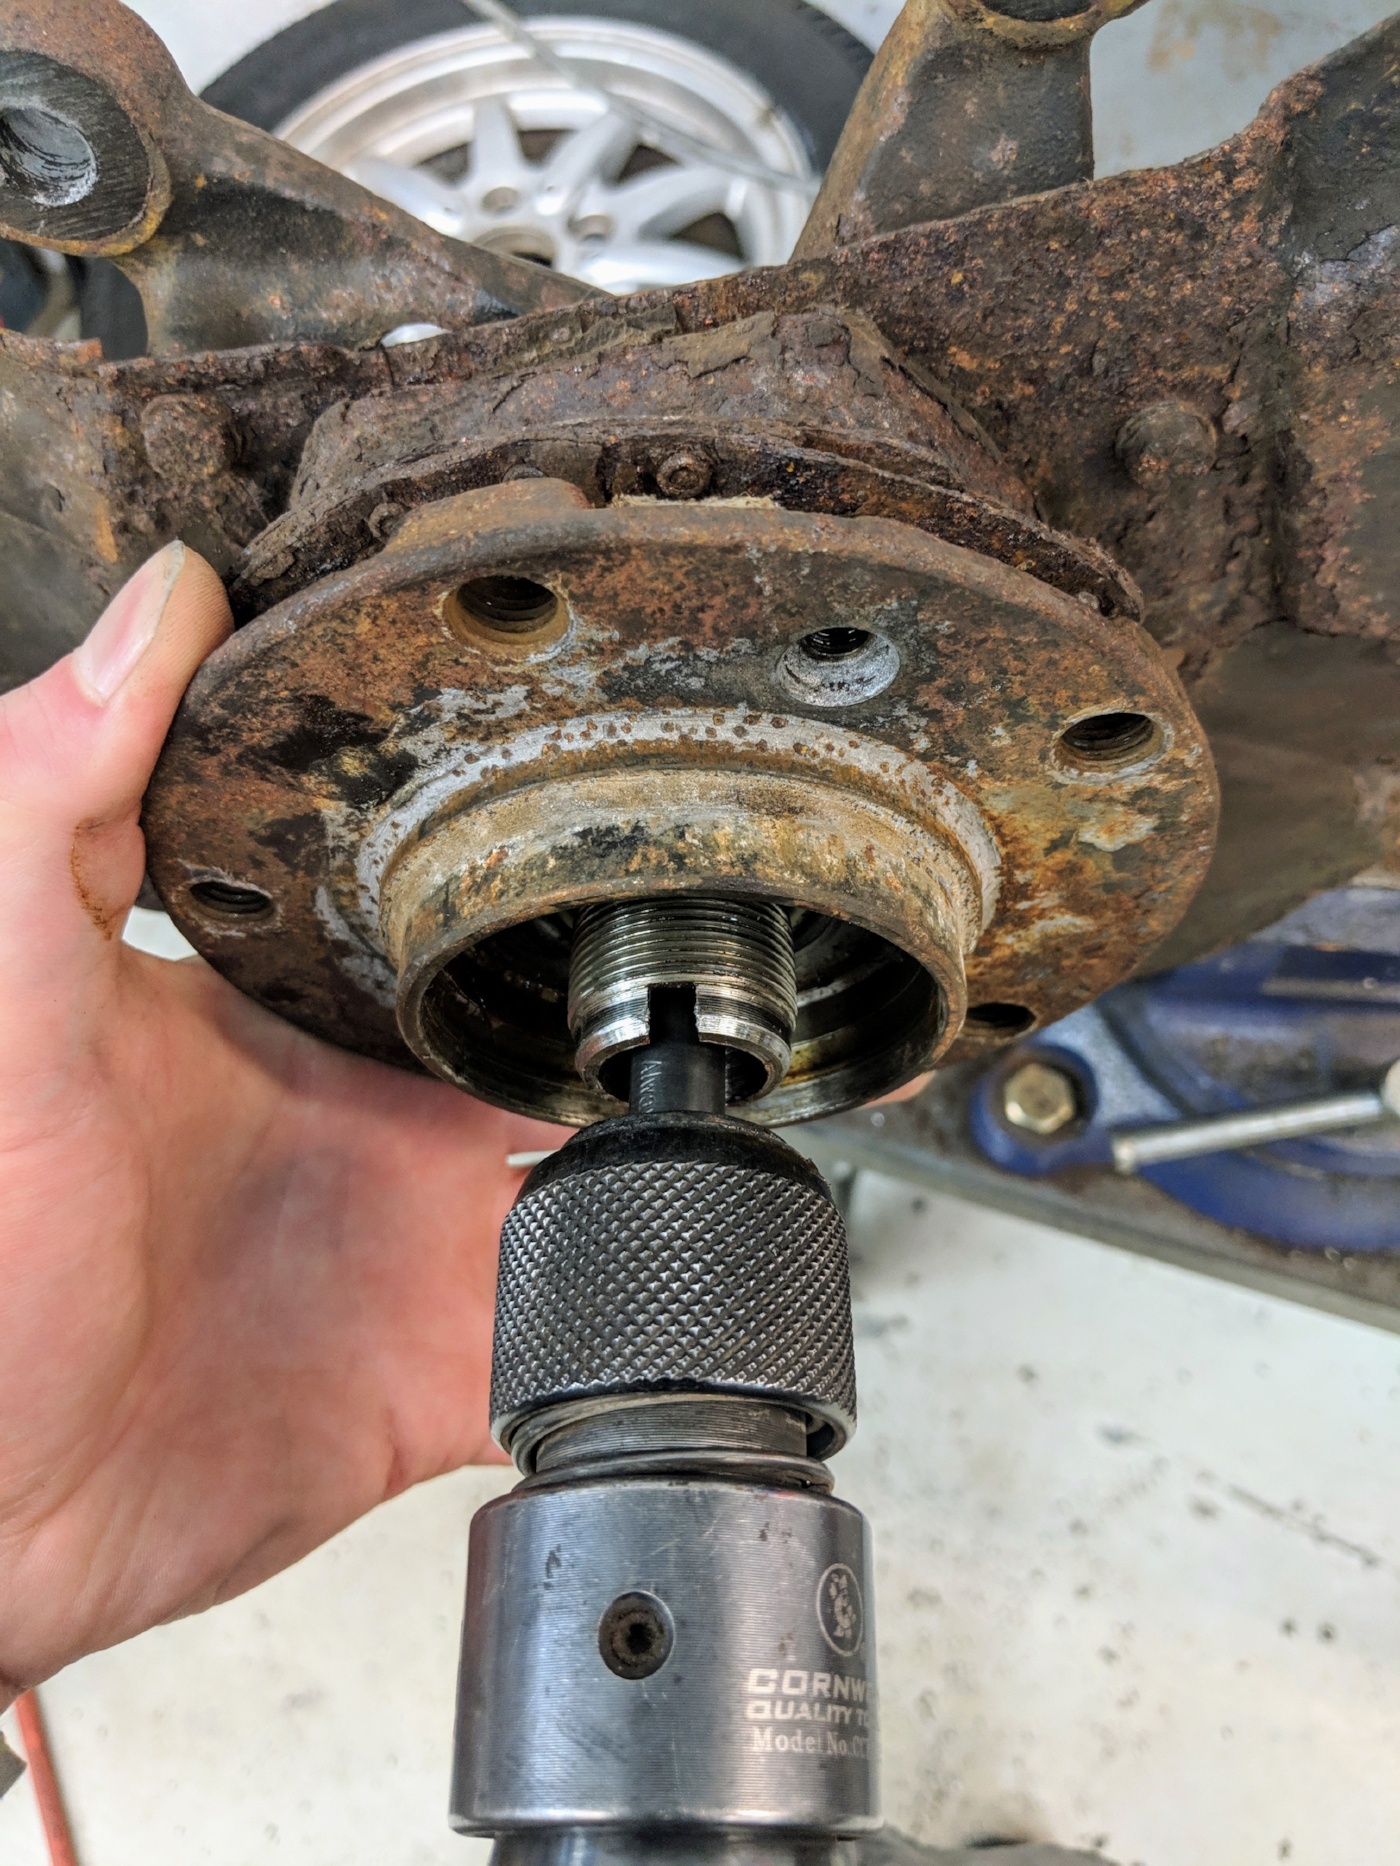
This step is important to do correctly in order to remove the hub in one piece. I use an air-hammer with a rounded bit to remove the hub but this can also be done with a hammer, long punch, and a second set of hands. Place the air-hammer bit or long punch into the center of the king pin as seen in the picture. You want to pull the hub towards you with equal pressure while gently "braaping" the air-hammer or having someone hit the long punch with a hammer. The shock of this will loosen the inner bearing race from the king pin and you should be able to slowly pull the hub towards you. Keep "braaping" or hammering until the hub has been completely removed in one piece.
Step four: Removal of the inner dust cap. (optional)
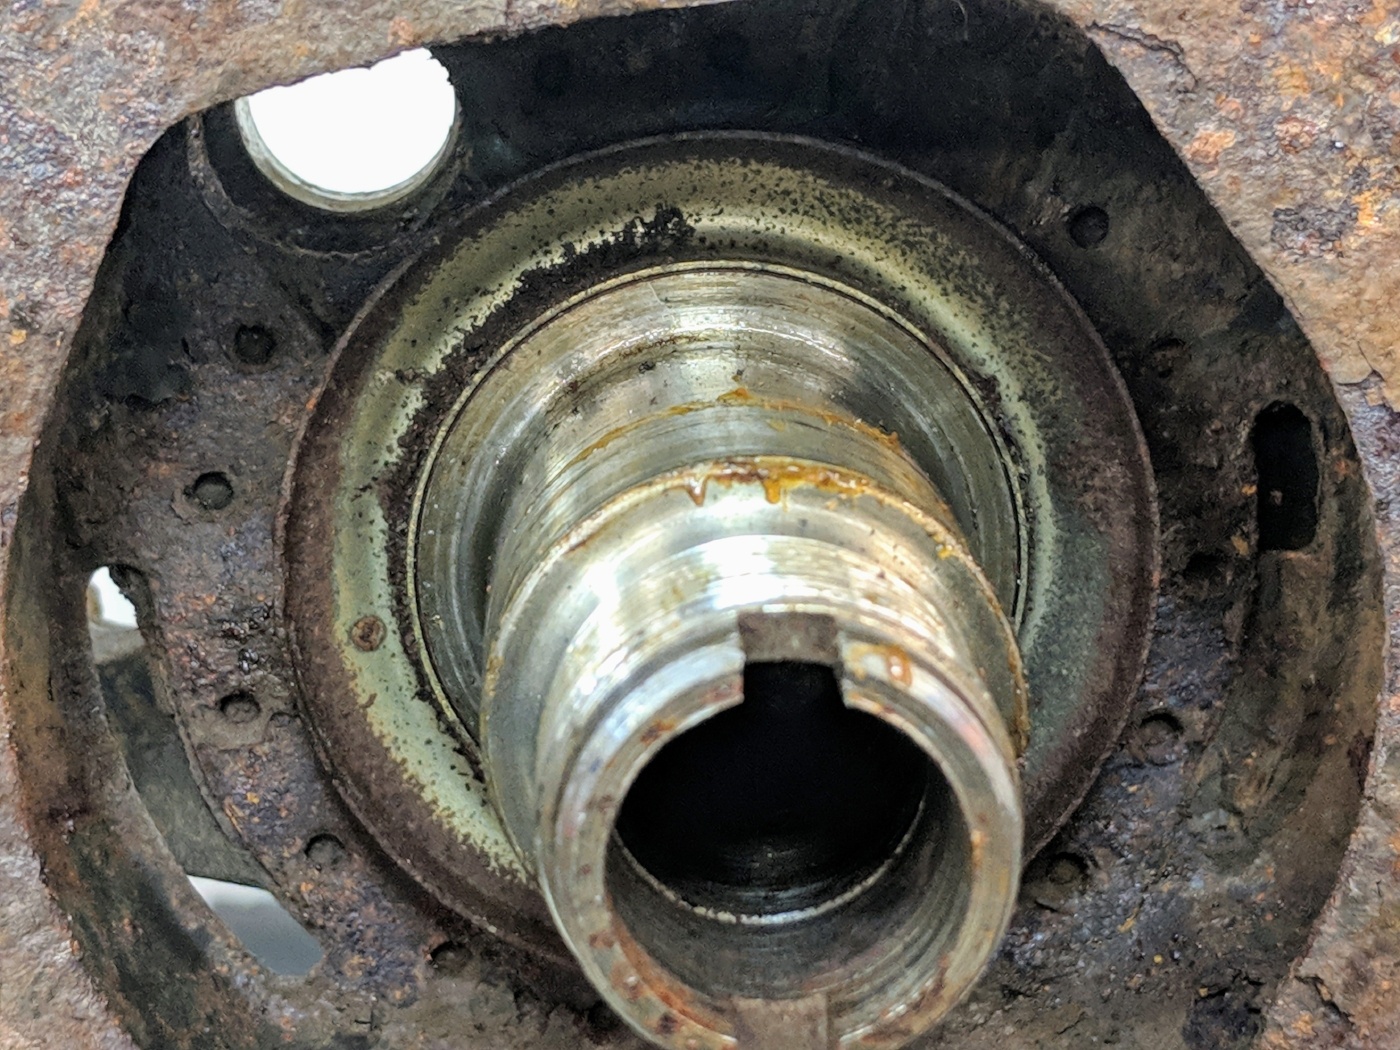
If your dust cap is in good shape then you can skip this and scroll down to step six. If you need to replace it or if you want to remove/replace the protection plate behind it, then keep reading. Place the tip of the flat-blade screwdriver on the seam where the dust cap meets the king pin and tap it with a hammer. The tip will wedge itself between the cap and king pin, wiggle the screwdriver back and forth and the dust cap should pop off.
Now is the time to clean or replace the protection plate, and to clean/paint the king pin. I decided not to run the protection plates on the rally car because it is a good spot for rocks to collect so the assembly pictures will all be protection plate-less.
Reassembly!
Step five: Install new inner dust cap.
Place your new inner dust cap into place and grab a hammer and 10 to 12 inch 3/8" extension to install it. I use the extension because it's long, skinny, and the end is nice and flat. If you are replacing the inner dust cap with the protective plate still on, the extension is ideal due to its low profile and long length.
Installing the inner cap can be tricky if you don't tap it in evenly. I like to start at the 12 o'clock position and then move down to the 6 o'clock position, executing little taps each time. Once you see that it is started and going on evenly I will go around in a clockwise direction tapping at the 12, 3, 6, and 9 o'clock positions. Do this until the cap is fully seated and flush.
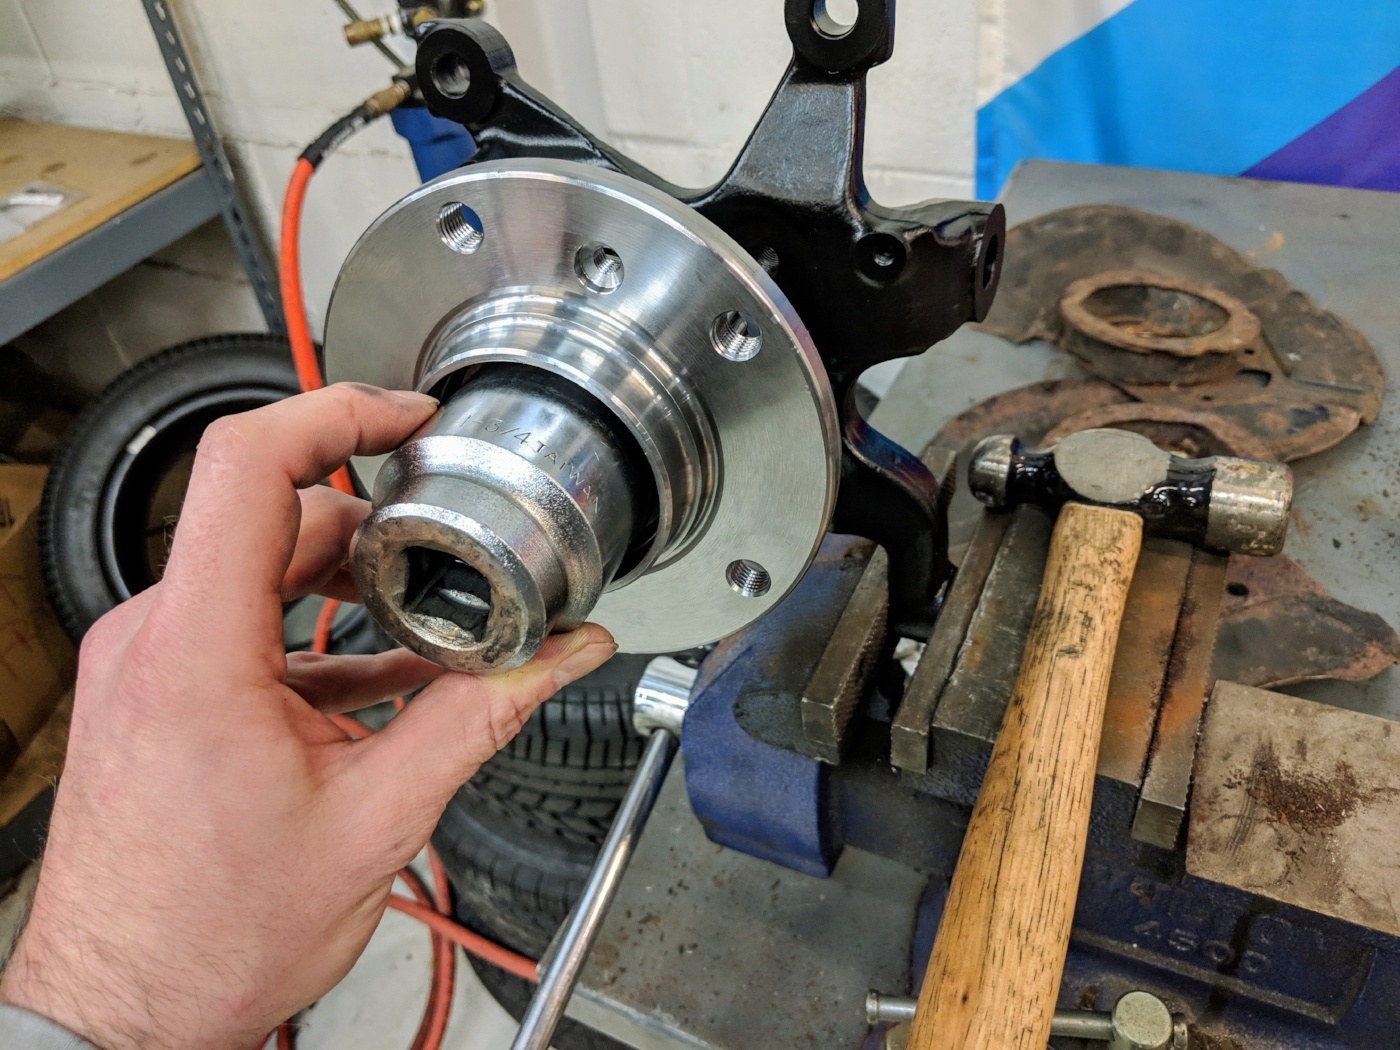
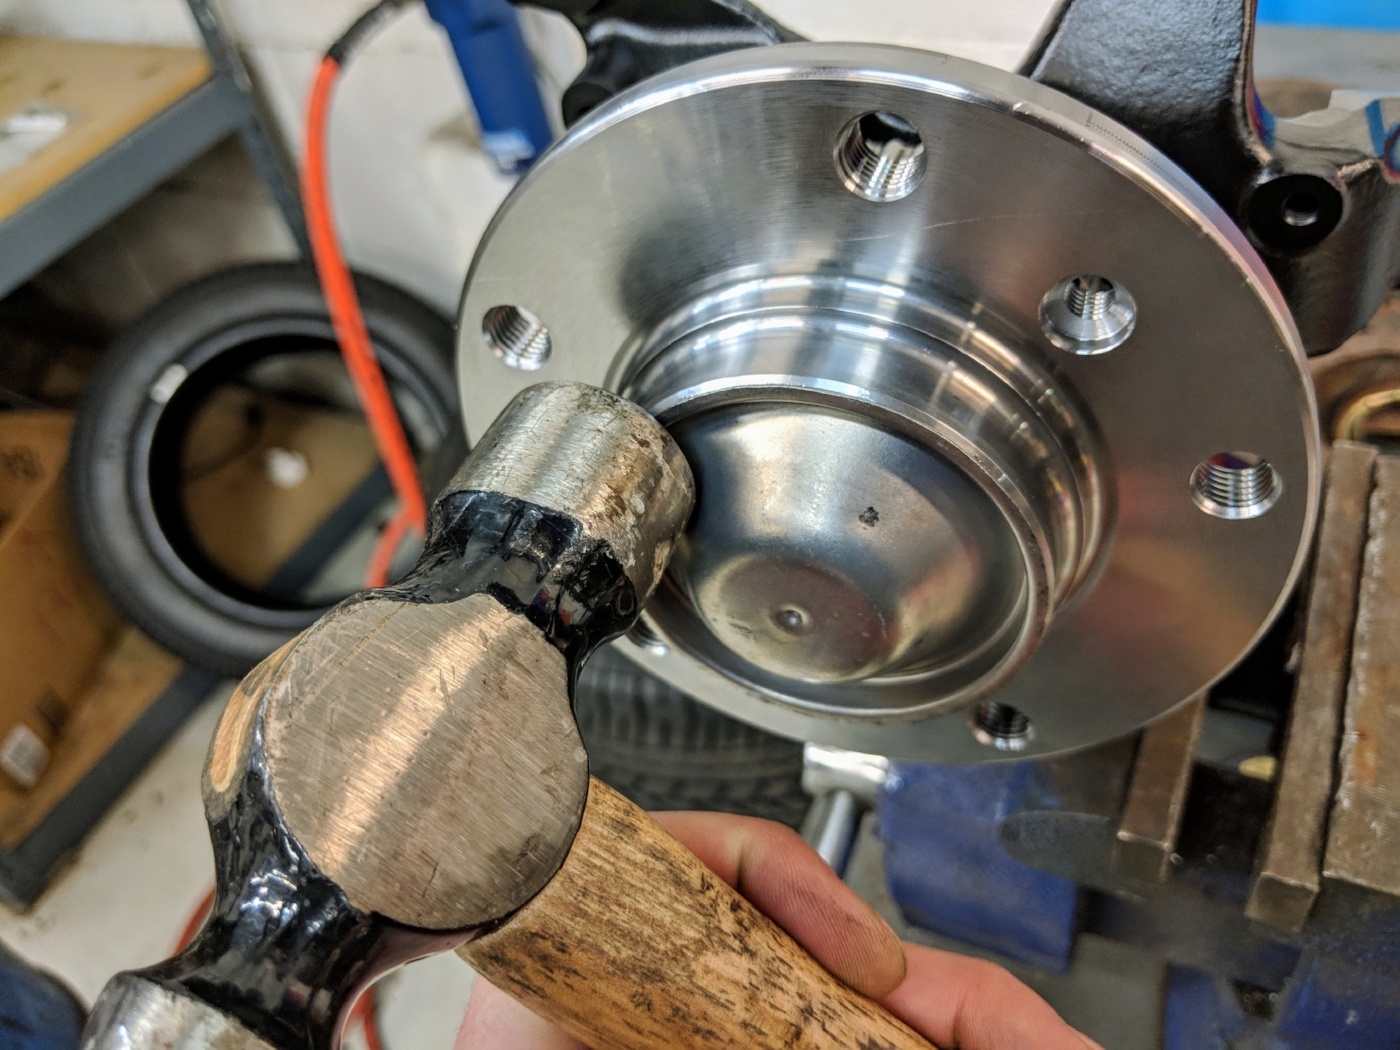
Step six: Installing the new wheel bearing hub assembly.

Place the new hub assembly onto the king pin as even and level as possible. Take a hammer and lightly tap on the inner hub ring (where my thumb is resting in the above picture). Just like the last step, tap it at 12 o'clock and then 6 o'clock before working in a clockwise direction tapping at the 12, 3, 6, and 9 o'clock positions. This is just to start the hub onto the kingpin evenly, don't smack the hub with the hammer hard and cause damage!
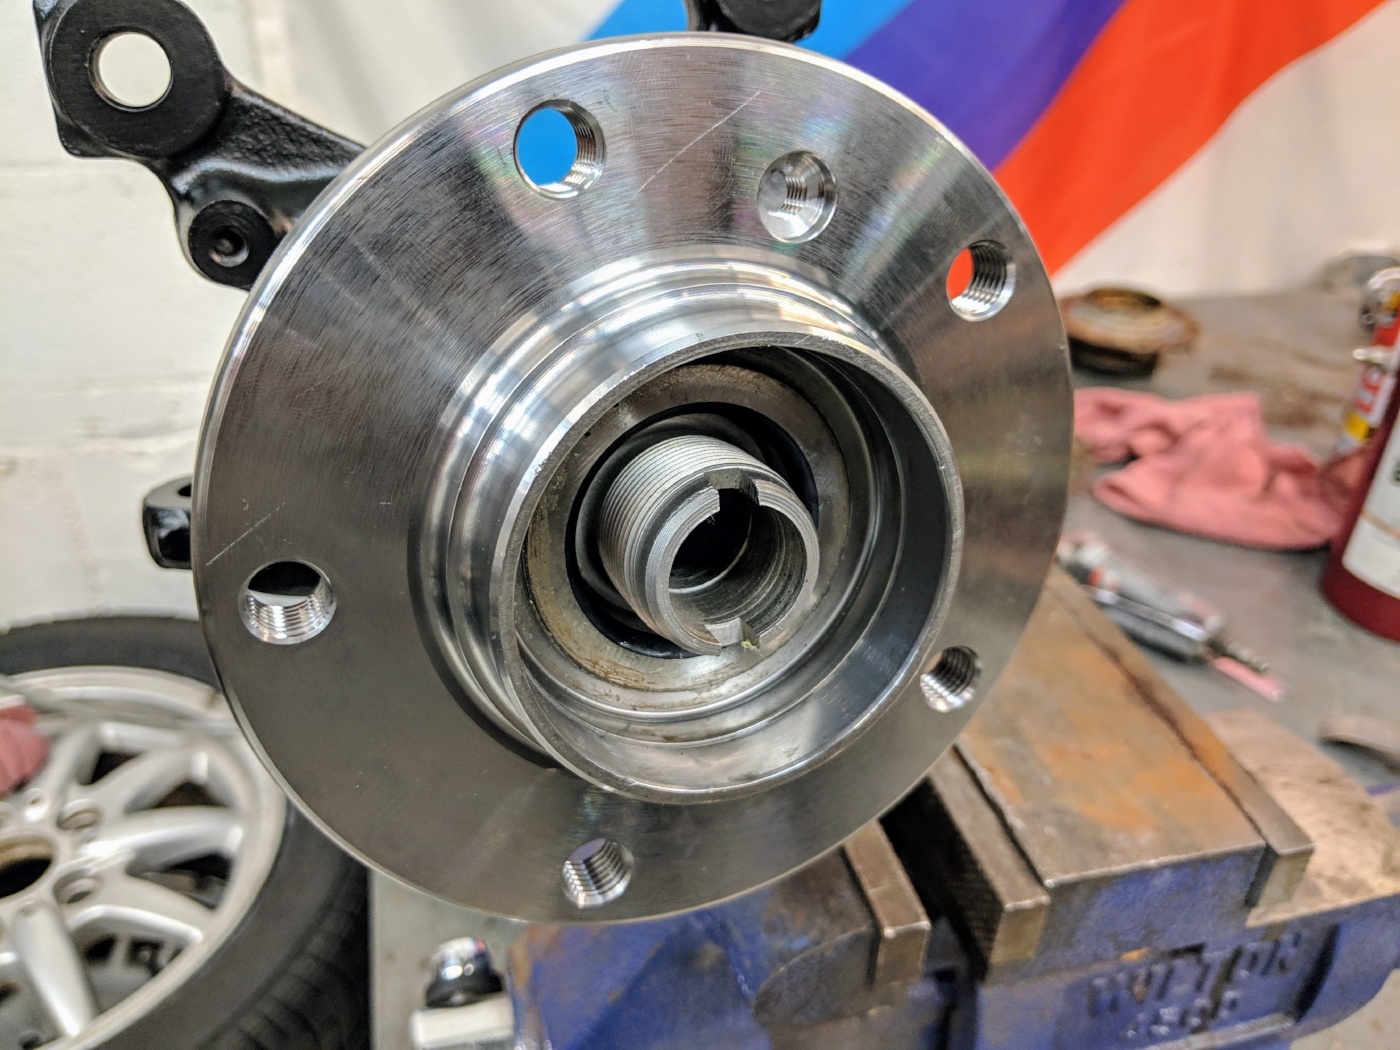
Now that the hub is secured in place, grab the 46mm socket and place it inside the hub and grab the hammer. The socket will be sitting on the inner race of the outside bearing, this is where we are going to be applying the pressure to push the hub on even farther.
While supporting the socket and holding the hub straight with one hand, start hitting the socket with the hammer in the other hand. Once again, working in the clockwise direction and tapping at the 12, 3, 6, and 9 o'clock positions. This part takes some effort so make sure you get some power into the swings.
Remove the socket every so often to check progress, we only want to knock the hub on far enough to get the axle nut started.
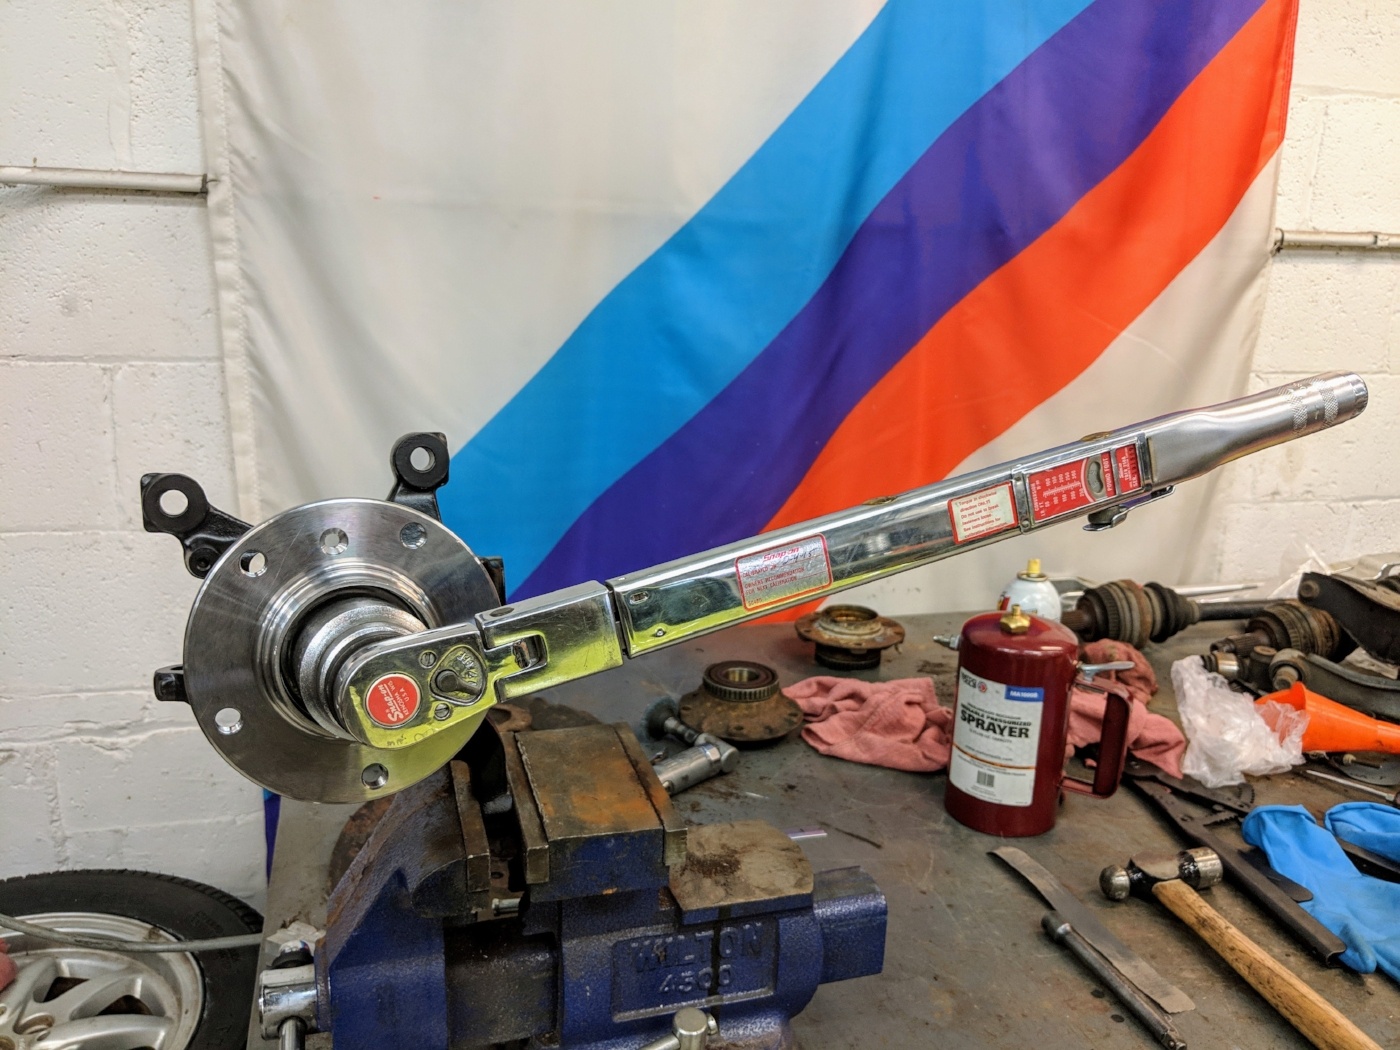
Now you can place your new axle nut on to finish installing the hub assembly. Slowly tighten the nut with a torque wrench and torque the nut to 215ft-lbs.
Step seven: Re-stake the nut.
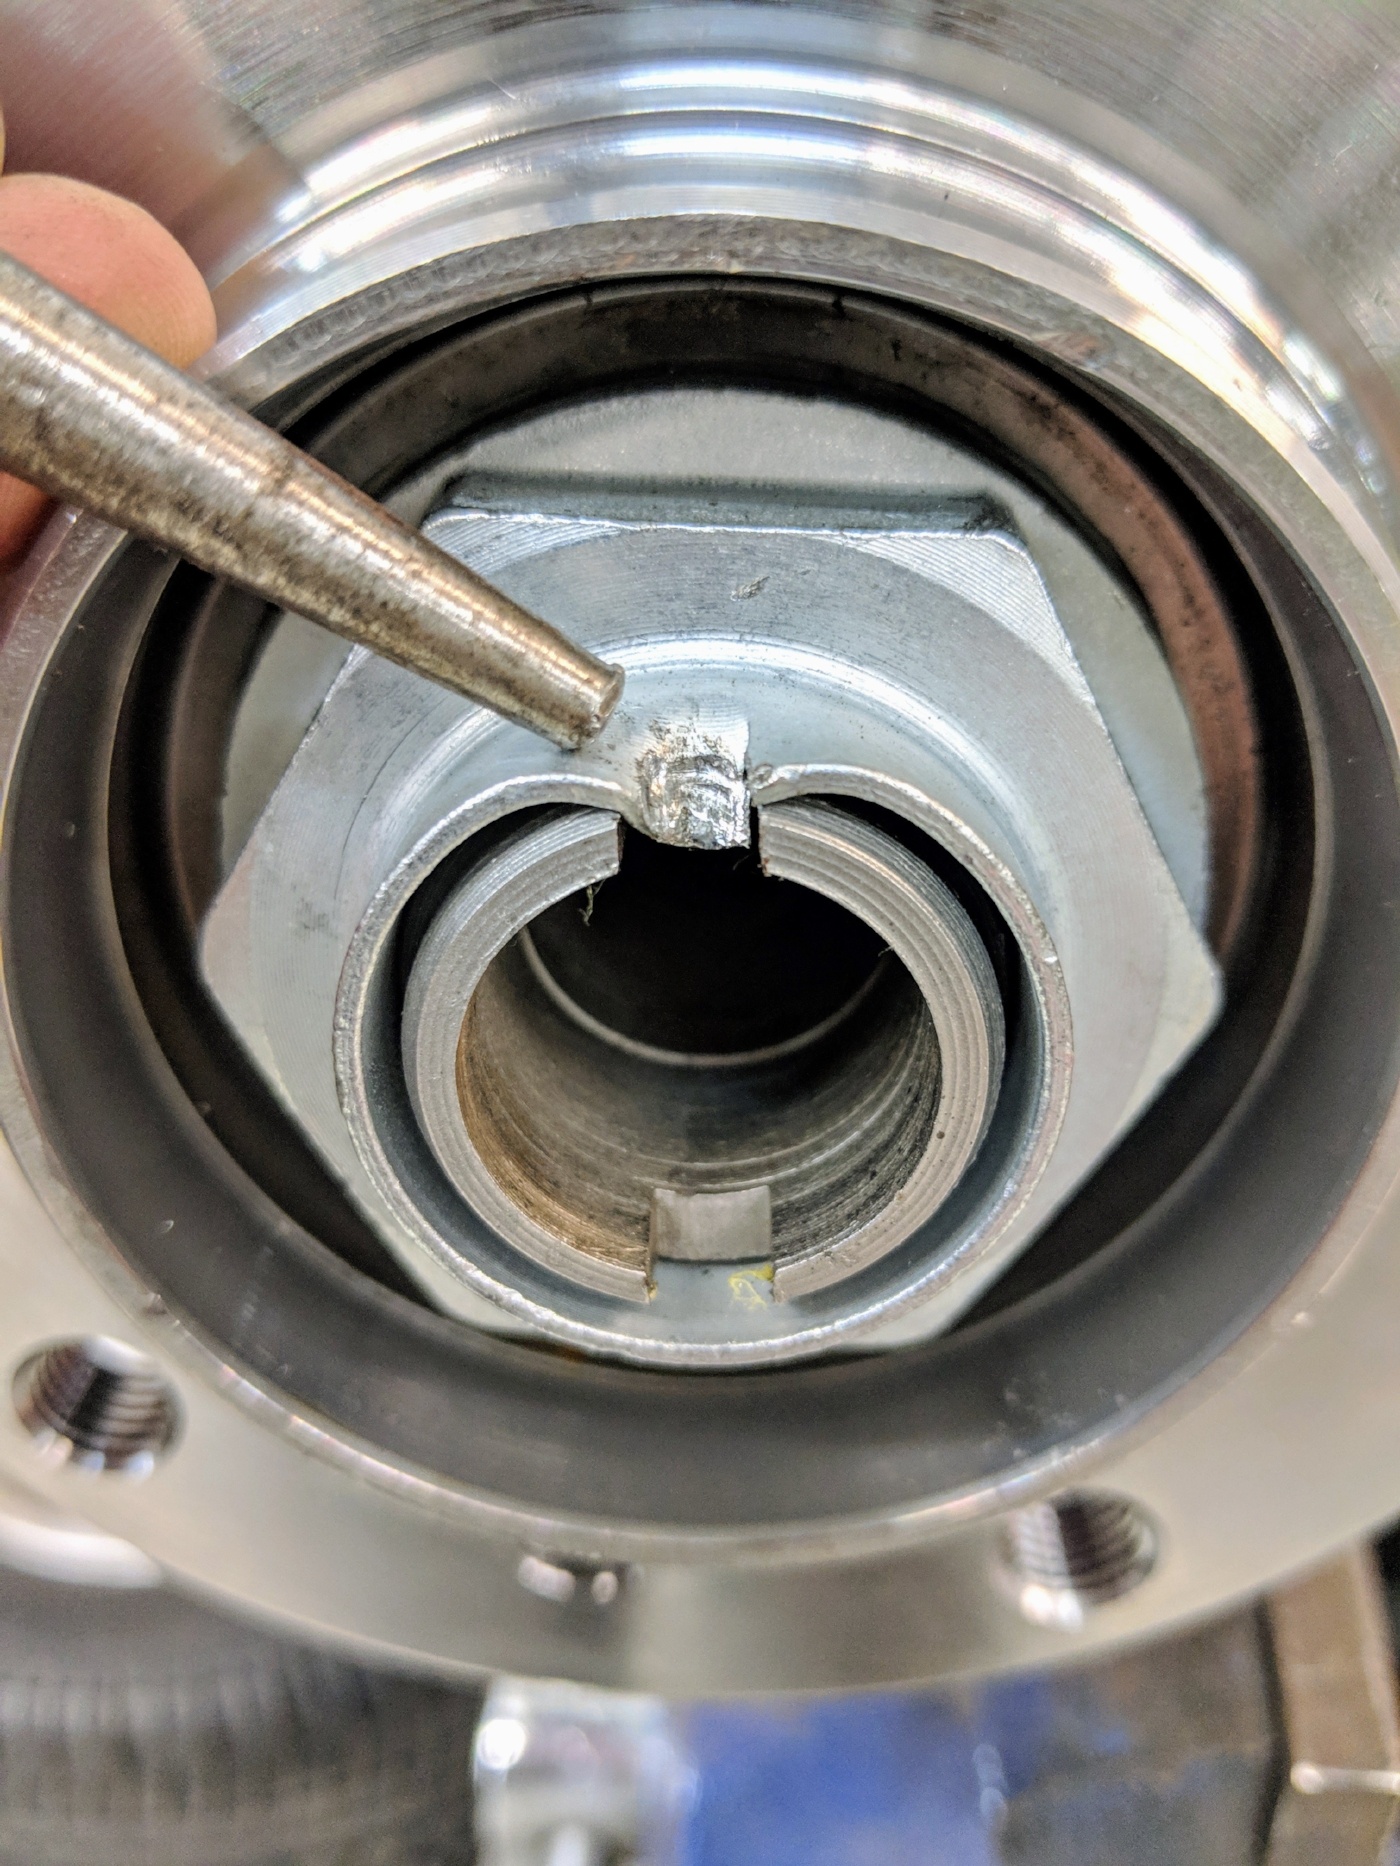
To re-stake the nut, dent in the nut into one of the cut outs in the king pin with a punch, and hammer. You only need to do one side. Re-staking the nut will ensure that it will not loosen up over time.
Step eight: Install the new outer dust cap.
Place your new outer dust cap on the hub and tap the outer edge of the cap into the hub with a hammer. This doesn't take much effort, the cap installs very easily. Tap it in until the edge is flush.
That's it! Reassemble your brakes, and put your wheel back on and you are DONE.