- 07/02/2020
- 3 Min Read
- By: Jose Martinez
How To Replace The Headlight Switch On A Classic Air-Cooled Porsche 911

A common failure point in the Porsche 911 lighting system is the dash headlight switch itself. This DIY will show you how to diagnose the problem and replace the switch if that's your issue.
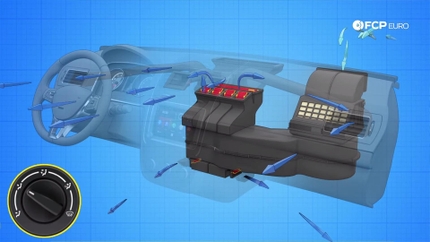
The air-cooled Porsche 911 came from the factory with a potentiometer-style dash headlight switch that controls all the exterior lights and the dimming of the instrument lights. Because the factory did not install headlight relays, all the lighting power has to travel from the battery at the front to the switch in the dash, then back out to the headlights. Over time, as wiring connection quality degrades and new owners upgrade to higher wattage bulbs, the light switch eventually burns out, taking out all the car lighting with it. Fortunately it is fairly straightforward to replace so read on to discover how.
Porsche Model Years Applicable:
All Porsche 911 cars up to 1989. The procedure shown here is on a US-spec 1983 911SC.
Tools Needed To Replace The Headlight Switch On A Porsche 911:
- Flashlight
- Needle nose pliers
- Circlip pliers
- Small Flathead screwdriver
- Electrical contact cleaner
- Heat gun
Parts Needed To Replace The Headlight Switch On A Porsche 911:
- One headlight switch
- Aftermarket headlight relay kit (recommended)
- Heat shrink tube (as needed)
- Service manual
Steps To Replace The Headlight Switch On A Porsche 911:
Note: If your headlight bulbs have increased wattage over the factory ones, it is strongly recommended you install a headlight relay kit to protect your new headlight switch. These are typically inexpensive, very easy-to-install aftermarket kits that will protect your factory wiring from potential fire and increase the brightness of your bulbs. These are out of scope for this procedure but an internet search for “Porsche 911 headlight relay kit” will point you in the right direction.
Step 1: Disconnect Battery
Disconnect the negative battery terminal.
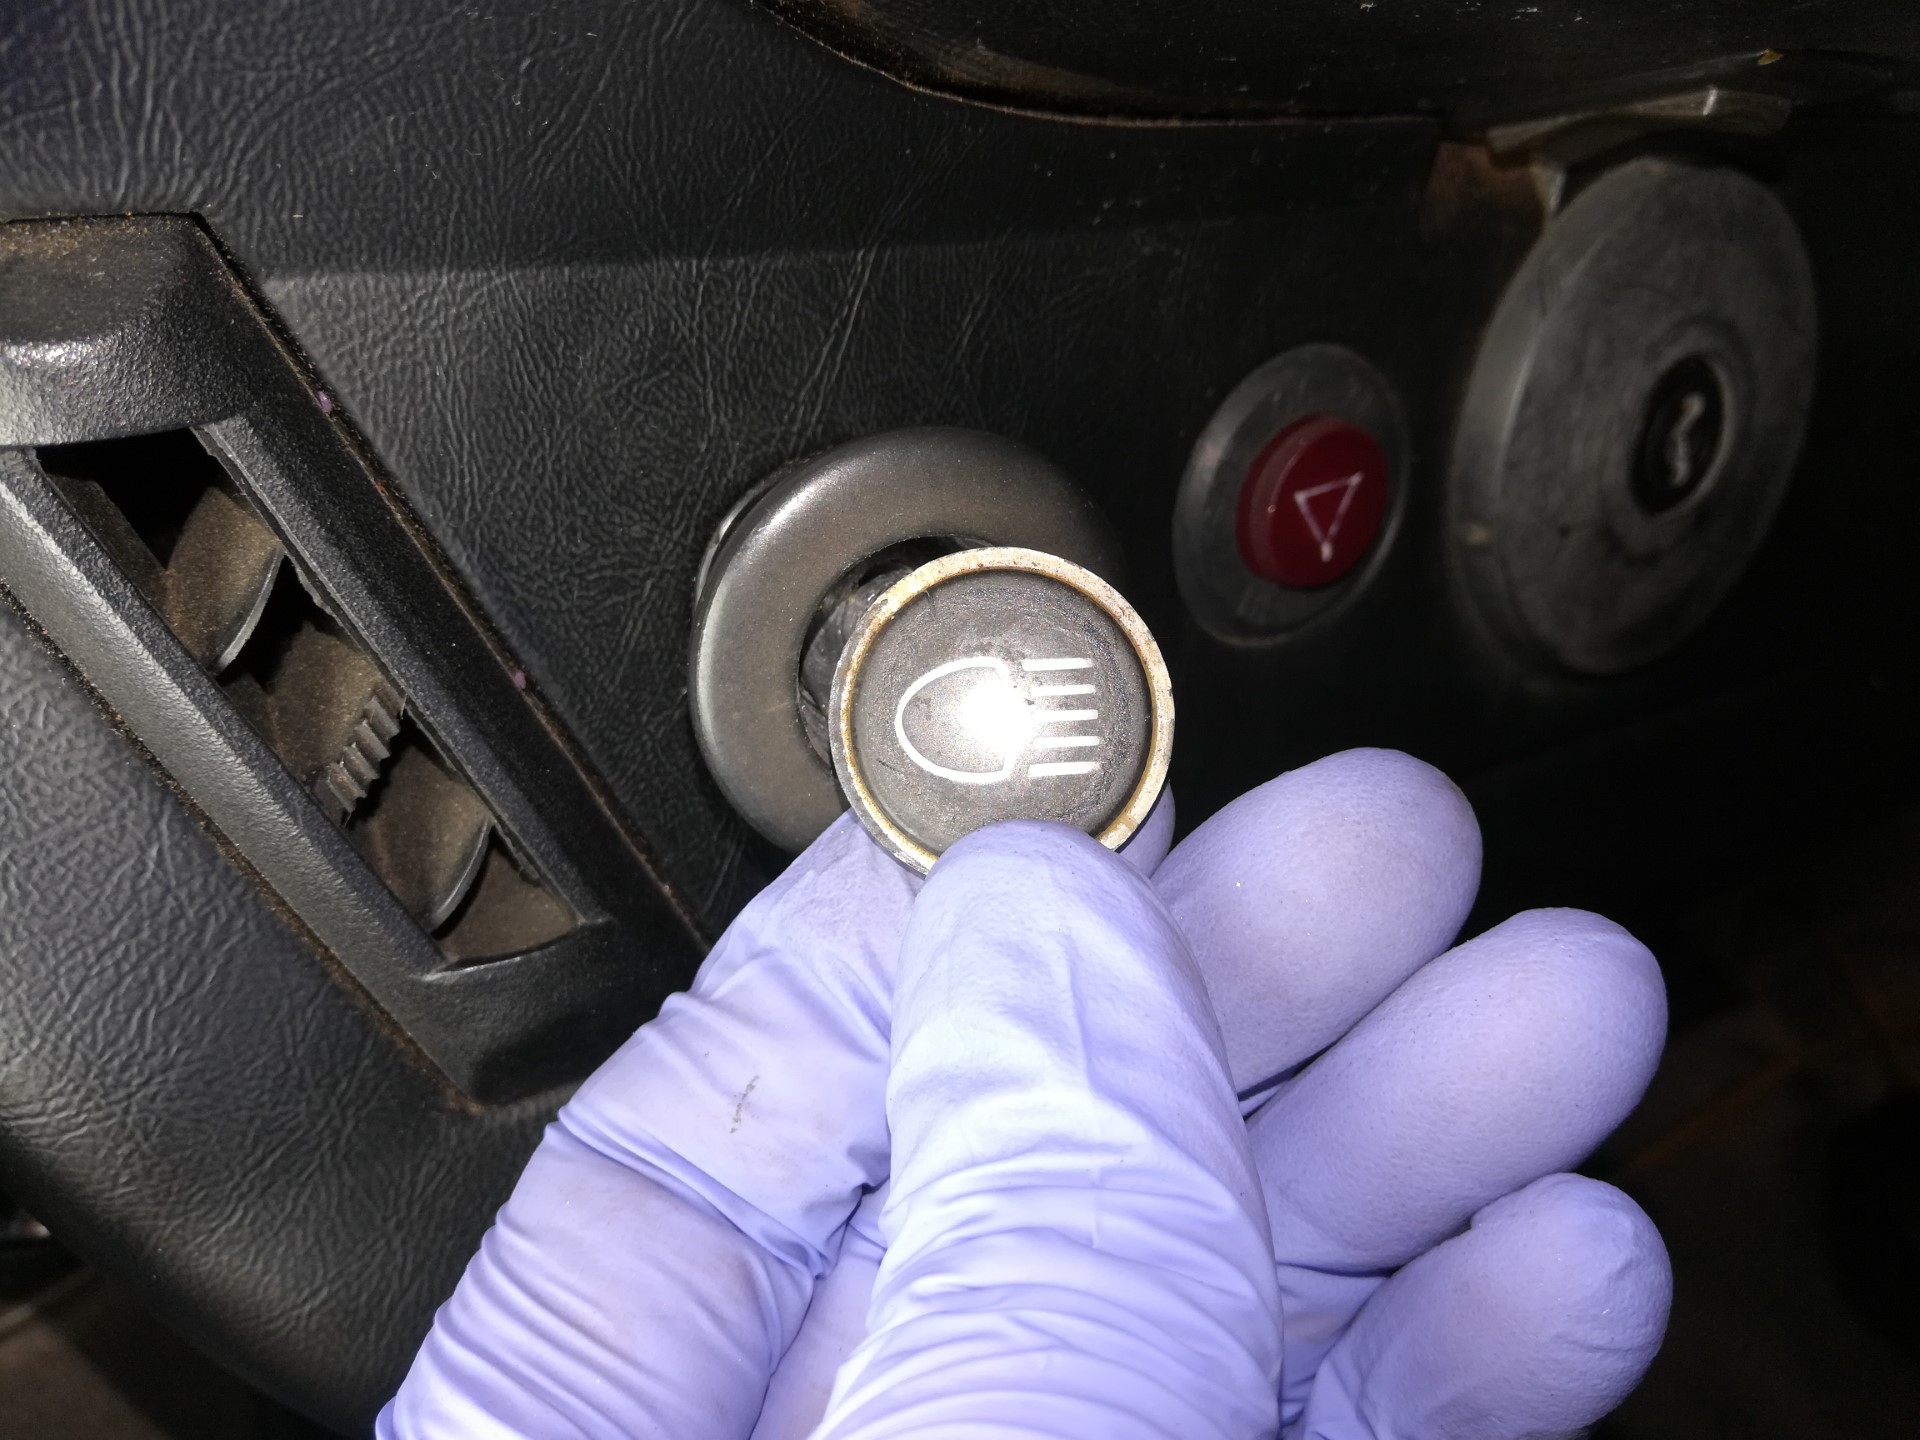
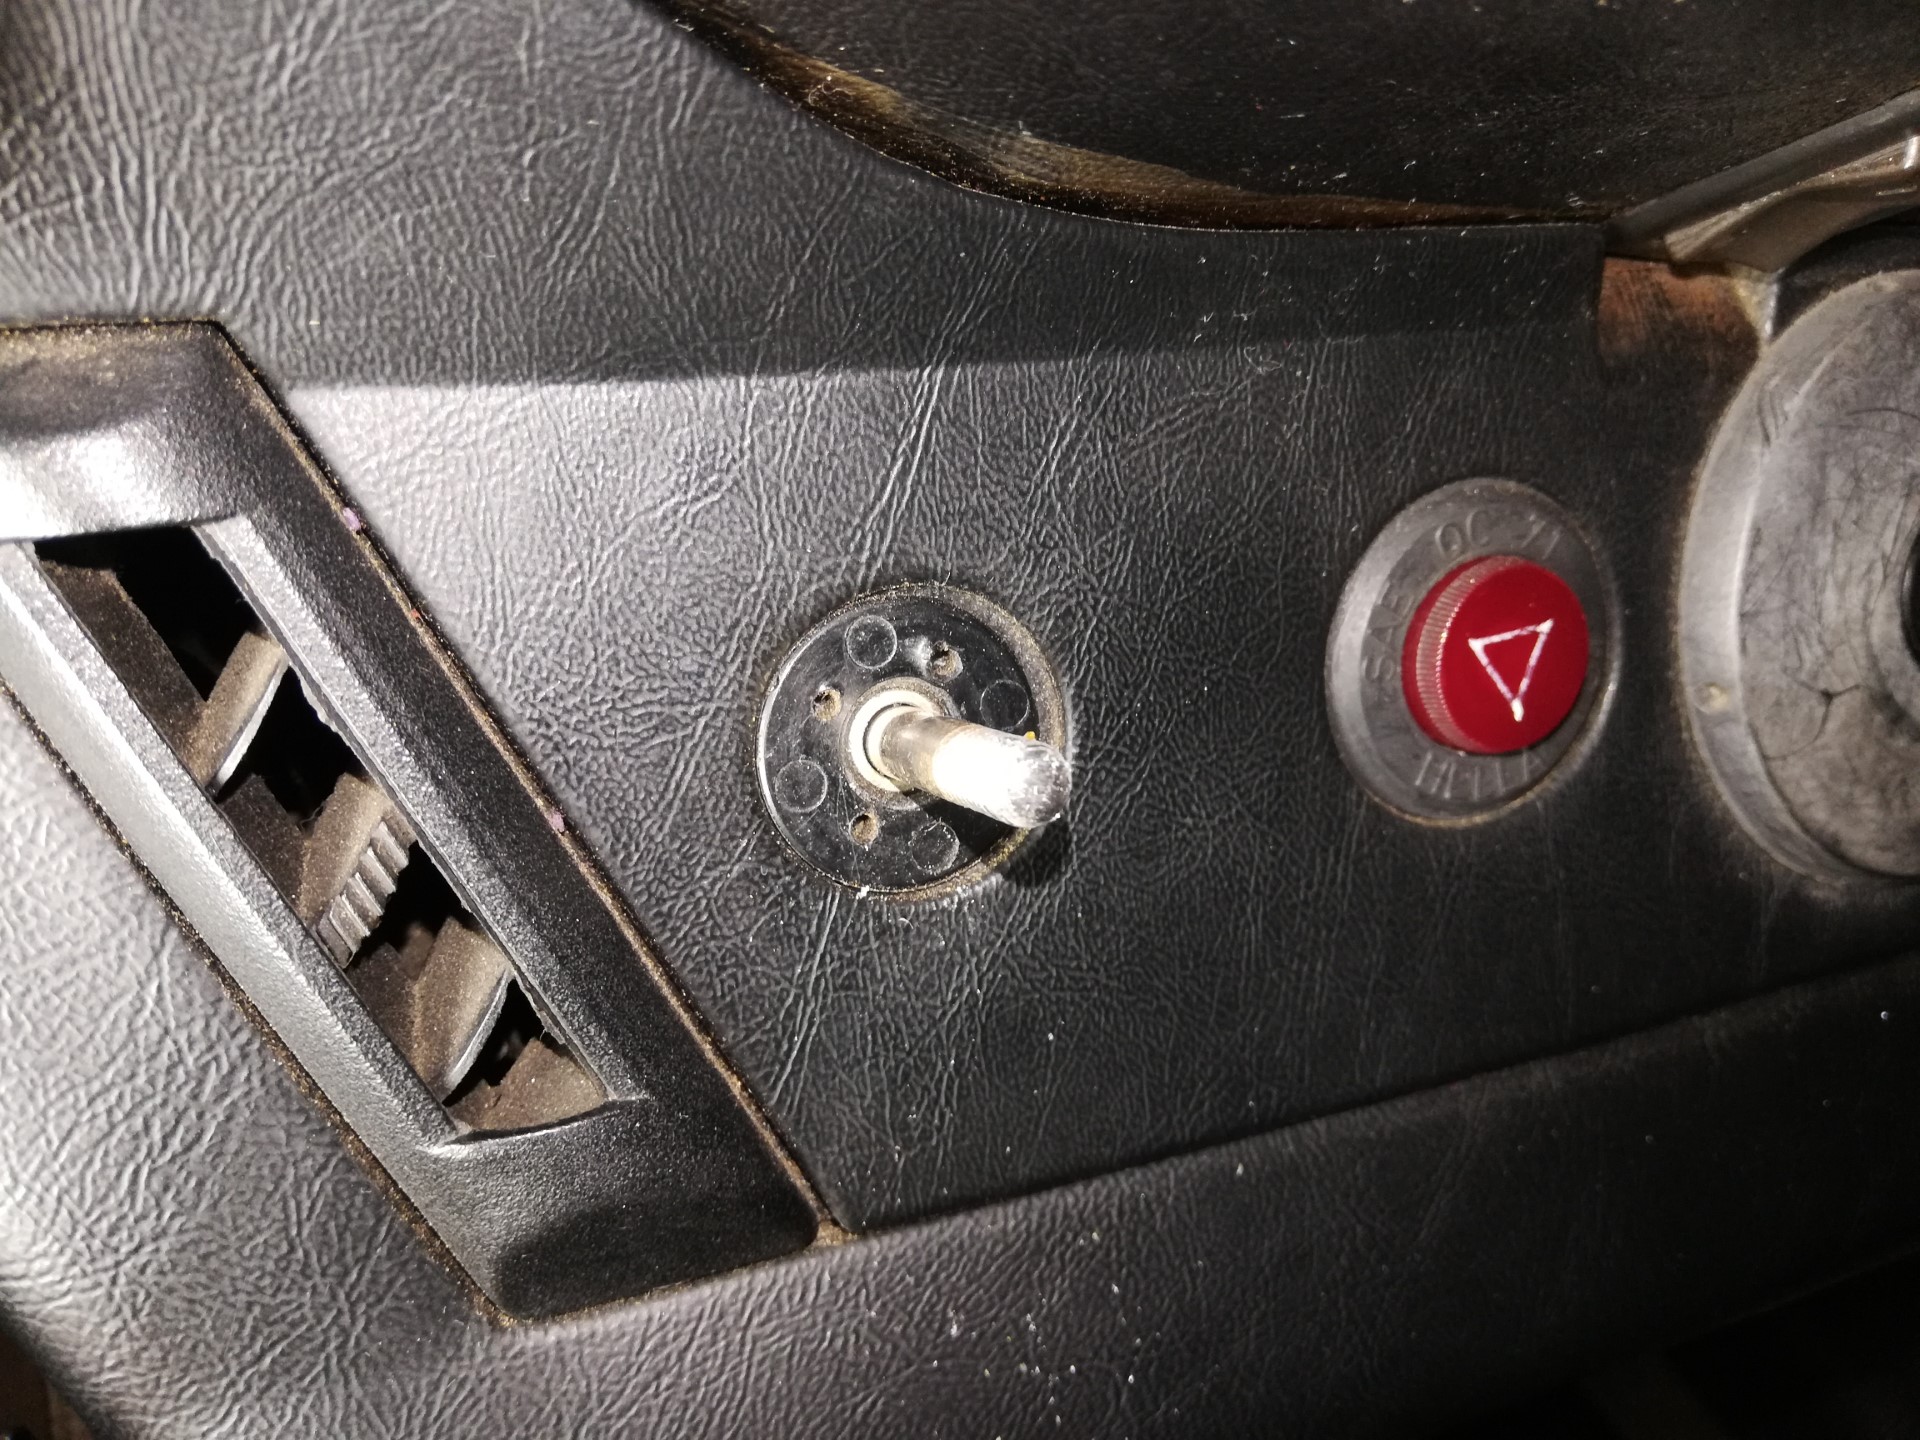
Step 2: Remove Headlight Switch Knob
Locate the headlight switch next to the ignition and hazard light switch. First try to spin the knob counterclockwise to see if it will unscrew from the threaded headlight switch shaft. If it just spins and does nothing, then proceed to pop off the logo cap on the end of the knob to expose the interior of the knob. Use a small flat screwdriver to do this.
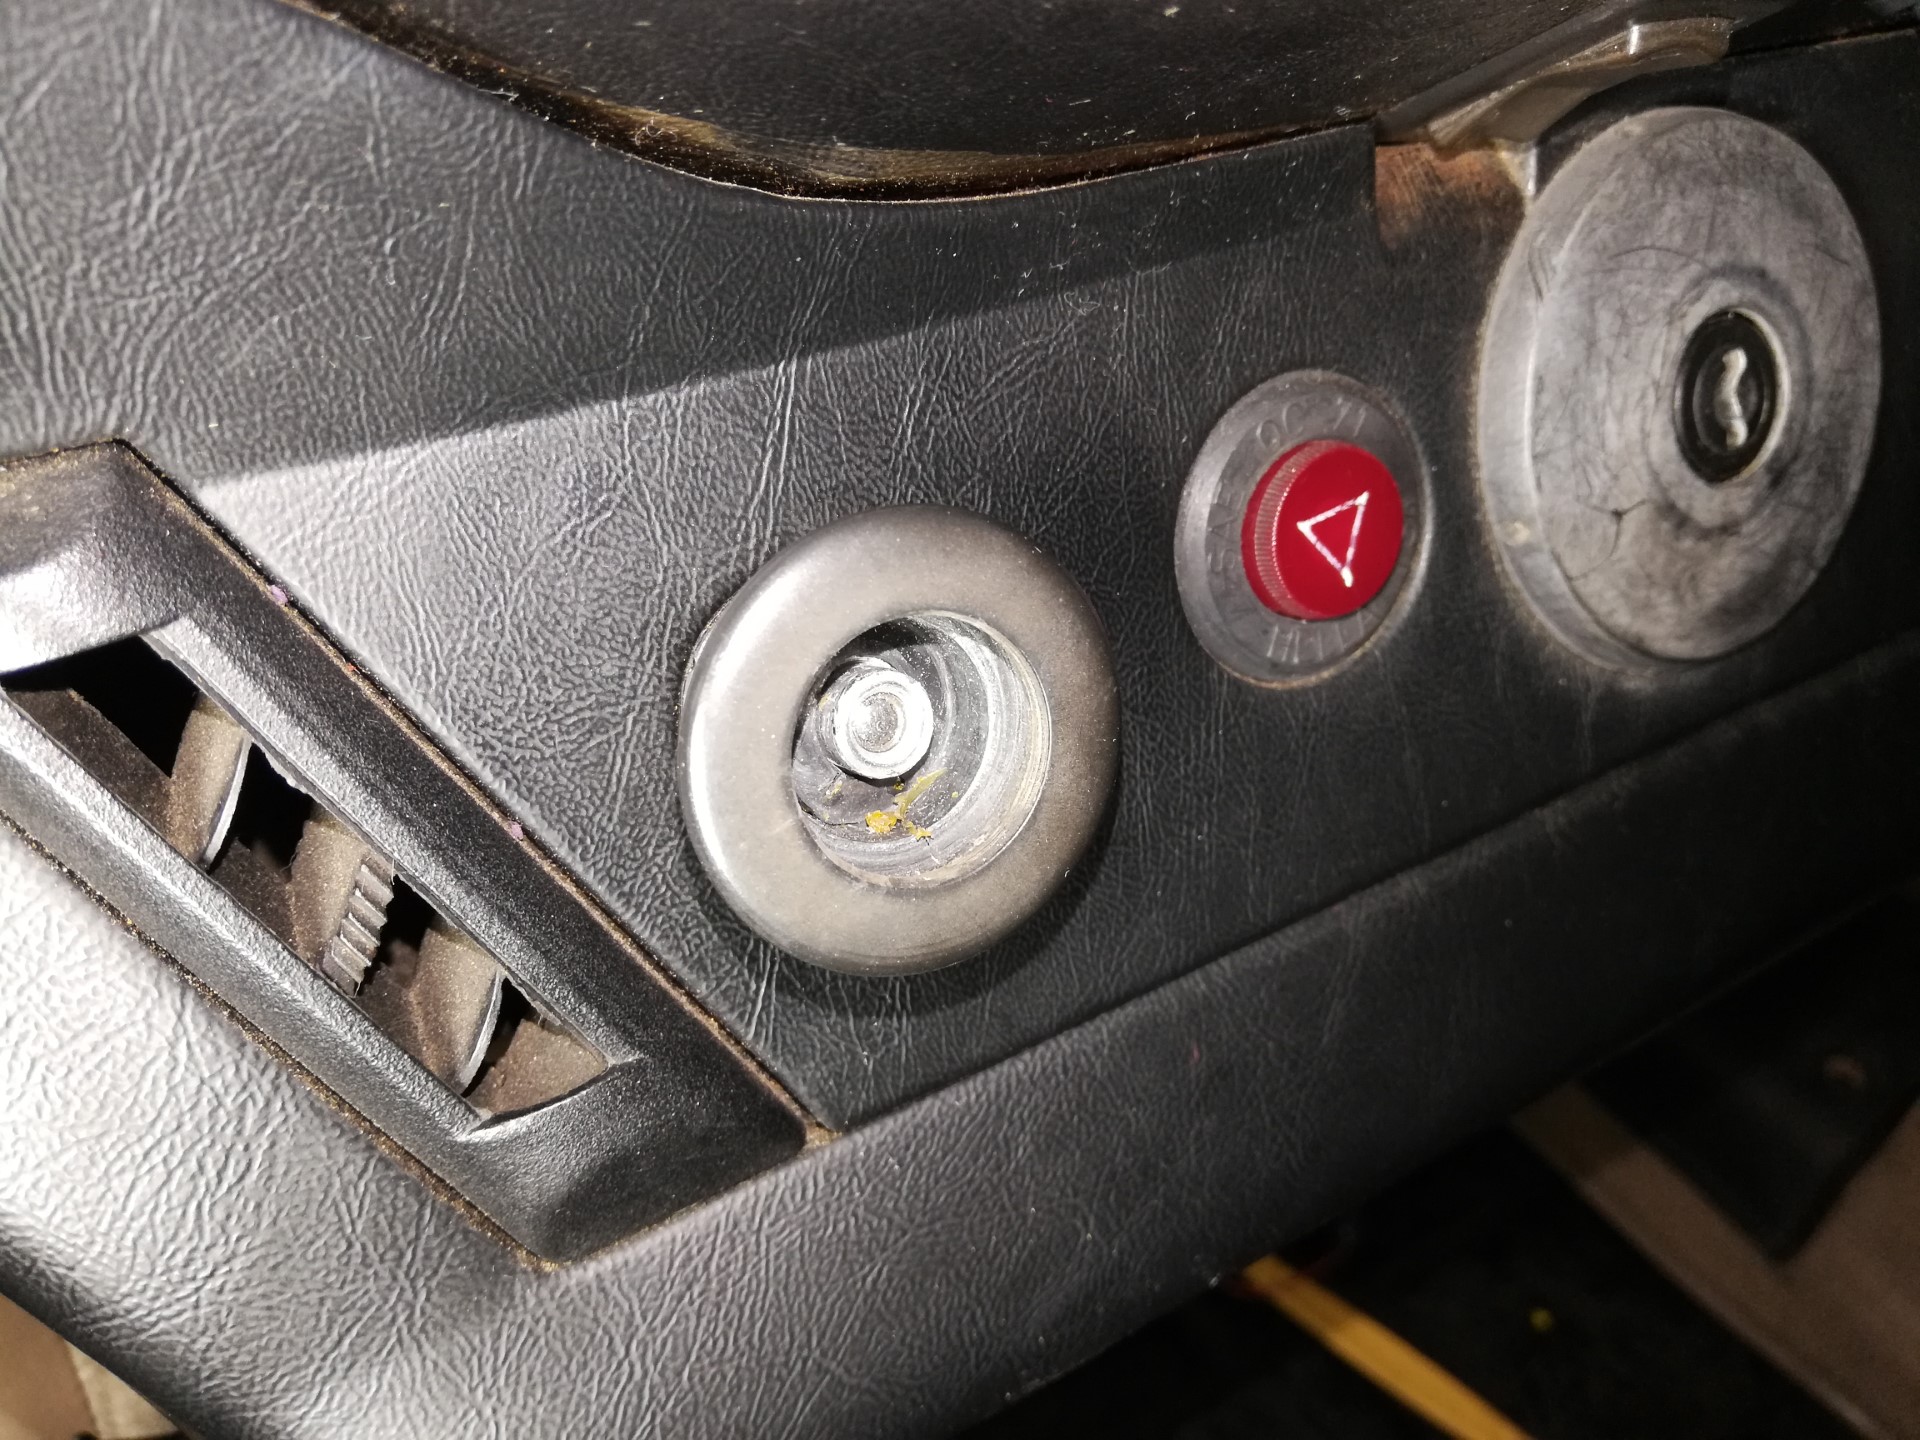
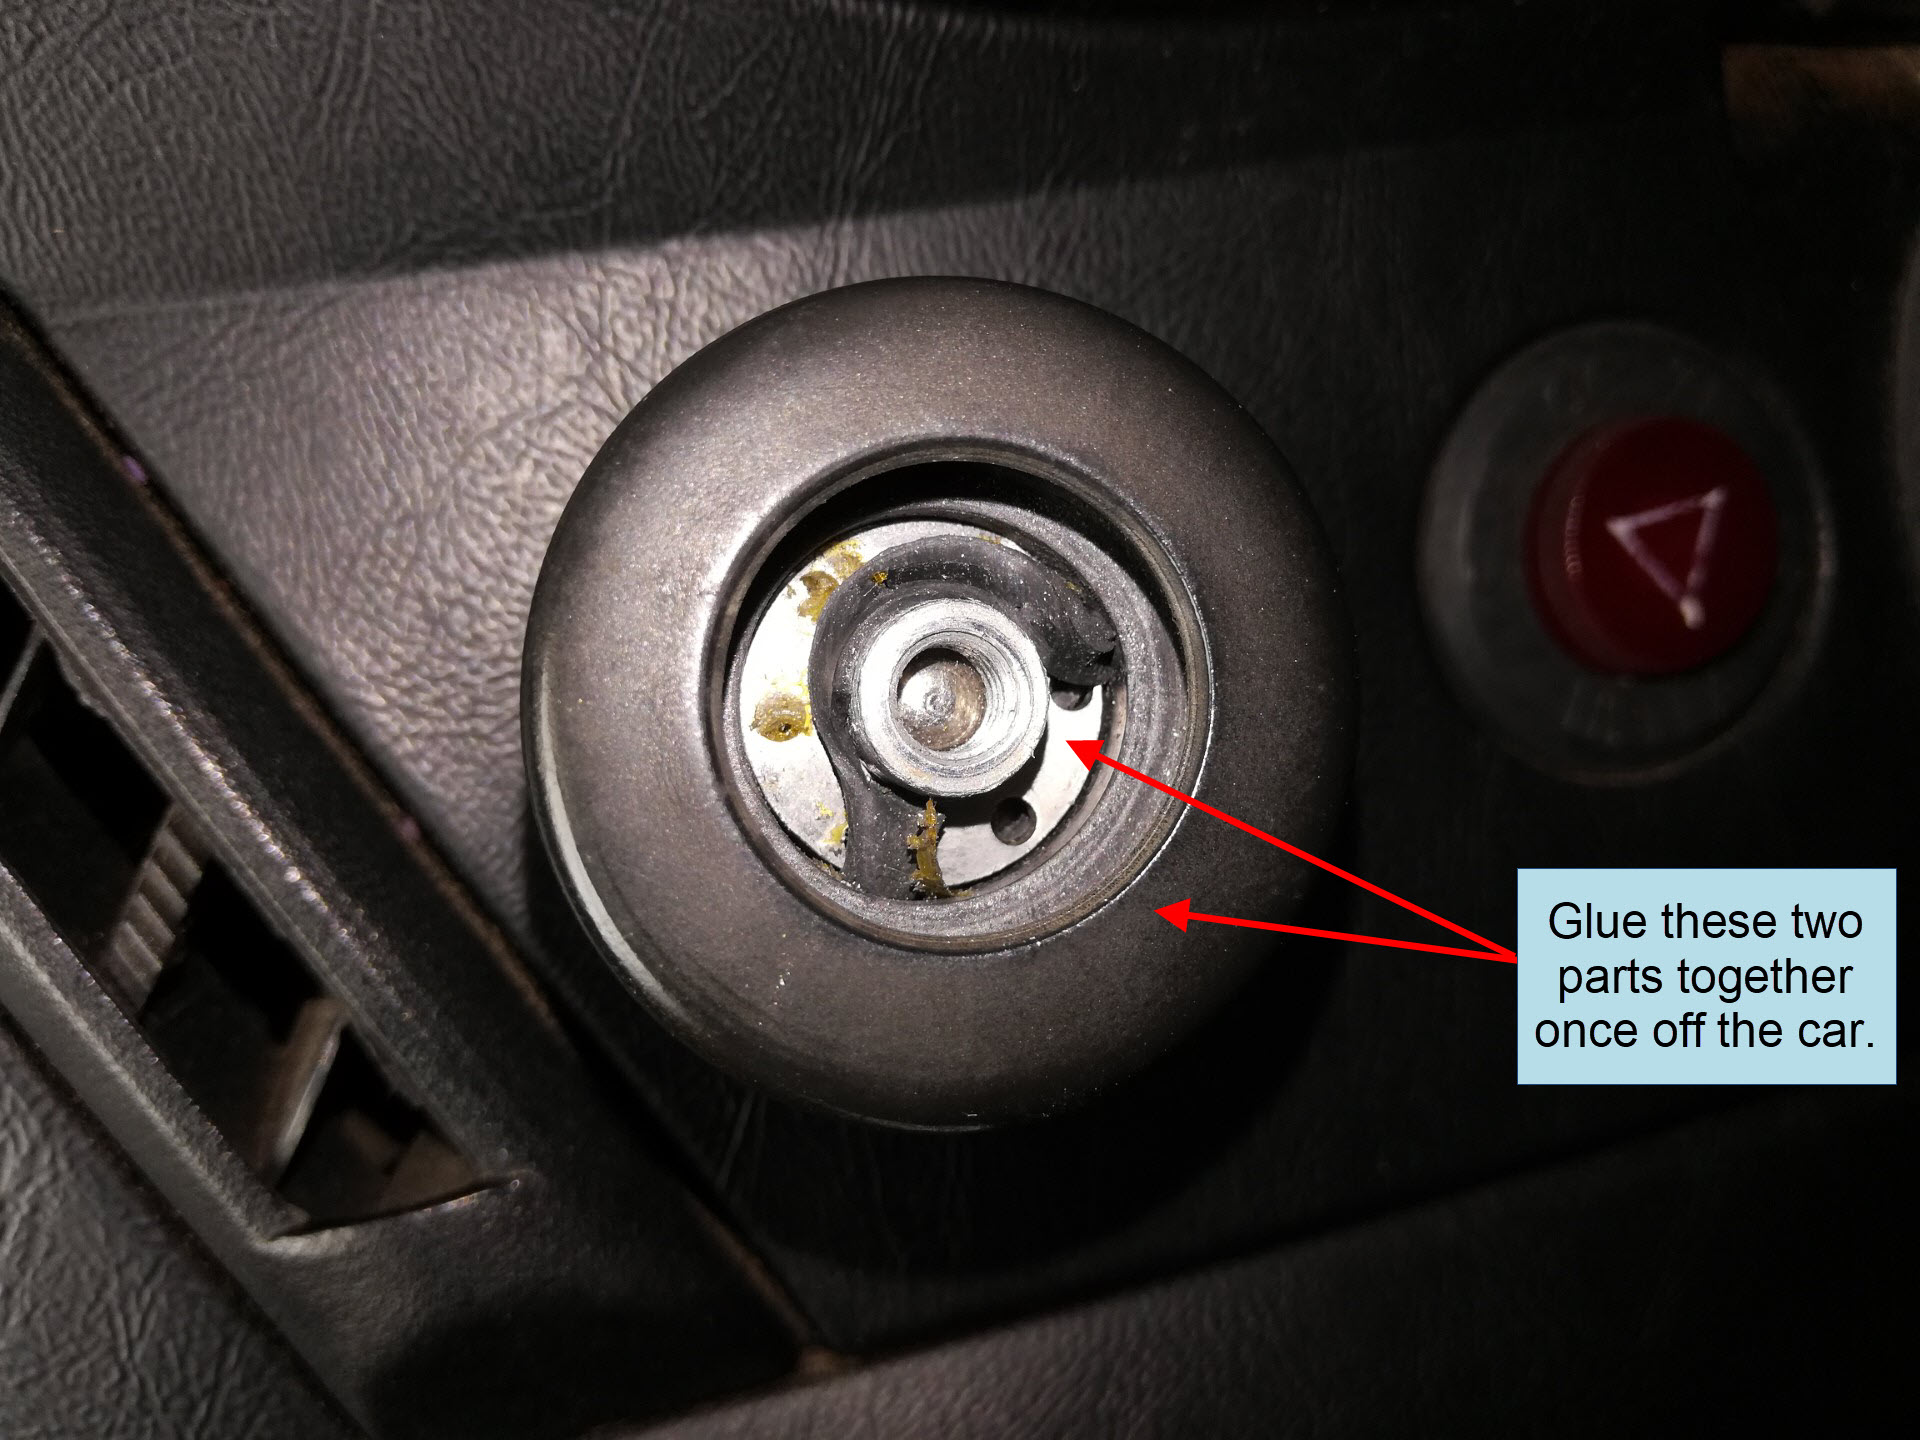
Inside the knob body you will see a threaded metal insert. Grab it with some needle nose pliers and turn it counterclockwise to unscrew it from the threaded headlight switch shaft.
If the rubber knob is damaged on the backside, you may need to re-glue the rubber knob body back on the metal insert once they are off the car. Use a urethane or 2-part epoxy.
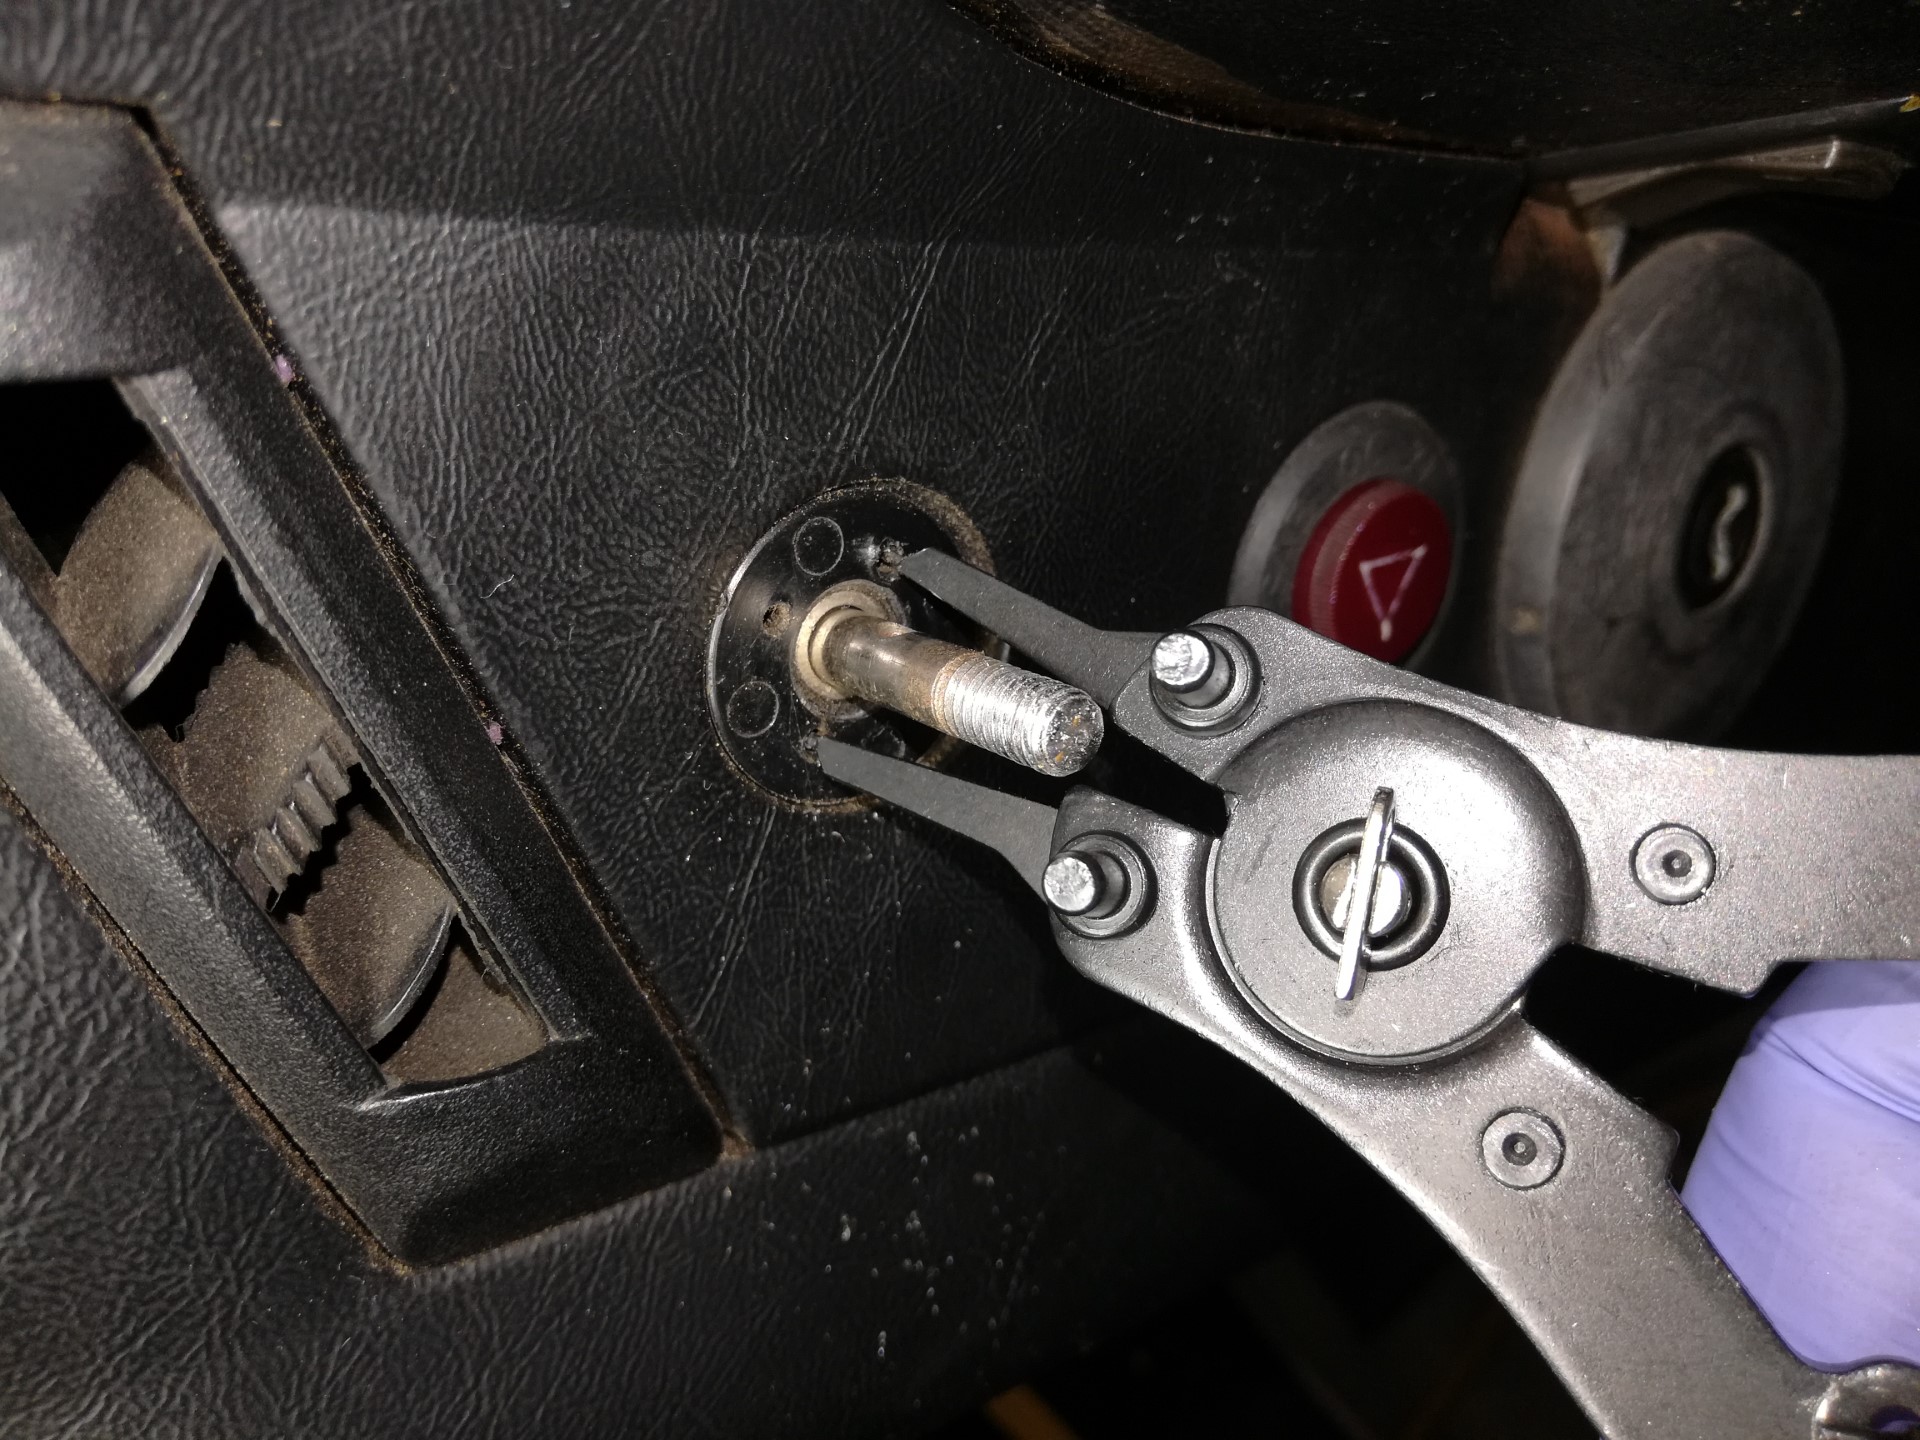
Step 3: Remove the Headlight Switch Body
Behind the rubber knob is a threaded plastic nut holding the headlight switch to the dash.
Using the tips of circlip pliers engage two of the small circular holes in the nut and spin it counterclockwise to loosen.
Fully unscrew the nut and the headlight switch body should now be loose behind the dash.
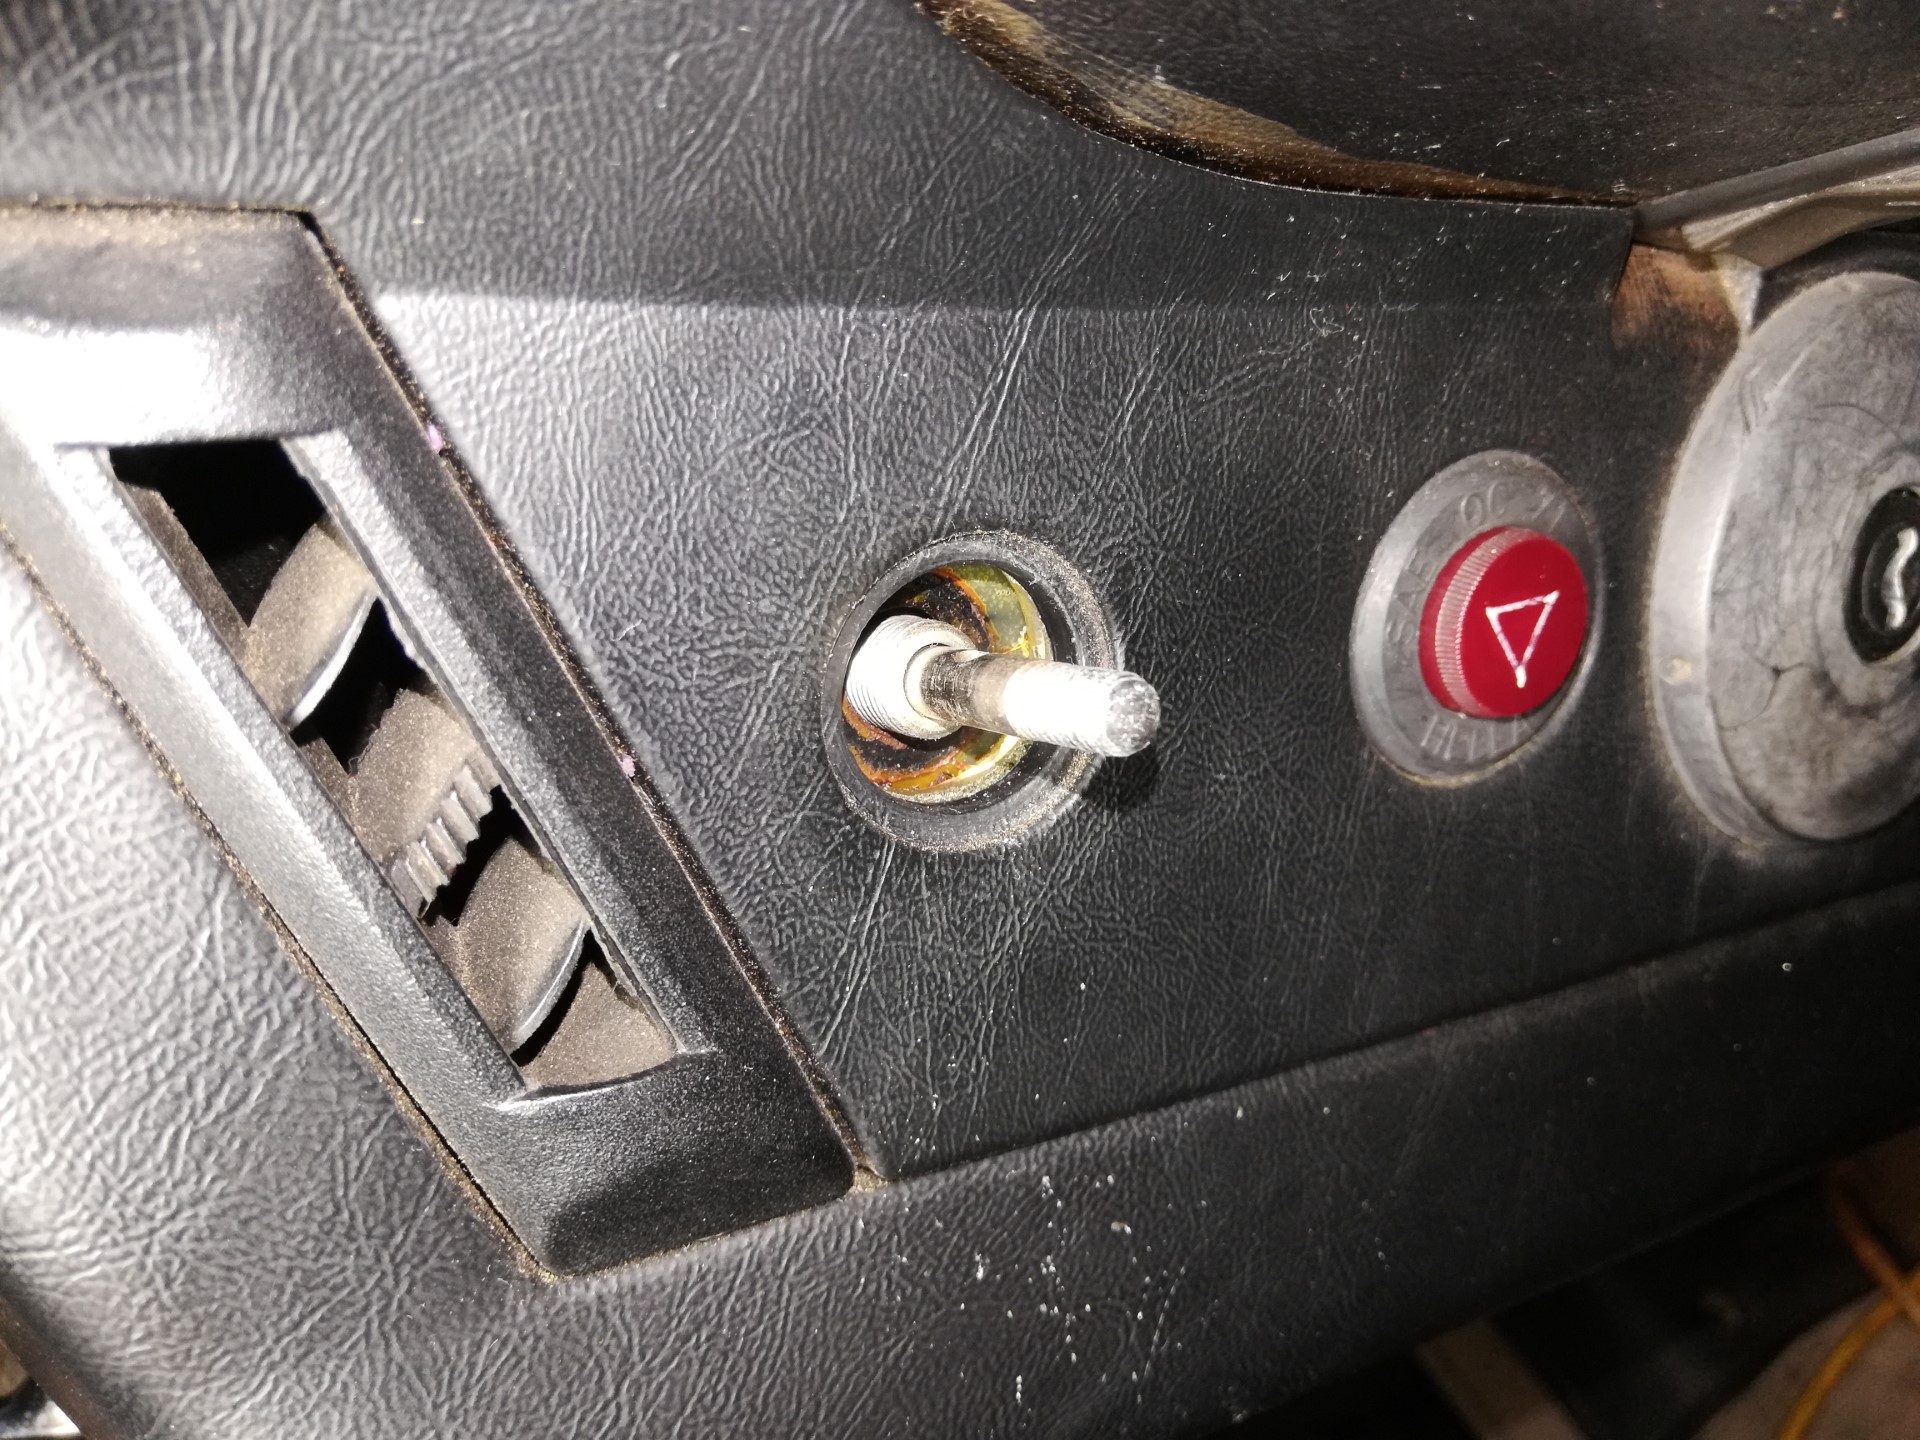
Push the headlight switch shaft into the dash with one hand and catch the switch from behind the dash with the other hand. Don’t lose the big washer at the base of the switch shaft.
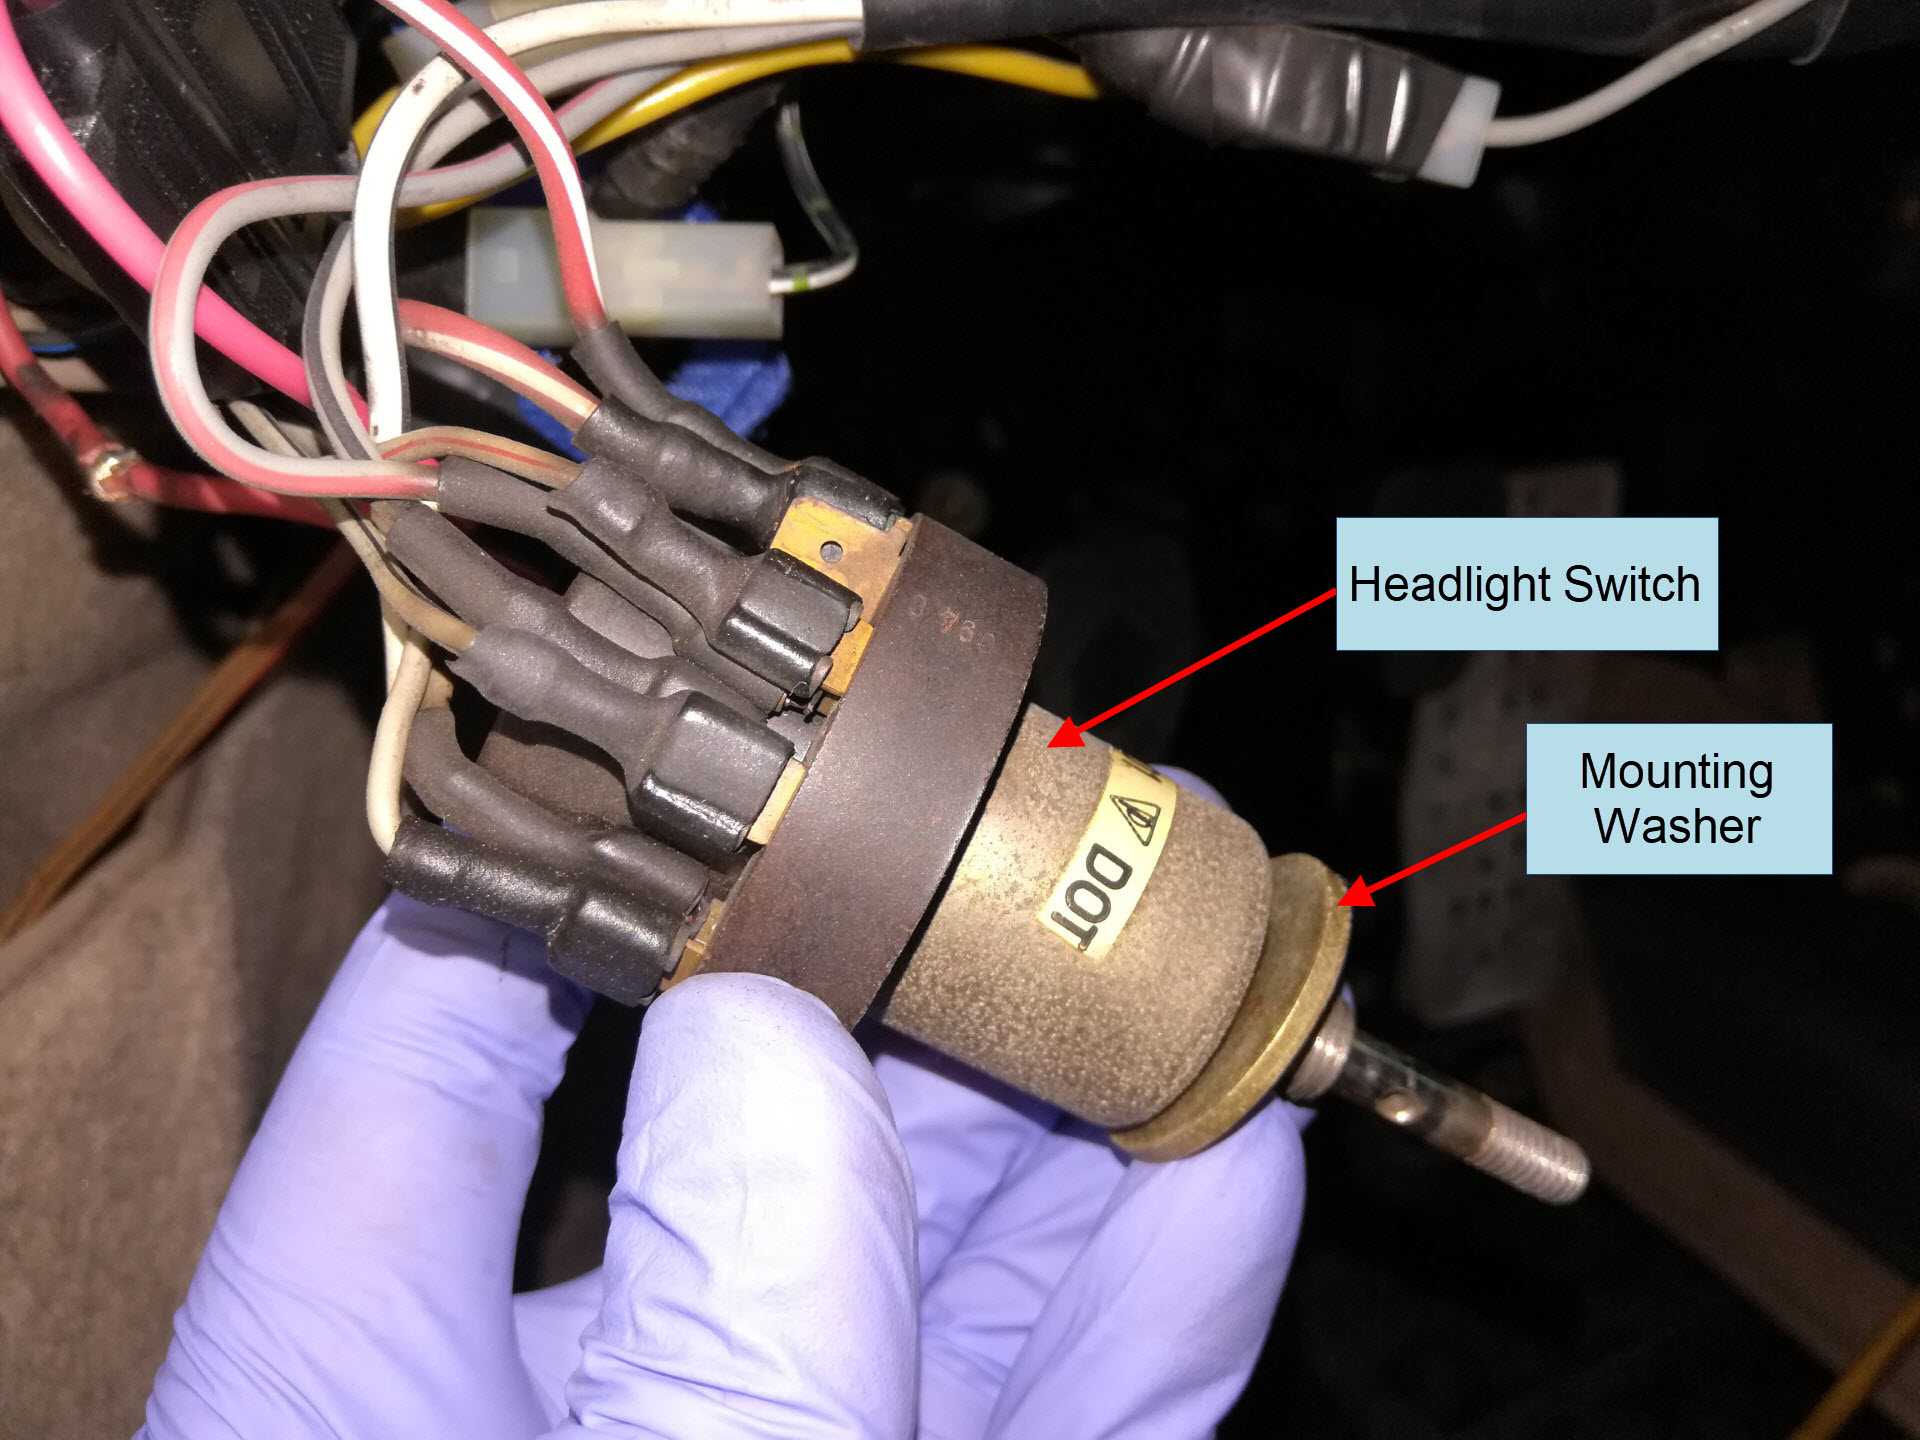
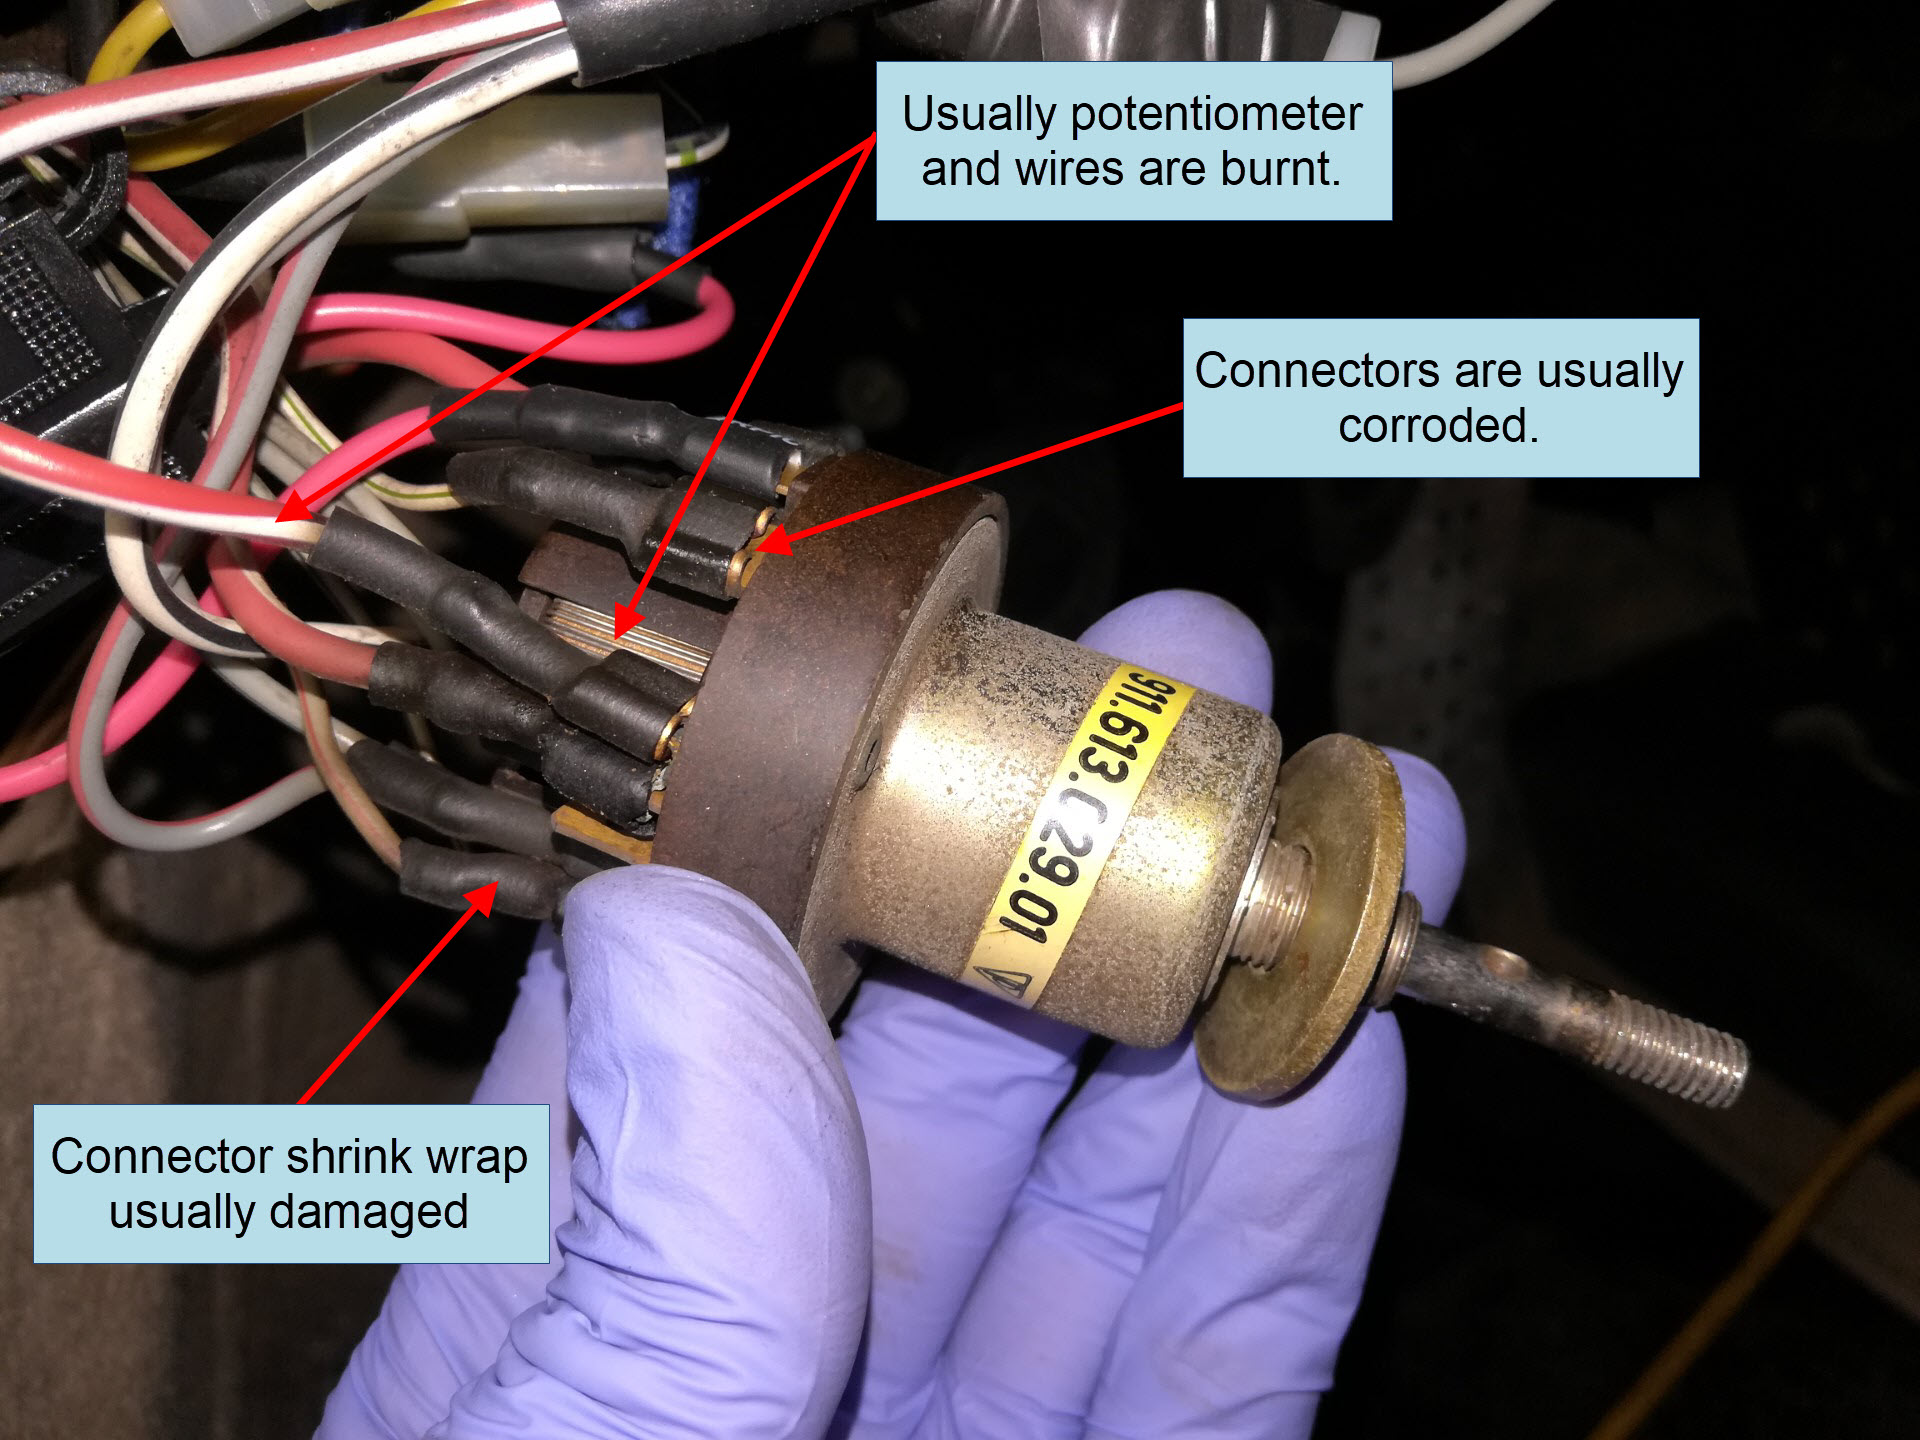
Step 4: Inspect and Repair Faulty Wiring Connections
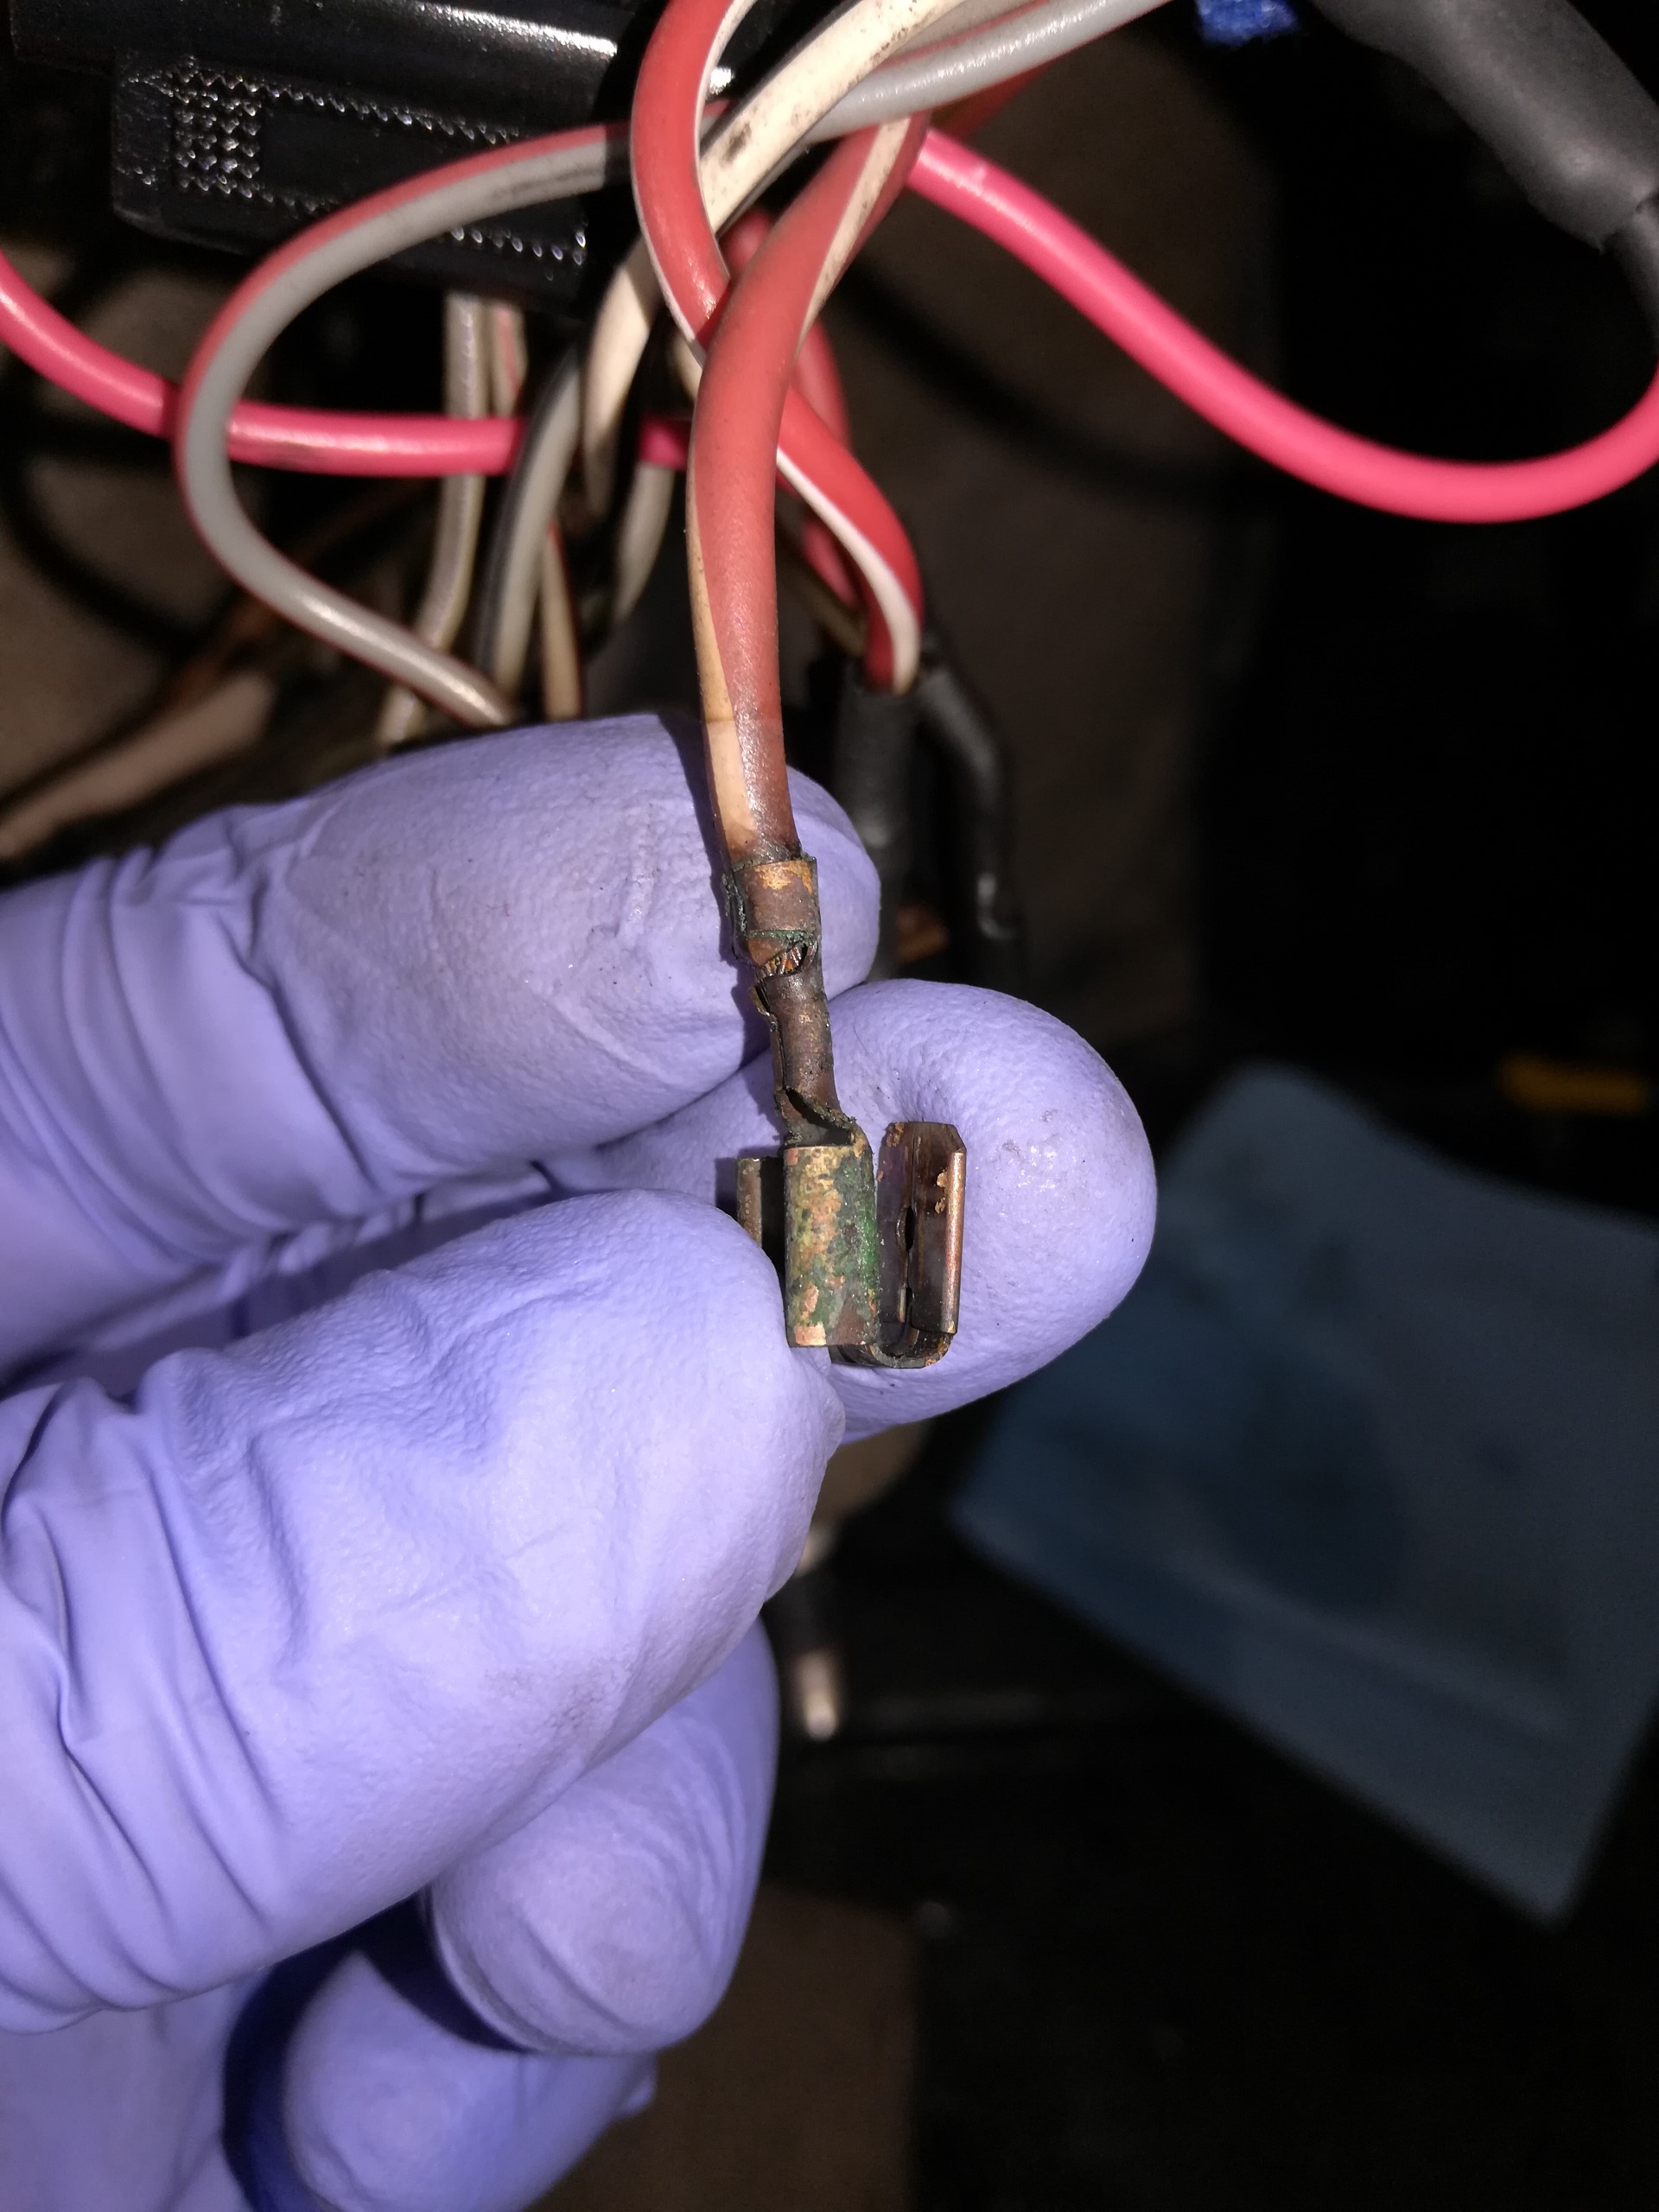
Inspect the headlight switch and all its wiring connections. You may find corroded spade connectors, burnt wires, and/or a burnt switch around the potentiometer windings.
If your car ever had an aftermarket stereo or alarm at some point, you will most certainly find questionable wiring at the headlight switch.
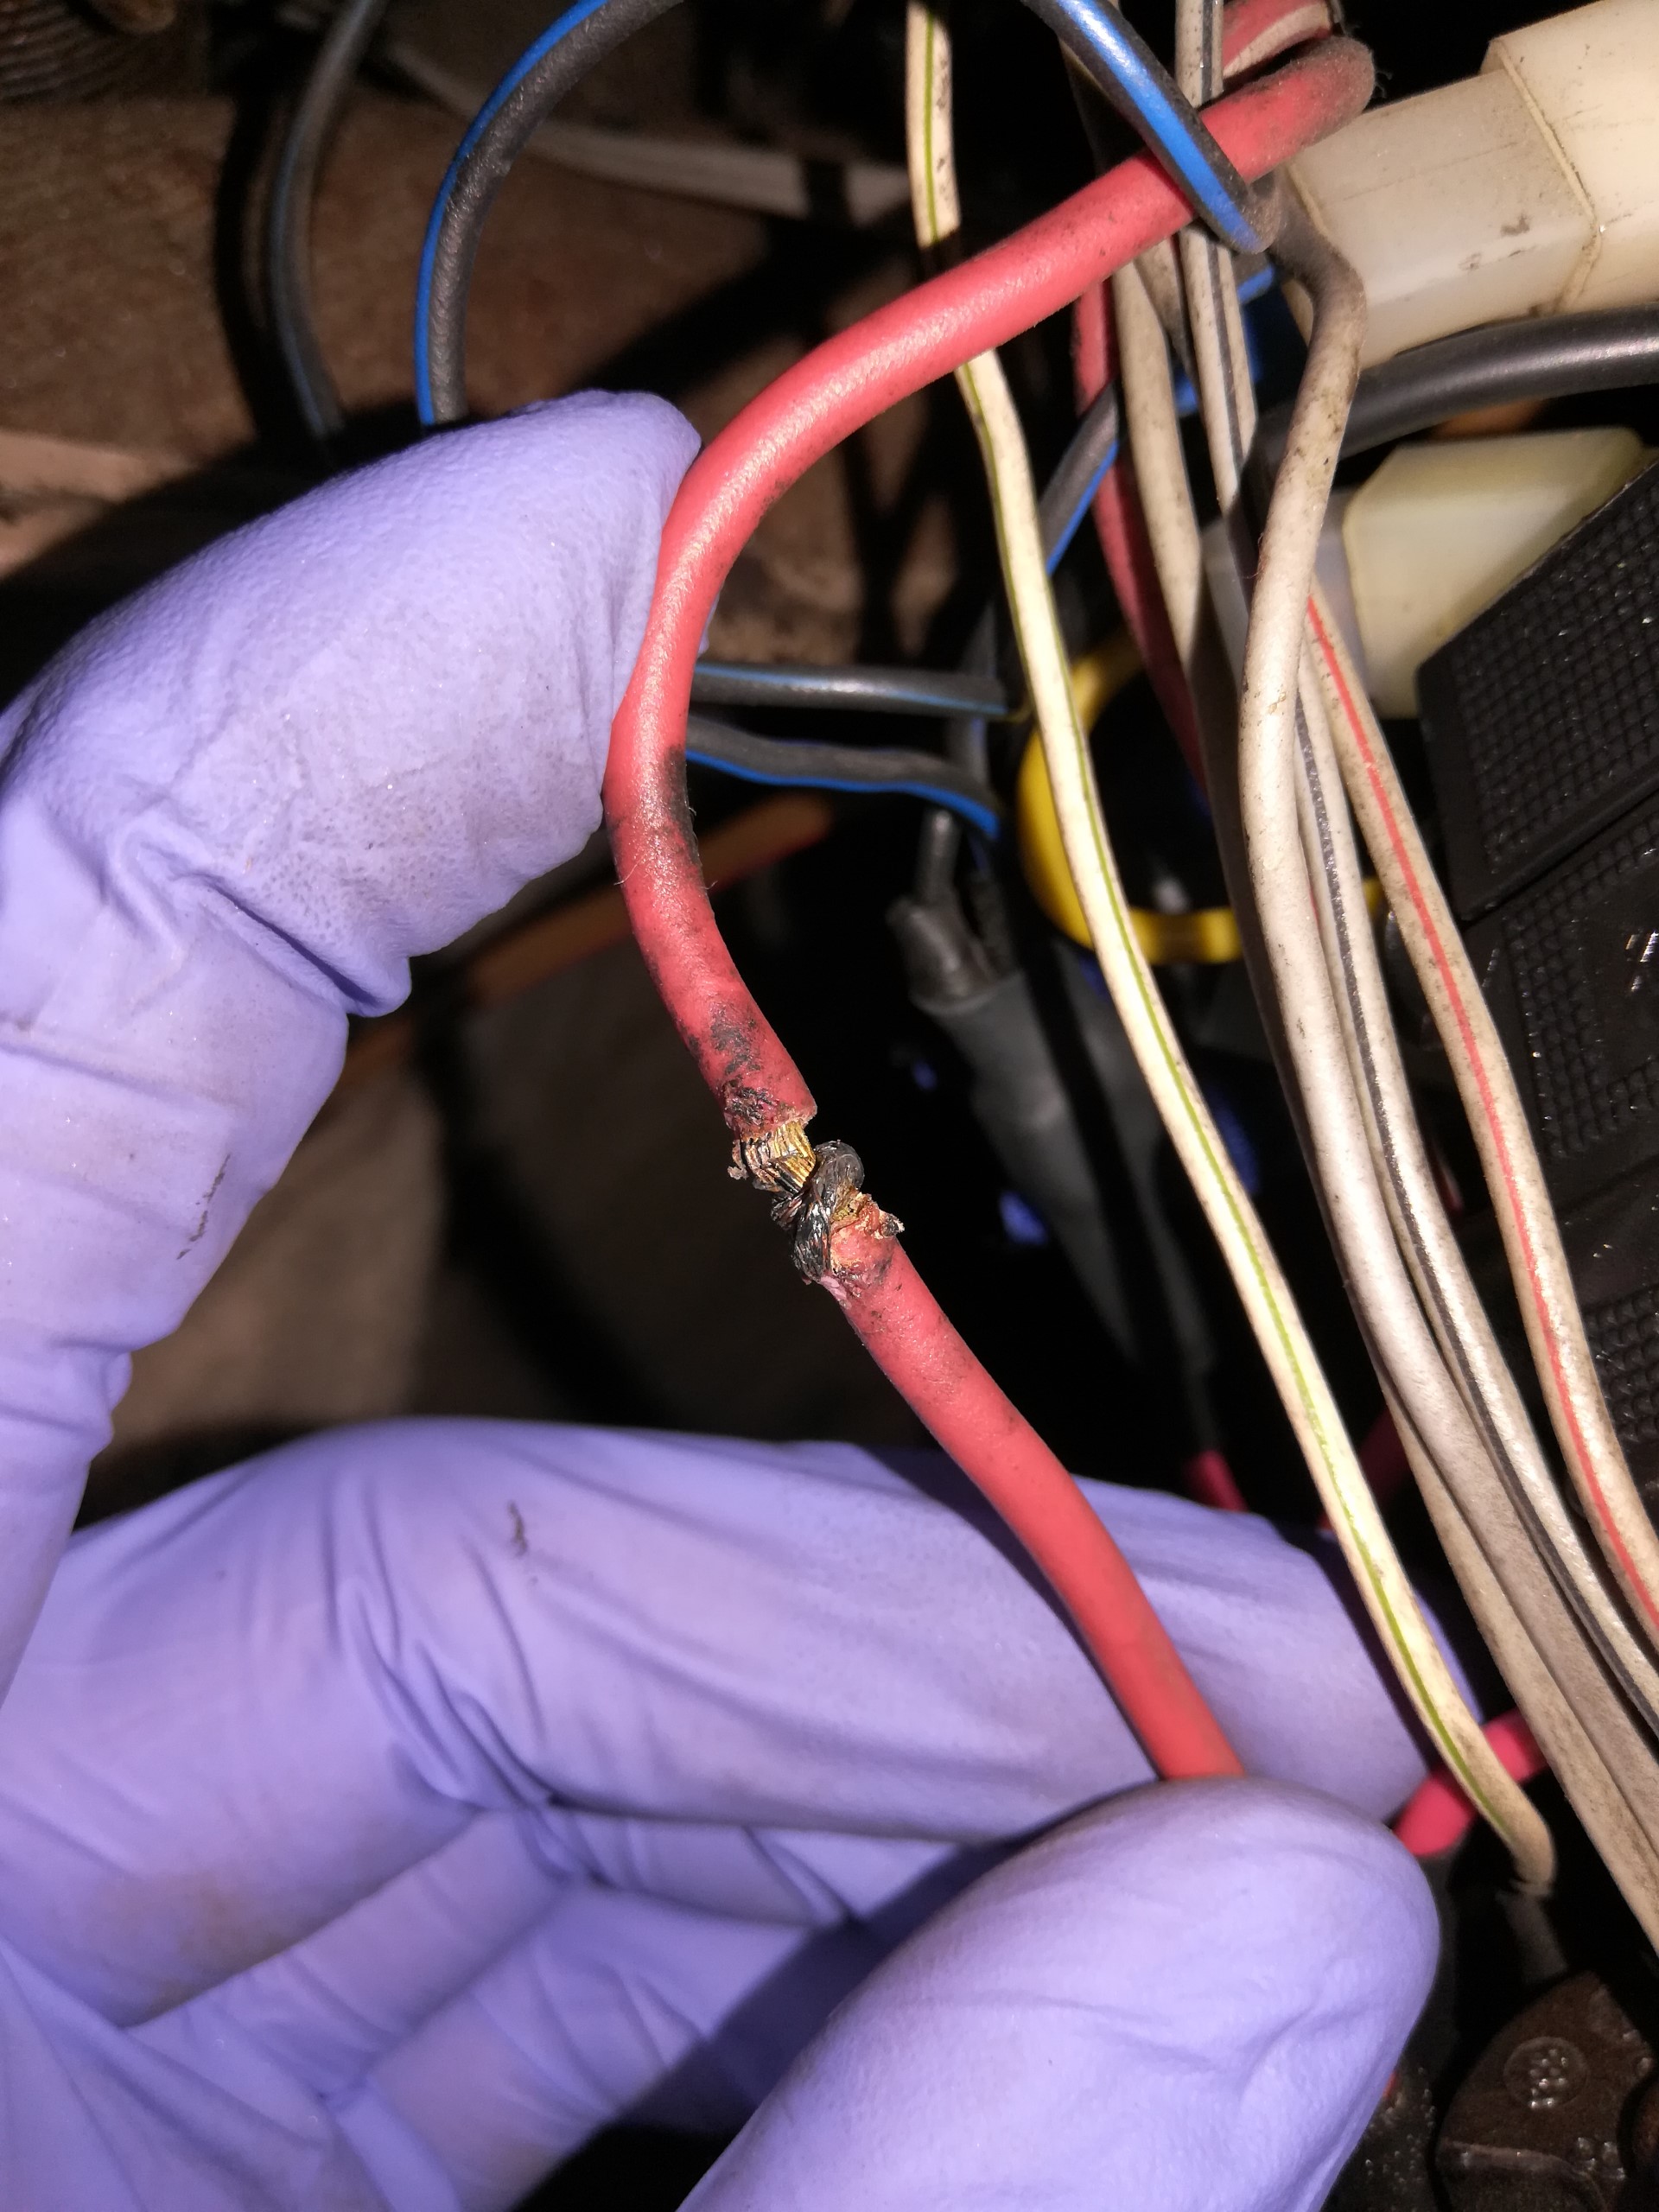
This is a good time to repair as many connectors and wires as possible using automotive wiring best practices. If you simply have dirty factory connectors, you can clean them with some electrical contact cleaner spray, and repair any damaged heat shrink sections over each connector with new heat shrink. It is a big help to have a service manual for your model year on hand to help you trace any unidentified wires you may find behind the headlight switch.
Step 5: Swap Old Switch Wiring to New Switch
All the terminals on the back of the headlight switch are labeled. Carefully swap connectors from the old switch to the new switch, making sure the terminals are the same between both switches. Once you are finished, set the old switch aside and make sure none of the connectors are shorting out. They are very close together and have insulation on them to prevent shorting.
Step 6: Test New Switch
If the connections all look OK, let the switch hang from the wiring and temporarily reconnect the negative battery terminal. Insert the key in the ignition and open the key to the “on” position but do not crank the starter. Supporting the switch body with one hand (and keeping fingers clear of the wiring), pull the headlight switch shaft out to turn on the headlights and twist it to adjust the dimming of the instrument panel lights. Review all your lighting at this moment and make sure it works. If any lights do not work, this is a good time to check the wiring at the switch before reinstalling it.
Step 7: Replace Switch Back in Dash
If everything operates OK, disconnect the negative battery cable again and proceed to re-install the headlight switch body back into the dash and secure it with the plastic retaining nut. Snug it tight, then spin the knob back onto the threaded switch shaft and reinstall the logo cap. Reconnect your negative battery cable and you are ready to drive.
Your headlight switch is now ready to give you overall improved lighting performance.
If you found this guide useful, you can follow along with my air-cooled Porsche 911 rebuild through all of my articles on our blog. If you have any questions or comments about this process, leave them in the comments below.