- 01/27/2017
- 2 Min Read
- By: Gerry Tseng
How to Replace Low Beam Headlight Bulbs on a Saab 9-3 (03-12)

Have one of your low-beam headlamp bulbs gone out? Your Saab 9-3 likely has daytime running lights that use low-beam bulbs which means this may be a frequent maintenance item to replace. After hearing from other Saab owners having to replace bulbs multiple times a year I would go for “extended life” versions of headlamp bulbs to reduce this frequency.
A few things to note before we get started:
if you’re looking for bulbs that offer “maximum brightness” then realize these typically have shorter lifespans and may need to be changed more frequently. This DIY covers H7 halogen bulbs as that’s what I had on a 2004 Saab 9-3.
Ready to change your low-beam headlamp bulbs? You'll need:
- Replacement H7 headlamp bulbs (you should replace them as a pair for equal brightness) and remember that all bulbs from FCP Euro come with a Lifetime Replacement Guarantee for when they burn out.
- a flat-head screwdriver
- some napkins (so you don’t directly touch the halogen bulbs)
- some creativity (you’ll see why when I describe what I ran into)
Procedure:
Starting with the driver side: use the flat-head screwdriver to unlock the battery cover retainers and carefully remove the battery cover.
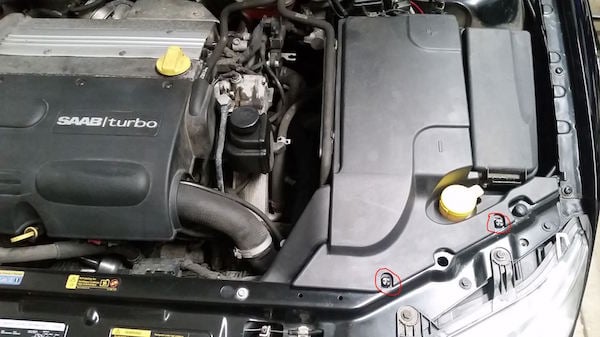
Remove the windshield washer fluid reservoir tube. Just wiggle+pull straight up.
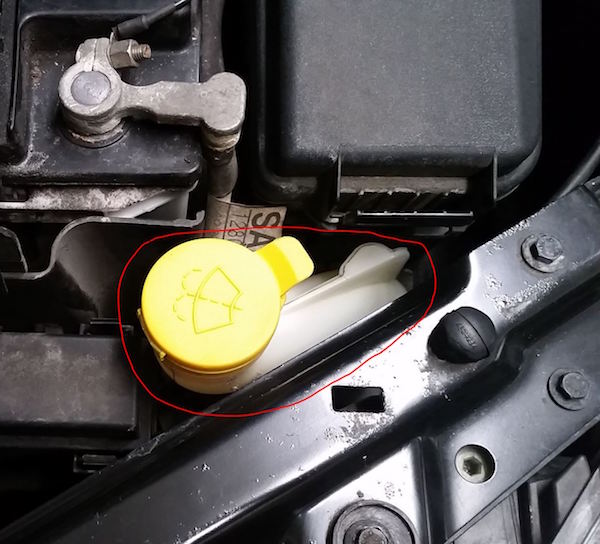
Reach in and remove the low-beam headlamp rear cover. It’s a bit tight in there so take your time.
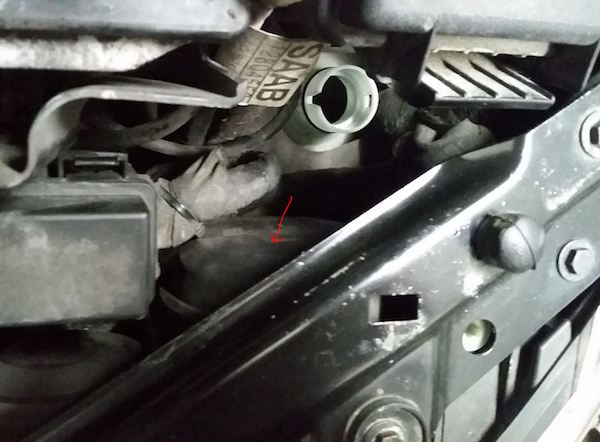
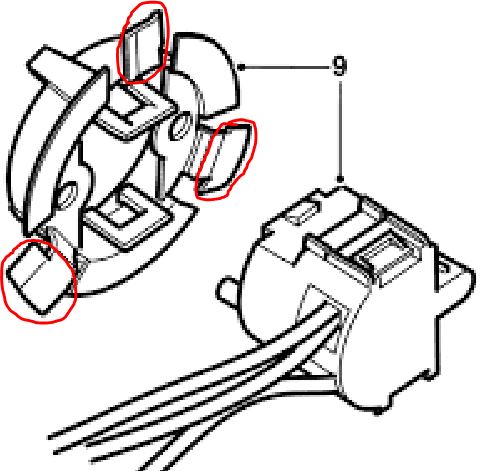
Turn the bulb connector counter-clockwise and it should unlock from the lens housing. You may notice some missing tabs on the plastic bulb retainer: mine had 2 out of 3 left so I was able to make do for now. If you want to replace that specific piece it’s Saab part # 93166870.
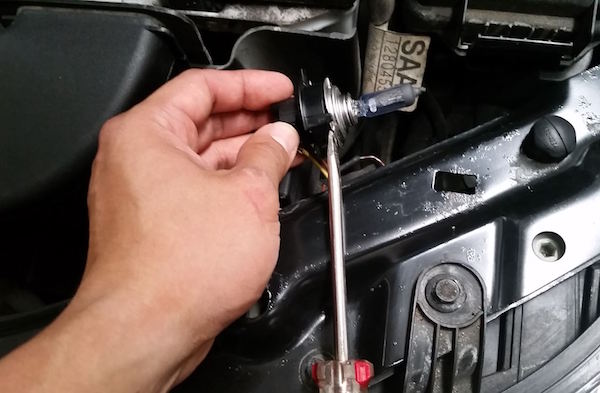
Using a flat-head screwdriver, carefully pry out the bulb from the connector. If the bulb is still good I recommend keeping it as a spare in the trunk in case you need an emergency bulb while on a road trip. Use a napkin to hold the bulb so that oils from your hand don’t get on the bulb (halogens don’t like that).
Installation is the reverse of removal. Tuck in the harness wires and take your time with the rear cover as that needs to stretch all around the opening on the lens housing. I found that gently starting on one side of the rear cover while massaging the rest of the edges in with my fingers worked best.
On the passenger side you’ll follow steps 3-6. It’s much easier to do!
So what if I run into some “surprises”?
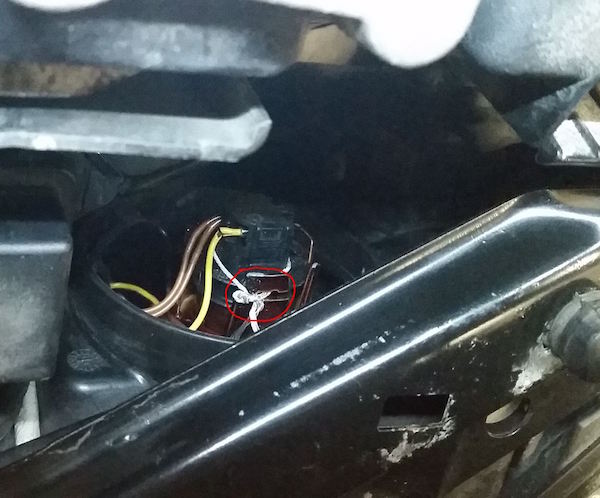
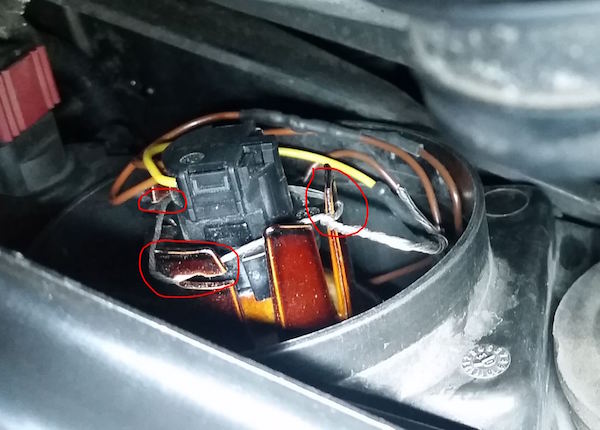
The most common problem I’ve heard (and have run into) is missing tabs on the plastic bulb retainer. There should be 3 locking tabs: my driver side had 1 missing and my passenger side had 2 missing. With 1 missing I could get by though not ideal to leave it like that. With 2 missing it’s just flopping around and unacceptable. You may elect to buy new retainers (Saab part # 93166870) or you could get creative and lock it down.
I’ve heard of people discovering layers of electrical or duct tape from previous owners: this isn’t a good idea. That stuff will just move/melt with moderate heat and it’s just generally messy to deal with the next time you may need to go in there. Some have used nylon zip ties which isn’t a bad idea but I’m not a fan of not knowing if it’ll melt or not. I resorted to using thin metal wire to carefully fish through the lens housing’s retainer slots while tightening the wire so it’s flush against the outside of the plastic bulb retainer’s base. It held very well but felt like I was doing surgical stitches since the area is pretty tight back there. If you choose to do this take your time and consider using long nose needle pliers like I did to twist the wire just enough to keep the base from moving.
Here’s a pic of the wire securing the driver side retainer’s missing 1 tab:
Here’s a pic of the wire securing the passenger side retainer’s missing 2 tabs:
For future bulb swaps I want to design+fabricate new tabs using duct sheet metal and some snips. The idea is to design the shape such that it locks onto the existing plastic retainer but has it’s own tabs to fit into the lens housing’s tab slots. I’m thinking duct sheet metal is thin and stiff enough to use: I’ll post a DIY if I get to that and it works :)
Let me know if you’ve done this job and what “surprises” you may have found!