- 10/27/2020
- 6 Min Read
- By: Alex Fiehl
How To Replace A BMW S54 Valve Cover Gasket (BMW E46 M3, Z3M, & Z4M)

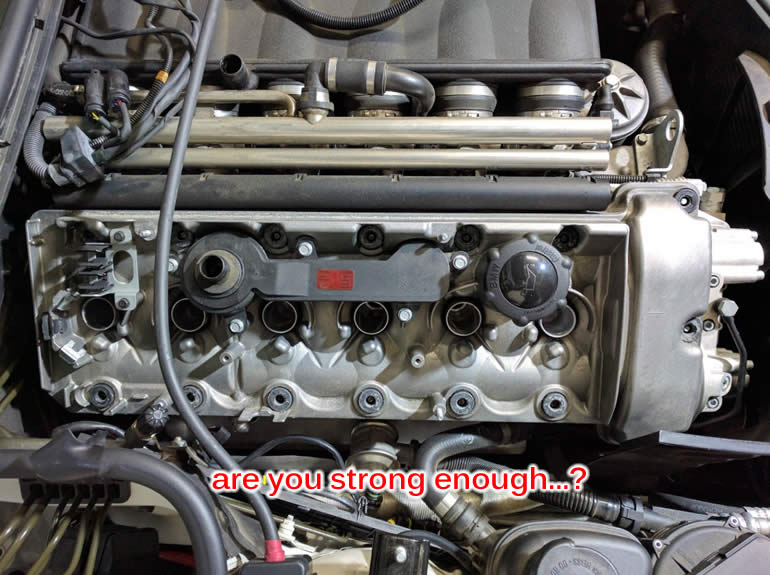
Your engine's valve cover gasket is the main part that keeps the top end of your motor sealed up and leak free. These parts are almost all made of rubber material and over time the rubber will dry out and become brittle - allowing oil to leak out of the engine. On straight-six BMW engines like the S54, the oil will leak out of the lowest side and usually hit the exhaust manifold which creates the burning oil smell you often get with a bad valve cover gasket.
The S54 also requires valve adjustment services every 30,000 miles. When completing a valve adjustment, the valve cover will need to be replaced for that service. This DIY serves as a guide to get remove your valve cover and access your valves.
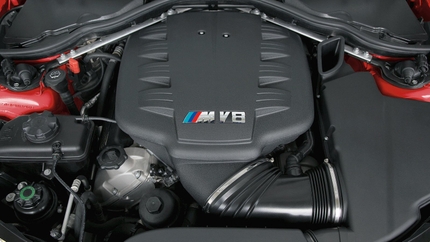
Replacing a valve cover gasket on a S54 engine is an easy-to-moderate level DIY that takes about 2 hours to complete. In this particular blog article, we'll be replacing the valve cover gasket on a 2002 BMW E46 M3. Some of the finer details may be slightly different on Z3M and Z4M models but the overall process is going to be the same.
BMW models and years applicable:
This job applies to any BMW with the S54 inline-6 engine.
- 2001-2002 BMW Z3M
- 2001-2006 BMW M3
- 2006-2008 BMW Z4M
Symptoms of failing BMW S54 valve cover gasket:
- Burning oil smell - especially coming through the car's air vents
- Engine is often low on oil
- The oil leak is much more apparent when the engine is running and the oil is hot
- Misfires/rough running is a symptom of a more serious valve cover gasket issue
One of the most common areas for the valve cover gasket on a BMW S54 to leak is at the back of the valve cover near the firewall. When it does this, it leaks oil onto the exhaust manifold right next to the cabin air intake, and when this happens, you will often smell burning oil inside the cabin of your car.
How much will it cost to replace the valve cover gasket on a BMW S54?
The full OEM valve cover gasket replacement kit is roughly $73 and that's the only cost if you do the labor yourself. A dealership or shop will likely charge more for the parts as well as about 2 hours of labor which will be roughly $250 before taxes.
How long will it take to replace the the valve cover gasket on a BMW S54?
The job will take roughly 2-3 hours to do on your own. To properly let the gasket maker seal up, you'll want to let the engine sit for 24 hours before running it at all.
Parts required to replace the valve cover gasket on a BMW S54:
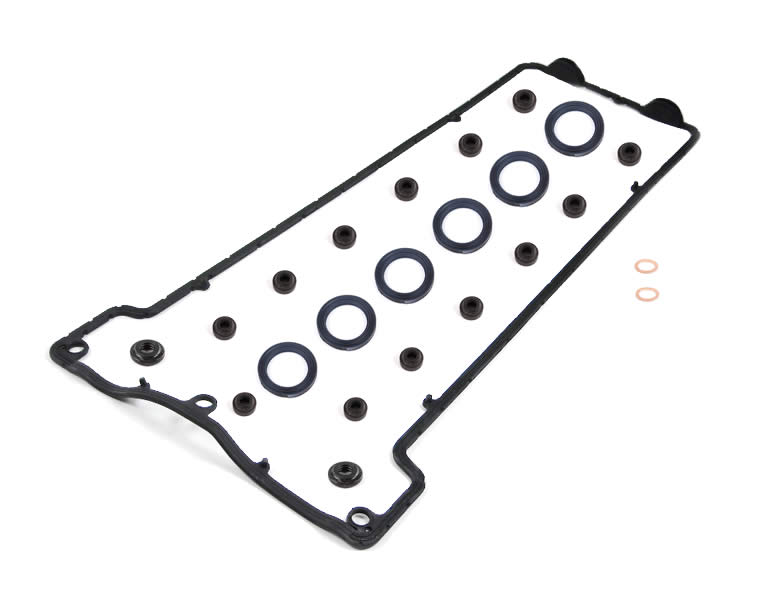
- 11127832034 - Valve Cover Gasket (1 required)
- 11127831271 - Spark Plug Tube Seals (6 required)
- 11127830972 - Valve Cover Seal Washer (13 required)
- 11121437395 - Valve Cover Seal Washer (2 required)
- 07119963129 - Crush Washers for Oil Return Pipe (2 required)
- Full valve cover gasket kit
Tools required to replace the valve cover gasket on your BMW S54:
- Metric Sockets
- Ratchets
- Wrenches
- Torx Bit Set
- Micrometer Torque Wrench
- Screwdrivers
- Picks
- Flashlight (optional)
- Pry Bar (optional)
- Magnetic Pick-Up Tool (optional)
- Brake Parts Cleaner
- Permatex or other Oil Safe High Temp Silicone
- Clean Lint-Free Shop Rags
Steps required to replace the valve cover gasket on your BMW S54:
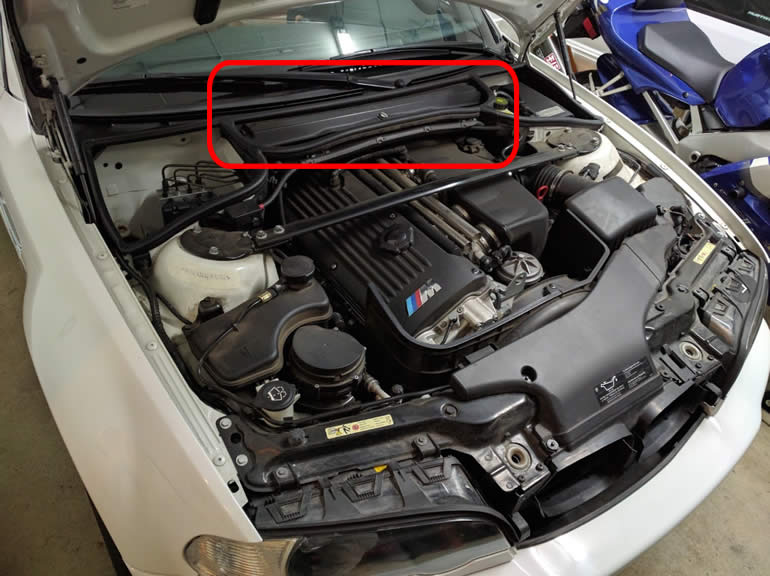
Step 1: Disconnect the battery (recommended) and raise the vehicle hood. Remove the cabin air filter housing.
Twist these 3 plastic locks counter-clockwise a ¼ turn and remove the cabin filter cover.
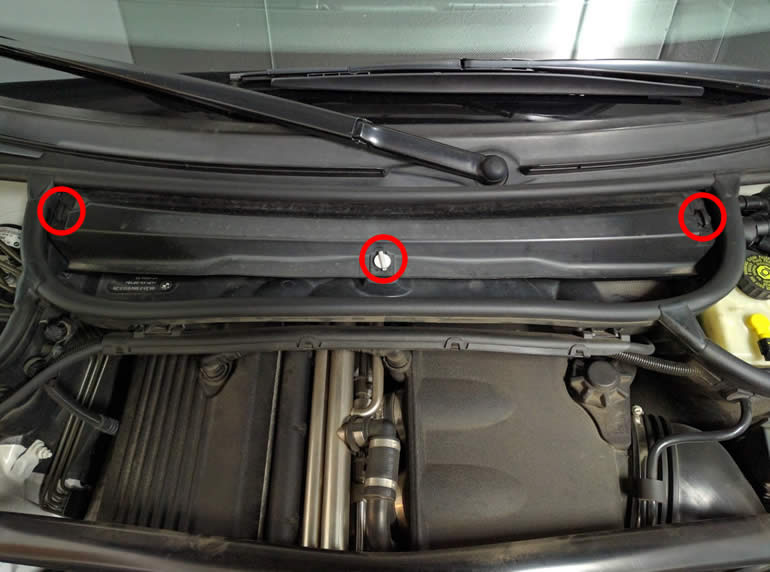
Remove the cabin filter by sliding it out.
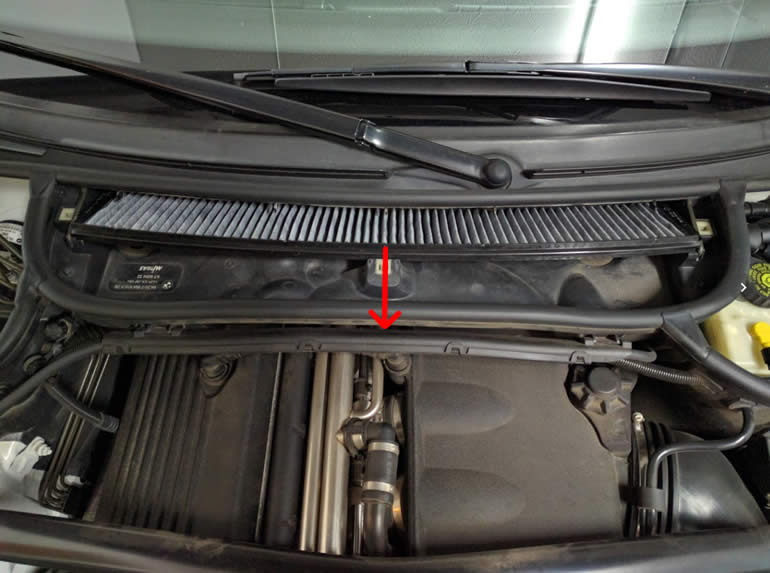
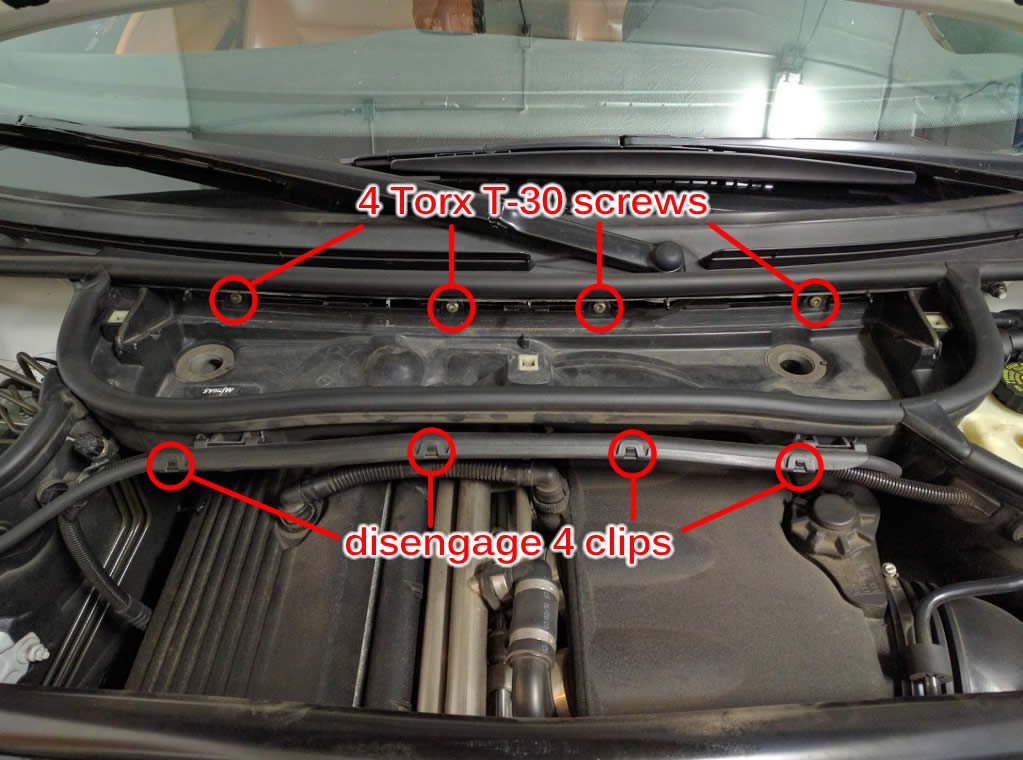
Step 2: Remove the cabin filter tray
Disengage 4 clips, remove the cable cover and slide the cables out. Then remove the 4 T-30 screws and lift out the cabin filter housing.
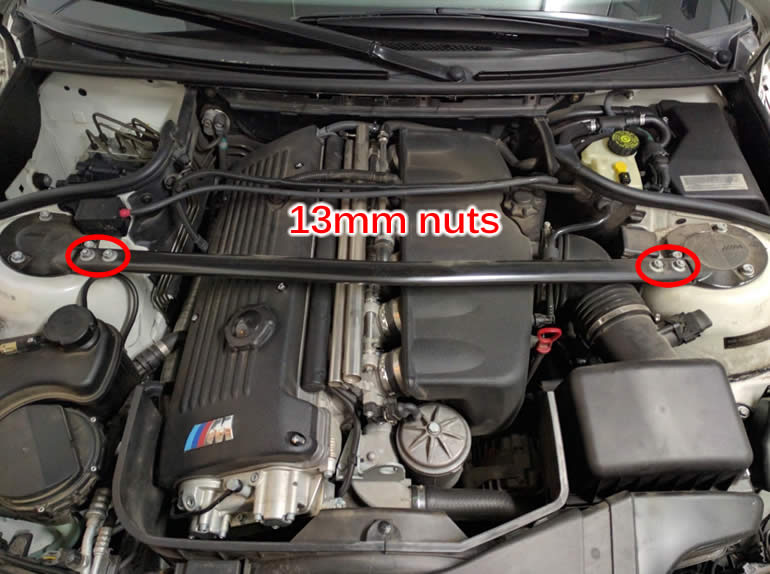
Step 3: Remove 4 nuts (13mm) and take off the strut brace
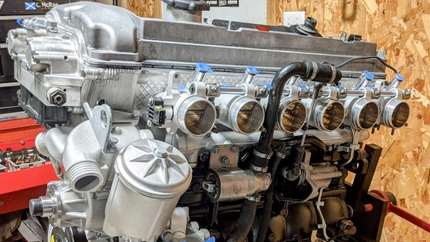
Step 4: Remove the engine cover
Remove the vent hose by squeezing the ends so they disengage. Then remove the 6 plastic cover nuts and finally remove the oil filler cap. Now you can remove the engine cover and reinstall the oil filler cap onto the valve cover underneath.
Step 5: Pinch these 2 clips to release the black plastic harness then pull it away from the valve cover
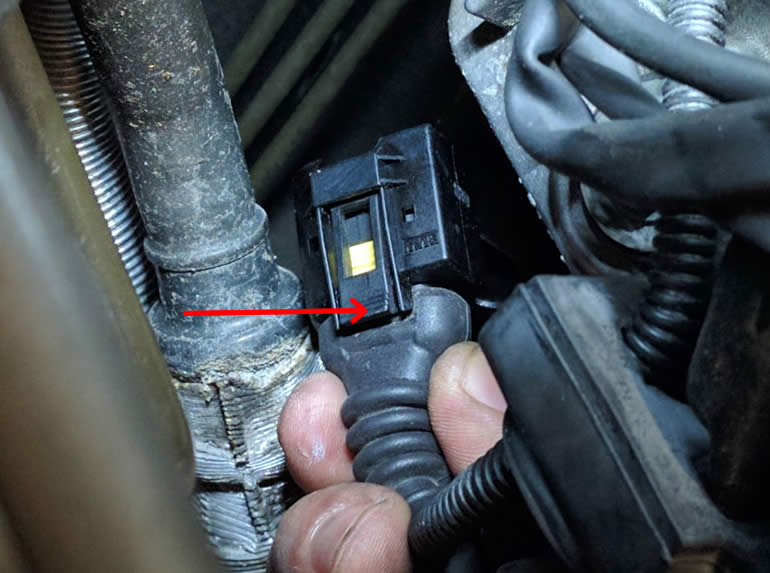
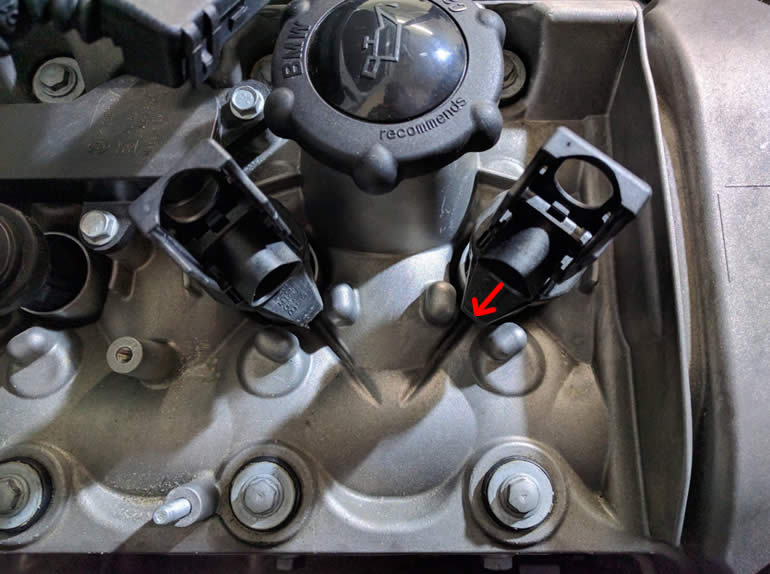
Step 6: Disconnect the exhaust cam sensor plug by pinching it underneath and pulling it off
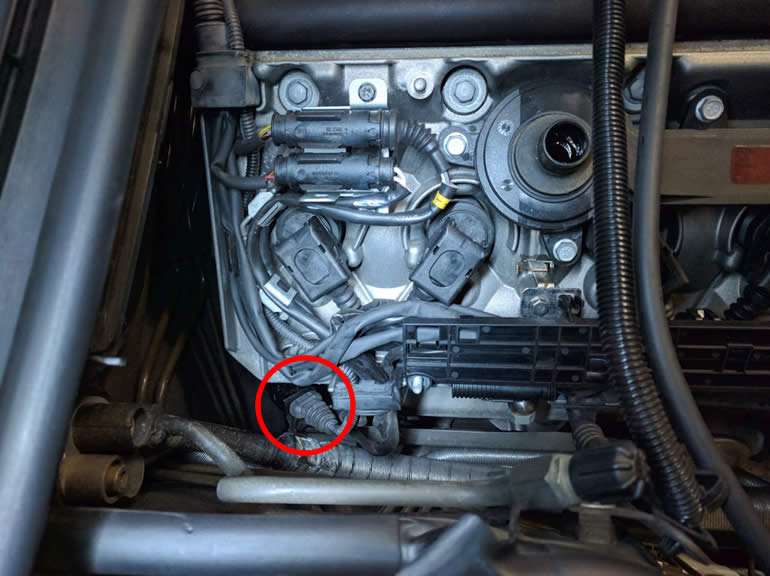
The exhaust cam sensor plug has a pinch point underneath that you can’t see from above. Here’s where you need to squeeze to be able to release and pull it off.
Step 7: Flip over the black plastic harness and slide out these 3 connections that are hooked on
Carefully disconnect them and fish out the wires of the female ends out of the routing path of the black plastic harness. Then unhook and disconnect 2 other connections toward the rear.

Those 3 connections were a pain as there are opposing ends to unclip with very little room to work with. Use a small flathead screwdriver in one hand and putting outward pressure with my other hand to carefully disconnect it without breaking them.
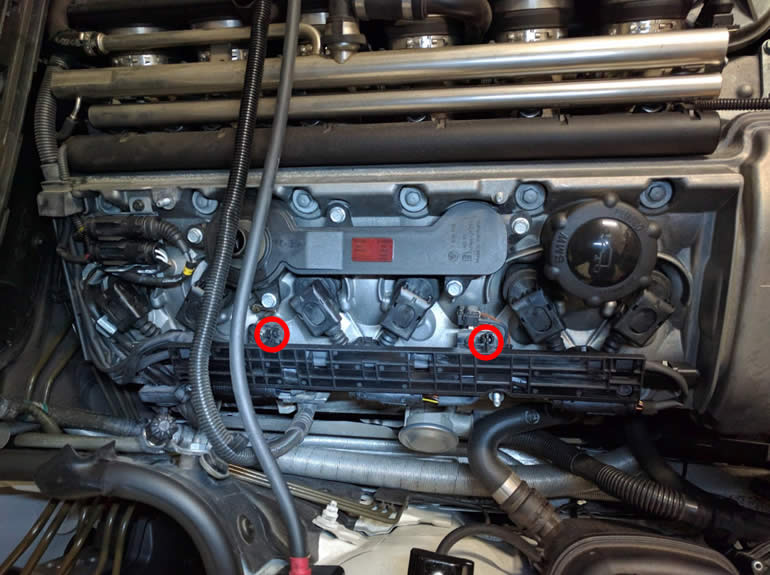
Step 8: Detach all of the wiring from the valve cover
Set the top portion away toward the intake side and push the bottom side portion down toward the exhaust so that the valve cover has maximum clearance. Now disconnect all 6 ignition coil connections by lifting the tabs up, then remove the 2 bolts holding down the harness
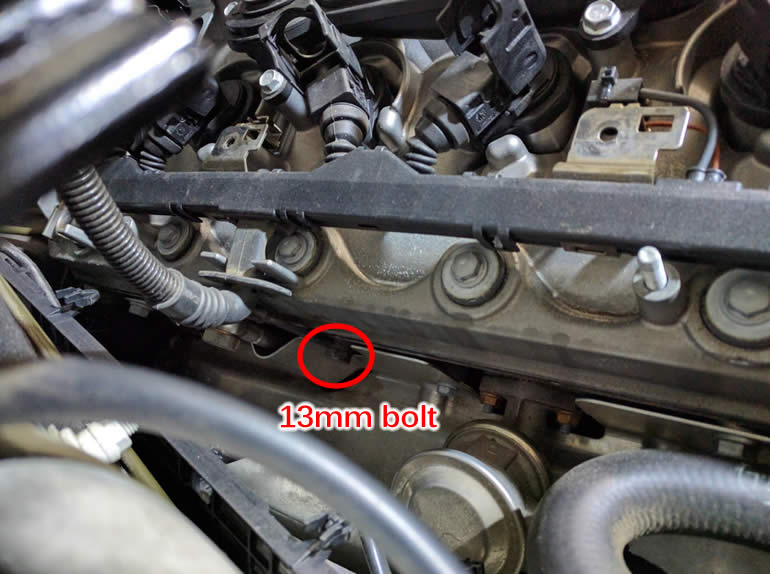
Step 9: Remove the 13mm grounding bolt then move the entire harness to the intake side so it’s out of the way
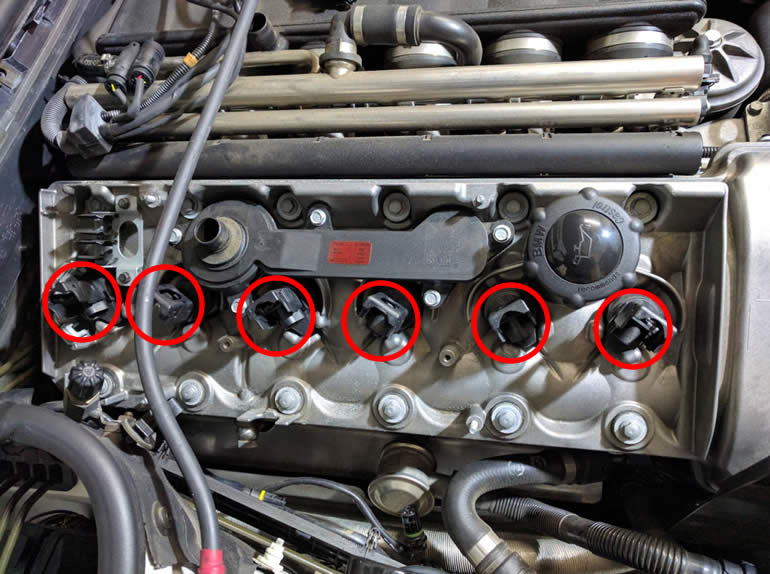
Step 10: Remove all 6 ignition coils by pulling it straight up and out
This could be snug and difficult so you can try wiggling it while pulling out with force, or hook a screwdriver into the holes of the tabs to help with leverage.
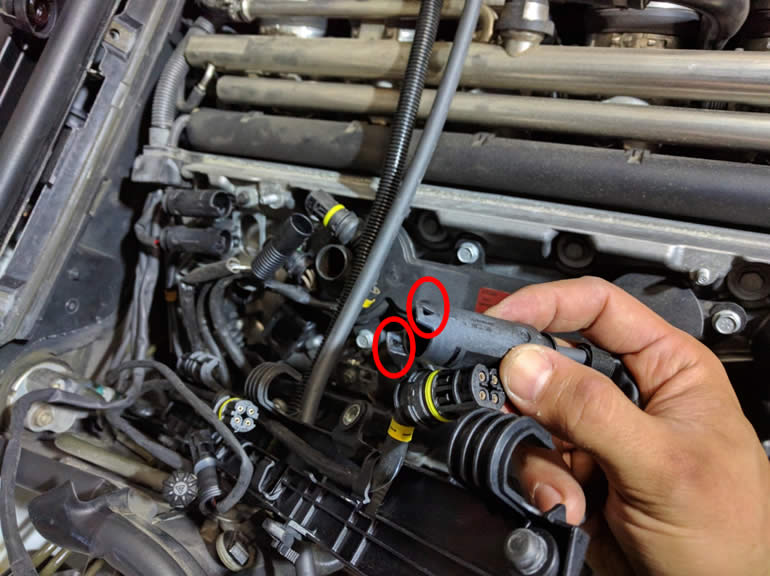
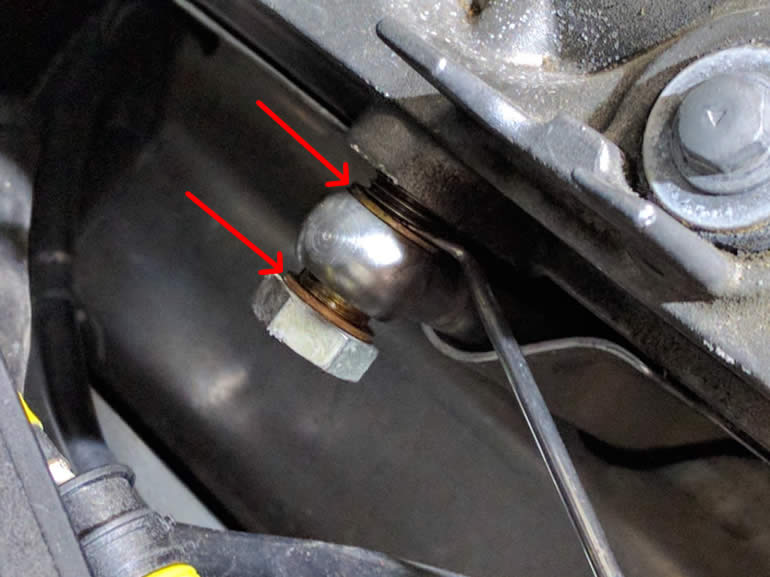
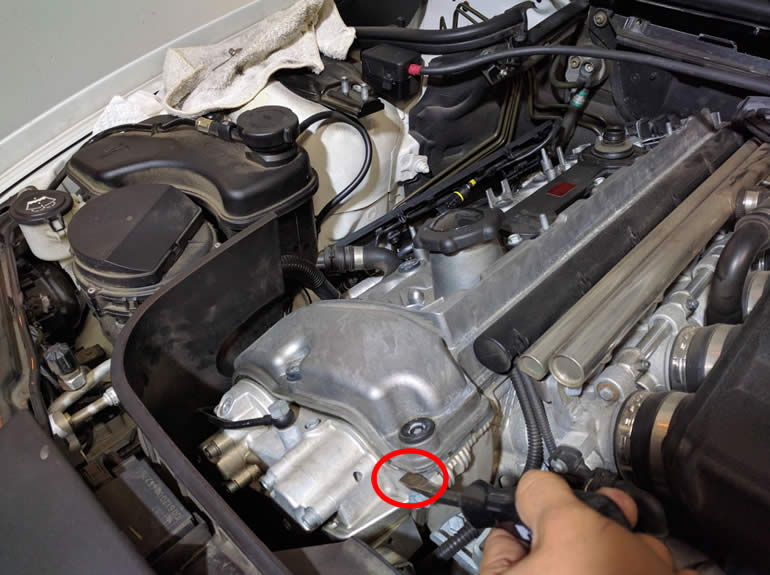
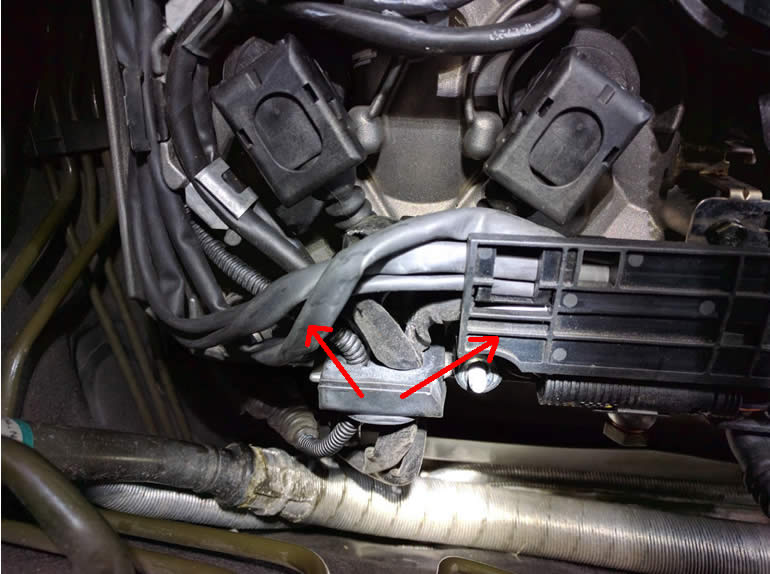
Step 11: Remove the banjo bolt with care so you don’t drop the gasket rings into the engine bay’s abyss
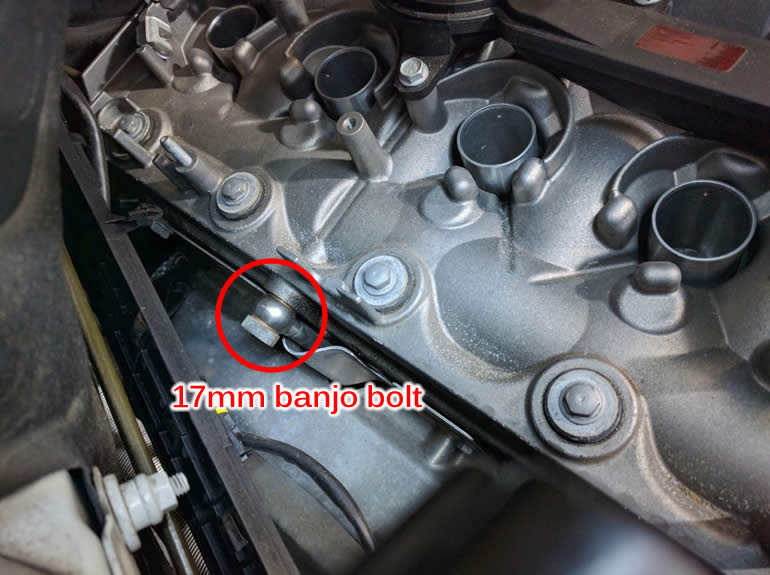
Step 12: I had to use a pick to secure the gasket rings while slowing pulling out the banjo bolt
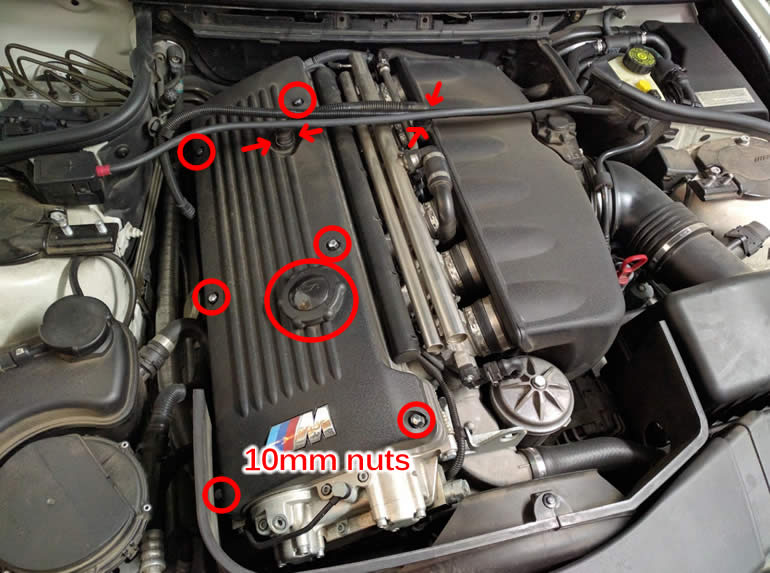
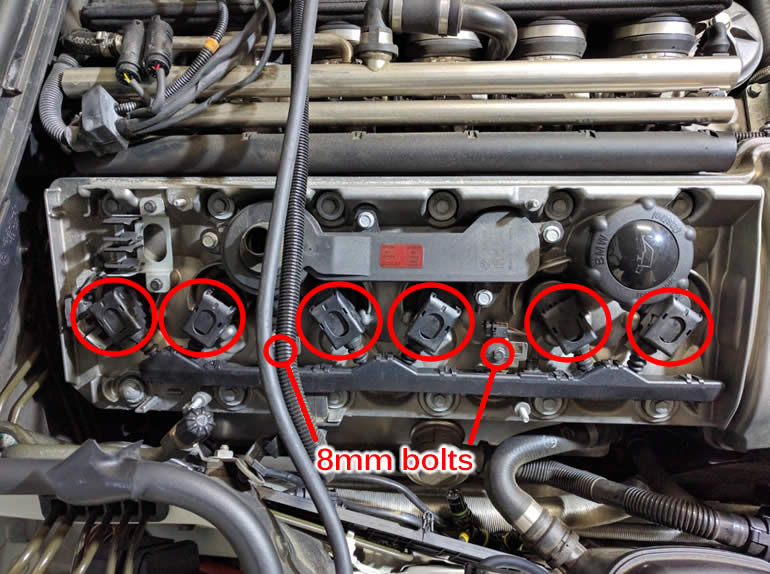
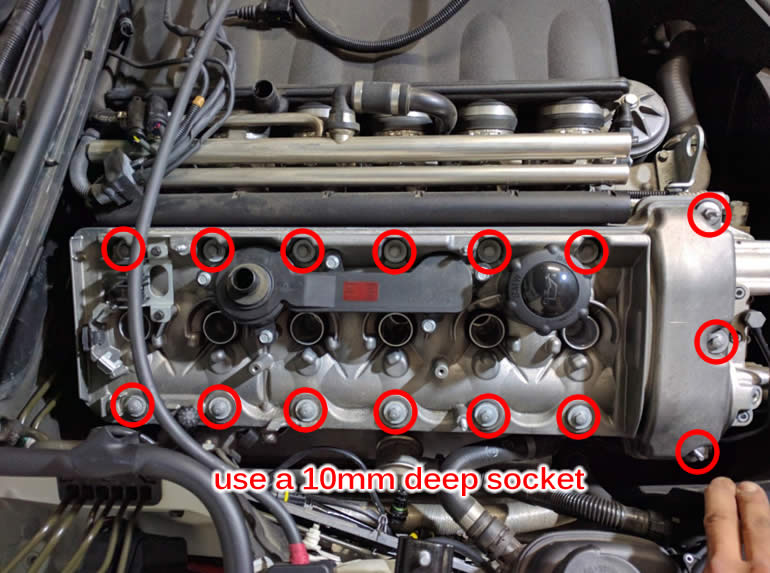
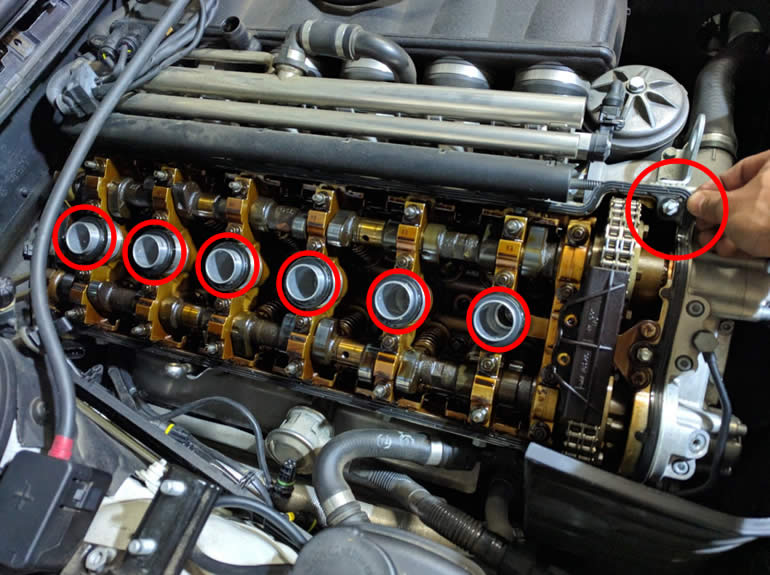
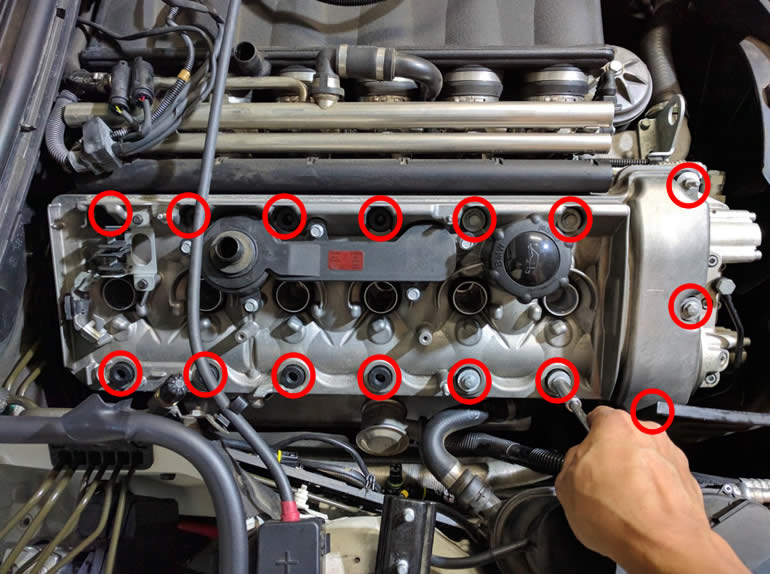
Step 13: Remove all 15 caps along with their washers
The 2 caps with protruding shafts don’t have washers as it’s one piece.
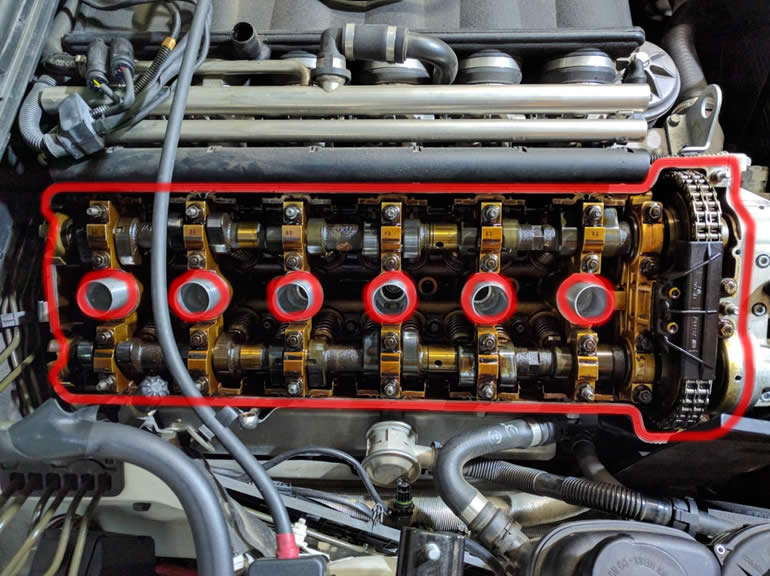
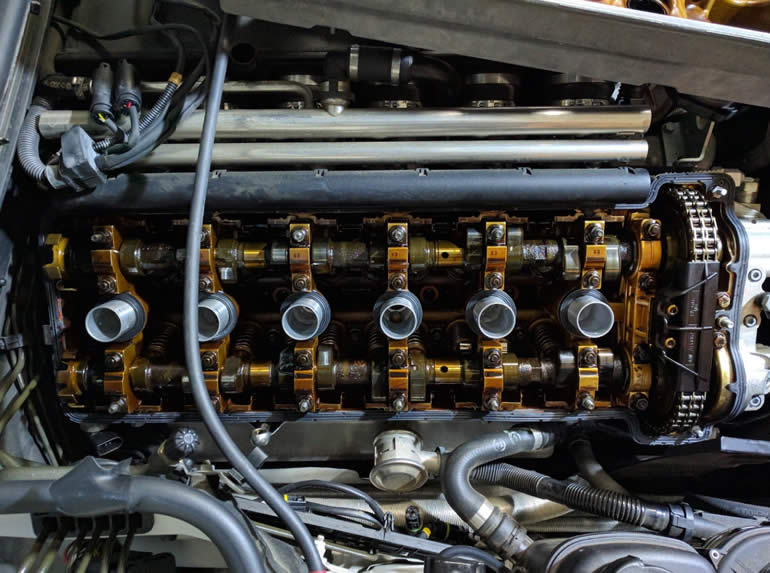
Step 14: Remove the valve cover by pulling it straight up and off.
It might be stuck on there so don’t hurt yourself.
You can be safe about its removal by using a small pry bar and lifting one side off at an exposed edge.
Step 15: Remove the old gasket
Start at one corner and work it completely off. Then remove the 6 old spark plug tube seals.
Wipe off excess oil residue from the mating surfaces of the gasket and seals.
Now we’re ready to reassemble everything back with a new gasket and seals. Reassembly is the reverse of removal but here are a few particulars along with factory specified torque values and recommended torquing pattern:
Step 16: Clean mating surfaces and strategically apply gasket maker
You want to make sure that the mating surfaces are perfectly clean and smooth before you begin applying the new gasket. To do so, use a clean lint free rag and brake clean. The only place you want to apply gasket maker is at the seams of the VANOS actuator/timing cover and the cylinder head.
Step 17: Carefully set the new gasket onto the mating surface and on top of the Permatex silicone where they both meet.
There are small gasket “feet” that protrude out and go into mating holes on the engine head so confirm that they are correctly in place before the next step. Lastly, install new spark plug tube seals.
Step 18: Install the valve cover
Carefully set the valve cover on top of the gasket such that you’re not sliding against it to ensure a solid seal. Install 13 new valve cover seals and 2 new valve cover grommets then reinstall the 15 caps by hand tightening it first.
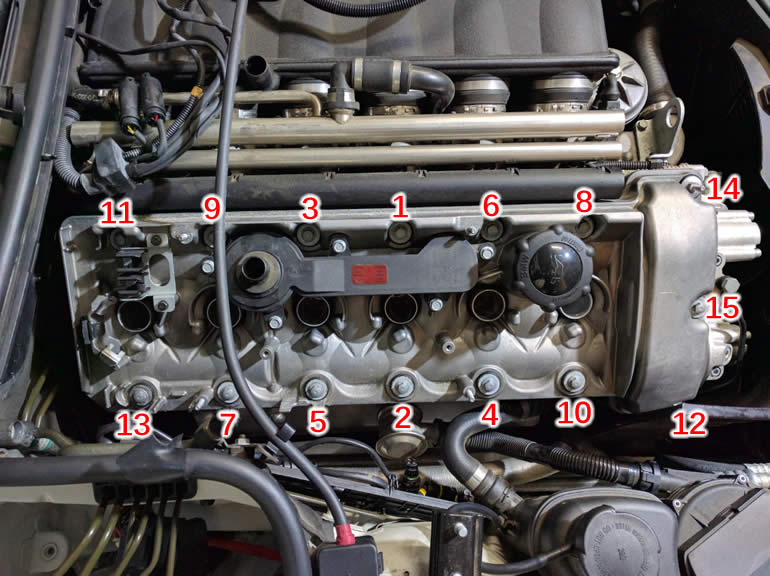
Step 19: Tightening to torque specs
Permatex silicone directions say to wait an hour before doing final tightening, then about 24 hours to fully cure. Start with a 20 in-lb initial torque of the 15 caps in a criss-cross pattern, then wait about an hour. Afterwards, increase it to 55 in-lb and finally to 89 in-lb, both sets also in the same criss-cross pattern so the valve cover has even pressure on all sides
Step 20: Reinstall banjo bolt
Installing new gasket rings on the banjo bolt was tricky as there isn’t enough space to work them in. Jam the handle of a pick onto the line to give yourself enough space to carefully place the inside ring before threading it onto the valve cover. Once threaded, torque to 18 ft-lb.

Step 21: Reinstall ignition coils
Ensure that you line up each ignition coil into the valve cover notches. It will “click” in when it’s push in and properly seated.
Step 22: Reattach valve cover wiring
When routing the wires through the insulator that slips onto the valve cover, it can get confusing where they each go. The 3 wires in the right opening of the insulator goes to the black plastic harness on the right side, while the 3 wires in the left opening of the insulator goes to the left. Take the time to get this right else a wire could get pinched.
Take the car for a test drive after the Permatex silicone fully cures to ensure all is good and enjoy a leak-free valve cover! If you're looking for more DIYs for your BMW, head to bmw.fcpeuro.com and subscribe to our YouTube channel. And if you have any questions about replacing the valve cover gasket on your E46 M3 or any other car with the S54 engine, leave them in the comments below.