- 07/28/2020
- 19 Min Read
- By: Christian Schaefer
How To Replace The BMW N20 Timing Chain (Part 1 - Removal)

It's well known that the BMW N20 and N26 engine have timing chain problems. So much so, that BMW has acknowledged this and issued a recall. Along with this, there's an extended warranty for the issue. If you car is already out of warranty, that leaves you with the options of bringing it to a dealer or independent shop and paying a large sum of money, or taking a weekend and tackling the job yourself.
The job of an engine’s timing chain is to keep all of the components of the engine in the right place at the right time. A belt or chain skipping a tooth can cause the valves to hit the pistons, destroying the engine. Timing chain systems, while safer than belts, are far more difficult to service. For engines with timing chain issues like BMW’s N20 or several of Audi’s engines, this means expensive and lengthy services to prevent a ruined engine.
Replacing the BMW N20 timing chains and their guides is not for the faint of heart. This job requires several specialty tools and a wealth of wrenching experience. With that said, it is a doable job for a DIY’er if you’re careful enough. You run the risk of severely hurting the engine if any of the steps are not done correctly, but if you follow along with our DIY, you’ll have all of the steps laid out in front of you.
BMW N20 Timing Chain Replacement Part 2
BMW Models and Years applicable:
|
|
|
|
|
|
|
|
Symptoms of a failing BMW N20 timing chain:
- A rattling or clacking noise coming from the front of the engine on start-up
A timing chain will stretch over time. As it stretches, the chain gains play, allowing it to move around inside the timing cover. If a chain stretches enough, it can come loose on one of the sprockets causing it to jump off of the sprocket. Engines are built to tight tolerances, and a worn chain will put the internal parts outside of those tolerances.
If the chain hasn’t stretched, then something has happened to the guides. The timing chain guides, as their name suggests, keep the chain on its proper path at the proper tension. These guides are made from plastic. Improper oil maintenance, excessive heat, or even a faulty design from the manufacturer can cause the guides to wear quickly or crack.
How much does BMW N20 timing chain replacement cost?
The job itself requires three special tools specific to this engine. Factoring in the cost of the tools with the parts brings the DIY bill to nearly $1200. The cost will get higher if you have to buy any of the other tools needed for the job.
However, if you were to go to a dealership for this job, out of the 7 year/70,000 mile warranty, you’ll be on the hook for more than that. The labor alone will be between 10-15 hours, causing the cost of the job to be upwards of $5000.
For those capable or bold enough to take on this job, there is a lot of monetary savings to be had.
How long does BMW N20 timing chain replacement take?
Set aside at least two days to give yourself ample time to do everything correctly and double-check your work. There are a lot of small pieces that need to be removed and unclipped before getting into the heart of the timing system. Missing something during reassembly will only cost more time and headaches.
The dealer will charge you between 10-15 hours to complete the job. Depending on the parts in stock and who is available to do the job, they could have the car upwards of a week.
Tools required to replace the BMW N20 timing chain:
- 2x Floor Jacks
- Jack Stands
- 10mm Wrench
- 13mm Wrench
- 14mm Wrench
- 17mm Wrench
- 8mm Socket
- 10mm Socket
- 16mm Socket
- 22mm Socket
- 24mm Socket
- 27mm Socket
- E6 Socket
- E7 Socket
- E8 Socket
- E10 Socket
- E12 Socket
- E20 Socket
- T30 Socket
- T40 Socket
- T45 Socket
- T60 Socket
- 8mm Hex Socket
- 5mm Hex Socket
- Pick
- Flat-head Screwdriver
- Torque Wrench
- Pry Bar
- BMW N20 N26 Timing Tool Kit - CTA 7675
- BMW Flex Plate Lock Tool - CTA 2801
- BMW N20 N26 Balance Shaft Seal Tool Kit - CTA 7676
Parts required to replace the BMW N20 timing chain:
Steps required to remove the BMW N20 timing chain:
Step 1: Put the car into neutral
The engine needs to be able to rotate freely by hand to remove the timing chain and its associated components. Leaving the car in park will prevent the engine from rotating as the transmission won’t let it move. Use the parking brake to prevent the car wheels from rolling.
If you’re reading this DIY and have already drained the oil, there is a way to get the transmission into neutral without starting the car. On the driver’s side of the transmission, there is a 5mm hex bolt. Tightening this bolt will thread it up into a small lever coming out from the transmission. Keep pushing the lever up with the bolt until you hear a pop. That will be the transmission disengaging from park and going into neutral.
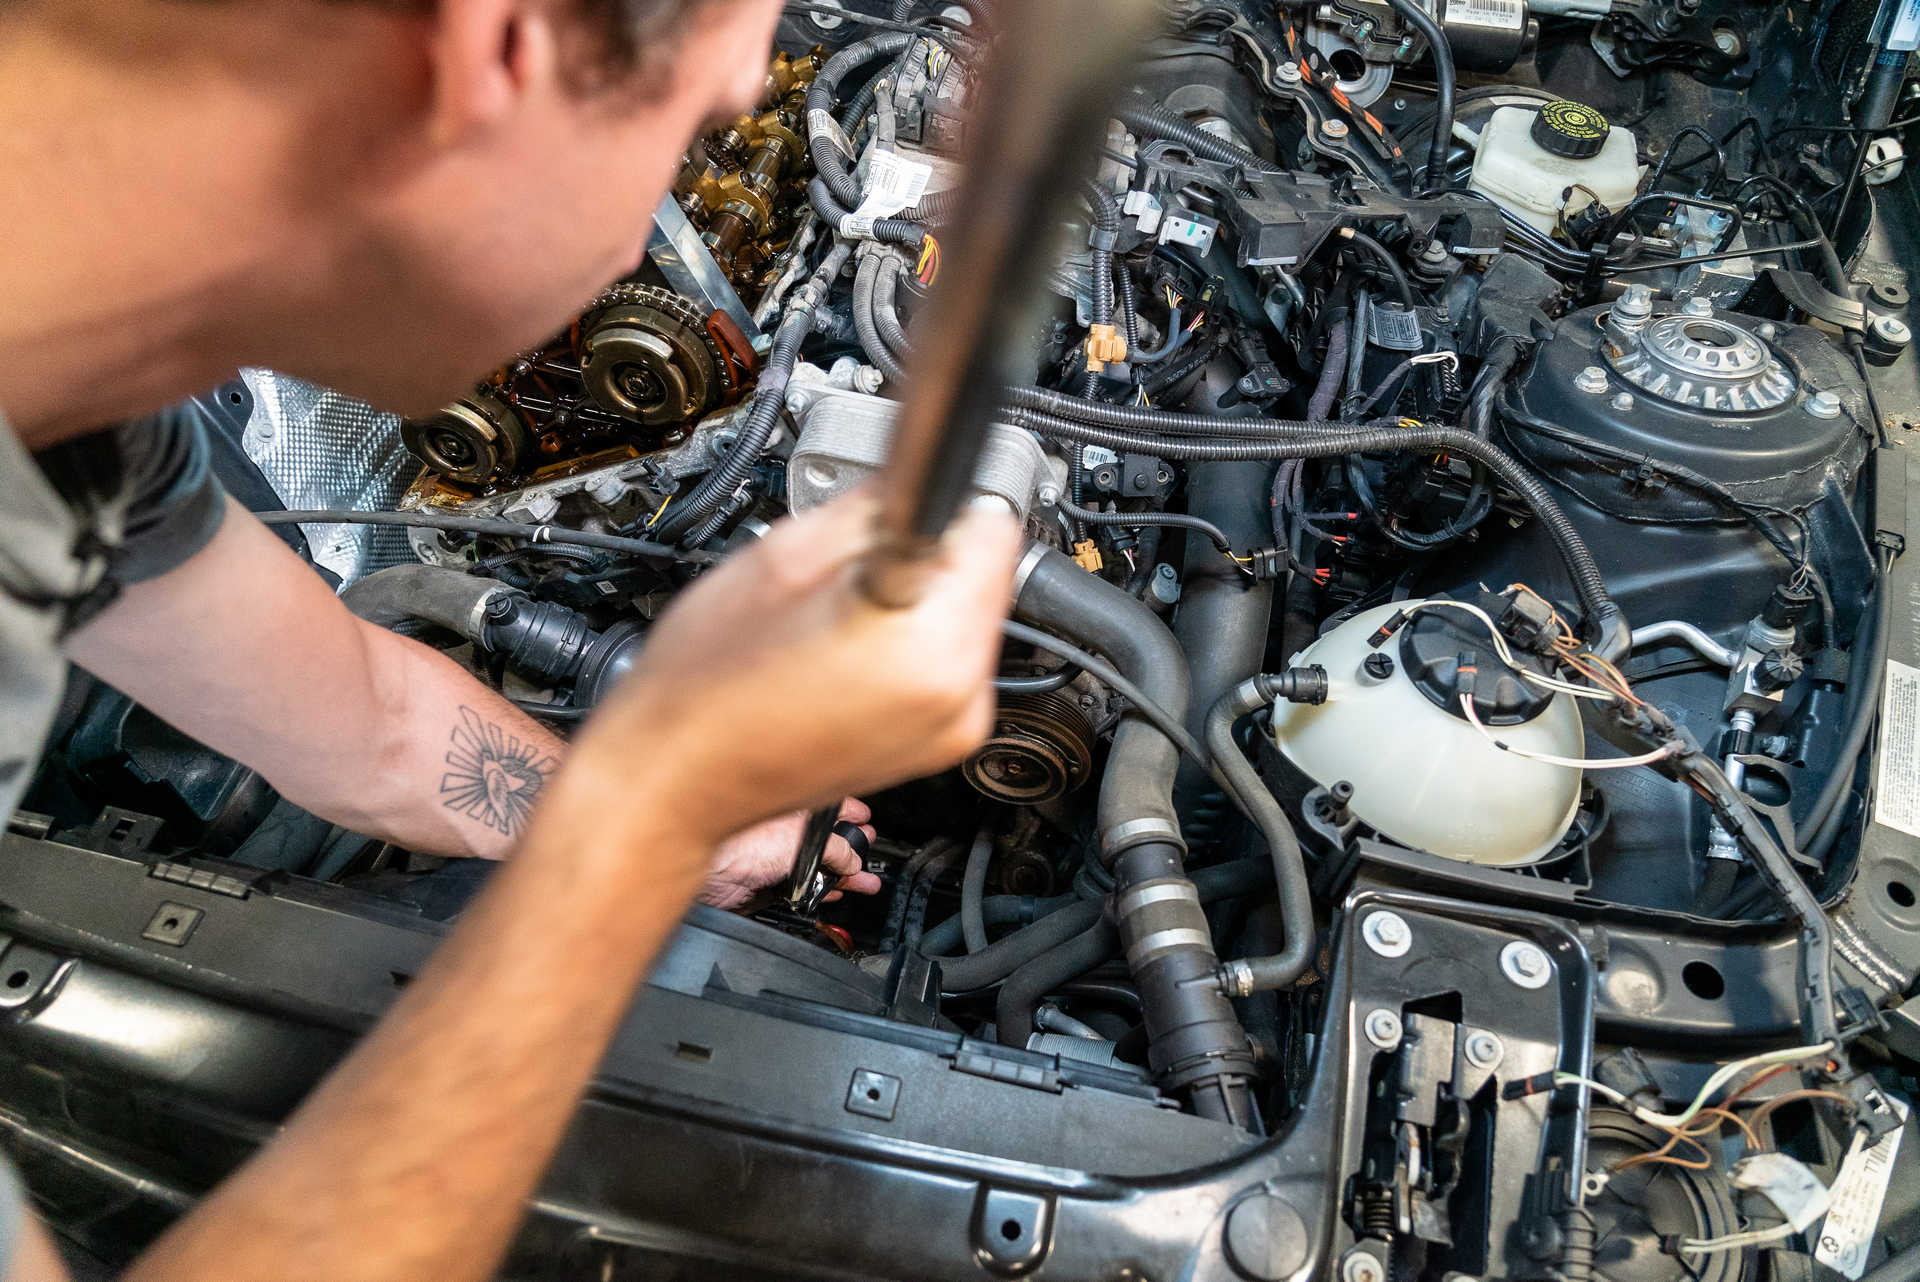
Step 2: Remove the engine bay plastics
Before attacking the timing chain system, several components need to be removed. Starting with the airbox, loosen the intake pipe clamp on the backside of the airbox with a flat-head screwdriver. Next, unplug the mass airflow sensor next to the clamp and unclip the hood release cable from the back of the airbox.
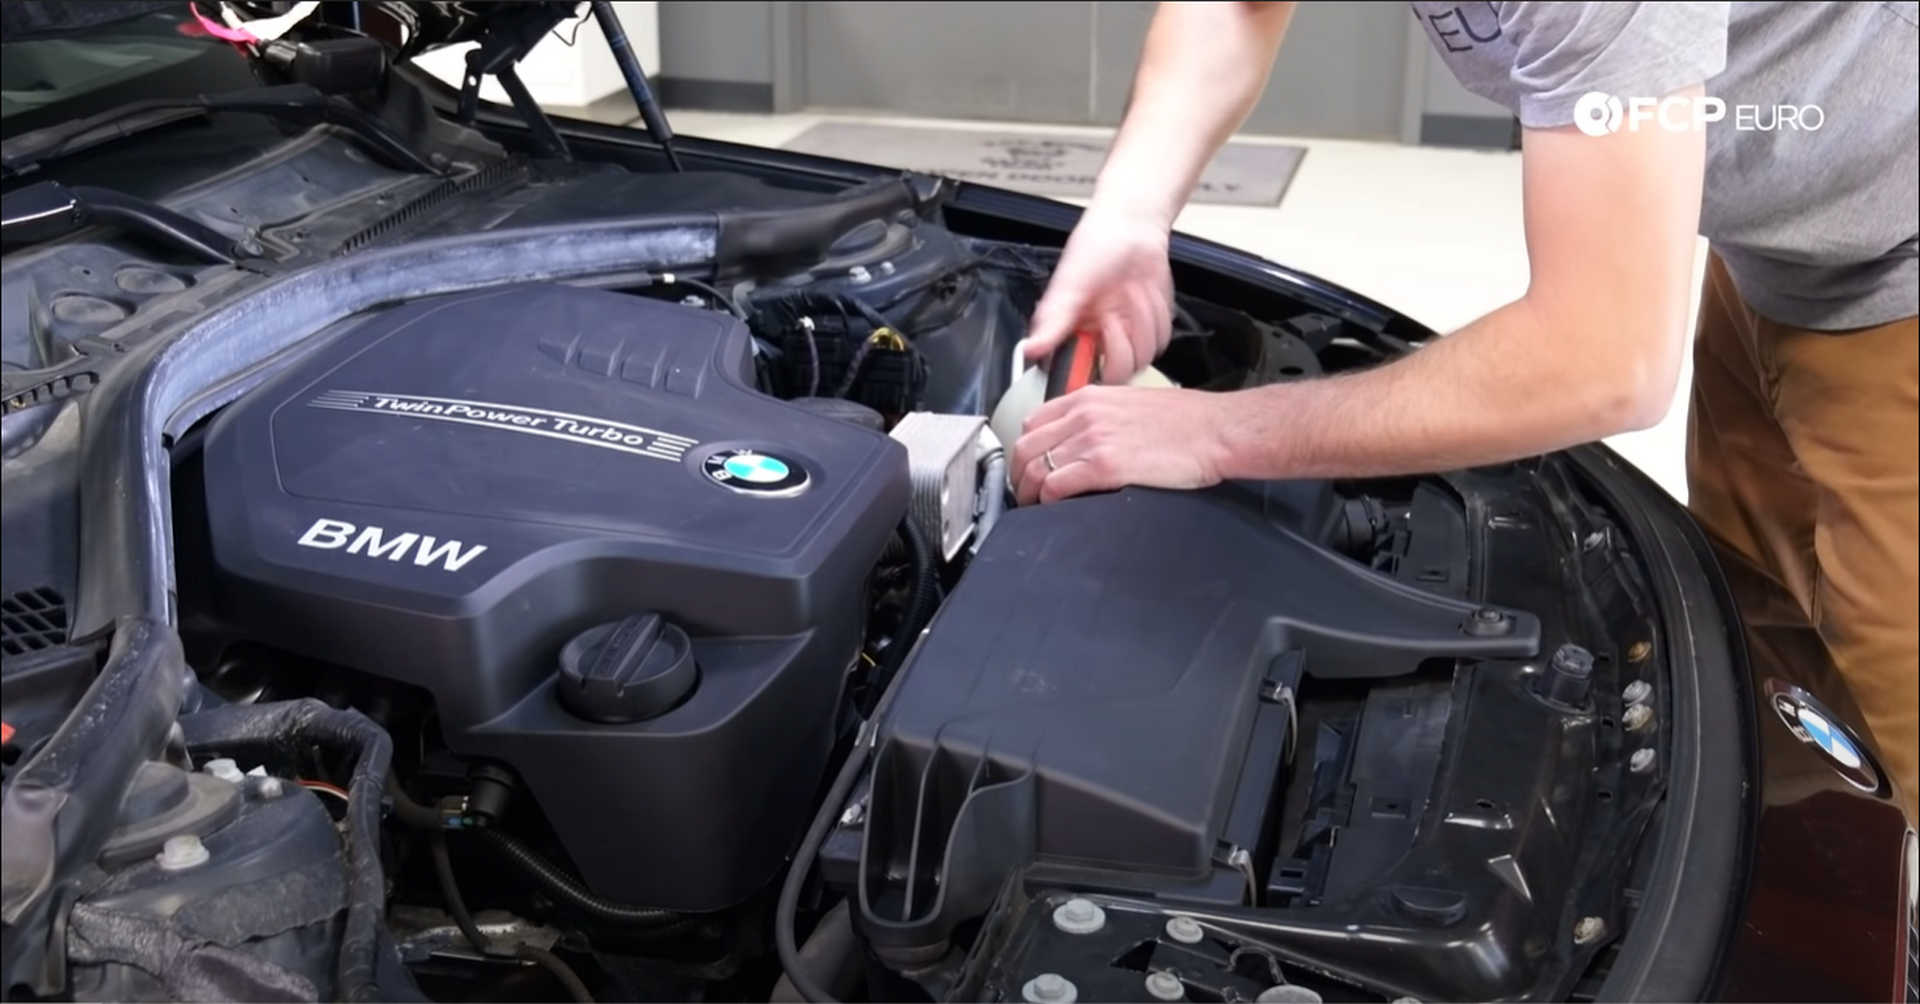
The airbox is secured to the car with three locating pins. Pull up on the pins to release them and push down on the intake pipe to separate it from the airbox. Once all of those have been released, pull the airbox out of the engine bay.
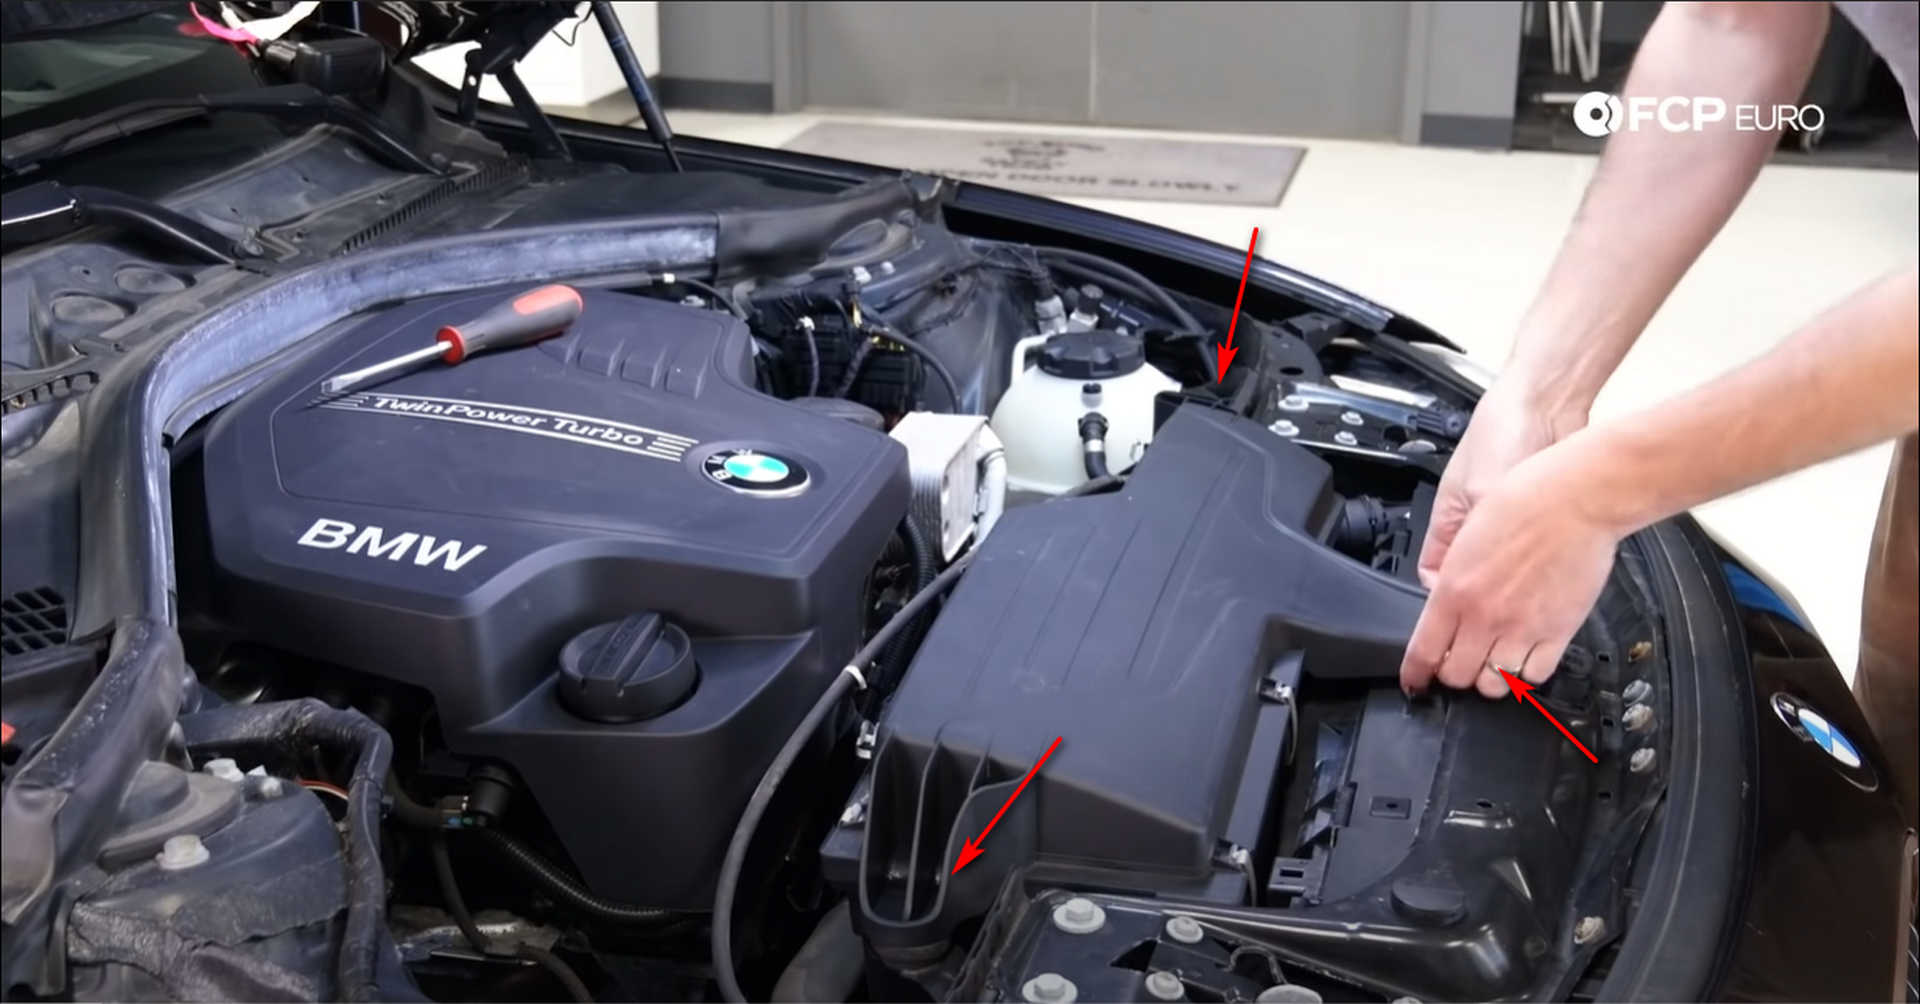
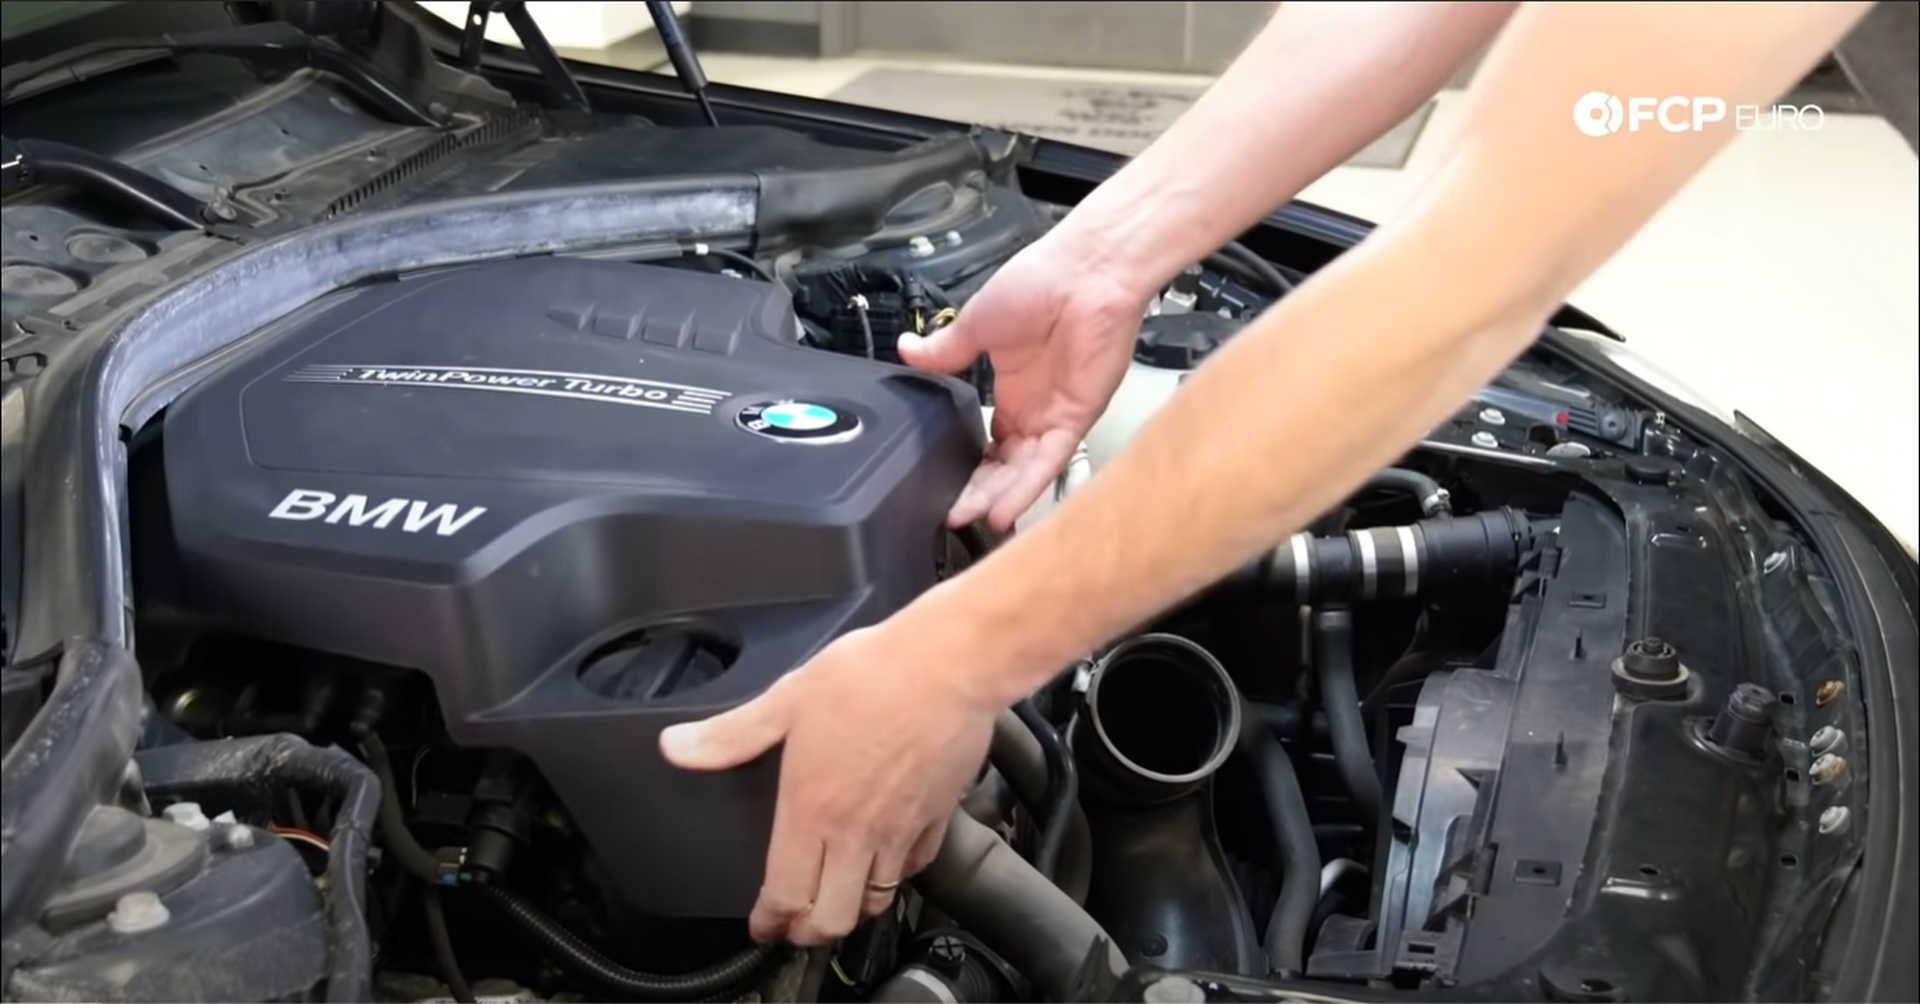
Grip the front of the engine cover and pull up to pop it off of the front locating pins. Then grab it by the right side and pull up to pop it off of the last pin. The pre-2013 engines also have two vacuum lines on the passenger’s side of the cover that need to be disconnected before the cover can be removed.
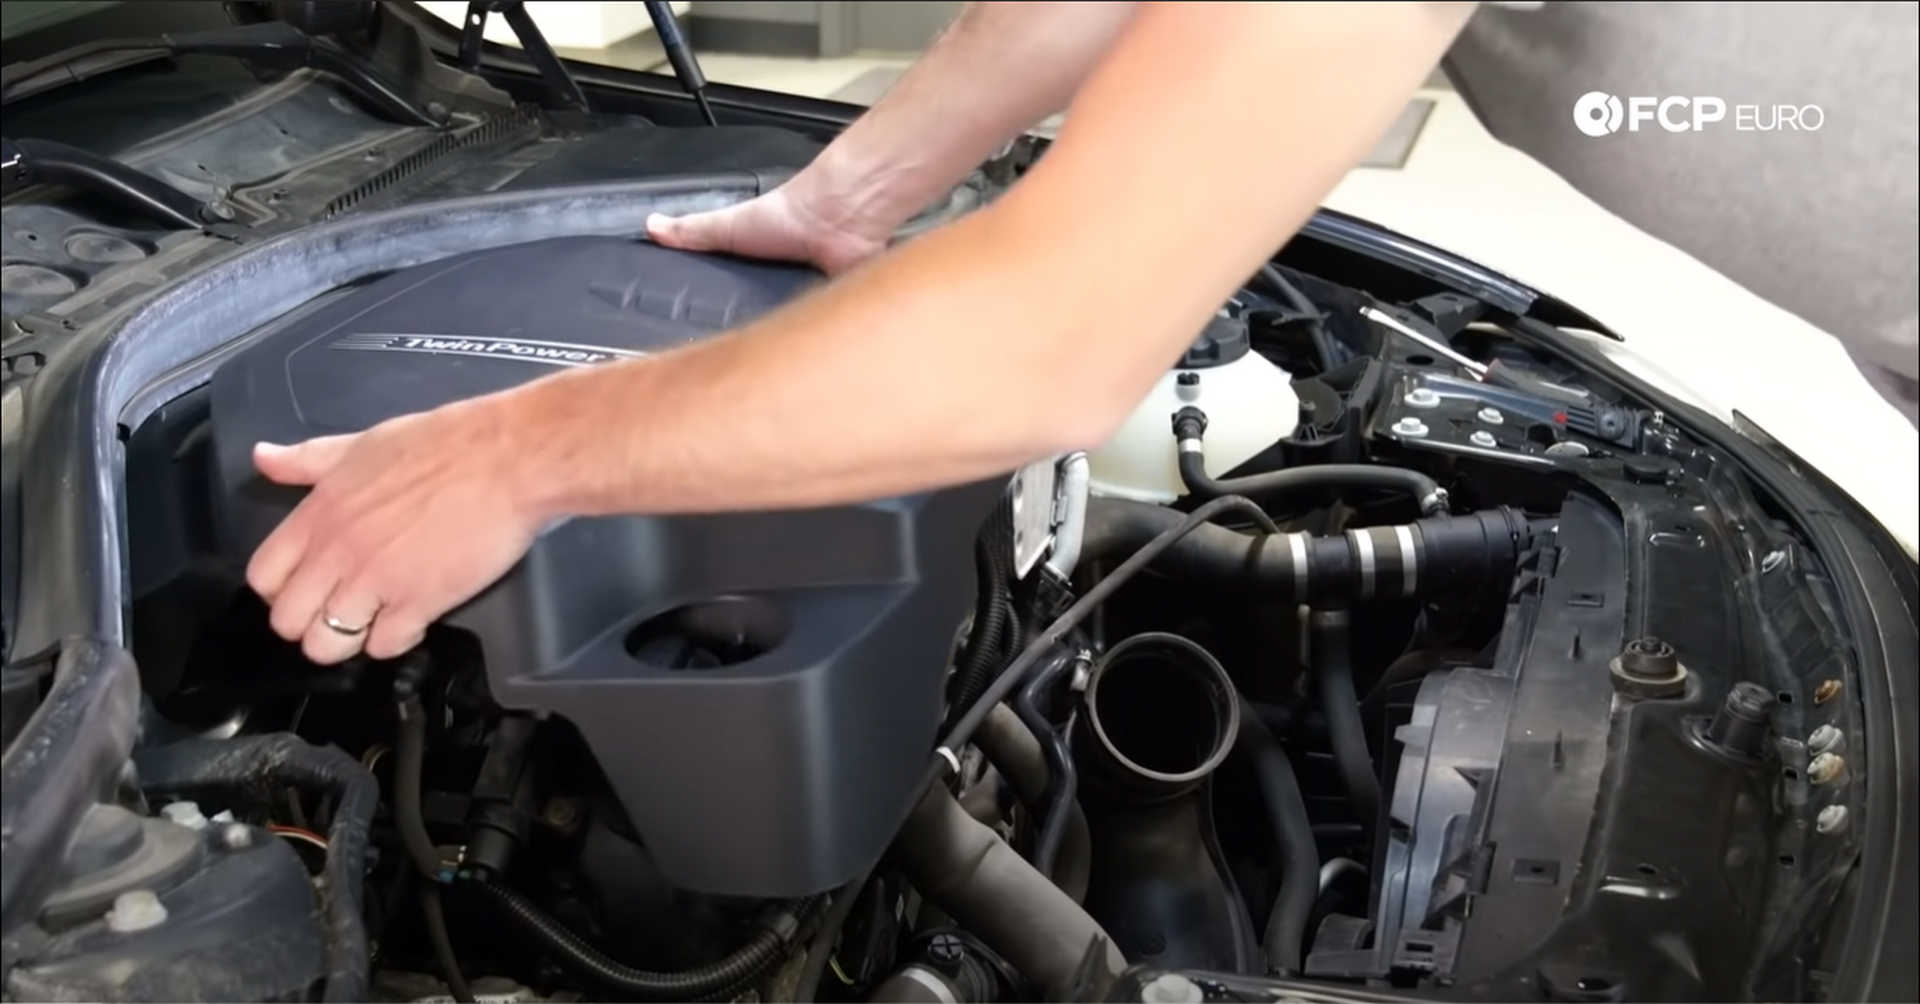
Underneath the plastic engine cover, is a foam noise-reduction pad. Pull up on it to remove it from the engine.

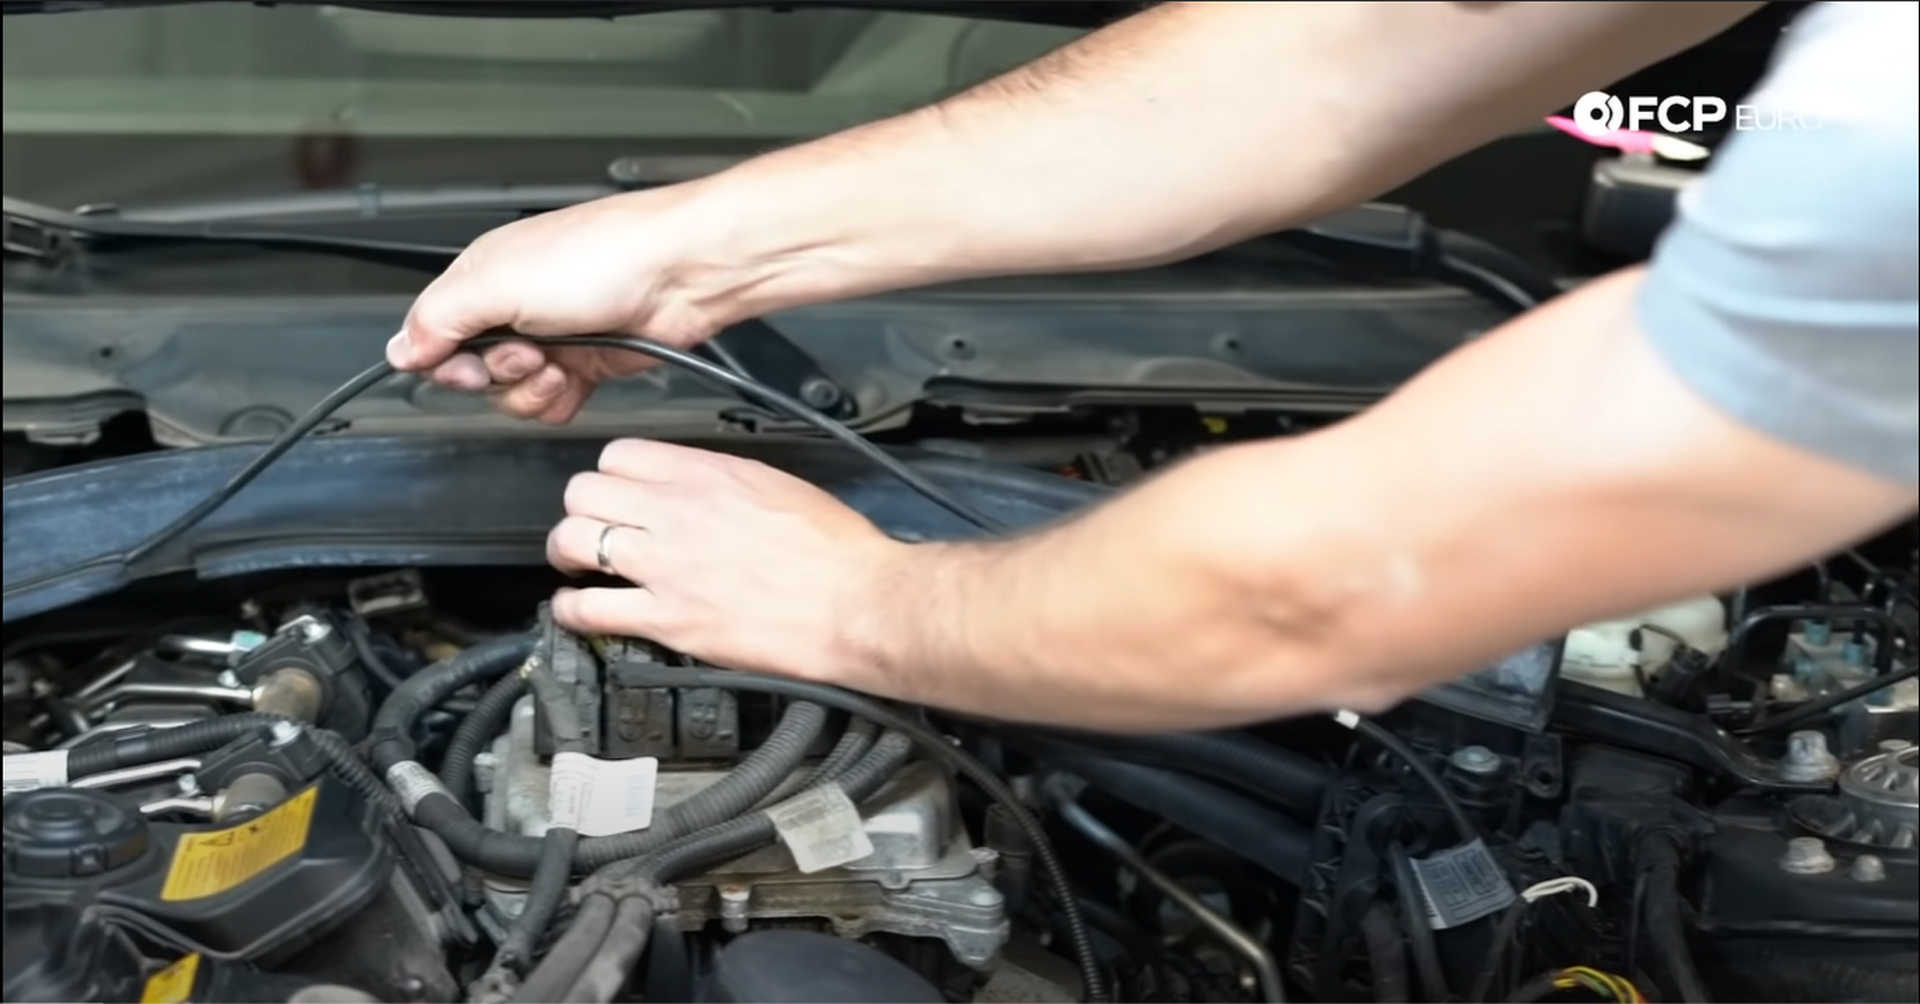
The next thing in the way is the plastic engine cowl, located behind the engine. There are two clips holding the cowl on, on either side of the engine bay. Pop these clips out, and the cowl can be pulled off. Pull the wiring out of the rubber seal just forward of the cowl and pull the seal off the strut brace.
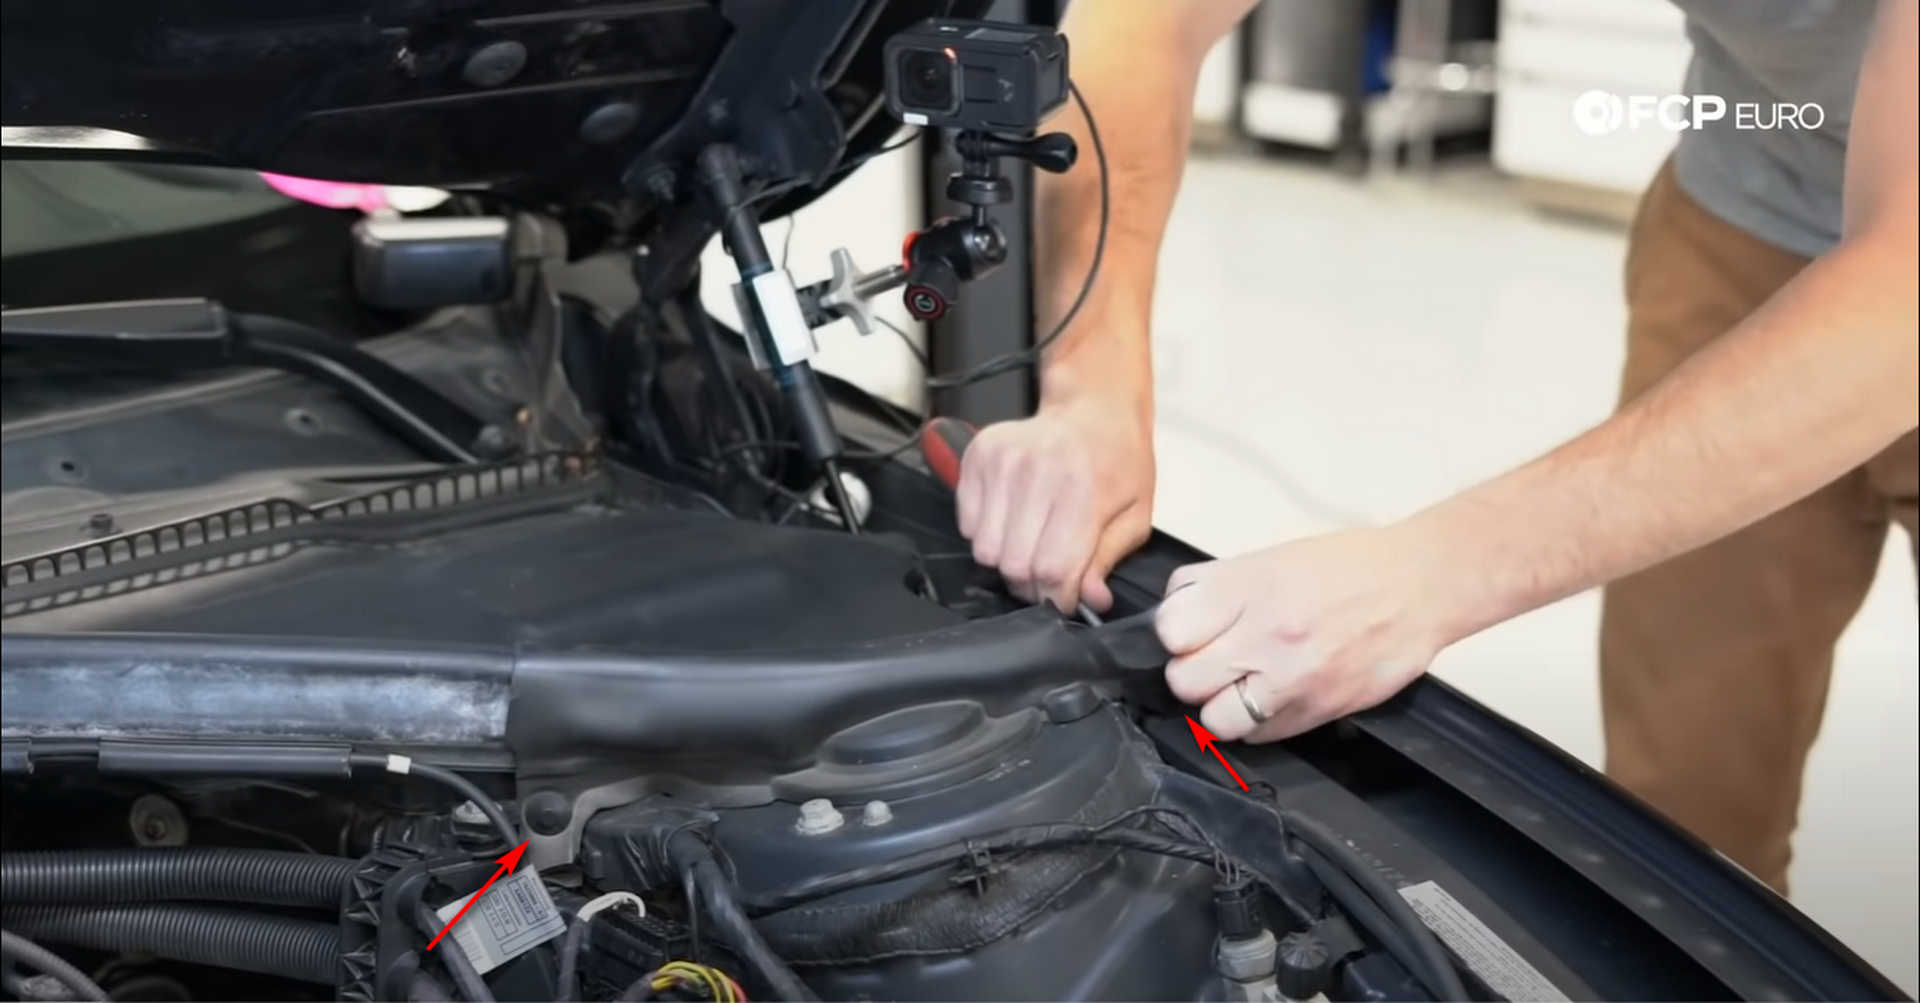
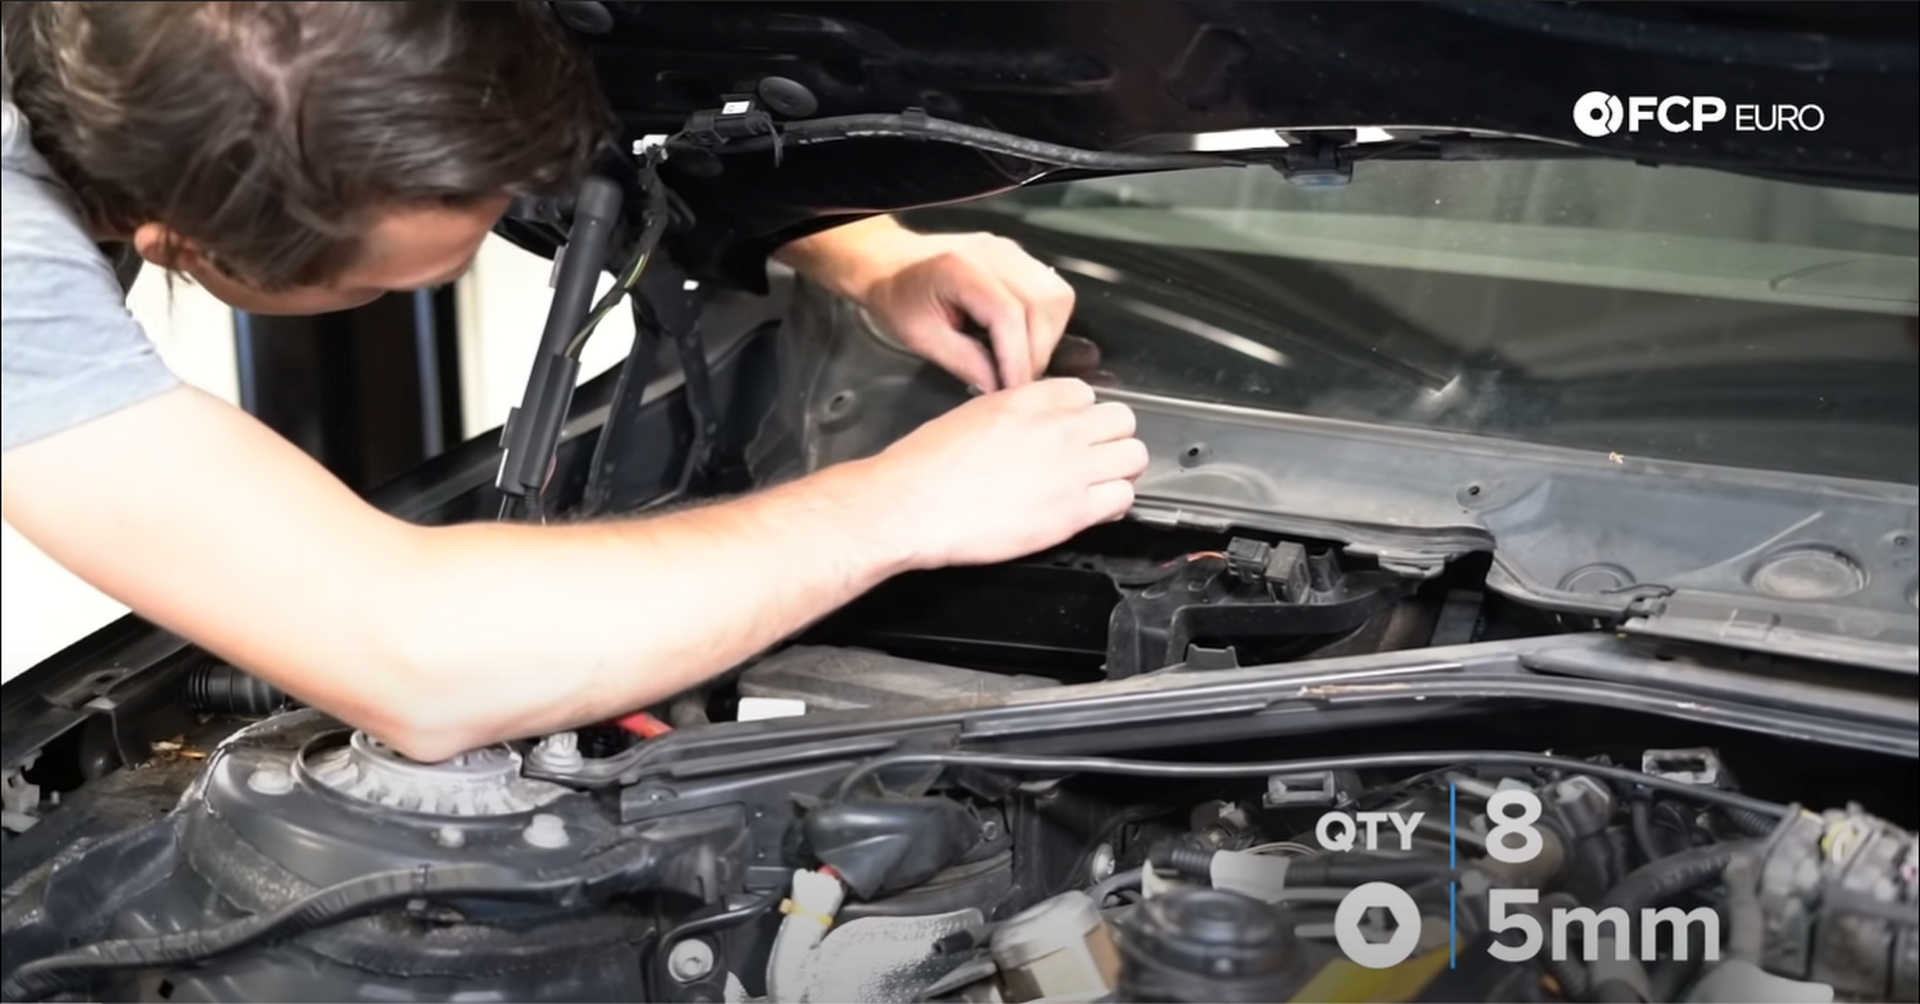
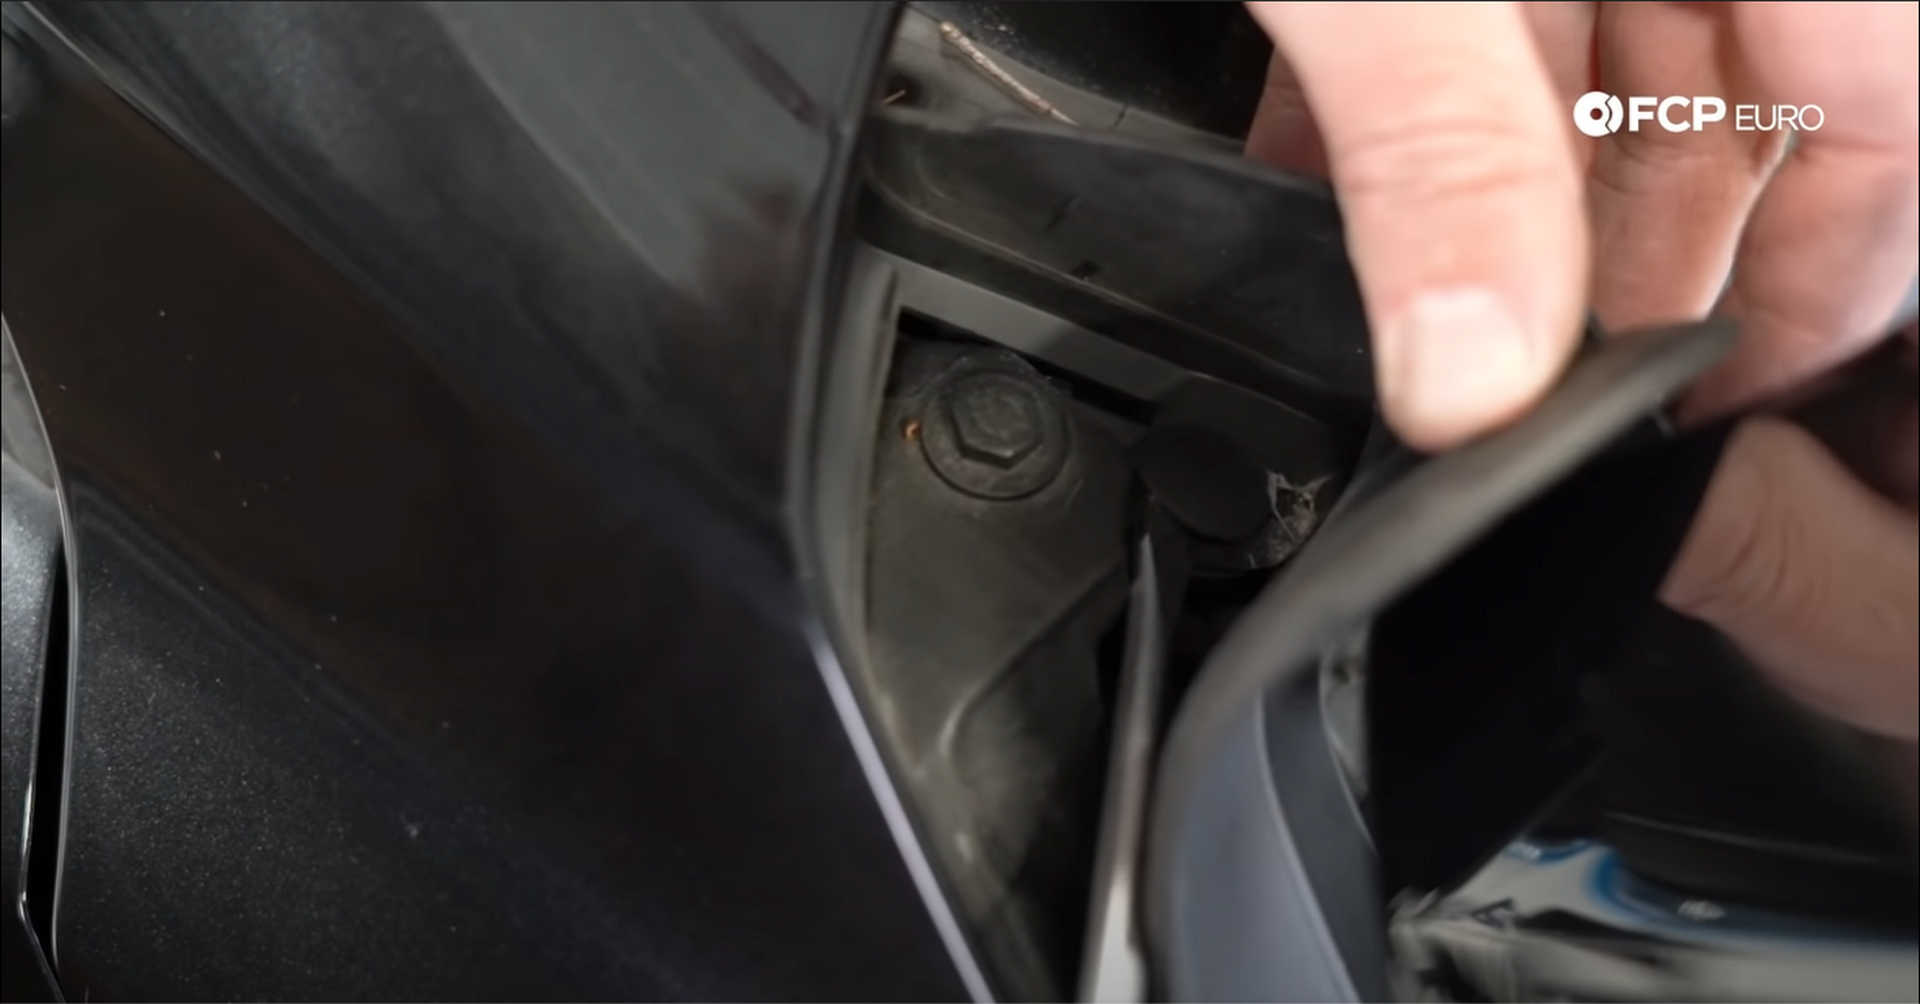
Using a 16mm socket, remove the windshield wiper arms. Then, use a 5mm hex socket or Allen wrench and turn the eight fasteners on the cowl 90° to the left. Doing so will unlock them and allow the cowl to be removed. There are two plastic rivets, one on each corner of the cowl. Remove them with a flat-head screwdriver and pull the cowl off.
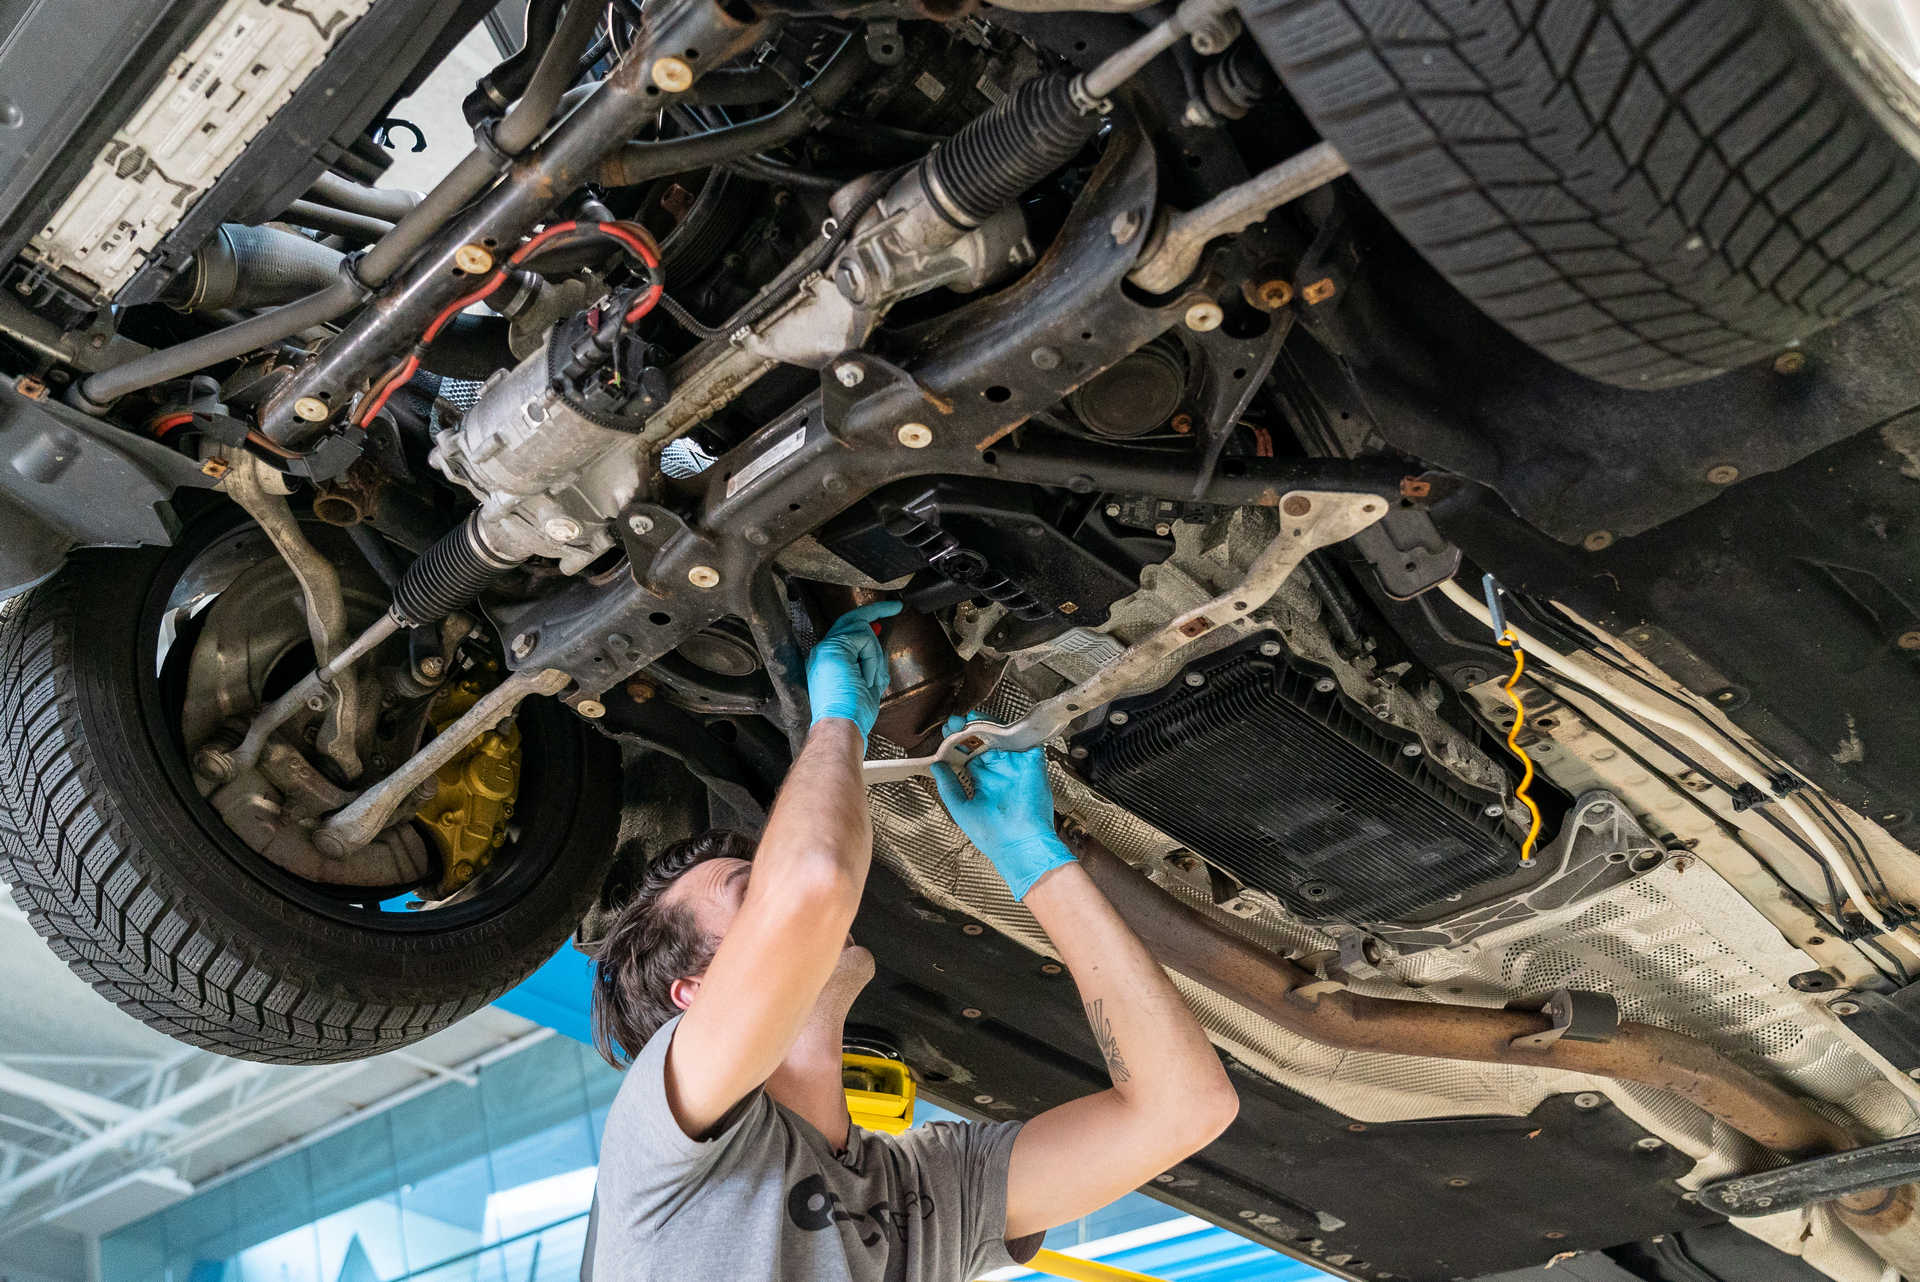
Step 3: Remove the underbody panels
There are several plastic underbody panels that need to be removed in order to access the engine. Jack the car up and place it on jack stands.
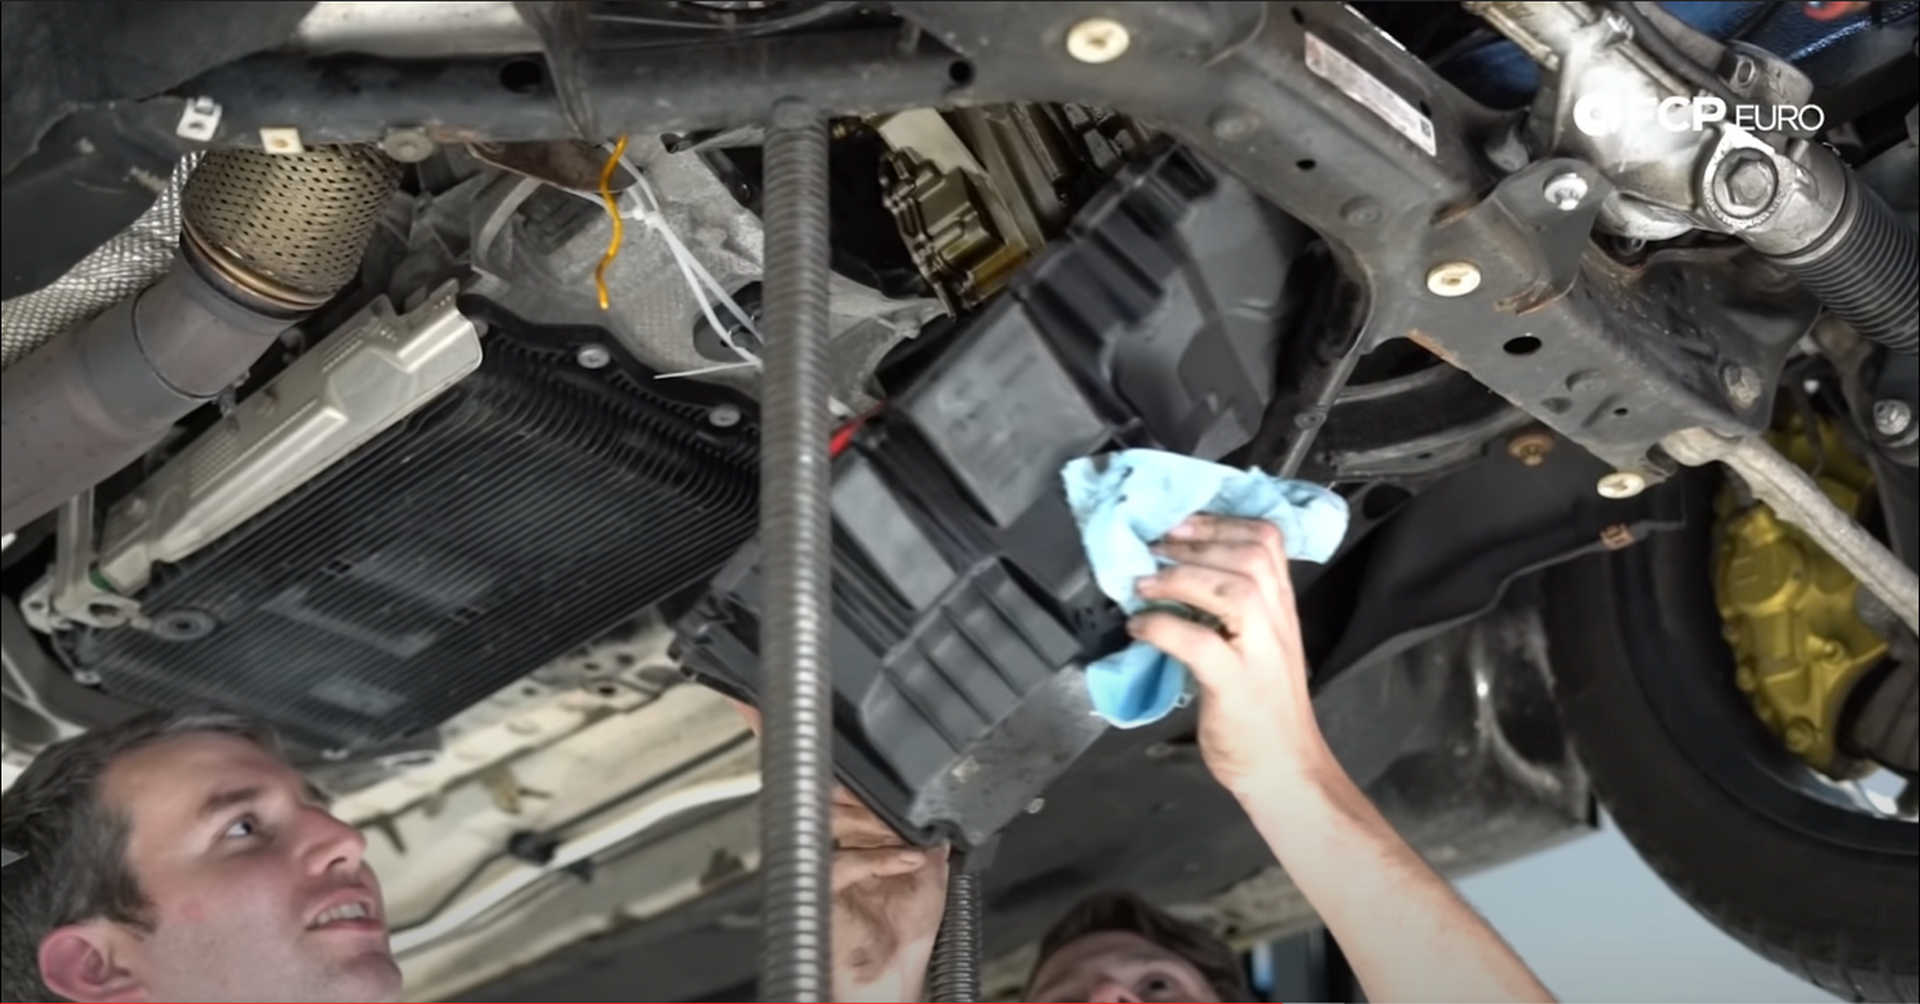
The outer panel is secured to the car with twenty 8mm bolts. When removing the panel, be careful not to get covered in the dirt and debris that may fall out of it. Three 8mm bolts hold the inner panel to the car, while two locating tabs lock the rear in place. Remove the bolts and slide the panel forward to remove it.


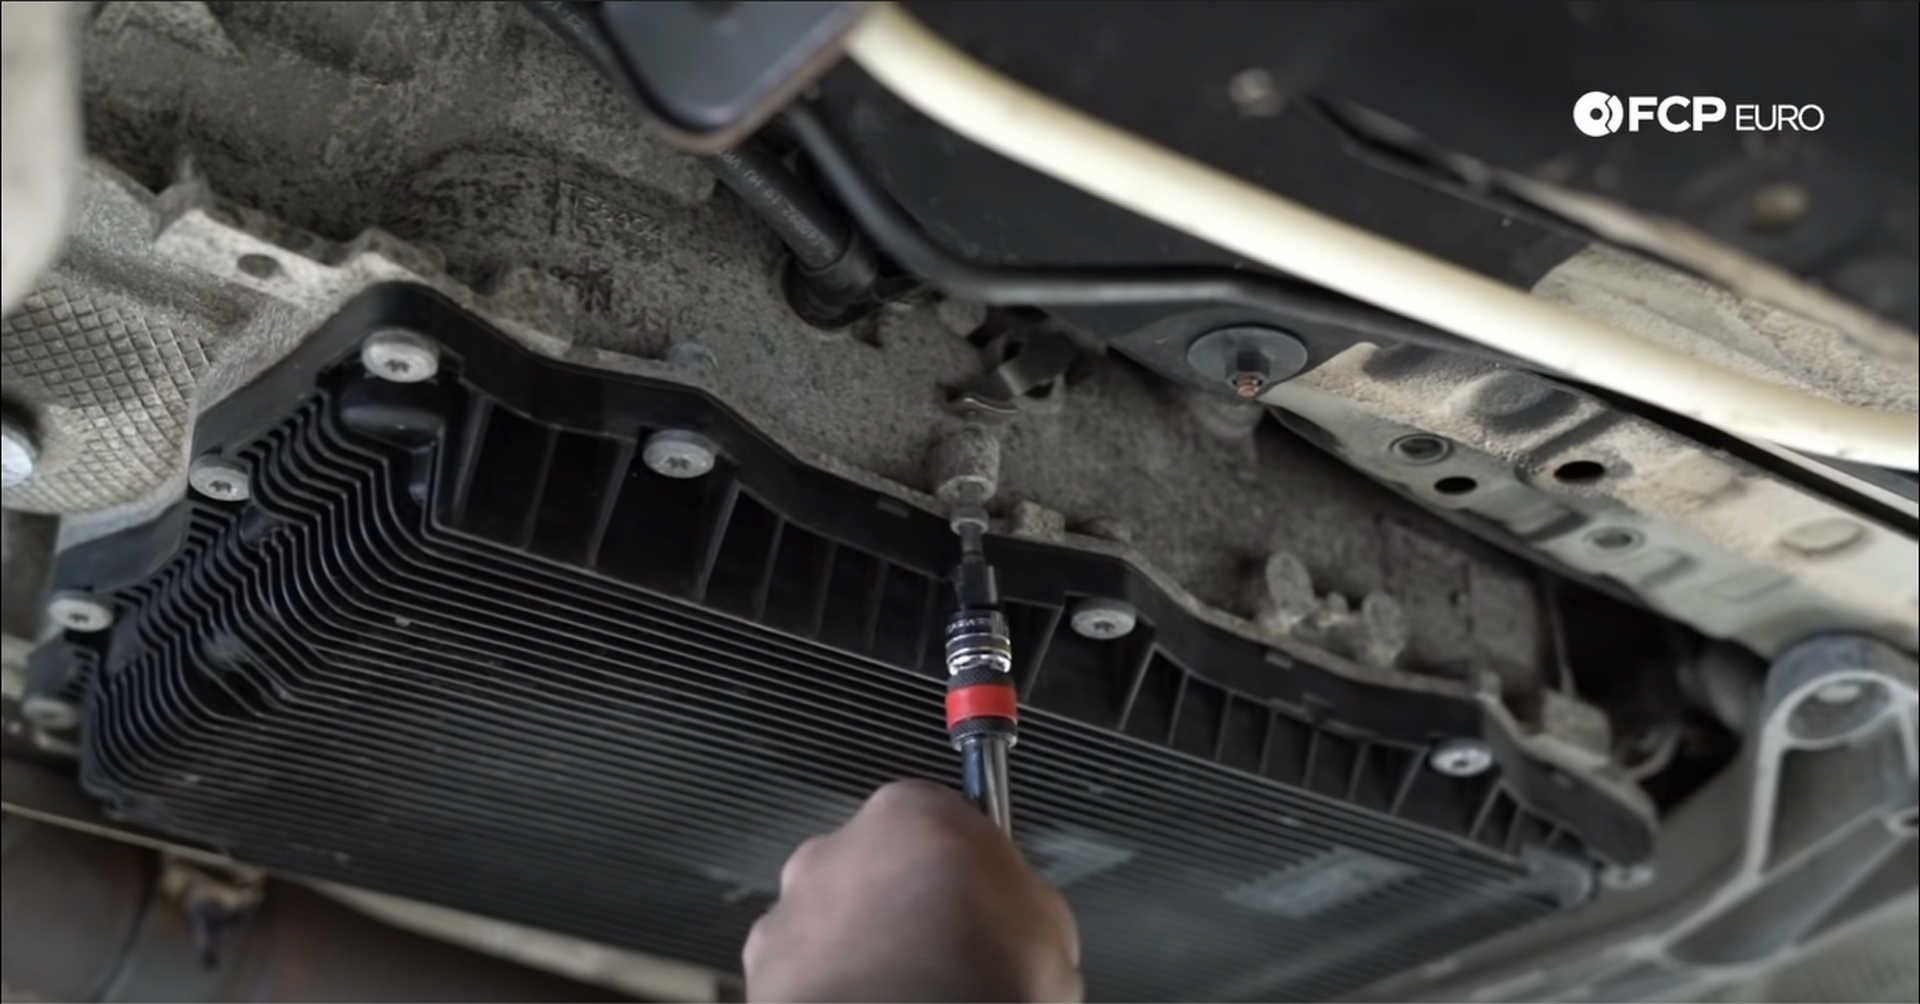
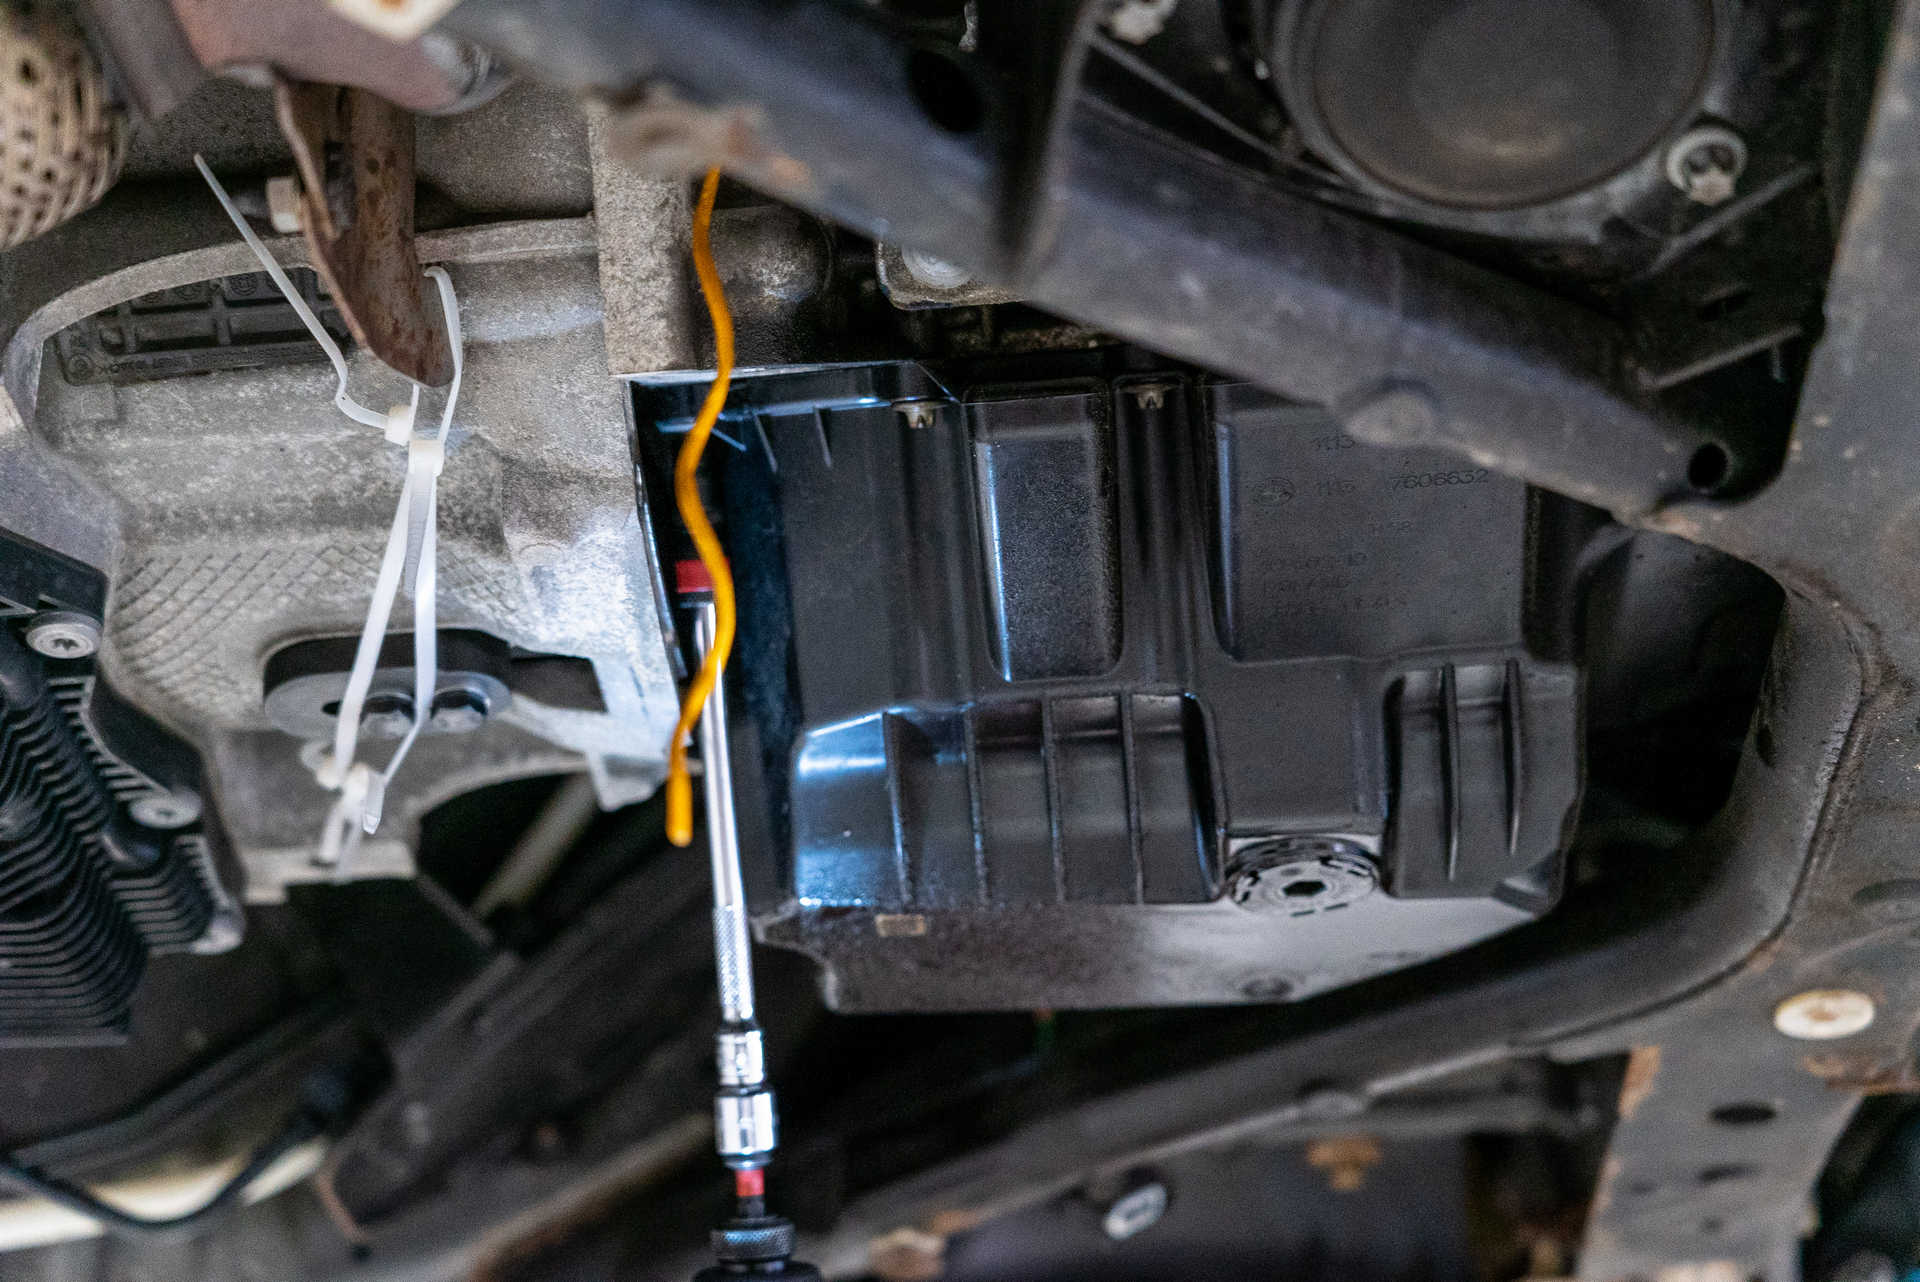
The transmission pan is secured to the body via four 8mm fasteners and a singular 10mm fastener. Remove these fasteners and set the pan aside.

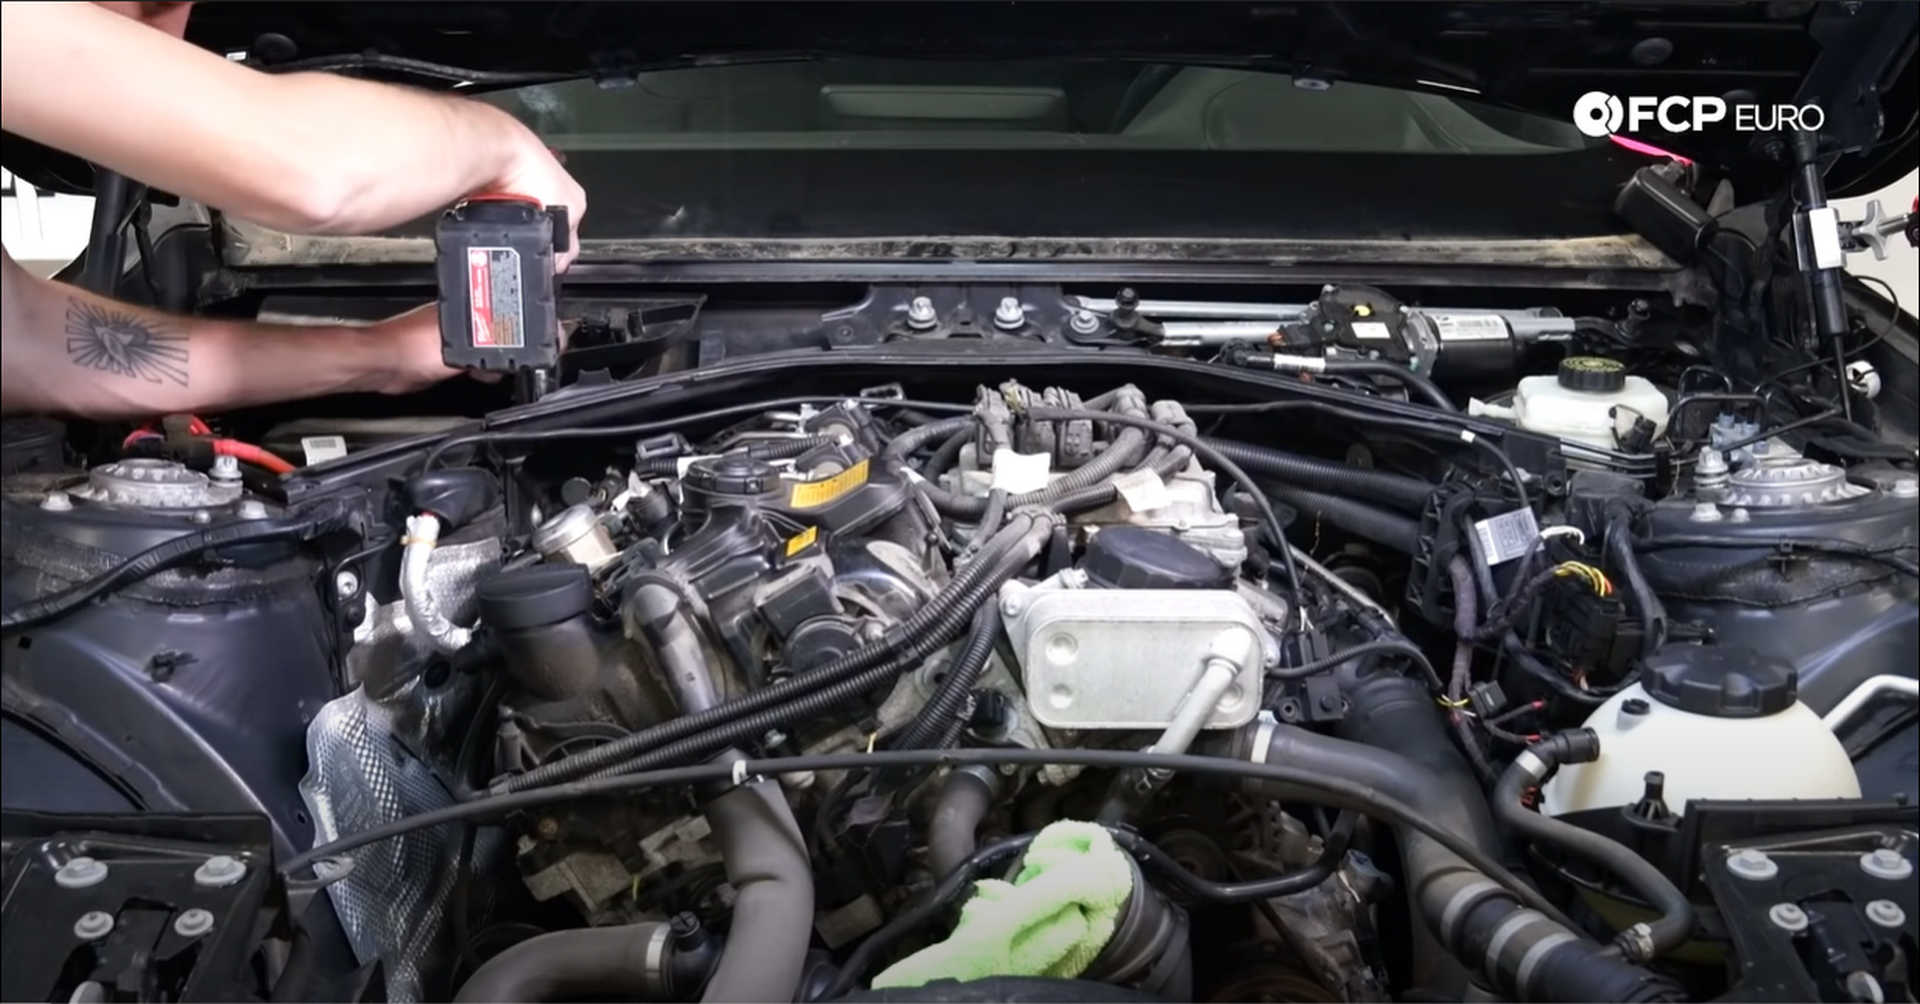
Step 4: Drain the oil and disconnect the battery
The drain plug on the engine is a 10mm hex. Have a drain pan at the ready and remove the drain plug.
Head into the trunk and locate the battery. Using a 10mm wrench, remove the negative cable from the battery, breaking the electrical circuit.
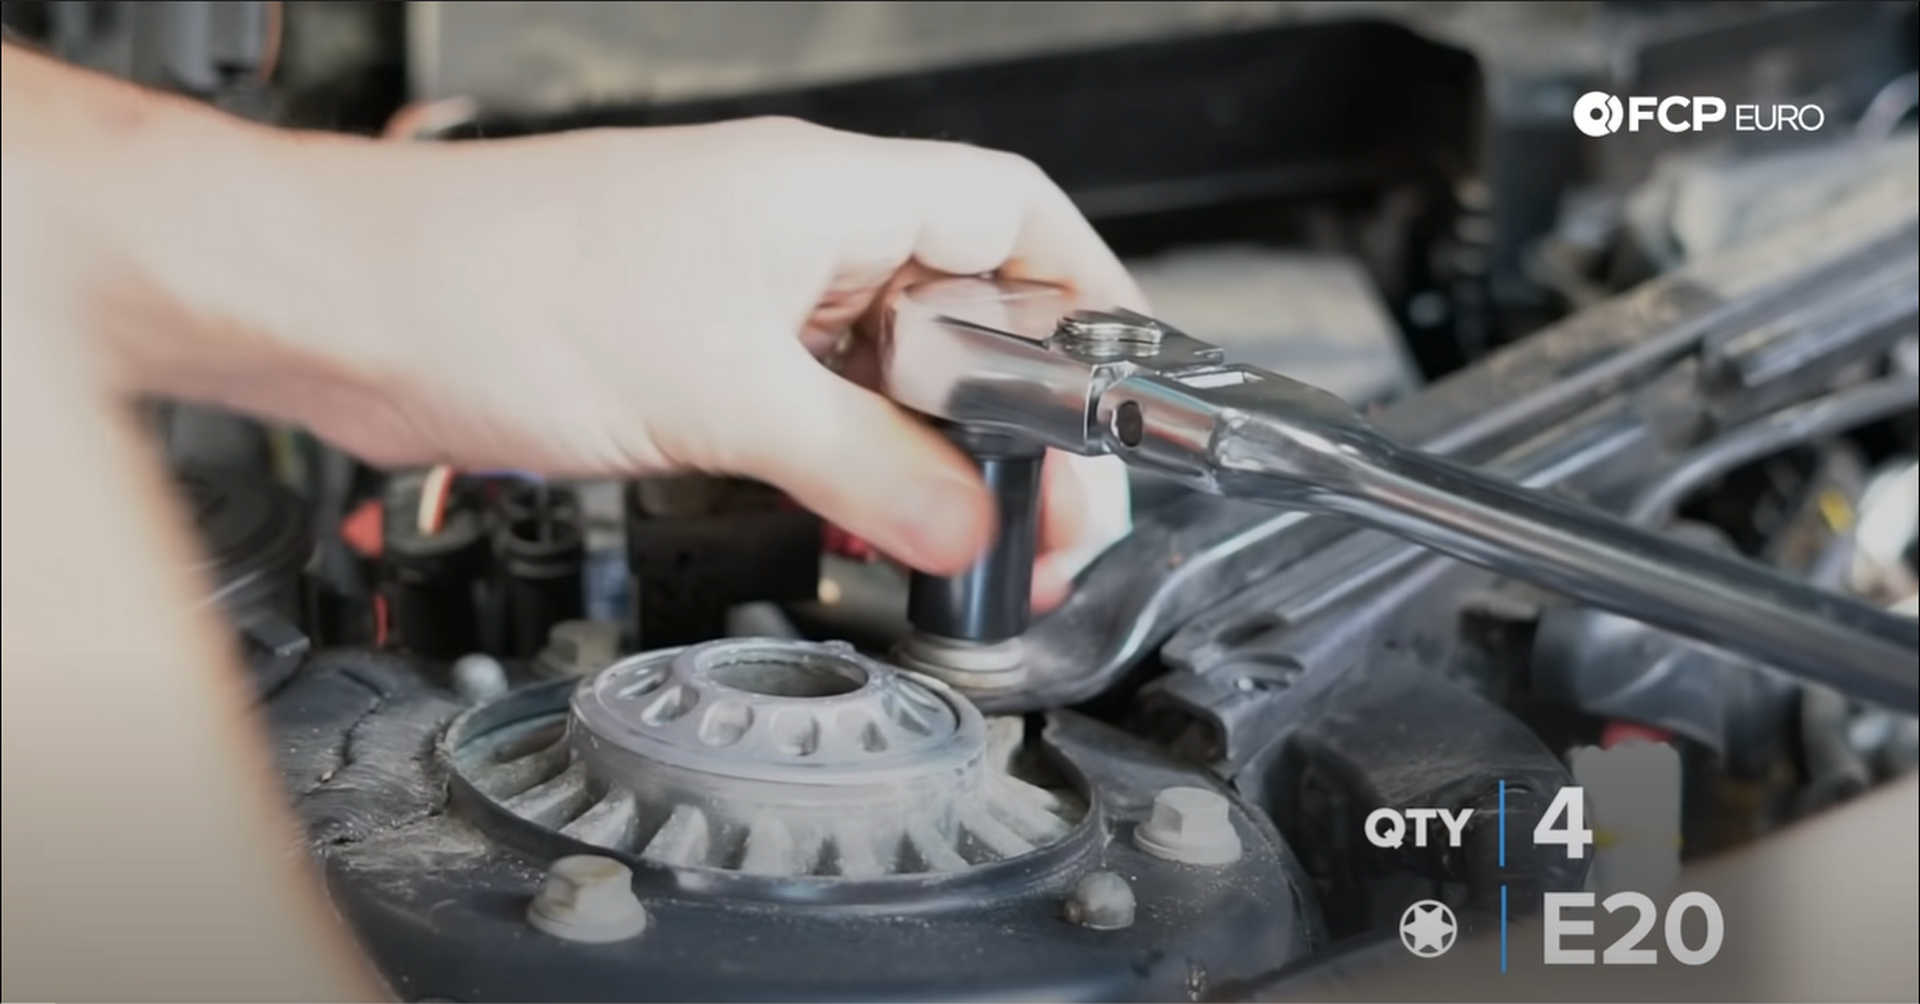
Step 5: Remove the strut brace
Four large E20 bolts mount the strut brace to the car, one on each strut tower and two against the firewall. The smallest part of the brace is held in with six 10mm bolts. Use a socket to remove them and set the brace aside.
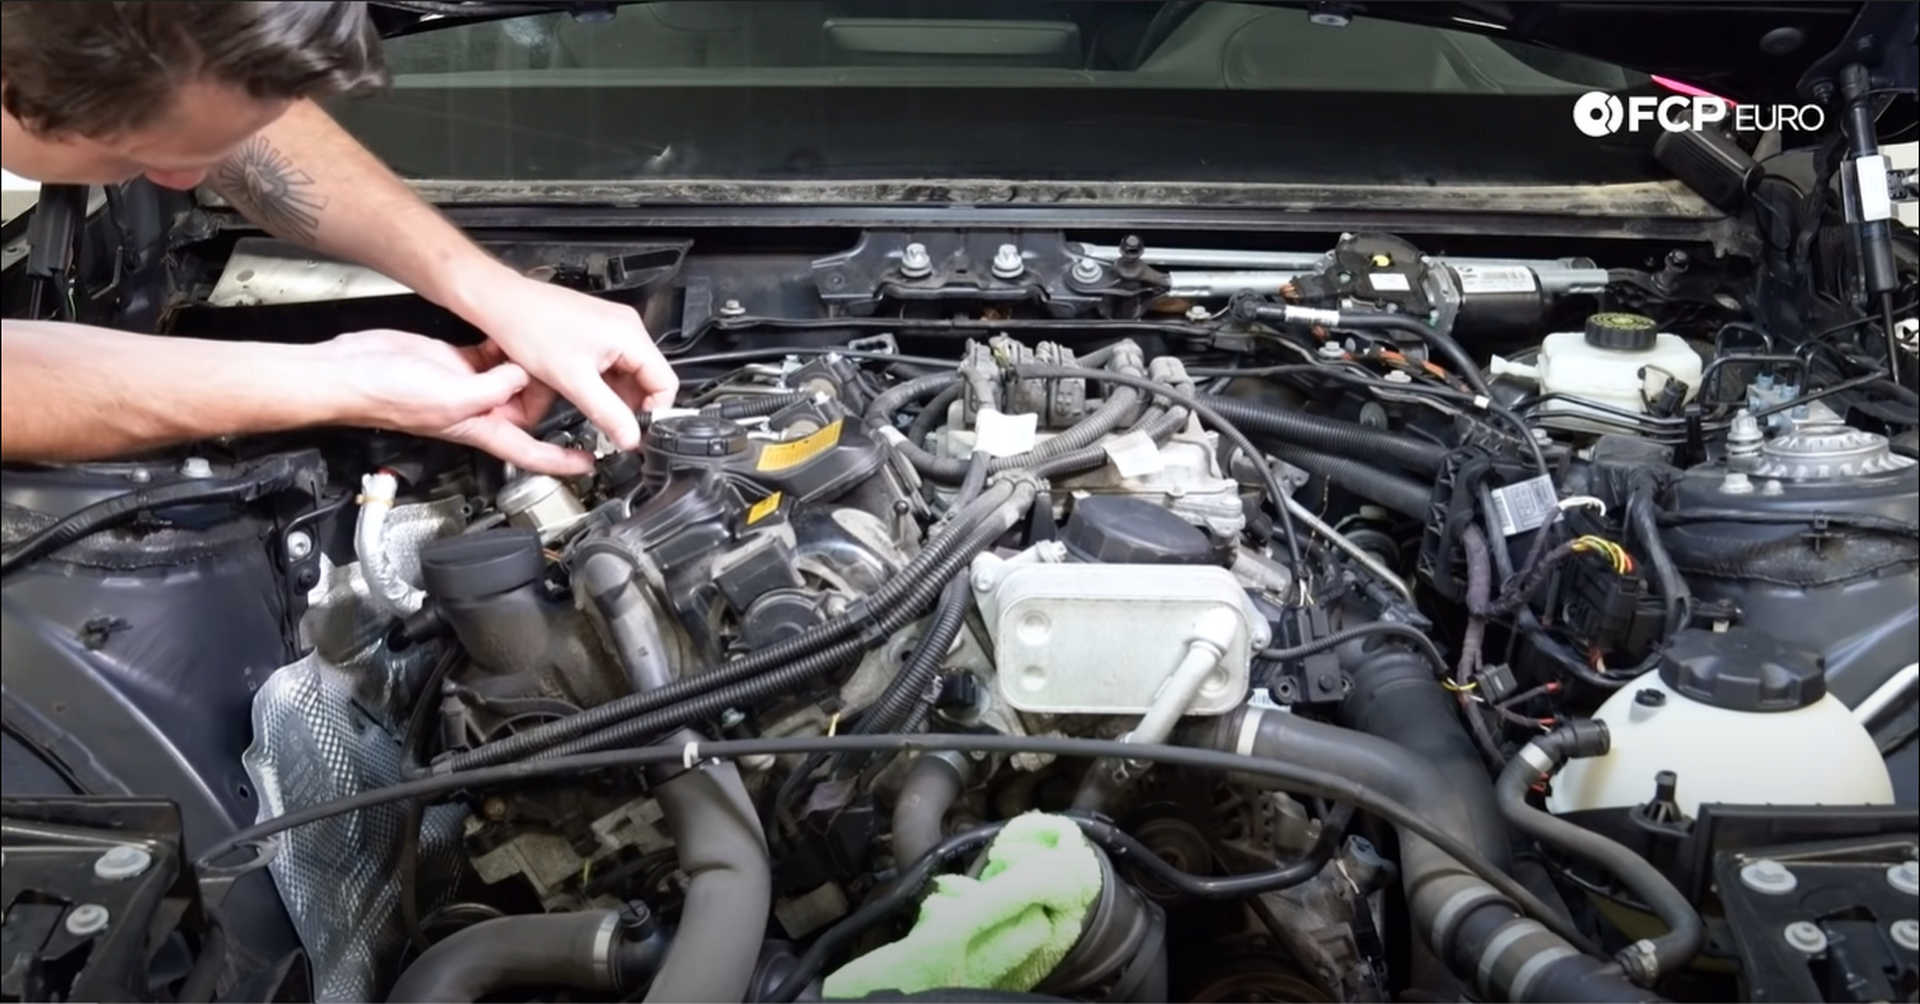
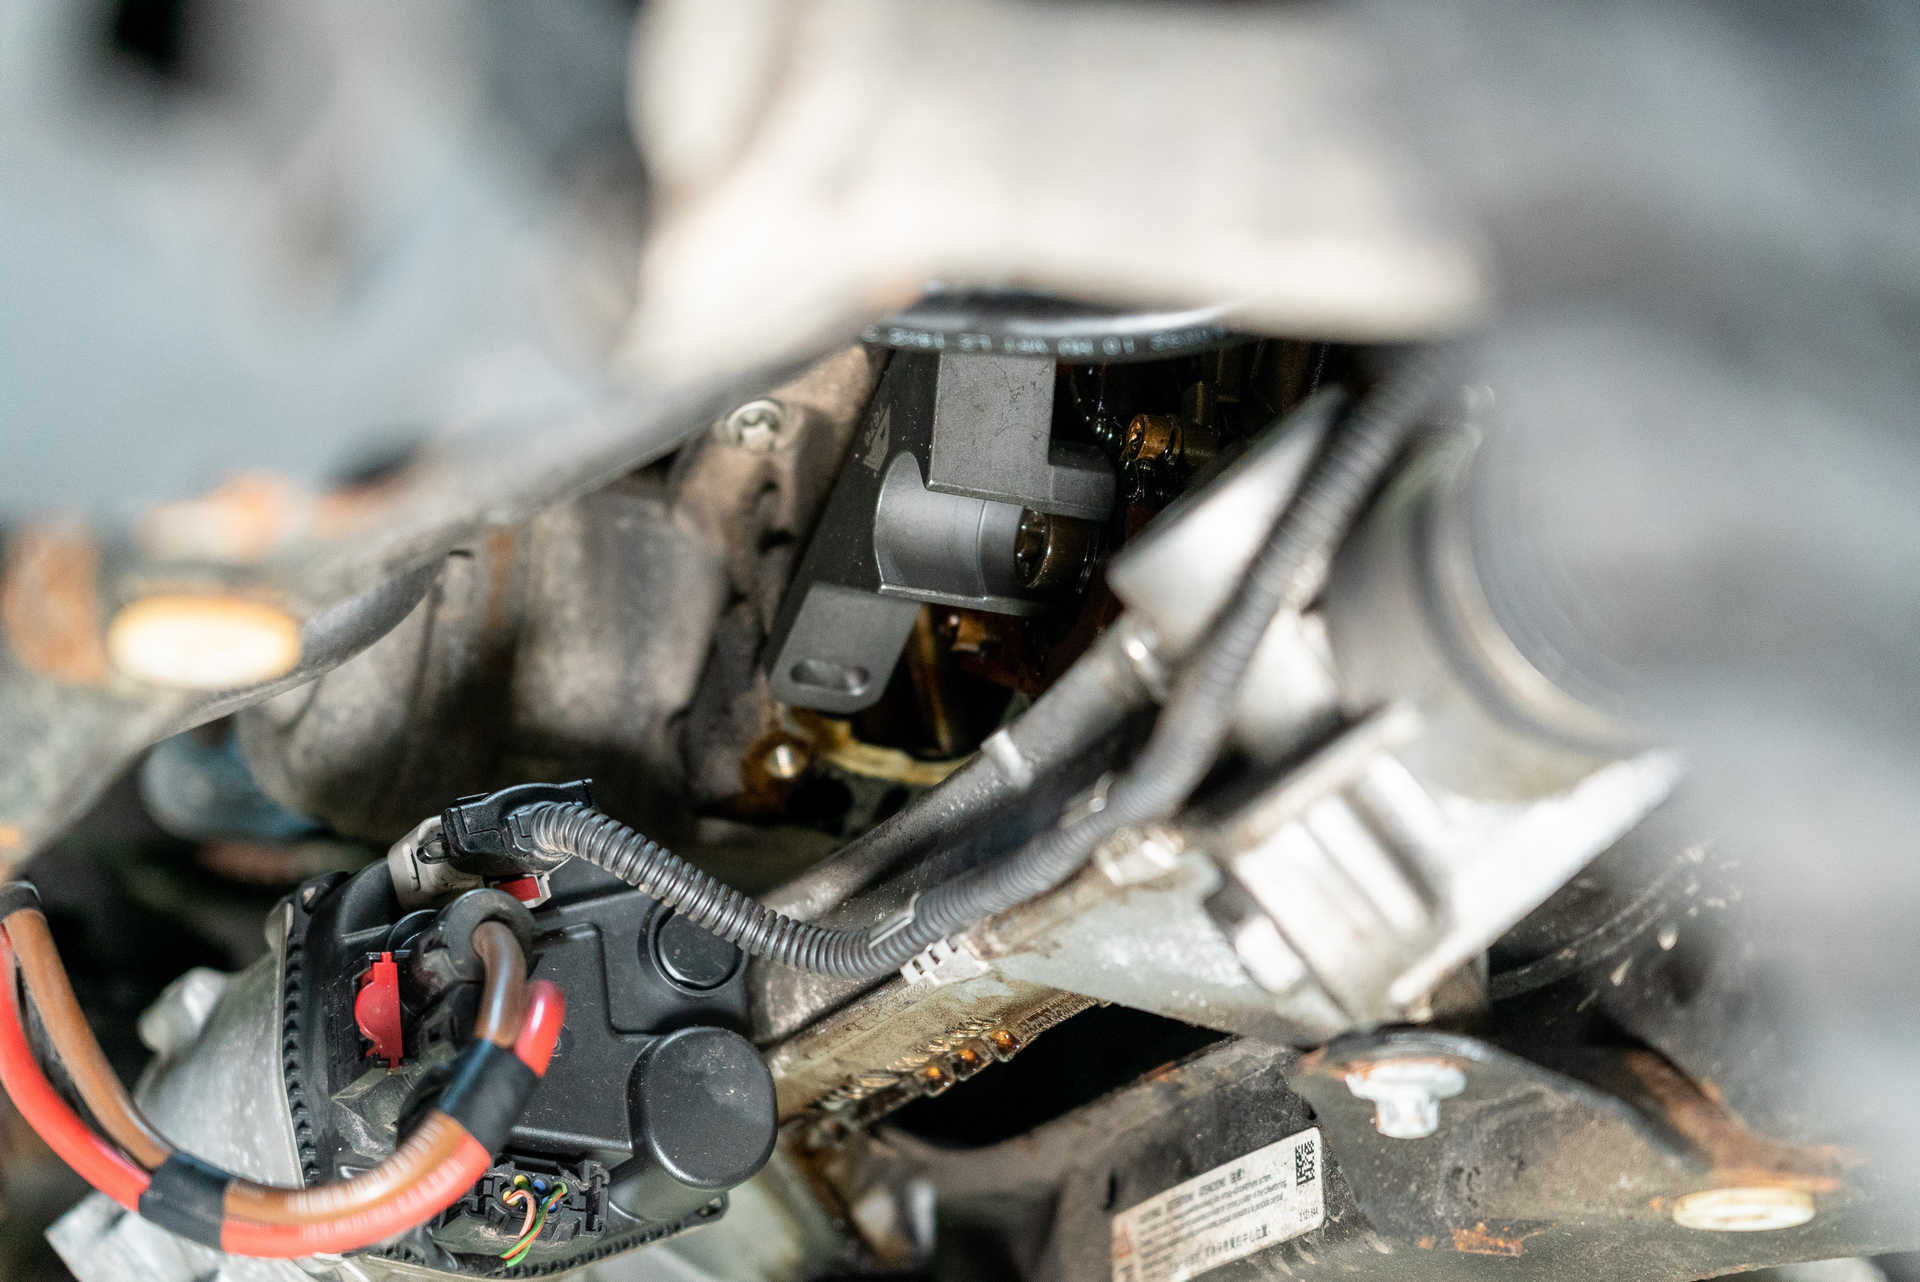
Step 6: Remove the electrical connections from the cylinder head
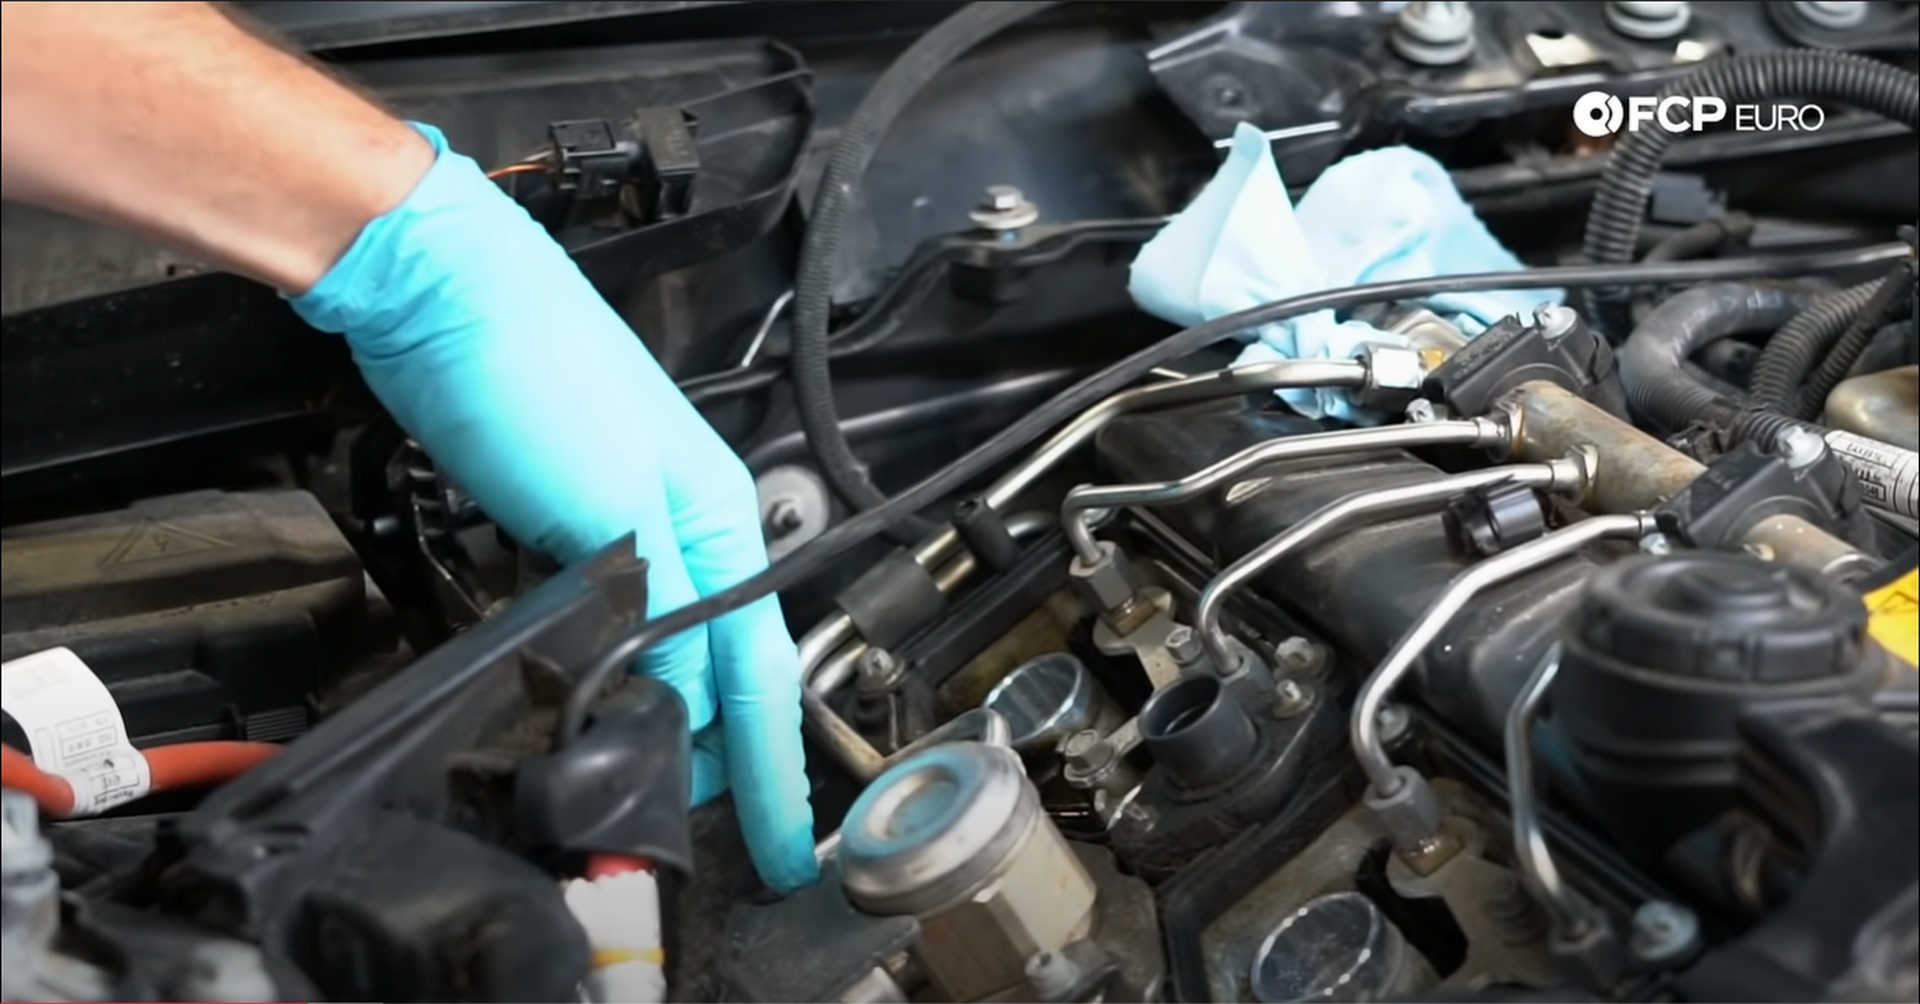
Starting in the center of the valve cover, remove the large round Vanos plug. Push in on its two tabs and pull up. Then, use a flat-blade screwdriver to open the clip securing its wiring to the valve cover, and fold the plug and its harness away from the engine.

Next up is the fuel rail plug. Push down on the tab located on an angle facing the driver’s side and pull the plug off of the rail. A flat-blade screwdriver can help push the tab in while you pull on the plug. Near the back of the engine are two grey rectangular plugs for the oxygen sensors. Push in the tabs on the plugs and separate the connections.

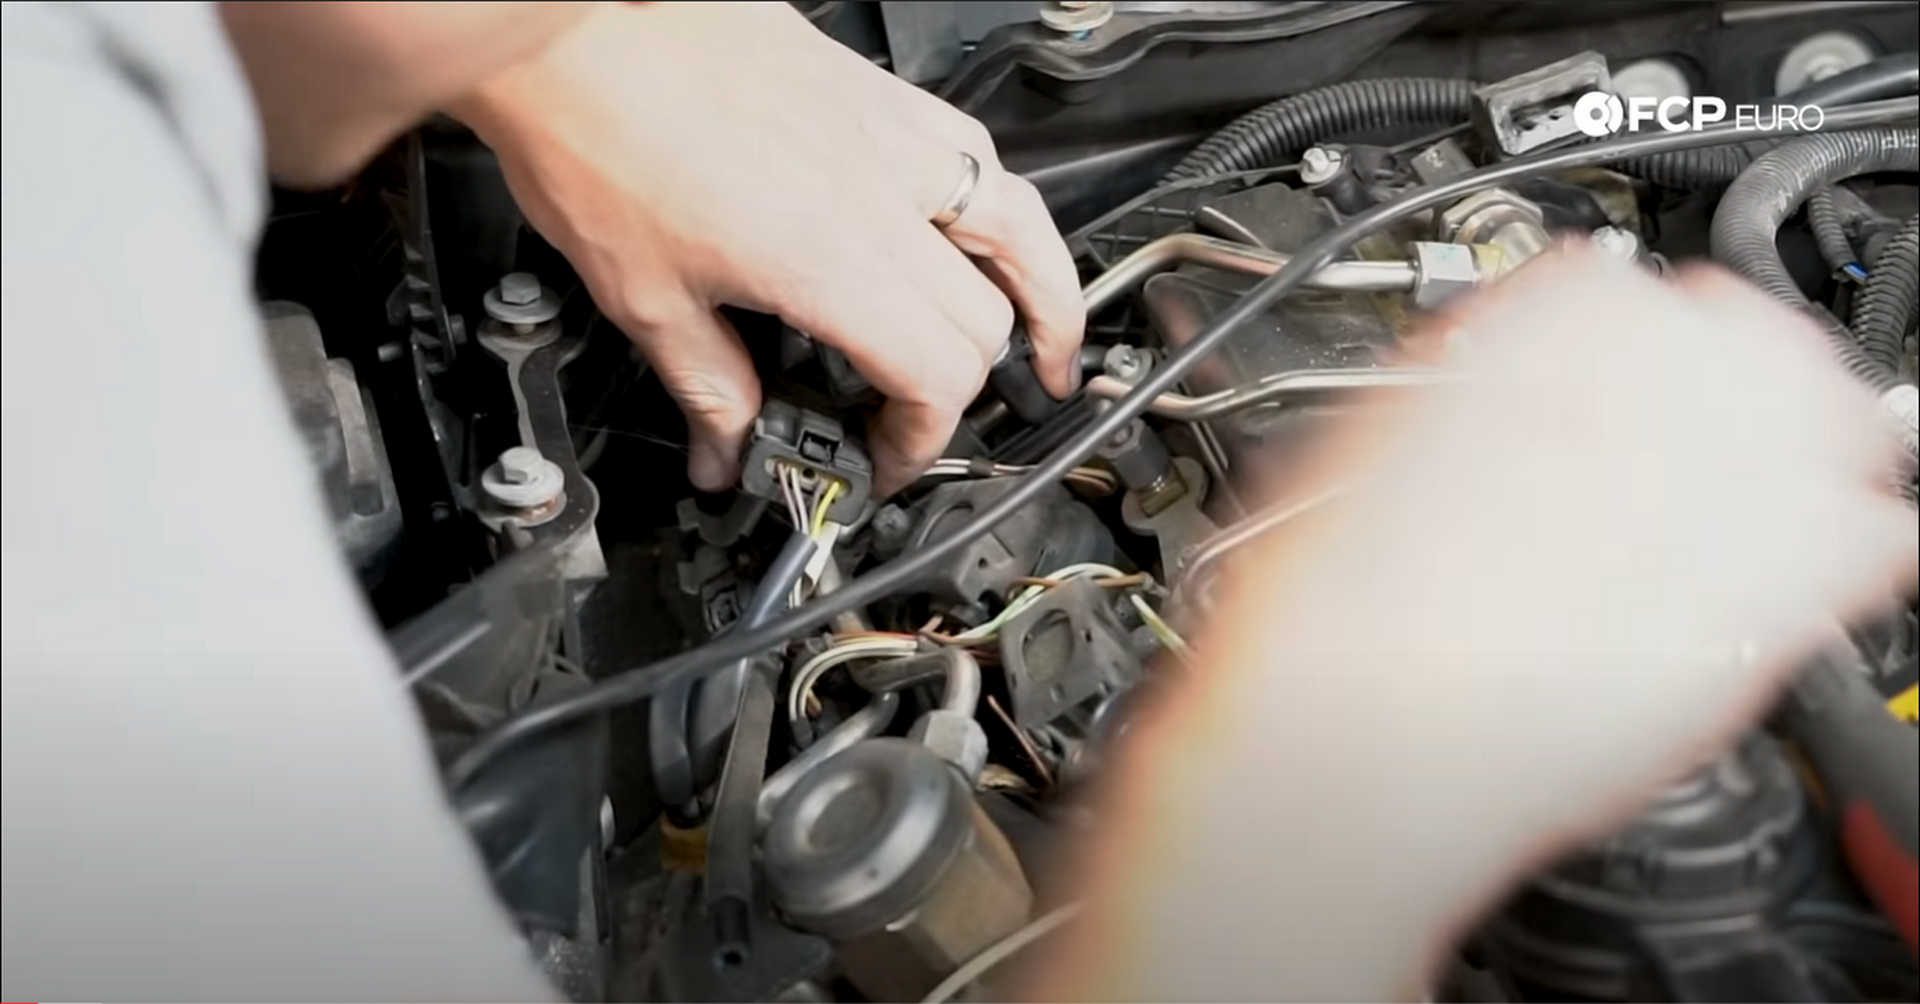
Just beneath the Vanos plug is the high-pressure fuel pump. To the right of the fuel pump, just behind the oil fill, is the boost control solenoid. Disconnect the wiring from both of them. The wiring harness from both of these plugs is clipped into the valve cover, below, and to the left of the fuel pump. Use a flat-blade screwdriver to pop the clip out and fold the harness away from the valve cover.

The wiring harness for the last few plugs runs along the back of the valve cover and is secured to it via a bracket. Use an E6 socket to remove the three fasteners mounting the bracket to the valve cover and then move the harness towards the driver’s side of the car, away from the engine.
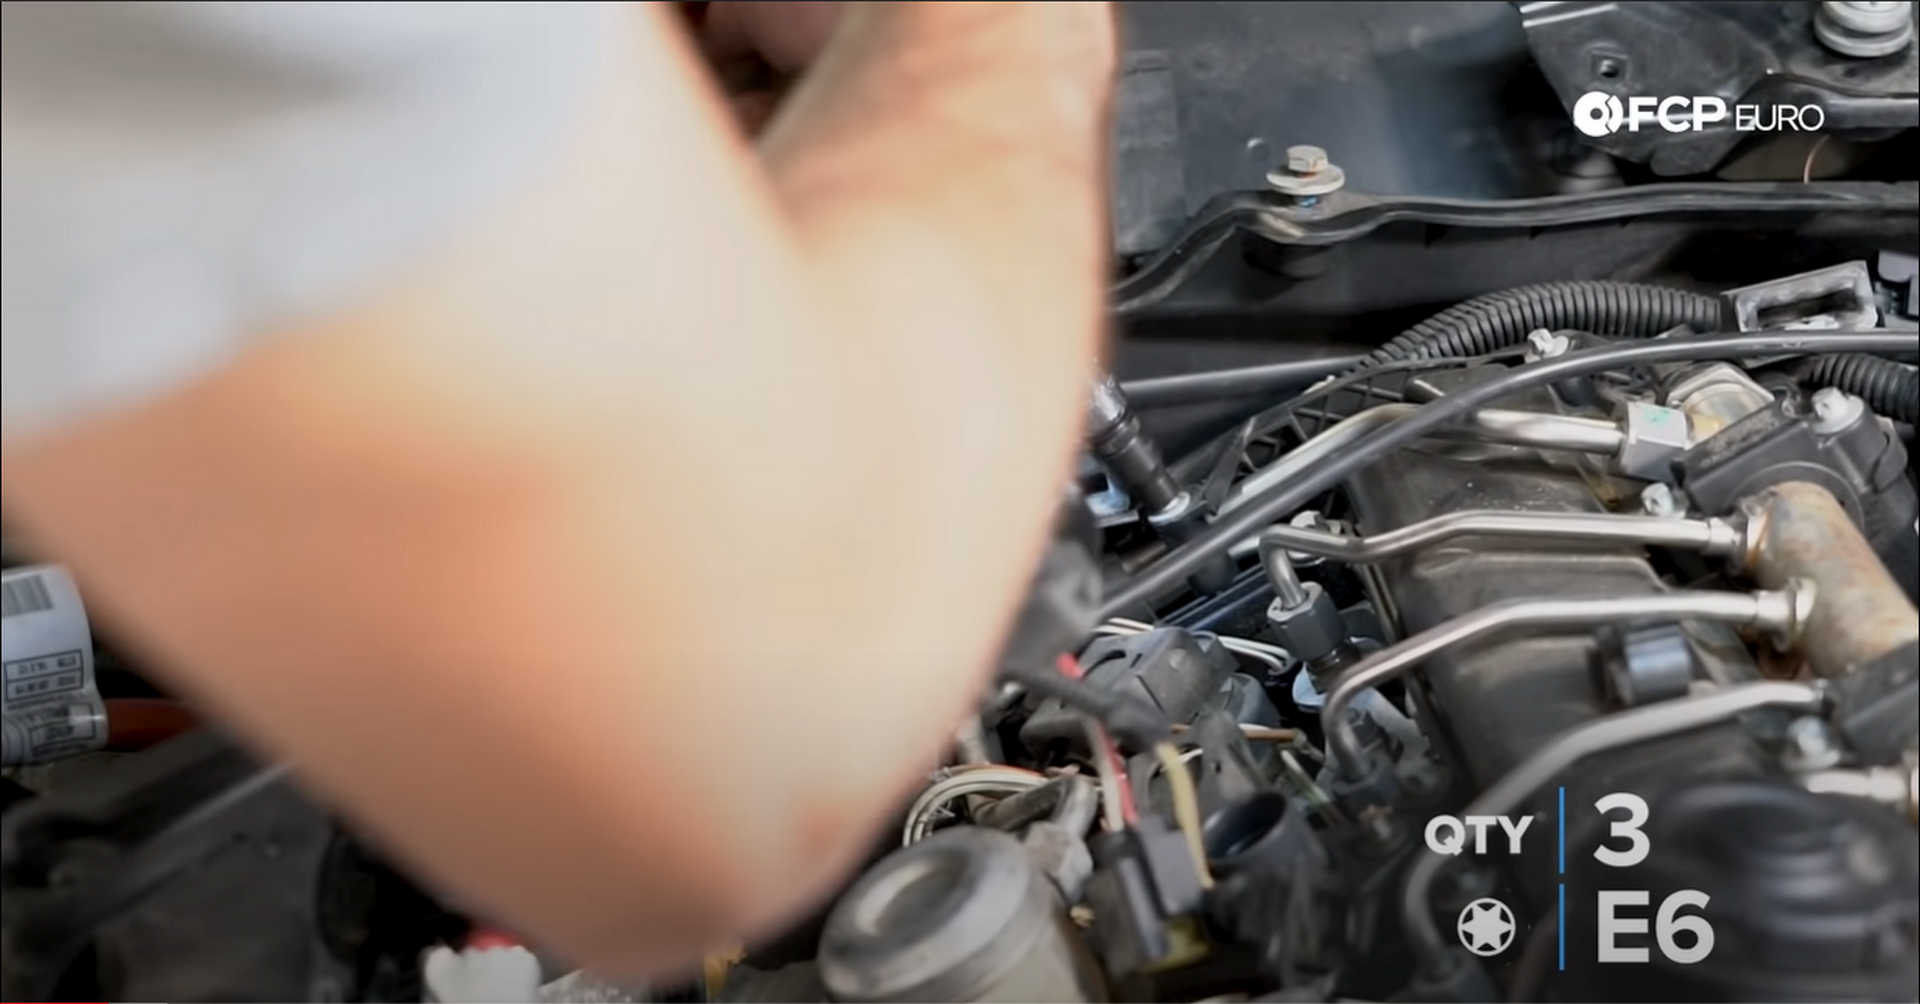
Now that the rear harness has been removed, the front harness is next. Each cylinder has an ignition coil, a fuel injector, and a ground wire. To remove their electrical connections, pull back on their tabs and pull out on the connections. Use an 8mm socket to remove the grounds. This harness is clipped to the valve cover at its lowest point. Use a screwdriver or pick to free the harness and pull it around the front of the engine.
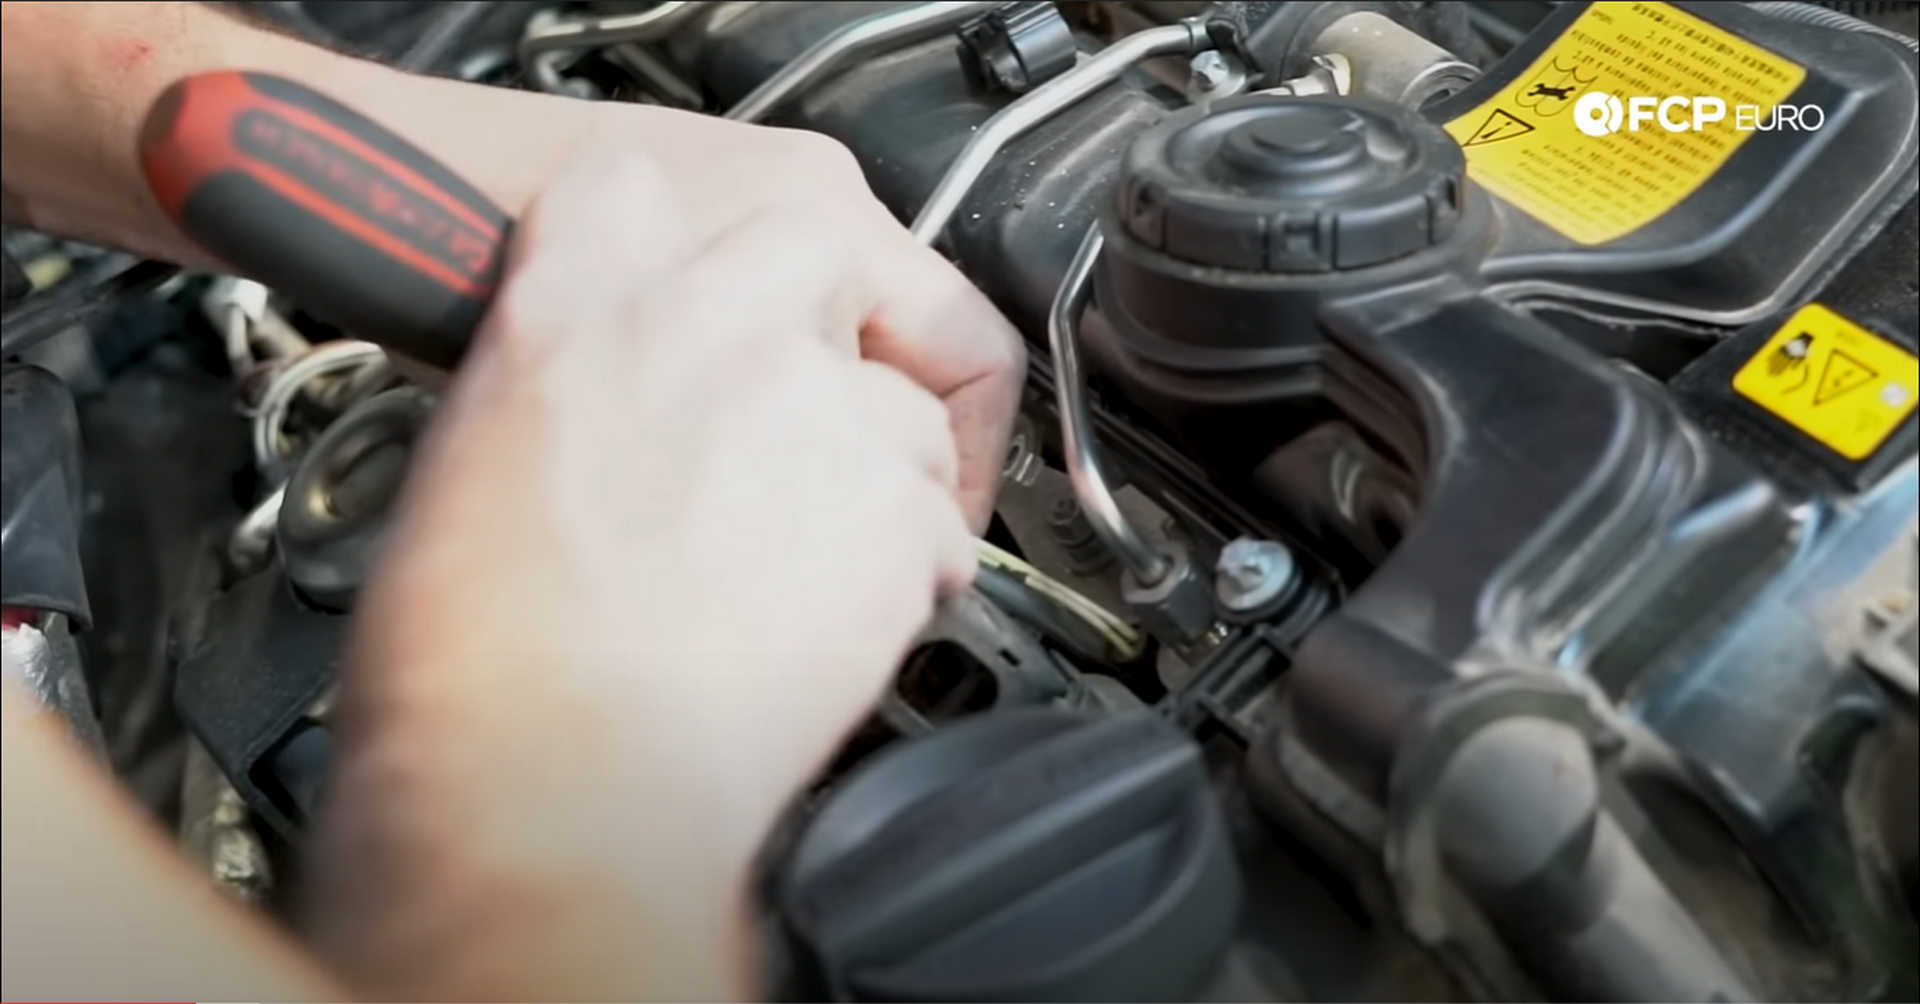
Next up, the boost control solenoid and wastegate actuator need to be removed. Use a T30 bit to remove the two fasteners mounting the solenoid to the engine. Set that out of the way and use a 10mm wrench or socket to get to the three bolts on the back of the actuator. Unclip the wastegate rod from the turbocharger and pull the actuator and solenoid out of the engine bay.

Lastly, pull the four ignition coils out from the engine.
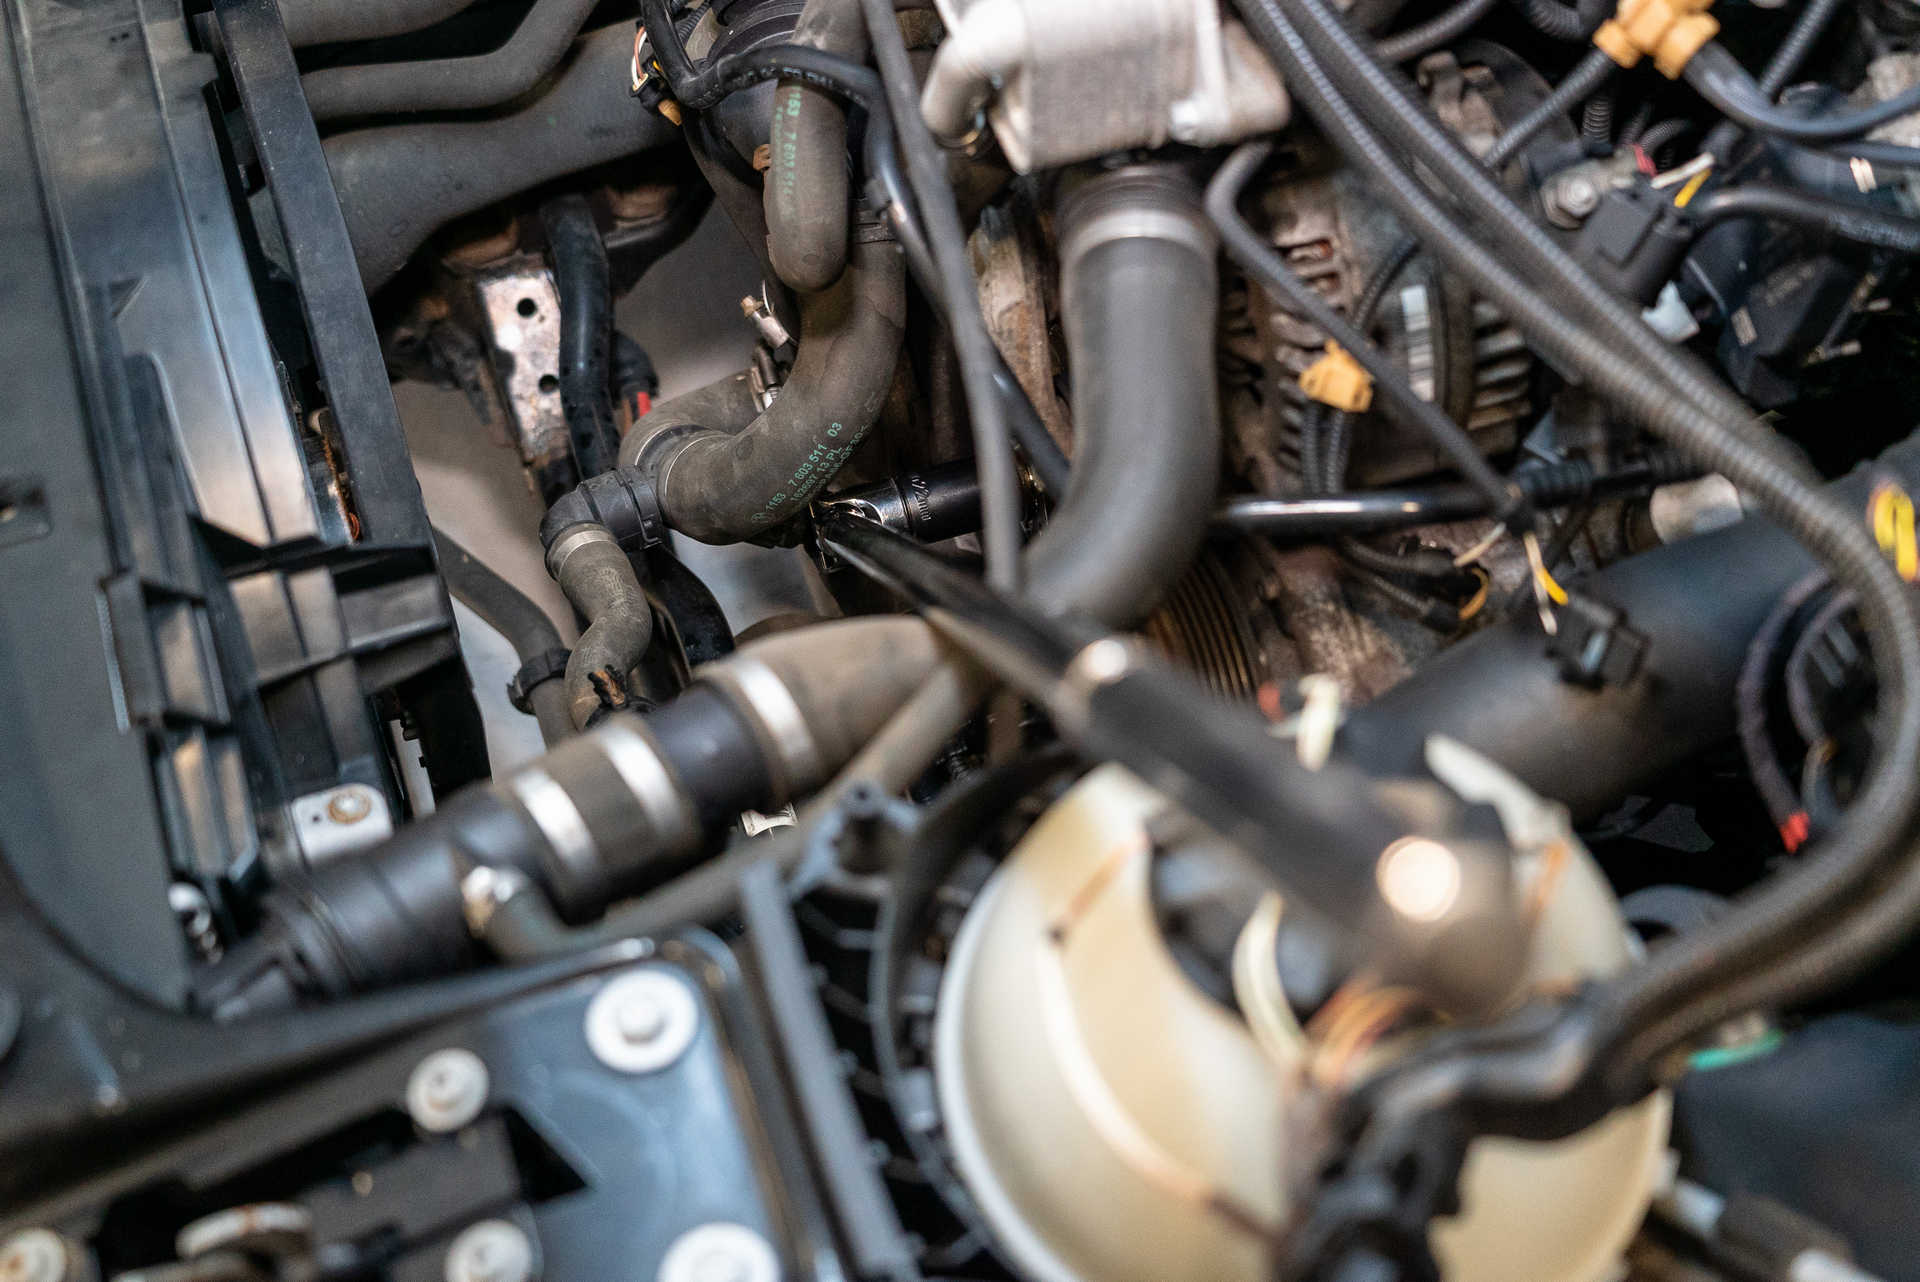
Step 7: Remove the fuel delivery system
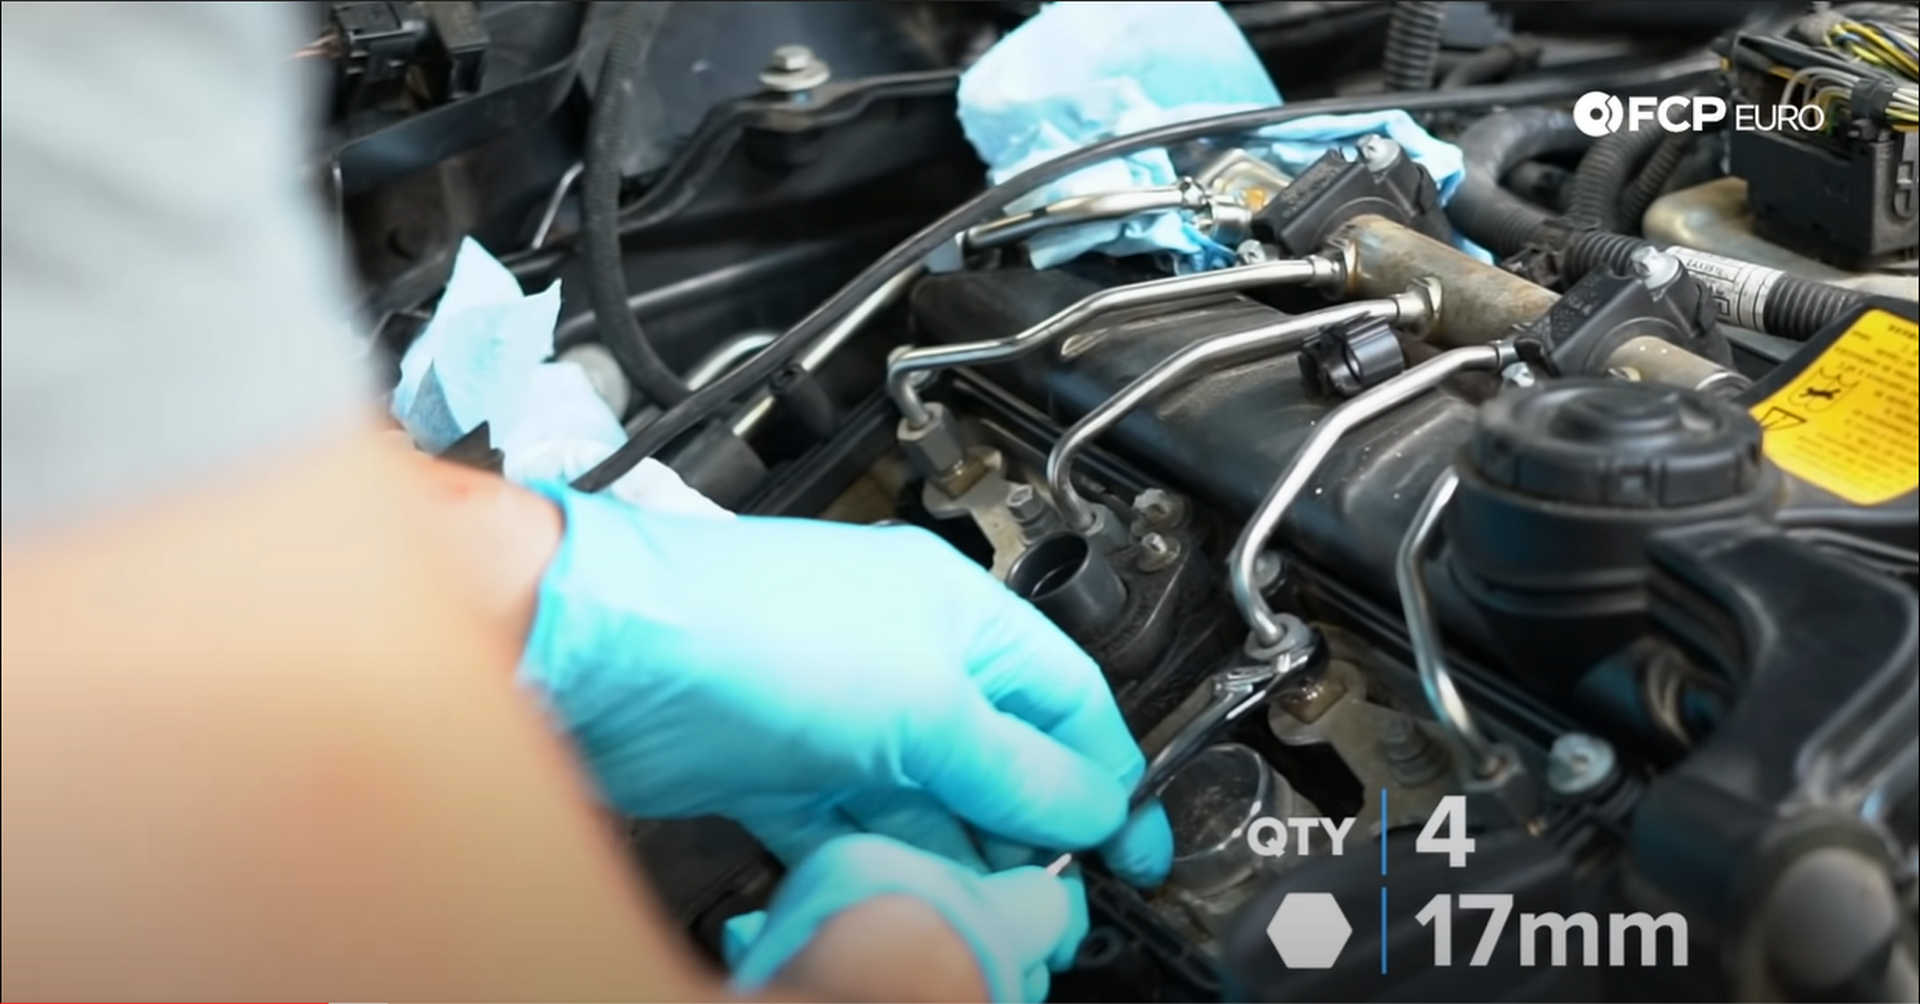
The fuel delivery system can now be removed with the wiring out of the way. Using a 17mm wrench, disconnect the fuel line going from the high-pressure fuel pump to the fuel rail, the feed line to the fuel pump. Grab a rag or six as there is fuel in these lines, and it is under pressure.
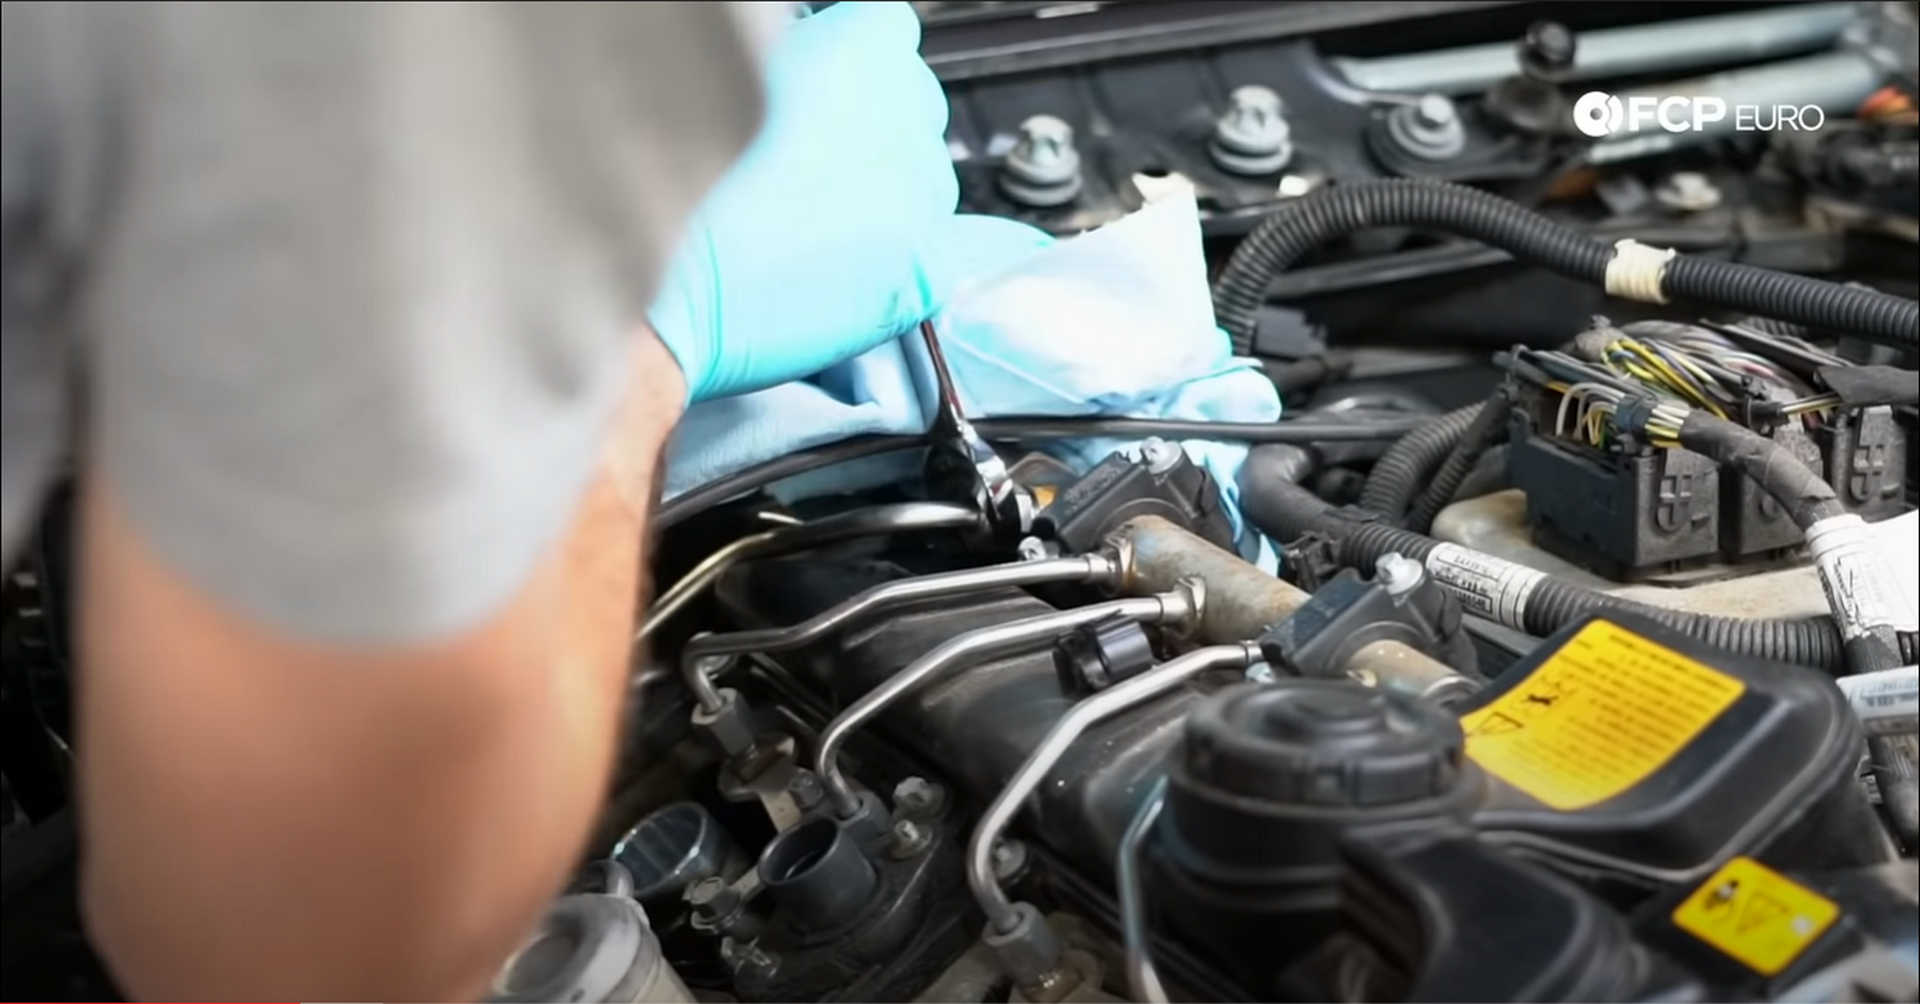
Next, loosen the fuel lines from the injectors with a 17mm wrench. Have even more rags ready for the fuel that will come out of the lines.
The fuel rail is secured to the valve cover via four E8 fasteners. Remove them and pull the fuel rail off of the engine. Remove the fuel pump from the cover using a T30 socket to remove its two mounting bolts.
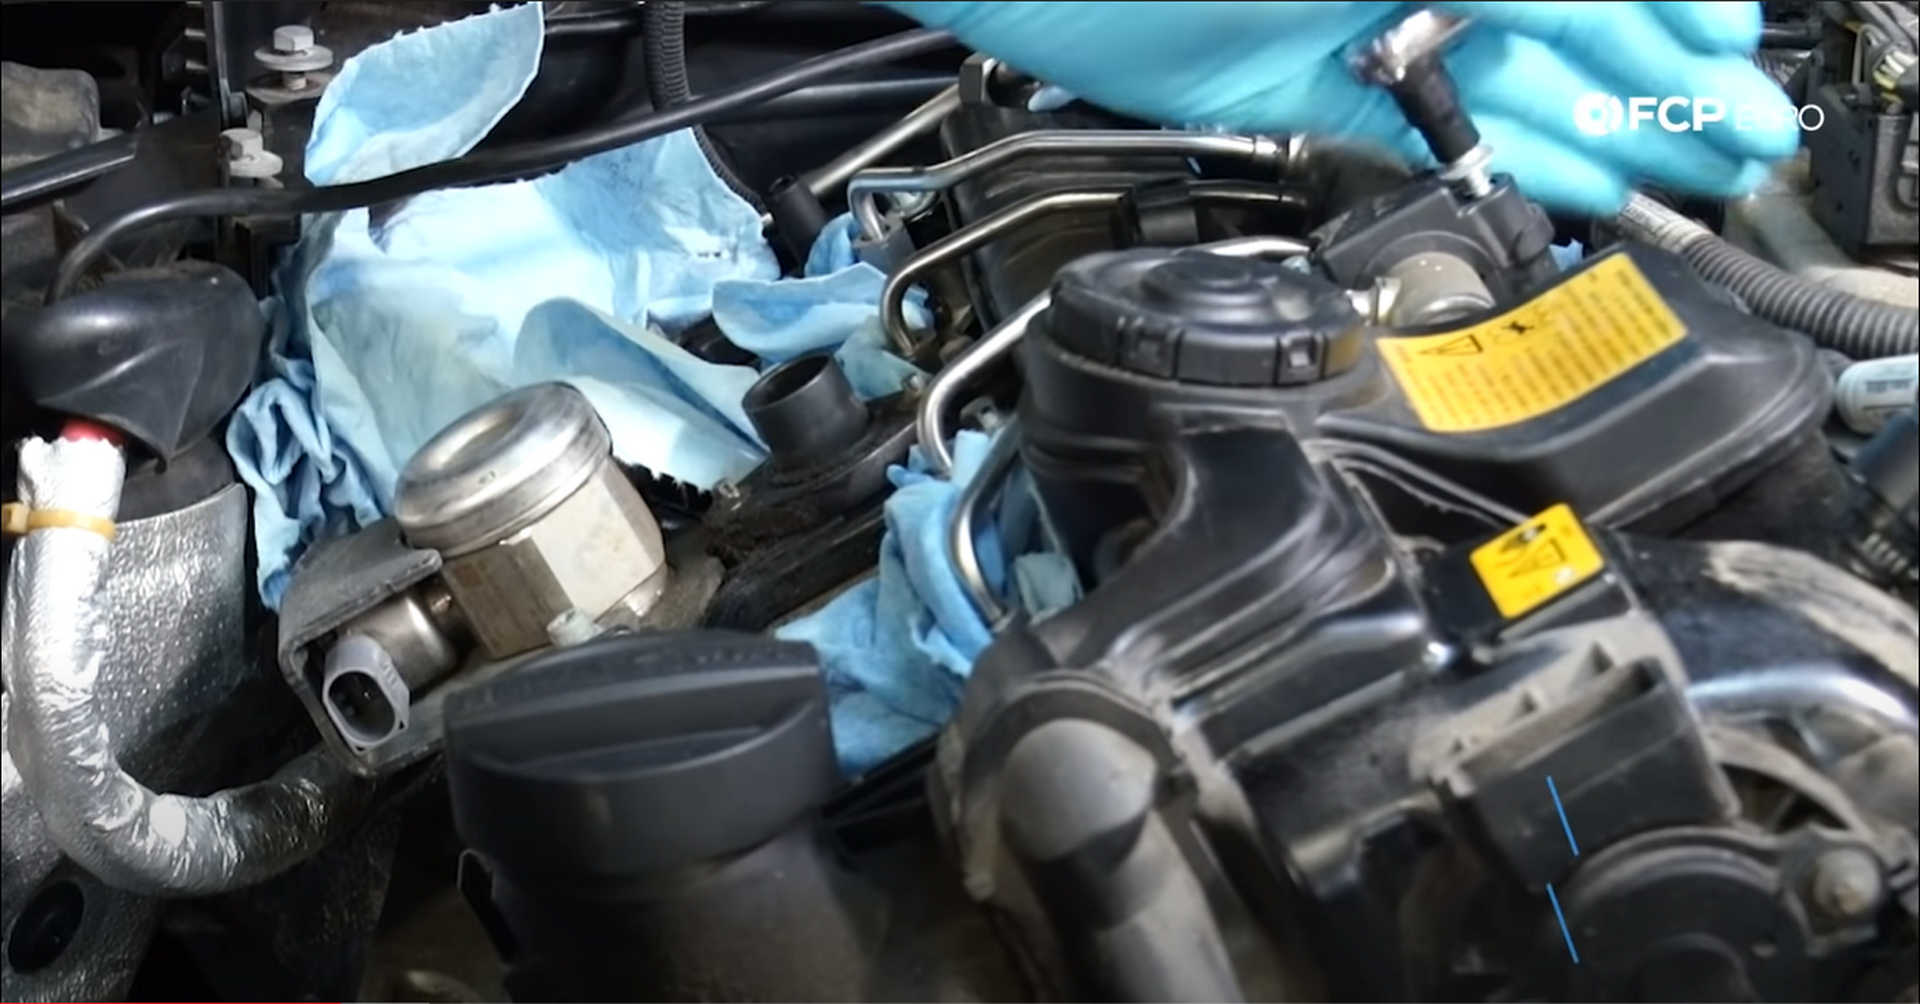
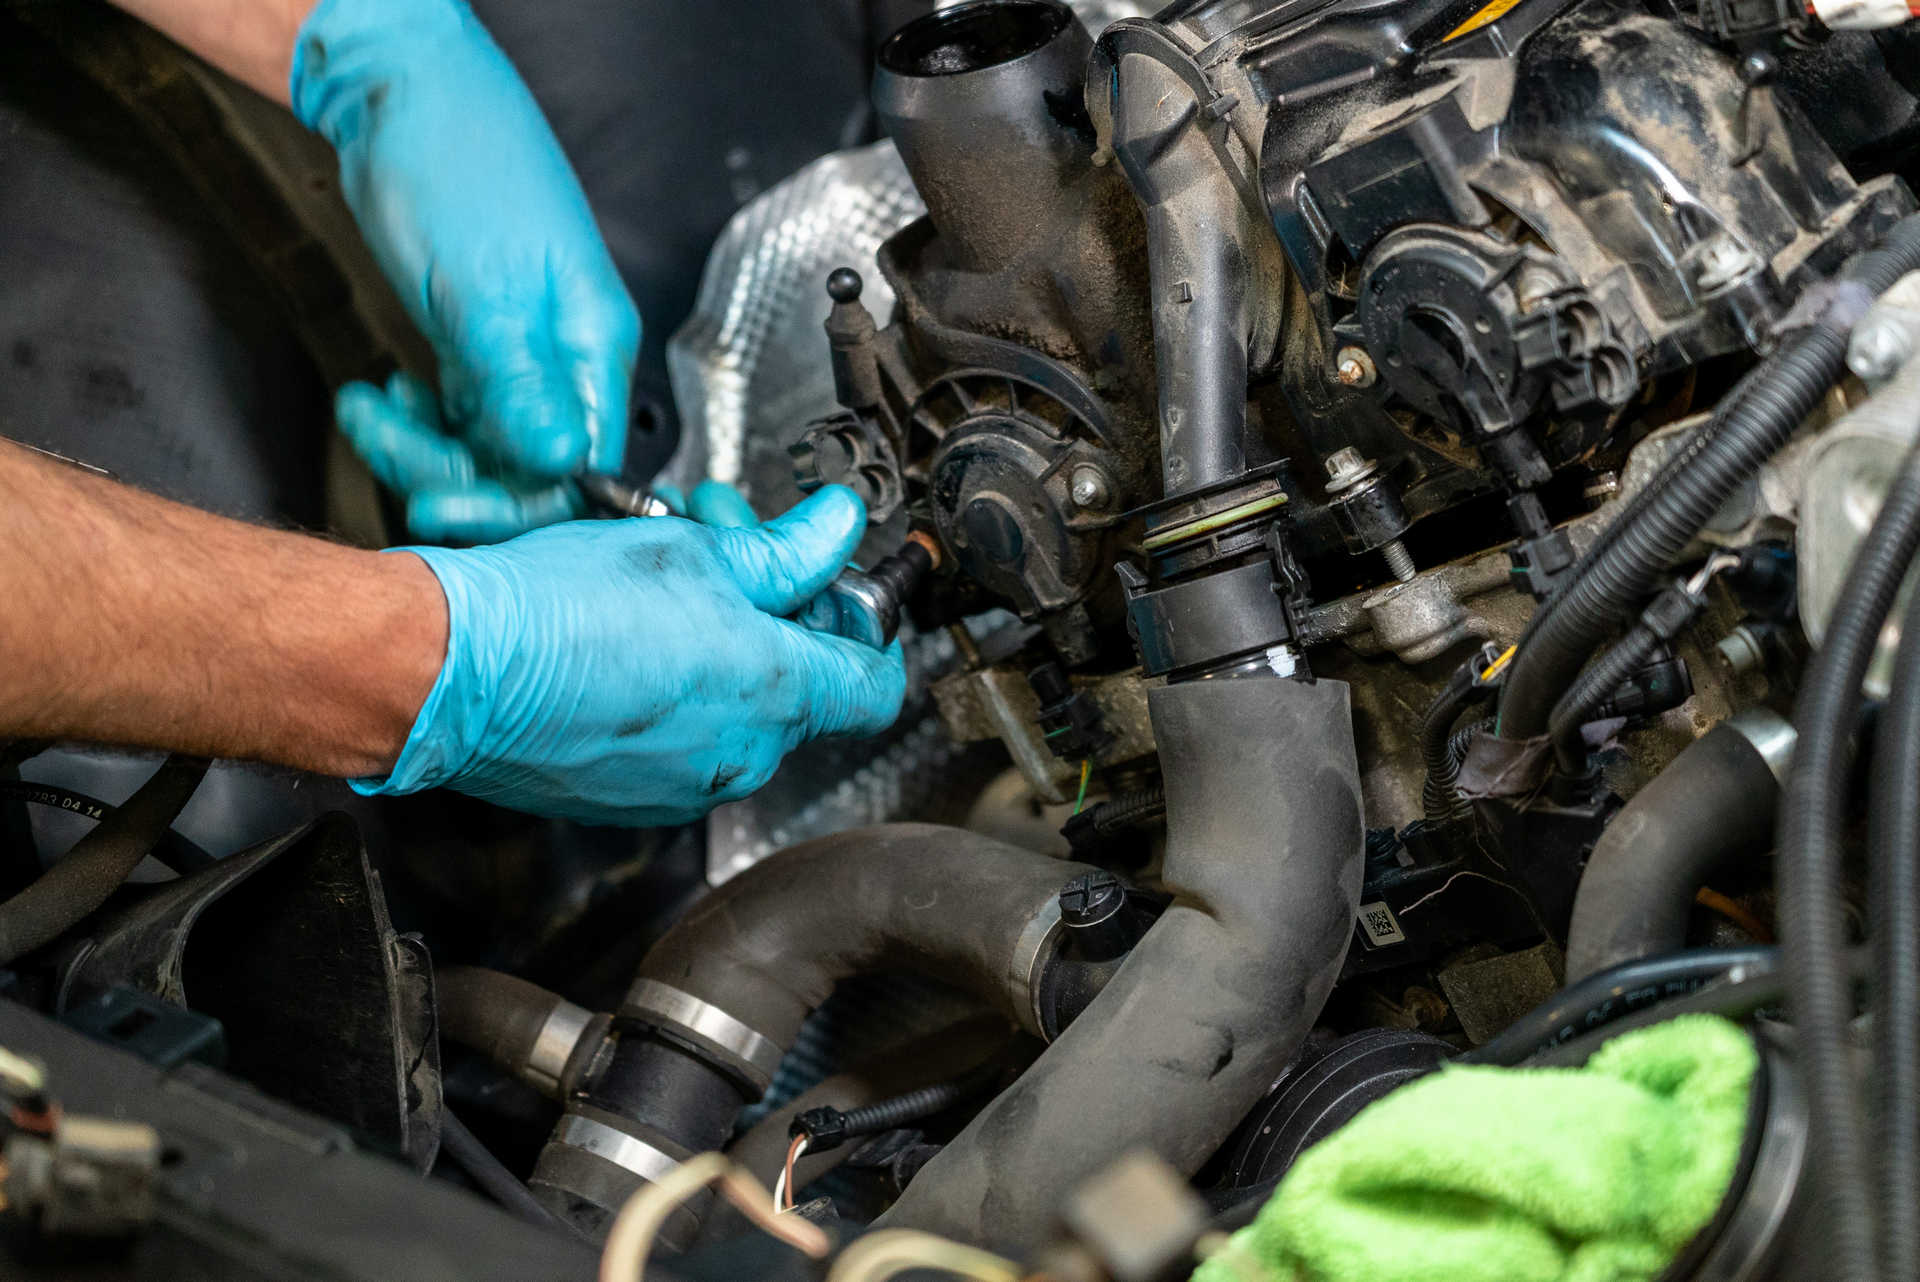
Step 8: Remove the vacuum pump and camshaft solenoids
At the back of the cylinder head, nearly up against the firewall, is a vacuum pump. Disconnect the large line coming off of it and then use a short T30 socket to remove the three bolts mounting it to the head.
![DIY BMW N20 Timing Chain removing the vacuum pump]](https://images.contentstack.io/v3/assets/blt75c85f063ac4ae63/bltb2b70c3bbd0eb08e/65f90796eef4f823cb8b1b0c/31_DIY_N20_Timing_Chain-Removing-Vacuum-Pump.jpg)
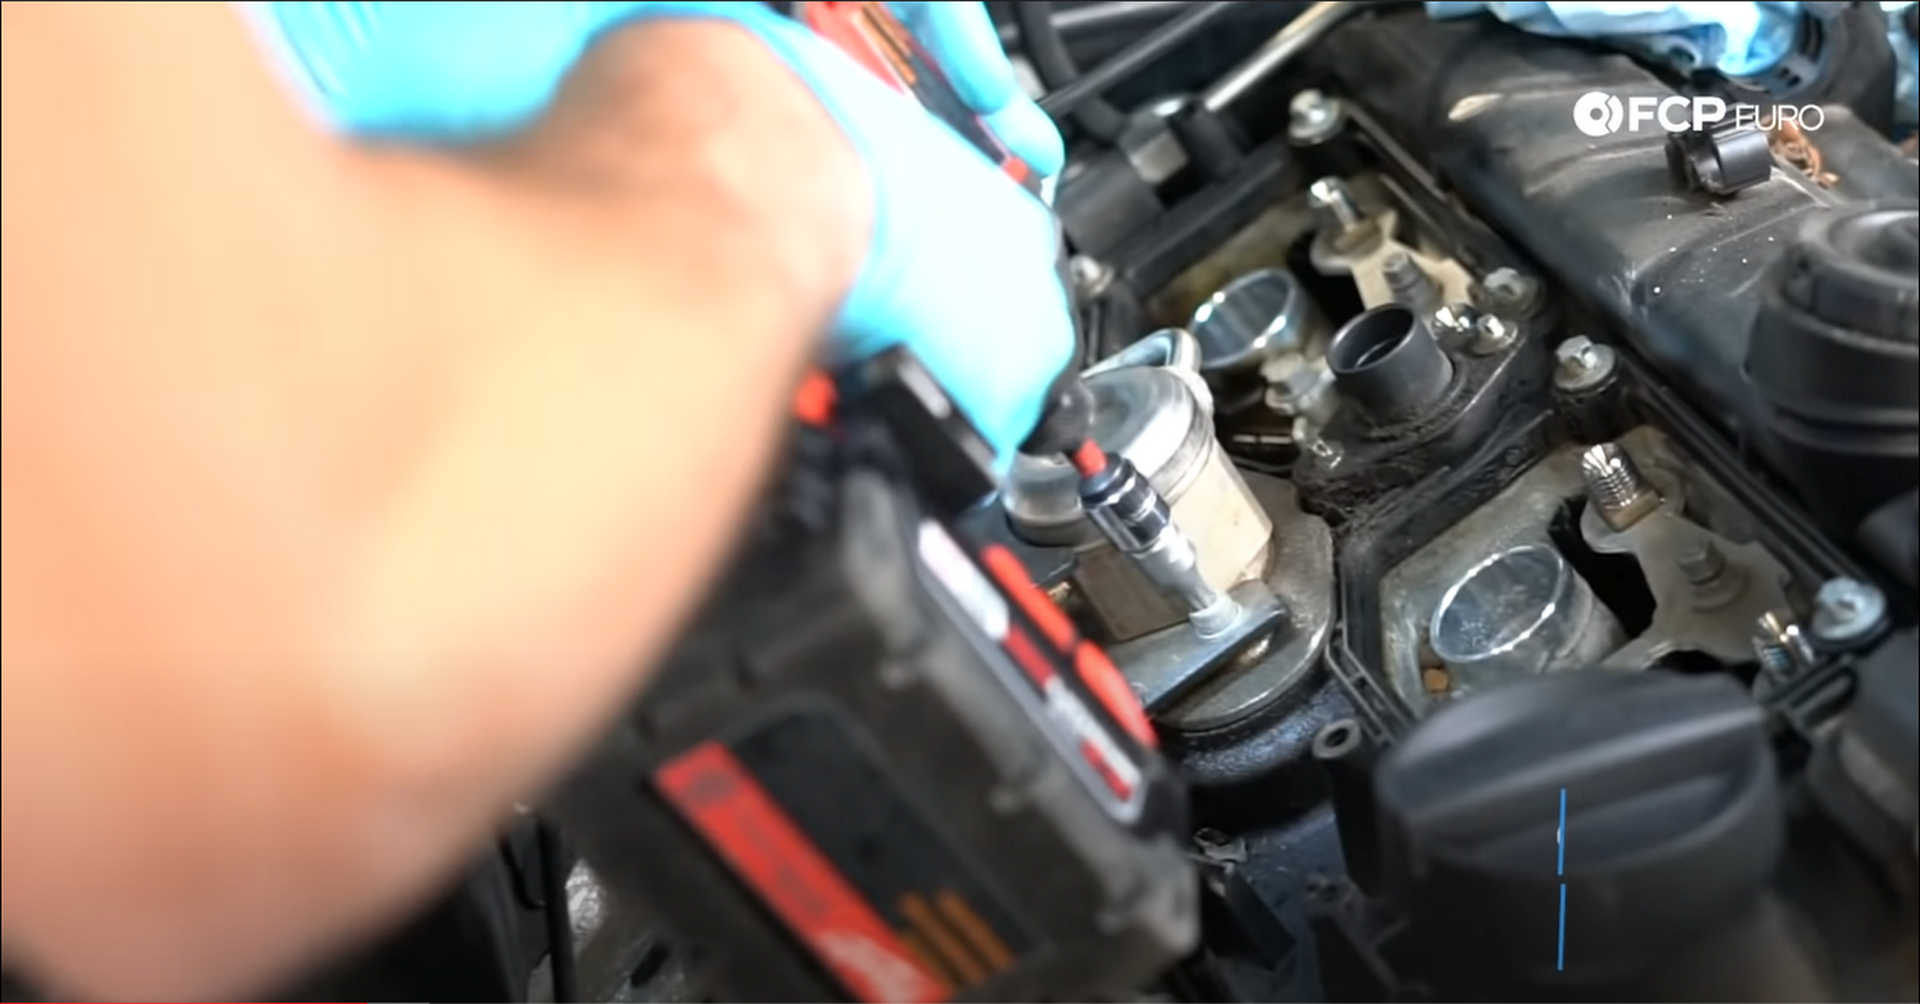
Back at the front of the valve cover, use a flat-head screwdriver to push out on the tab and release the electrical connection for the camshafts. To prevent the solenoids from getting damaged, use an E7 socket, and remove the two bolts that hold each of them into the valve cover.
The large breather hose that runs between the camshafts needs to be disconnected from the cylinder head. Pull back on the two tabs and pull the hose down to disconnect it.

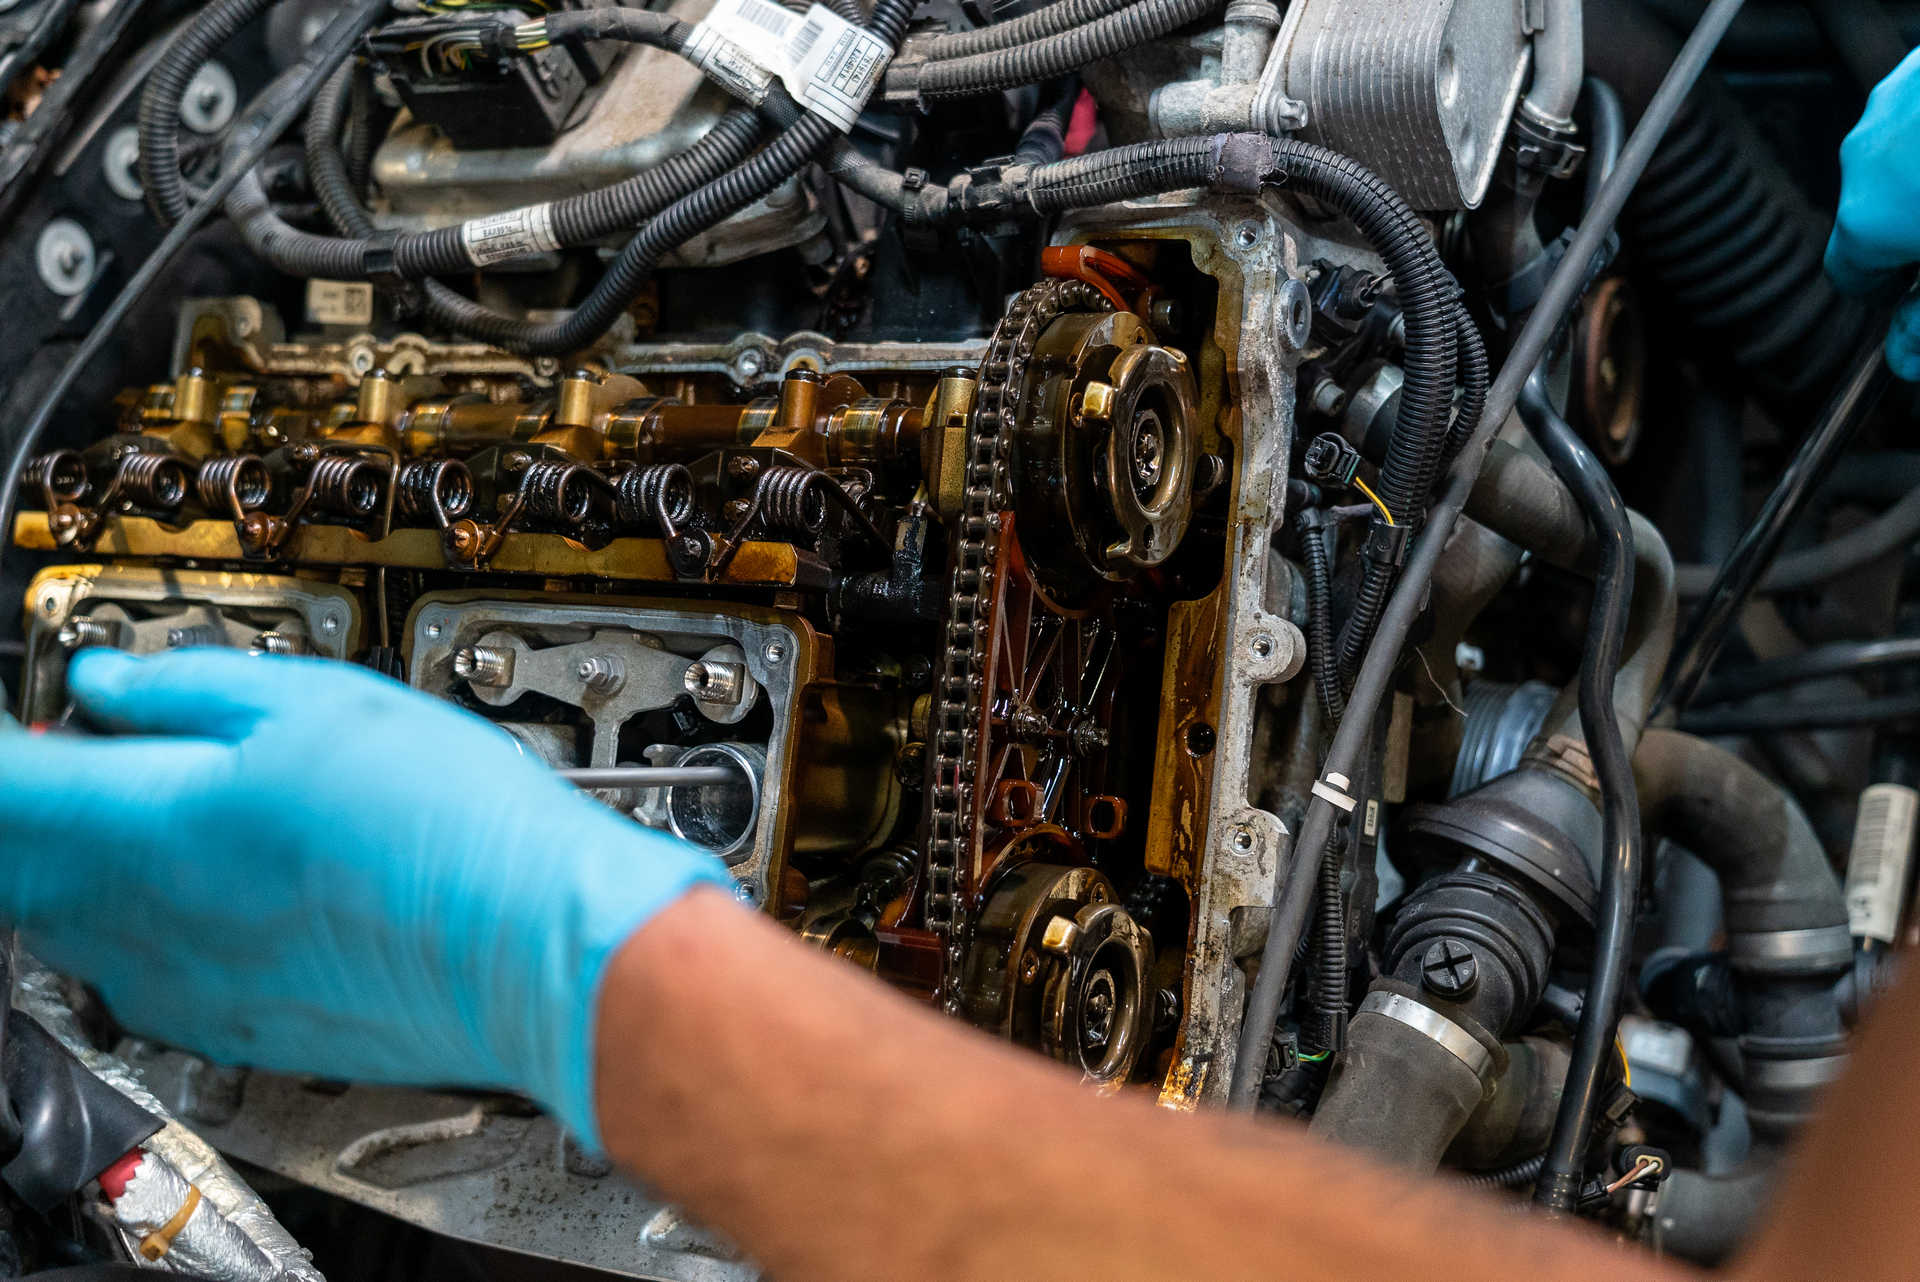
Step 9: Remove the valve cover
The valve cover is secured to the cylinder head via twenty E12 bolts. Starting at the exhaust side front corner, remove the bolts in a counter-clockwise spiral pattern, removing the outermost bolts before moving to the inner bolts.
Grab the valve cover by one of the camshaft solenoid holes and by where the vacuum pump sits at the back, and rock the cover back and forth until it is freed. A plastic trim removal tool can be used to help pry the valve cover off of the cylinder head. You can use a flat-head screwdriver, you’ll run the risk of scoring the aluminum head.
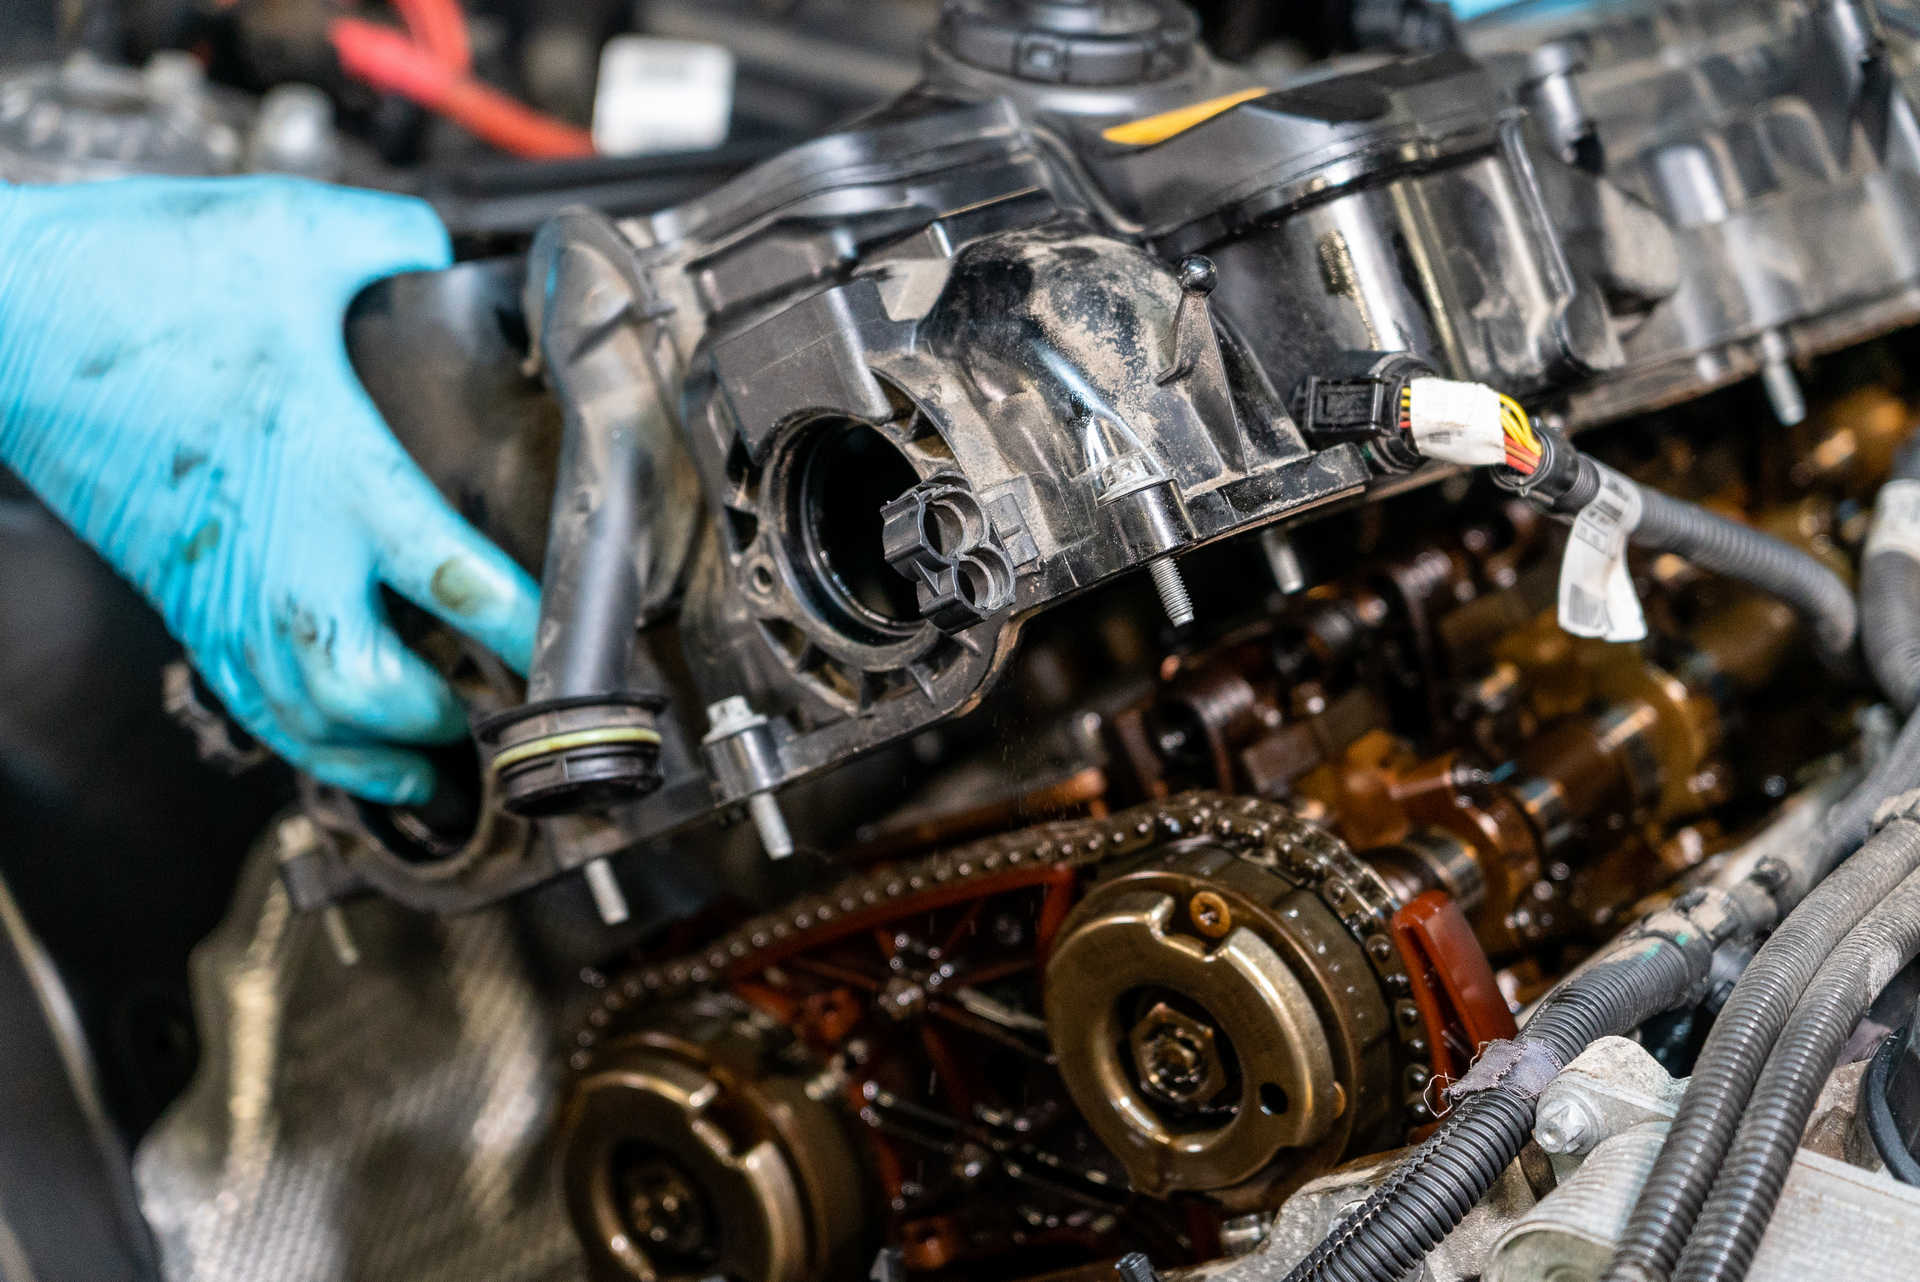
Some of the bolt threads may catch the cylinder head, so if a bolt won’t budge, back it out with your fingers.
Step 10: Set the engine at top dead center
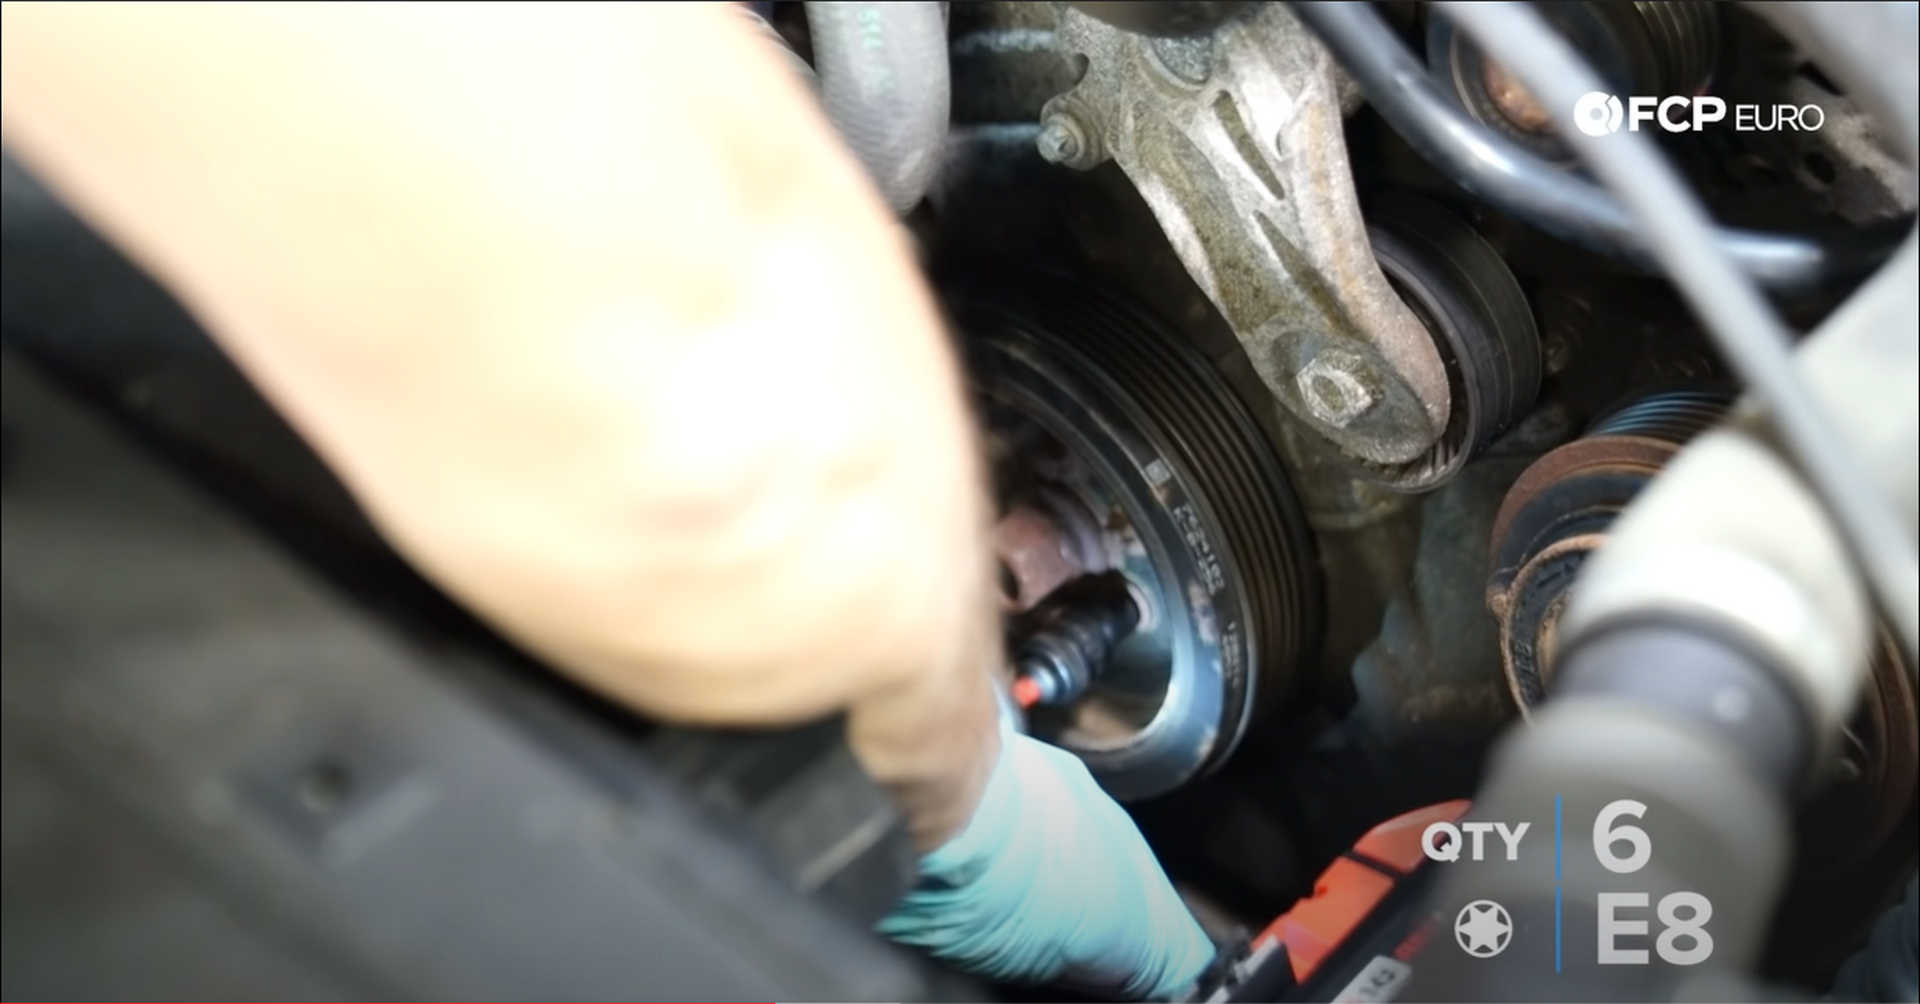
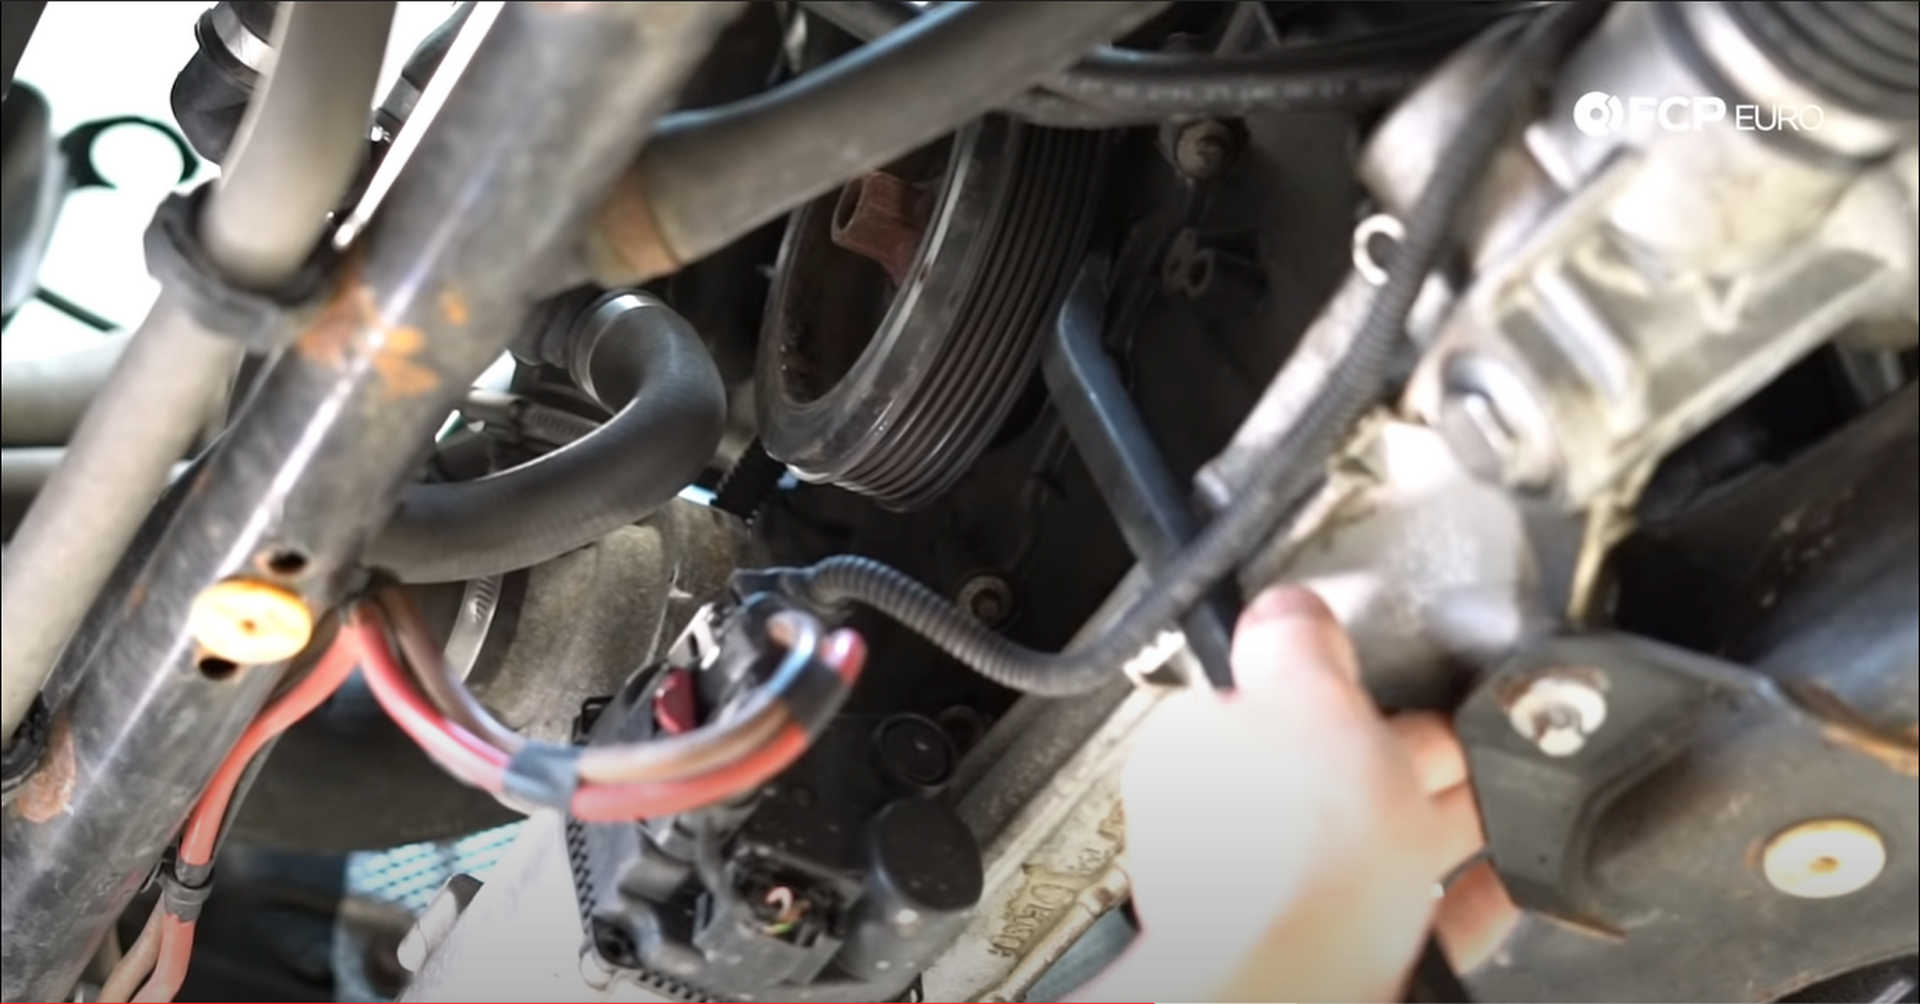
Using a twelve-point 14mm socket, remove the spark plugs from the cylinder head. Next, use a 16mm socket and pull it to the driver’s side of the engine bay to remove the tension from the accessory belt tensioner. Pull the belt off of one of the pulleys and release the pressure on the tensioner.
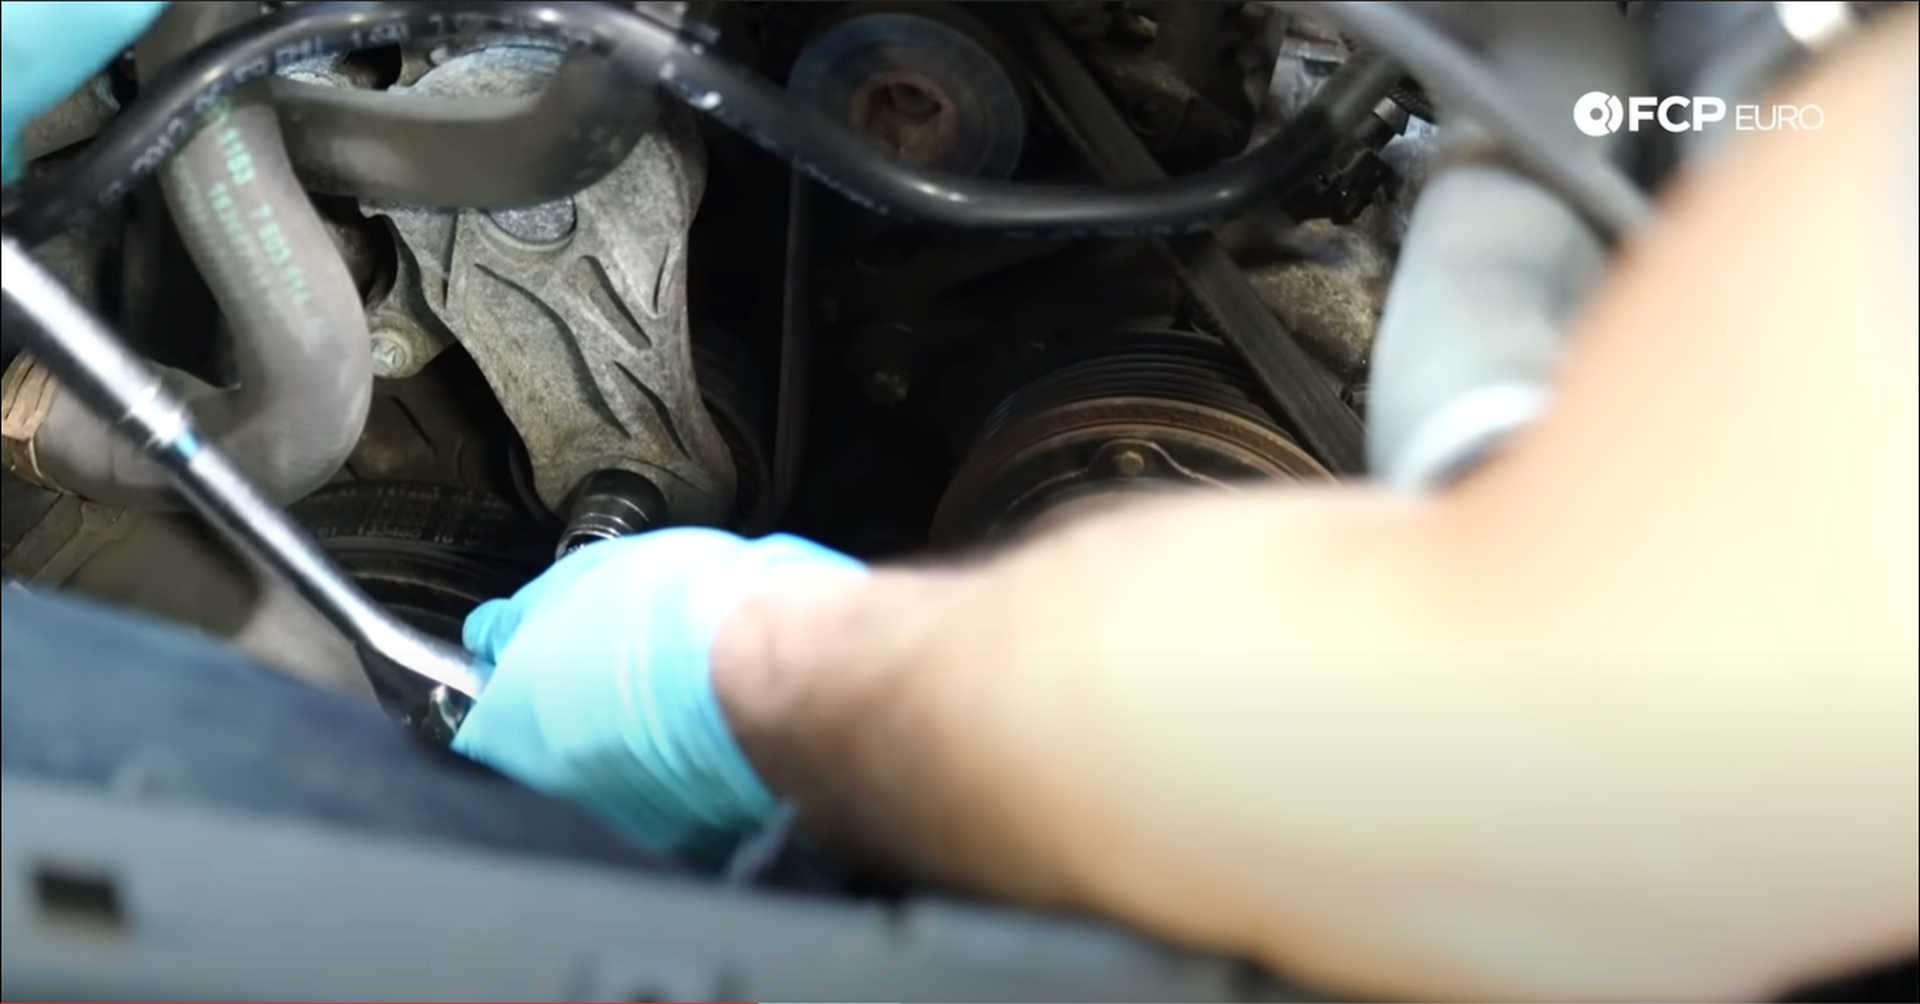
Next, remove the six E8 bolts from the crank pulley using an E8 socket. Use a 22mm socket to rotate the pulley to give yourself better access to the bolts.
Take a long screwdriver or a straightened piece of a wire coat hanger and stick it into the front cylinder through the spark plug hole. The point of the rod is to show you when cylinder one reaches the top of its stroke, indicating that it is at top dead center. With the rod in the cylinder, rotate the crankshaft clockwise.

Rotate the crankshaft until the piston is at the top of its stroke, meaning the rod is pushed out as far as it will go, and neither camshaft is opening valves on the first cylinder. The BMW timing tool and be placed onto the camshafts once top dead center is reached.
If the flats on the camshaft don’t line up with the tool, slowly rotate the crankshaft until they do. The tool is designed to be a tight fit and may require a few taps with your hand to seat fully onto the cylinder head.
There are two long bolts supplied with the tool. They will go through the tool and thread into the cylinder head, locking the tool into place. Thread the bolts in by hand first, to get them started, and tighten them with a 5mm hex wrench. Once the two long bolts are tightened, snug up the four other hex bolts with the same wrench.
There is a plug that needs to be pulled out of the transmissions bell housing. Pulling out this plug will allow you to insert another lock to make sure the engine is set at top dead center for this procedure. You’ll need to reach up on the passenger’s side of the transmission with a hook or pick tool and pull the plug out. It is nearly impossible to get a look at it with a camera, so you’ll need to feel around until you find it. When you do find it, pull it out in the direction of the loop.
The locking pin with the yellow cord attached to it should slide into the space that the plug occupied if the car is at top dead center. If it doesn’t, recheck the previous steps.
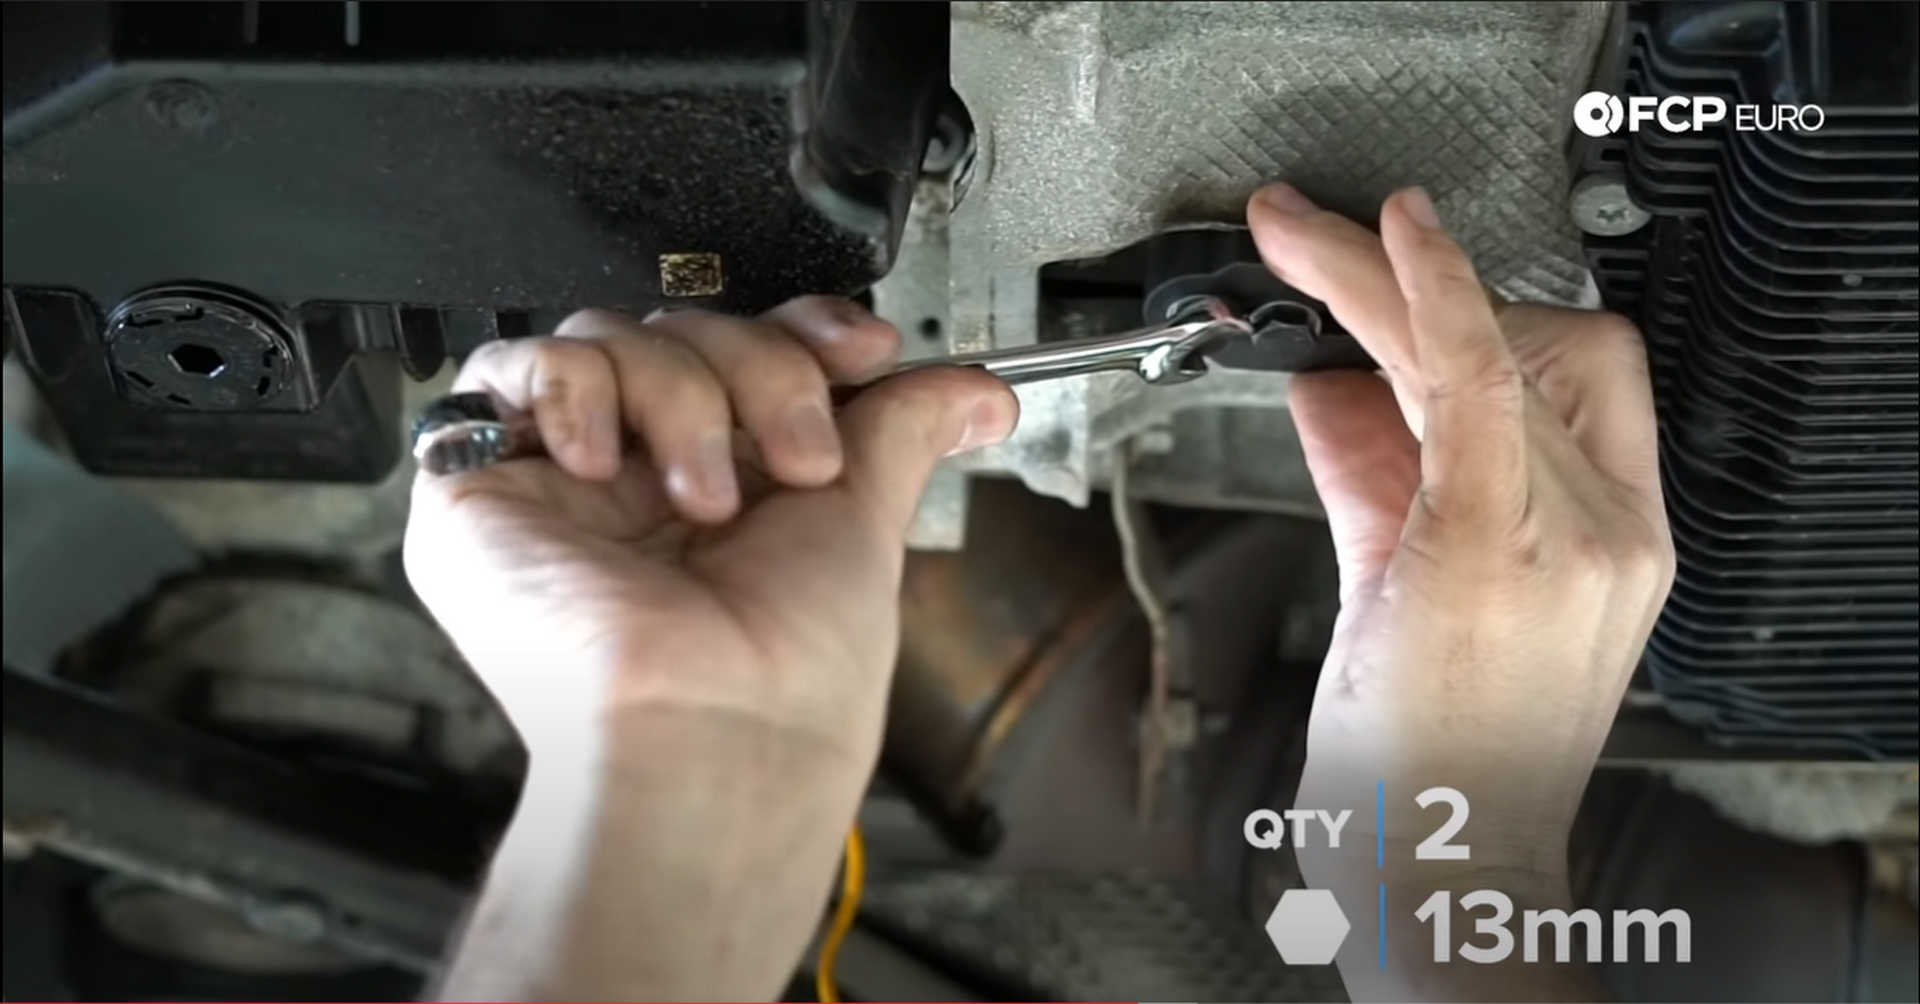
Next, take the flywheel locking tool and install it with the teeth facing upwards so that they mesh with the teeth on the flywheel. Adjust the tool as necessary and then lock it down by tightening the two bolts with a 13mm wrench.
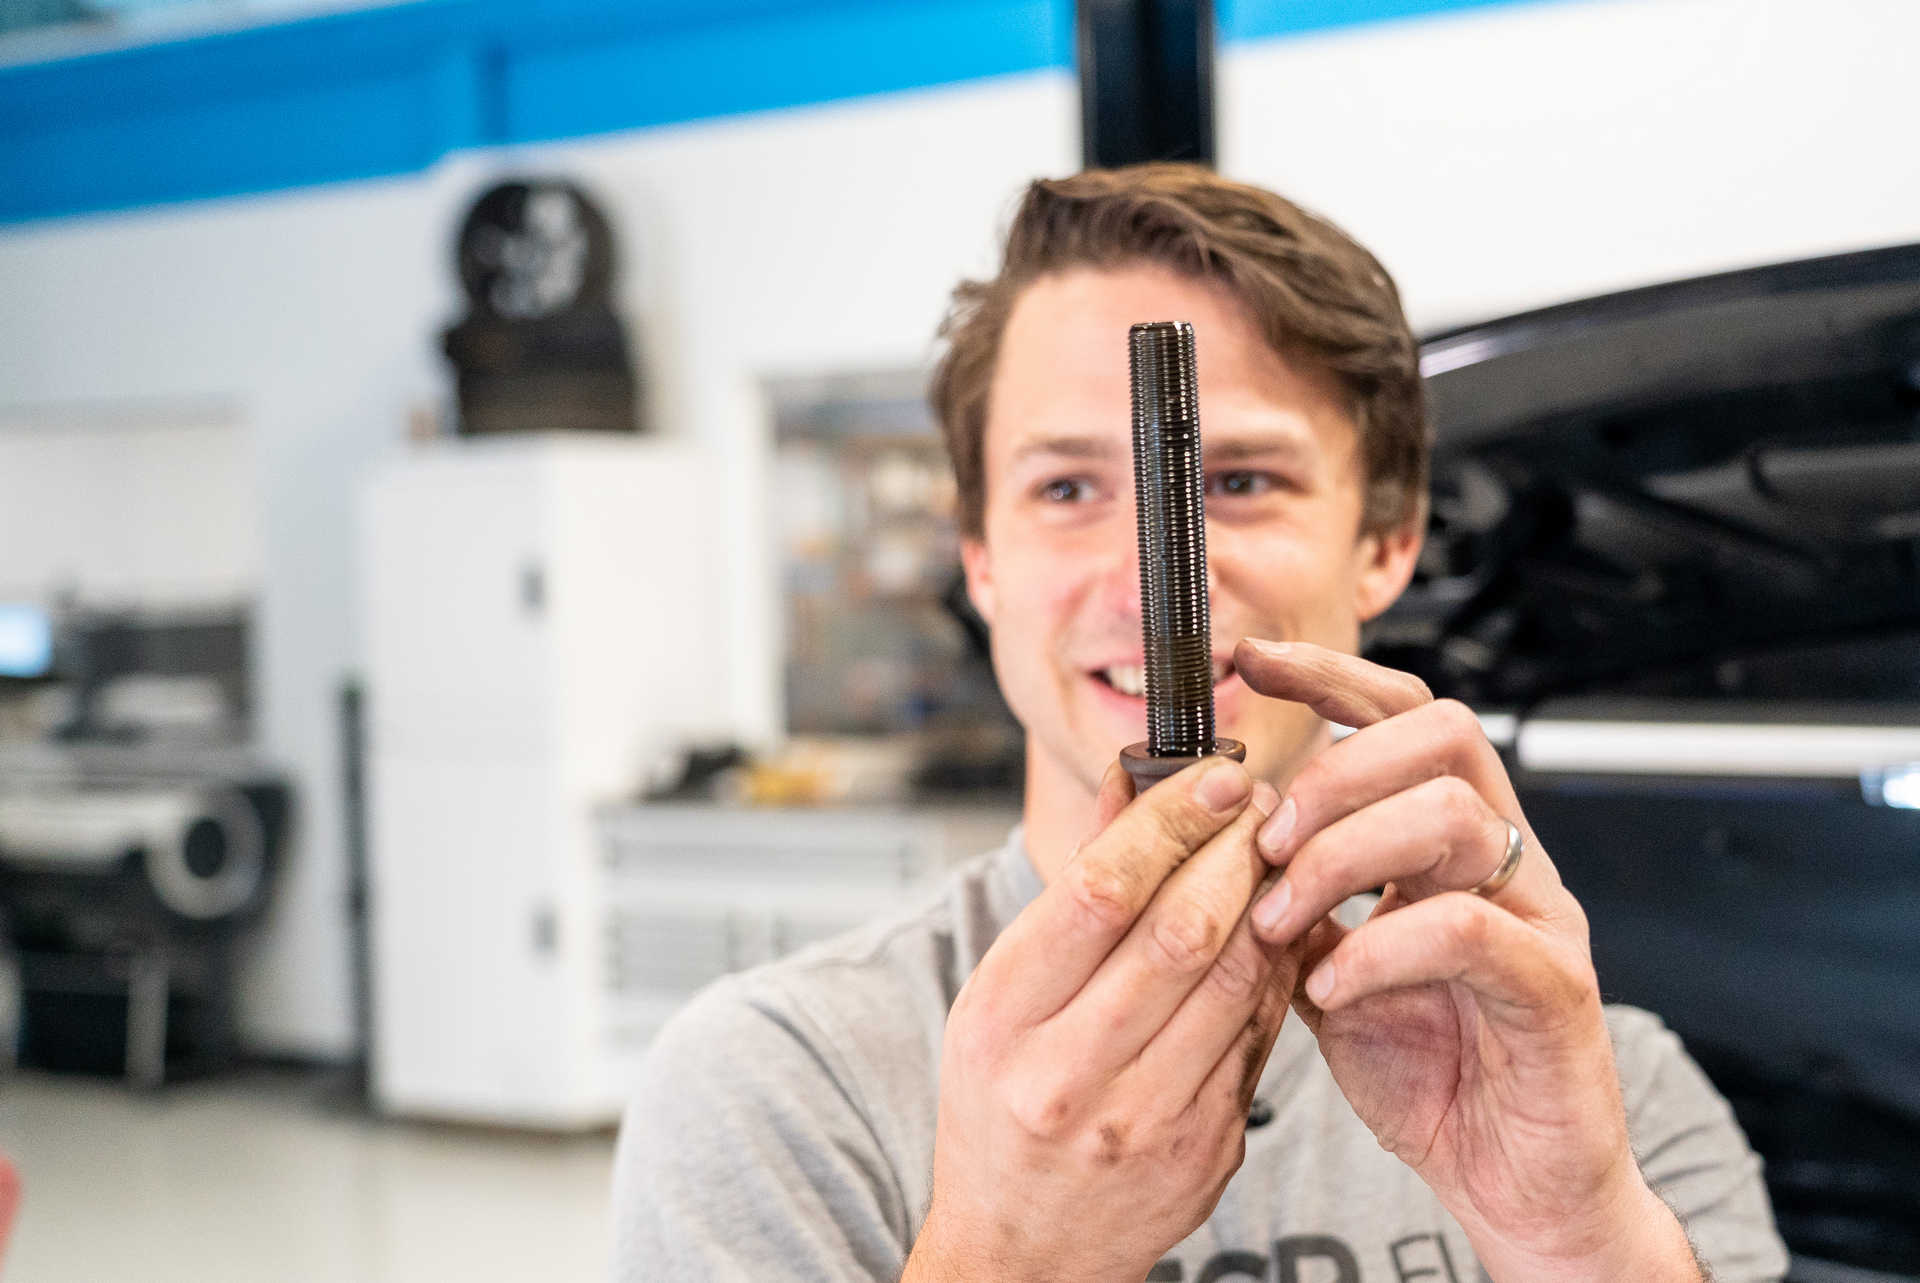
Step 11: Remove the crankshaft bolt
Before the crankshaft bolt can be removed, the vibration dampener needs to be removed. Use a pry bar to push on the dampener from underneath and on top to slide it off of the crankshaft snout. Hit the dampener with a mallet or hammer to loosen it up.
BMW claims that the breakaway torque for the crankshaft bolt is 600Nm. To remove it, use a 22mm socket on the longest breaker bar you have. A jack handle or a long piece of pipe can be slipped over the breaker bar.

Step 12: Remove the oil pan
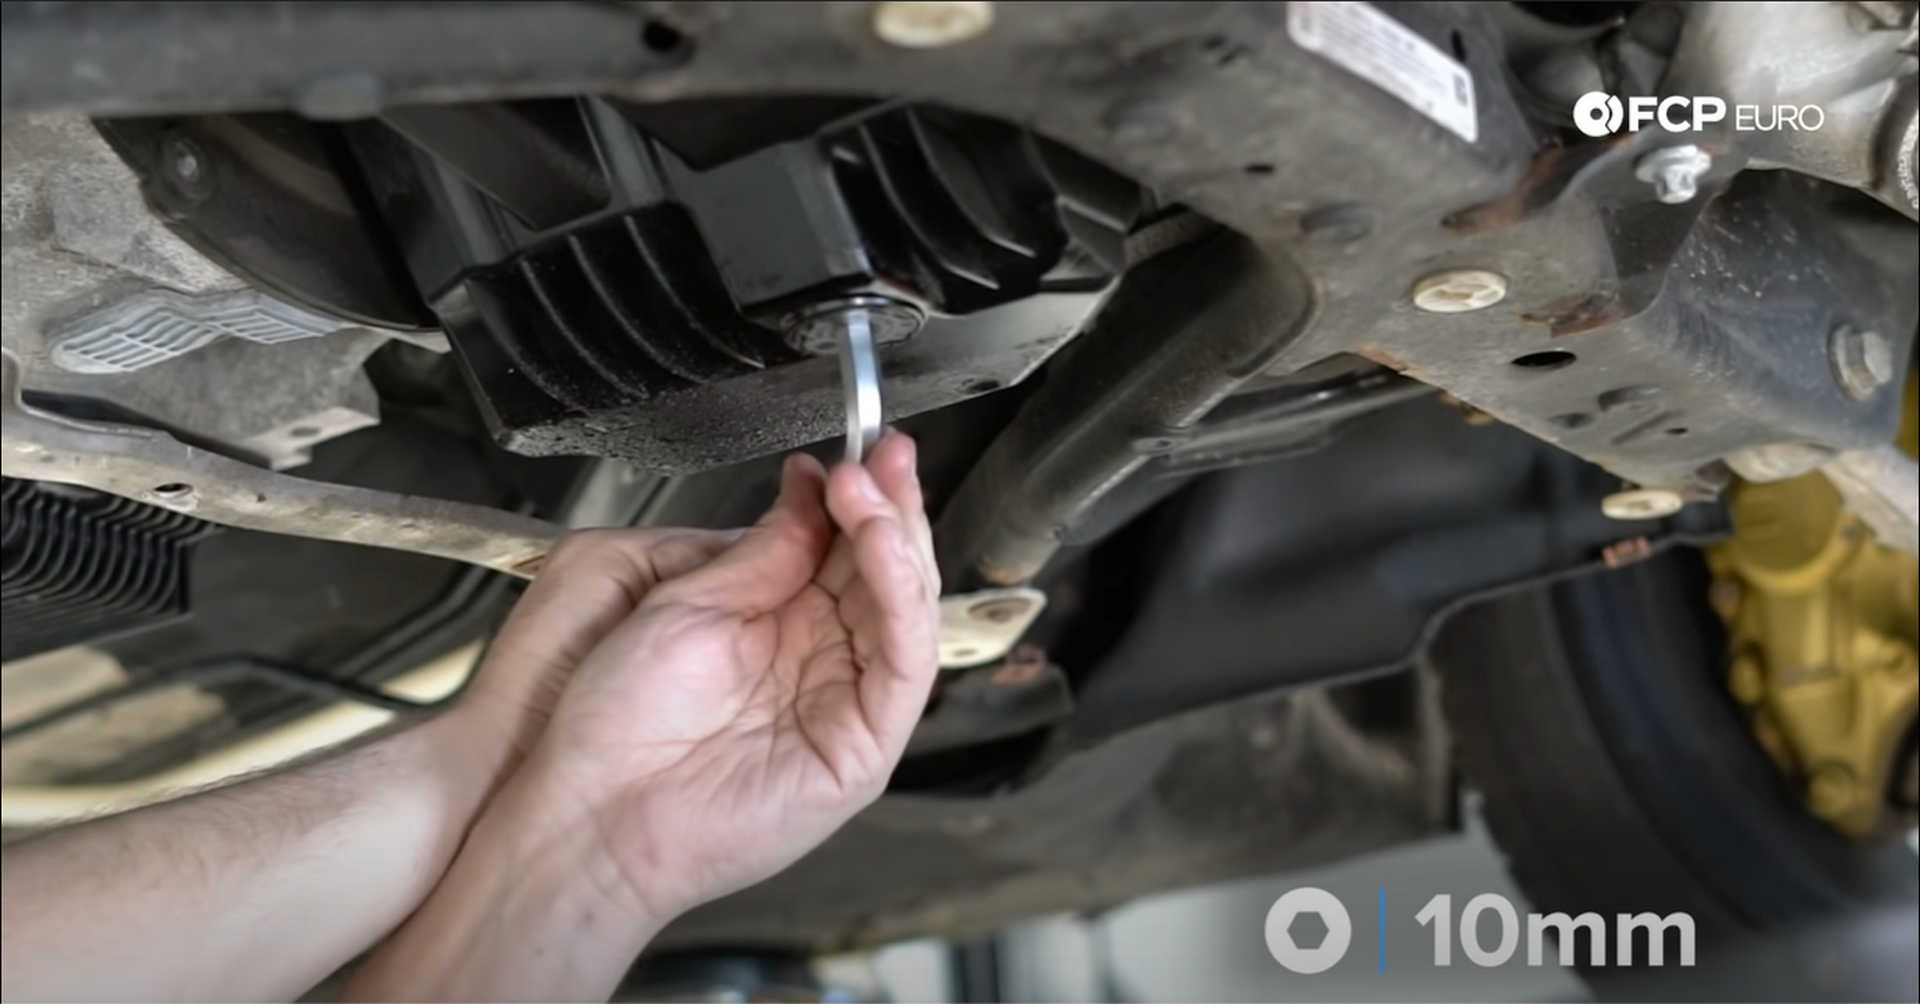
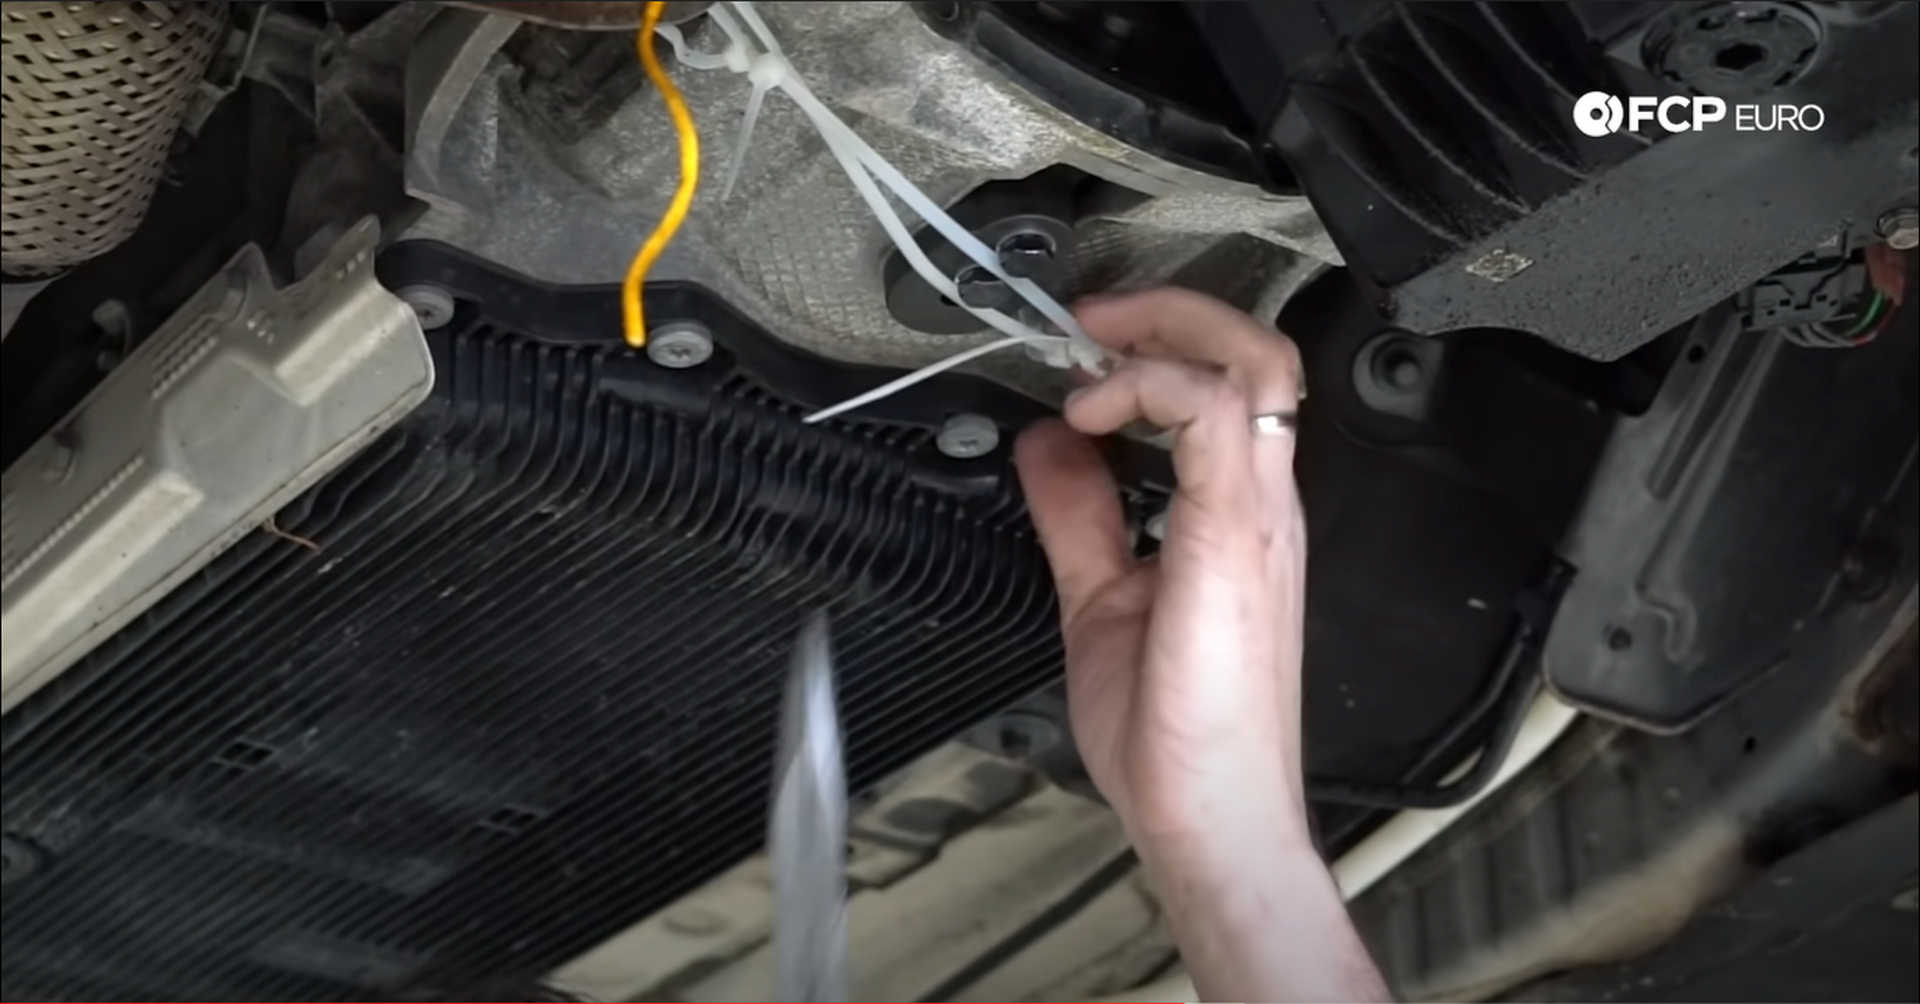
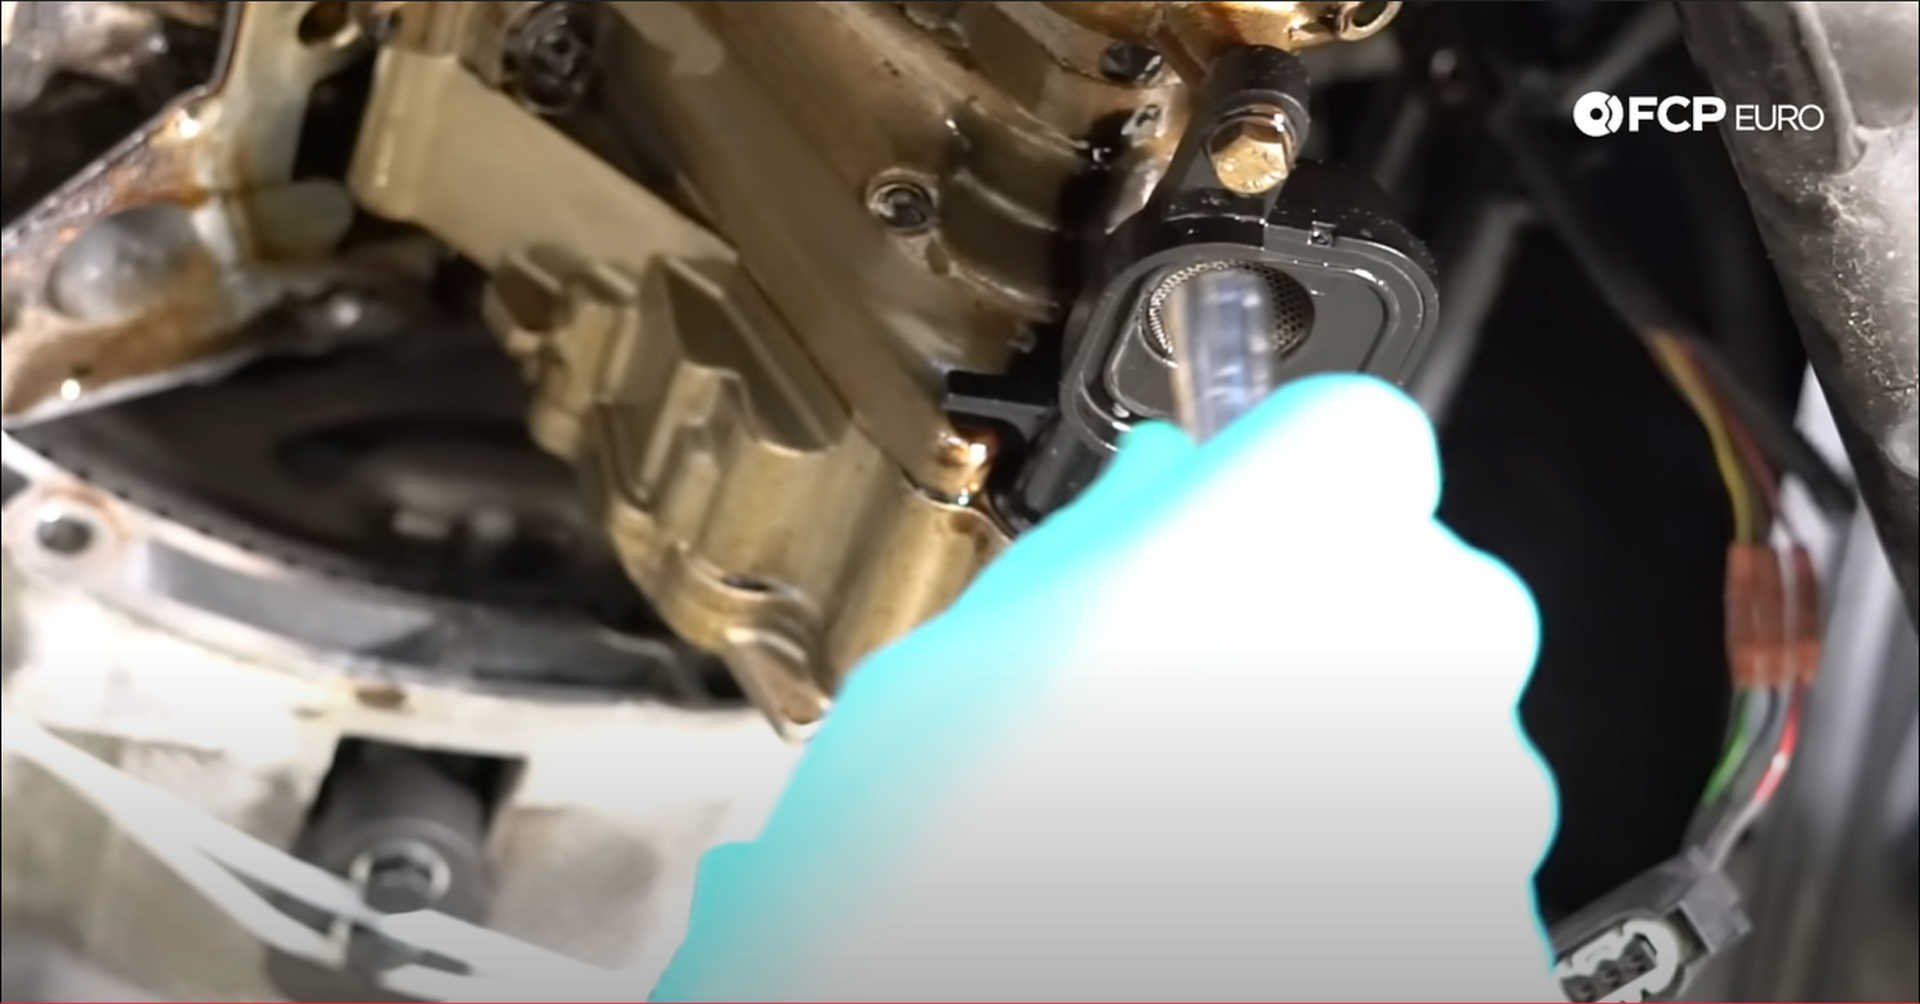
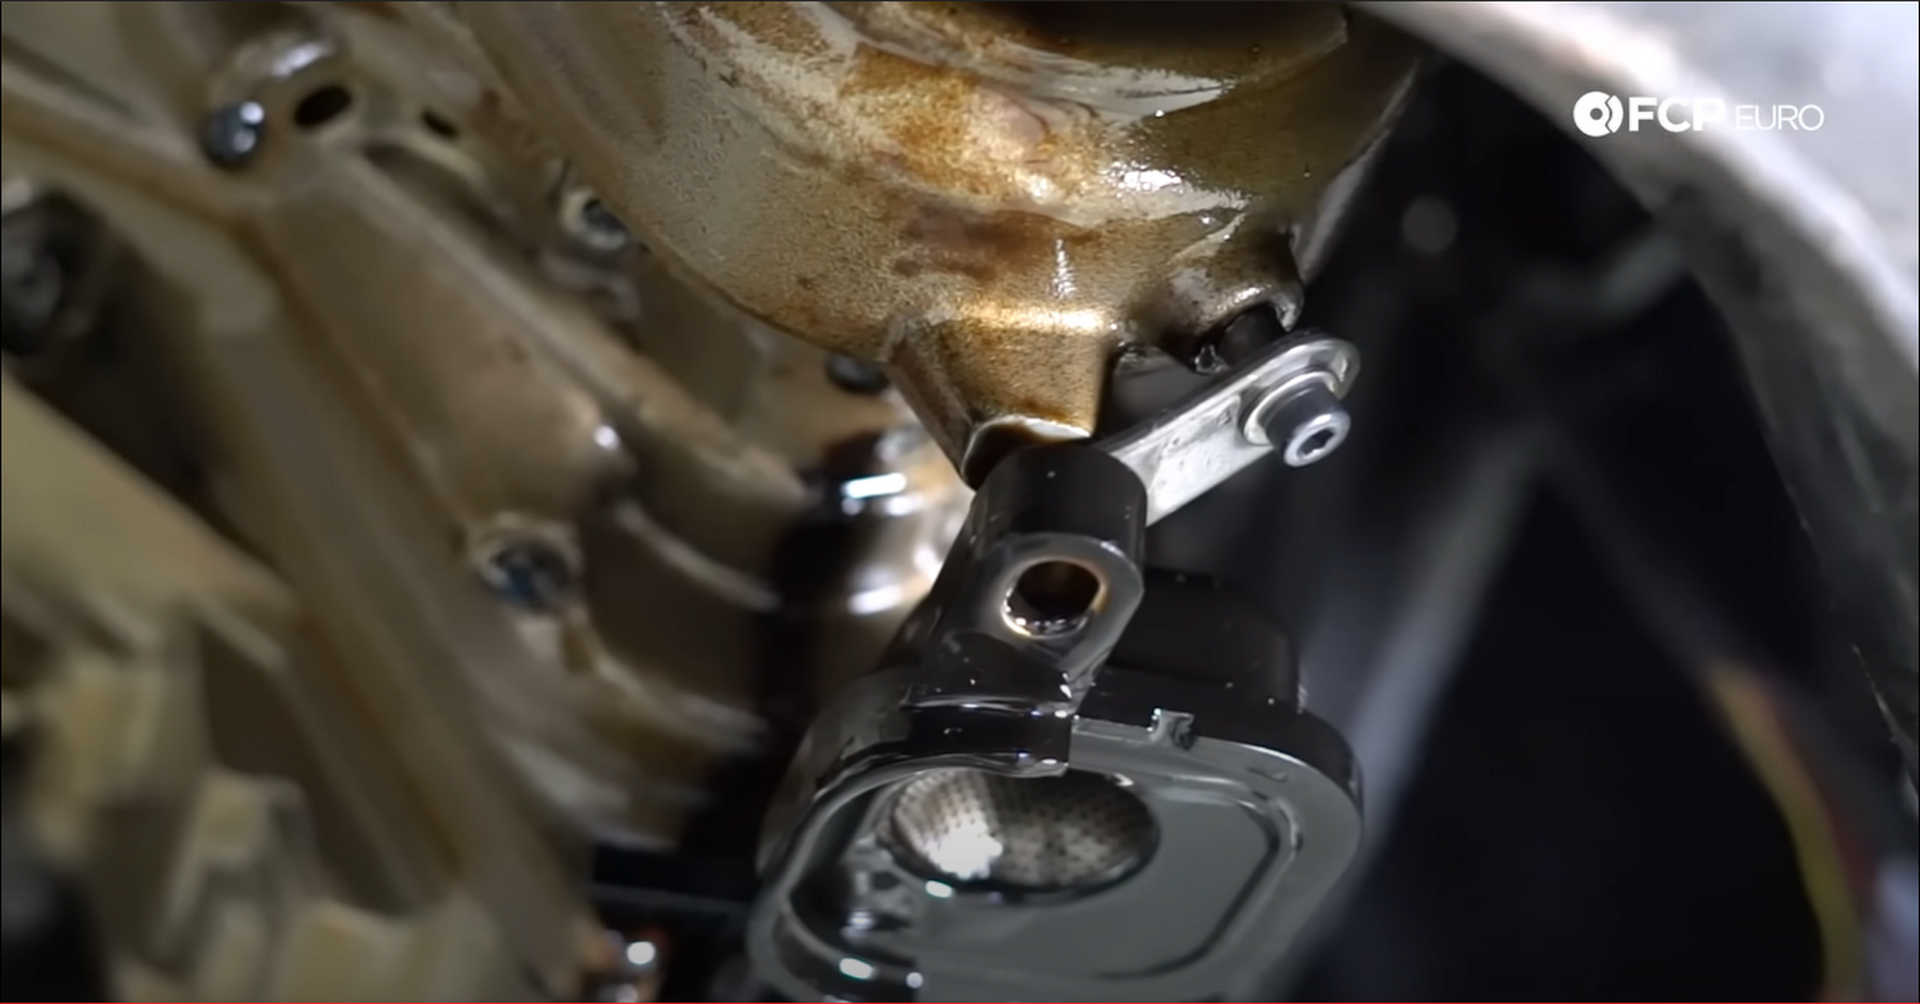
Towards the rear of the oil pan, on the driver’s side is the oil level sensor. Push down on the tab and pull the plug off.
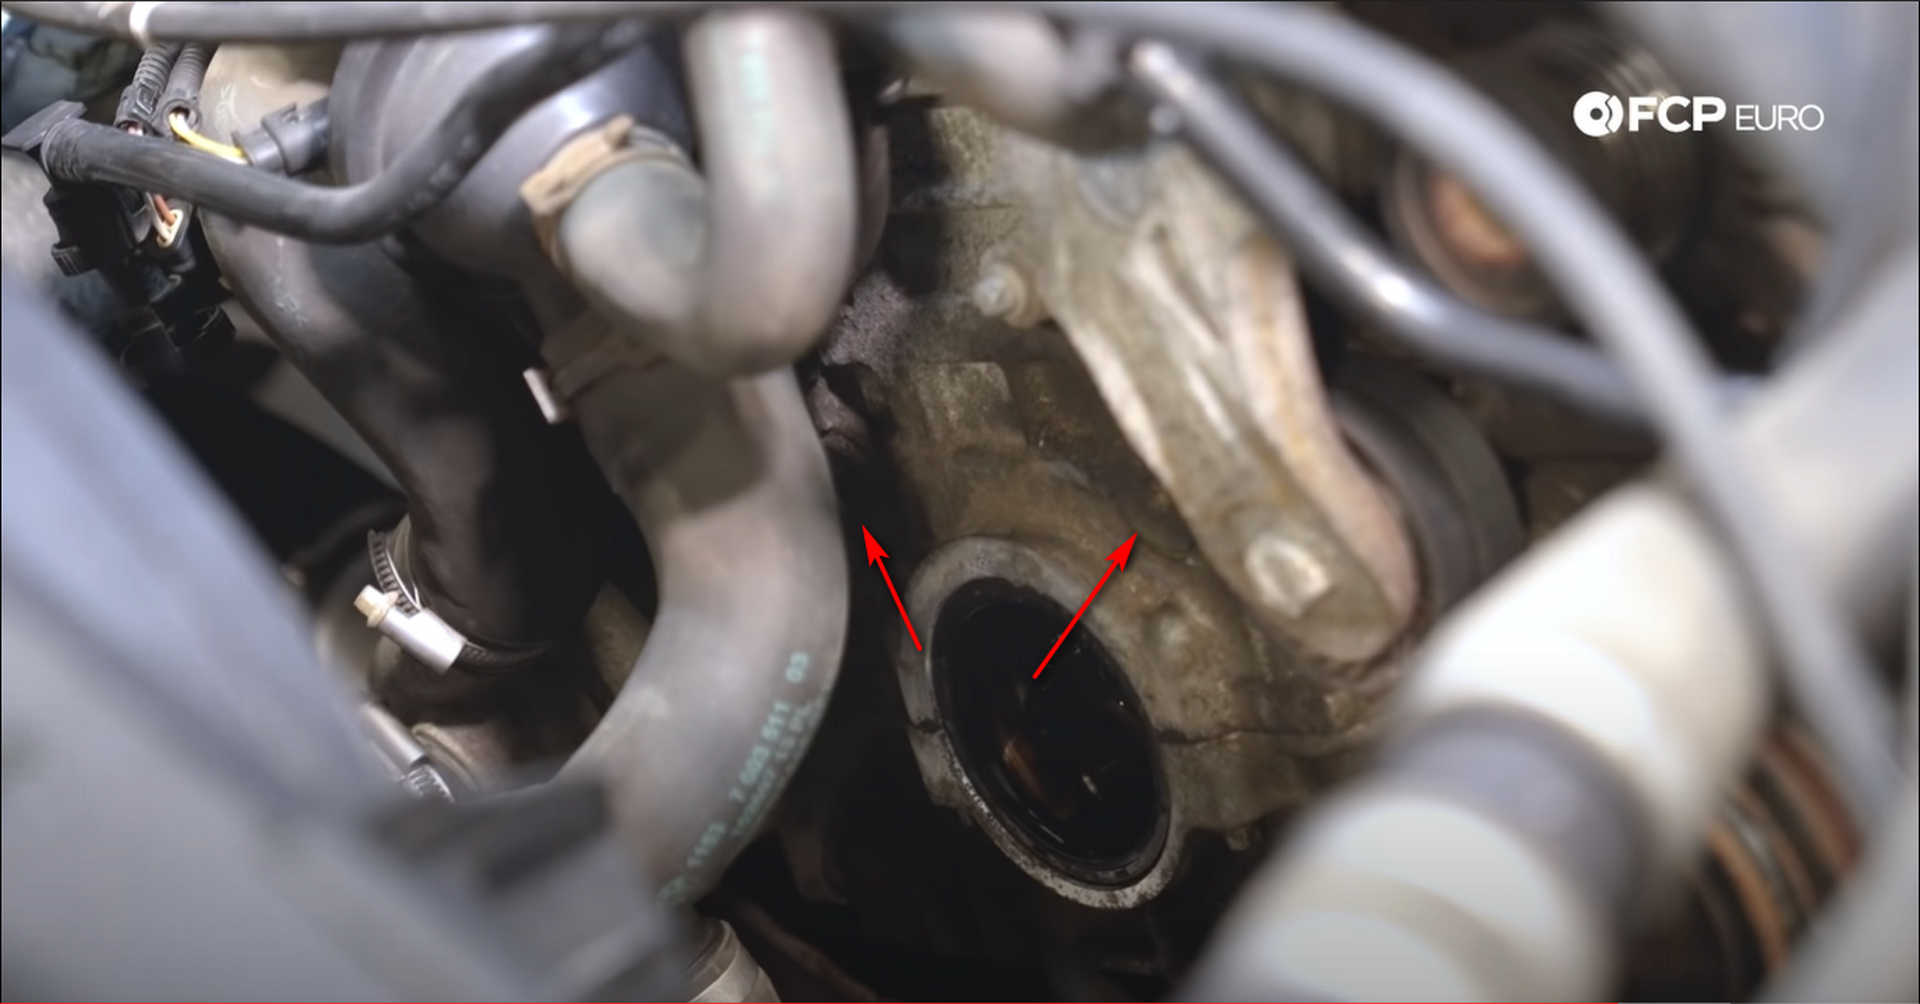
Next, use an E8 socket to remove all of the oil pan bolts. A fuel line is mounted to the oil pan just above the oil level sensor. Remove that with an E8 socket as well. To get the oil pan out, you may need to disconnect the engine mounts and jack the engine up. Use a??mm socket to remove the nut from the engine mount stud. Use a jack on the transmission to lift the engine up and towards the passenger’s side to wiggle the pan out.
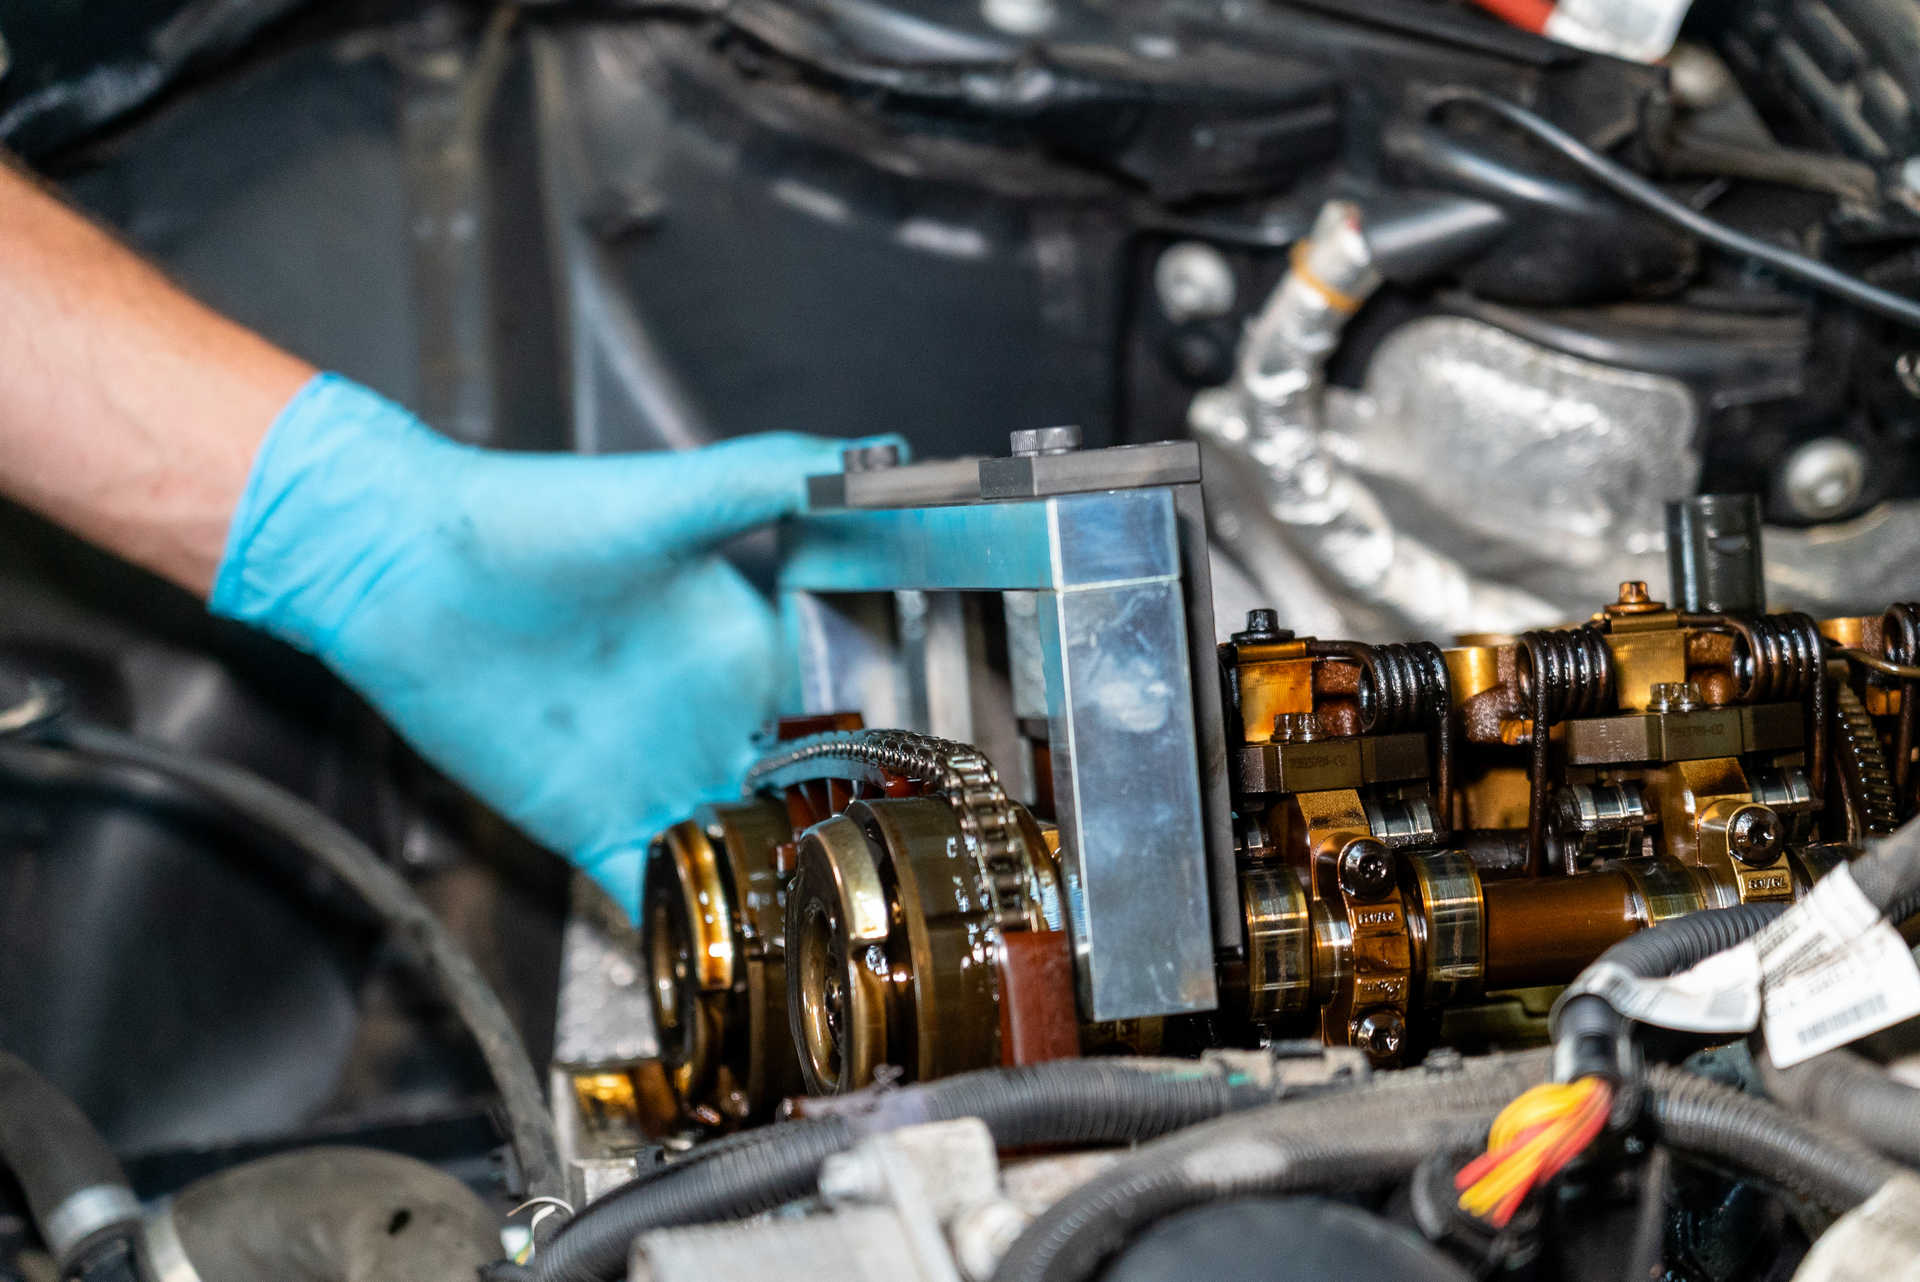
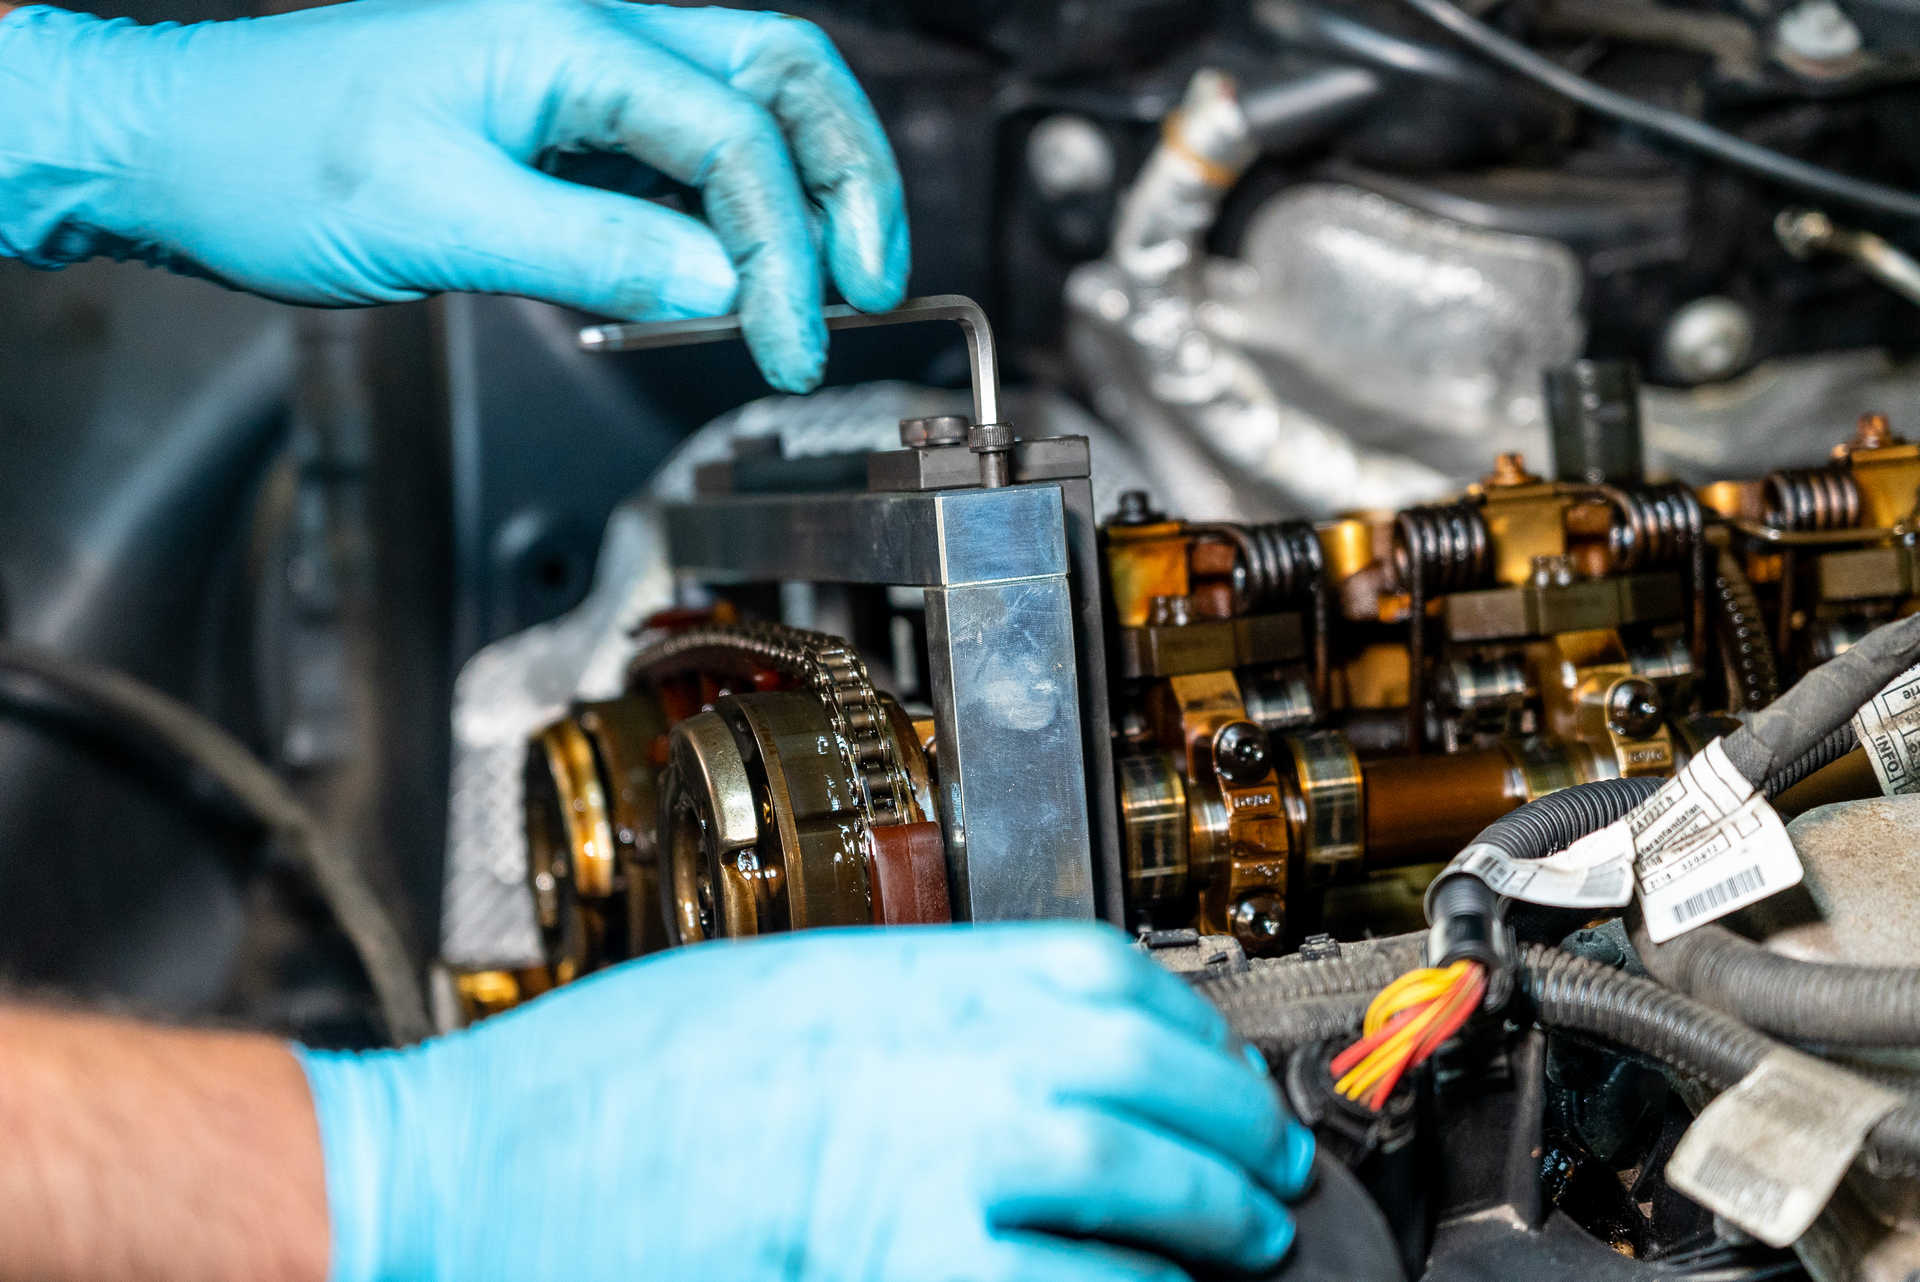
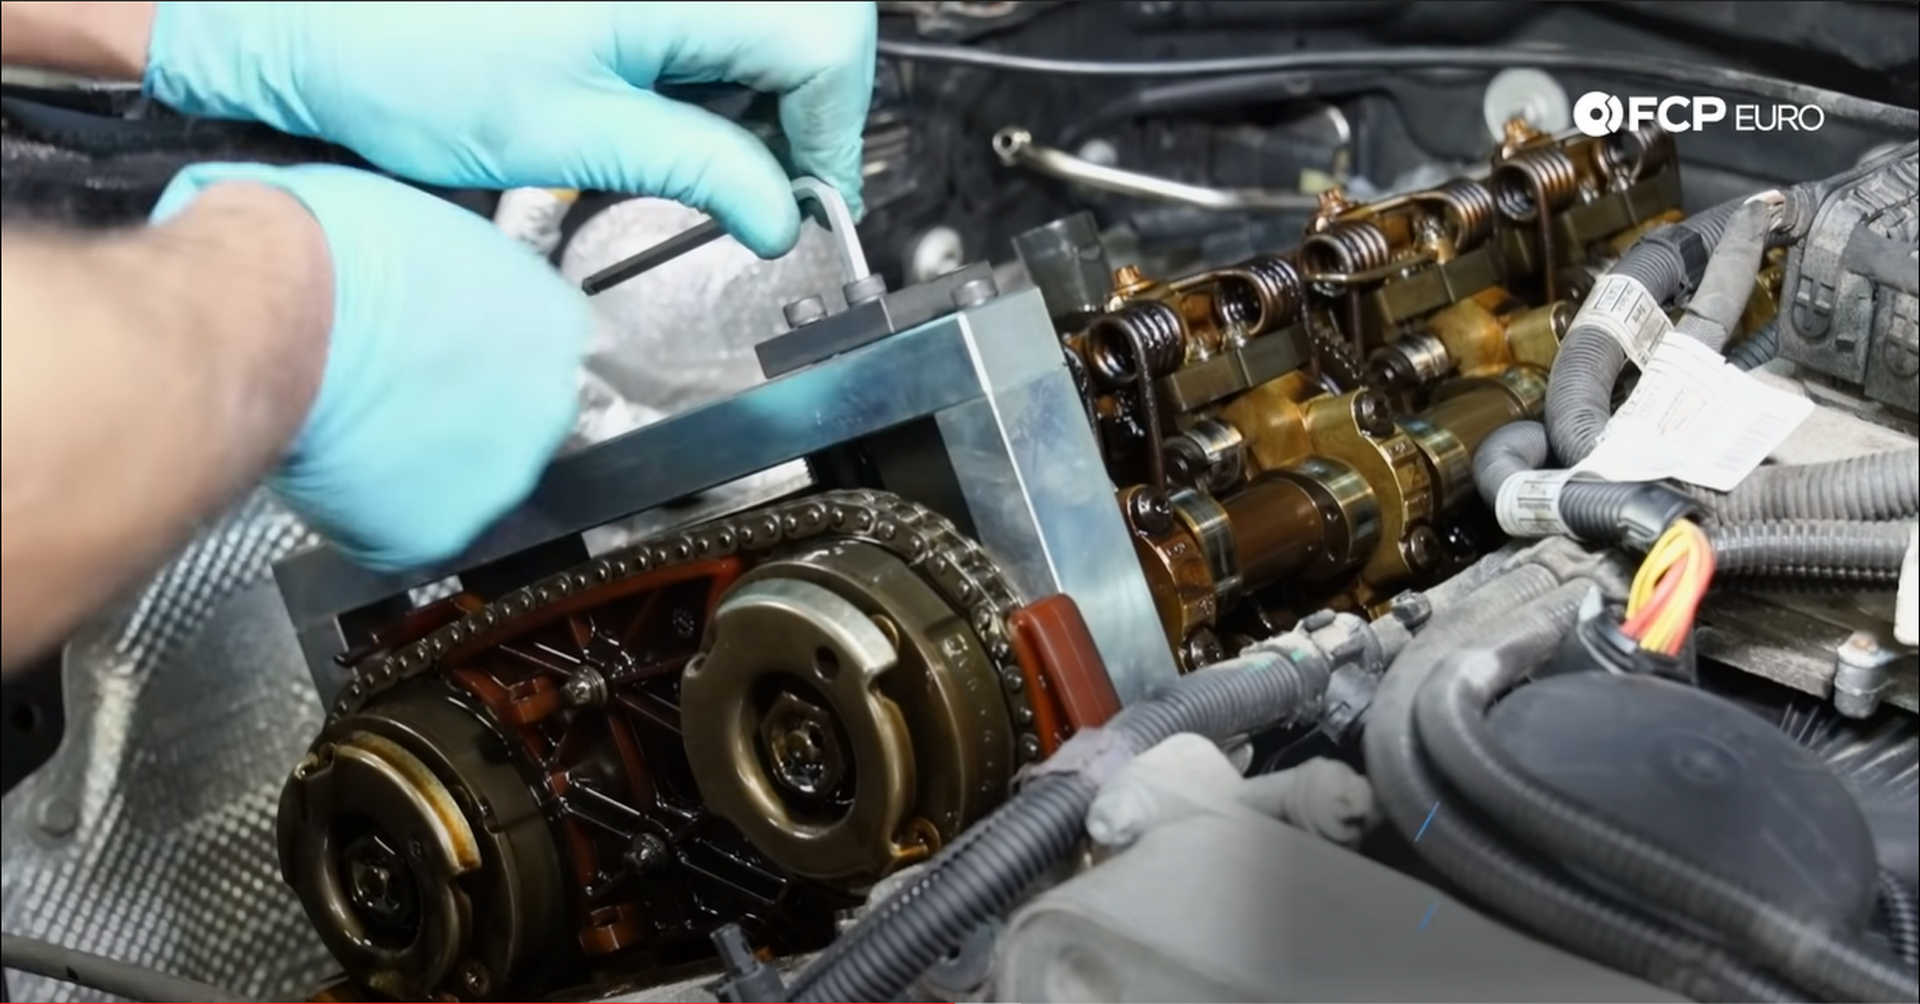
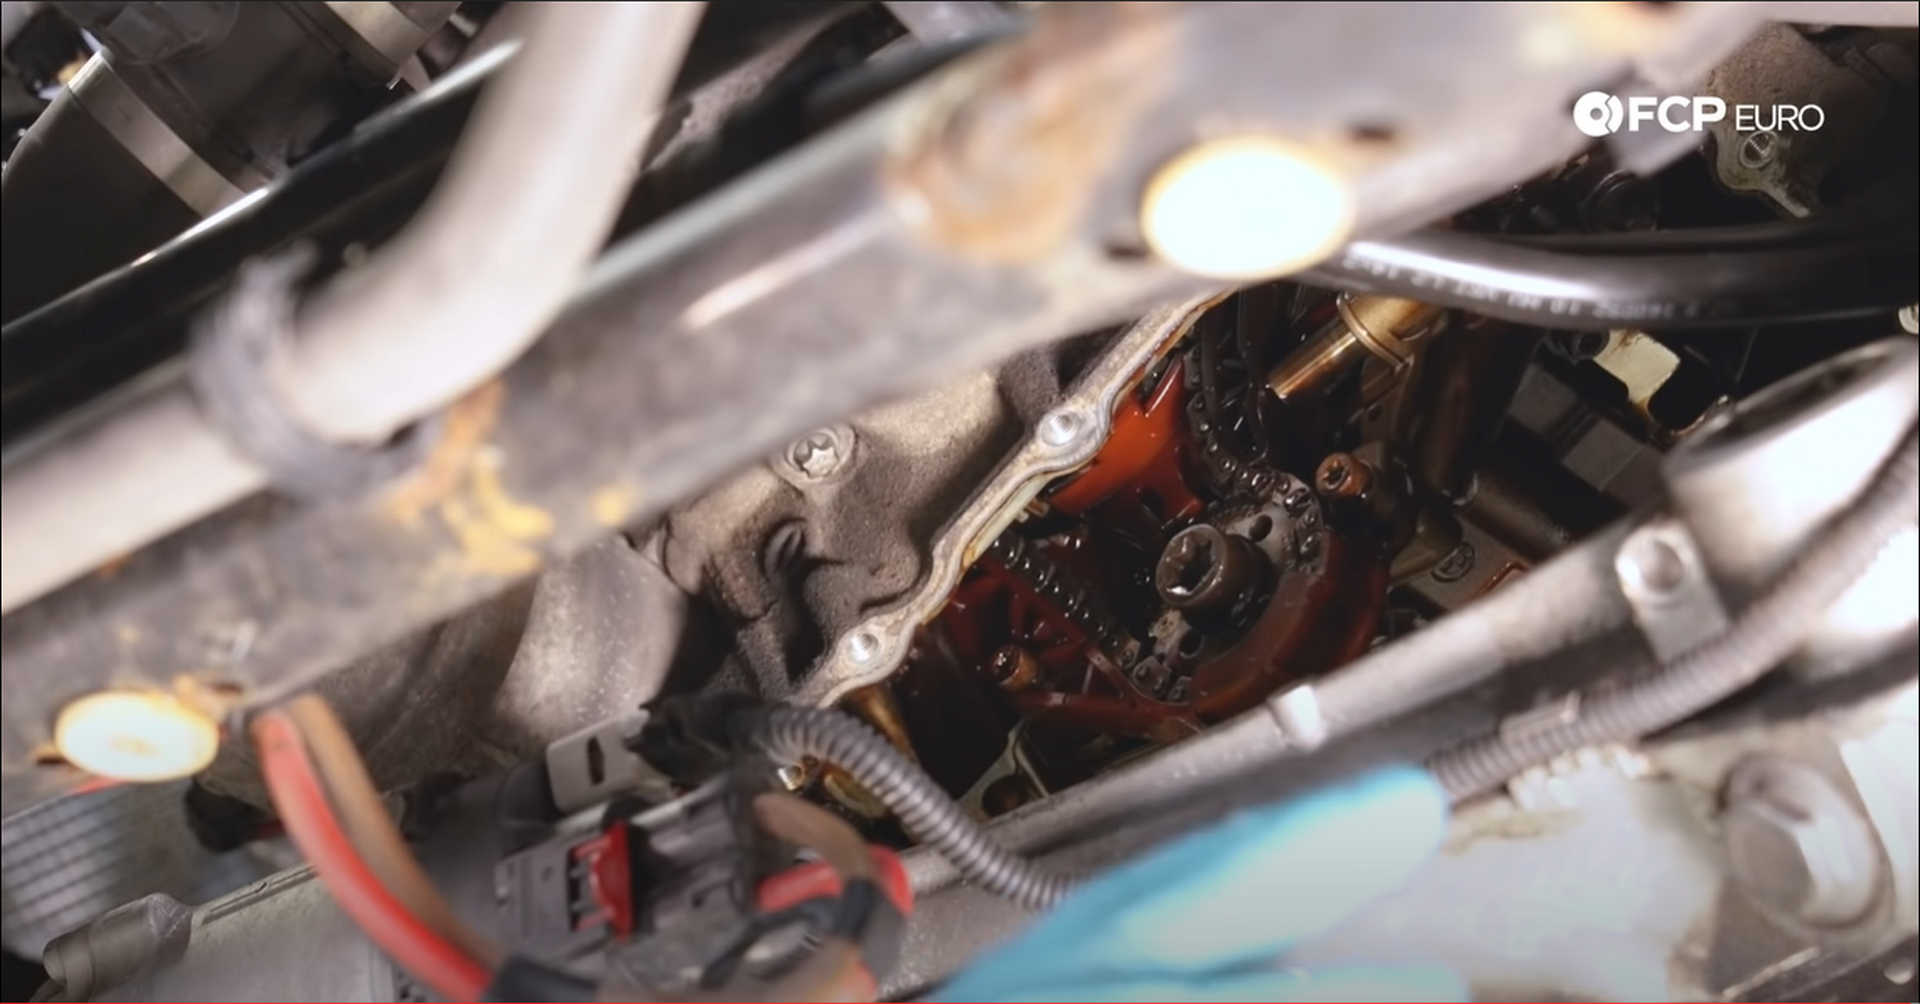
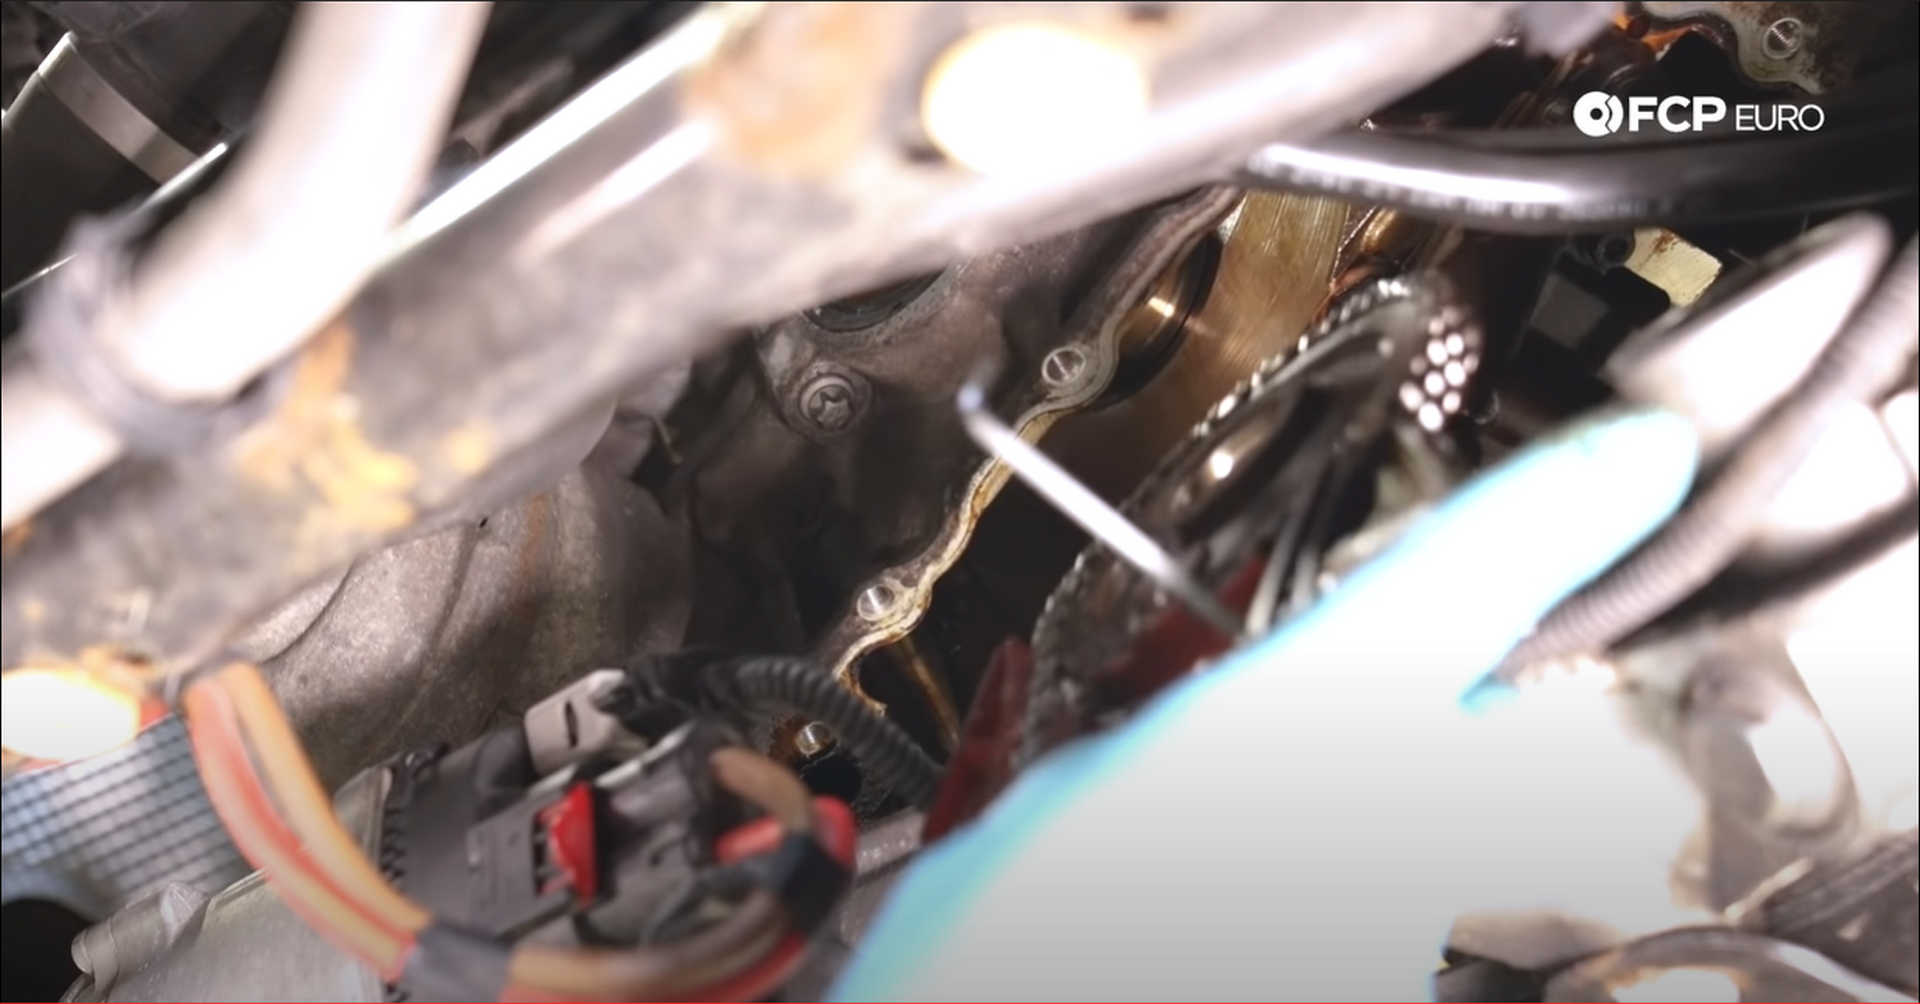
Step 13: Remove the upper timing chain
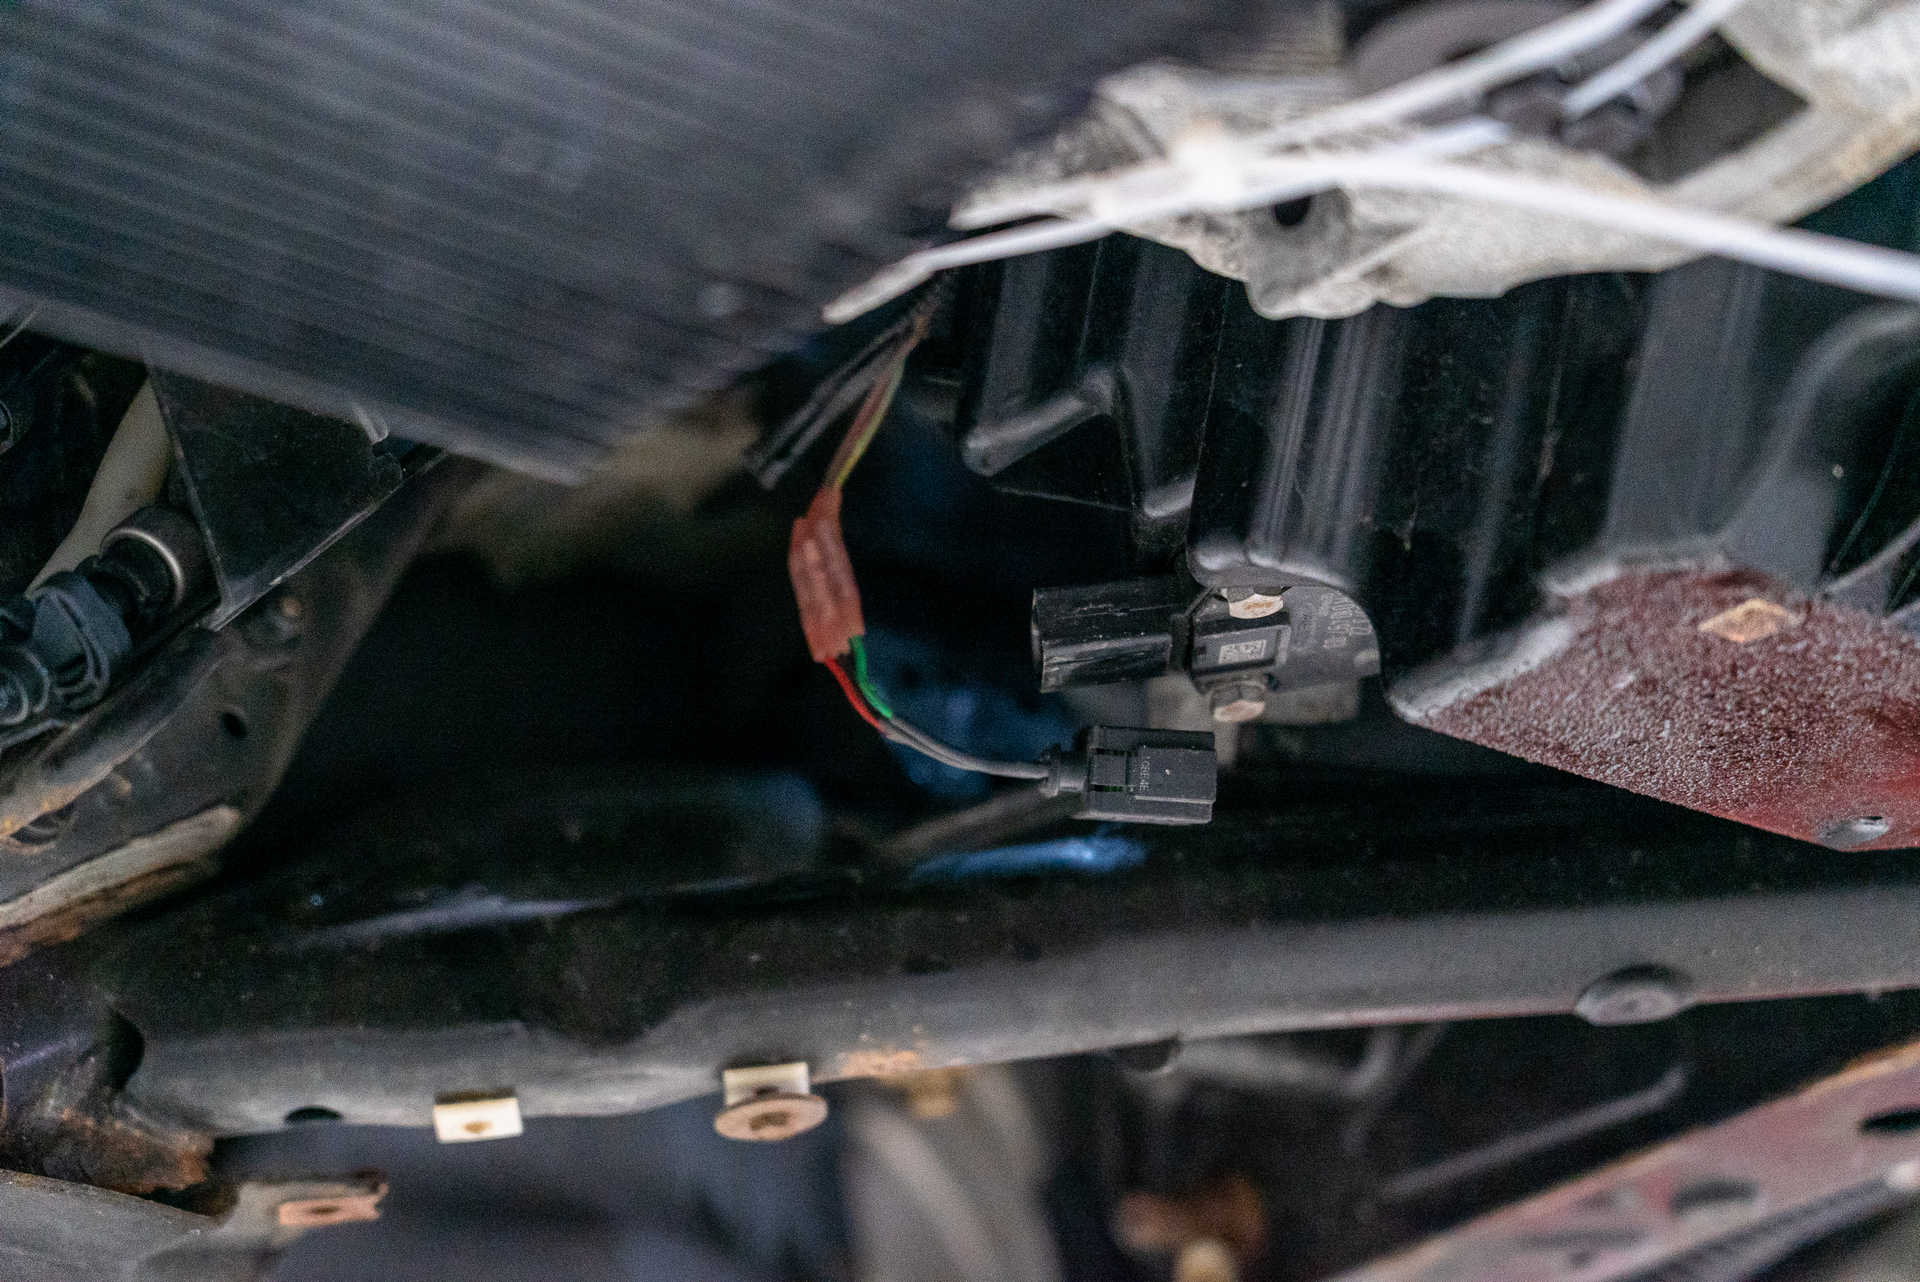
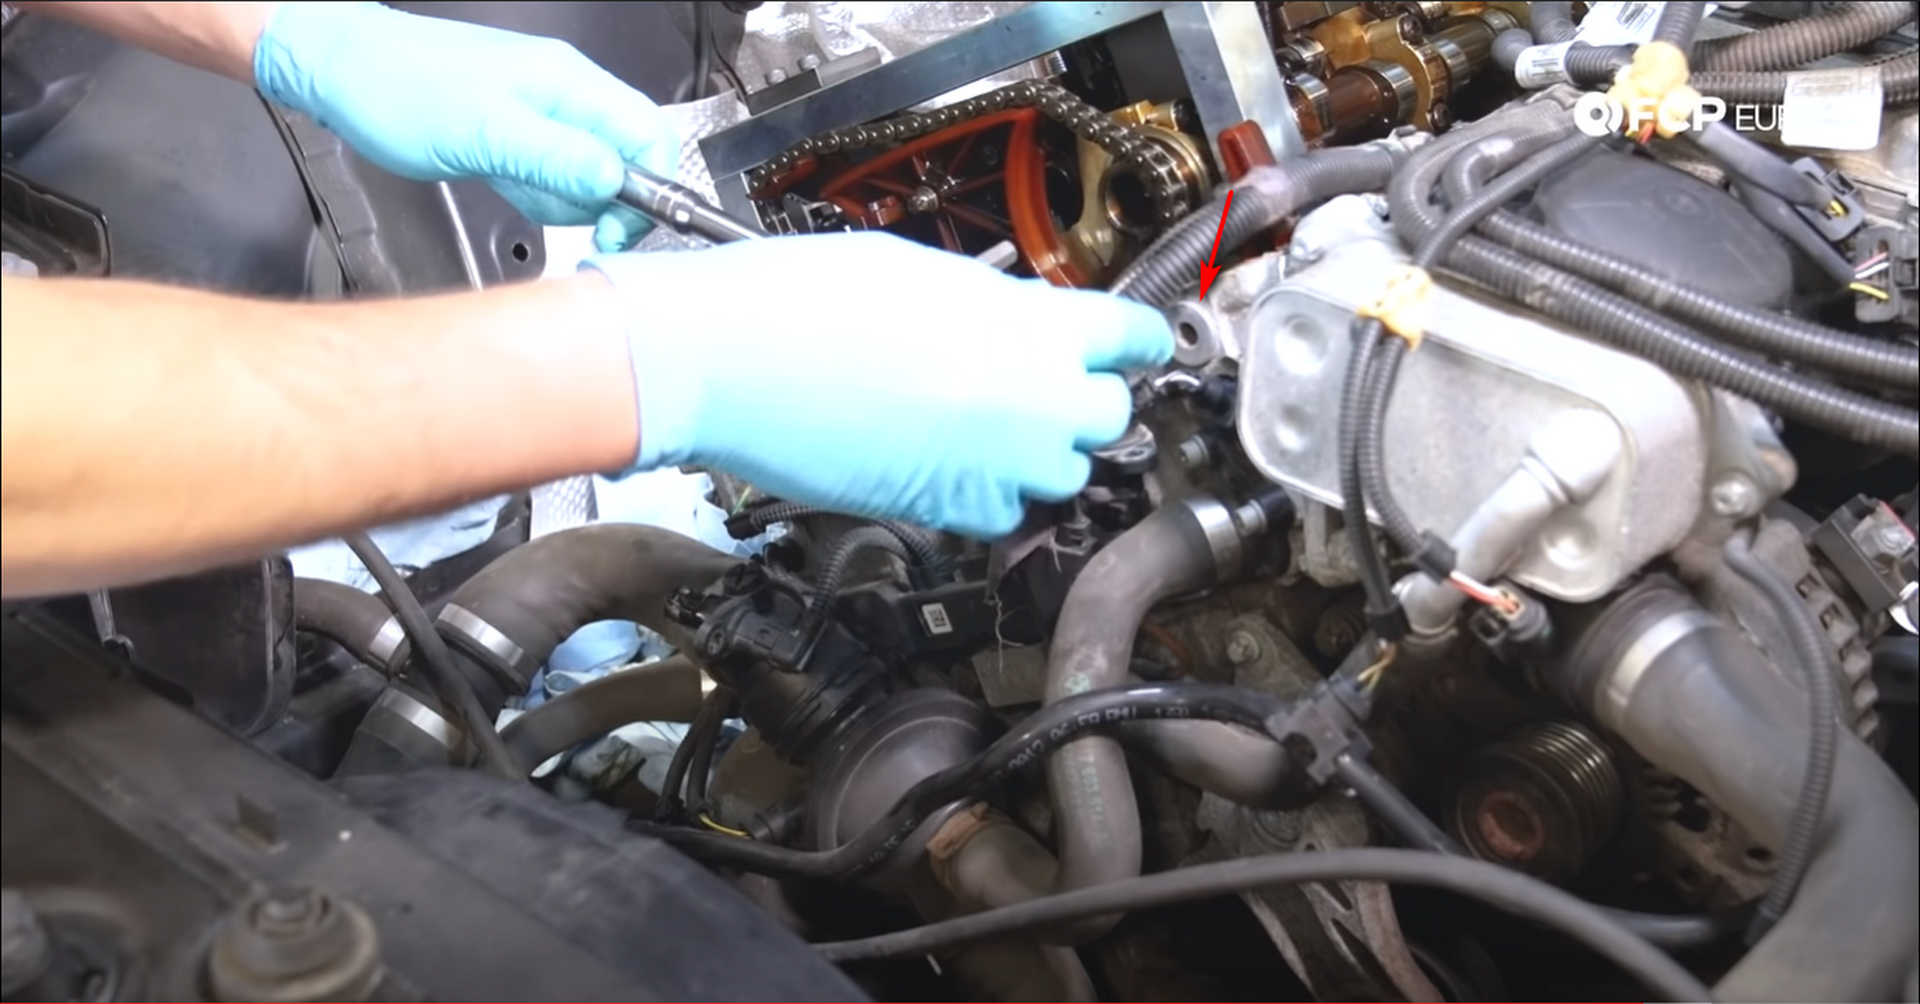
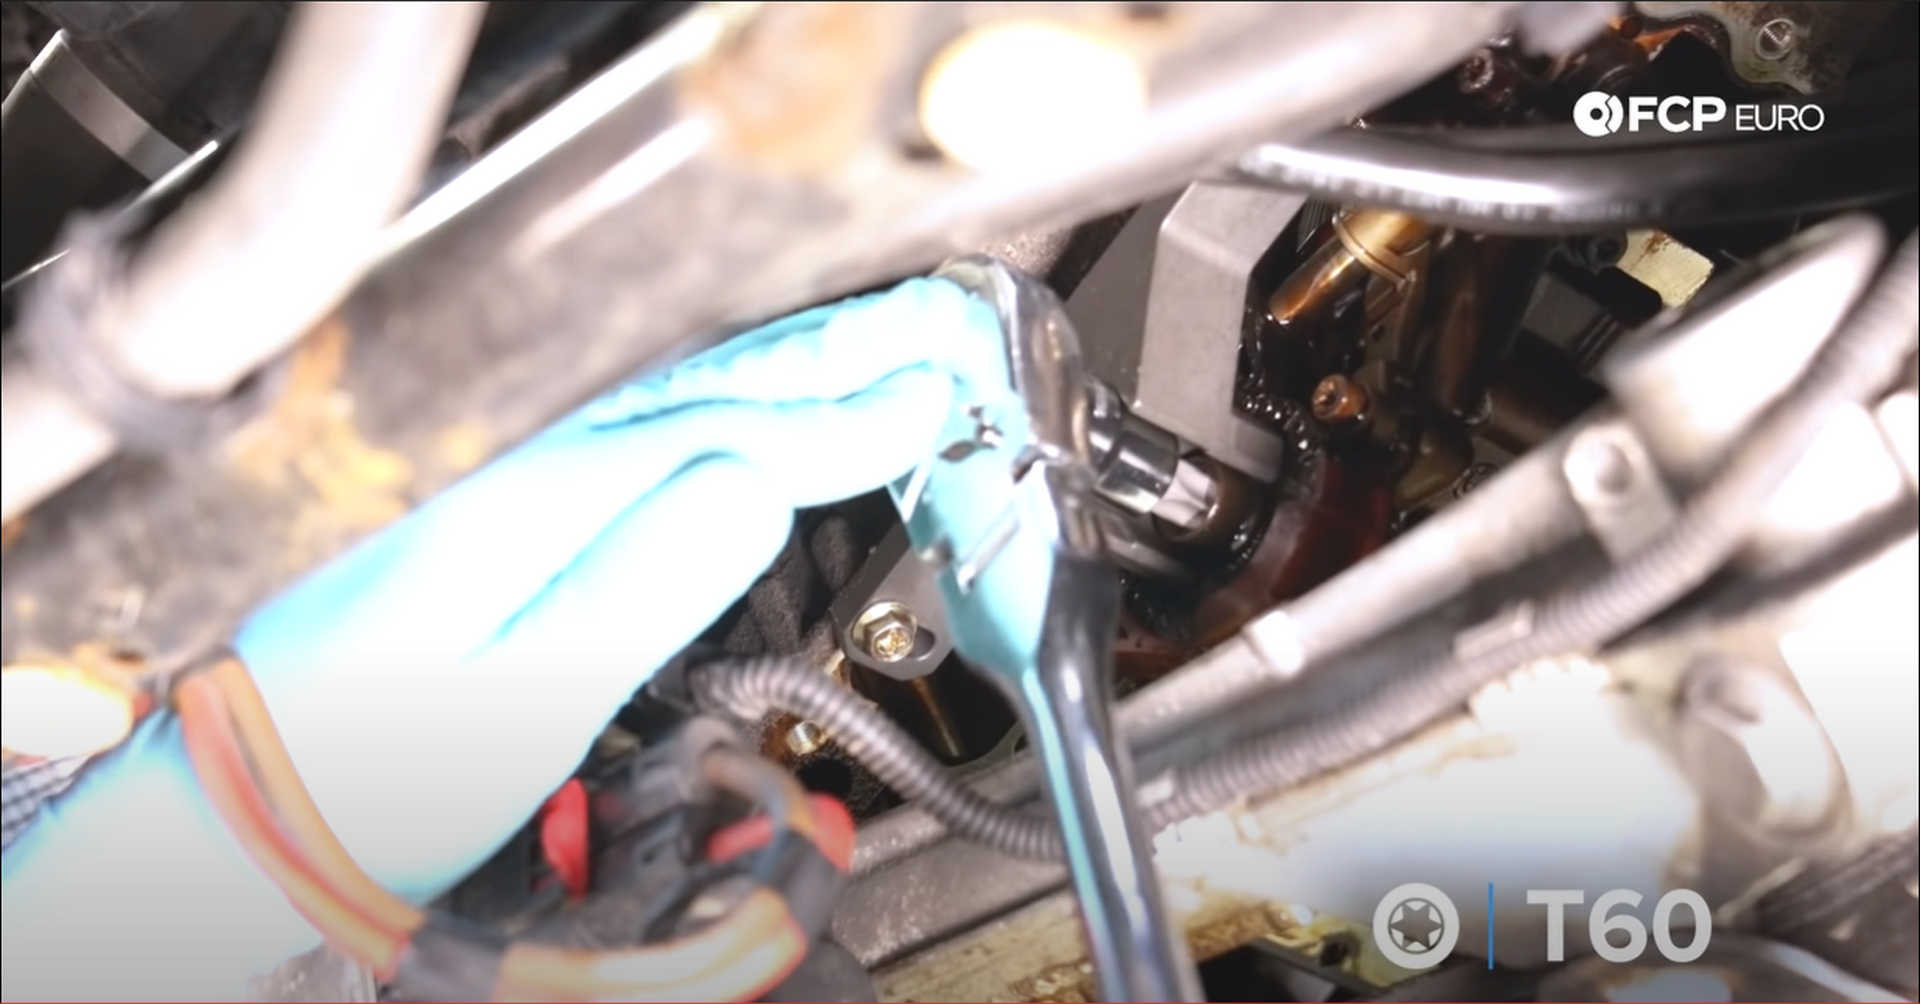
On the front of the timing chain cover under each camshaft sprocket, are the camshaft angle sensors. Use an E8 socket to remove the single bolt holding each of them in and then pull them out of the cover.
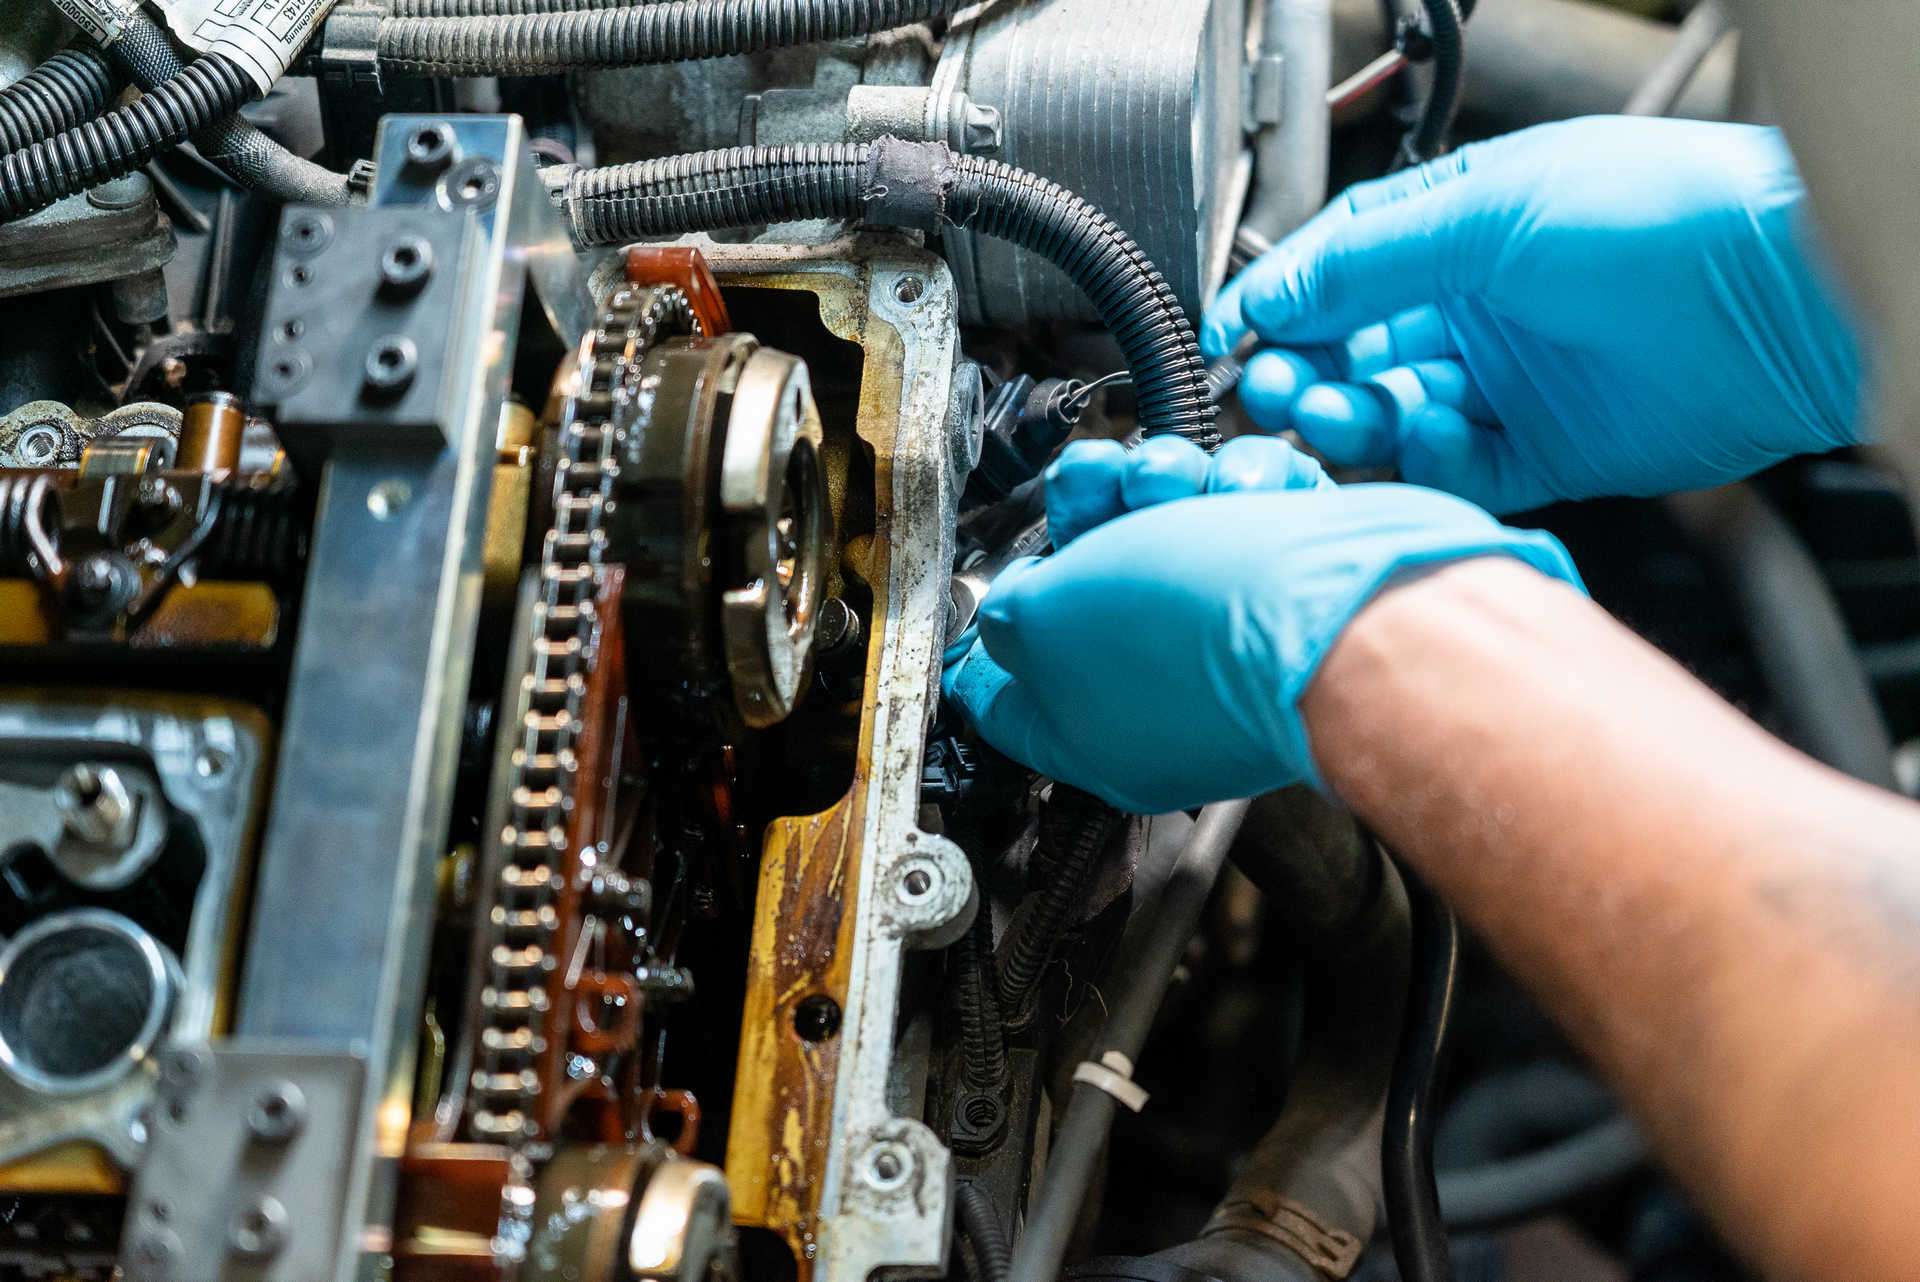
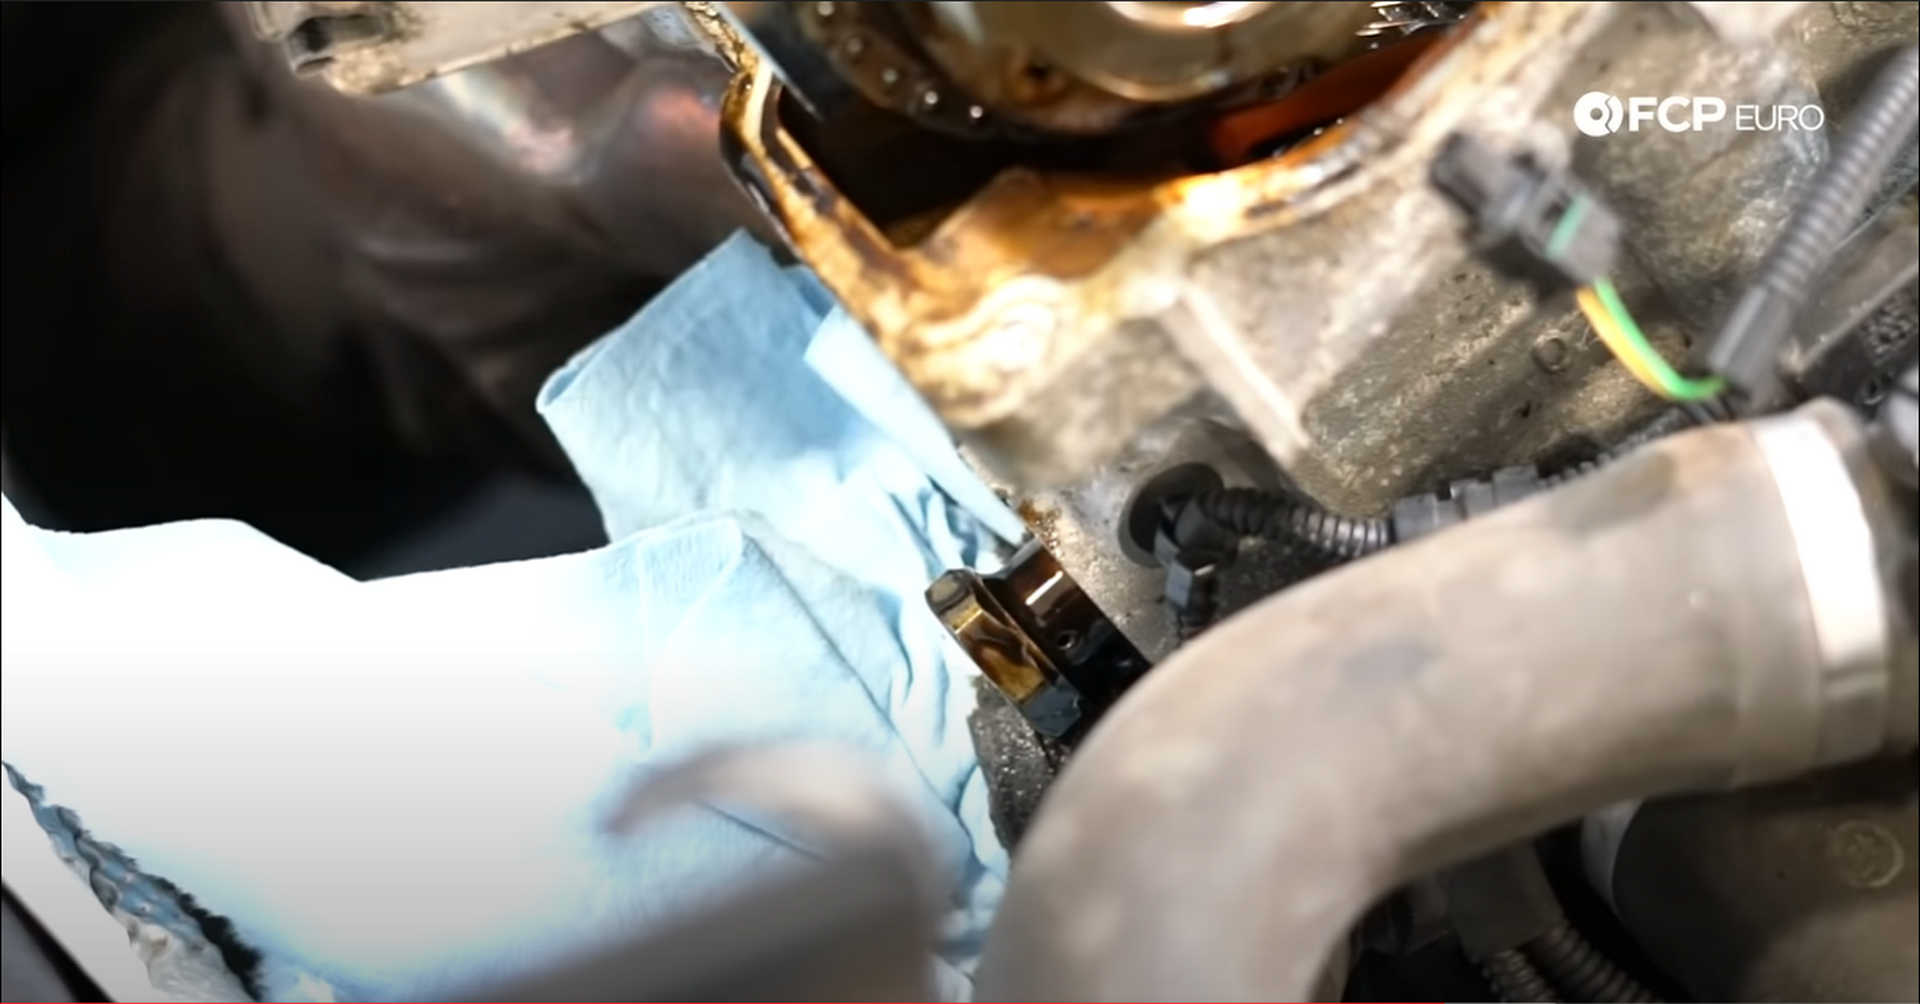
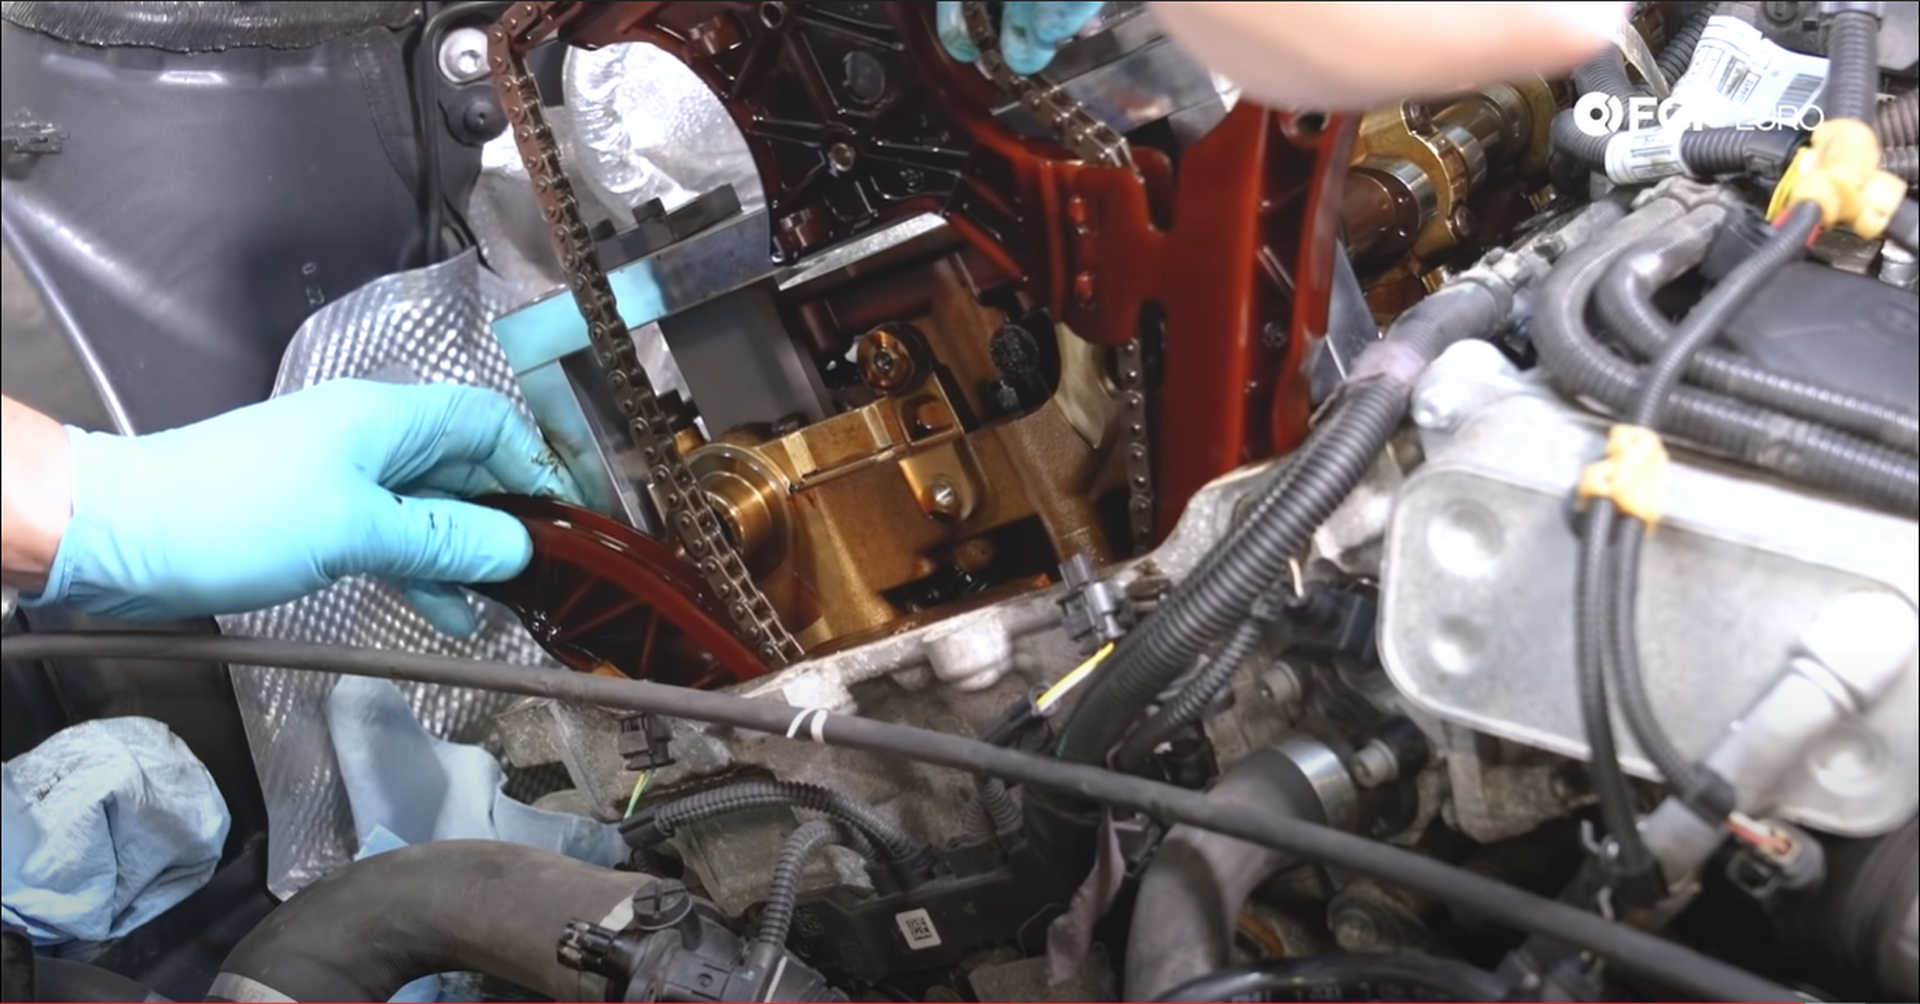
One the passenger’s side of the engine block, where the wastegate actuator sat, is the timing chain tensioner. Use a 27mm socket to loosen the tensioner to finger tight. Have plenty of rags ready when threading the tensioner out by hand, it is oil fed and will leak oil upon removal.
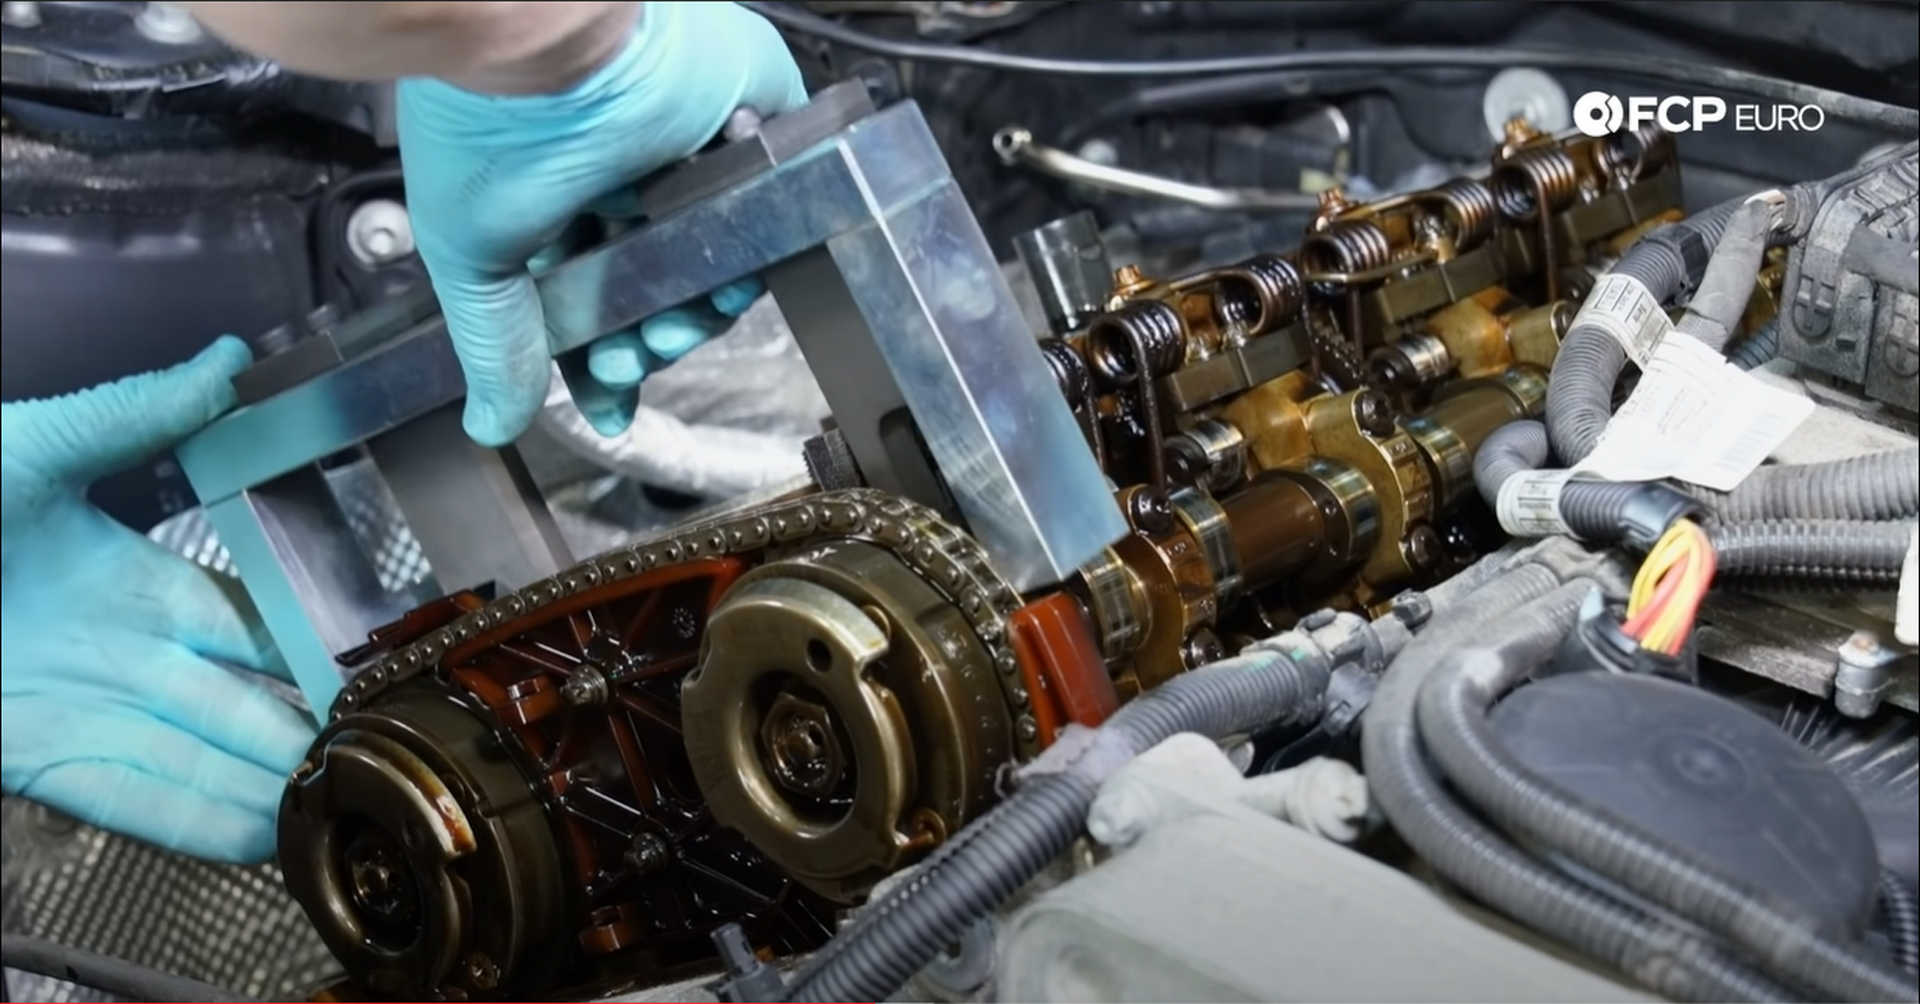
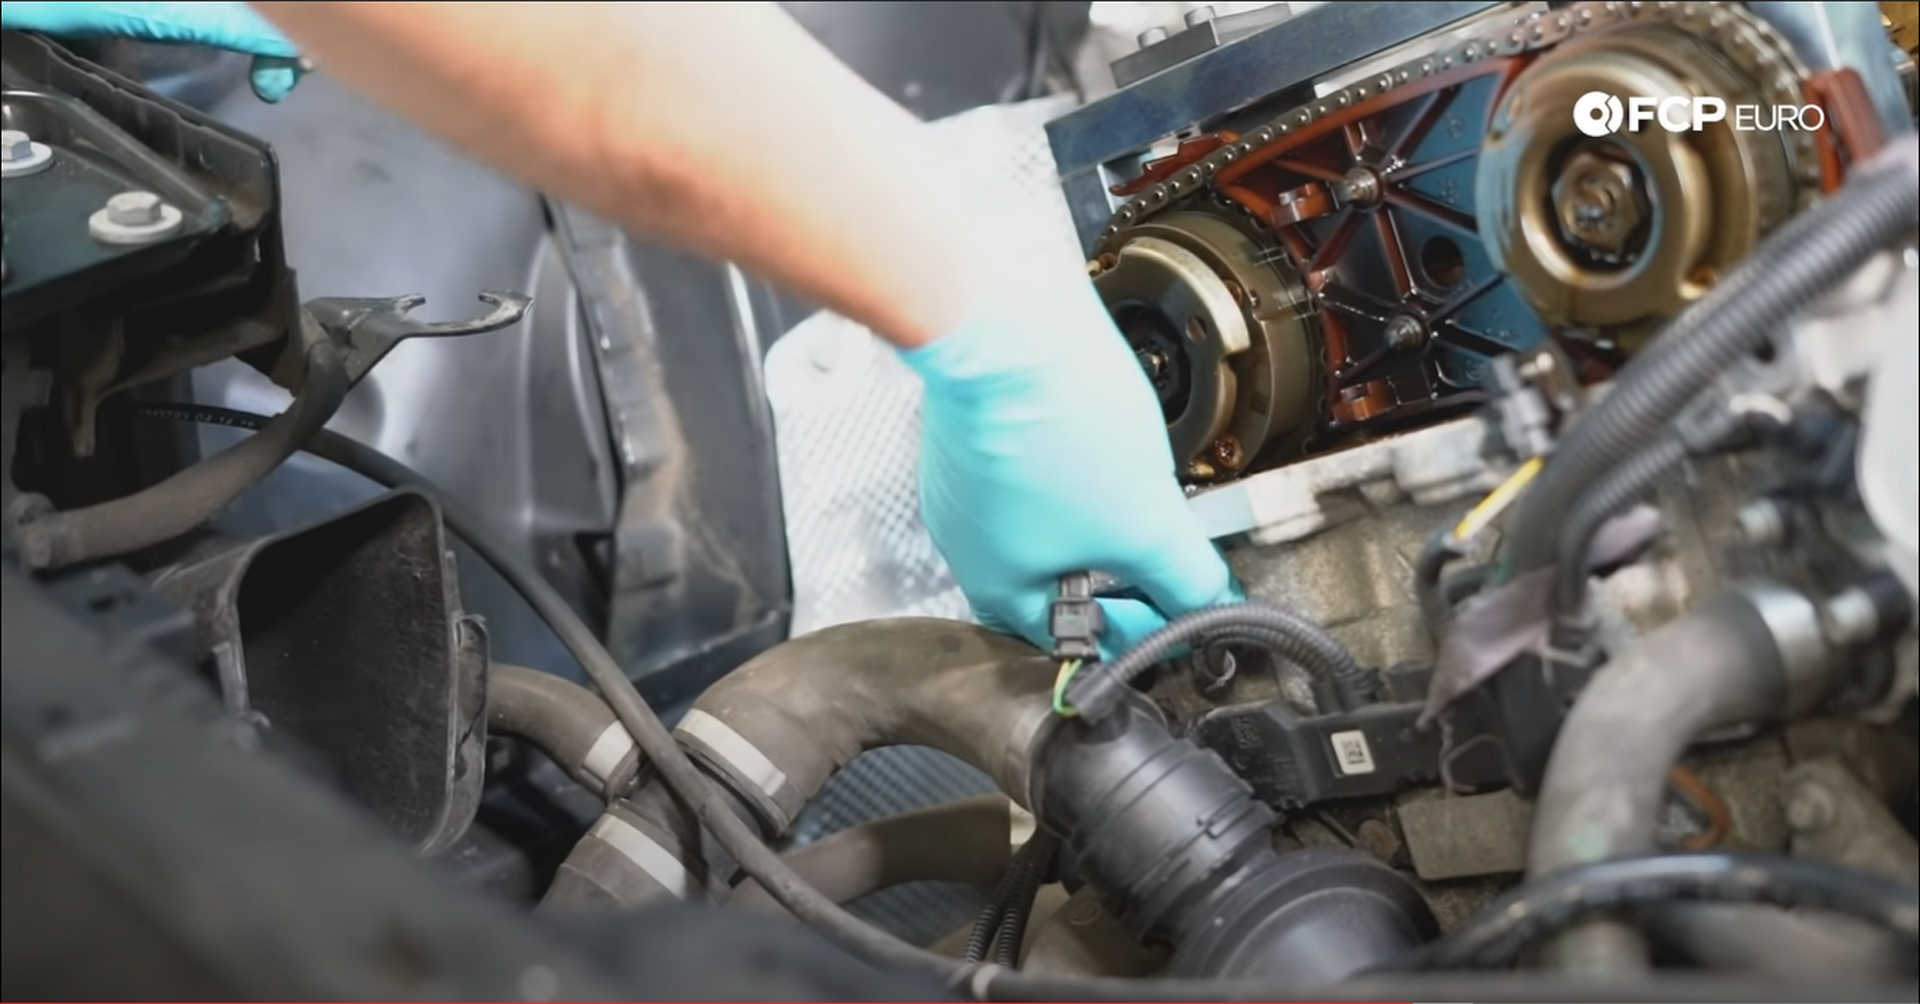
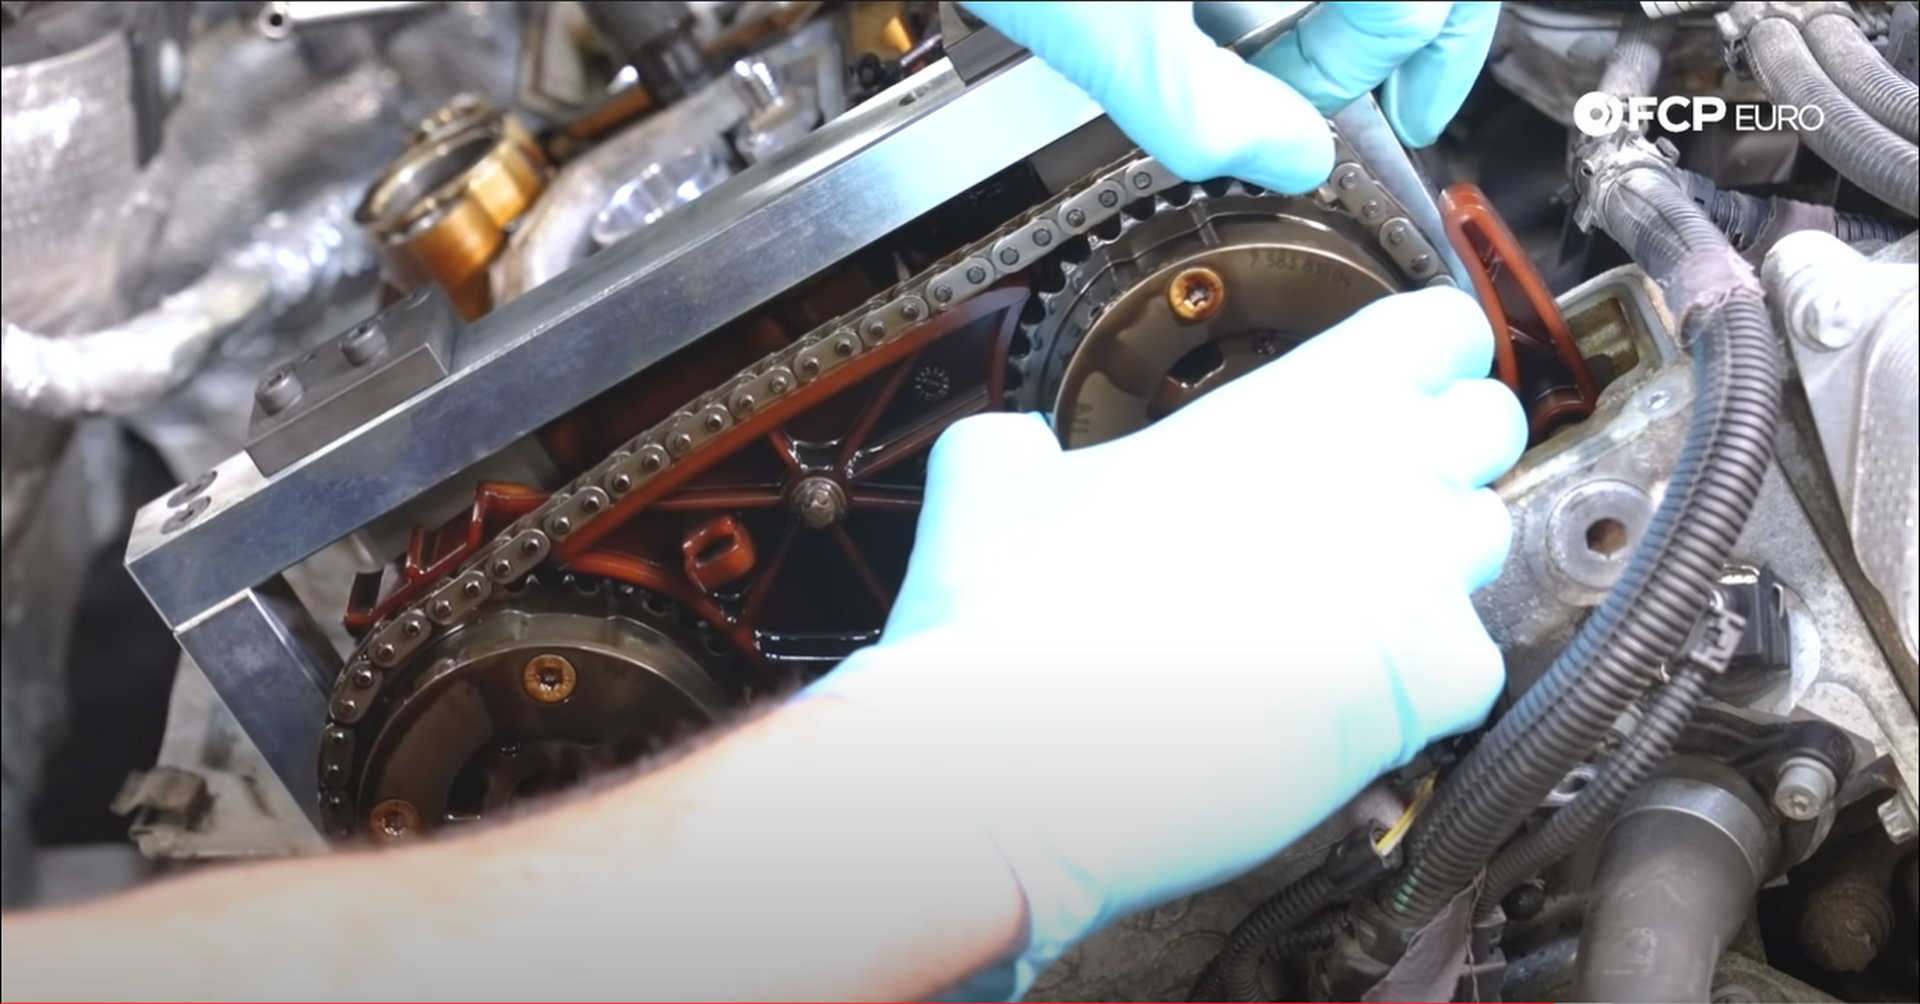
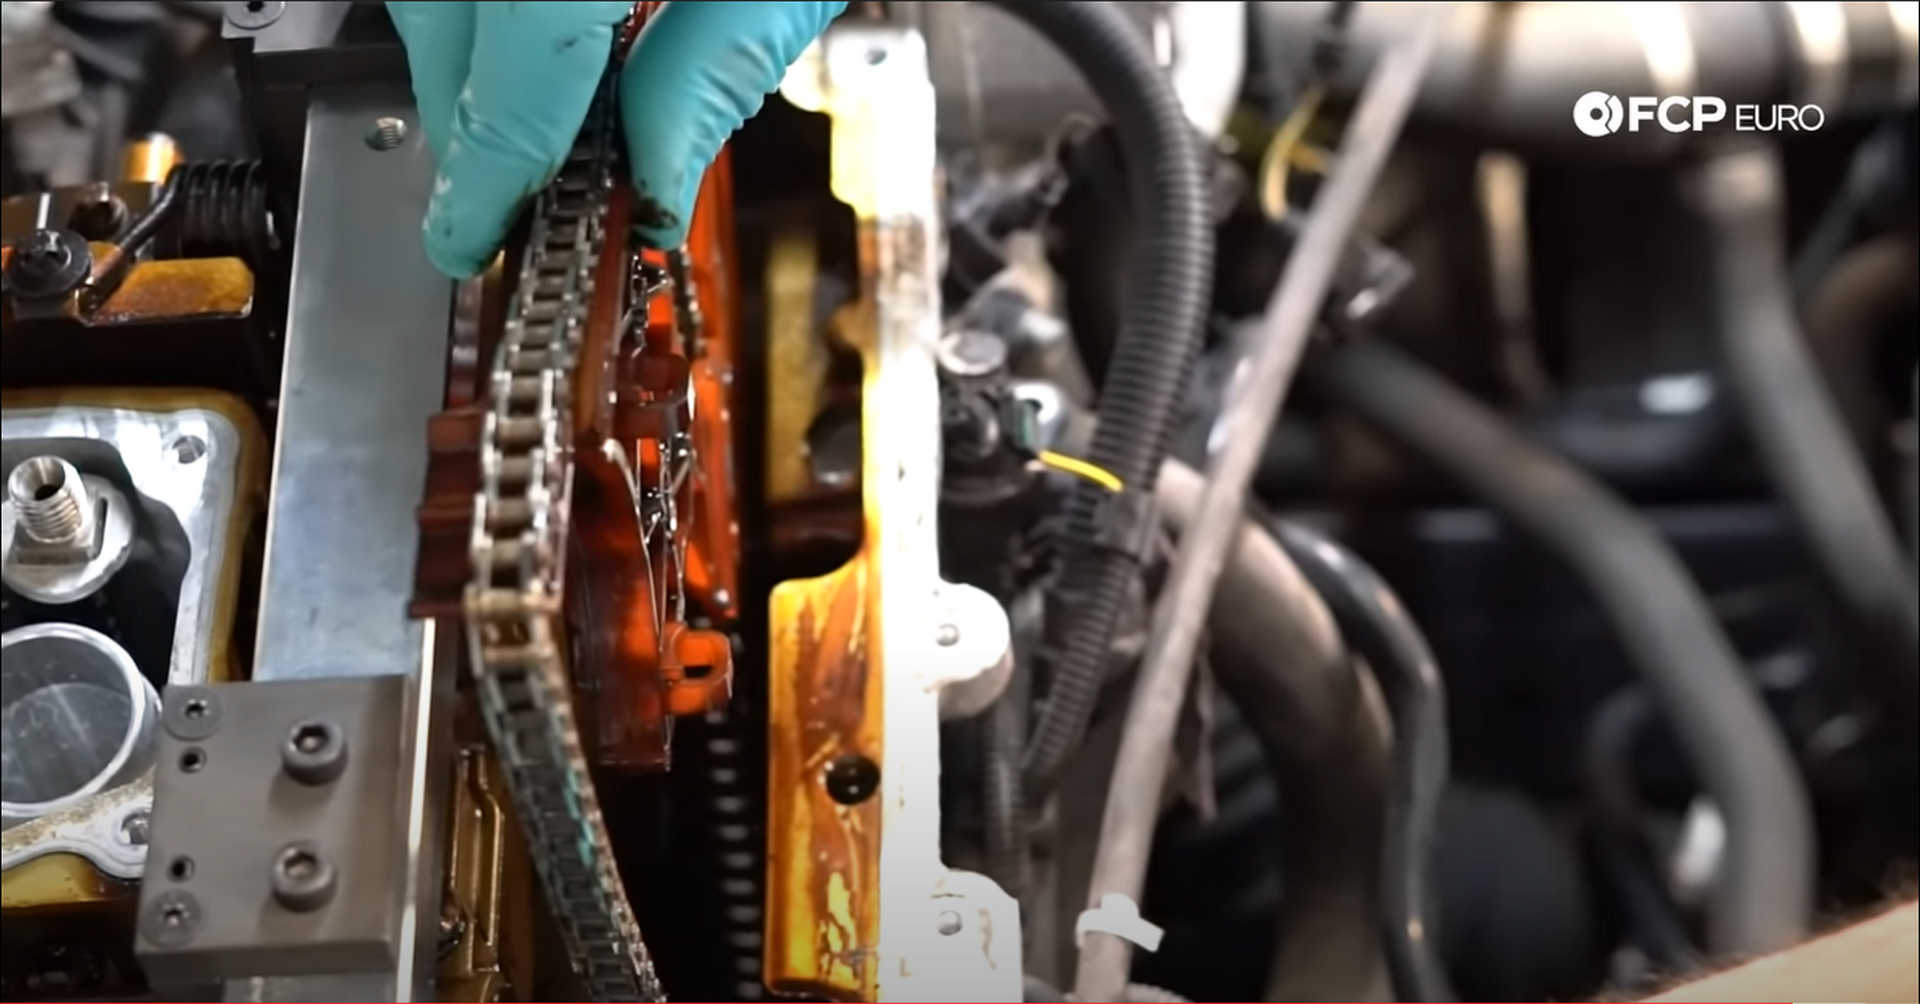
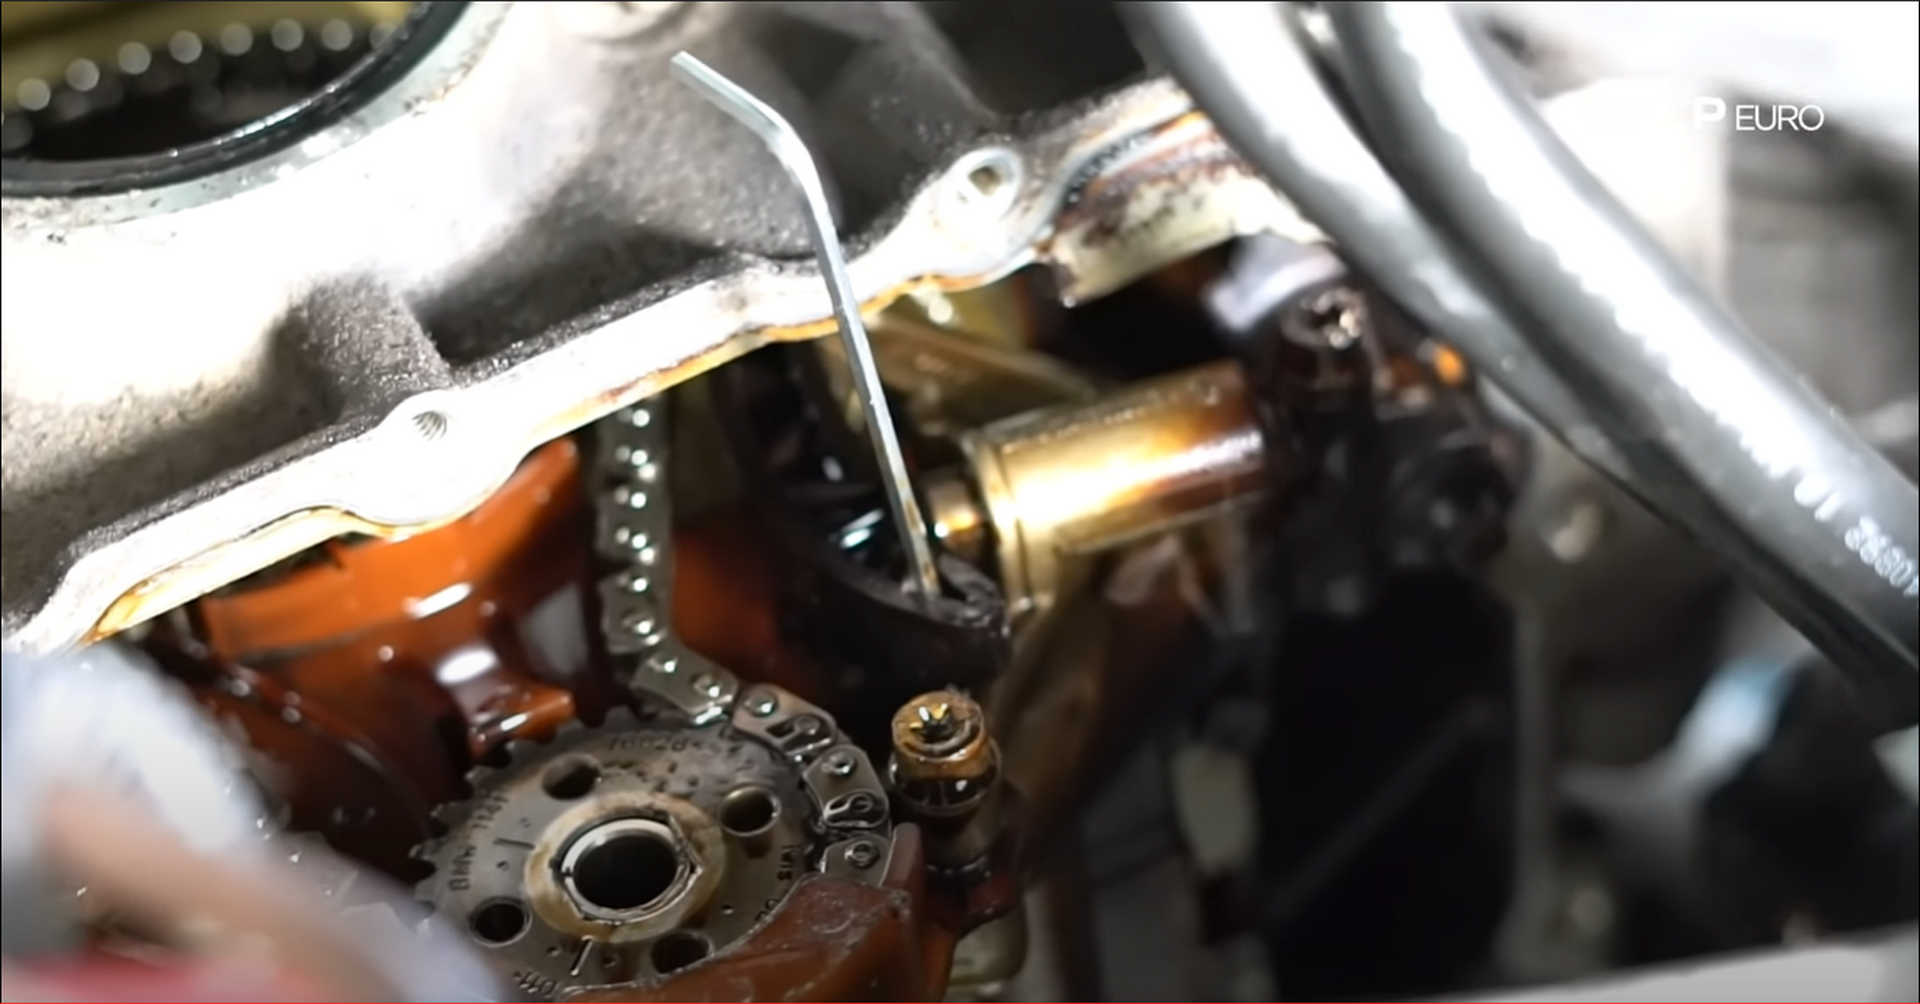
Using a 24mm socket, remove the camshaft sprocket nuts. Pull the variable timing components off of the sprockets and then pull the sprockets off of the camshafts. Pull up on the chain while pulling the sprockets off.
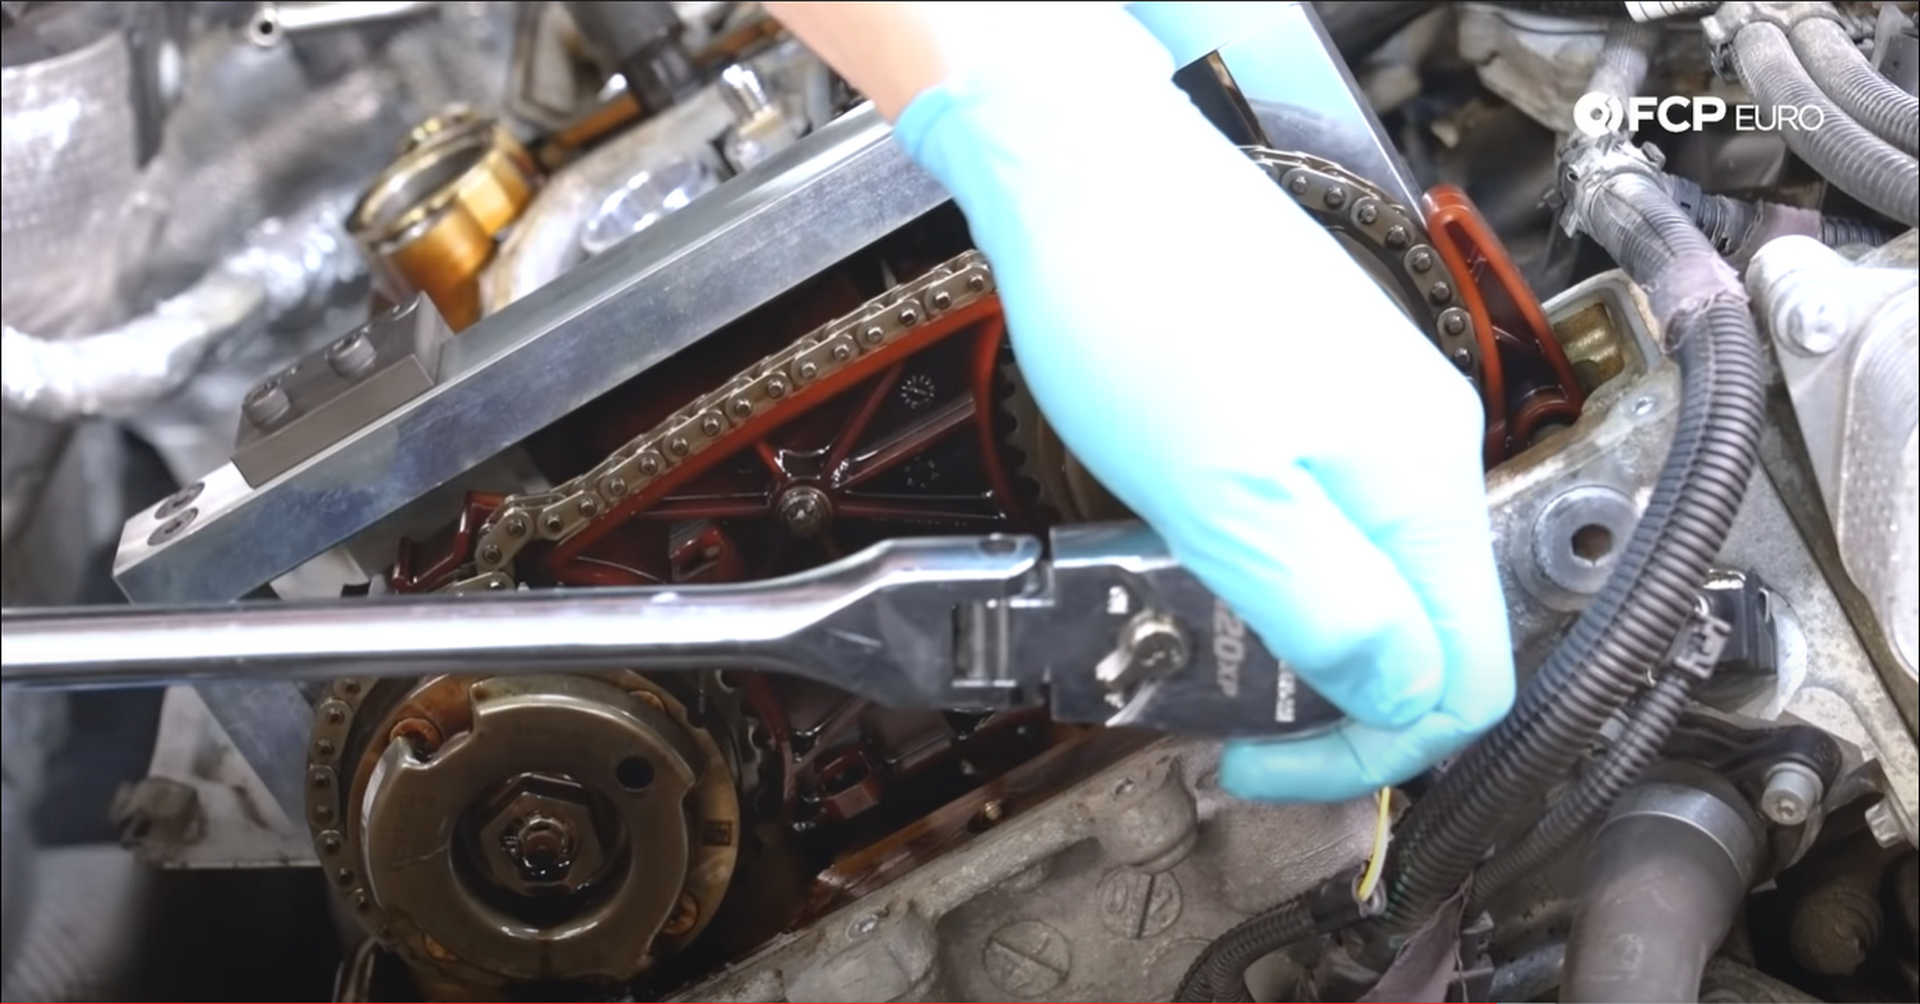
Mark the variable timing components so that they don’t get mixed up. They cannot be used interchangeably.
The crankshaft pulley mount sits on the snout of the crankshaft and helps to align the chains in the engine. Thread two of the vibration dampener bolts into the mount and pull on them, wiggling it off of the crank snout.

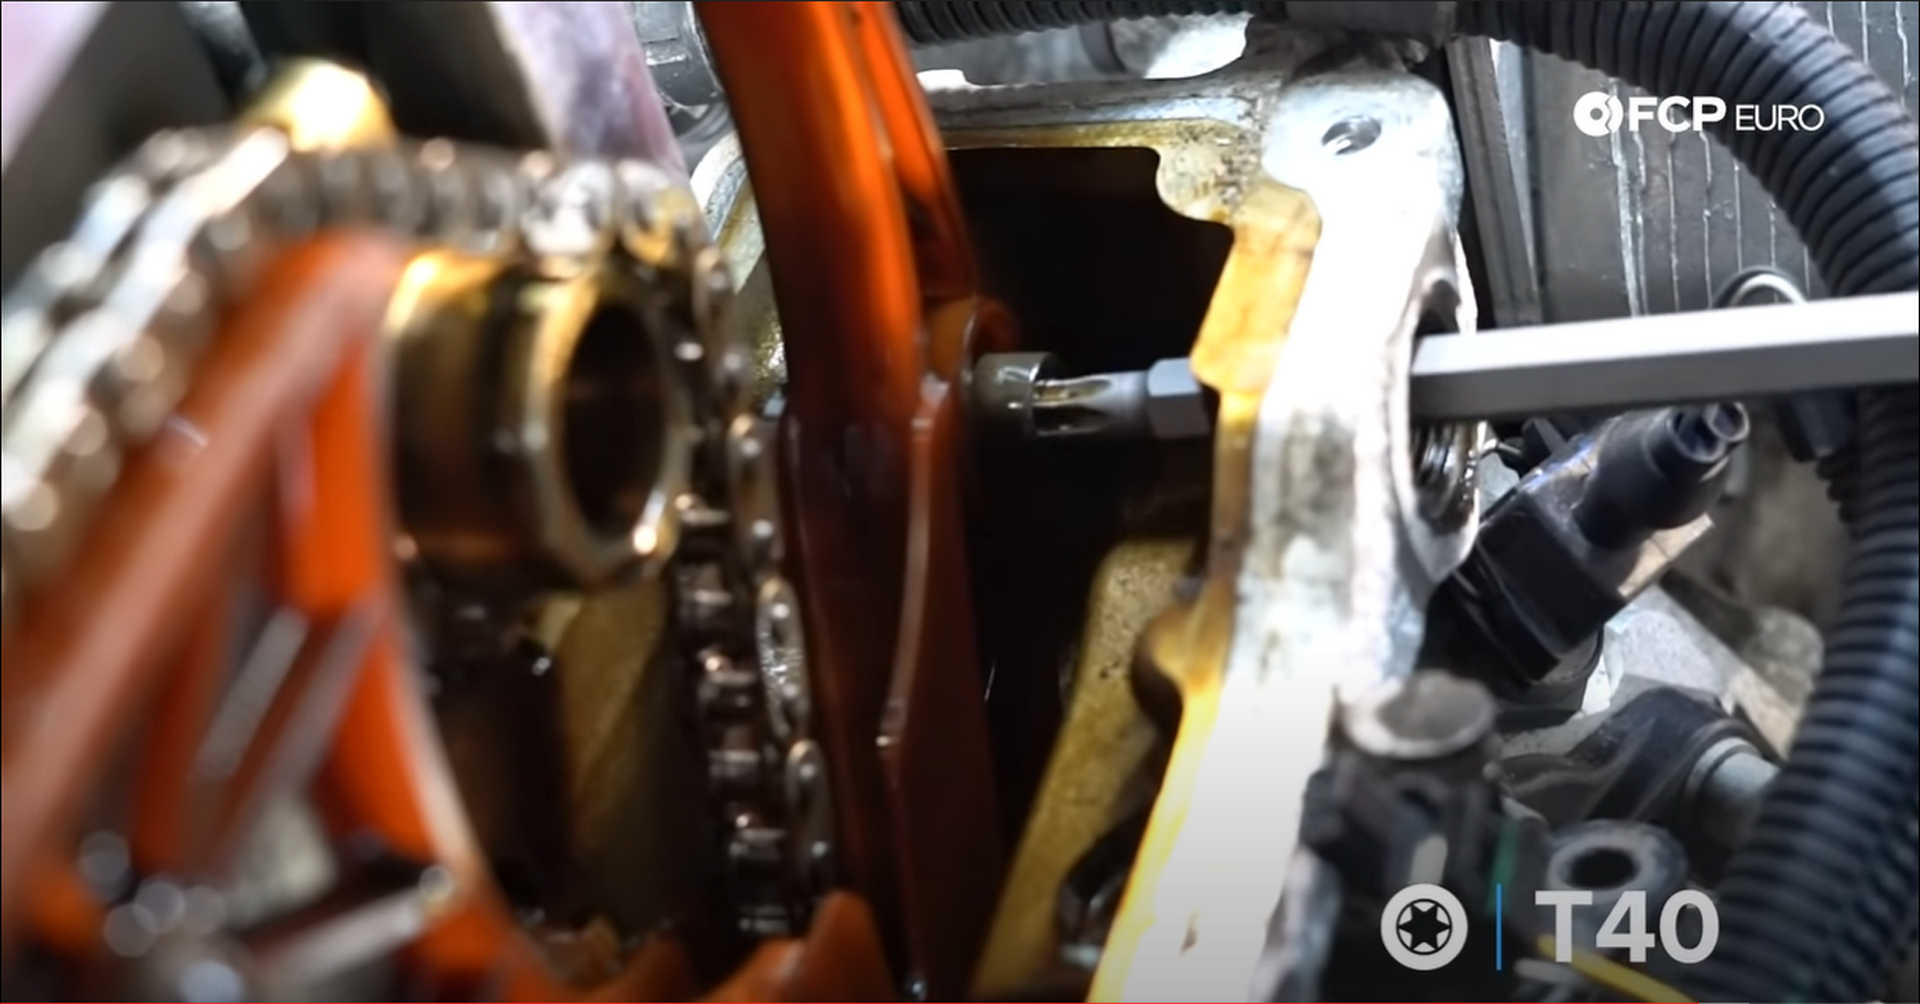
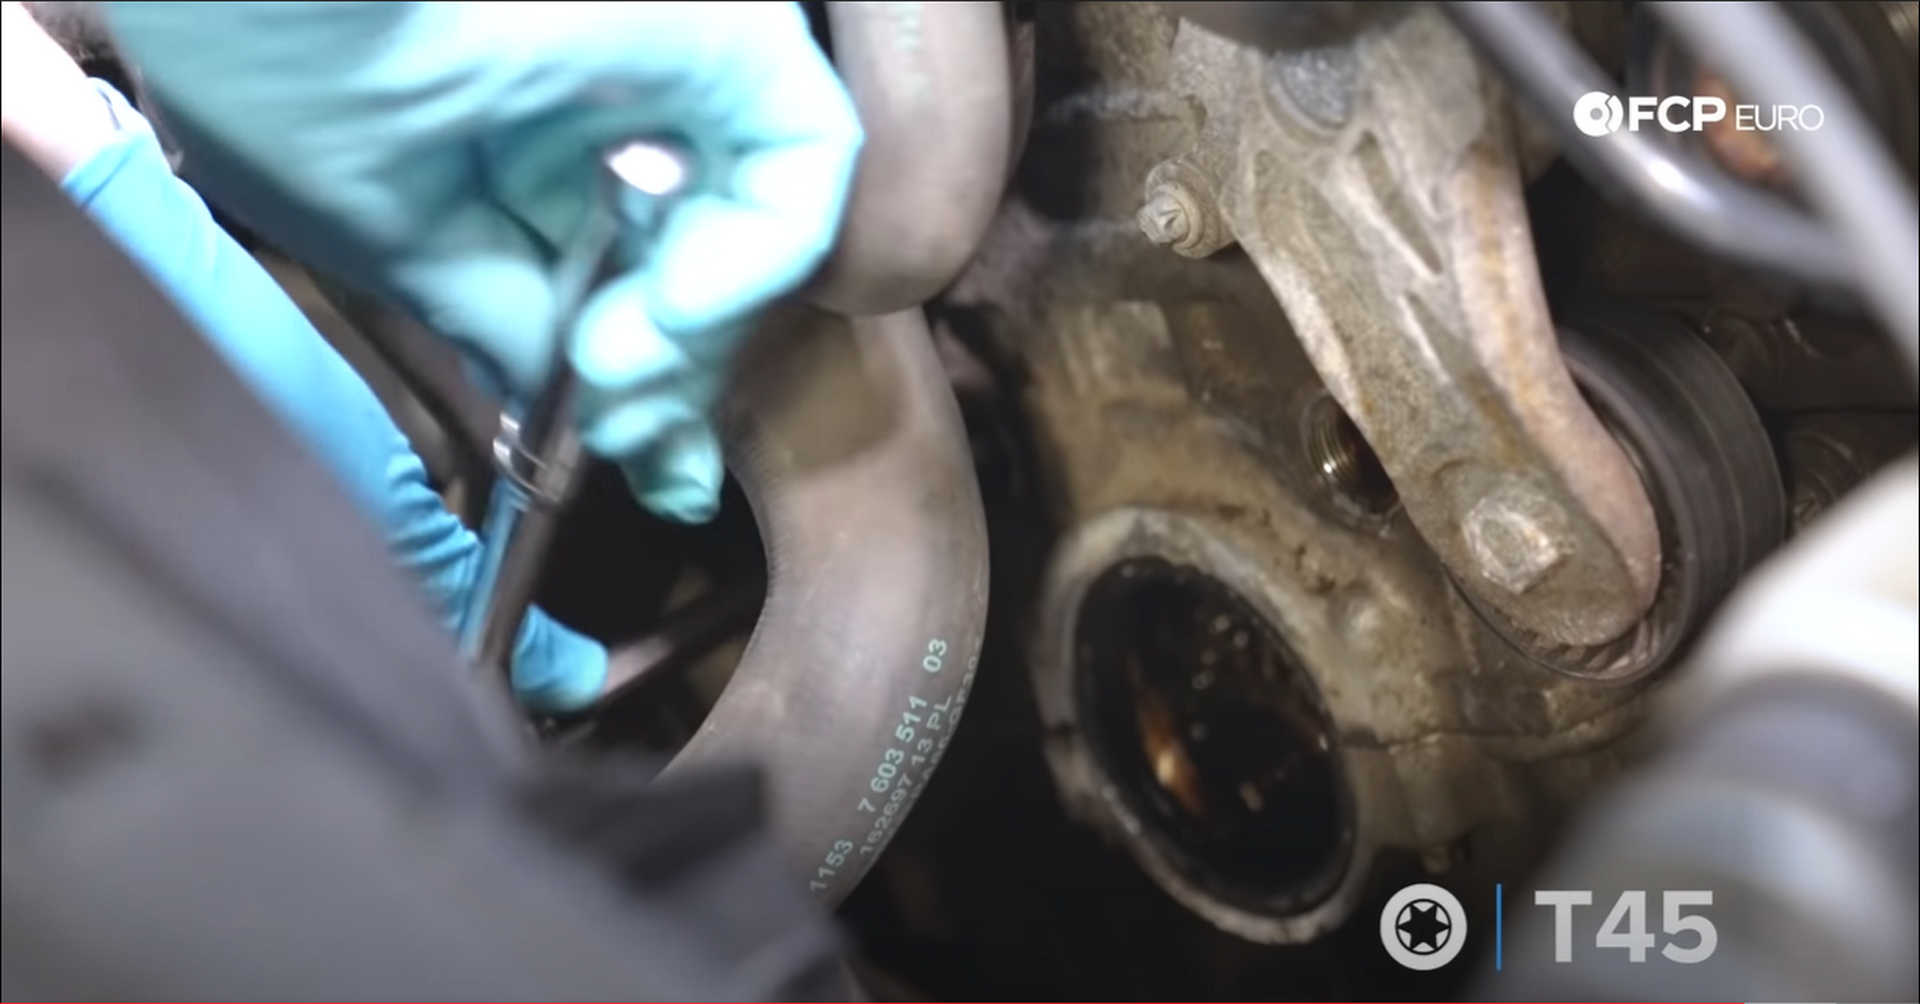
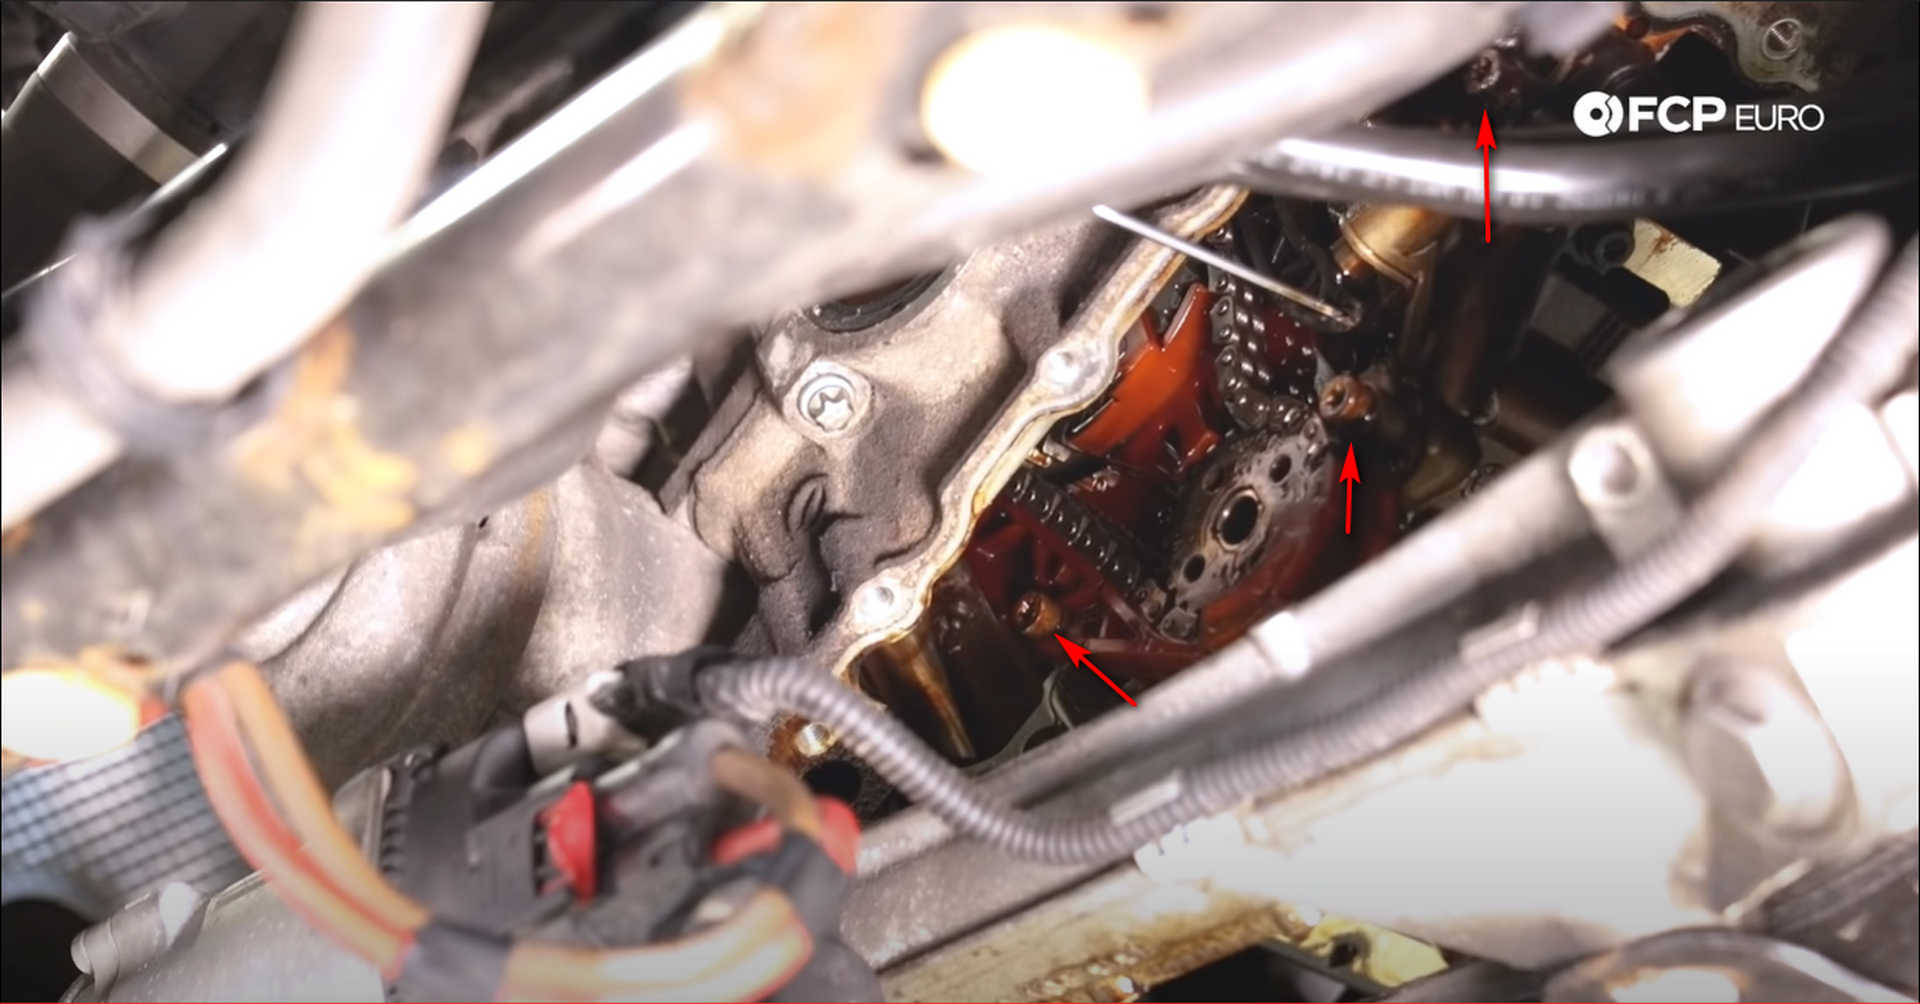
The timing chain guides can now be loosened with everything else out of the way. Several of the timing chain guide bolts are behind plugs Use an 8mm hex bit socket to remove the plugs. One plug is under the driver’s side camshaft, while the two others and down by the crankshaft.
The bolt behind the upper plug can be removed with a T40 socket, while the bolts behind the lower plugs need a T45 socket. Set the bolts in a safe location after removal as they will be reused.
Lastly, remove the two E8 bolts in the center of the middle guide. Support the middle guide when the second bolt is removed; otherwise, the guide will fall into the engine.
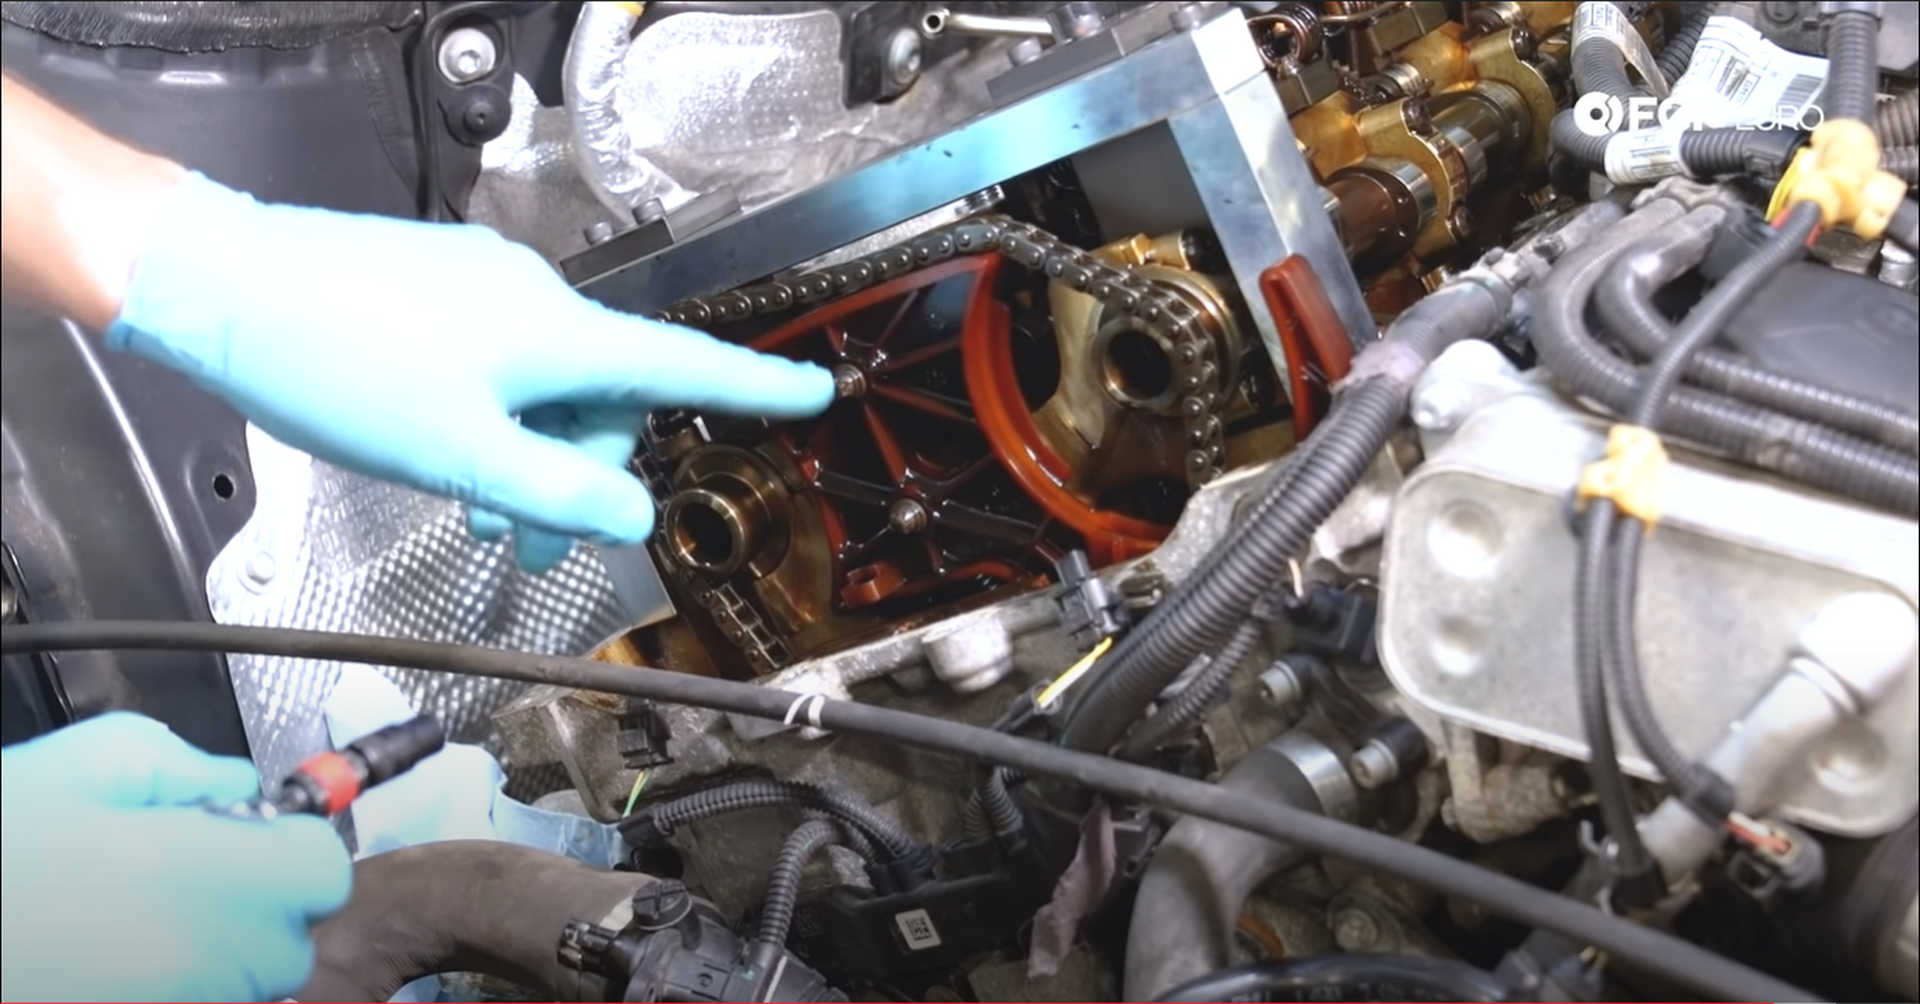
When those last two bolts are removed, remove the entire timing chain and guide assembly as one unit. Hold the middle guide and the chain, pulling up out of the engine. The chain and the guides may get snagged on parts inside of the engine. Go slowly and work around that, and the assembly will all come out together.

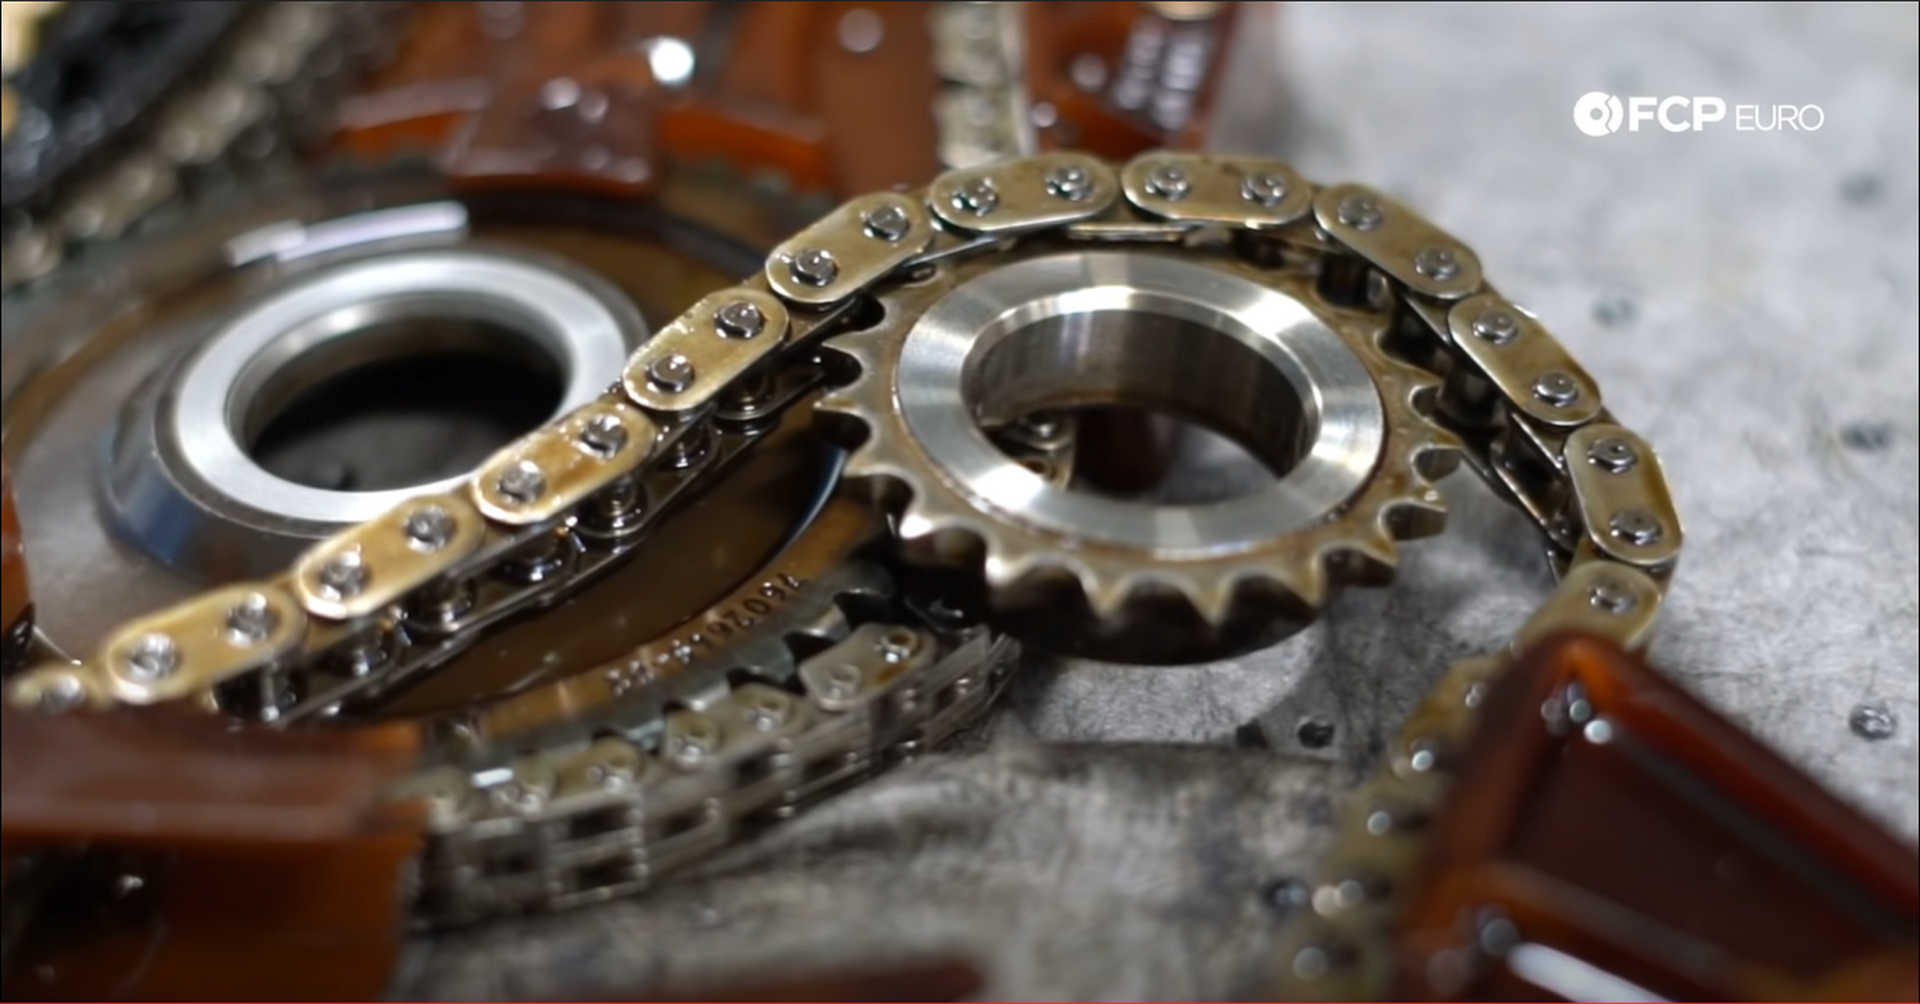
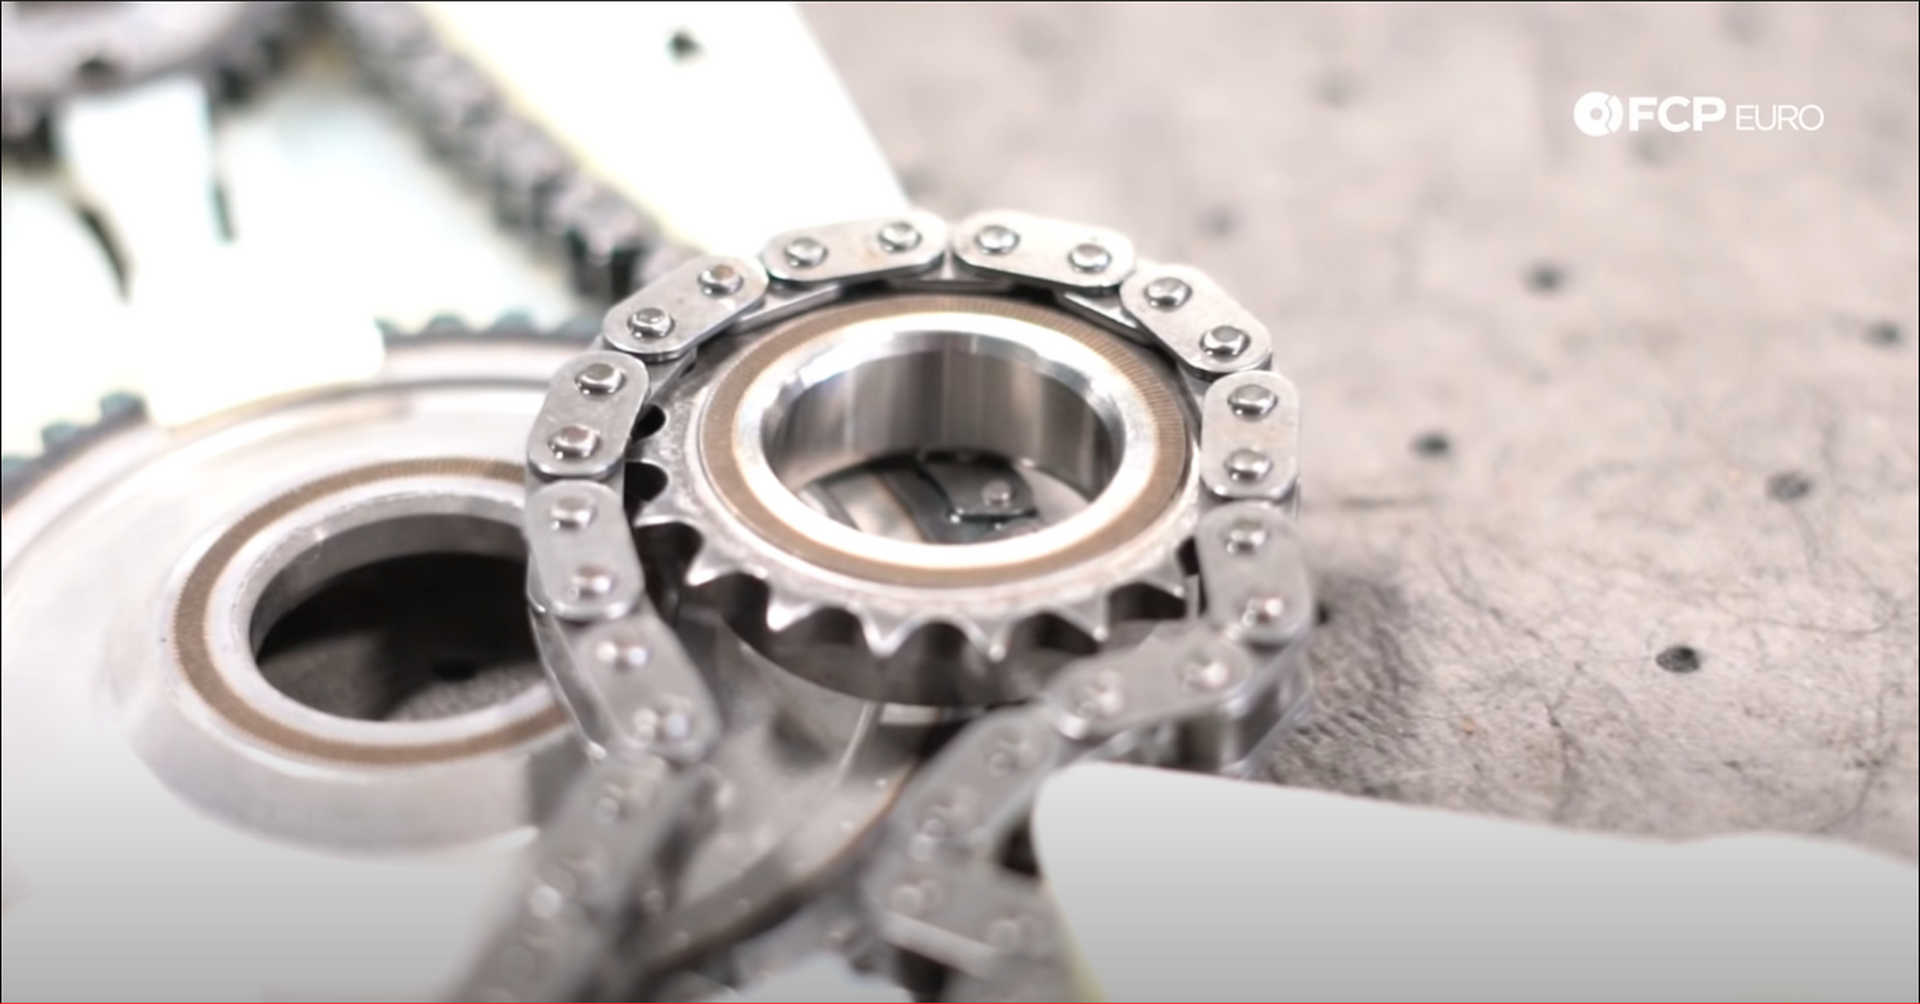
Take a look at the timing chain sprocket now that it’s out of the car. The early production N20s had sprockets with smooth faces. BMW updated this starting in 2013, and any new timing chain replacement will need one of the new sprockets. The new sprocket is available on our website and is linked above.
Step 14: Remove the oil pump drive assembly
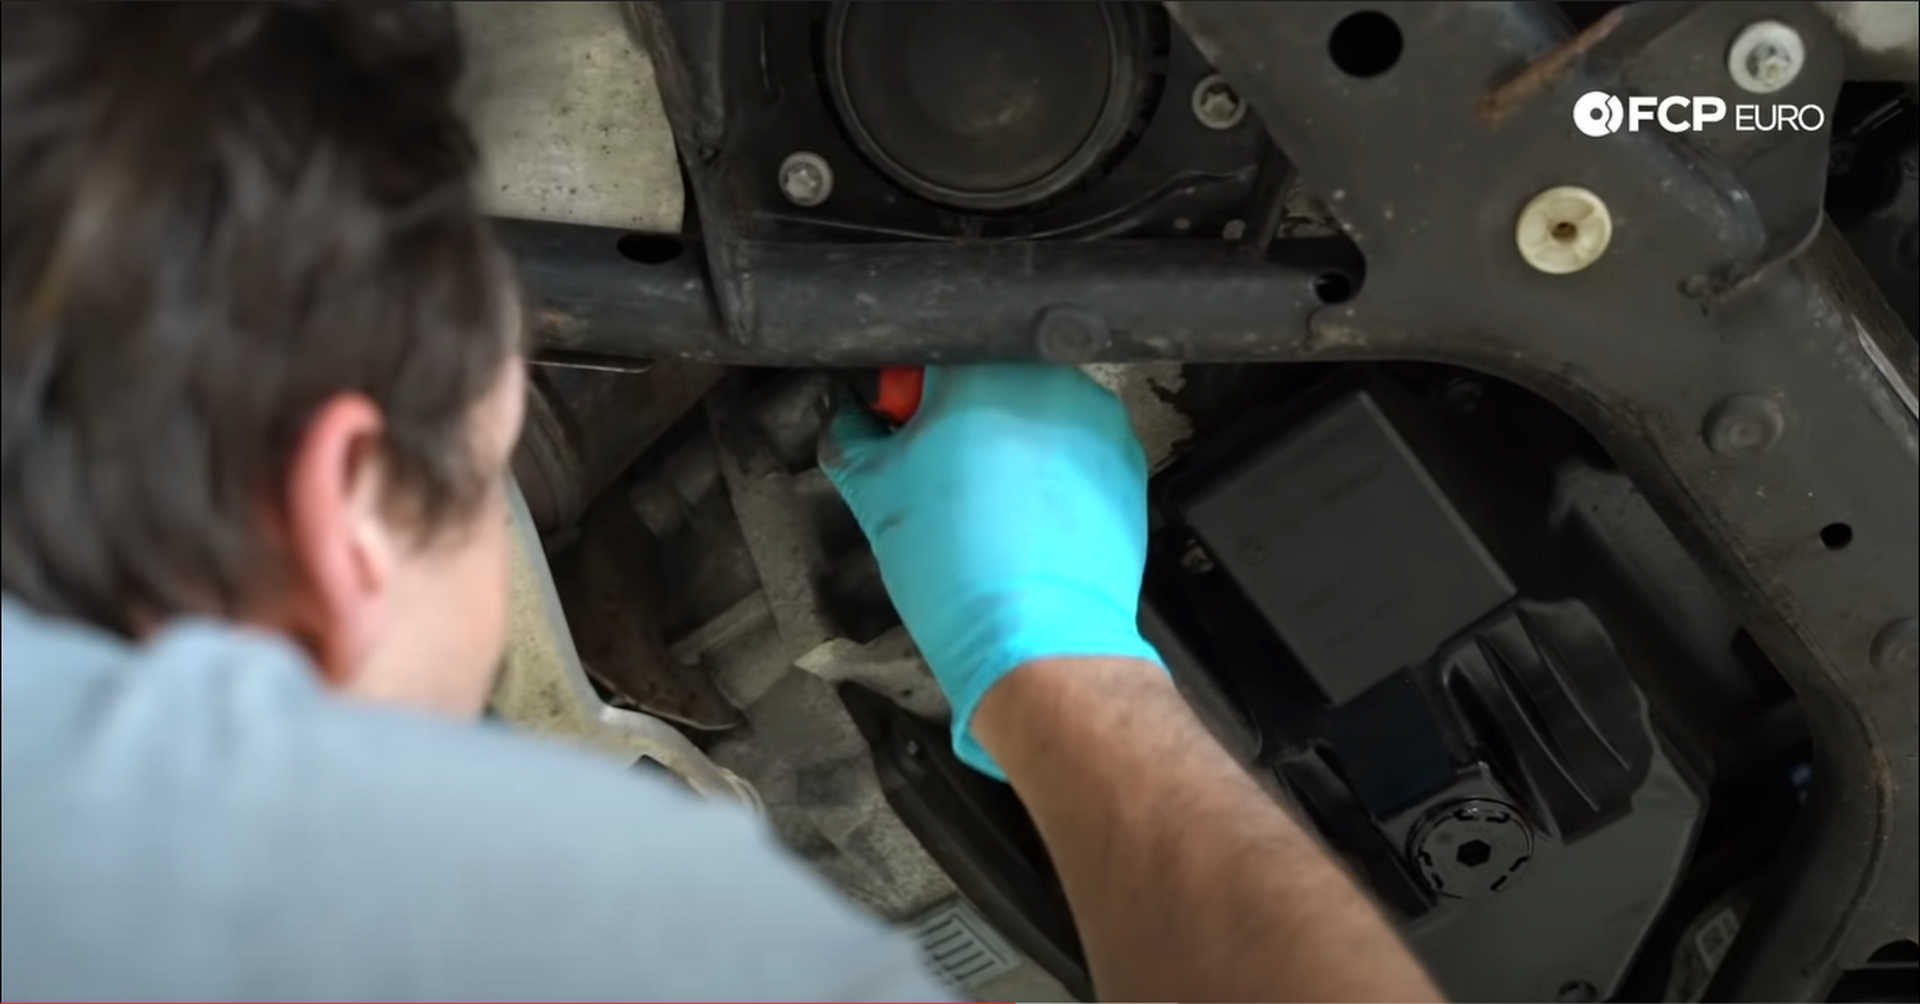
Part of the timing chain kit is a new oil pump drive assembly. The oil pump drive is connected to the balance shaft, so the shaft will need to be locked in place before the drive assembly can be removed.
The CTA balance shaft tool used to lock the shaft in place mounts under the oil pickup. Use a 10mm socket to remove the bolt on the oil pickup. Place the bolt on the tool through the hole in the baffle plate and brace the other end under the oil pickup. Rotate the balance shaft slightly until the bolt slips in if it doesn’t right away.
The biggest piece of the CTA balance shaft tool is used to lock the oil pump in place so that the sprocket bolt can be removed. The two pins on the tool will fit into the sprocket, while the flat portion will mount to the bottom of the timing cover.
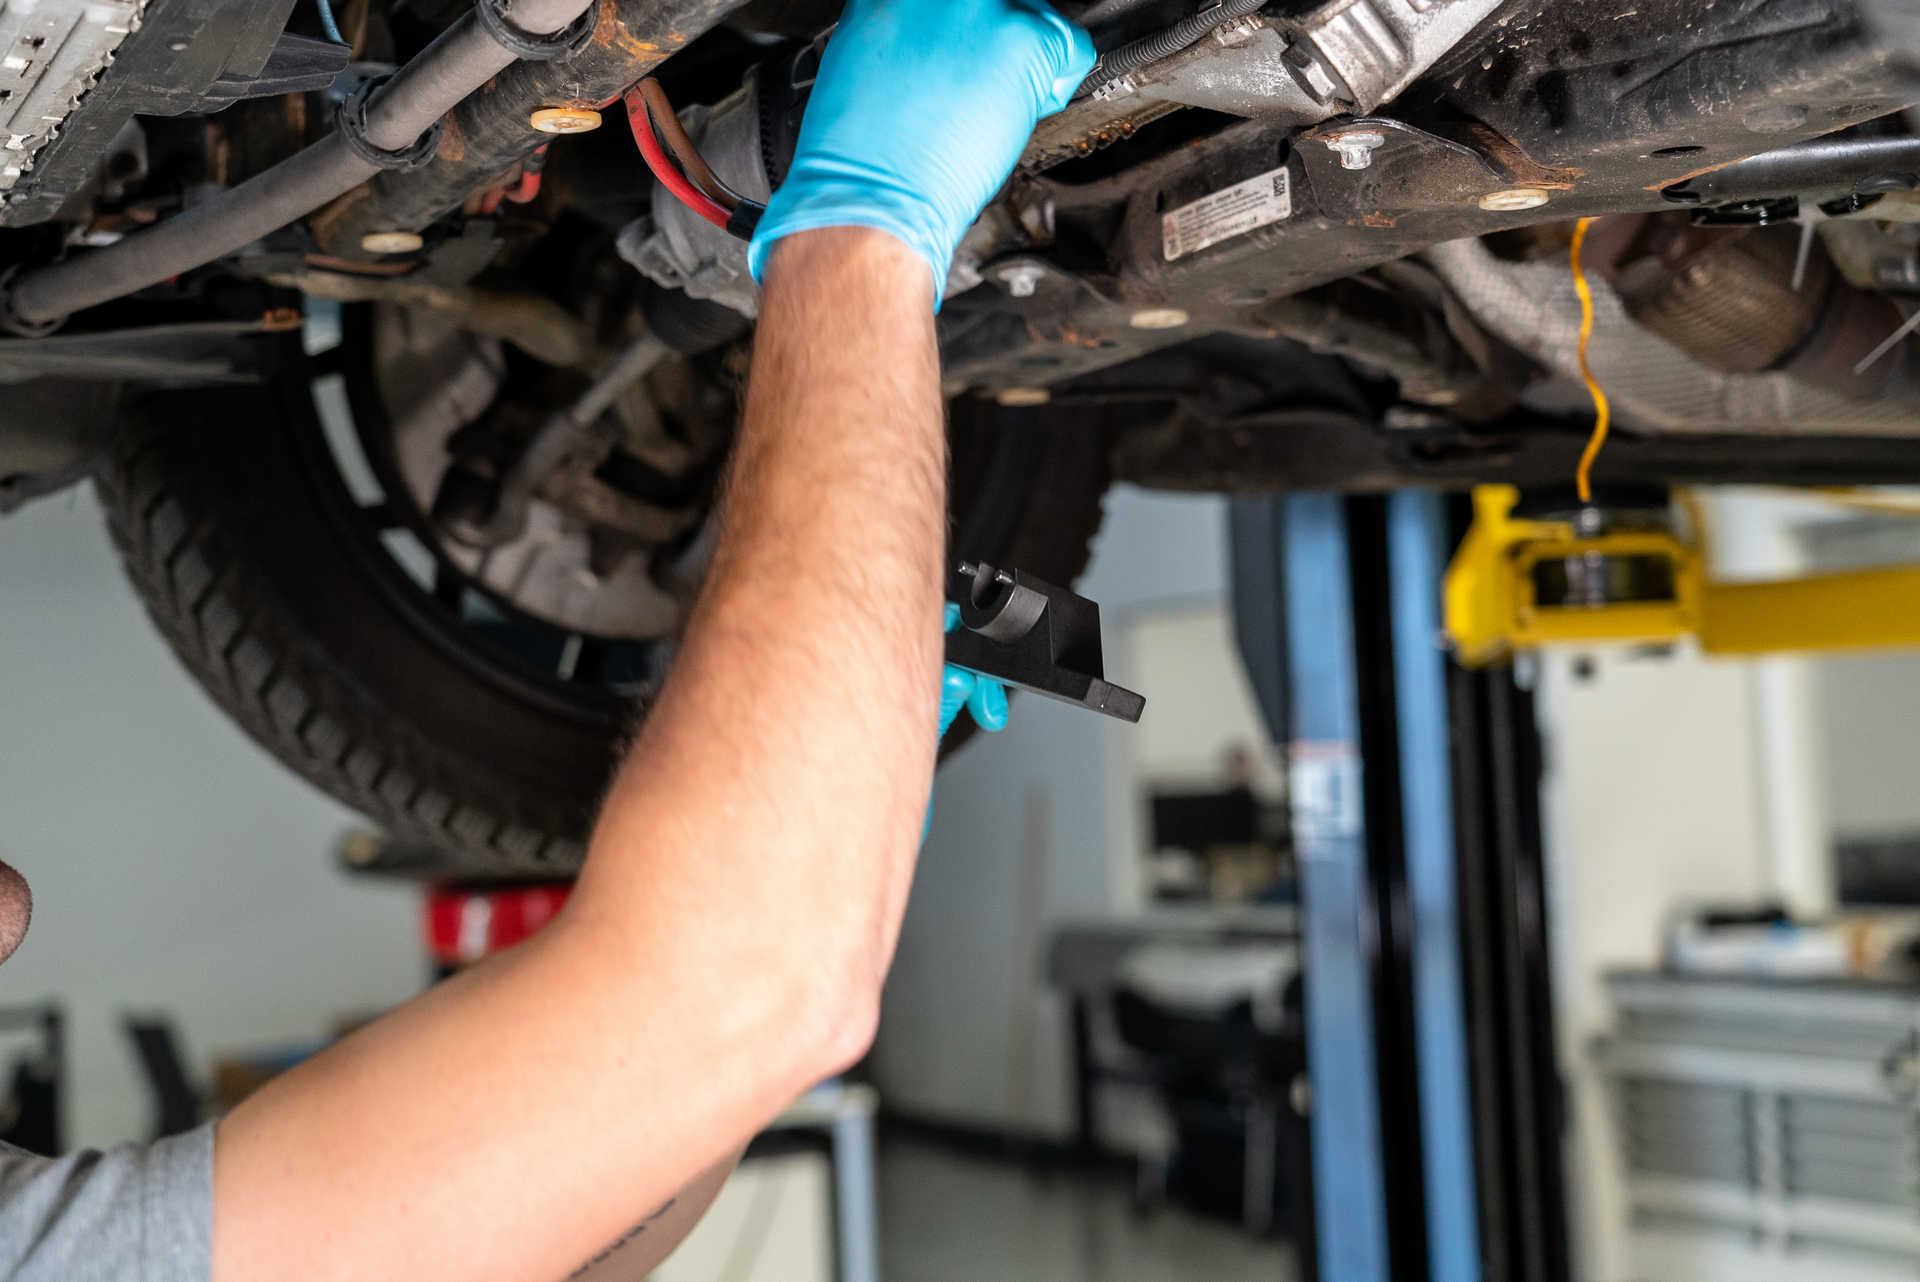
Use a 10mm wrench or socket to secure the bolts mounting the tool to the engine. Use a T60 socket to remove the oil pump sprocket bolt. Remove the tool after the bolt is removed.
Next, compress the chain tensioner and use the pin provided in the tool kit or an Allen wrench to lock the tensioner and guide out of the way.
There are three bolts holding the oil pump drive assembly into the engine. Use a T30 socket to remove them and then pull the assembly out the bottom of the engine.
And with that, the entire timing chain/oil pump drive assembly has been removed from the engine. Stay tuned to the blog for part 2 of this project, where we show you how to install the new timing chain/oil pump drive assembly. If you’re interested in more DIYs for your BMW, you can visit bmw.fcpeuro.com and subscribe to our YouTube channel.
BMW N20 Timing Chain Replacement Part 2