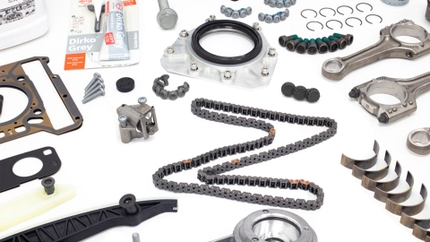
Replacing the Engine Mounts on a 2001 Volvo S60 T5 is moderately easy to do: it requires a bit more muscle but everything is relatively accessible.
Tools you’ll need:
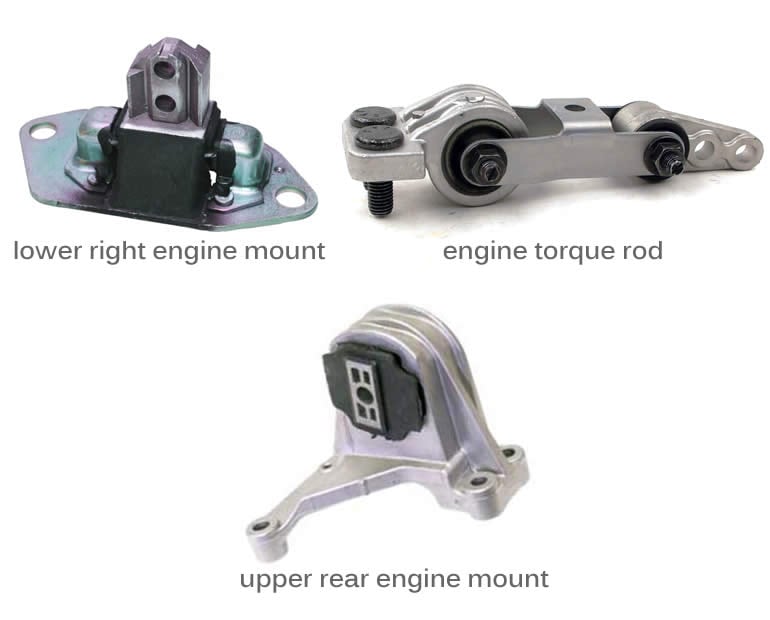
- new lower right Volvo engine mount
- new Volvo engine torque rod
- new upper rear Volvo engine mount
- sockets, ratchet
- breaker bar (optional)
- wrenches
- Torx bit set
- torque wrench
- jack, jack stands, wheel chocks
- wood block
- impact wrench + impact sockets (optional)
- vise grip (optional)
- about 1-2 hours of free time
Ready to replace your engine mounts?
-
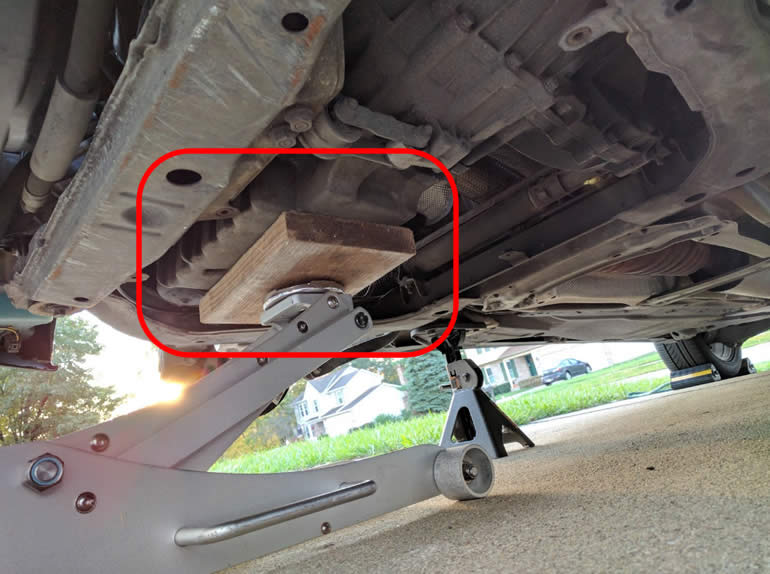
Place wheel chocks at the rear wheels, jack up the front of the car and secure it with jack stands. Remove the front passenger wheel
-
Place a wood block on the jack and carefully lift the bottom of the engine about ½ or 1 inch to relieve pressure on the existing engine mounts
-
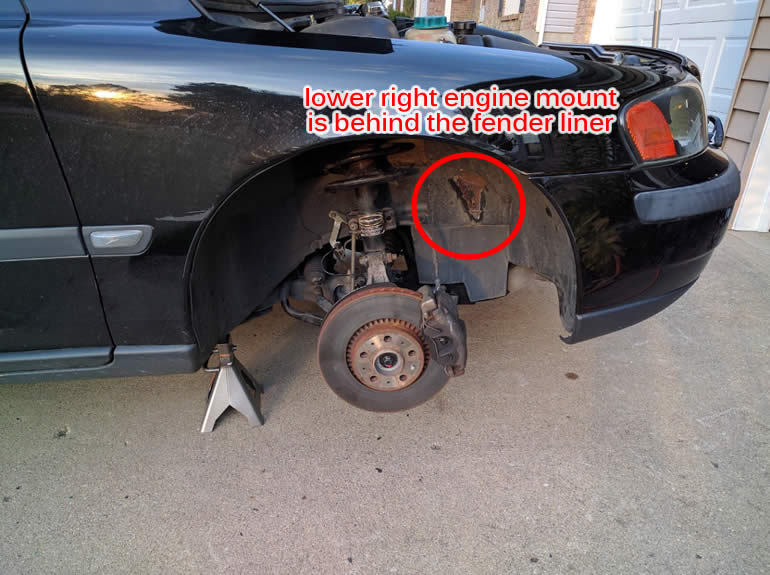
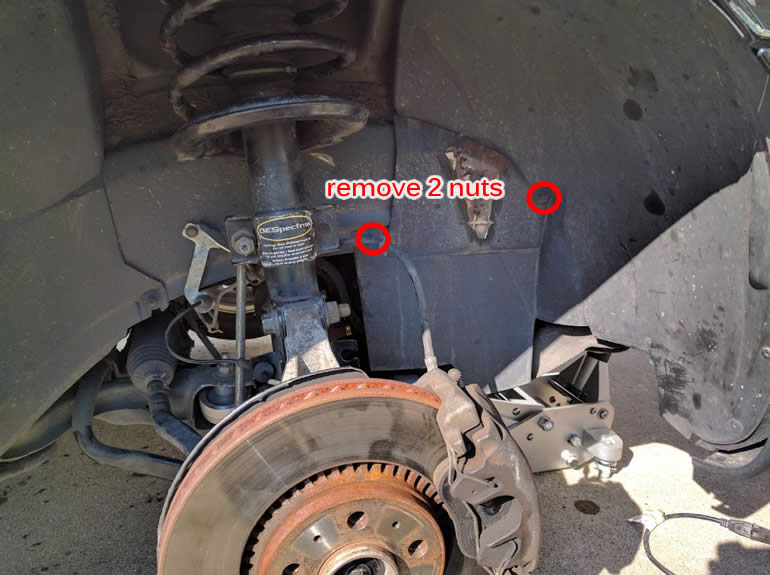
Remove 2 plastic nuts holding down the fender liner and put the metal plate off to the side
-
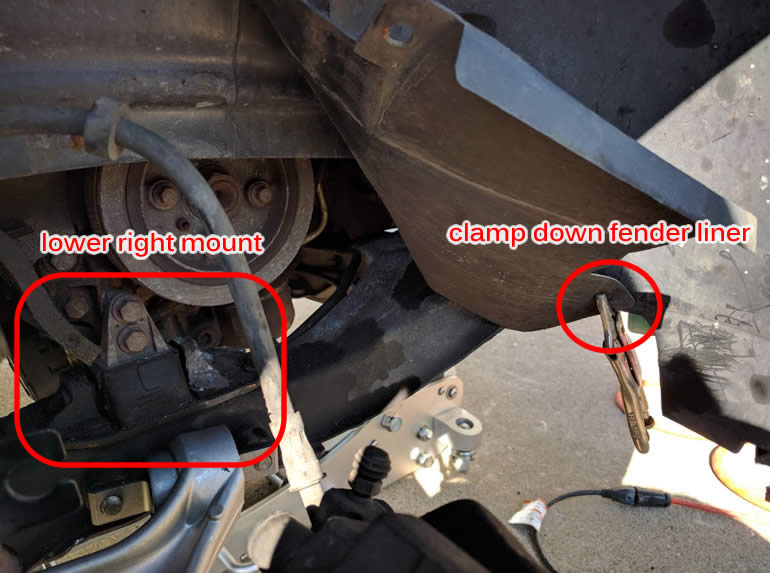
Using a vice grip to hold back the fender liner helps to provide better access
-
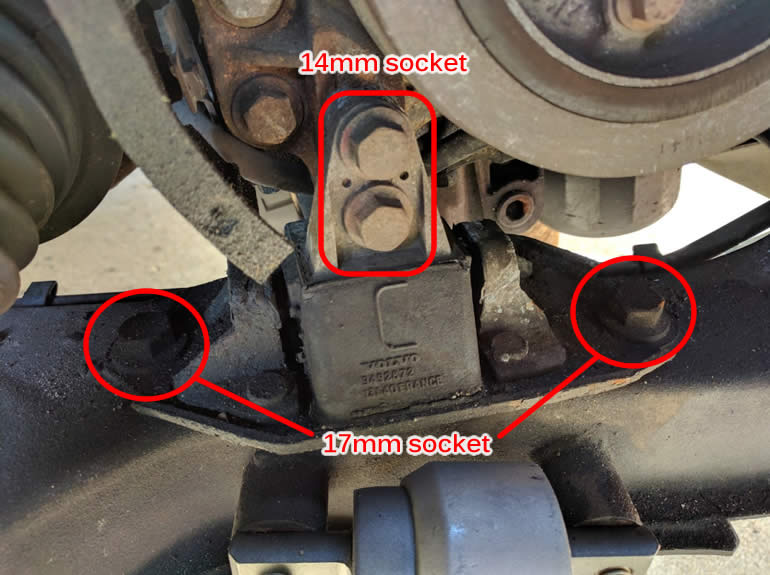
Remove 4 bolts to take out the lower right mount. A breaker bar or impact wrench helps with leverage if you can fit in there
-
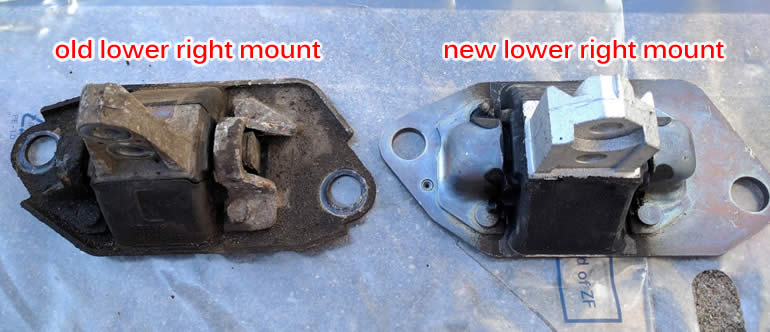
Compare the old mount with the new mount. You may notice that the new mount is firm and solid. The old one I took out had cracks and had free movement.
-
Installation is the reverse of removal. Position the notches underneath the mount into holes in the car frame for correct placement. You may need to slightly raise or lower the engine to line up the holes. Bolts to engine block should be torqued to 26 ft-lb. I couldn’t find the torque spec for the bolts to the frame so I tightened it down as best I could. After you’ve reinstalled the fender liner nuts go underneath the engine to replace the engine torque rod next.
-
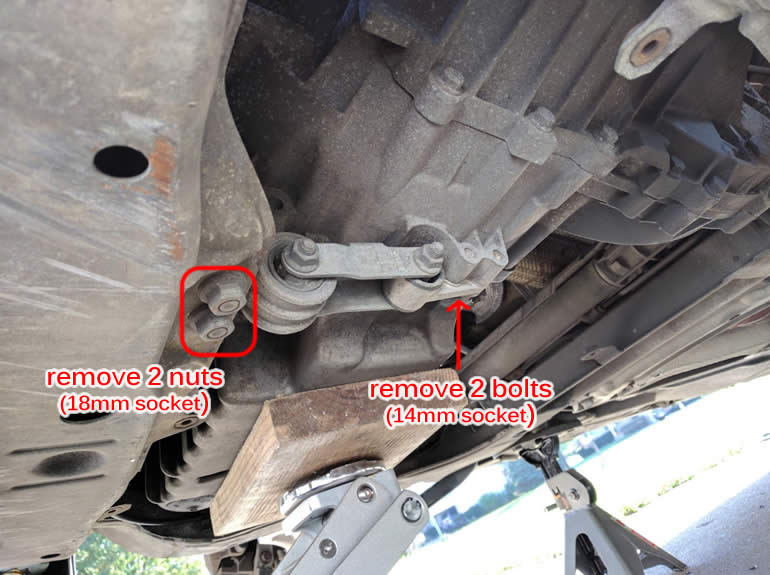
Remove 2 bolts and 2 nuts to take out the torque rod. A breaker bar or impact wrench helps with leverage:
-
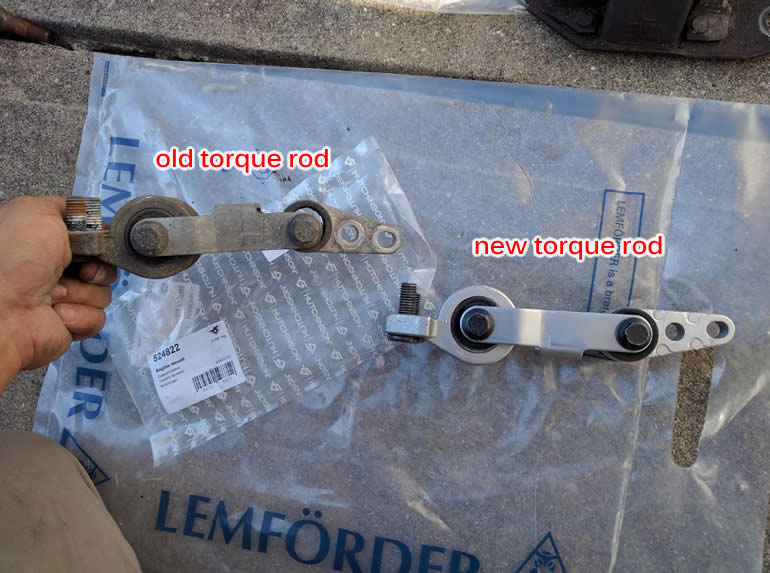
Compare the old torque rod with the new one. You may notice that the new mount is firm and solid. The old one I took out had large gaps and was long overdue for replacement.
-
Installation is the reverse of removal. Torque the bolts to 26 ft-lb and the nuts to 48 ft-lb. Once the new torque rod is installed go underneath the hood to replace the upper rear engine mount next.
-
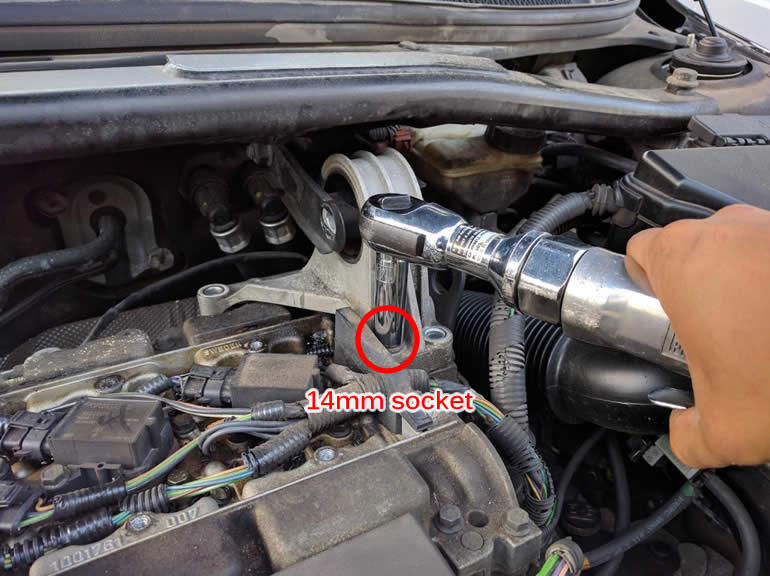
Pop off the bolt tread nipple (I was able to remove it with my fingers) and remove the upper bolt and 3 lower bolts that you can see on the upper mount. Note that the rear bolt underneath the strut bar attachment point will require a short socket and a ratchet with low clearance (or you can use a wrench). There’s one more lower bolt that you’ll be able to access after removing the spark plug engine cover in the next few steps.

-
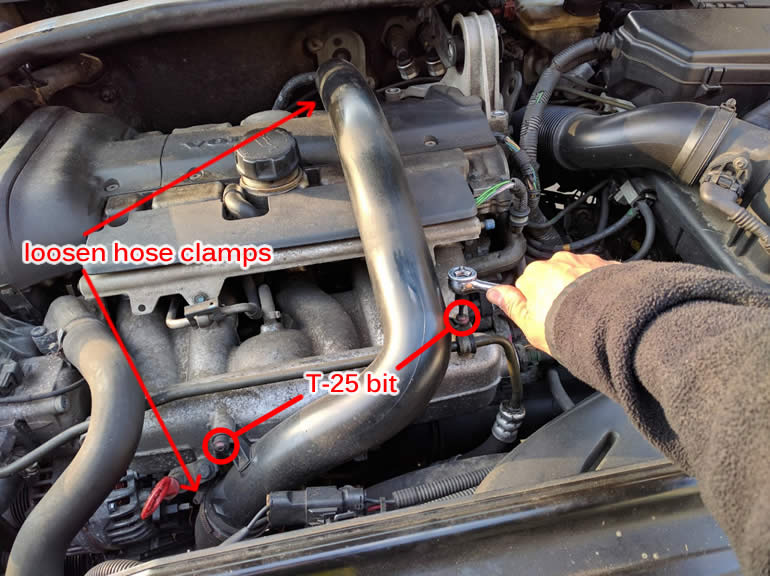
Remove the air pipe above the engine by removing 2 Torx bolts, loosening 2 clamps at both ends and disengaging a routed wire in the back near the firewall. Note the additional hose attachment on the upper Torx bolt that you’ll need to re-attach later.
-
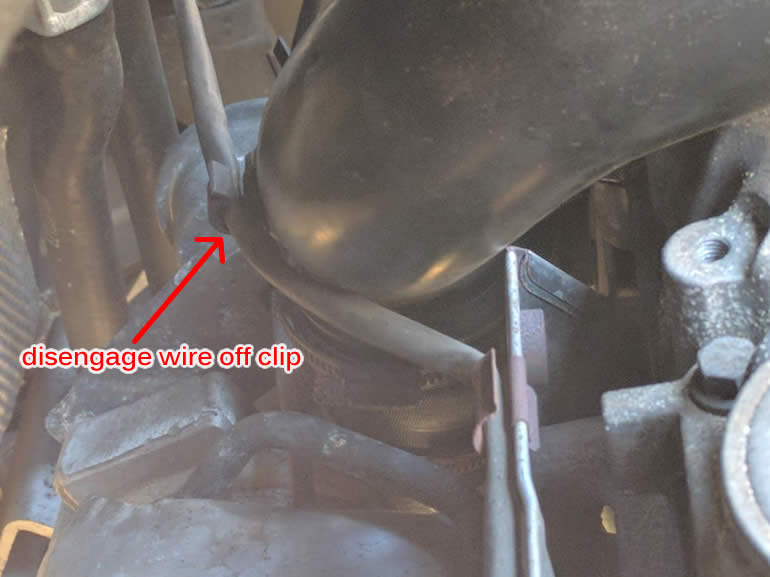
Here’s a view near the firewall. Disengage that wire off the clip on the air pipe then slip off the air pipe and set it aside.
-
Remove 8 bolts securing the 2 adjacent engine covers:
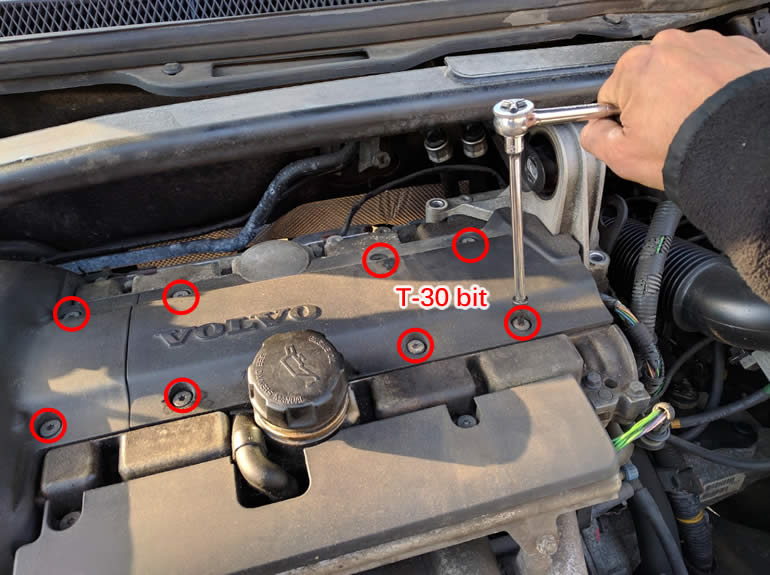
-
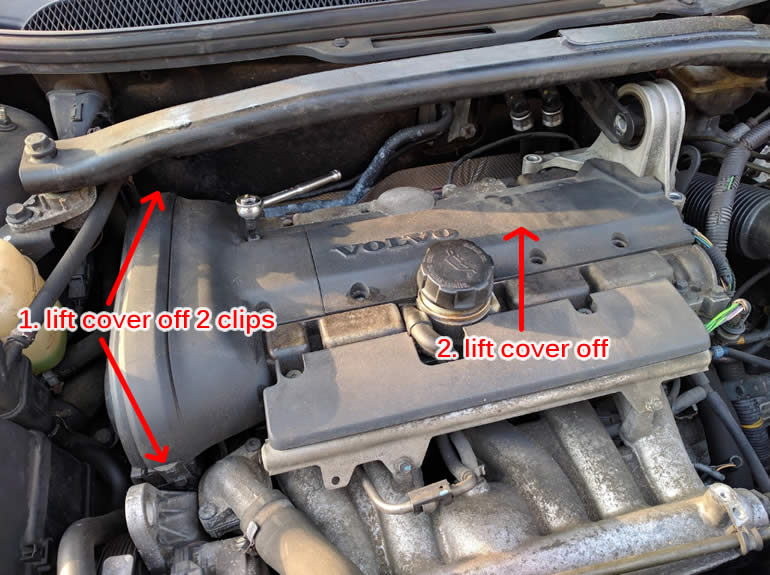
First, remove the timing engine cover by lifting it off the 2 side clips and disengaging it from the spark plug engine cover. Then you can lift off the spark plug engine cover to remove the last bolt on the upper rear engine mount.
-
Remove the last bolt to get the upper rear mount off the car:
-
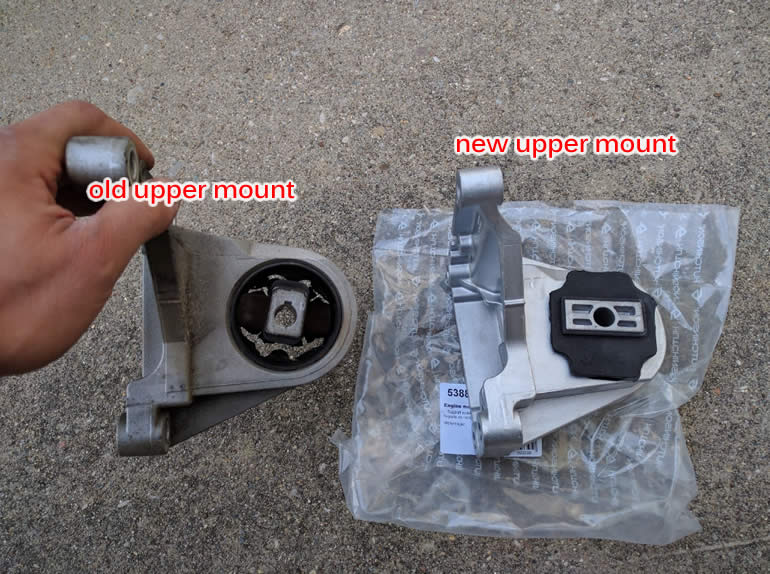
Compare the old upper rear mount with the new one. You may notice that the new mount has a substantially different design. The old one I took out had large gaps and was long overdue for replacement.
-
Installation is the reverse of removal. I couldn’t find the torque specs for this mount so I tightened it down as best I could.
-
Remove the wood block from the jack, lower the car, mount the front passenger wheel (torque spec = 105 ft-lb) and remove the wheel chocks.
Take the car for a test drive to ensure all is good and enjoy smooth engine performance!