The ZF 8HP, also known as the ZF 8-Speed, is not a standard automatic transmission. It's actually a breakthrough for transmission performance in general as it not only provides lightning-quick smooth shifts, but it also offers a wide range of potential applications. In fact, the 8HP transmission is so good from a performance standpoint that it is used in the BMW M235iR race car in place of a manual, dual clutch, or sequential transmission. The 8HP will also be in the upcoming F90 M5 as well. This DIY covers how to perform the relatively simple service procedure.
Typically automatic transmission (also popularly known as a slushbox) cars aren't that fun to drive. But I can say for certain the 8HP delivers a different experience that I dare say offers better performance, day to day use, and the same amount of fun that a manual transmission can deliver. Pretty much all F chassis cars come equipped with a variant of the 8HP transmission. In addition to BMW, several other car manufacturers widely use the 8HP including Audi, Aston Martin, Jaguar, Chrysler, Jeep, Ram, Dodge, Bentley, Rolls Royce, and more.
While this DIY is performed on an BMW F30 328i which is equipped with an 8HP45 with a plastic oil pan, the overall procedure is going to be very similar across all 8HP transmissions for a basic drain and fill service. I recommend changing the fluid on this transmission at least every 50K miles. If you drive the car hard or use it for more than regular duty I recommend shortening the interval to 40K-miles or less.
Tools needed to service a ZF 8-Speed transmission:
- Ratchet set
- Torque wrench
- Metric socket set
- Torx socket set
- Fluid filling device
- Fluid catch pan
- OBD diagnostic tool
Parts required to service a ZF 8-Speed transmission:
Steps required to service a ZF 8-Speed transmission:
Step 1: Raise the vehicle in the air
You're going to want to get your vehicle in the air and level. I recommend performing this job on as close to a level surface as possible. Once you have your vehicle properly supported and secured (always make sure a vehicle is stable when jacked up) you can begin by getting under the car. Also, to make the job easier when you go to refill the transmission make sure the vehicle has sat for awhile if recently driven. On a hot day, it may be best to let it sit until the following morning as it takes a while for the trans temp to drop into optimal final fill temp range.
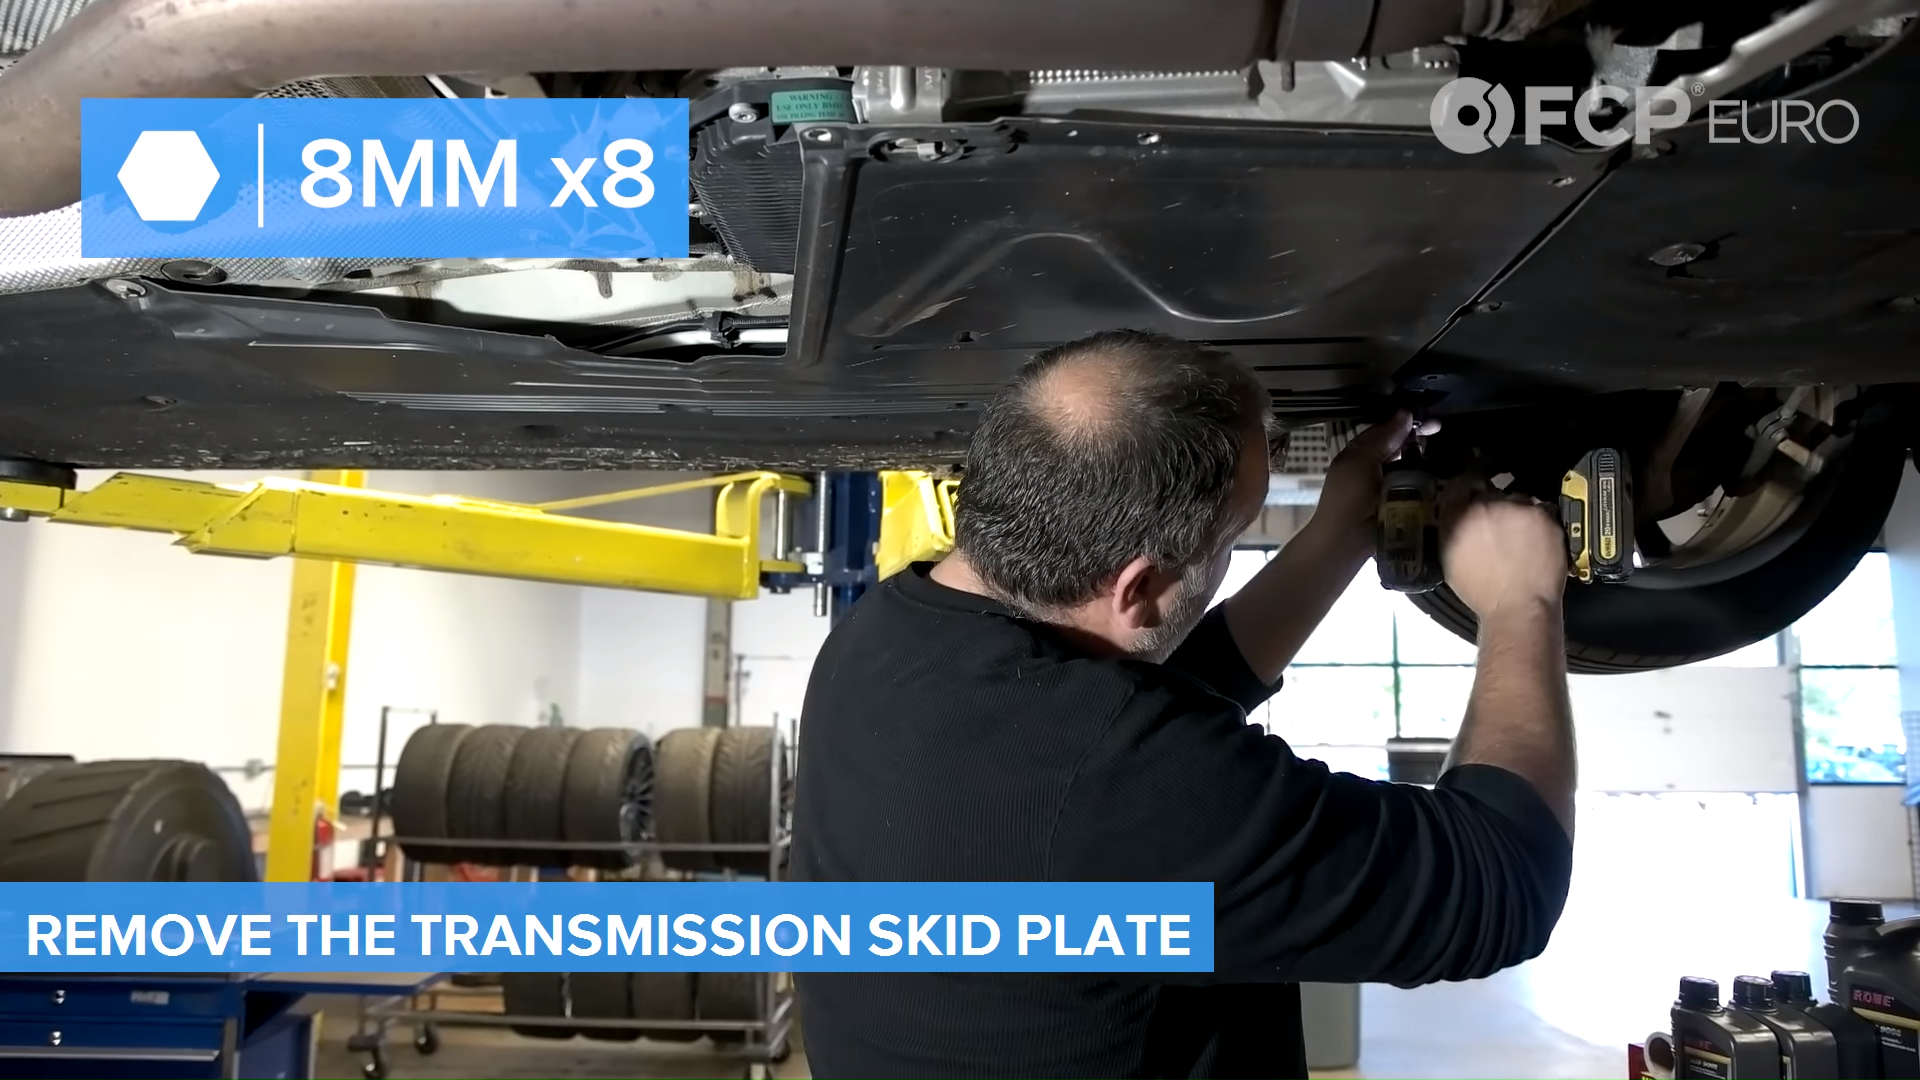
Step 2: Remove the under panels
This next step will vary from vehicle to vehicle, but there is usually a splash shield or aerodynamic tray blocking access to the oil pan drain plug on the transmission. Remove this tray (if equipped) and you should at this point have access to the drain plug on the pan, all bolts securing the pan to the transmission, and access to the fill plug on the side of the transmission (location of the drain plug may vary on all-wheel-drive models equipped with an external transfer case).
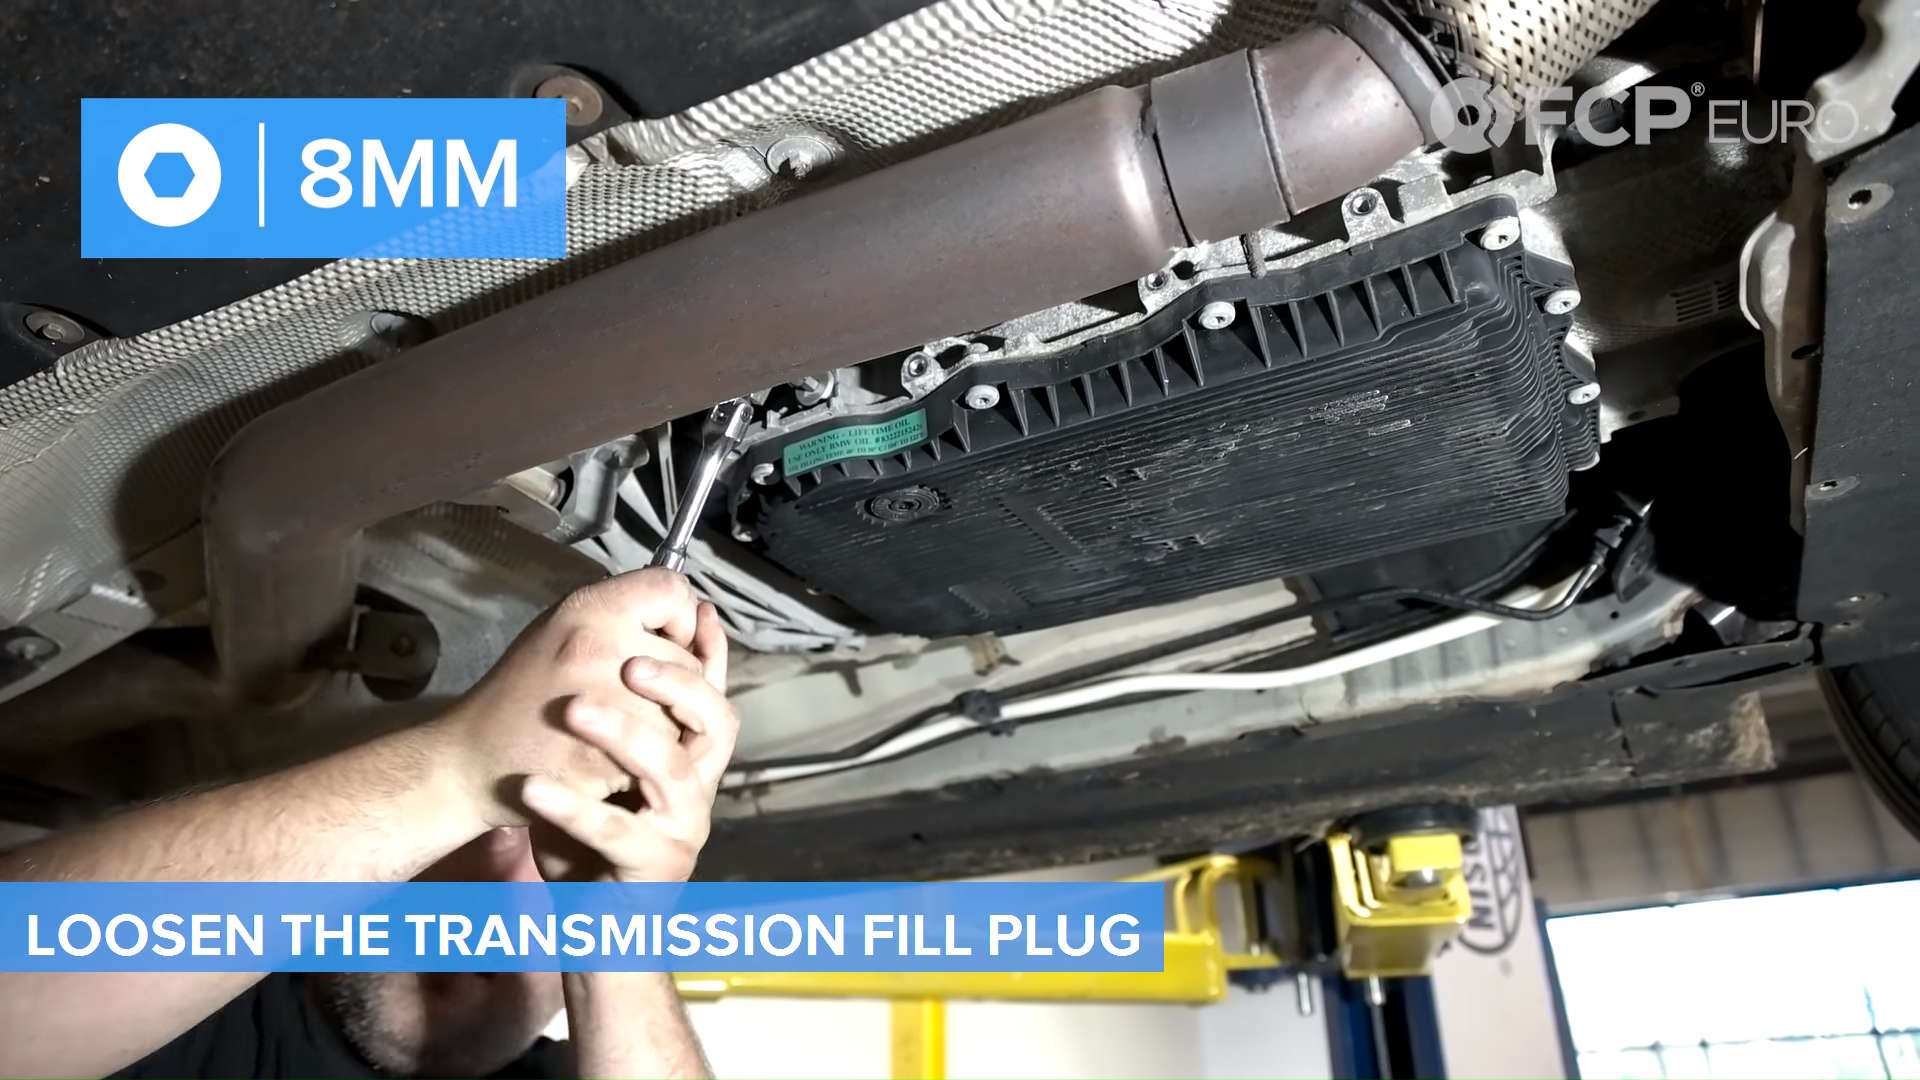
Step 3: Loosen the fill plug
After you locate the fill plug on the transmission, take the appropriate socket and crack the fill plug loose. This is important for two reasons:
- 1) You want to verify that the fill plug can be removed before draining the transmission
- 2) Having the fill plug loose/removed before removing the fill plug will allow the transmission to drain quicker
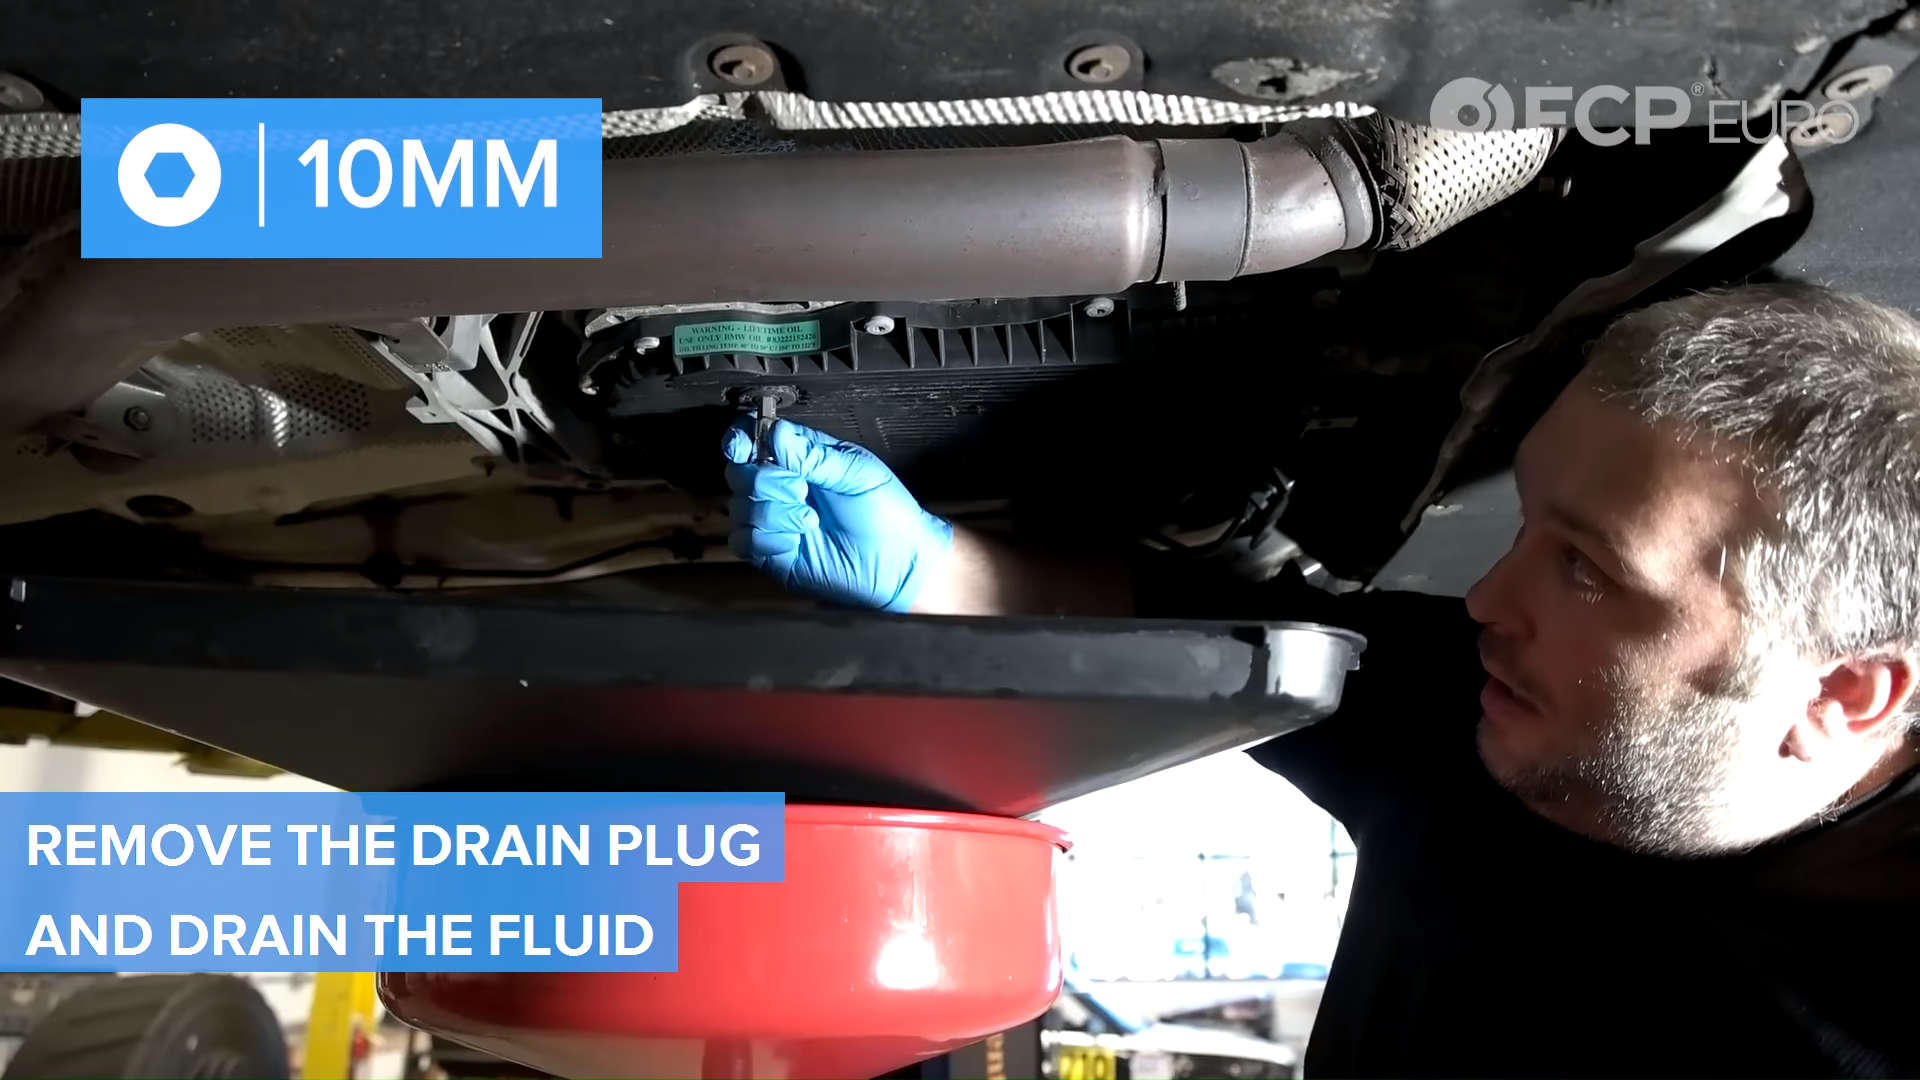
Step 4: Remove the drain plug and drain the transmission
Now that your fill plug is loose it's time to drain the transmission. On plastic oil pans, you will need an 8mm hex socket or key to remove the plug. The fluid will drain quickly with the fill plug removed. Expect 4-5 liters to drain through the drain plug.
If servicing the filter and oil pan or the oil pan/filter assembly: You will now be able to remove the oil pan. Remove the bolts towards the rear of the transmission first and leave the bolts towards the front loose. This will allow the pan to tilt back slightly. This will allow for more fluid to drain before you remove the pan completely. Note that the plastic pan/filter assembly equipped on most 8HP's may require some effort to remove as an o-ring seals the filter to the transmission. Once you remove the assembly, make sure that the o-ring has come out with the pan/filter assembly or it will need to be removed separately before installing the new unit.
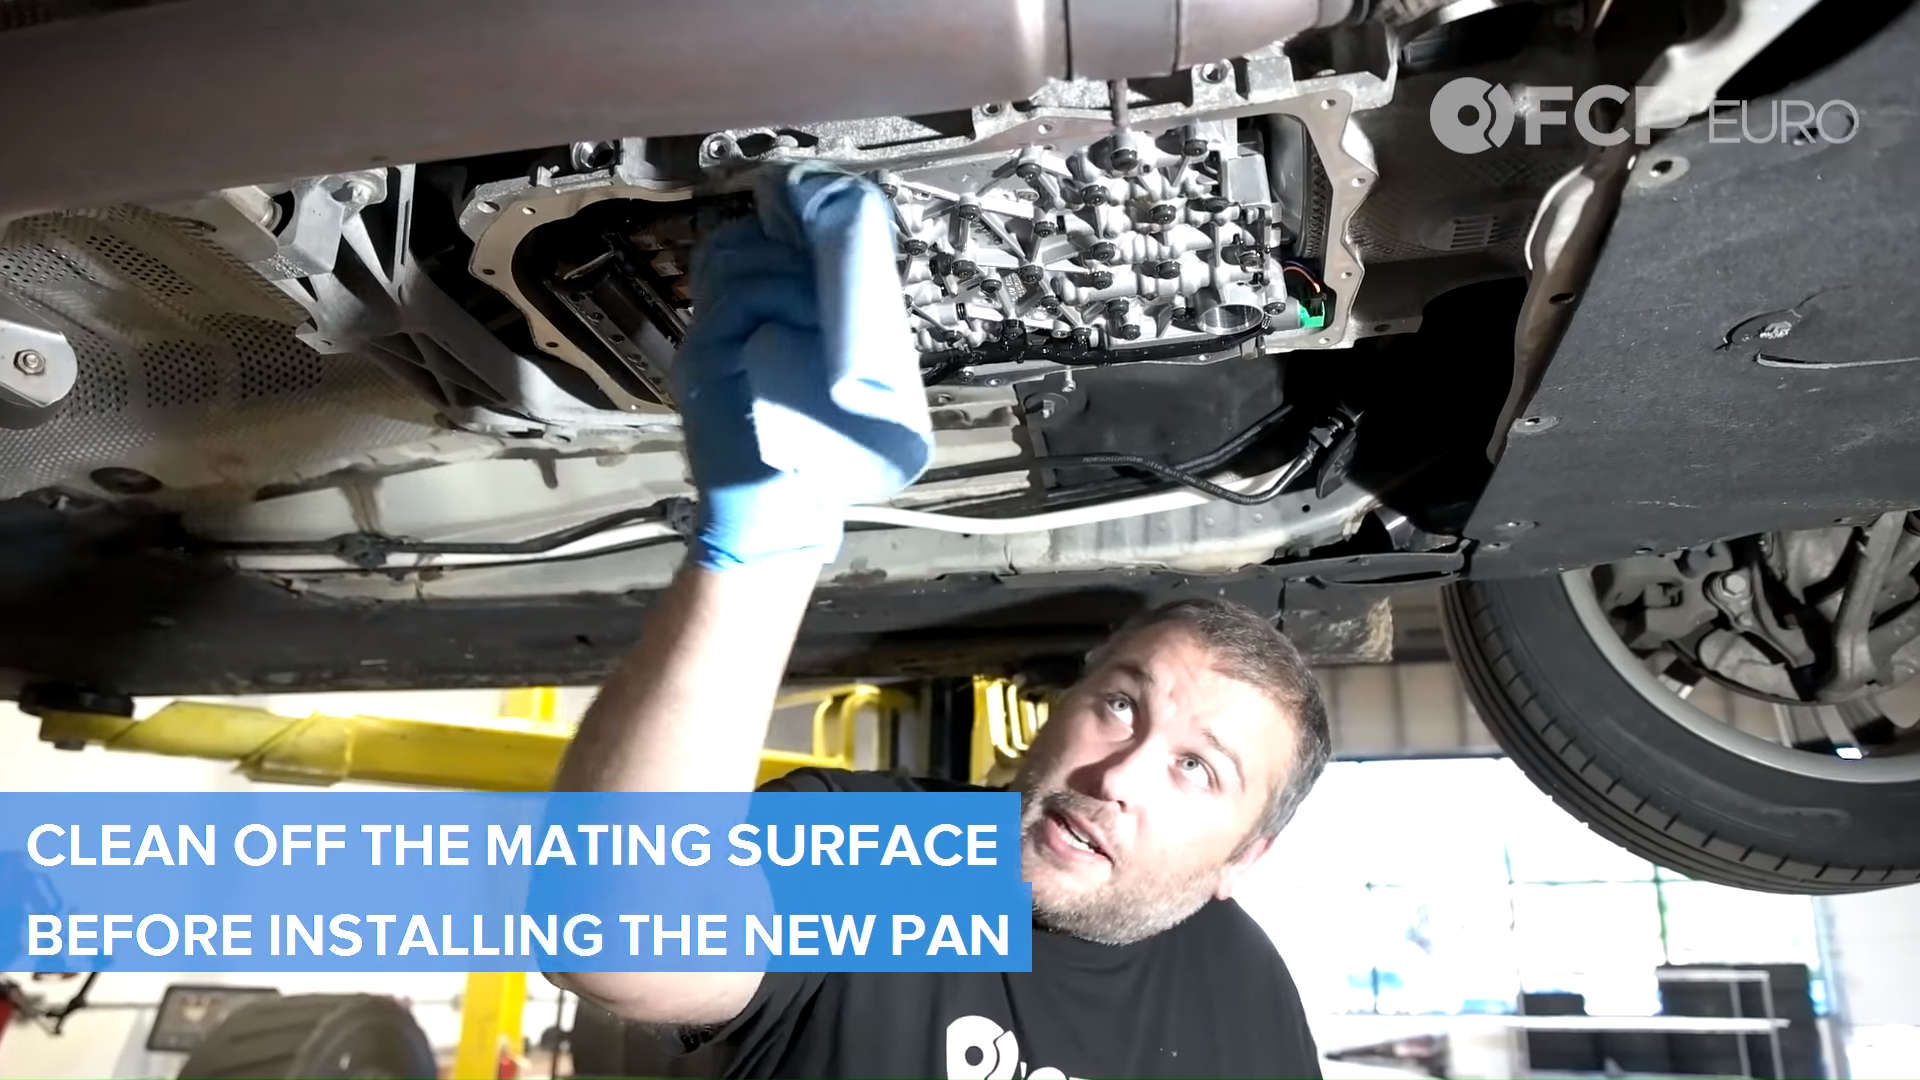
Step 5: Clean the mating surfaces
Clean the mating area on the transmission where the oil pan gasket seals. There will be a lot of residual fluid dripping off the valve body, so I recommend letting it sit for a few minutes until fluid stops dripping. The rubber gasket that seals the pan shouldn't leave much residue behind so I use a blue shop towel with some brake parts cleaner to clean the surface from oil/contaminants. If you see any residue from the gasket, use a plastic scraper to remove the remnants. Make sure the surface is clean and dry before reinstalling the pan.
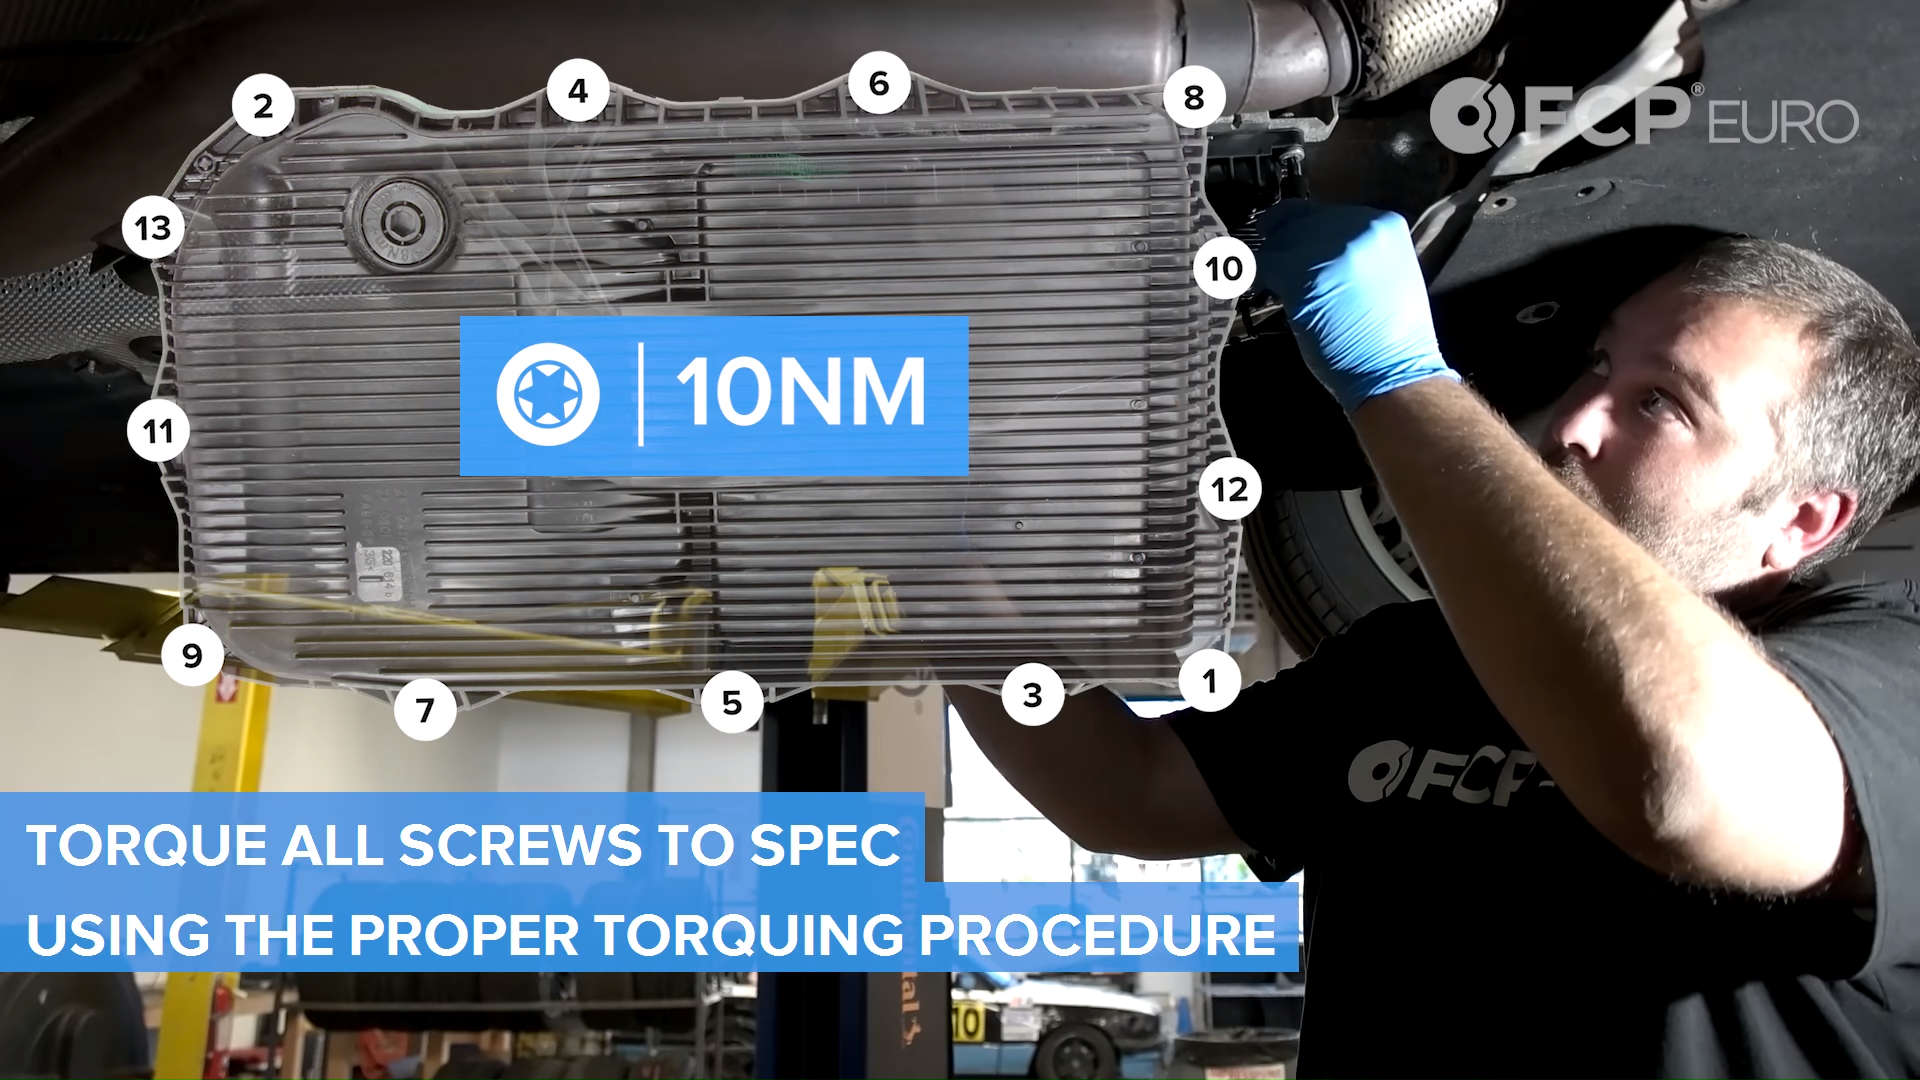
Step 6: Install the new pan and filter assembly
Install the pan/filter assembly (for plastic oil pans) or the filter (for metal pans) by lubricating the filter o-ring with trans fluid. The filter should slide easily into place. If it will not fully seat into position, do not force it. There may be an issue with the sealing o-ring. It is critical to make sure that the filter neck seals to the transmission properly to ensure proper fluid pressure in the transmission. Poor shifting performance or transmission damage can occur if this step is not done correctly. Once the filter is secured, begin to secure the pan with new replacement bolts. The original bolts corrode quite a bit, and it is not recommended to reuse them. I recommend threading all bolts in by hand. You will need to follow the torquing procedure and torque pattern below to ensure the pan gasket is equally pressed against the bottom of the transmission. Make sure you have a good in-lb torque wrench for this step.
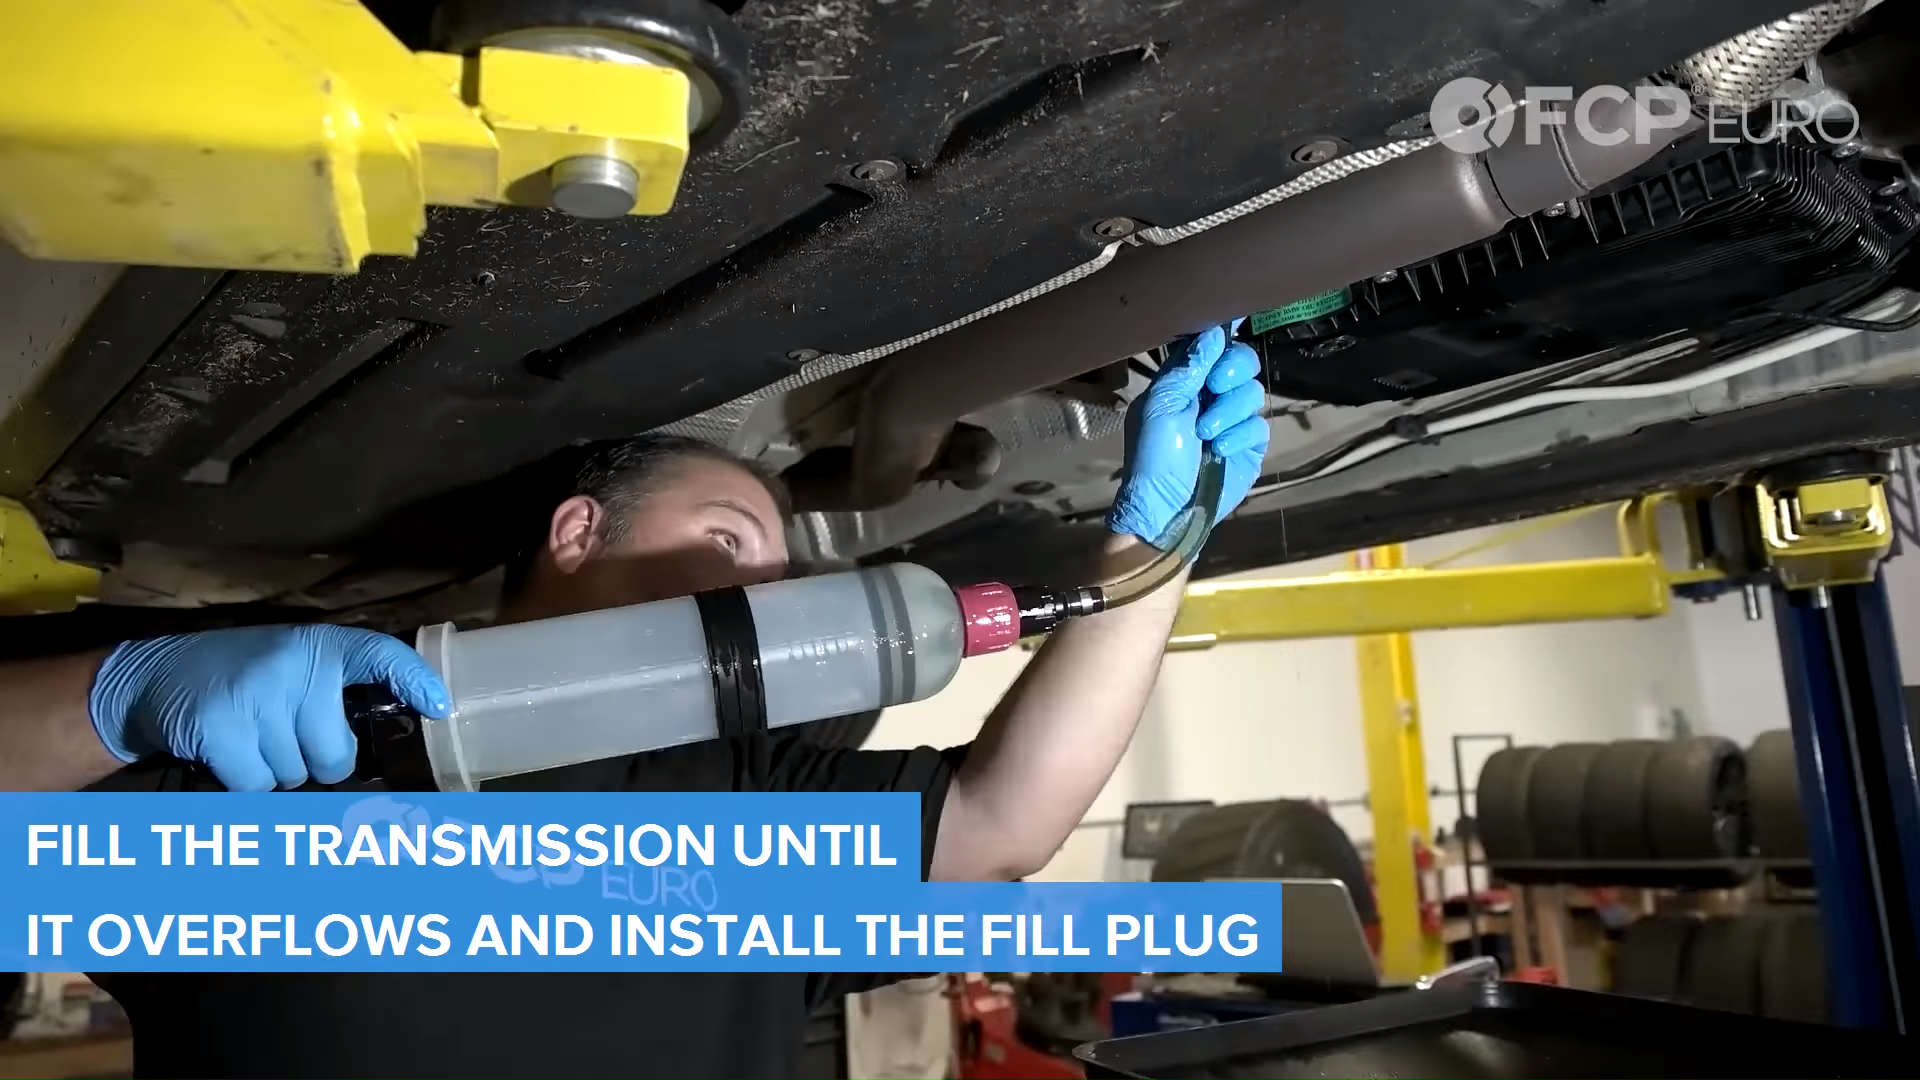
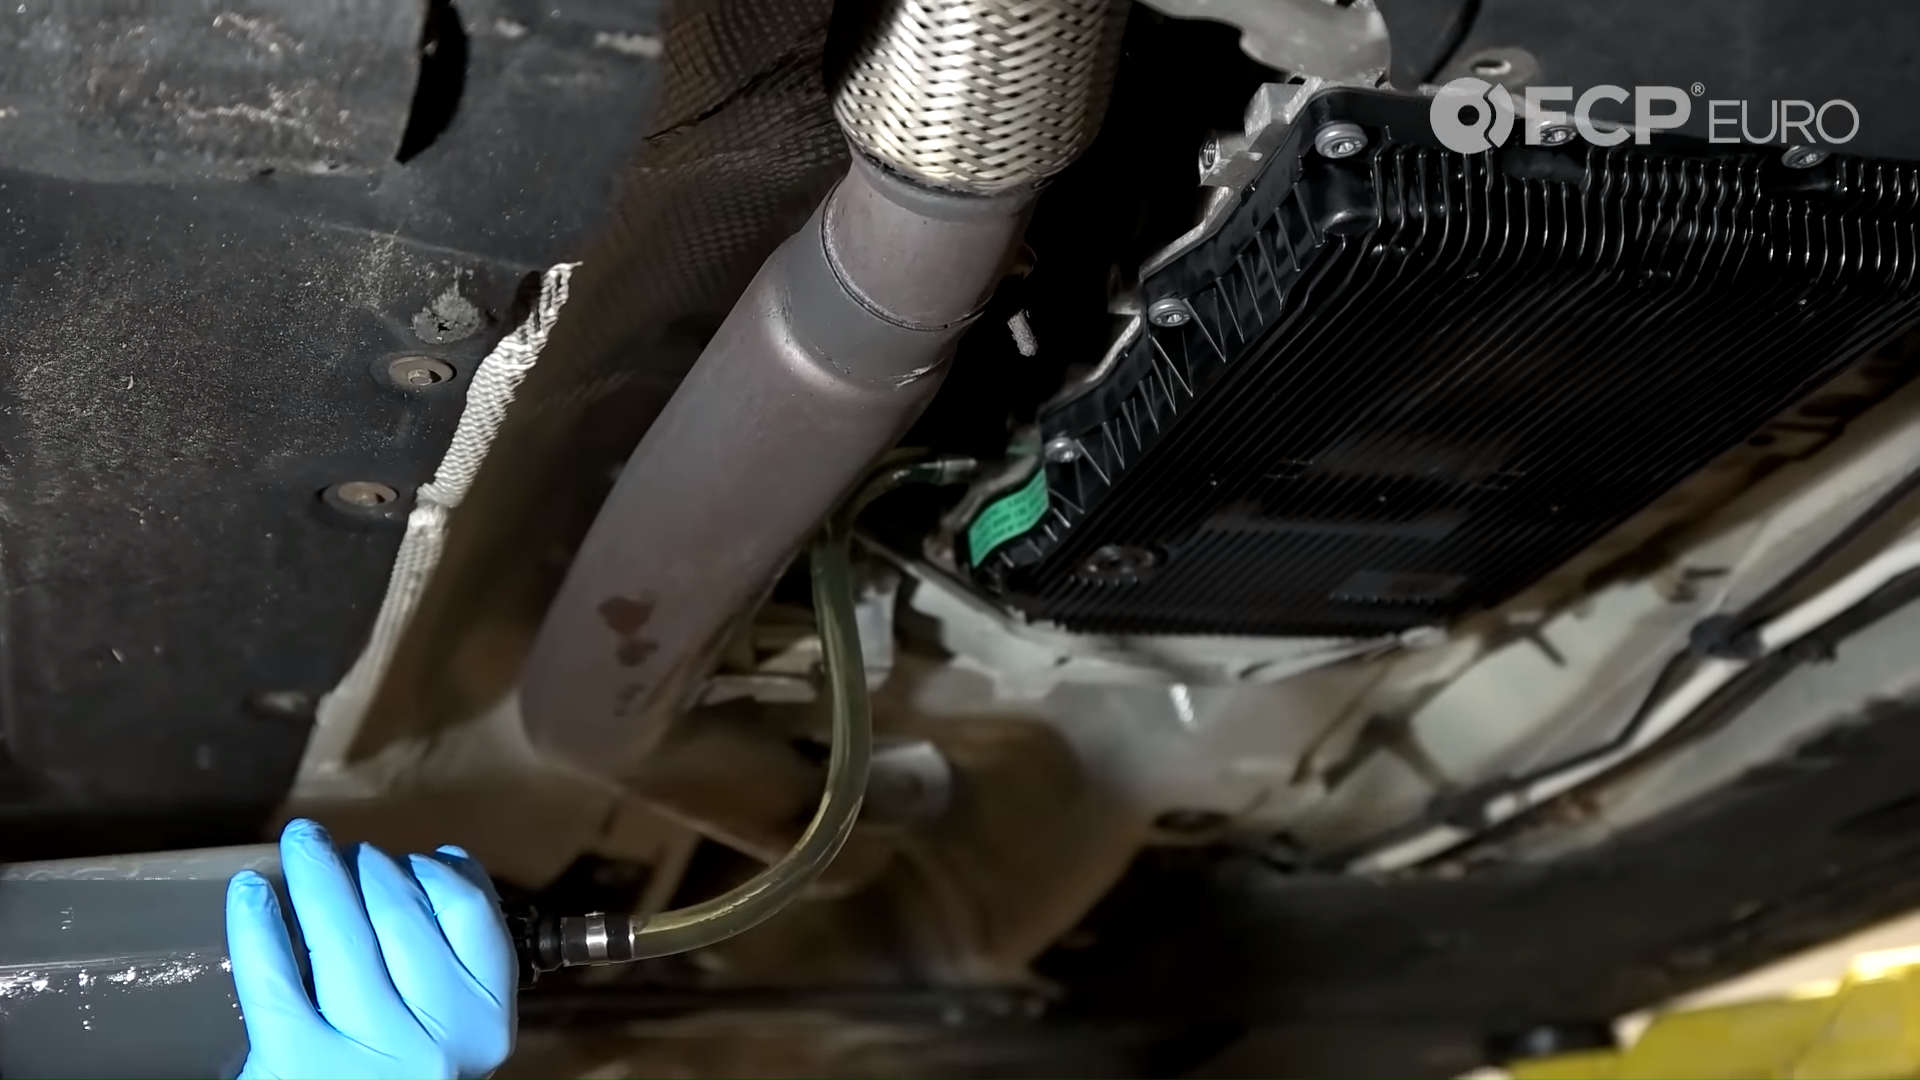
Step 7: Perform first transmission fill
Once the oil pan bolts have been properly torqued down in the correct sequence, it's time to perform the initial fill of the transmission. You will add about 4 liters of fluid on this first fill. You will fill the transmission through the fill hole on the transmission until fluid begins to stream out. At this point loosely install the fill plug to prevent any more fluid from coming out.
Step 8: Get the transmission to temperature and perform the second fill
Plug your scan tool in and bring up information pertaining to gearbox oil temperature. The temperature of the transmission must be between 30°C-40°C before doing the final level check. The 8HP does not have a fluid level dipstick, so the fill hole is essentially the level indicator. You must check the fluid level at the listed temperature range as the fluid expands when it gets warm. It is also not possible to refill the transmission to the correct level on the initial fill as fluid needs to be pumped back through the system from the oil pan. It is very likely the fluid level will drop significantly during this procedure.
- Start engine
- Put foot on brake
- Shift transmission into "R" and "D" continuously
- Shift transmission in manual mode from 1st to 3rd and hold gear for 3 seconds
- Shift transmission in manual mode from 1st to 4th and hold gear for 10 seconds
- Select all gears in manual mode from 1st to 8th and hold gear for 10 seconds
- Keep engine speed at 2000 RPM's to ensure torque converter fills with fluid
- Check temperature and verify that fluid temp is between 30°C and 40°C
Once the temp has reached the desired level, remove the fill plug and check for fluid coming out. If fluid is coming out, wait until it's a slow trickle and reinstall the fill plug. If fluid doesn't come out, add fluid until a thin film begins to pour out.
Step 9: Reinstall the fill plug and under-panels
Reinstall the fill plug and torque to spec. At this point, check for any leaks. If no leaks are present reinstall all corresponding splash shield and aero trays that required removal to gain access to the oil pan.
ZF 8-Speed transmission torque specs:
- Oil Pan Screws - 10Nm for steel screws, 4Nm + 45 degrees for aluminum screws
- Fill plug - 35Nm for M18x1.5 plugs, 80Nm for M30x1.5 plugs
- Drain Plug - Comes preinstalled on new plastic pans, 12Nm
That's it! You're done and can now enjoy your car once again with peace of mind. As we mentioned, the process really isn't all that complicated. If you're interested in more DIYs for your BMW, you can visit bmw.fcpeuro.com or subscribe to our YouTube channel.