Eventually you will more than likely need to remove your fan and fan shroud from your Mercedes 450SL. It is not difficult but does require removing a number of items to accomplish the task.
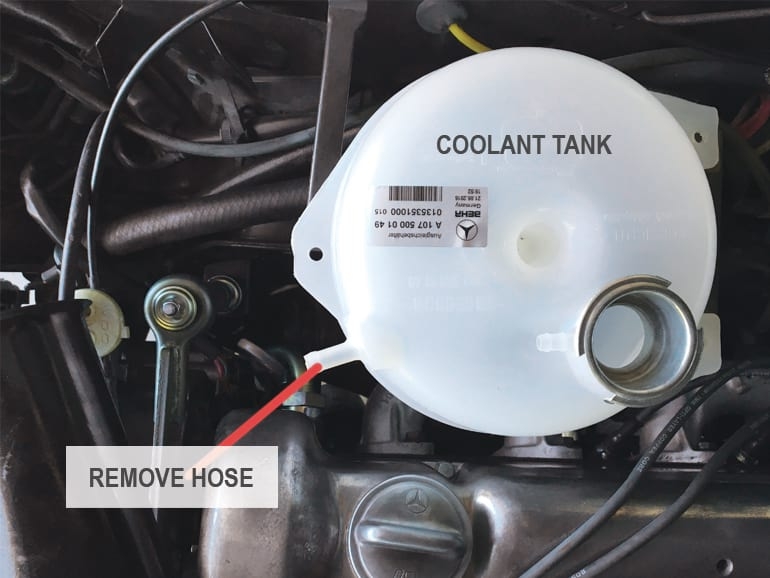
To get started, a little coolant will need to be drained from the radiator via the drain plug at the
bottom. Do this in order to remove the upper radiator hose from the radiator side with out losing
too much coolant. If you drain your coolant in to a clean container you can simply add it back
when you have completed the job. Once the coolant has been drained down a bit, disconnect
your hose and be prepared for excess coolant to spill out.
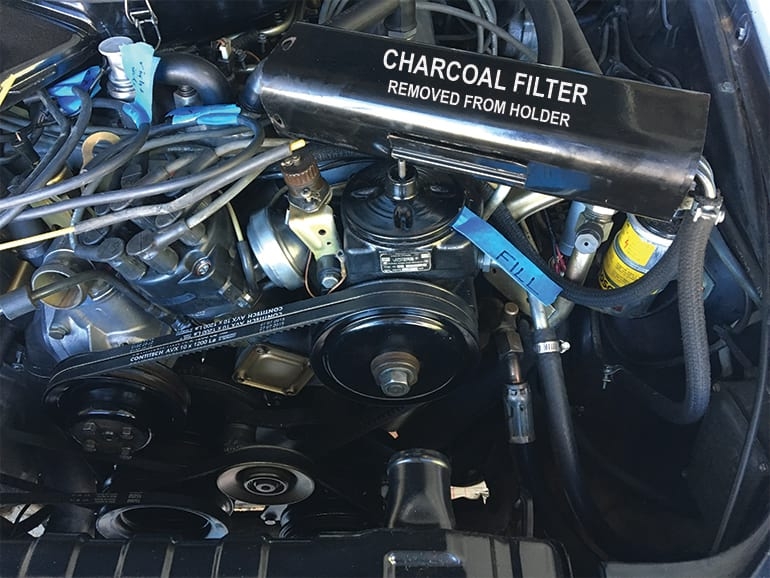
The next step will be getting the charcoal fuel vapor filter out of the way. Do this by sliding
(lifting) the canister straight up. You may leave the two hoses connected as there should be
enough length to lay the canister on top of your power steering unit.
It will also be required to remove either end of the over flow tube from the left side of the
radiator.
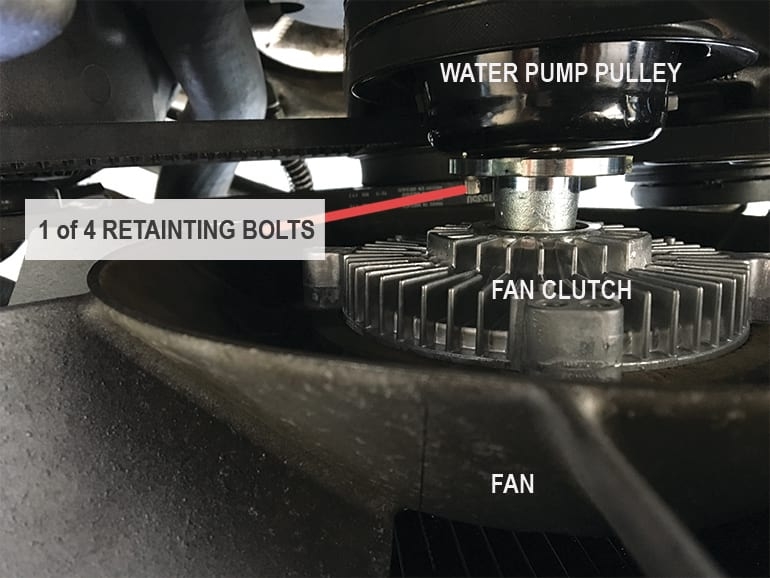
Now loosen and remove the four 10mm bolts holding the fan clutch and attached blades from
the water pump pulley. They should not be exceptionally tight but will be a bit stubborn if they
have not been removed previously.
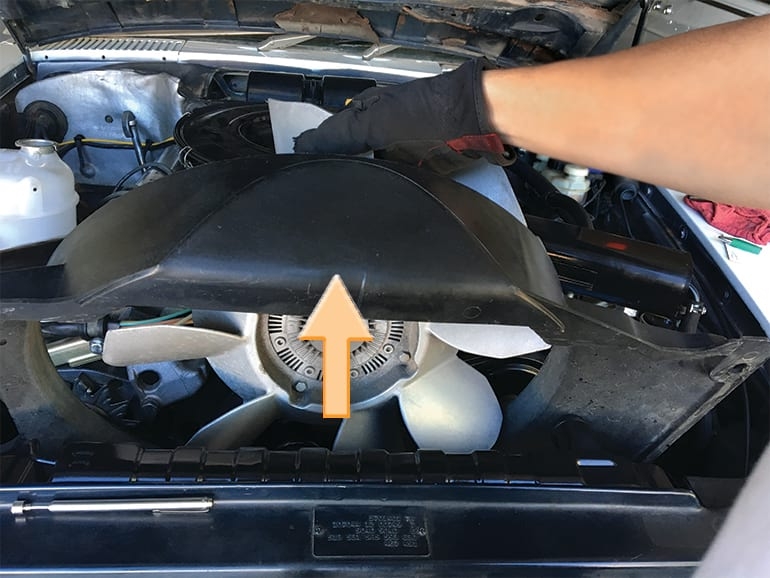
With the fan now loose, it will simply sit in the fan shroud while you remove the two 8mm bolts
retaining the fan shroud. These bolts are located on upper right and left corners. The lower
portion of the shroud is held by permeant clips. As I continue to emphasis with all jobs, don’t
yank, twist etc., so you do not take the chance of breaking old plastic.
You are now ready to grab hold of the fan with one hand and the shroud with the other and lift
the parts up and out.
At this point, you should inspect your fan clutch to make sure it is working properly if you do not
know. My fan clutch “freewheeled” when I removed it and I noticed the viscus coupling oil had
leaked out at some point over the sever years the car sat.
Should you require a new fan clutch, that too is a very simple job. Simply remove the four 10mm
bolts on the front side of the fan blades and tap out old clutch and replace with a new unit.
If you are not installing the new fan clutch immediately, or are not reinstalling your old fan
immediately, the fan and or clutch must be stored face down or drive shaft and mount pointing
skyward! If you store the clutch the other direction the viscus oil will leak out leaving your clutch
unable to work. If you purchase a new clutch, you will also notice the box will or should say
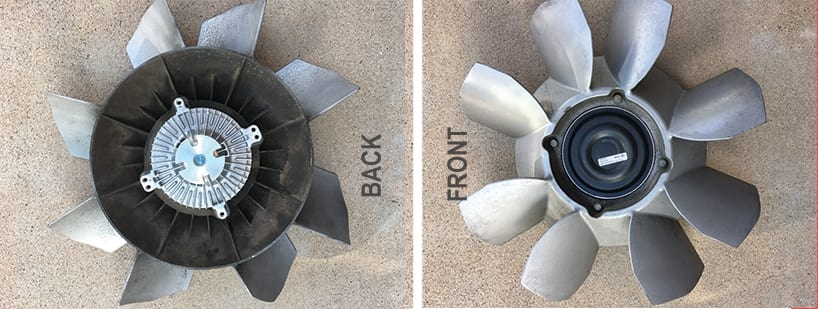
“store this side up.” NOTE: The new fan clutch will most likely appear slightly different if you are
replacing an original unit. The new unit has six mounting holes (as you can see in the photo
above) where as the old unit had four. This is not a problem as they have now been made to
accommodate more than one fan design and the proper mounting holes will align.
With your clutch bolted back to the blades you are now ready to reverse the process for
installation. Be sure to replace your coolant and check for any leaks after starting the car.
POTENTIAL PARTS NEEDED:
- Mercedes 450SL Upper and Lower Radiator Hoses
- Mercedes 450SL Coolant Tank Overflow Hose
- Hose Clamps
- Mercedes 450SL Coolant Tank
- Fuel Vapor Recovery Hose
- Fan Clutch
TOOLS NEEDED:
- Screw Driver
- 10mm box wrench