
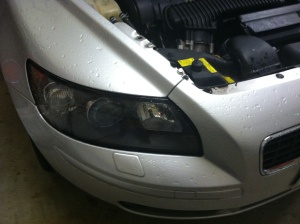
 Changing a P1 S40 headlight is simpler (and cheaper!) than you might think. My friend was actually quoted $285.00 for the light bulb and the install. For the price of a D2S bulb ($69.95) and 5 minutes of my time it saved her a lot. This is a step by step guide with photos to help out anyone that needs to get this done.
How-To
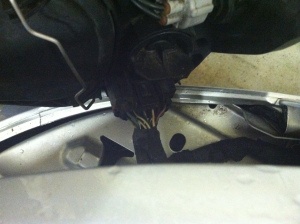
Open the hood and to the outer portion of the headlight right near where the fender meets there is a metal tab. Place your finger under the lip and pull straight up.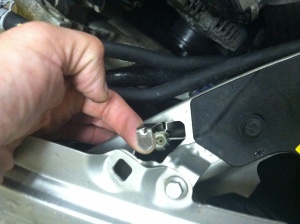
After this has been done the headlight is pretty much free from the vehicle. Now pull the inner portion of the headlight assembly out slowly. While you are doing this go to the outer portion of the light near the fender and pull out at the same time. If it feels like it will not move you can get your free hand behind the light and help push it out. Remove the harness on the outer back portion of the light, and then there it is. Out and ready to swap bulbs.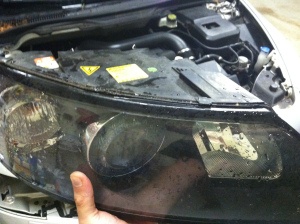
Flip the headlight over making sure the lens is either on a soft surface or on something that will not scratch the lens. On the back cover there are two clips, push each one away from the cover.
[gallery type="square" columns="2" ids="4818,4817"]
Now simply remove the cover and set it aside. On the side of the igniter there is a small 2 wire connection, unplug this and you will see the bulb and the retaining ring. Unscrew the ring and set aside as well.
[gallery type="square" columns="2" ids="4816,4815"]
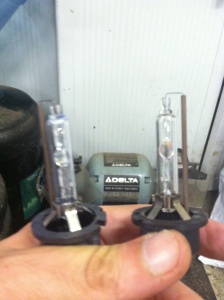
Here you have the two bulbs. One on the left is new and the right is old. You can see the element is burnt and brownish in color.
Put everything back in reverse order. Install the bulb, being careful not to touch the glass, the lock ring and the igniter. Don’t forget to plug in the small 2 wire connector or you will be taking it apart again. Put the cover back on. Push the retaining clips back on the cover and the light is all set to go back in. Plug the main harness in and slowly put the outer edge in the fender opening and swing the inner portion in as well.
Put the retaining pin back in and push it all the way down. (Note the direction of the tab, as the other way will not fully lock the assembly in)
That’s it. Now you have a working headlight again and you are good to go. I do however recommend doing both sides at the same time so the colors are even and allow you to have the correct lighting these should give you.
[gallery ids="4810,4809,4808"]

About The Author: Bill Petrey
Bill is a Mercedes enthusiast, ASE certified technician and Senior Sales Associate at FCP Euro. He can be reached at billp@fcpeuro.com


