Having a sunroof is one of the greatest features in a vehicle... Until the day the drains leak and flood the entire car.
Contrary to common belief, the sunroof does not make a tight seal with the roof of the car. Rather, there is a water catch pan running around the sunroof with 4 drains in each corner. These drains run down the A and C pillars of the car and drop the water near the wheel wells. In the event that these drains become clogged or crack, all that water will leak into the car. Depending on where it fails, broken drains may saturate the headliner or worse, develop a pool of standing water on the floor boards.
The rear sunroof drains are rare to fail, but many people face issues with the front drains from clogging or cracking with time. Upon examining the drain system, it is easy to see where the faults lay; it is the perfect example of an over-engineered part by Volvo.
Rather than being a single tube, the front sunroof drains are composed of four pieces, each one being a potential point for failure.
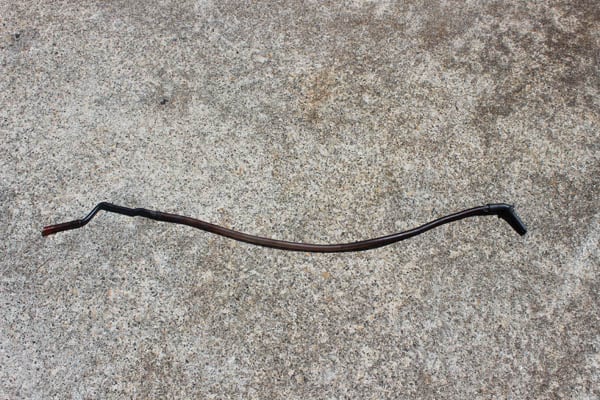
Leading from the catch pan is a 3" section of tube which is connected to a plastic elbow. This narrow plastic elbow is the first clogging point and also at risk for cracking with age.
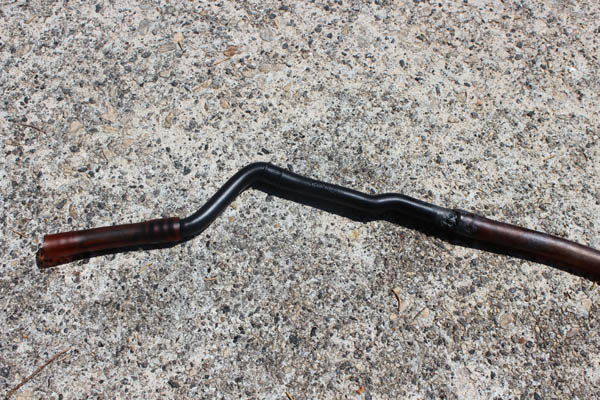
On the other end of the drain is a tight spout by the fire wall. While the spout has an excessively narrow end to discourage insects from crawling up, it is also a catch for dirt and debris.

Rather than replacing each various piece of the drain, many have opted to replace the entire line with a single hose. The following guide will step you through the process of replacing the front factory drains as preventative maintenance.
Necessary Parts and Tools:
- About 9 feet of 3/8" inner diameter hose
- Small flat head screwdriver
- Phillips head screwdriver or torx driver set
If you wish to replace the rear drains as well, additional hose will need to be purchased. However, rear drain failure is rare.
Step 1
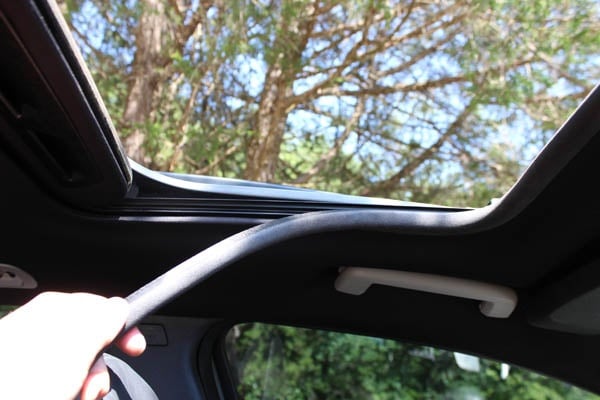
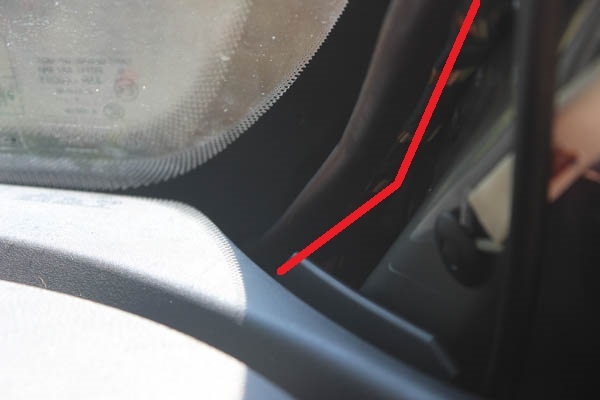
Remove the trim running around the sunroof by pulling it straight down.
Step 2
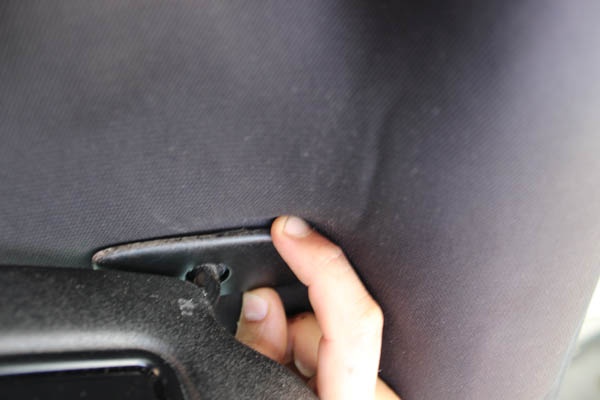
Pry the A-pillar covers off.
Behind the A-pillar cover, you will notice a small plastic tether which prevents the cover from moving more than a few inches. This tether can be un-clipped from the car, but MUST be clipped back into place during re-installation. The purpose of this tether is to keep the panel cover in place upon side-curtain airbag deployment.
Step 3
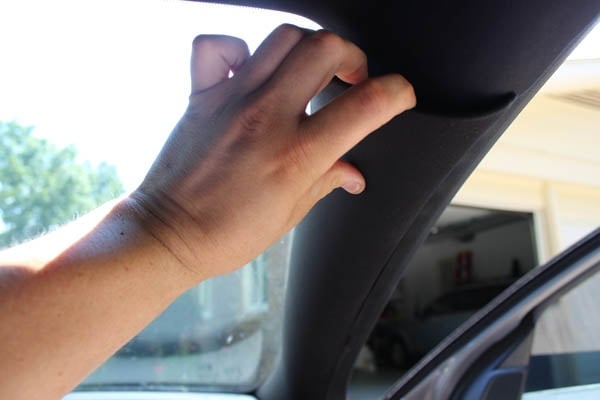
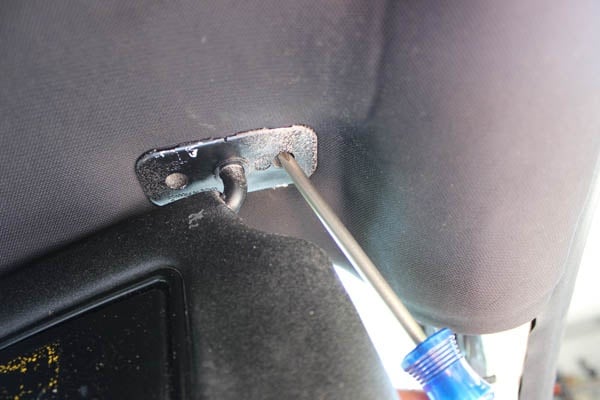
To remove the upper handles, use a flat head screwdriver to pry down the caps which expose the screws. Depending on your model year, these screws may require a phillips or torx bit driver.
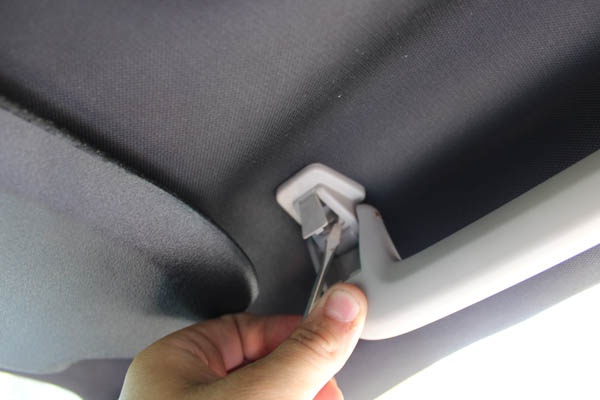
Step 4
Remove the visors by sliding the cover cap off of the hinge to expose the screws.
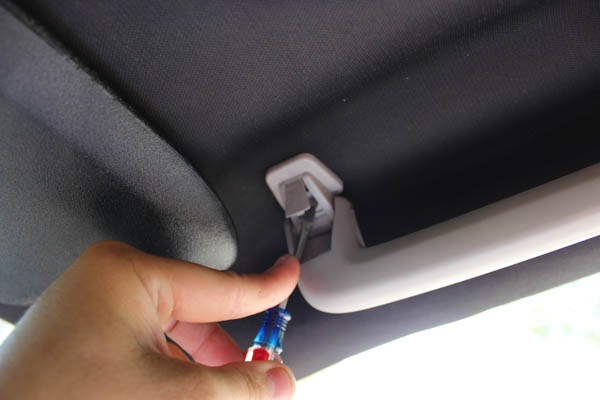
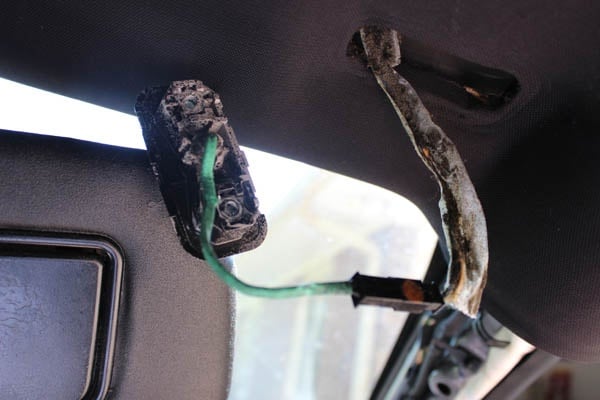
Then remove the two screws and gently pull the visor down. It will still be attached to the ceiling by the electric harness for the vanity mirror, do not let it dangle by the thin wires.
Pull a bit of the wiring through the headliner to unveil the wiring clip. Disconnect this clip and the visor will be free to remove from the car.
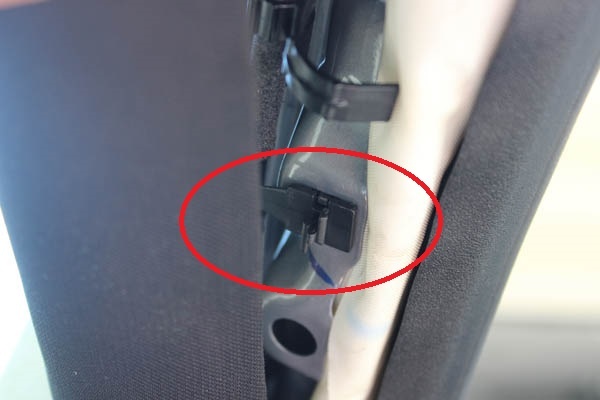
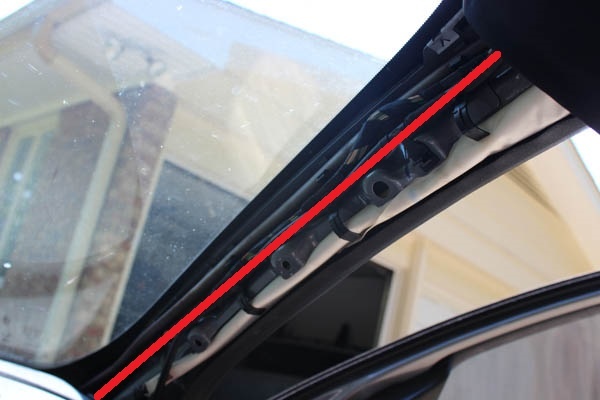
Step 5
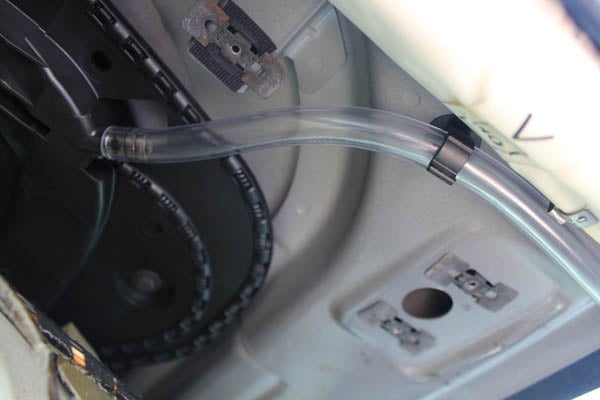
Gently bend back the corner of the headliner to gain access to the sunroof drain. Simply pull the hose off of the drain valve and follow it the length of the A-pillar.
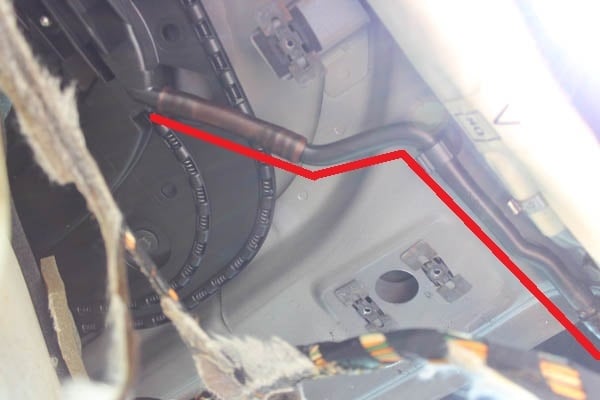
At the base of the A-pillar, you will encounter the rubber end which passes through the firewall. Due to limited space, you may want to use a pair of pliers to pull this piece out.
Step 6
With the old drain completely removed, replace it with the 3/8 inch inner diameter hose. As you can see, the single hose has less points for failure and will be less likely to clog with time.
Step 7
Before reinstalling the headliner and trim pieces, I suggest pouring water on the sunroof to confirm that the drains are flowing properly. If done right, you will see the water pouring out from under the car near the wheel wells.
Step 8
Follow these steps in reverse order to reassemble the interior.
Once the drains have been replaced, I strongly encourage people to annually inspect their lines for any clogging. Using an air compressor with a fitting, you can easily blow out any debris which may be collecting. While it may be a pain to access and examine the drains, it will be a bigger nightmare to gut the interior in the event of flooding.