- 01/24/2020
- 6 Min Read
- By: Jose Martinez
How To Replace The Parking Brake Shoes And Rear Rotors On A Classic Air-Cooled Porsche 911

There's a good chance that if you pull the parking brake lever on your old Porsche 911, it will still try to roll away.
Your air-cooled Porsche 911 has very small drum parking brakes on the rear hubs in the center of the discs. Driving with the parking brake lever accidentally engaged and/or years of neglect renders them useless on a lot of cars. Follow this procedure to rebuild and adjust them, and replace your rear drums while you are at it.
Model Years Applicable:
All Porsche 911 cars through 1989. The photos and parts shown here are on a 1983 Porsche 911SC but the general procedures apply to all years within this range. Consult a service manual for detailed information on your particular model year’s part numbers and torque specs.
Tools Needed To Complete This Repair:
- Jack stands
- Floor jack
- Jack pad
- Rubber gloves
- Safety glasses
- Paper towels
- Penetrating oil
- Socket set
- Ratchet
- Breaker bar
- Zip ties
- Needle nose pliers
- Pliers
- Pick tools
- Lithium grease
- Brake cleaner
- Service manual for your car’s model year
Parts Needed:
- 1x Parking brake shoe kit (contains 4 shoes total)
- 2x Rear brake rotors
- Because this procedure covers an extensive model year range, we recommend adding your car to our "My Garage" tool to find the exact parts you need.
Replacement Procedure
Step 1: Raise Car on Jack Stands
Raise the rear of the car on jack stands using this procedure.
Step 2: Remove Brake Pads
Remove the rear brake pads and retaining hardware using this procedure.
Step 3: Remove Brake Caliper
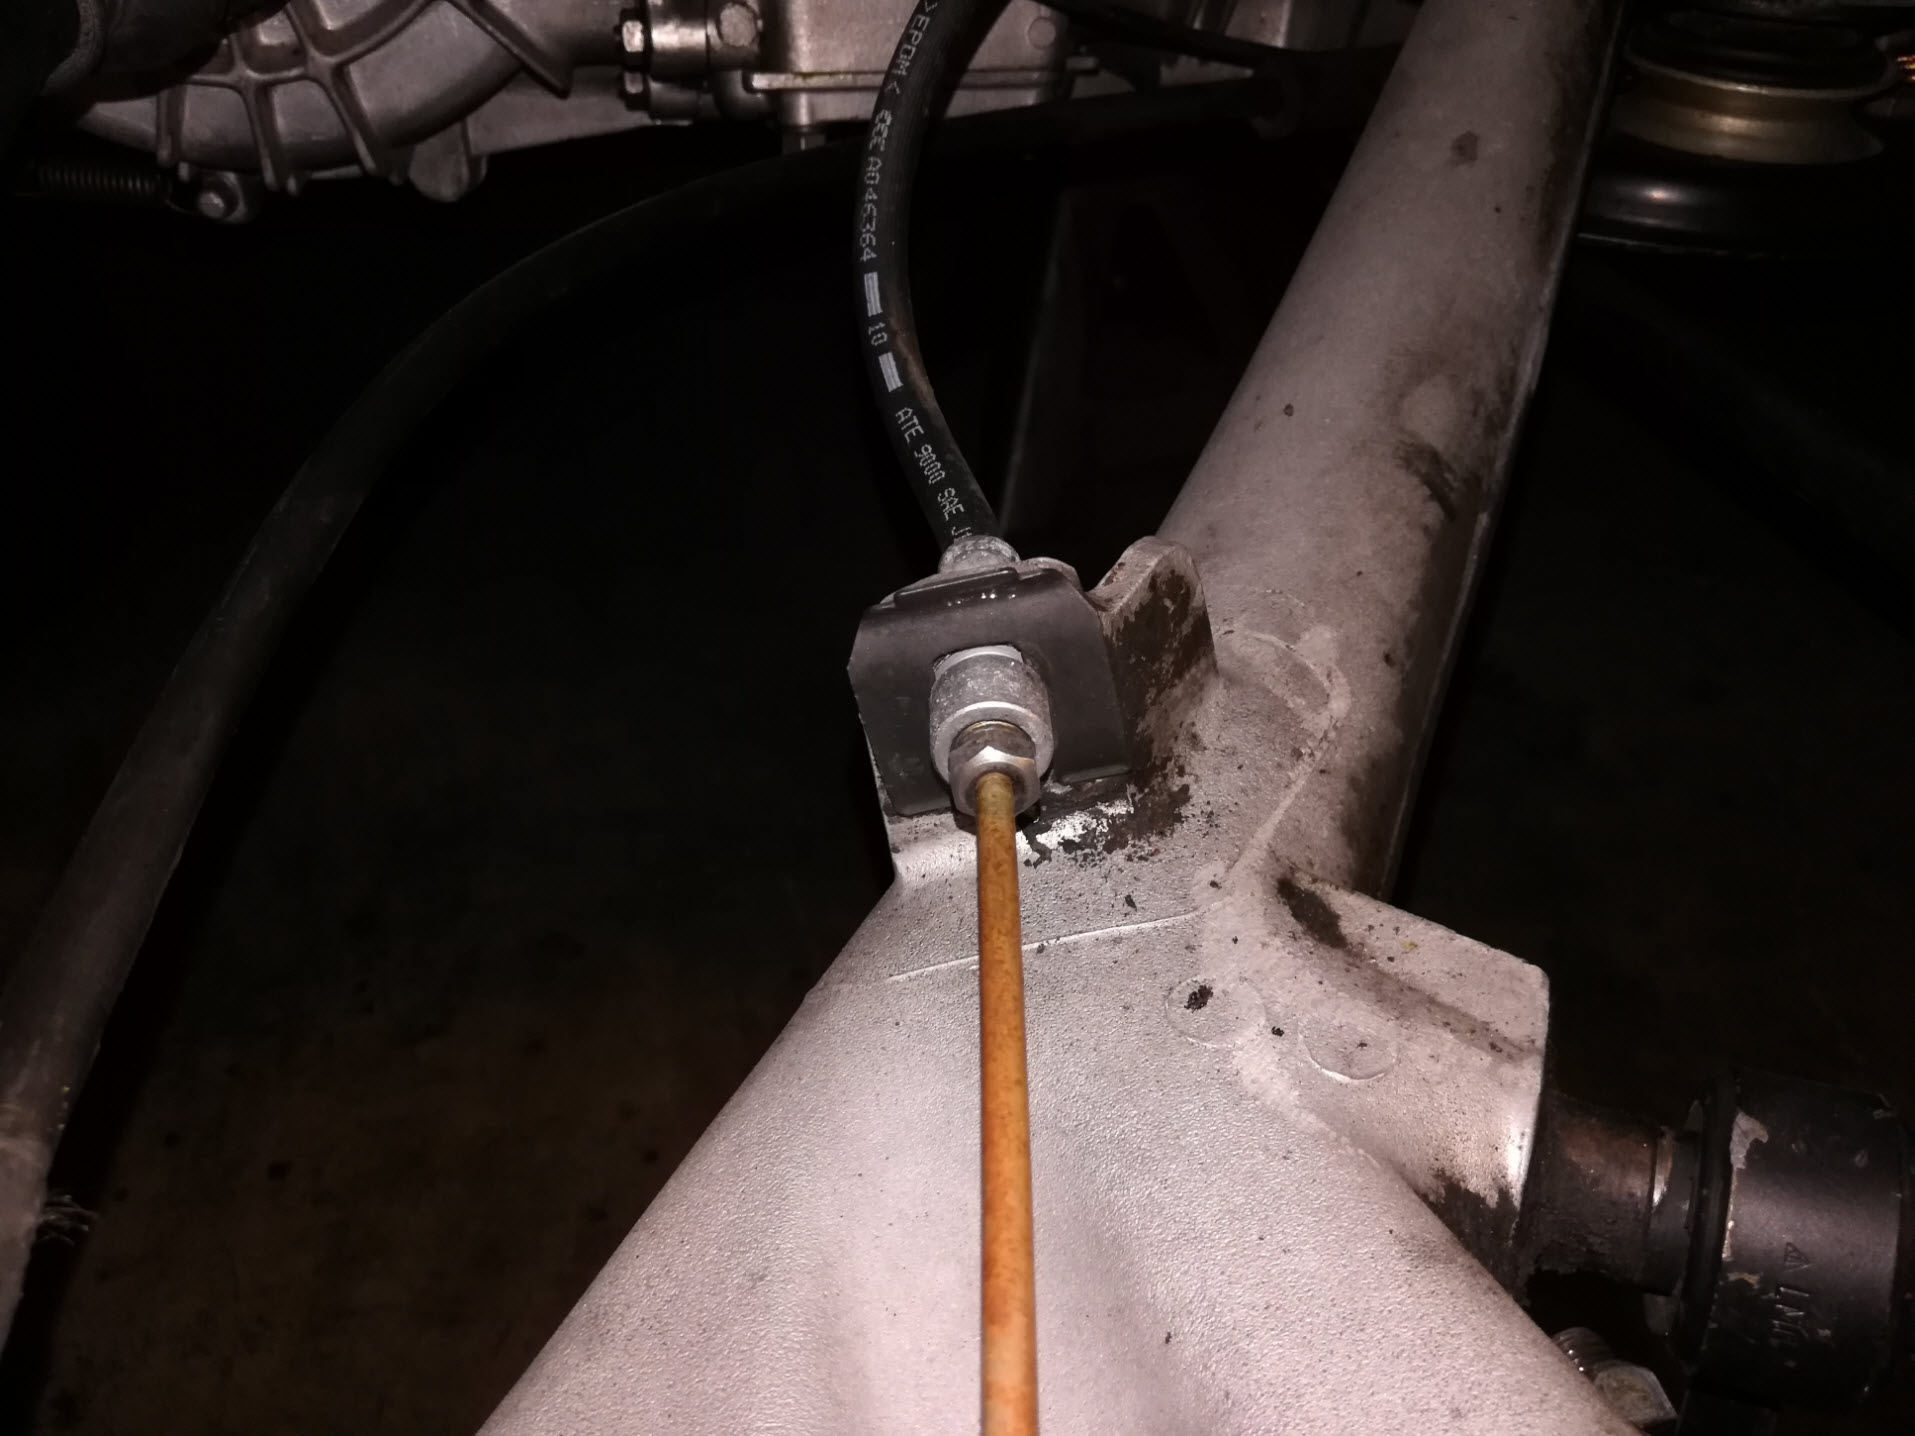
Pull the brake line retaining clip on the rear trailing arm between the brake hard line and the rubber line. Set it aside for later re-use.
Loosen the 2 bolts on the back of the caliper. The lower bolt has very little room for the socket and ratchet but it can be done. Do not disconnect or disturb the brake line.
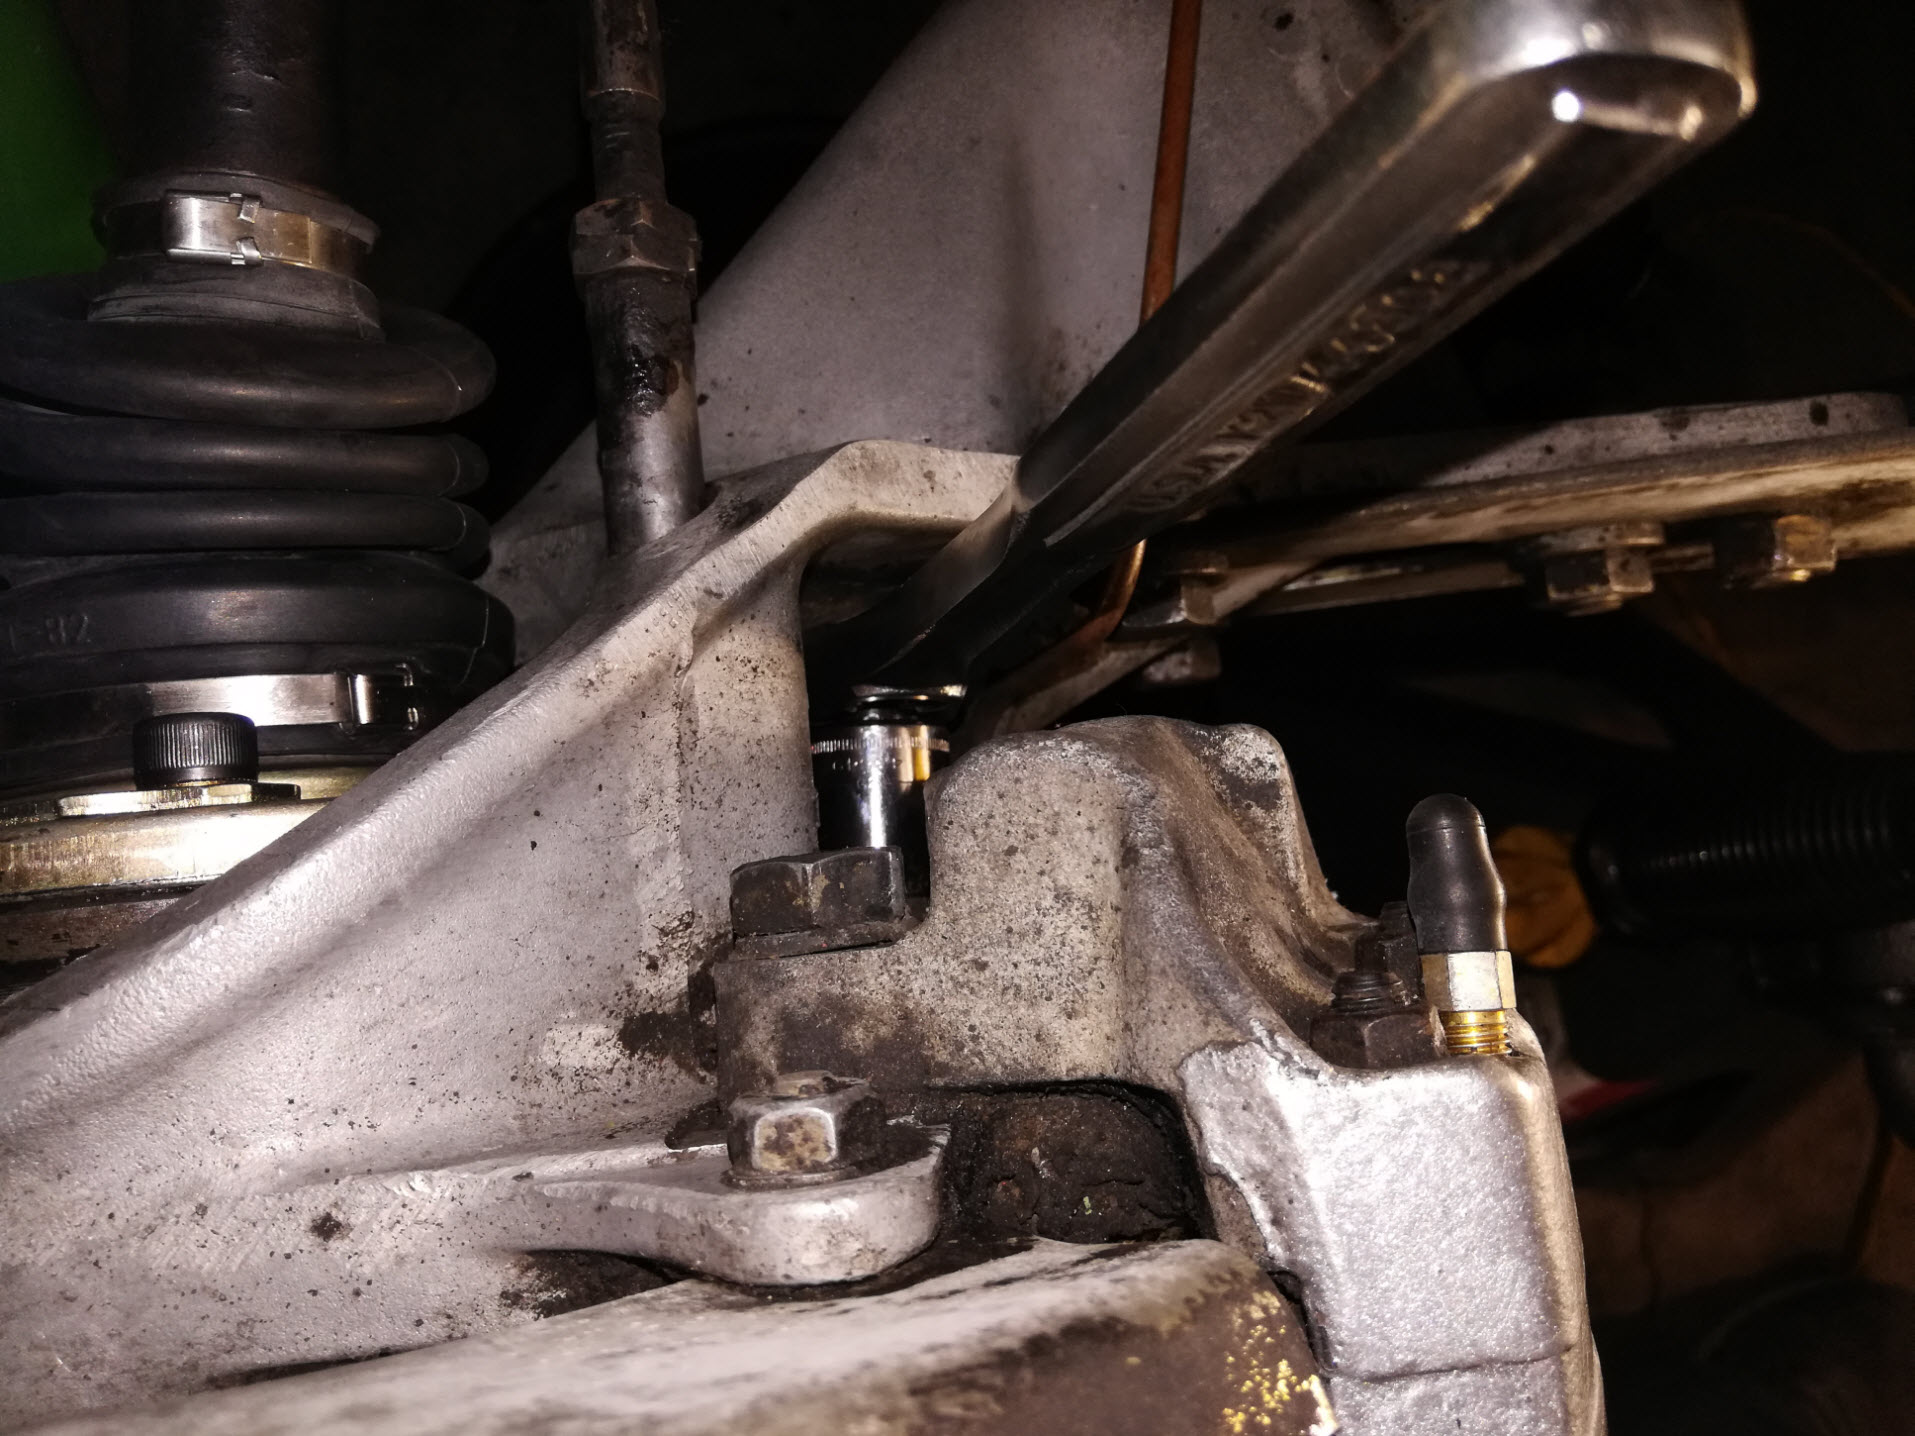
Suspend the caliper from above with thin rope or zip ties to keep the hard brake line from bending or getting damaged while you work on the parking brake. It should be suspended at approximately the same height as the installed caliper position. The removed brake line clip should allow enough rotation in the rubber line to allow the caliper and hard brake line to carefully slide off and clear the rotor. On the right side you can use the hard oil lines to the front oil cooler to suspend from. Stuff a rag under the hard brake line to protect it from any damage from the trailing arm.

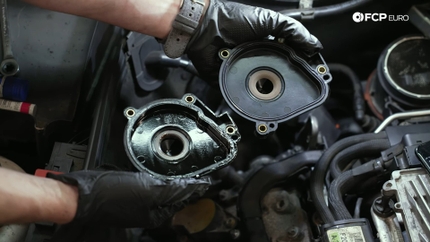
Step 4: Remove the Brake Rotor
Disengage the parking brake lever completely. Remove the 2 retaining screws on the wheel mounting face of the rotor.
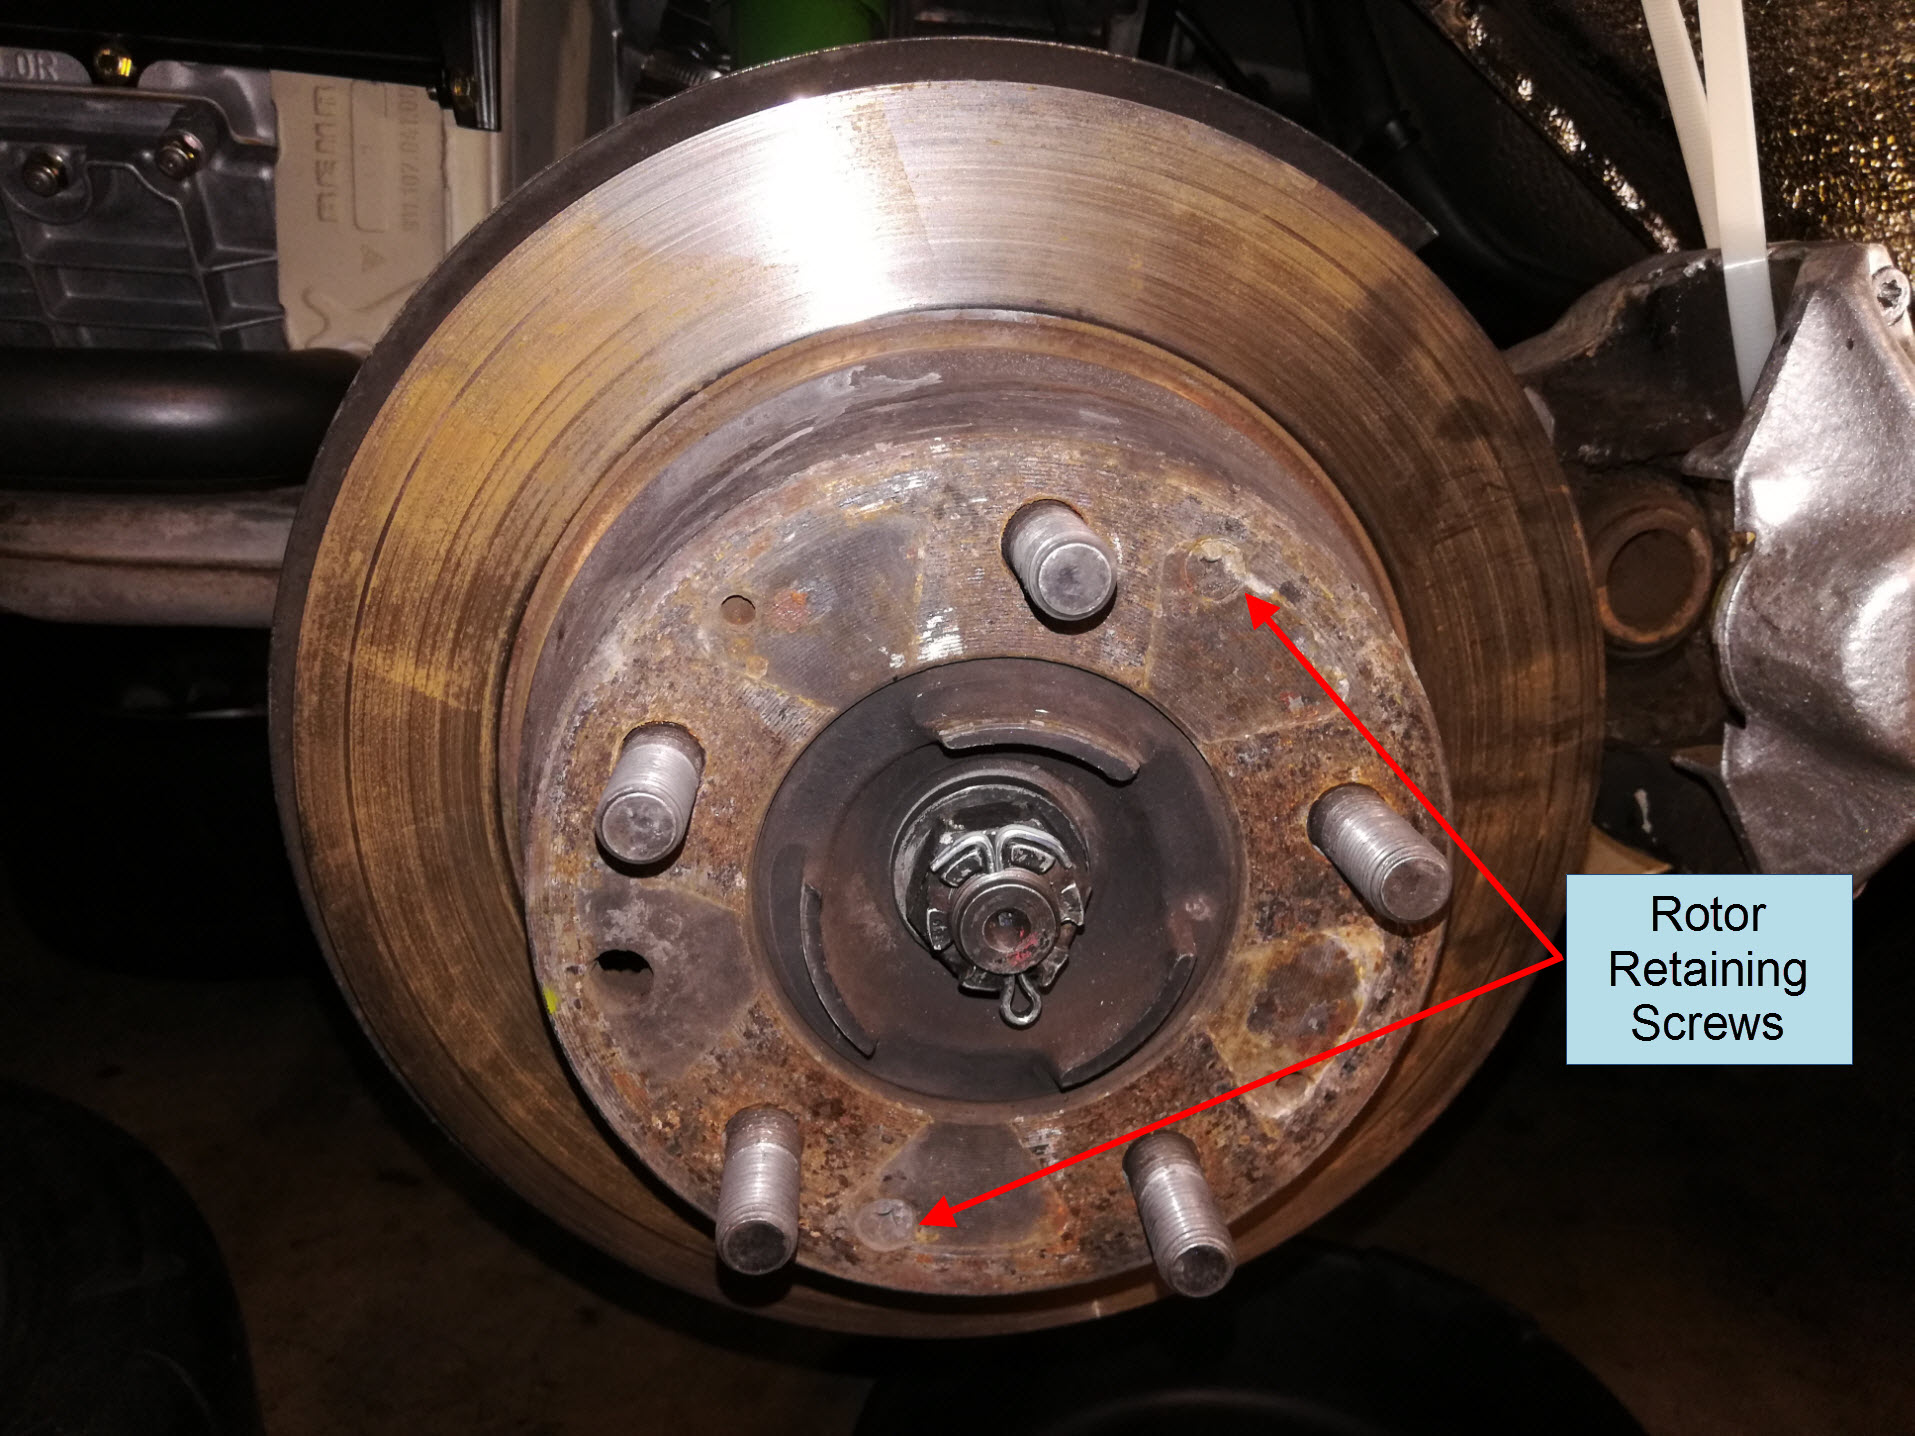
The rotor should pull right off at this point. If necessary, give it a few taps with a rubber mallet to release it. The rear hub and parking brake assembly are now exposed.
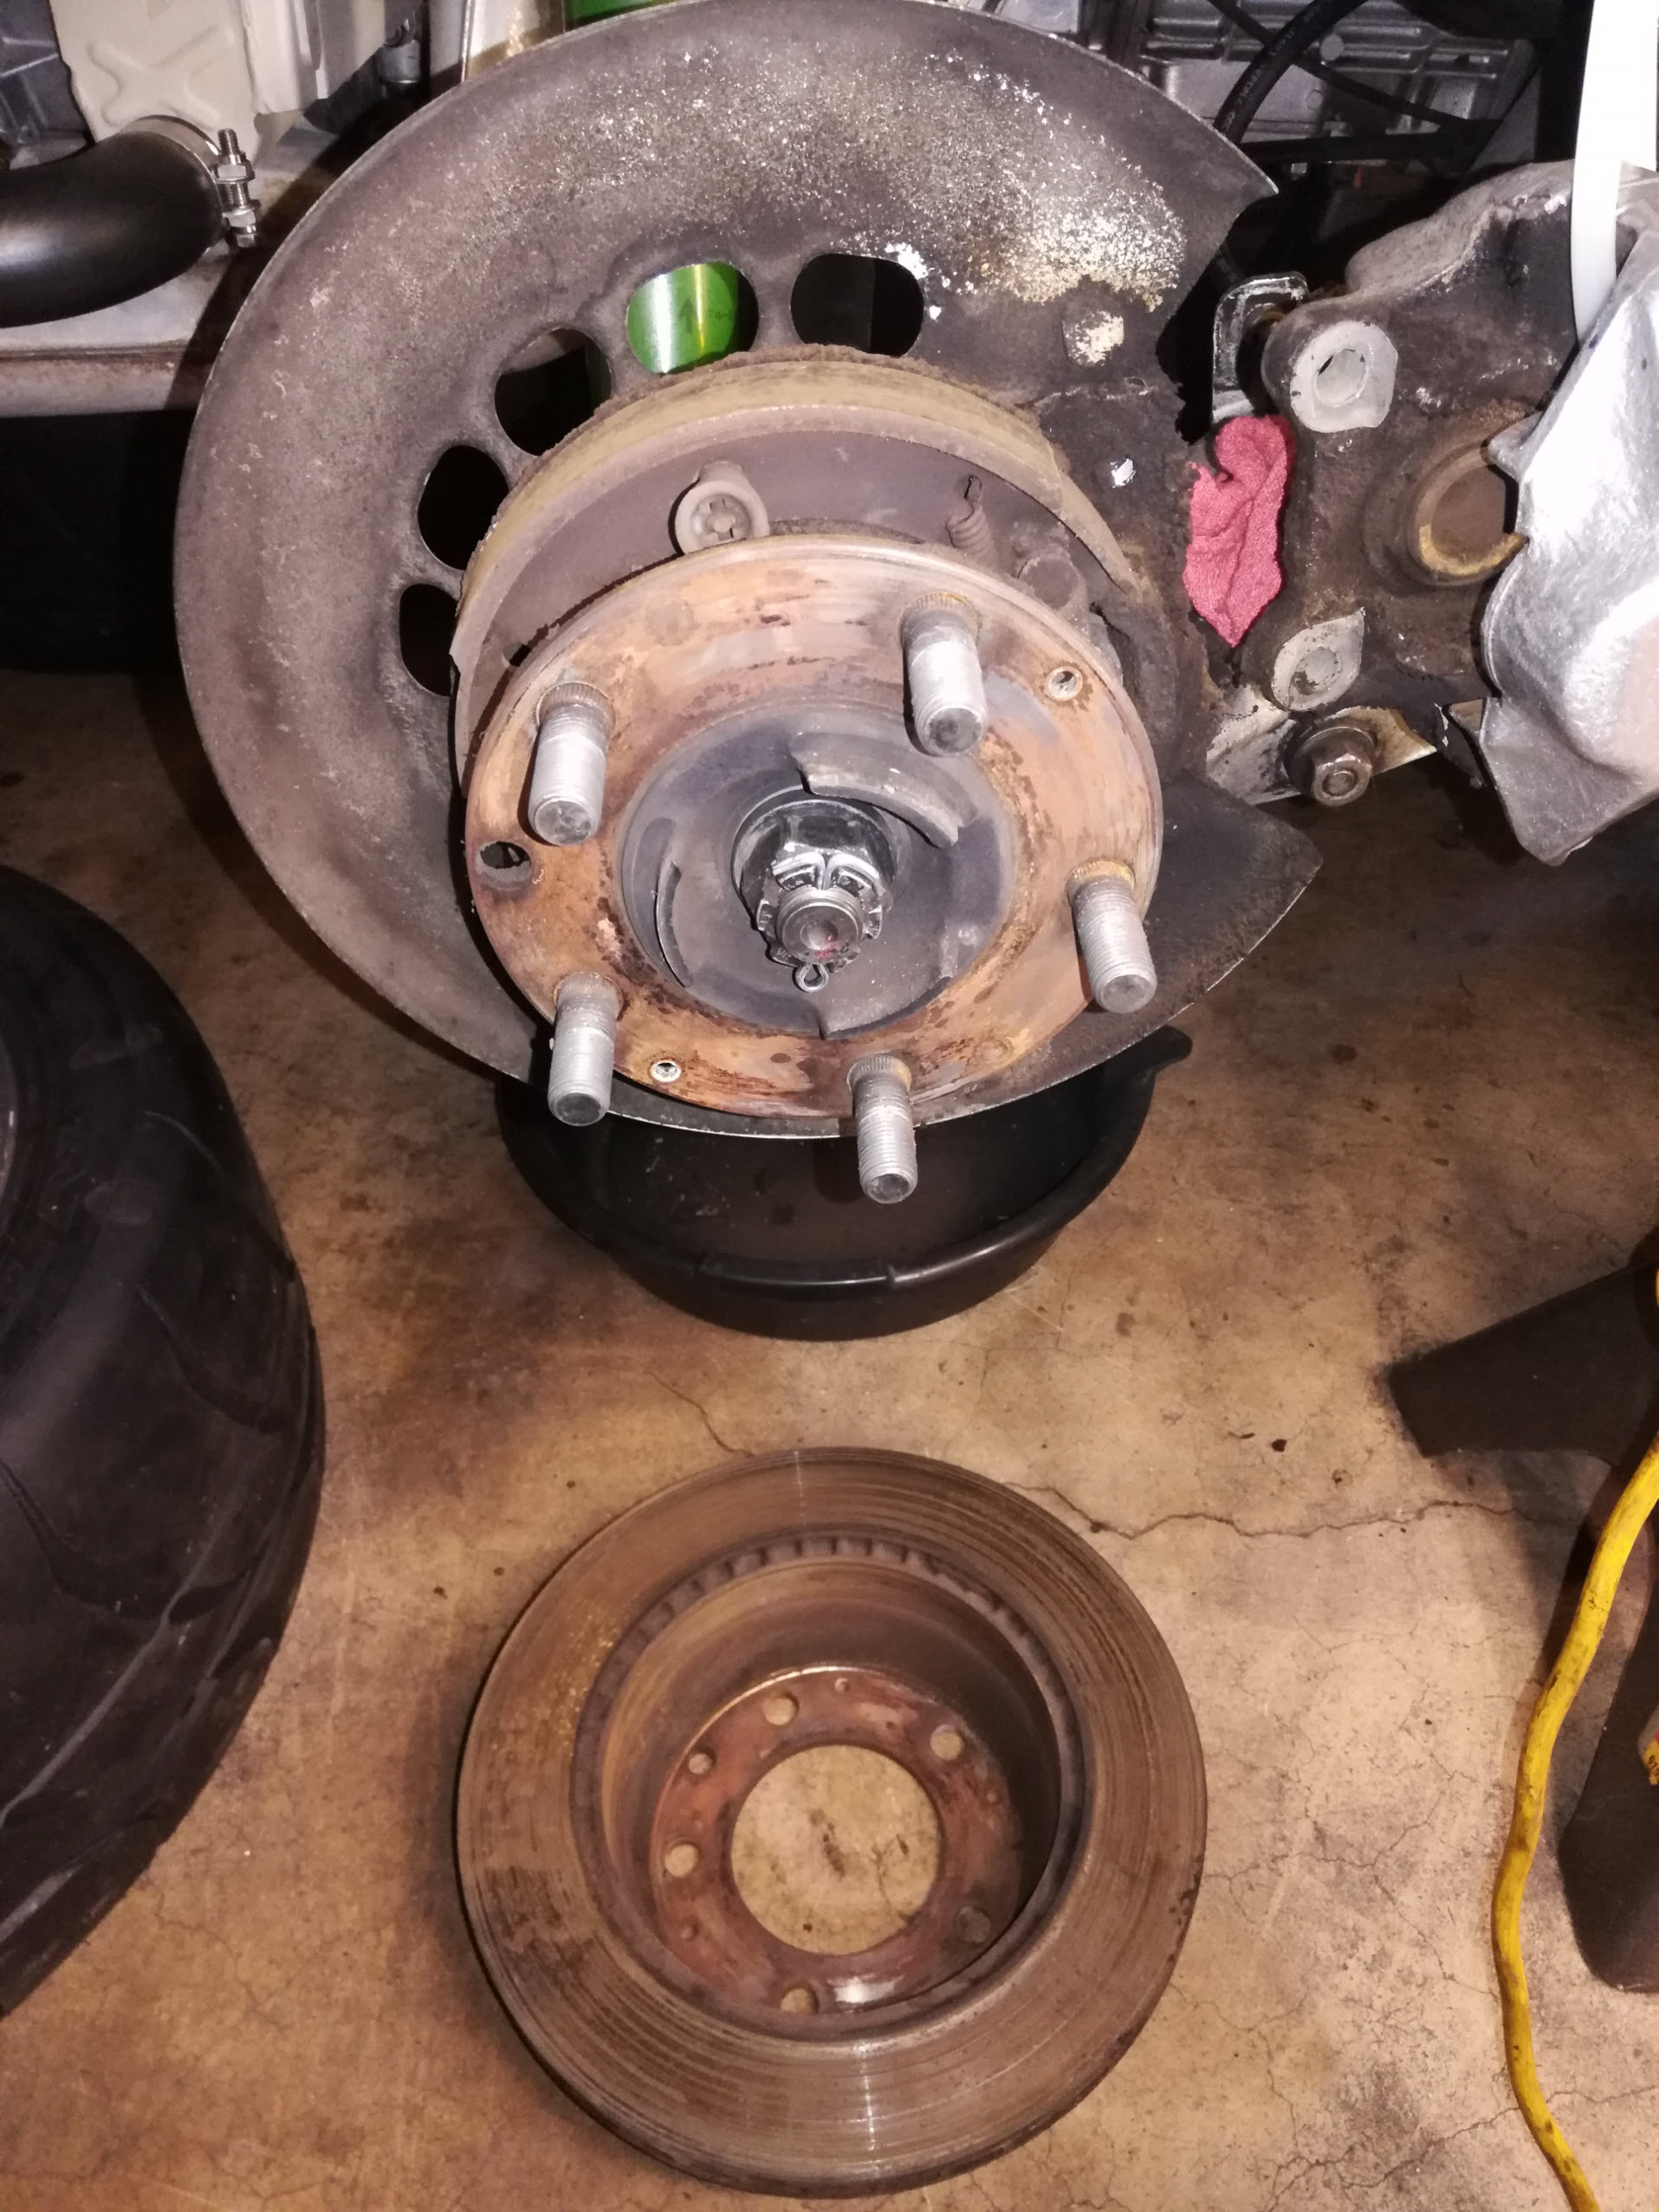
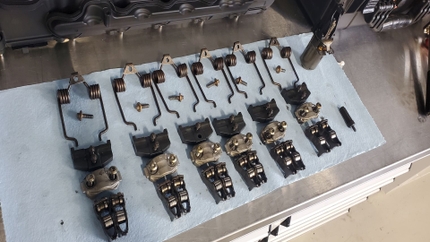
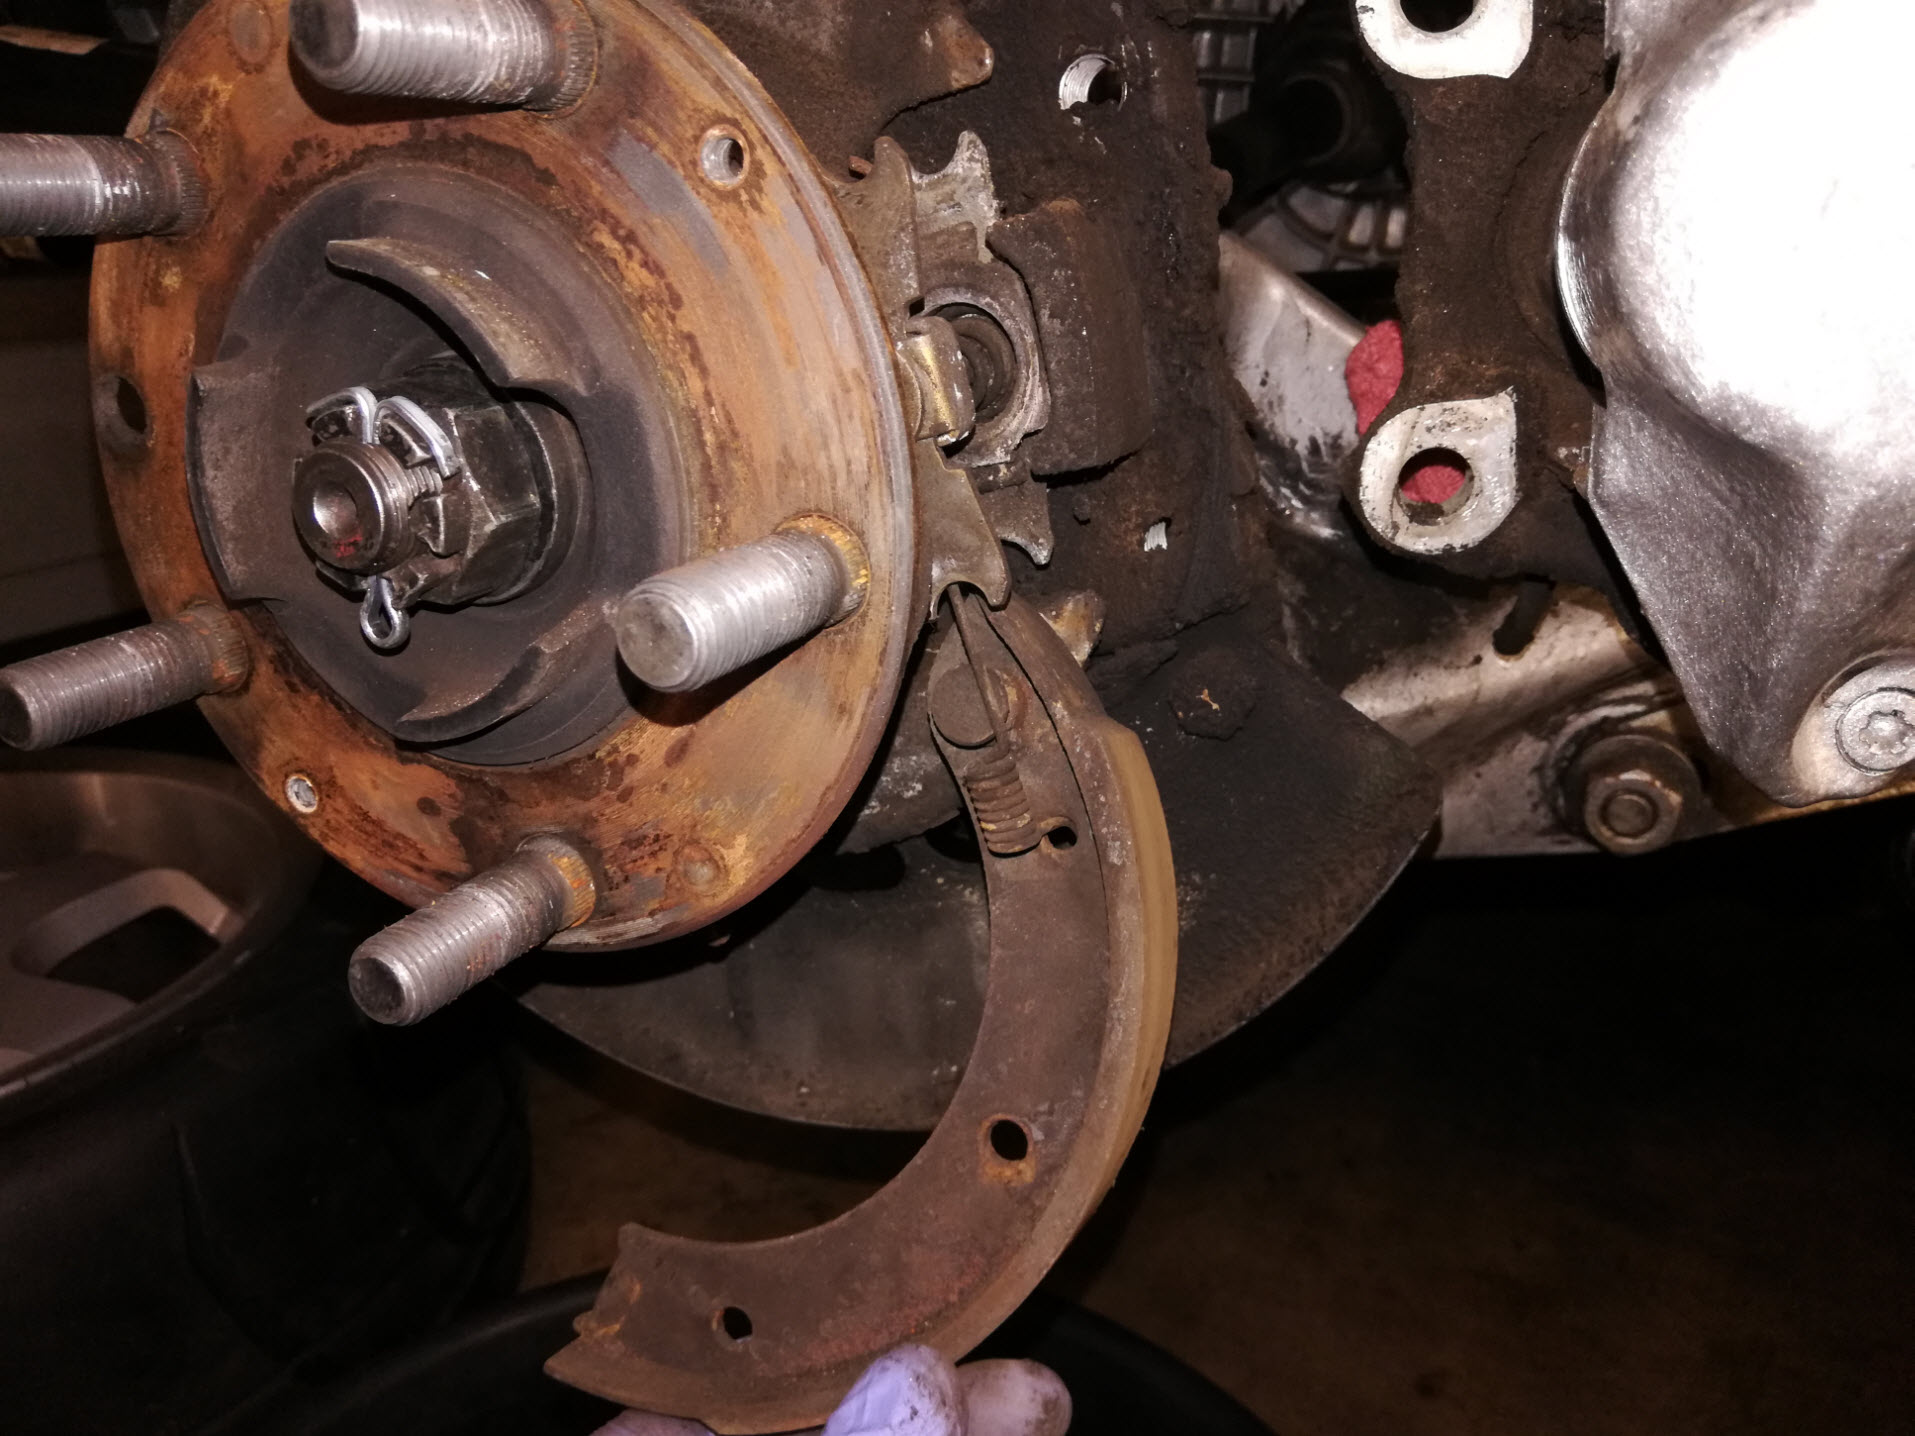
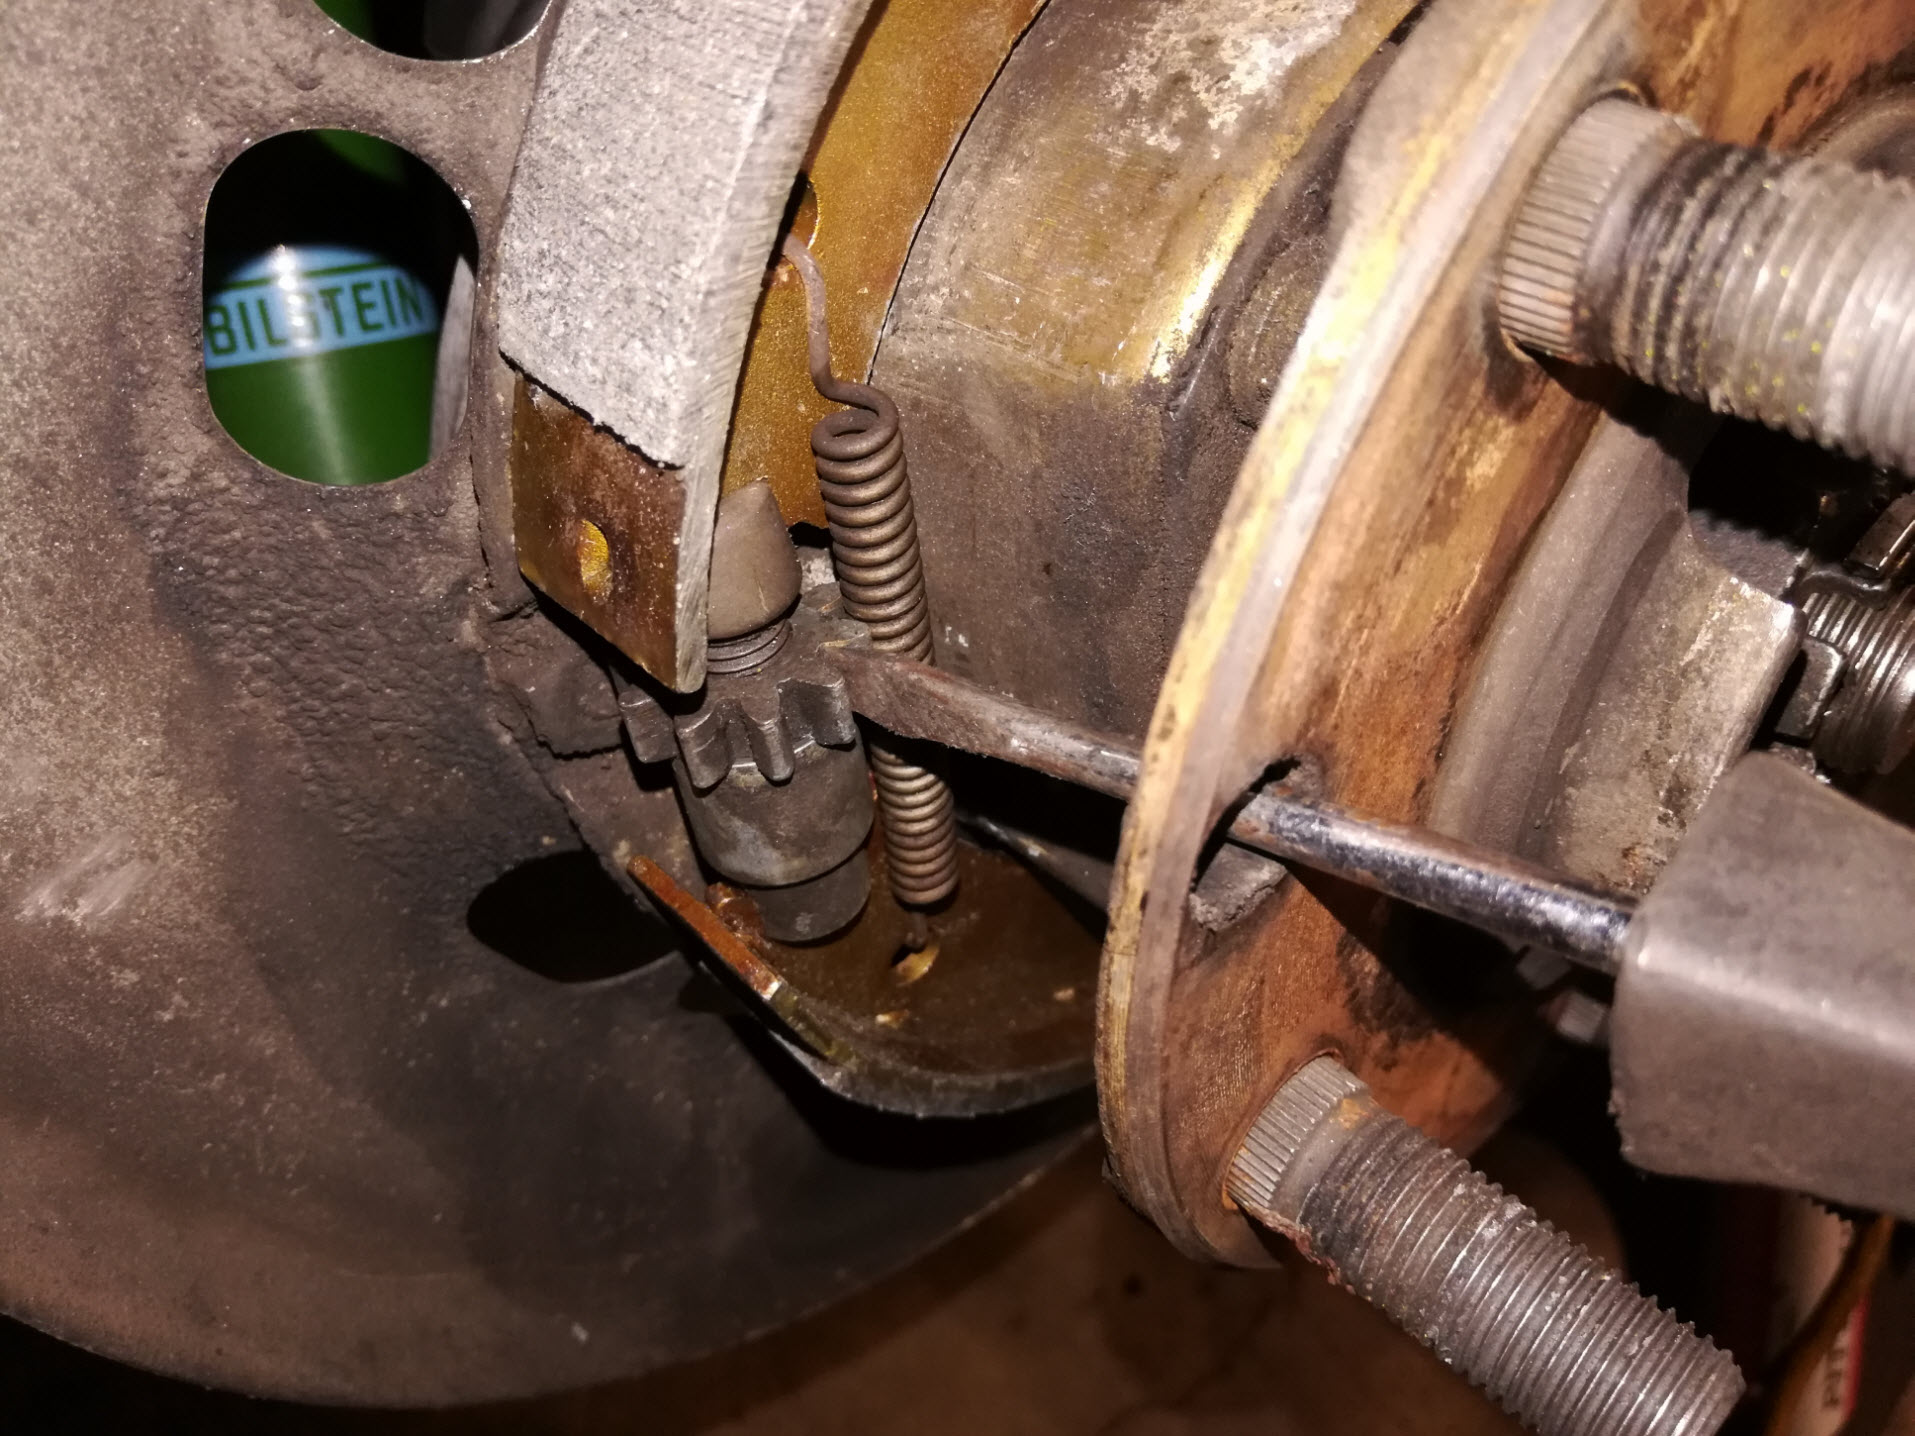
Step 5: Remove Parking Brake Shoes
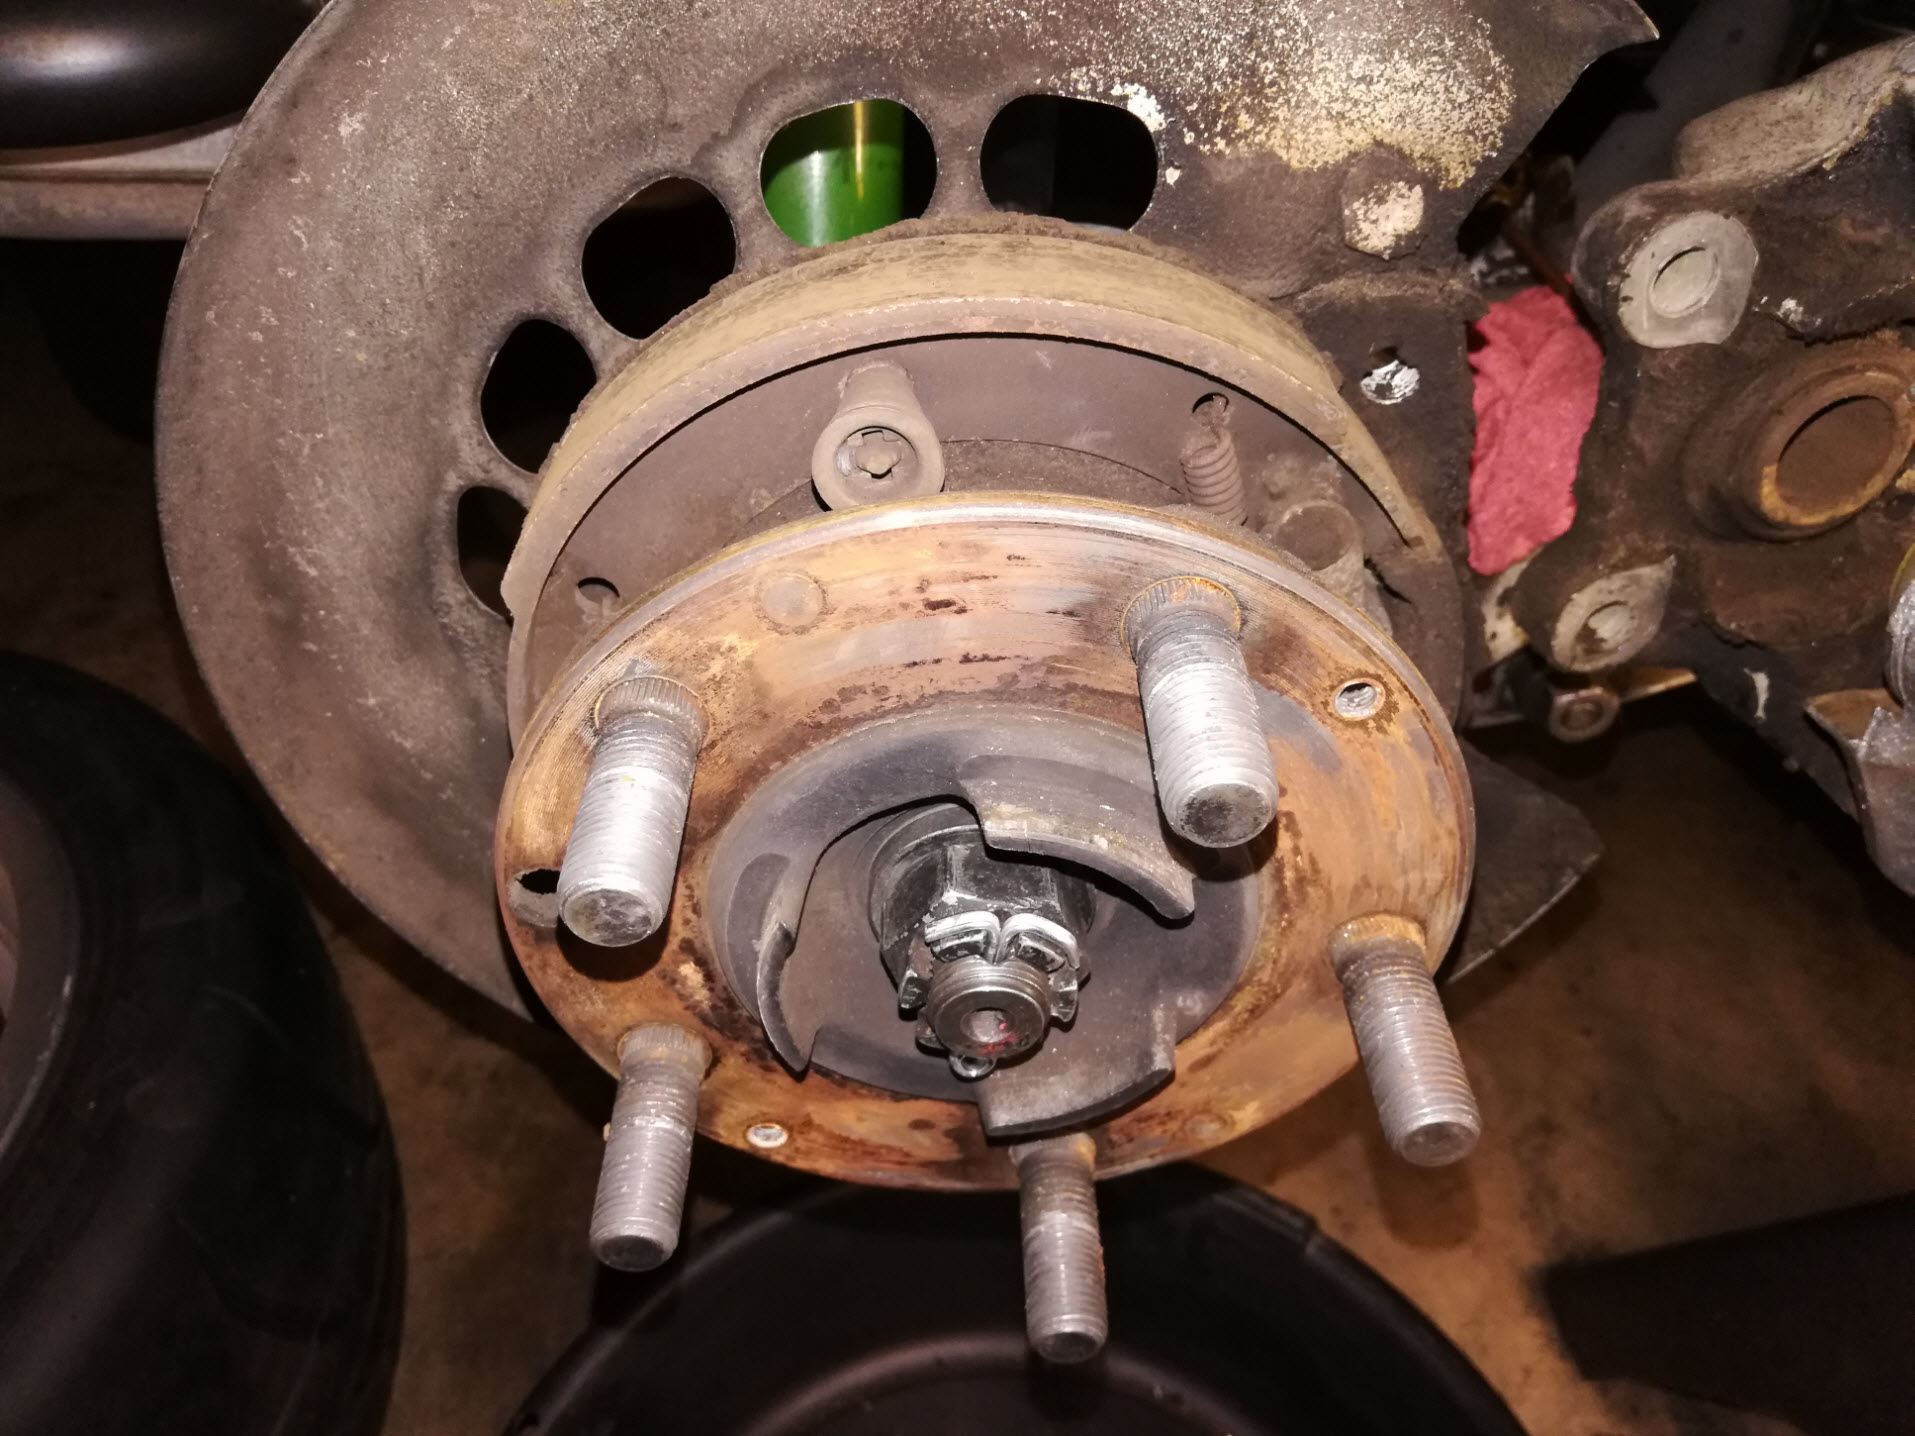
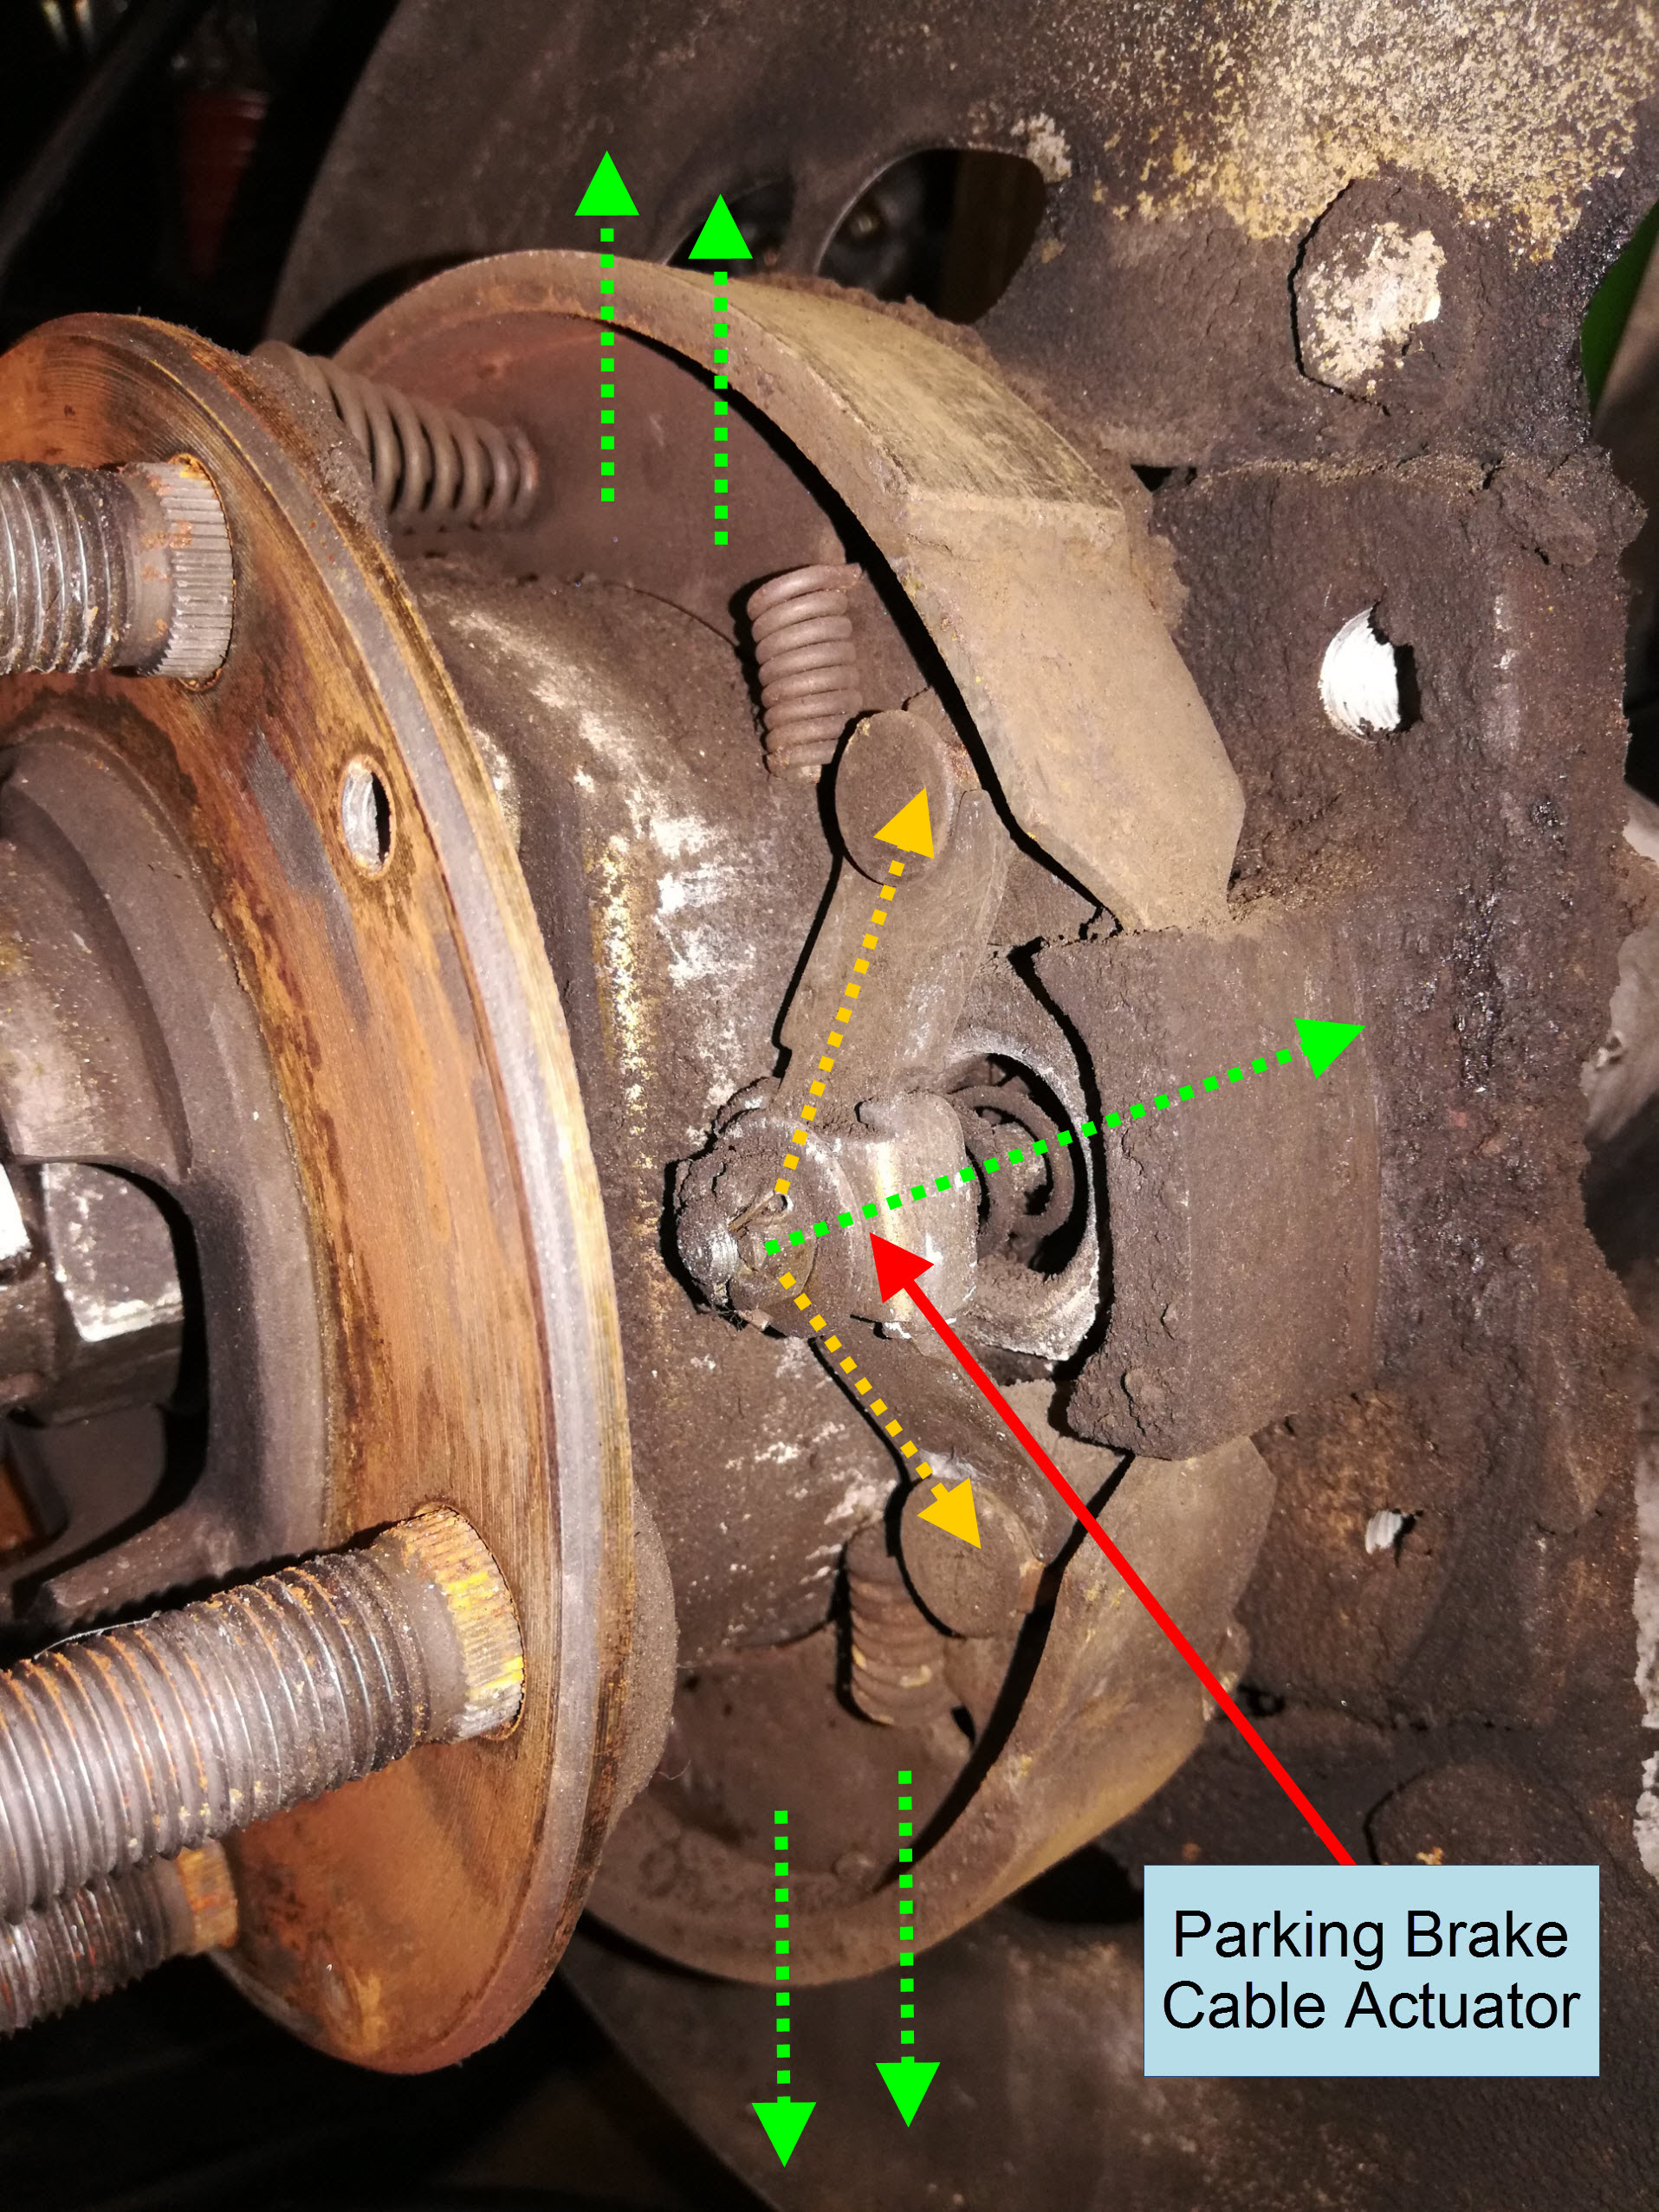
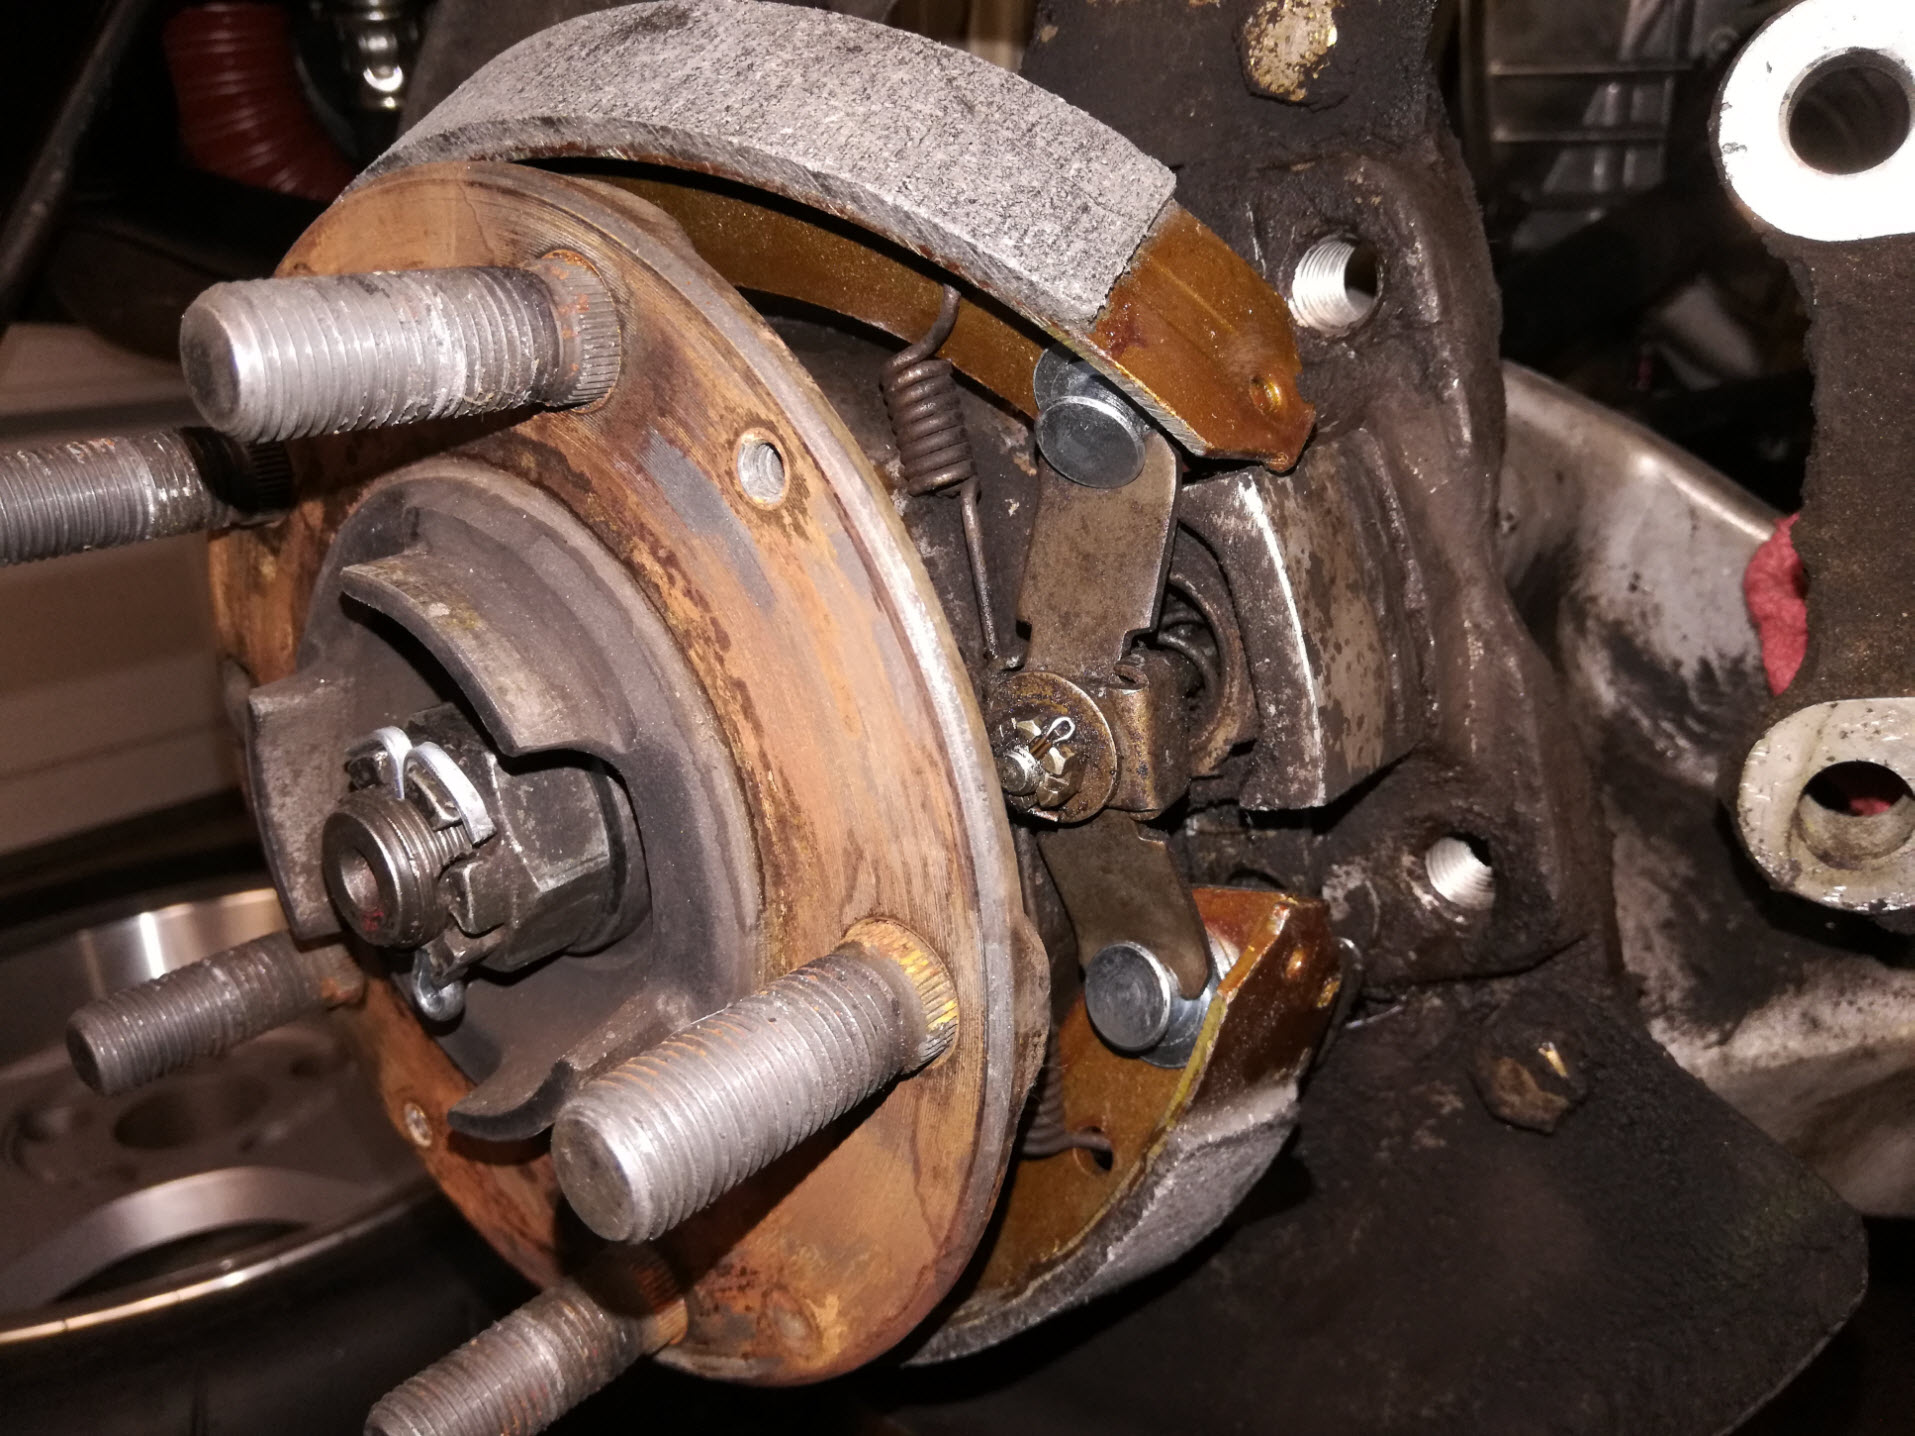
Notice how the parking brake assembly is a tiny cable-actuated drum brake with shoes that push against the inner “hat” part of the rear rotor. When you pull the parking brake lever, the cables pull the actuator levers which push the brake shoes apart against the inside of the rotor surface. There are several springs that hold everything in place during operation. Servicing this assembly is very similar to full size drum brakes.
Note: Work on one side at a time, so you can reference the assembled side while rebuilding the other side.
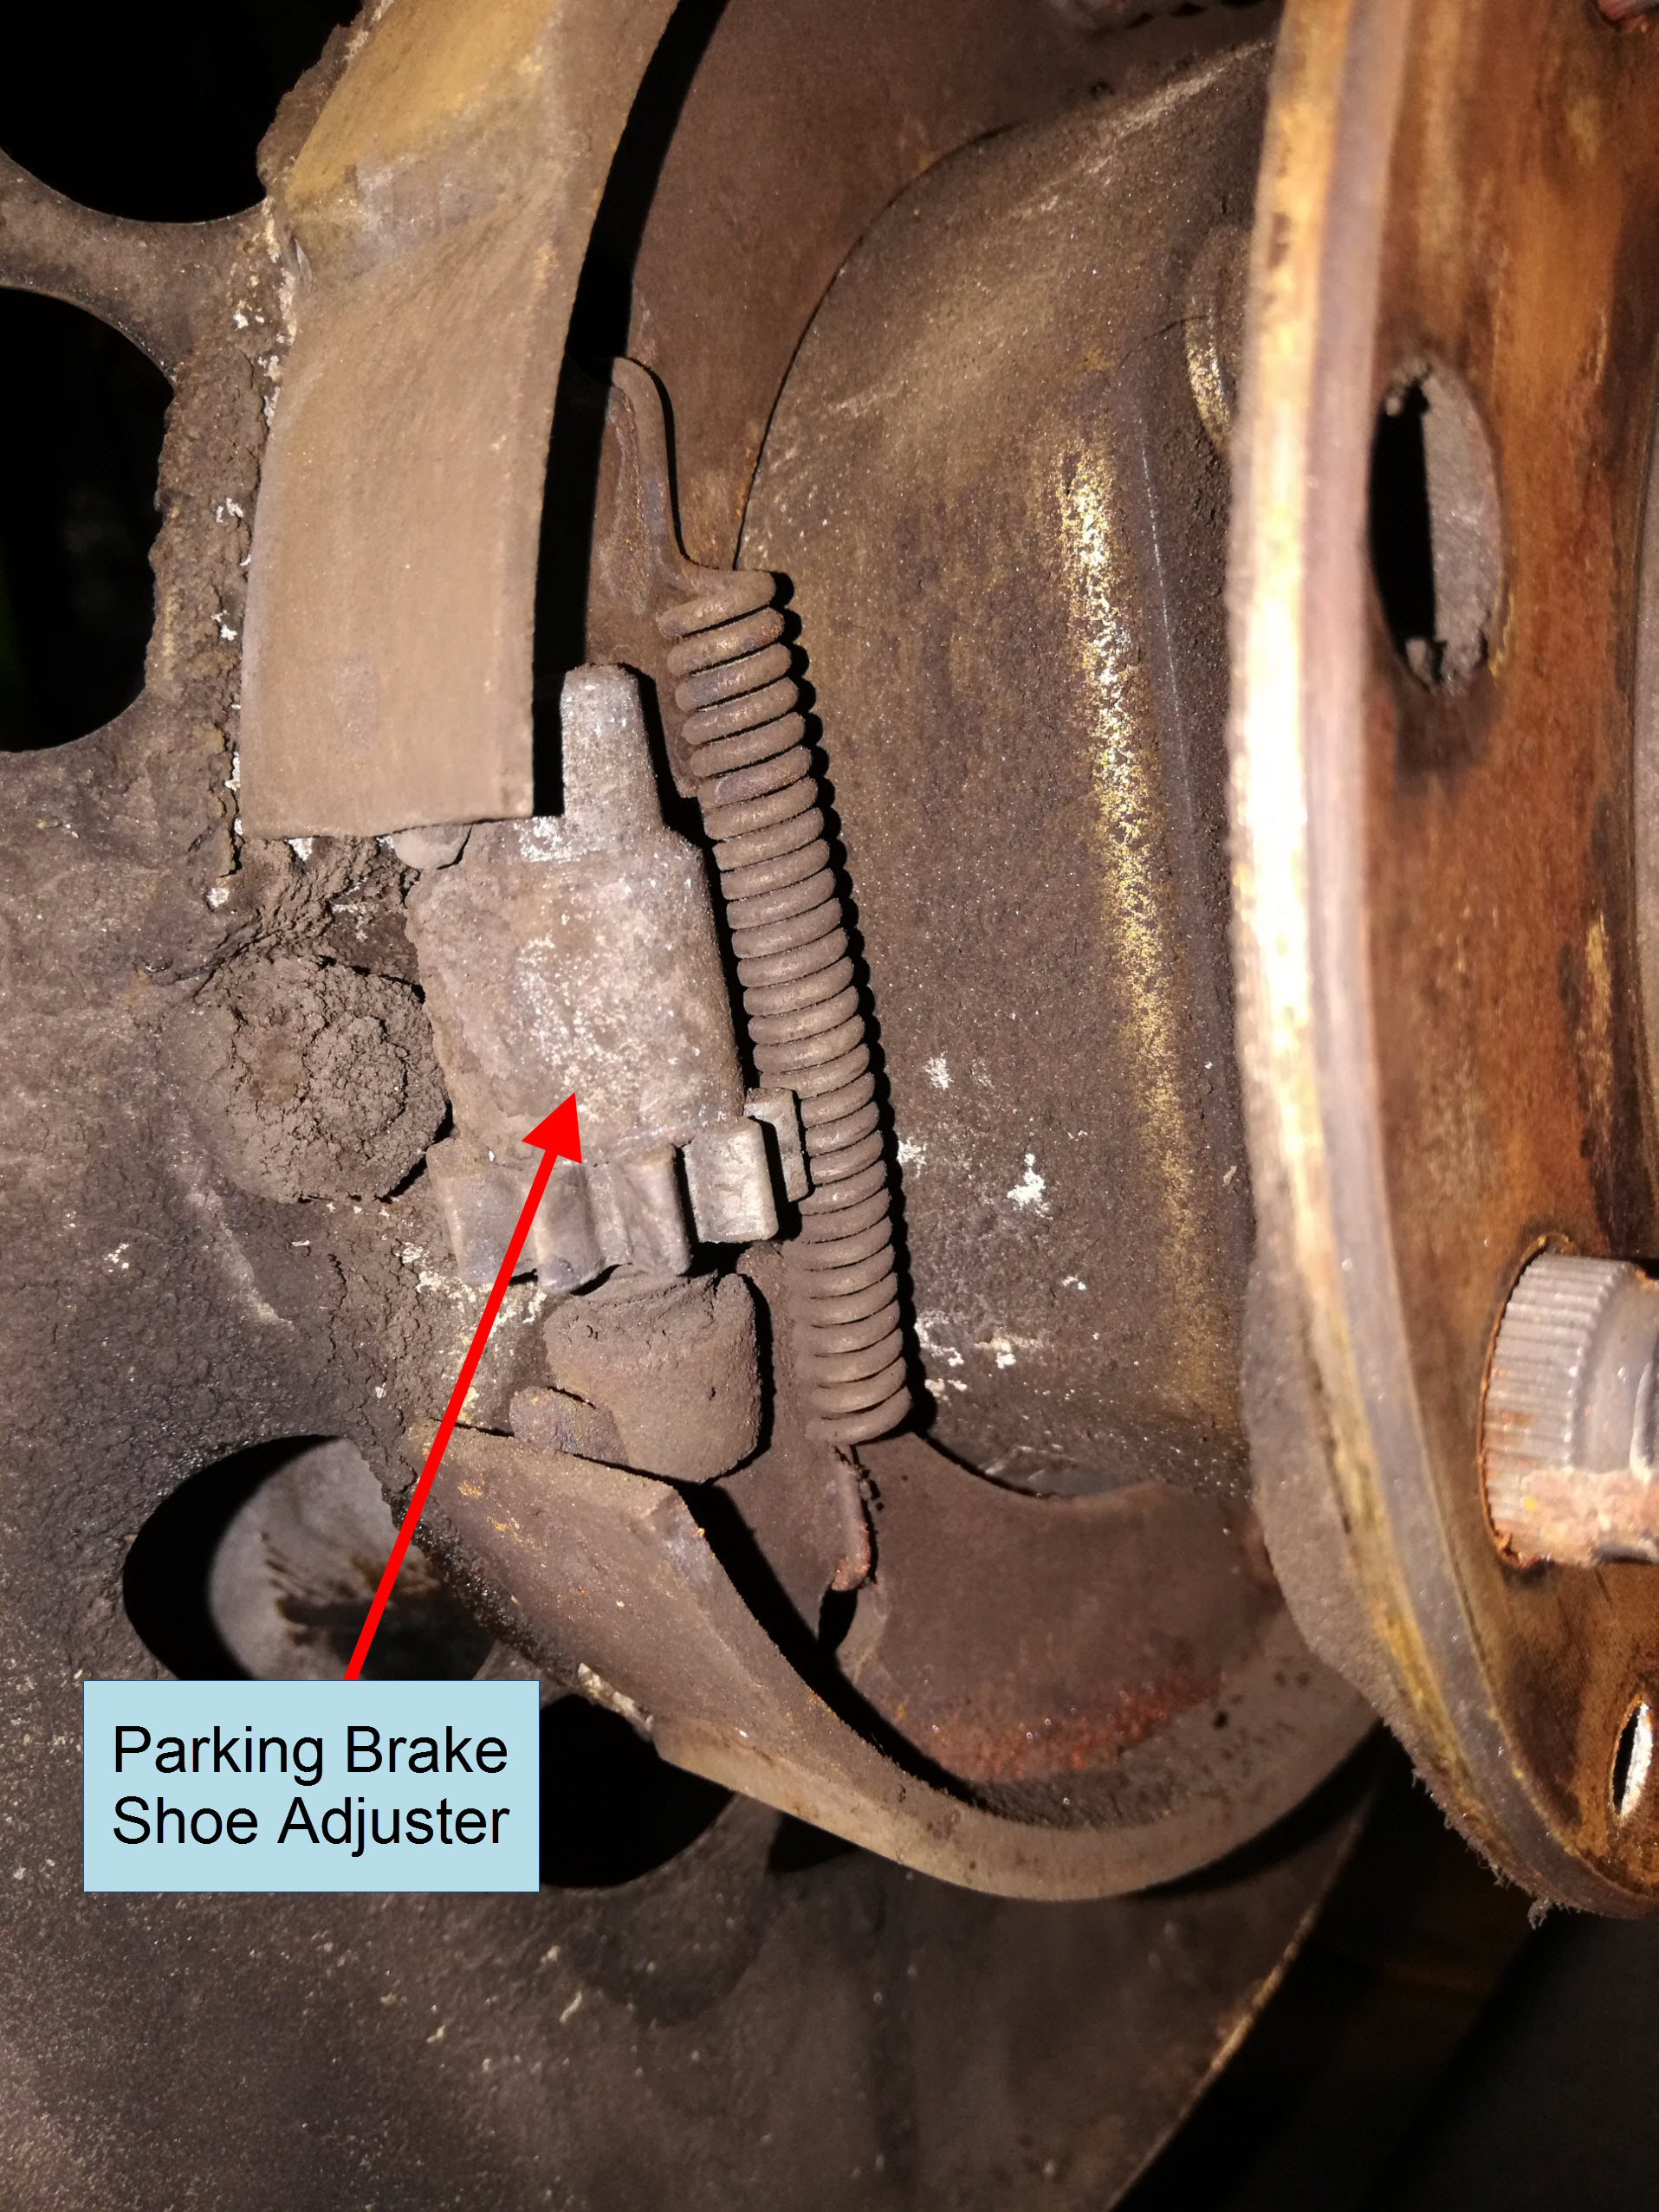
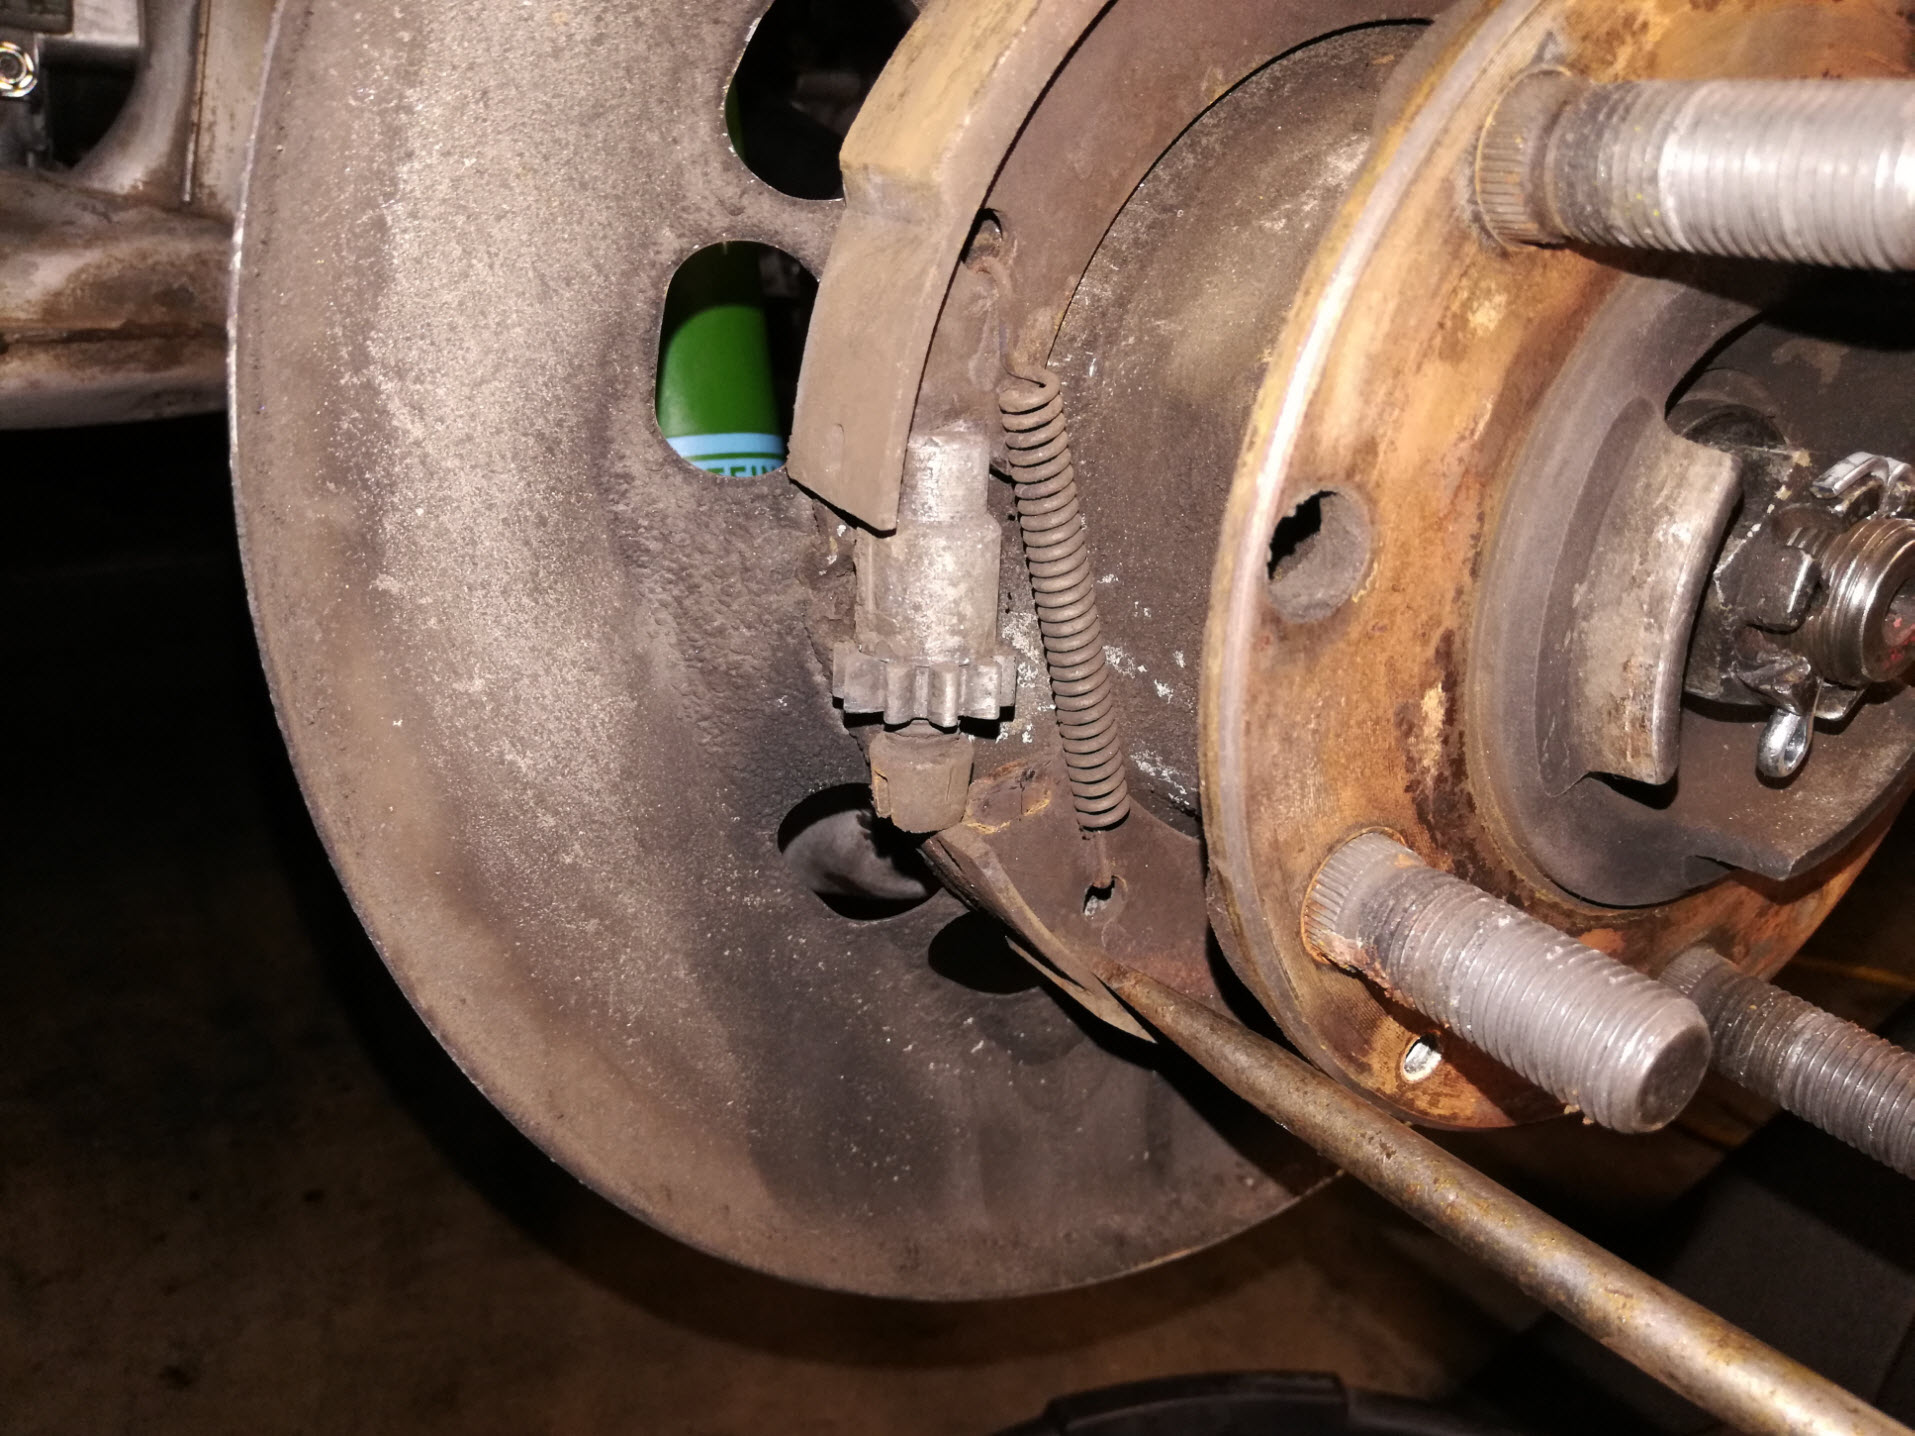
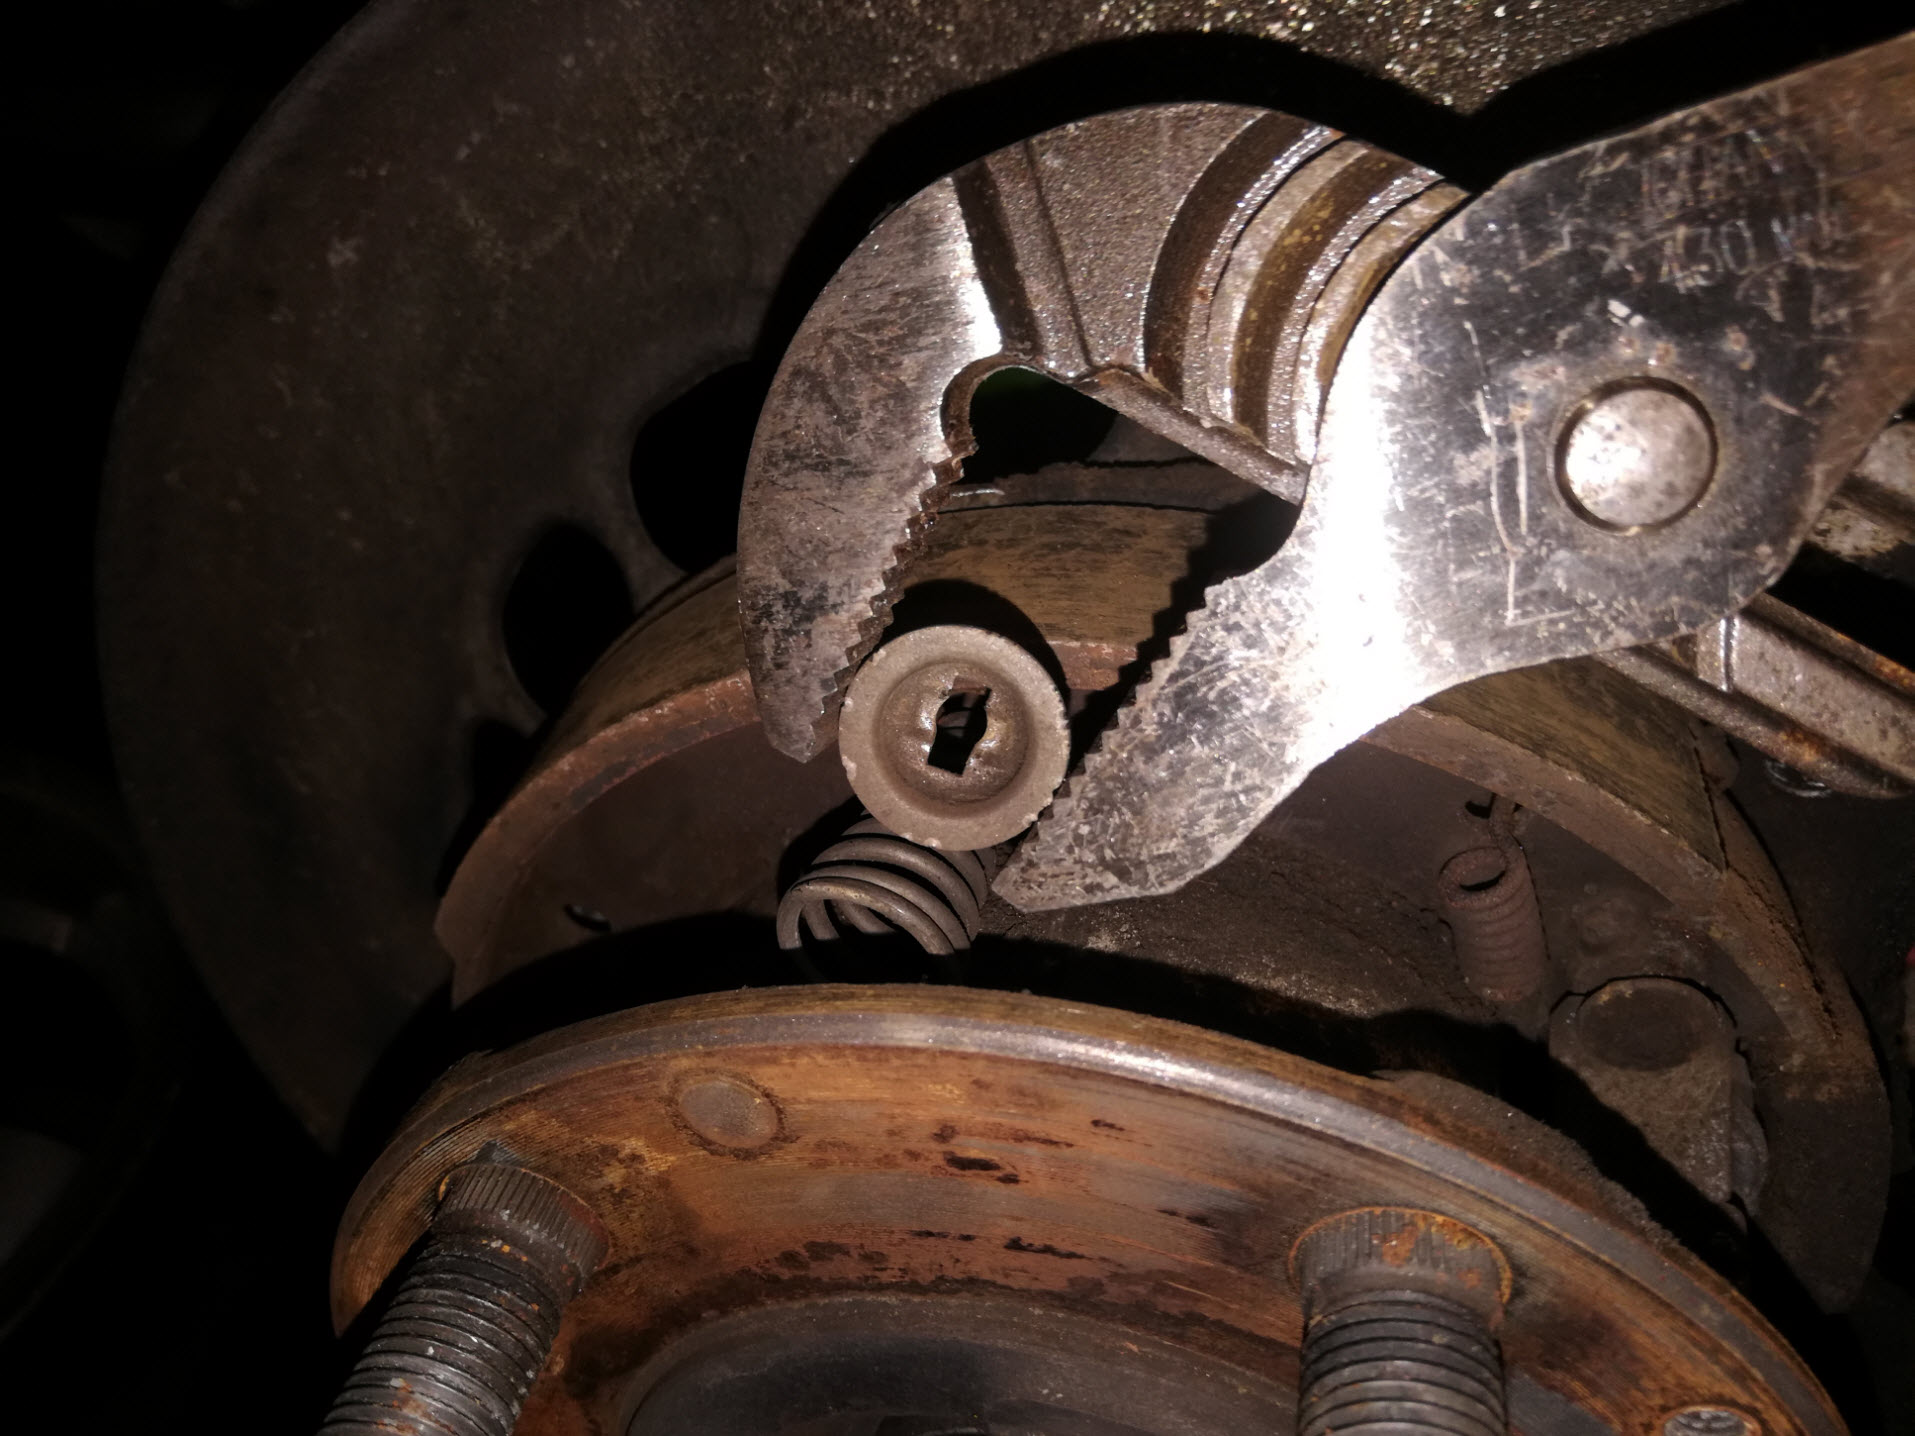
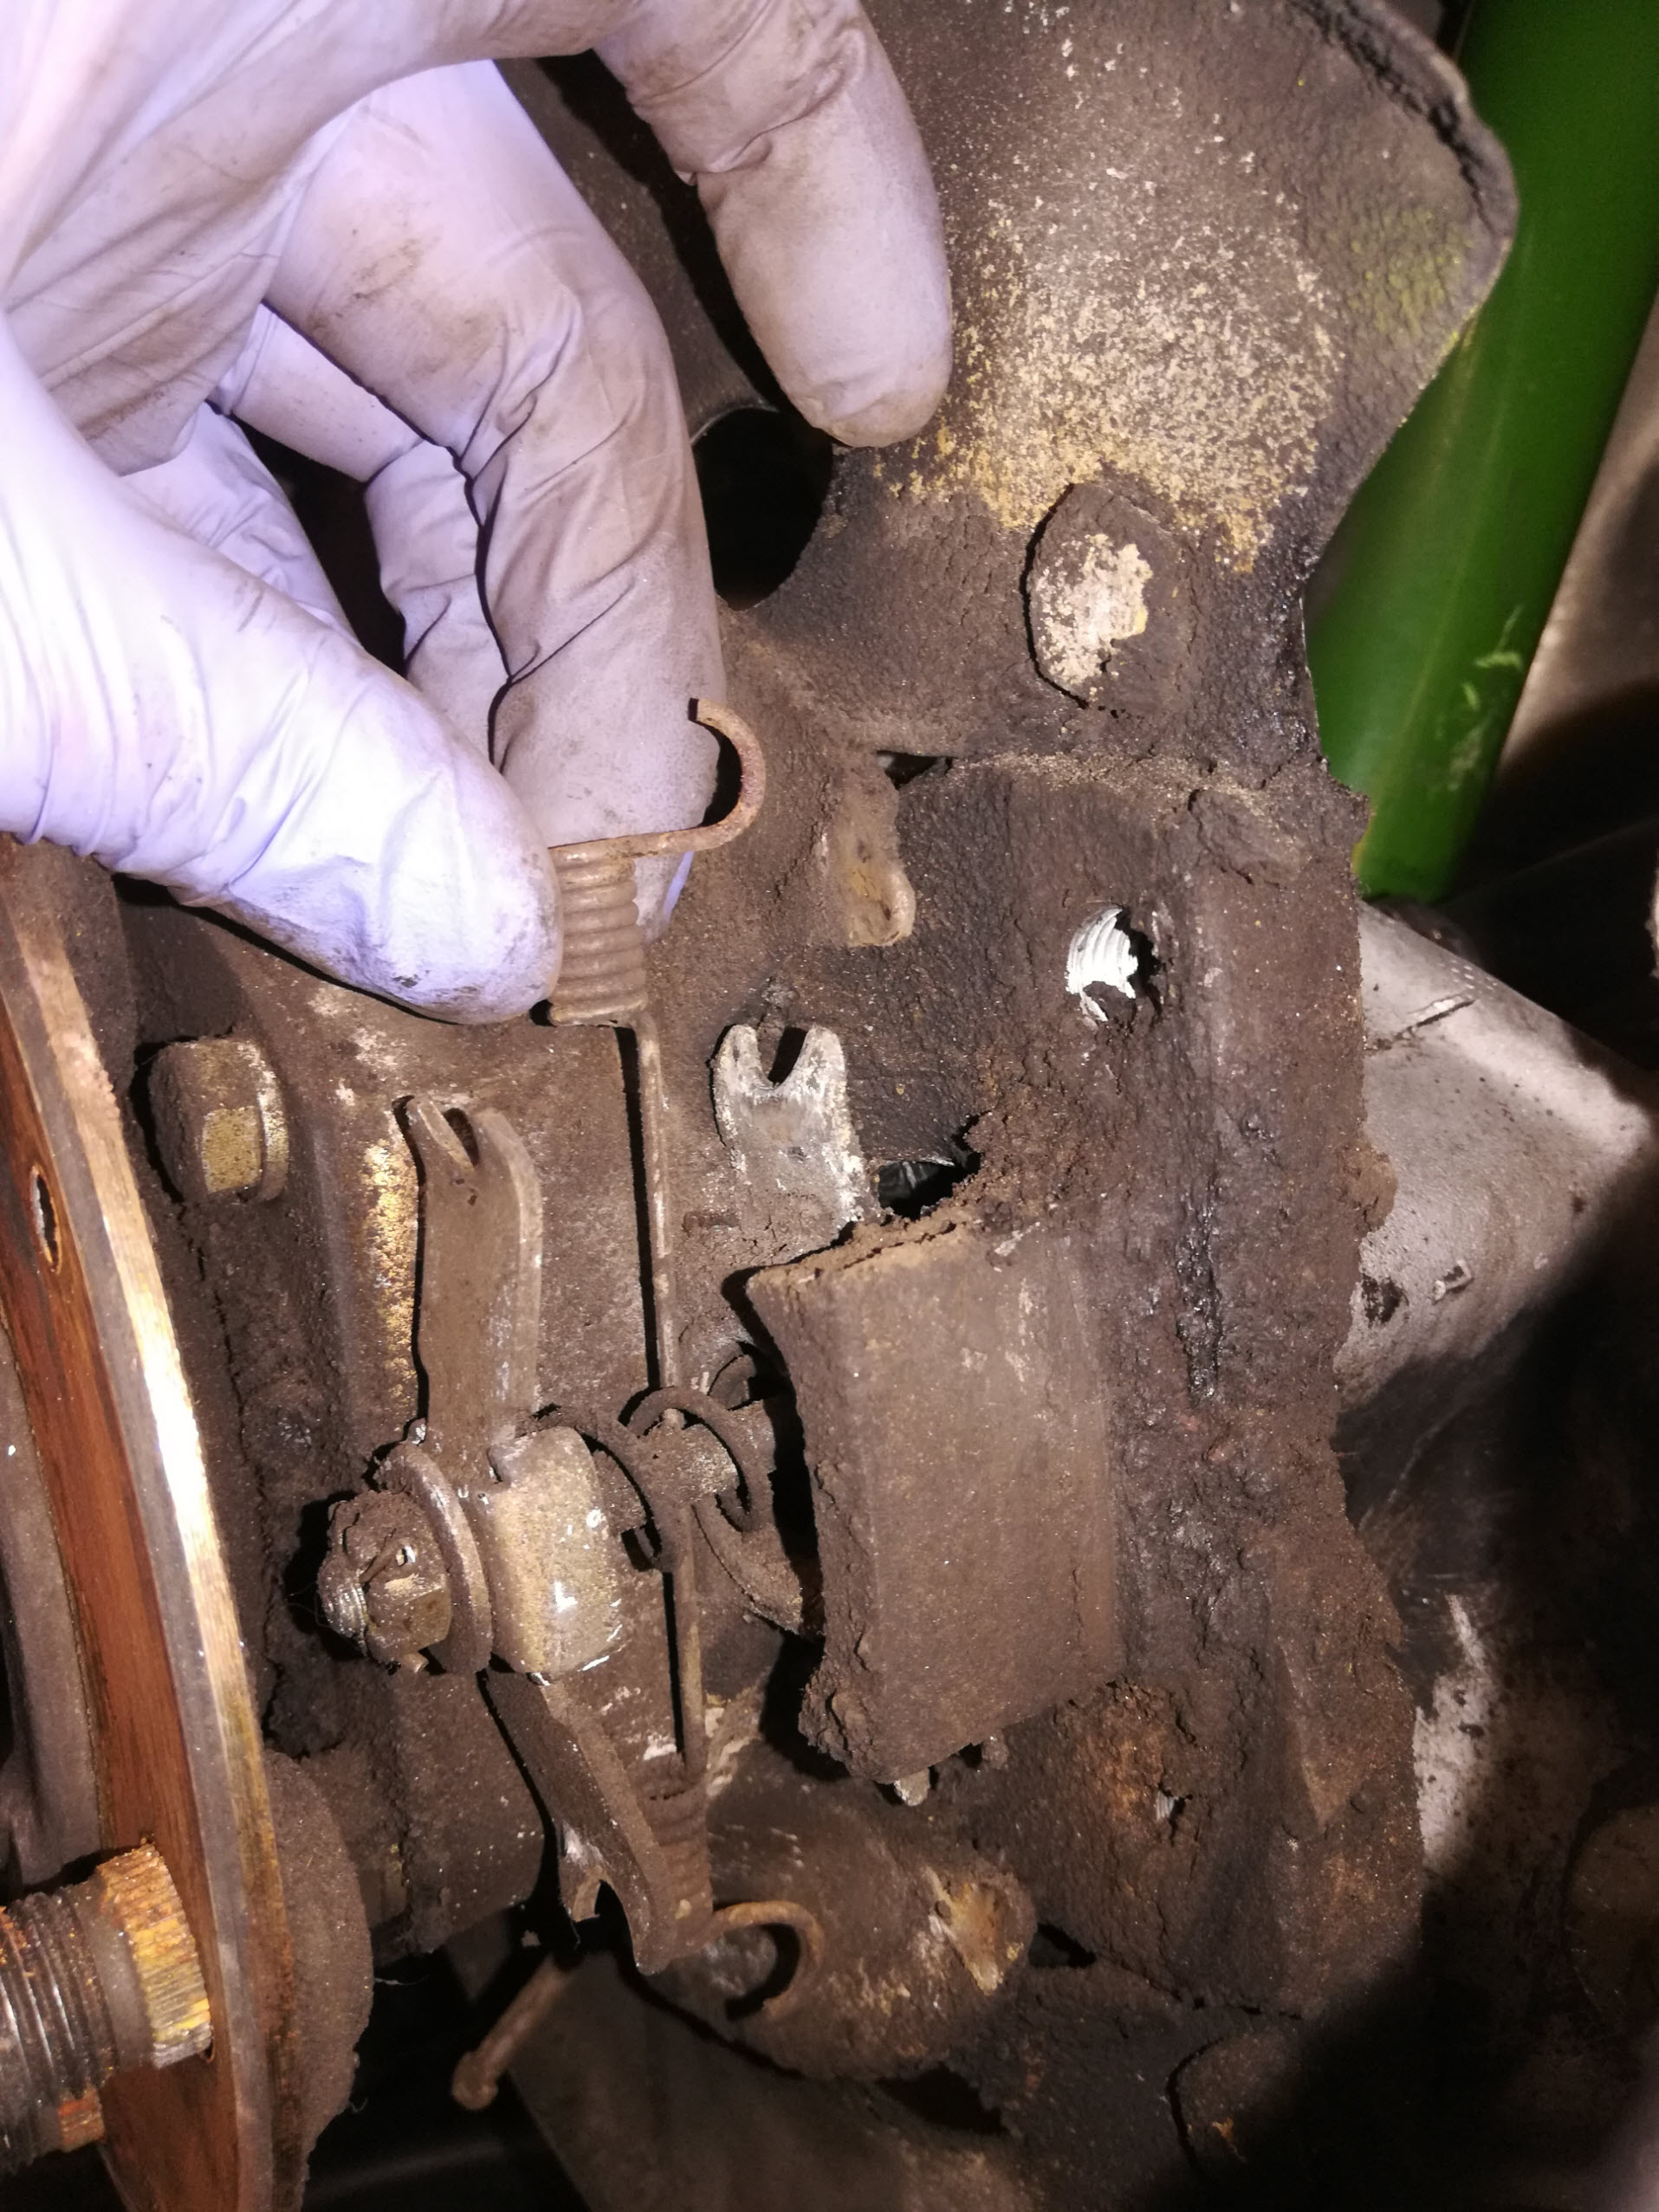
To disassemble the parking brake start by prying down on the lower shoe to remove the adjuster.
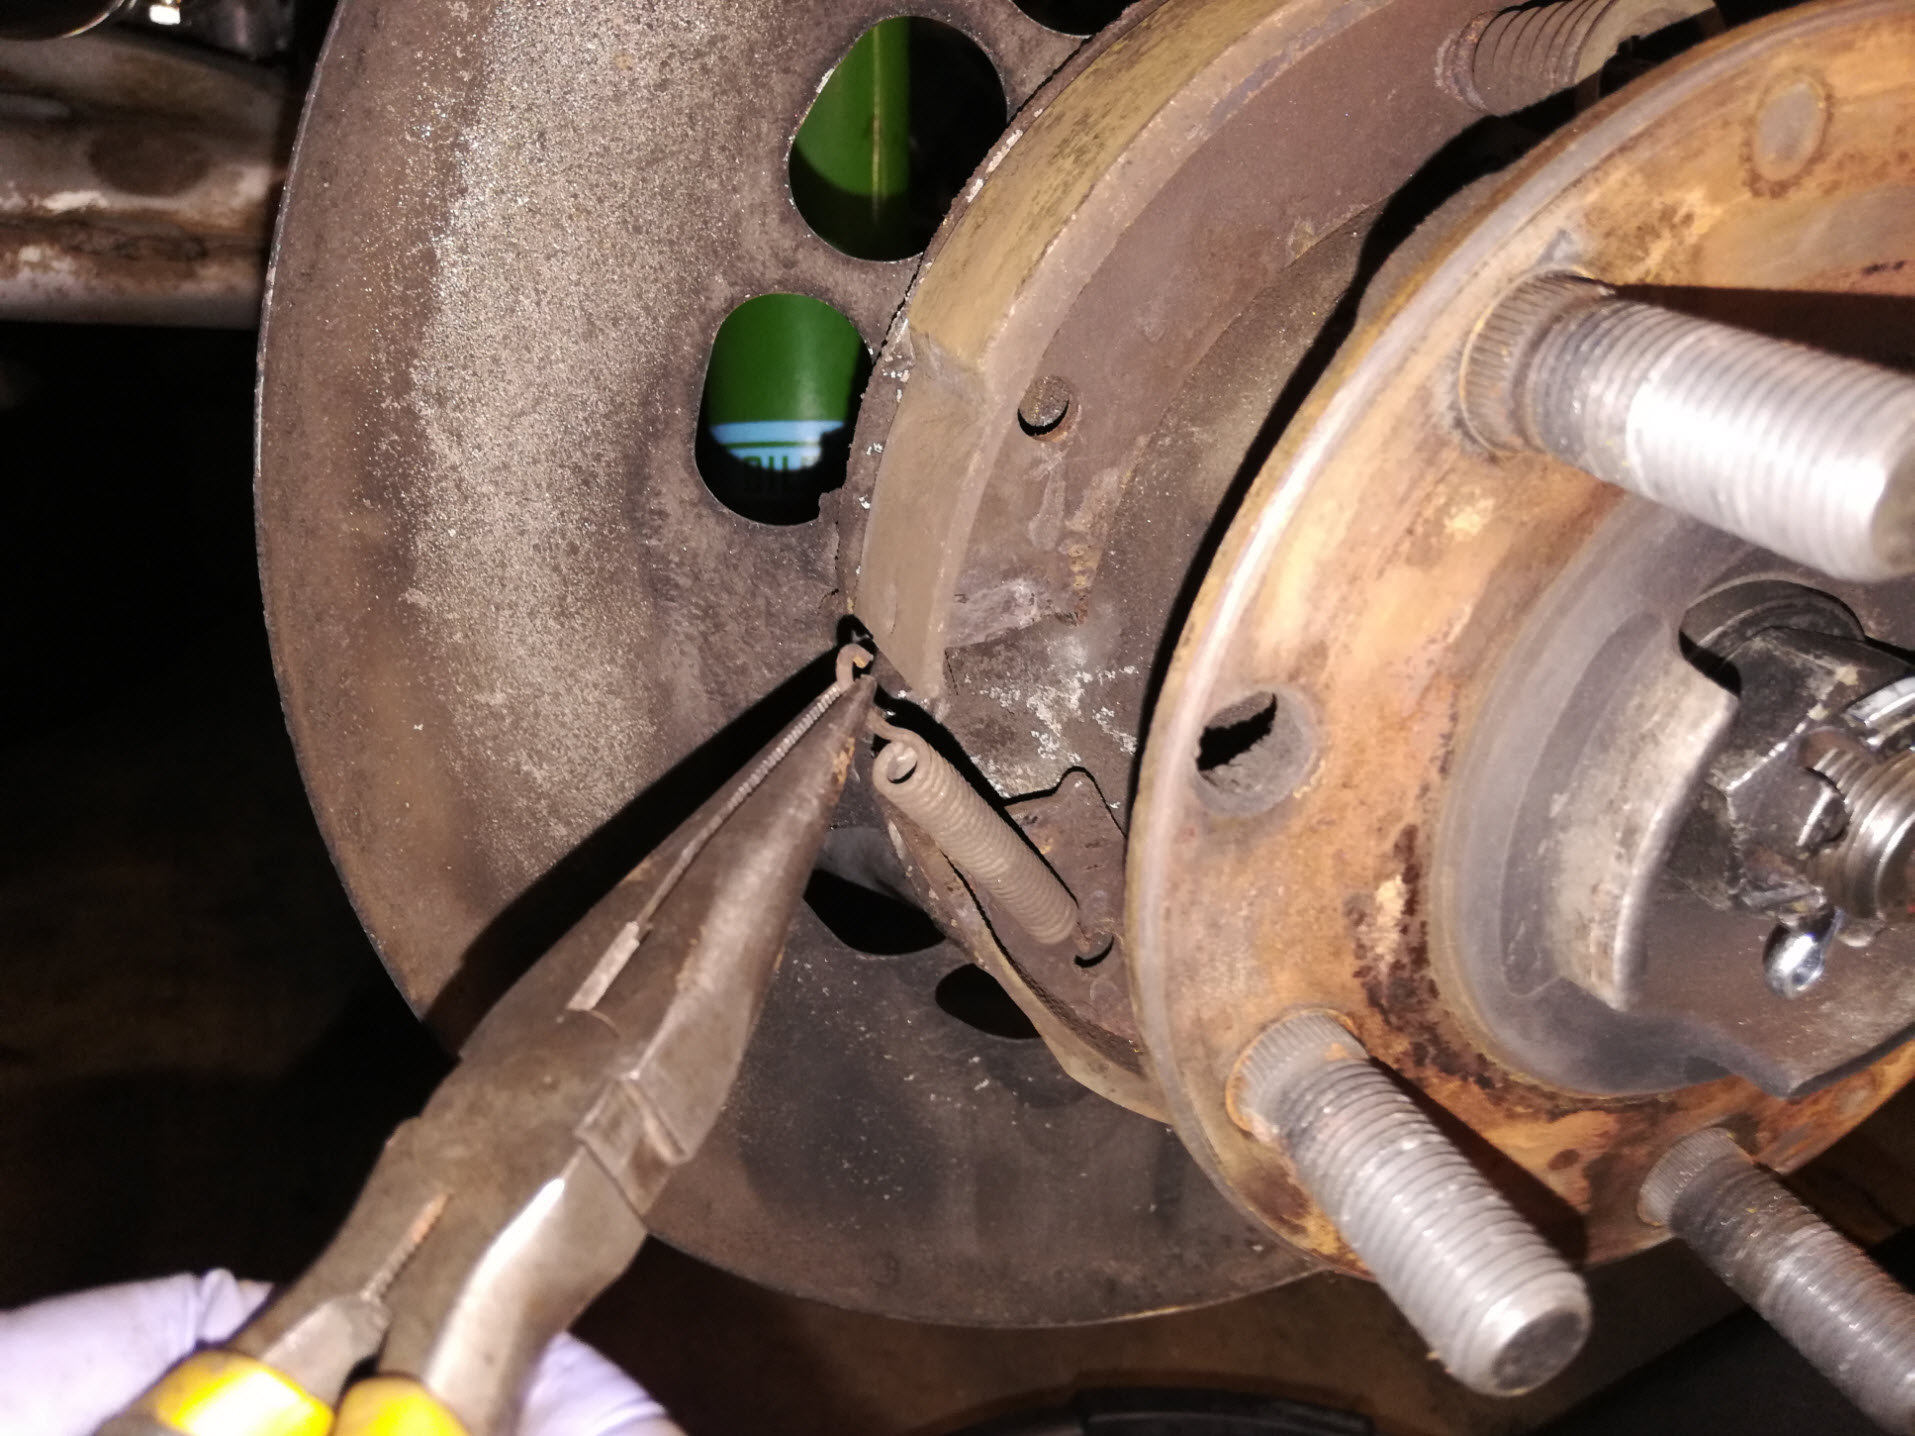
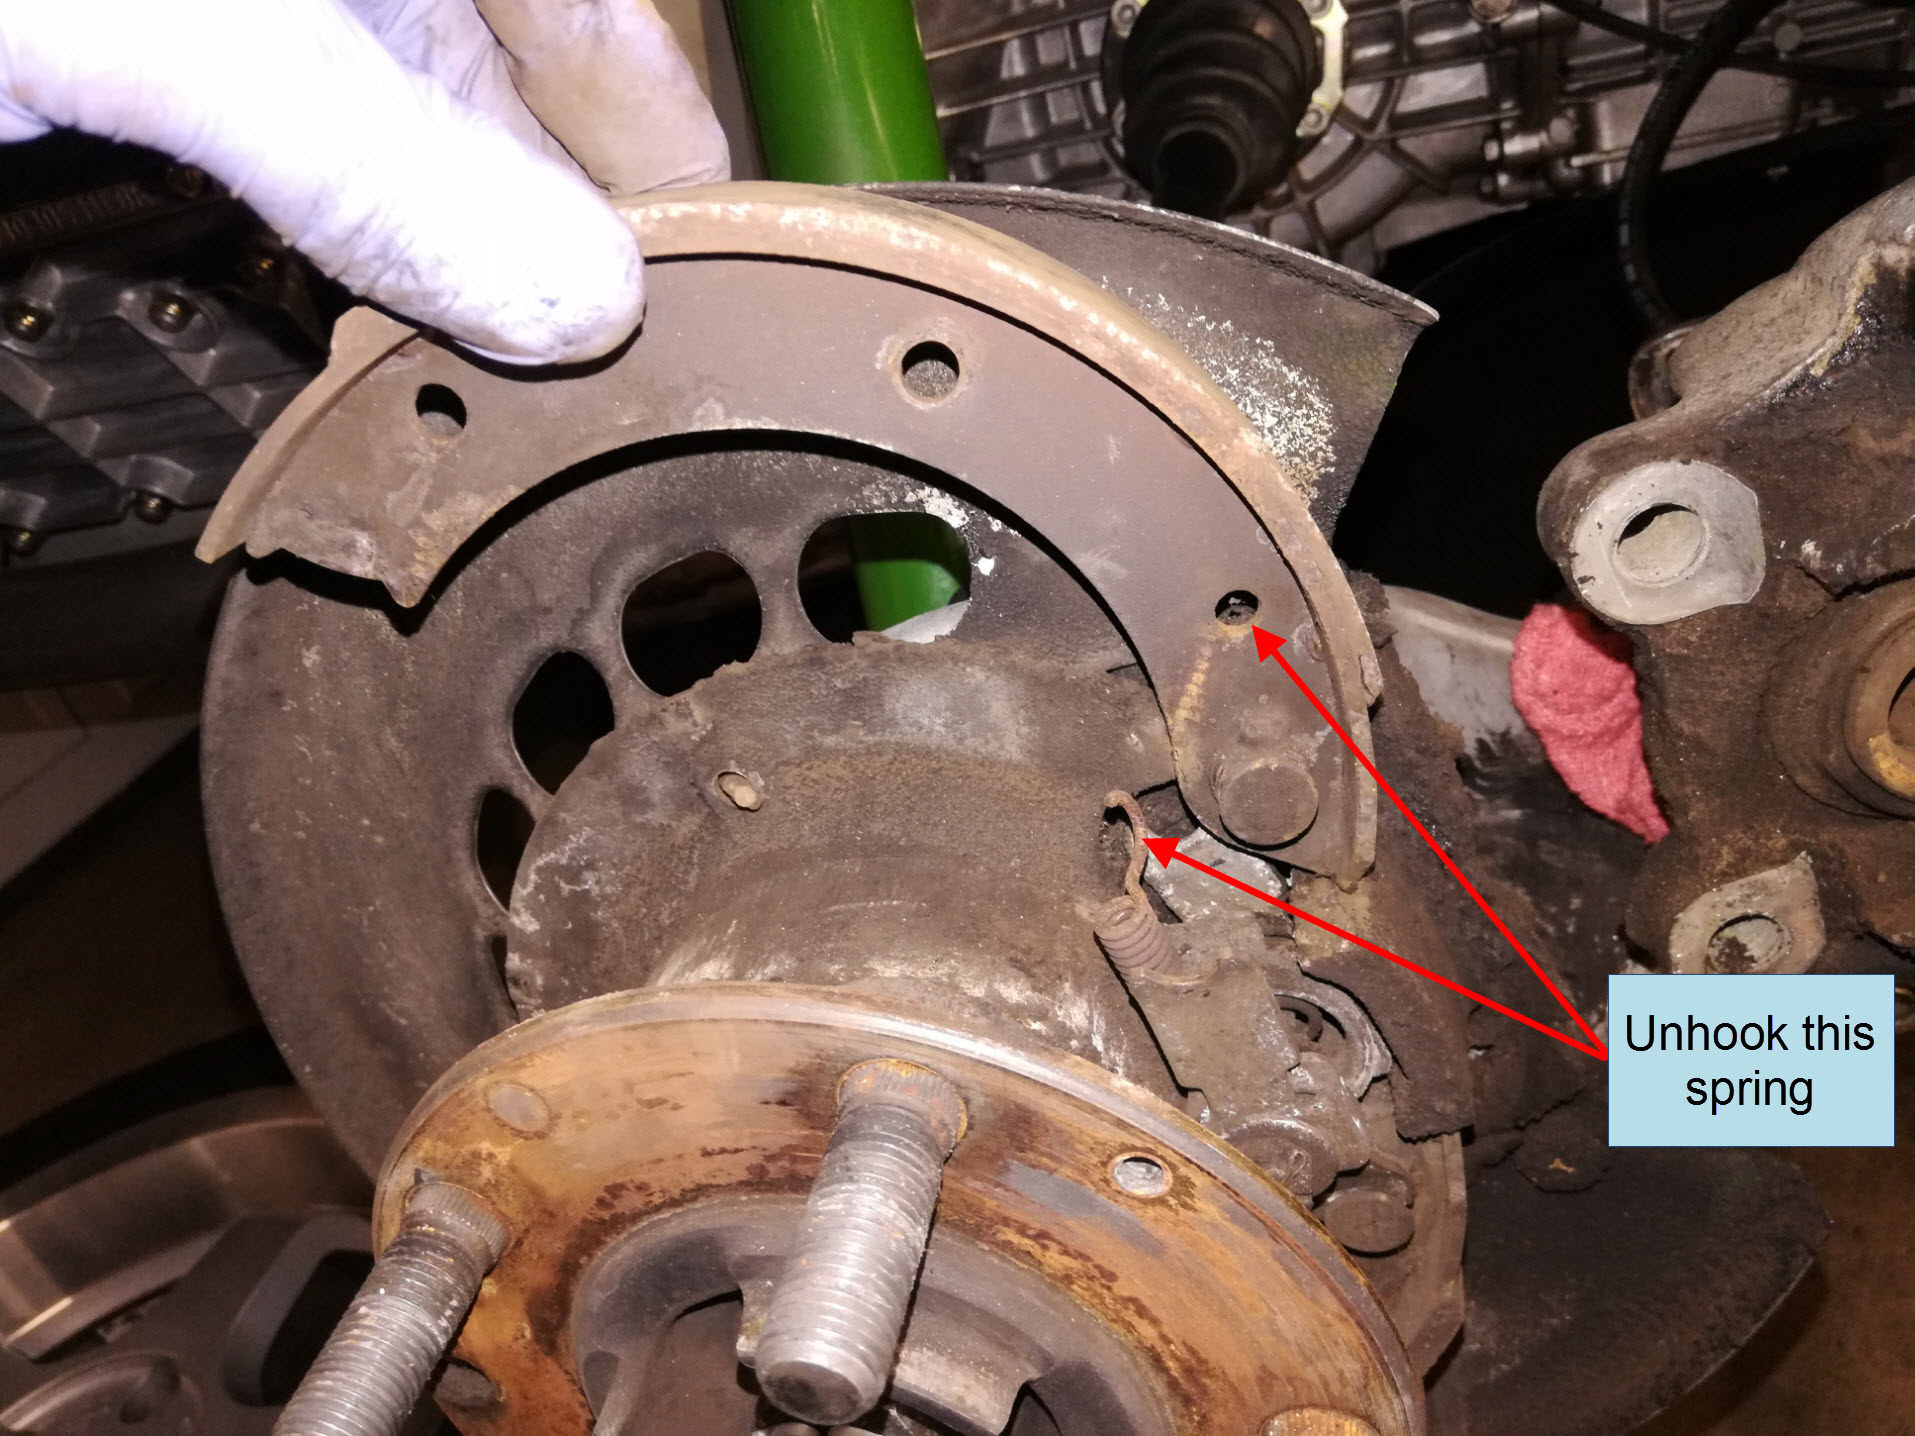
Unhook the retaining spring nearest to the adjuster.
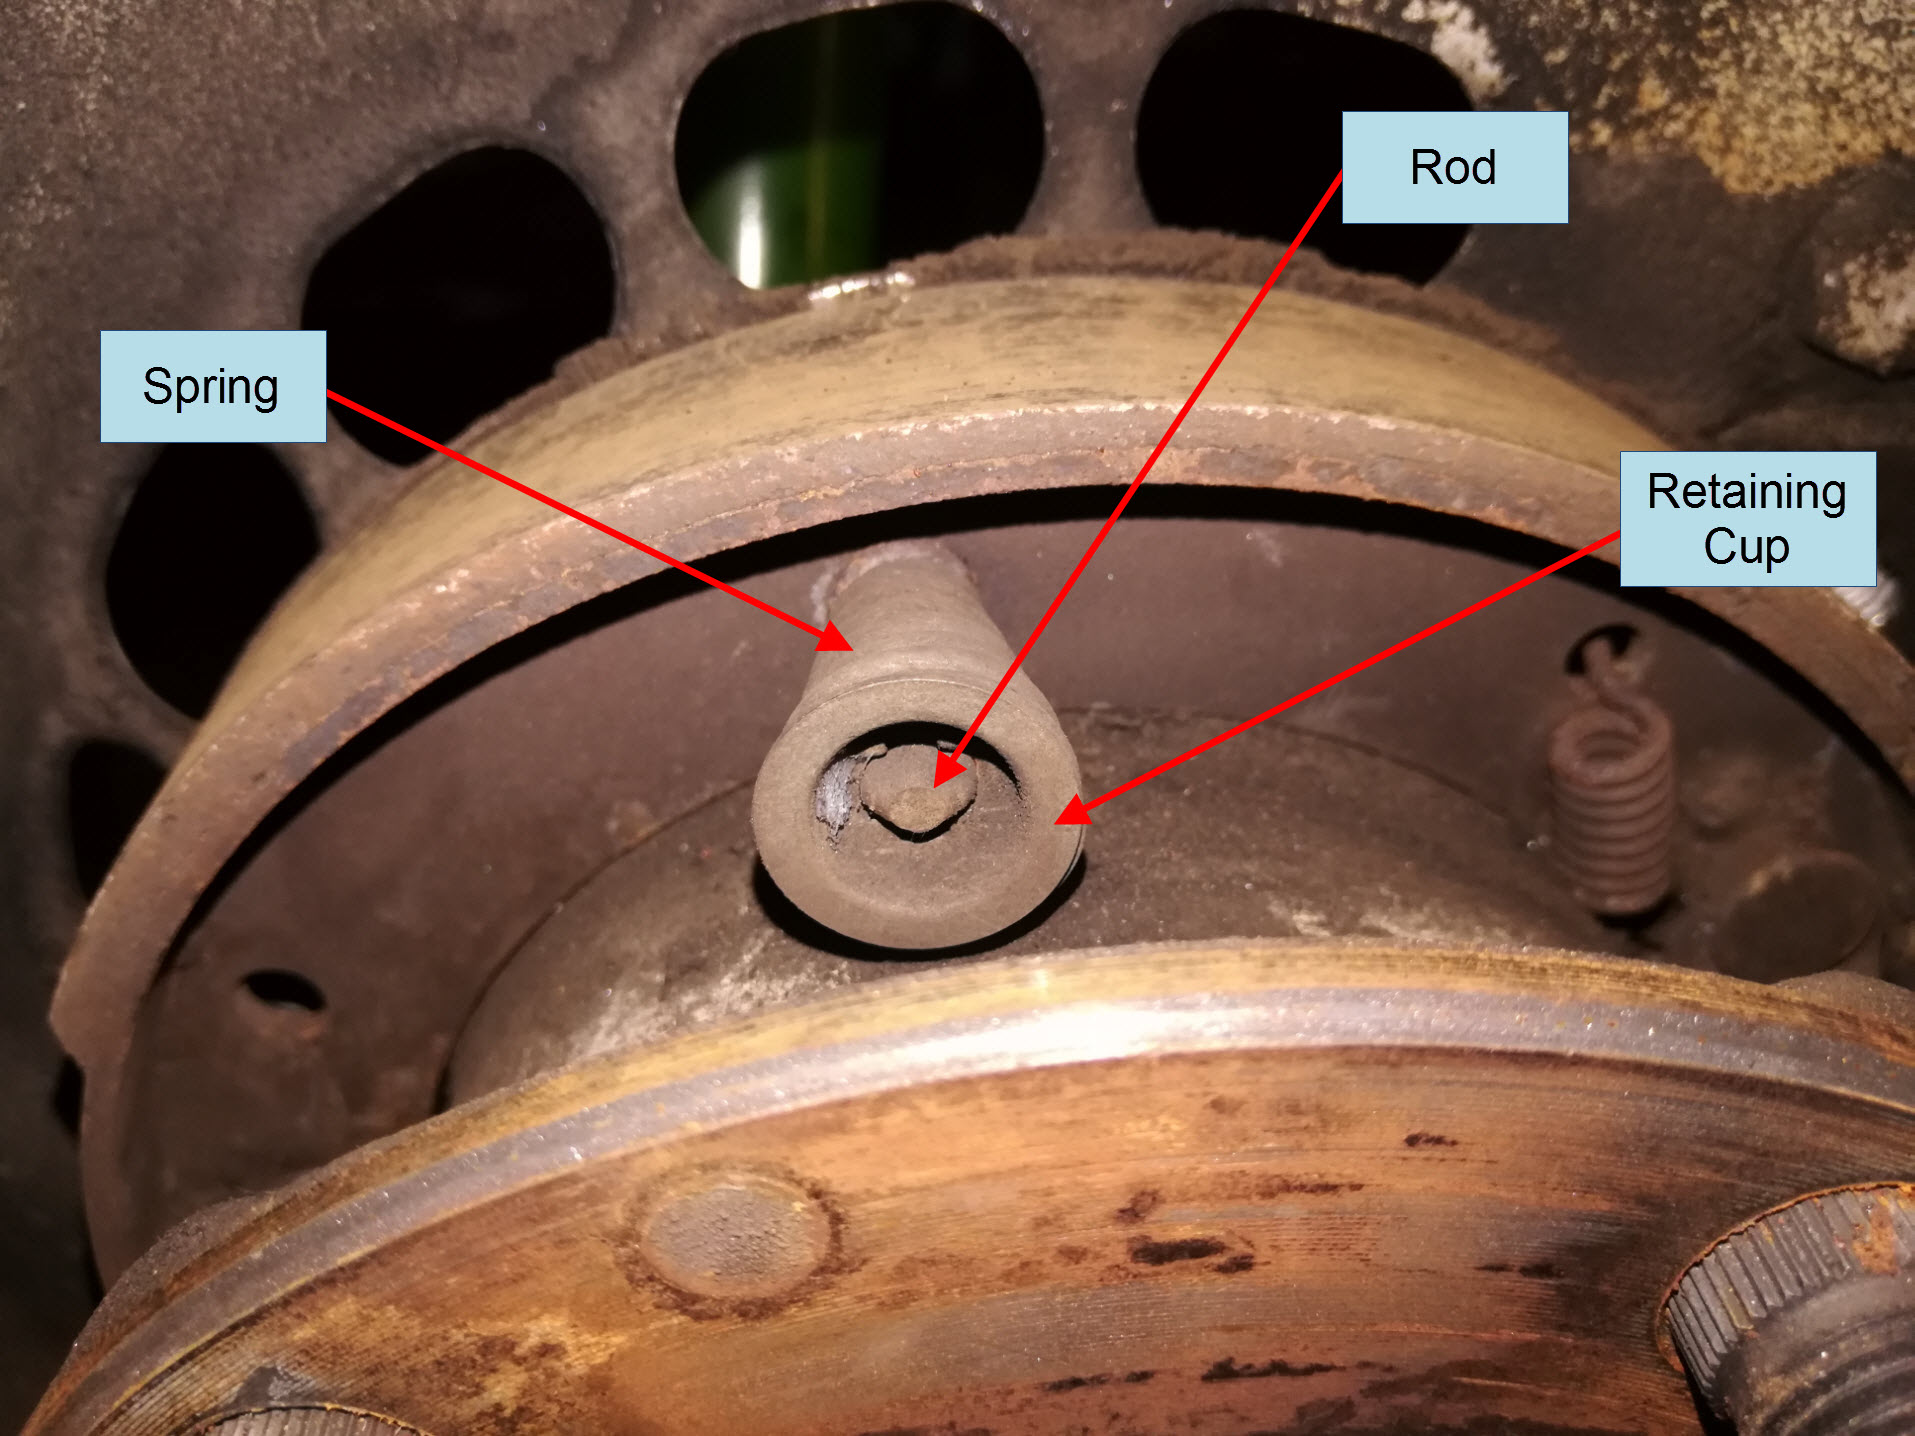
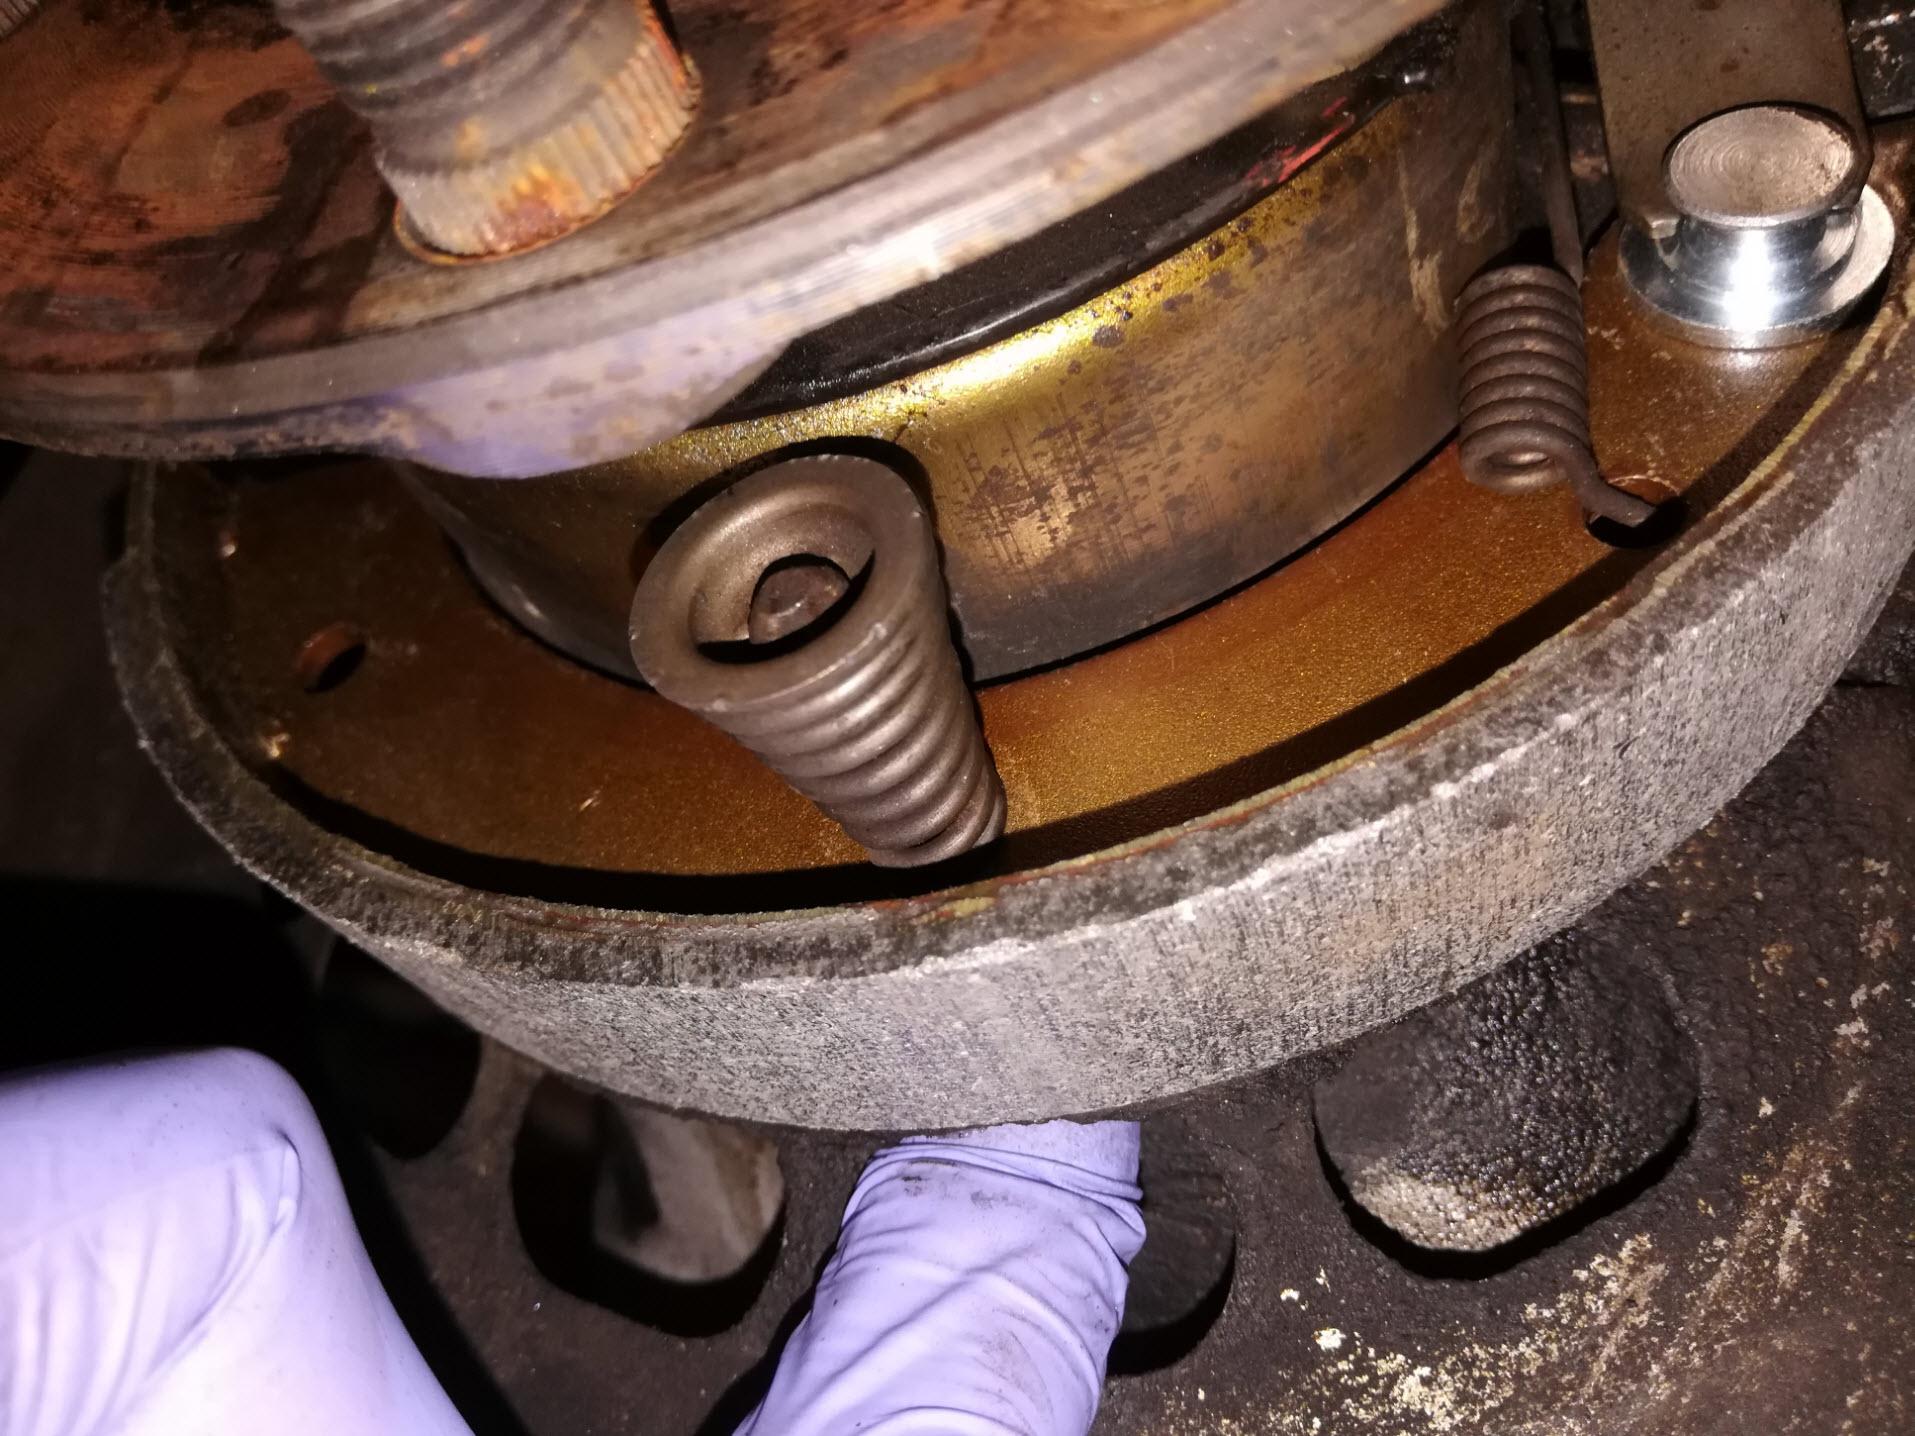
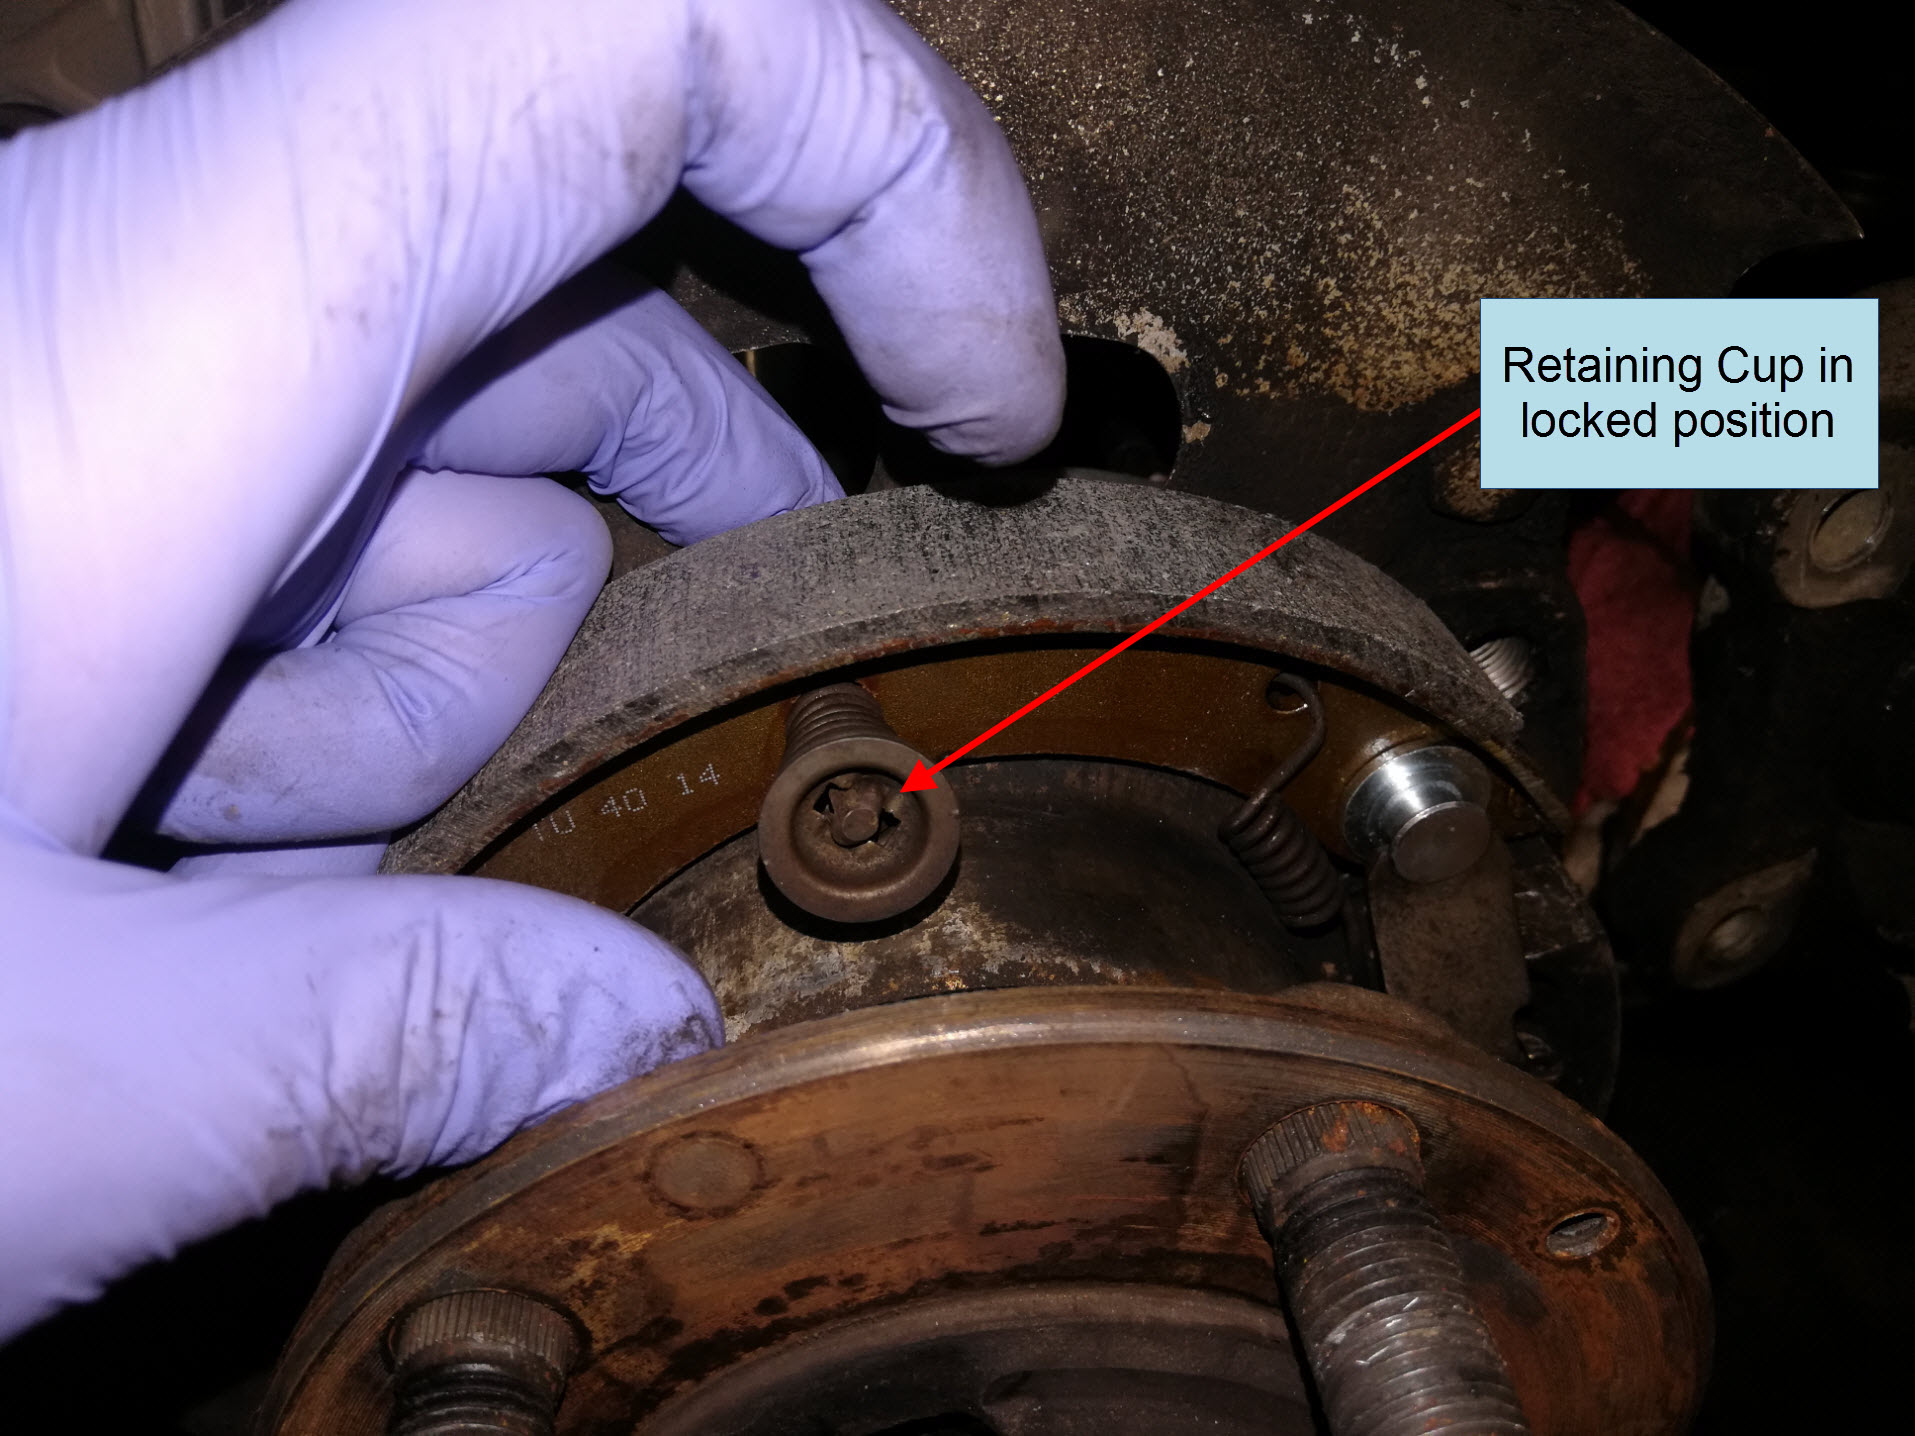
Remove the upper spring retaining cup by rotating it 90 degrees and pulling it off the end of the coil spring and the thin rod that goes through it.
The upper brake shoe is now free to be unhooked from the spring closest to the cable actuator.
Remove the lower spring retaining cup the same way as the upper and the lower shoe can be removed.
Note the orientation of the spring closest to the cable actuator so you can reinstall it in the same orientation.
Set the 4 springs, 2 spring retaining cups, and 2 brake shoes aside and clean the remaining assembly thoroughly with brake cleaner.
Step 6: Reassemble New Brake Shoes
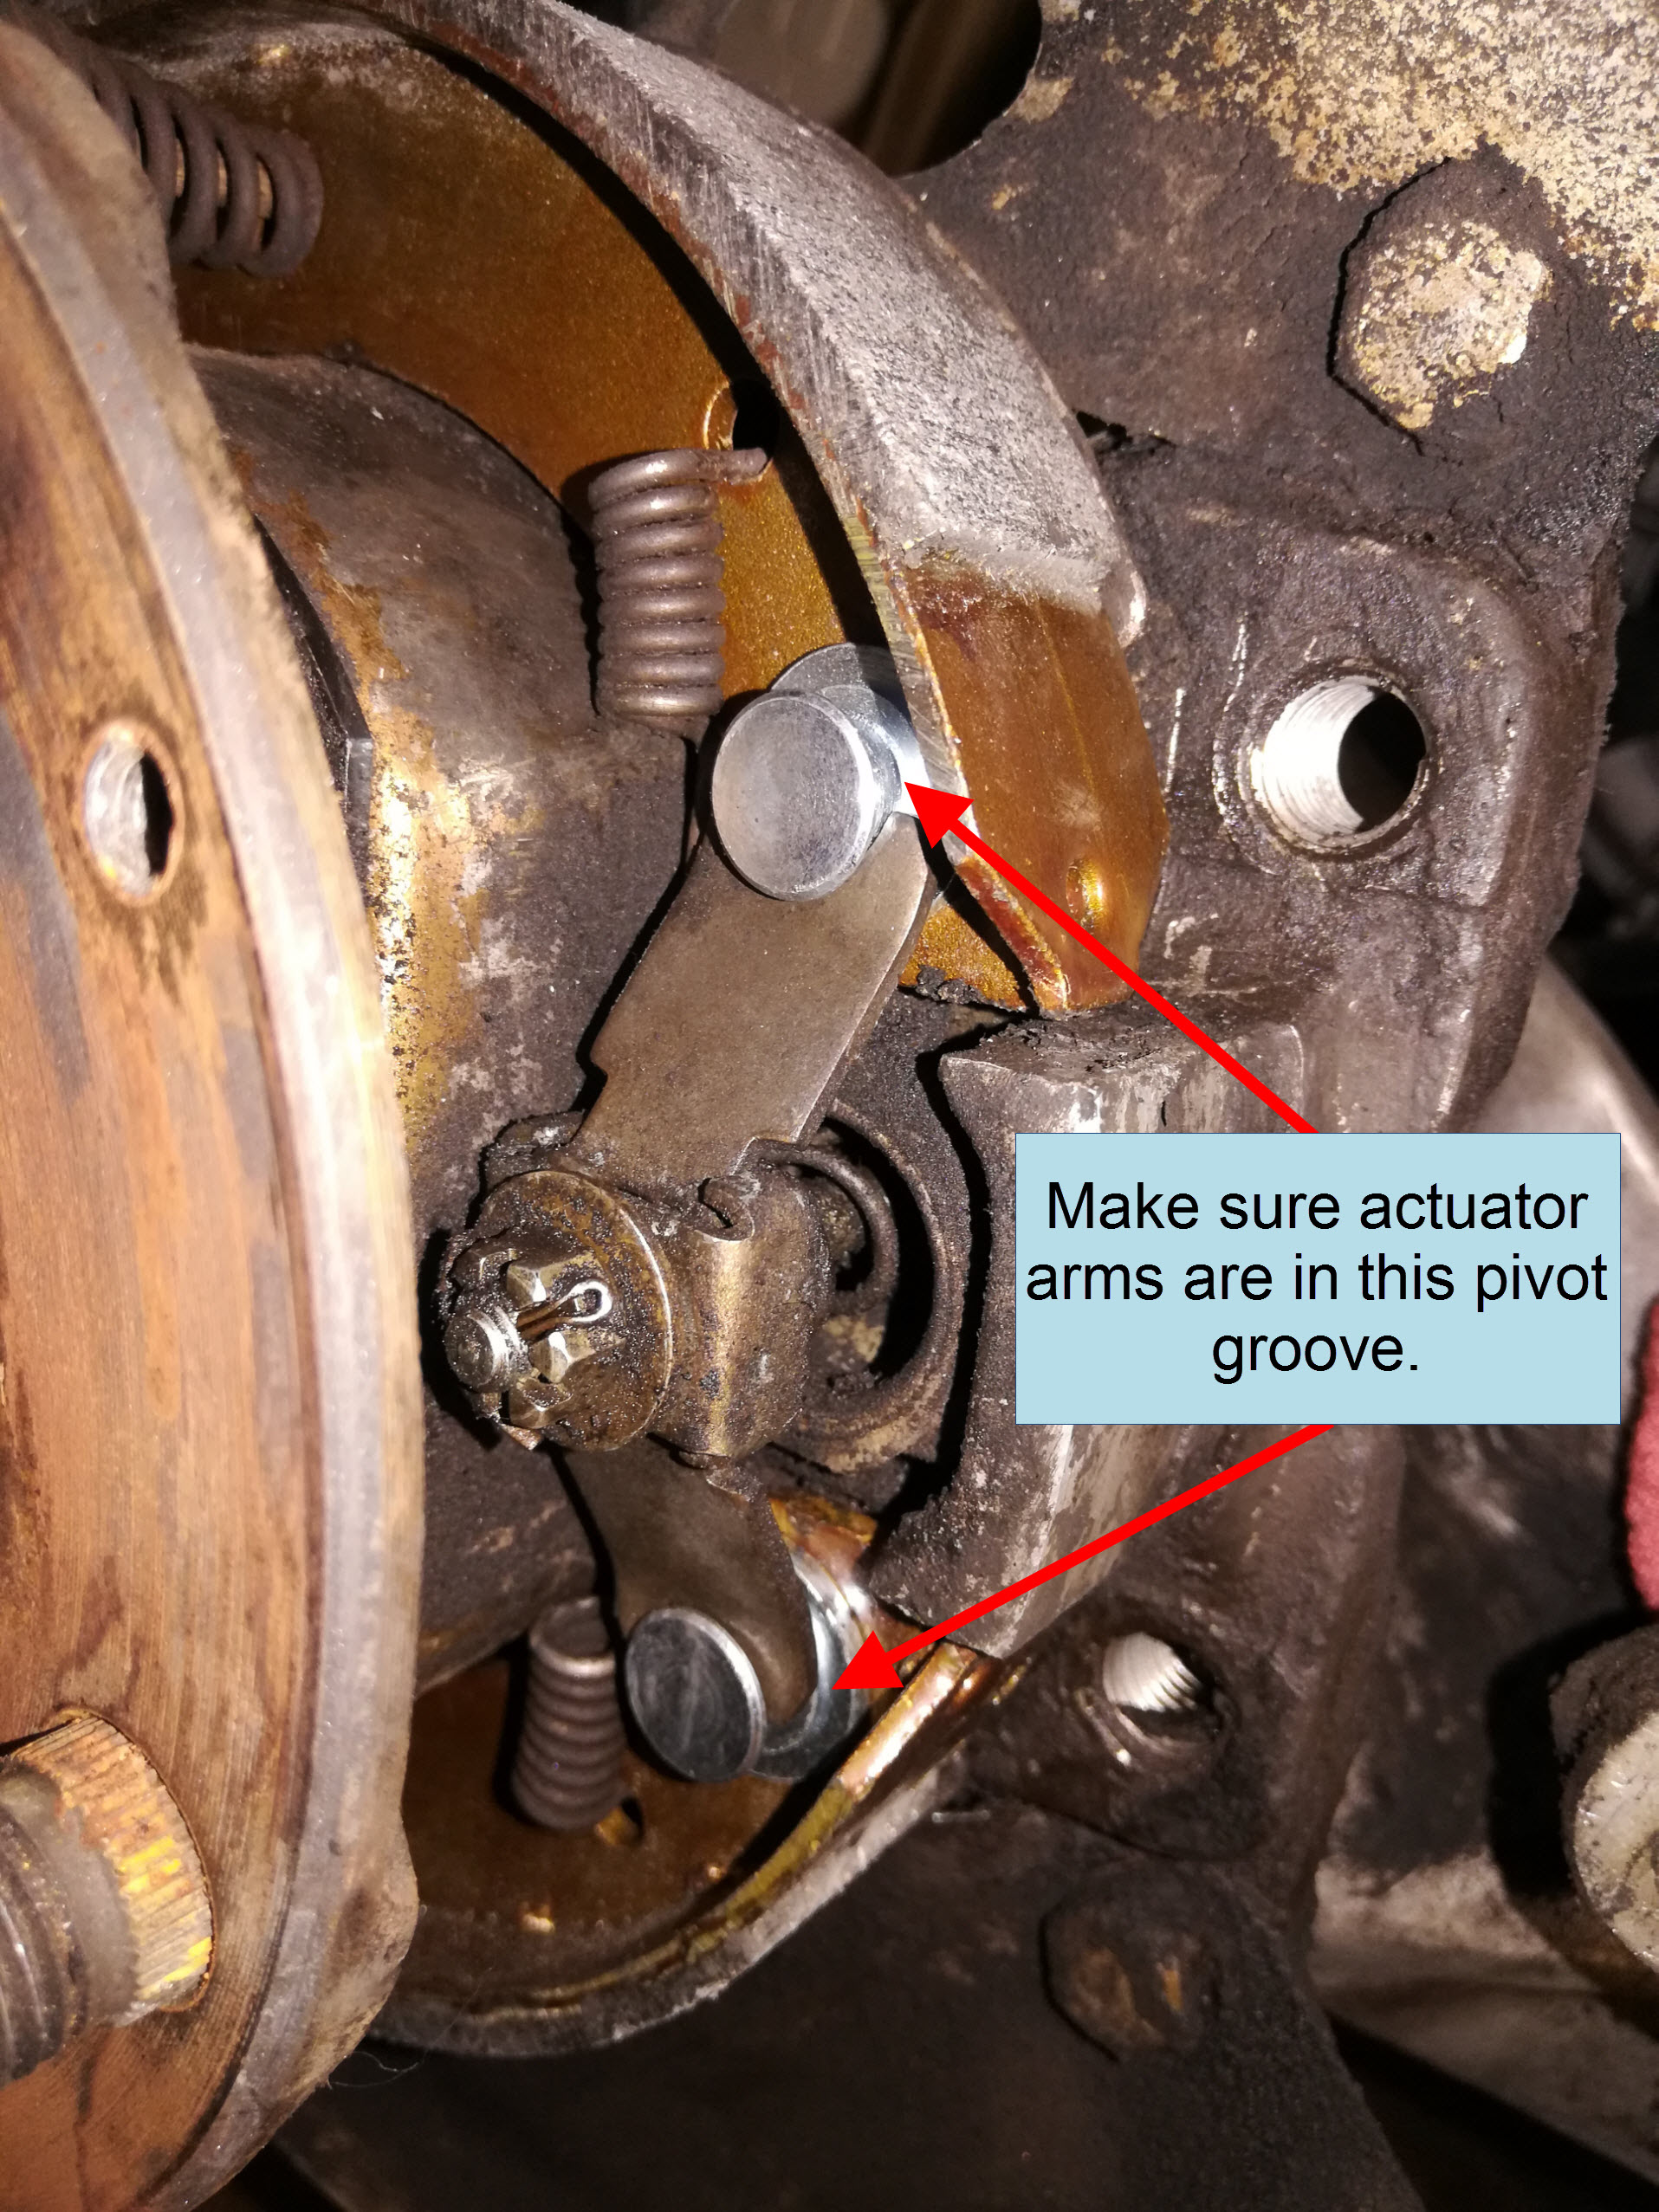
Reassembly is the reverse of disassembly with the added complexity of fighting the springs. Start by replacing the spring closest to the cable actuator in the same orientation as before, and hooking the ends to the new brake shoes. Place each cable actuator arm into the circular pivot on each brake shoe. They are going to flop over like this because the rest of the springs are not in place yet.
Here’s the tricky part. Each upper and lower coil spring had a thin rod going through the shoe, the spring, and the spring retaining cup holding them together. Reach behind the hub and push the rod back through the shoe and place the coil spring over the rod and put the retaining cup back on. Compress the spring slightly as you turn the retaining cup 90 degrees to lock it back in place. You will need both hands to do this and while this is happening each brake shoe will want to slip off the cable actuator arms or the long spring next to the actuator will unhook from one end or the other.
It will take a bit of practice but eventually you should end up with upper and lower shoes sitting upright. They will be secured by the upper and lower coil springs, hooked by the spring by the cable actuator, and with each cable actuator arm in the shoe pivot.
Screw the adjuster in so it is as short as possible and re-insert it in between the two shoes. Pry the shoes apart slightly with a screwdriver if needed. Then unscrew the adjuster so it just touches both brake shoes.
Finally, hook the adjuster spring back in place between both shoes.
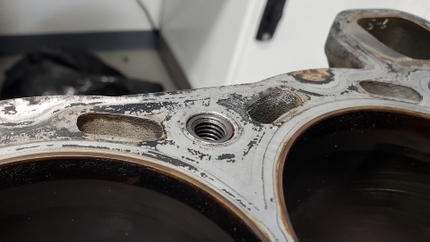
Step 7: Replace Rotor
Reinstall your old or new rotor. If the rotor does not fully slip over the brake shoes make sure the adjuster is screwed to its shortest position possible, that the shoes are not hung up on the inside edge of the hub, and that all springs and hardware are in the correct position. Install the 2 retaining screws and torque them to spec. On the 911SC this is 5Nm (3.5 ft-lbs)
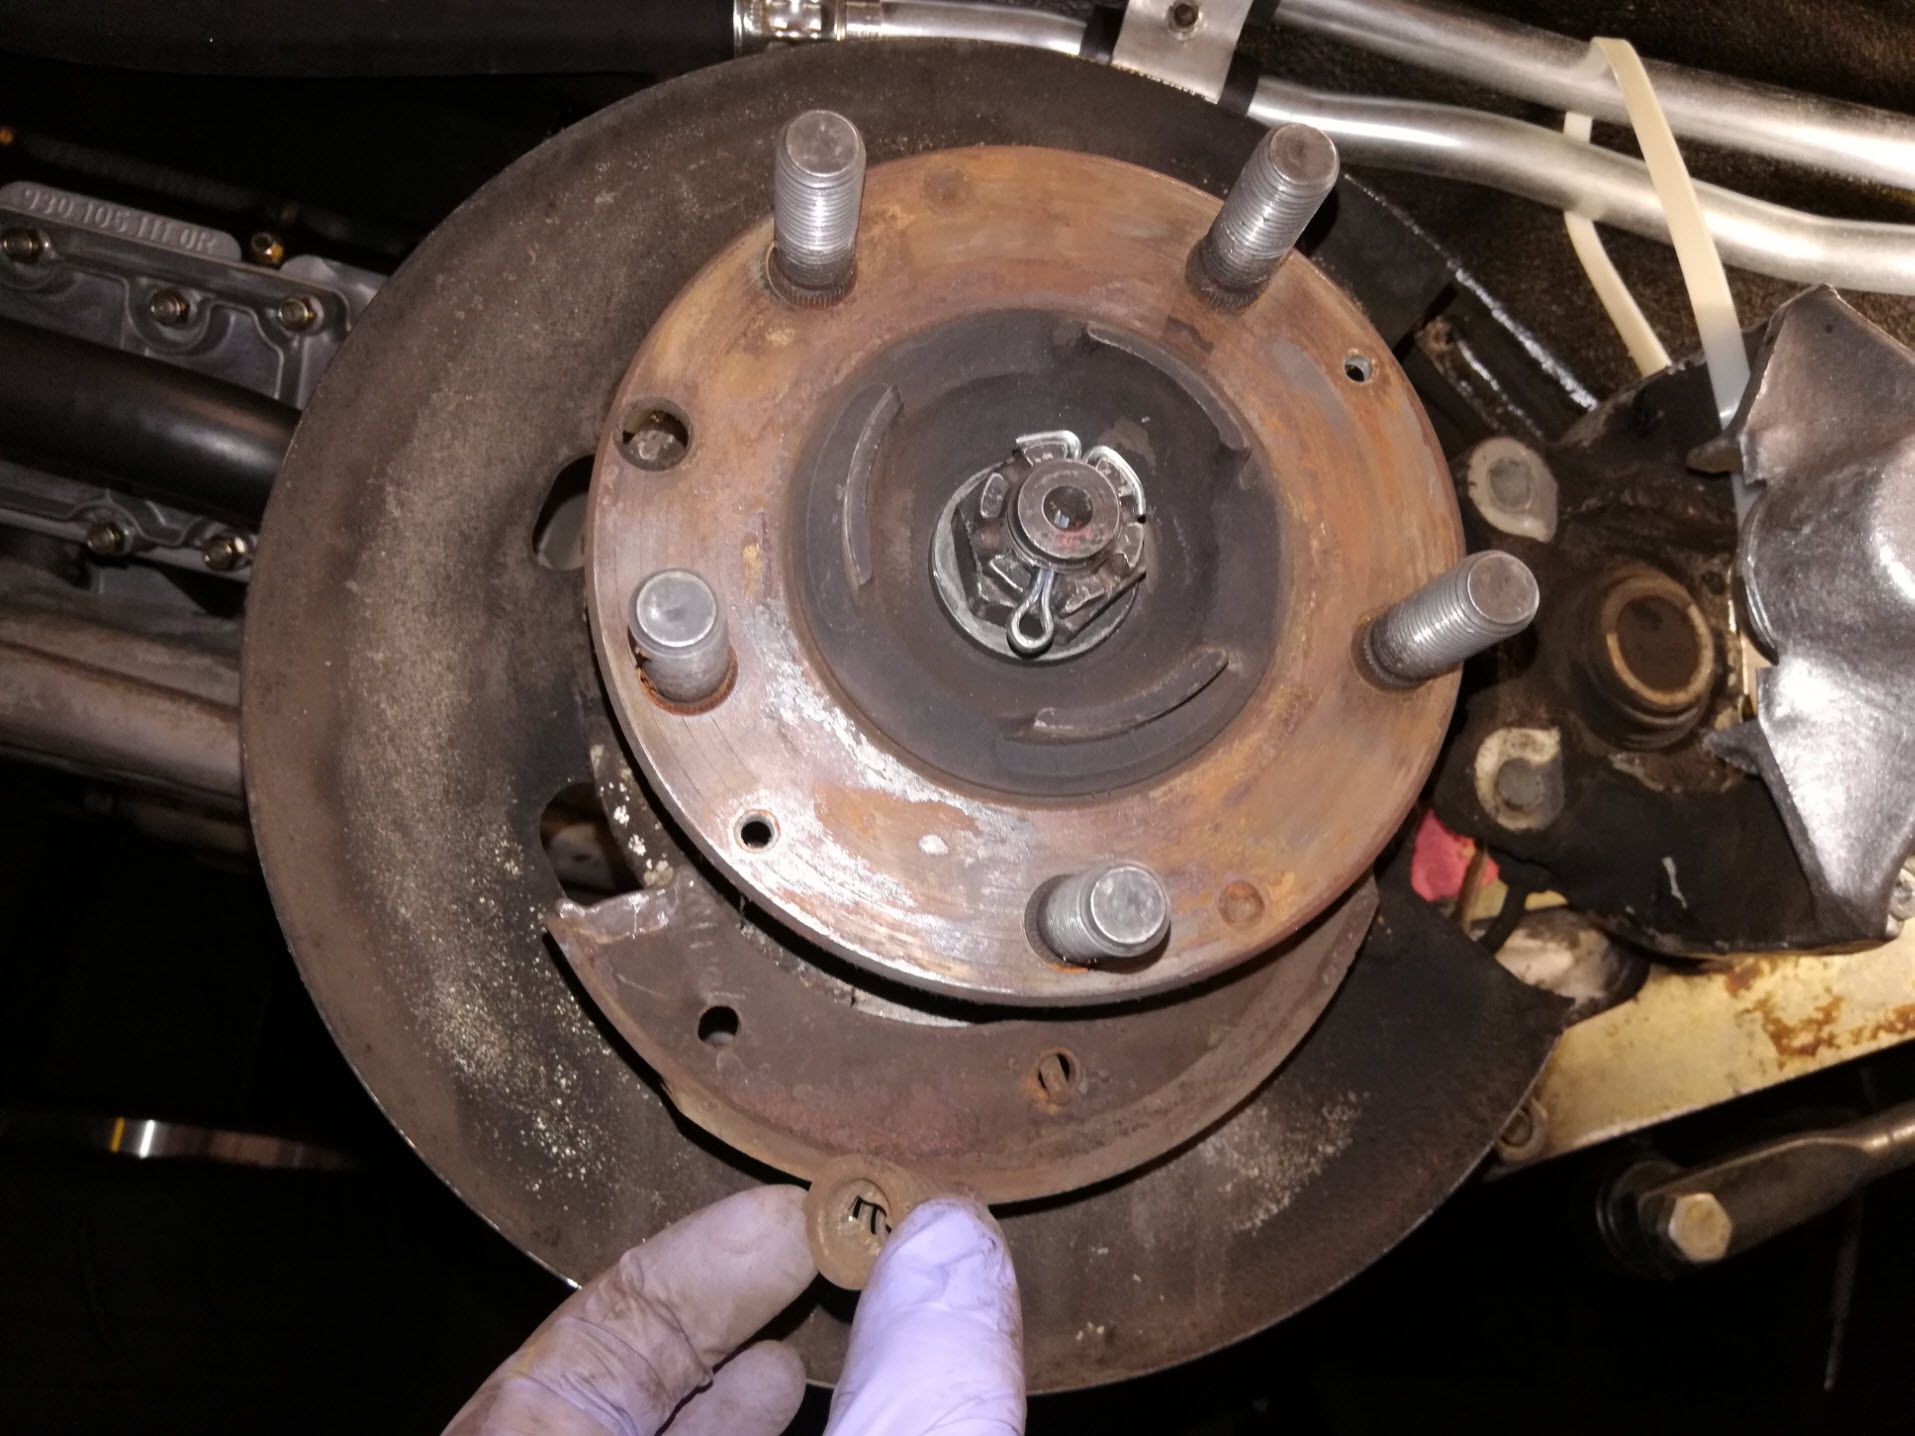
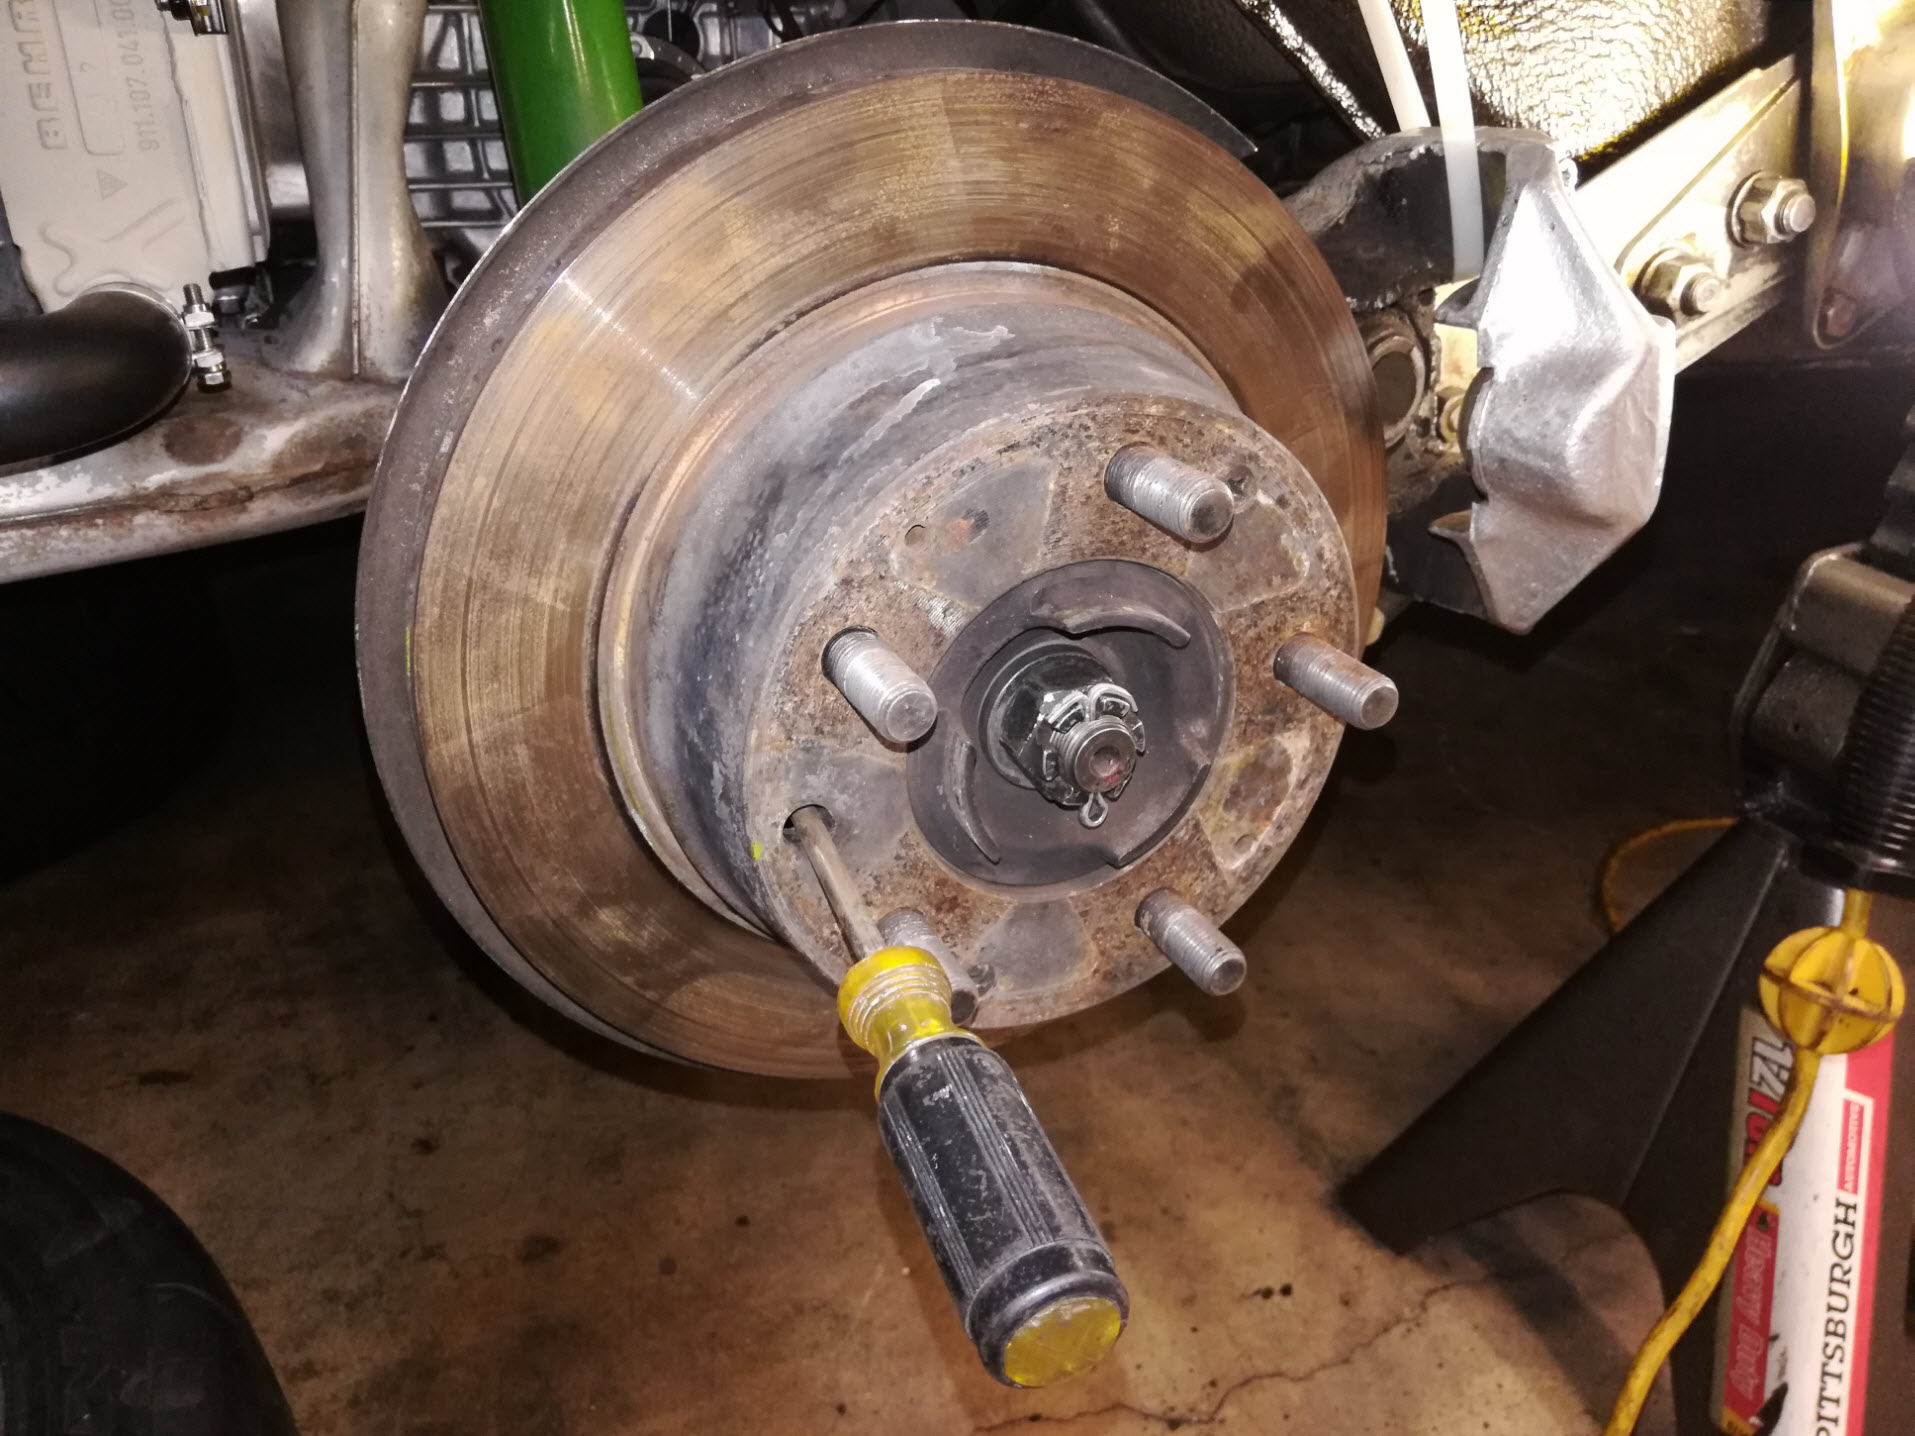
Step 8: Adjust Brake Shoes
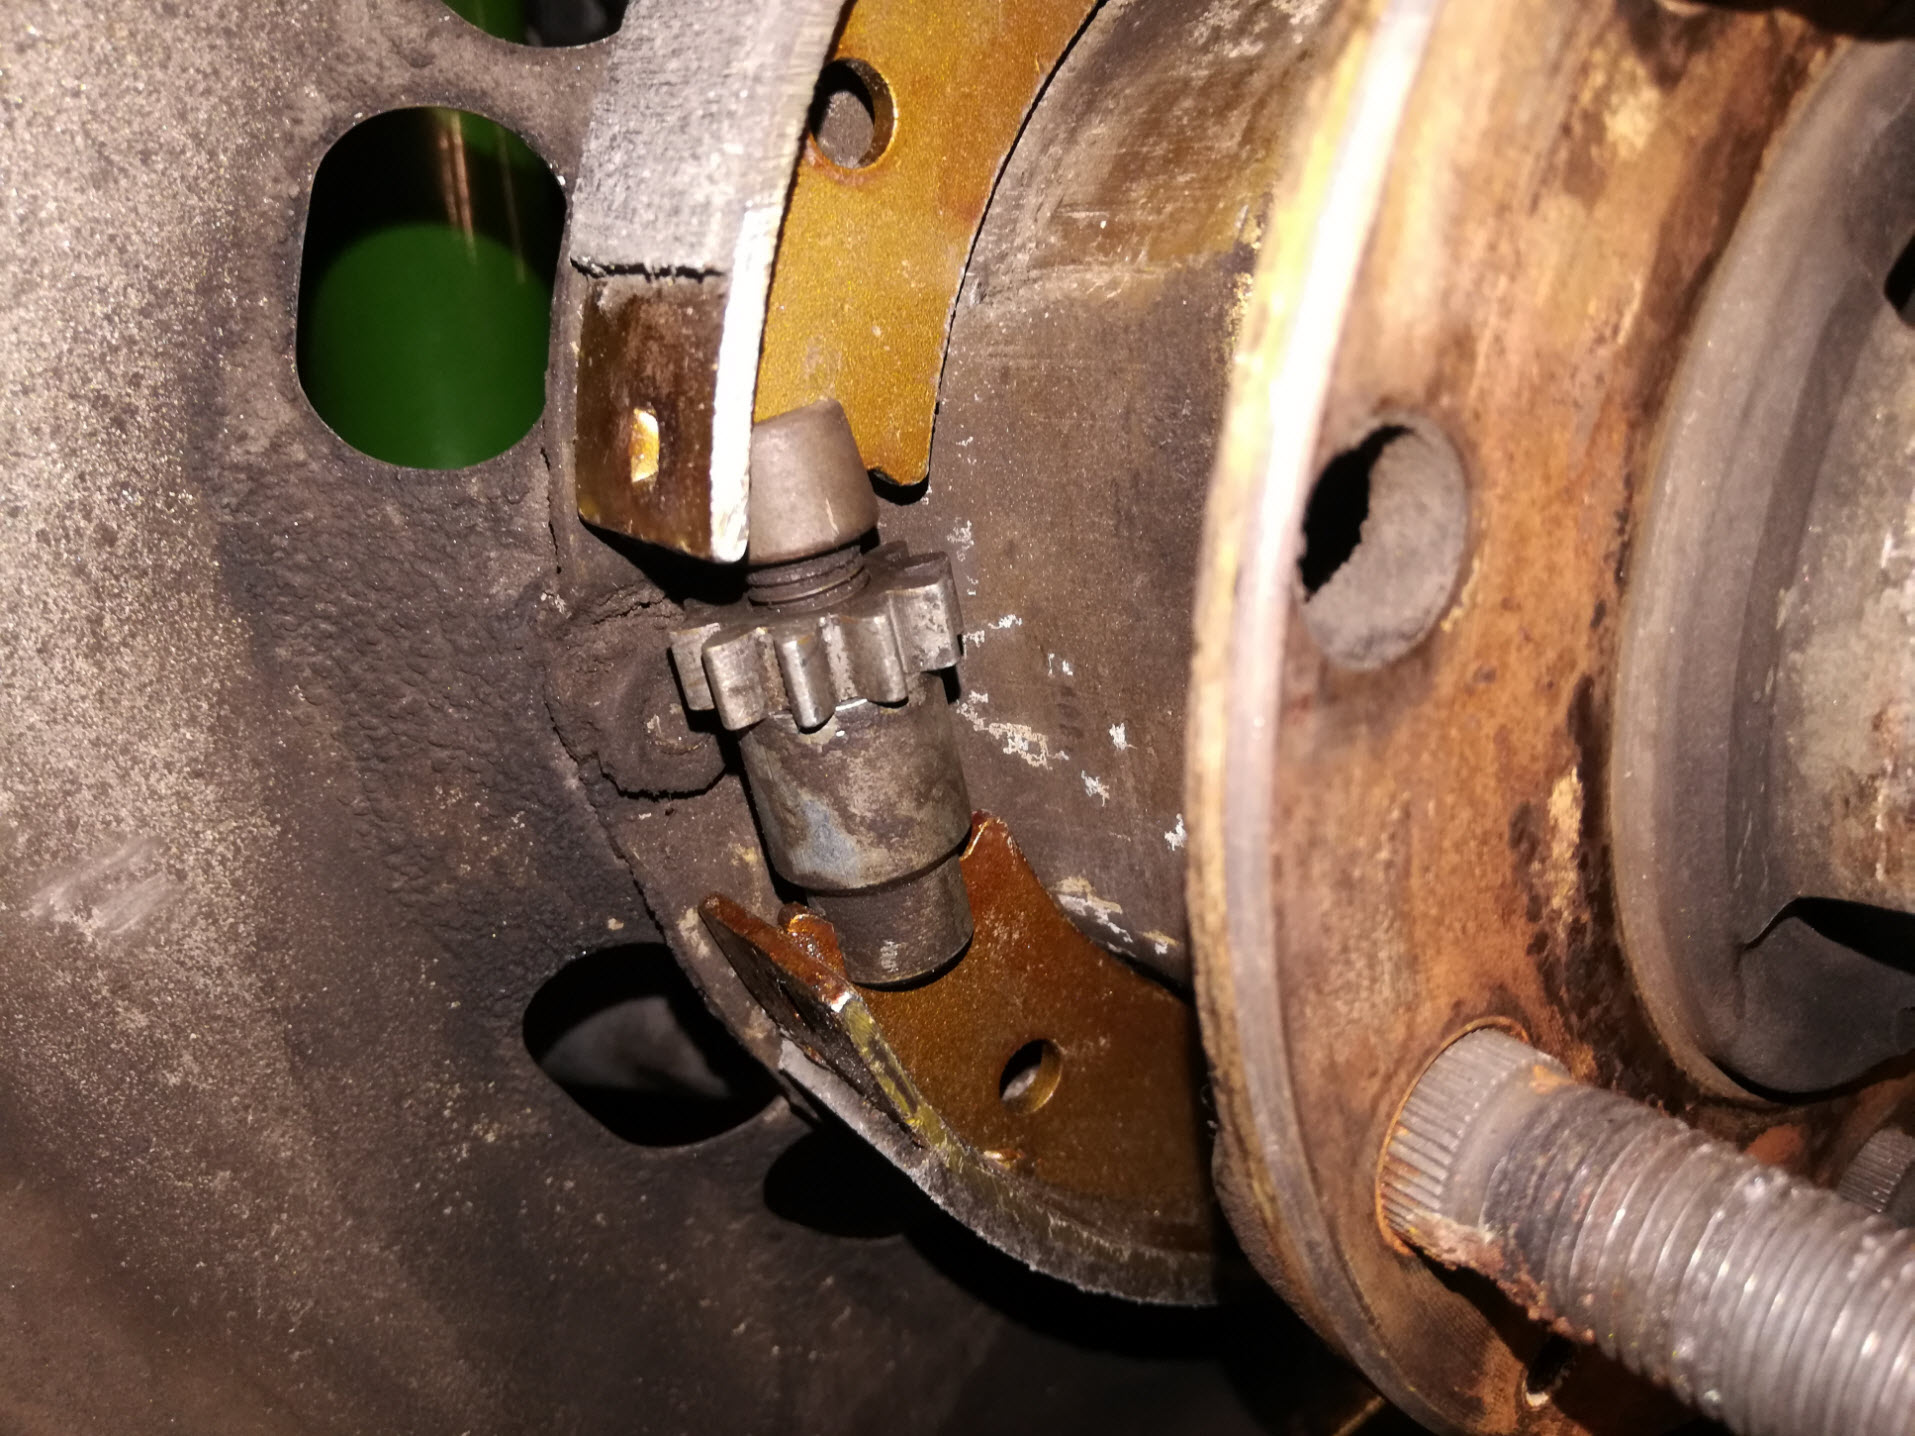
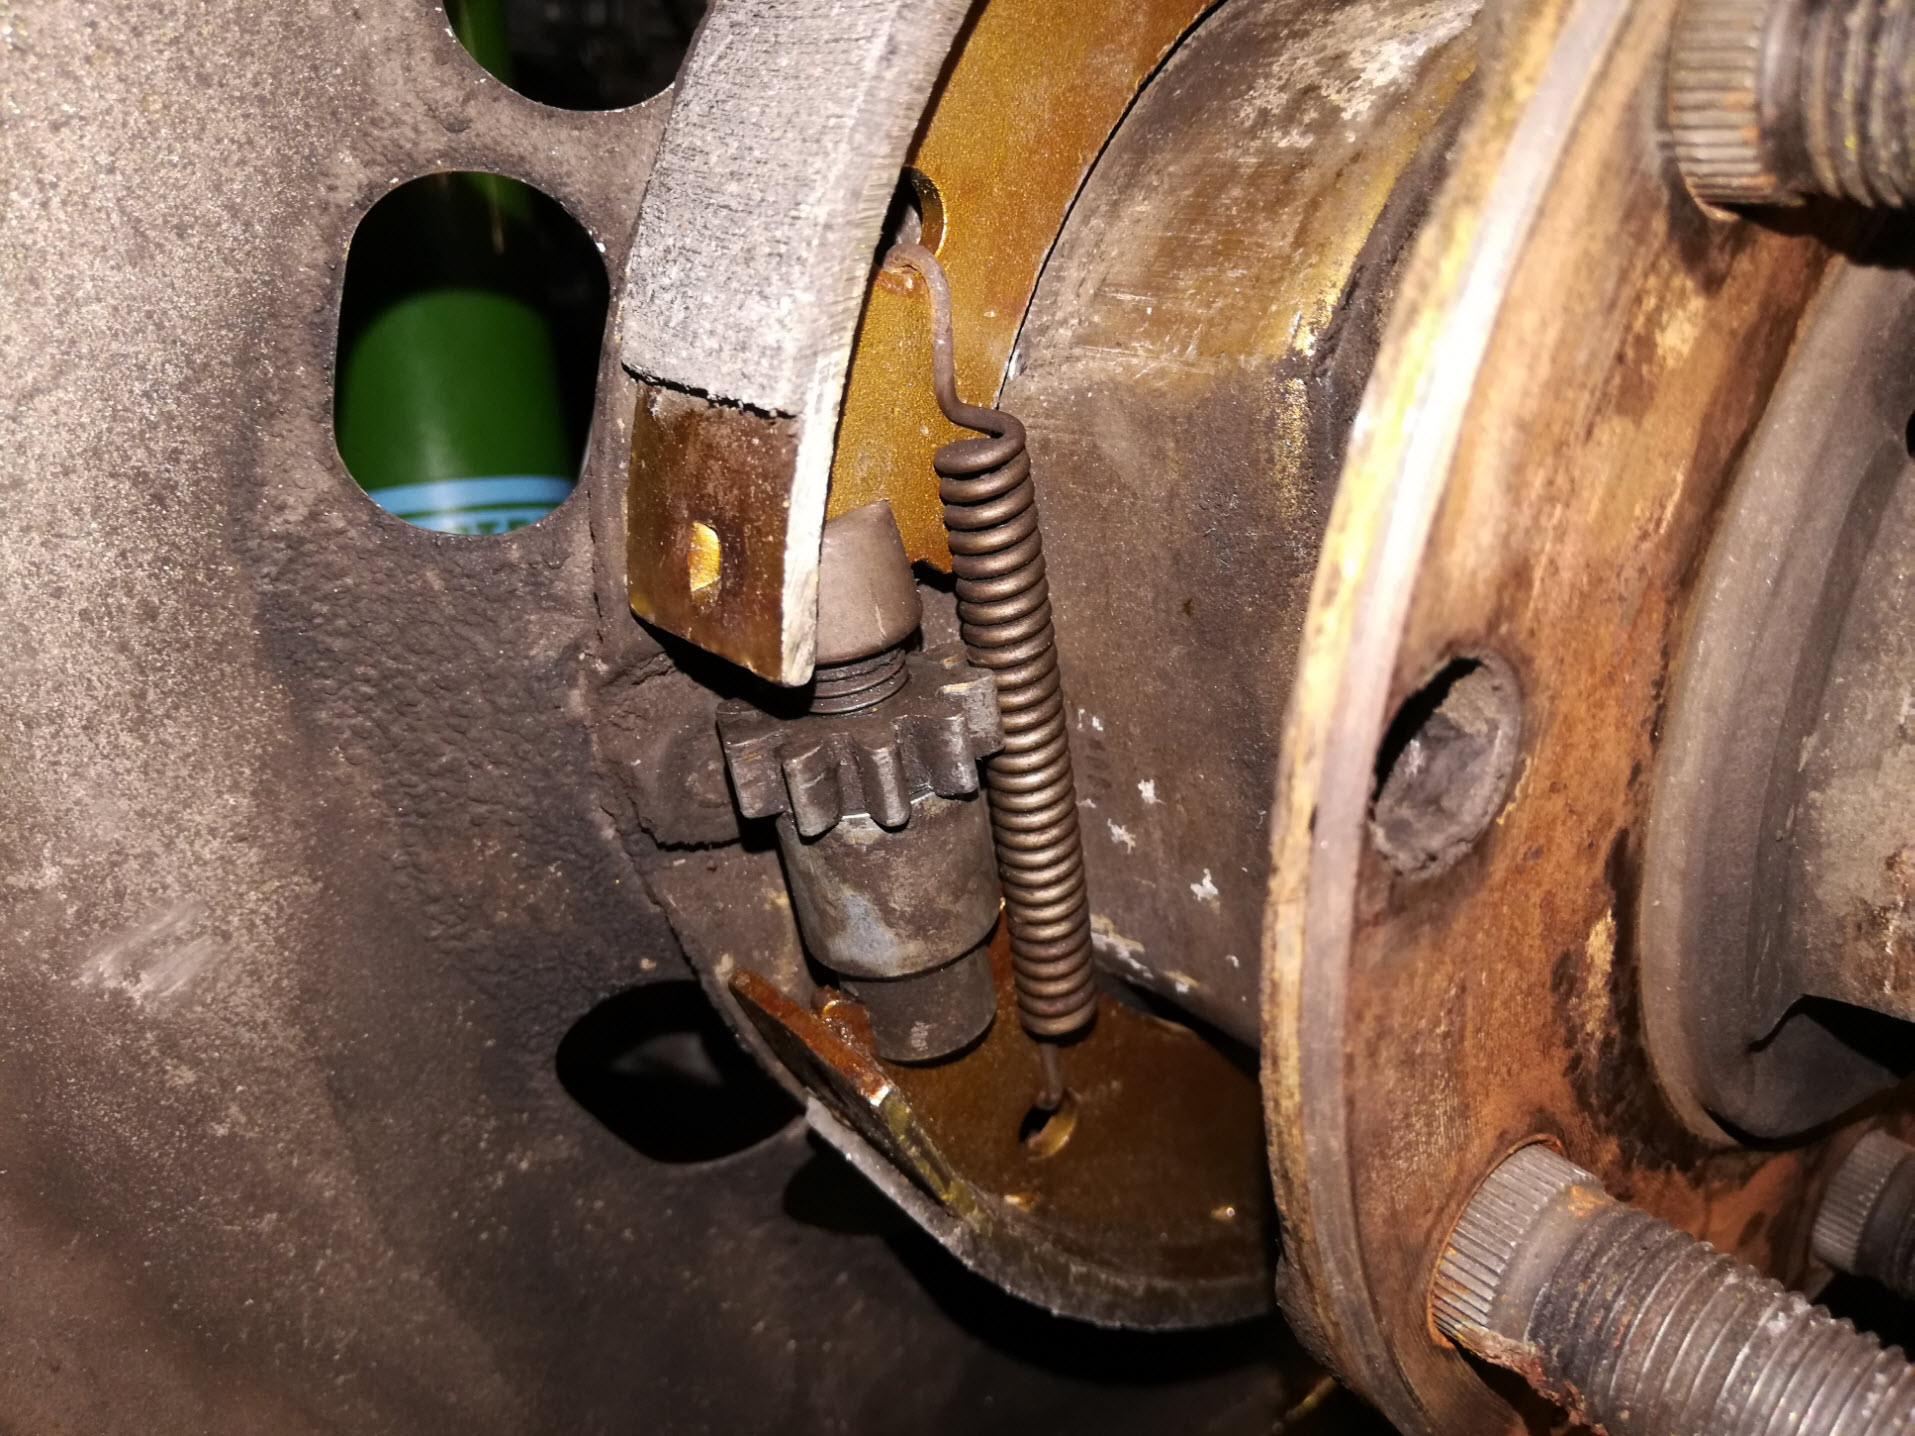
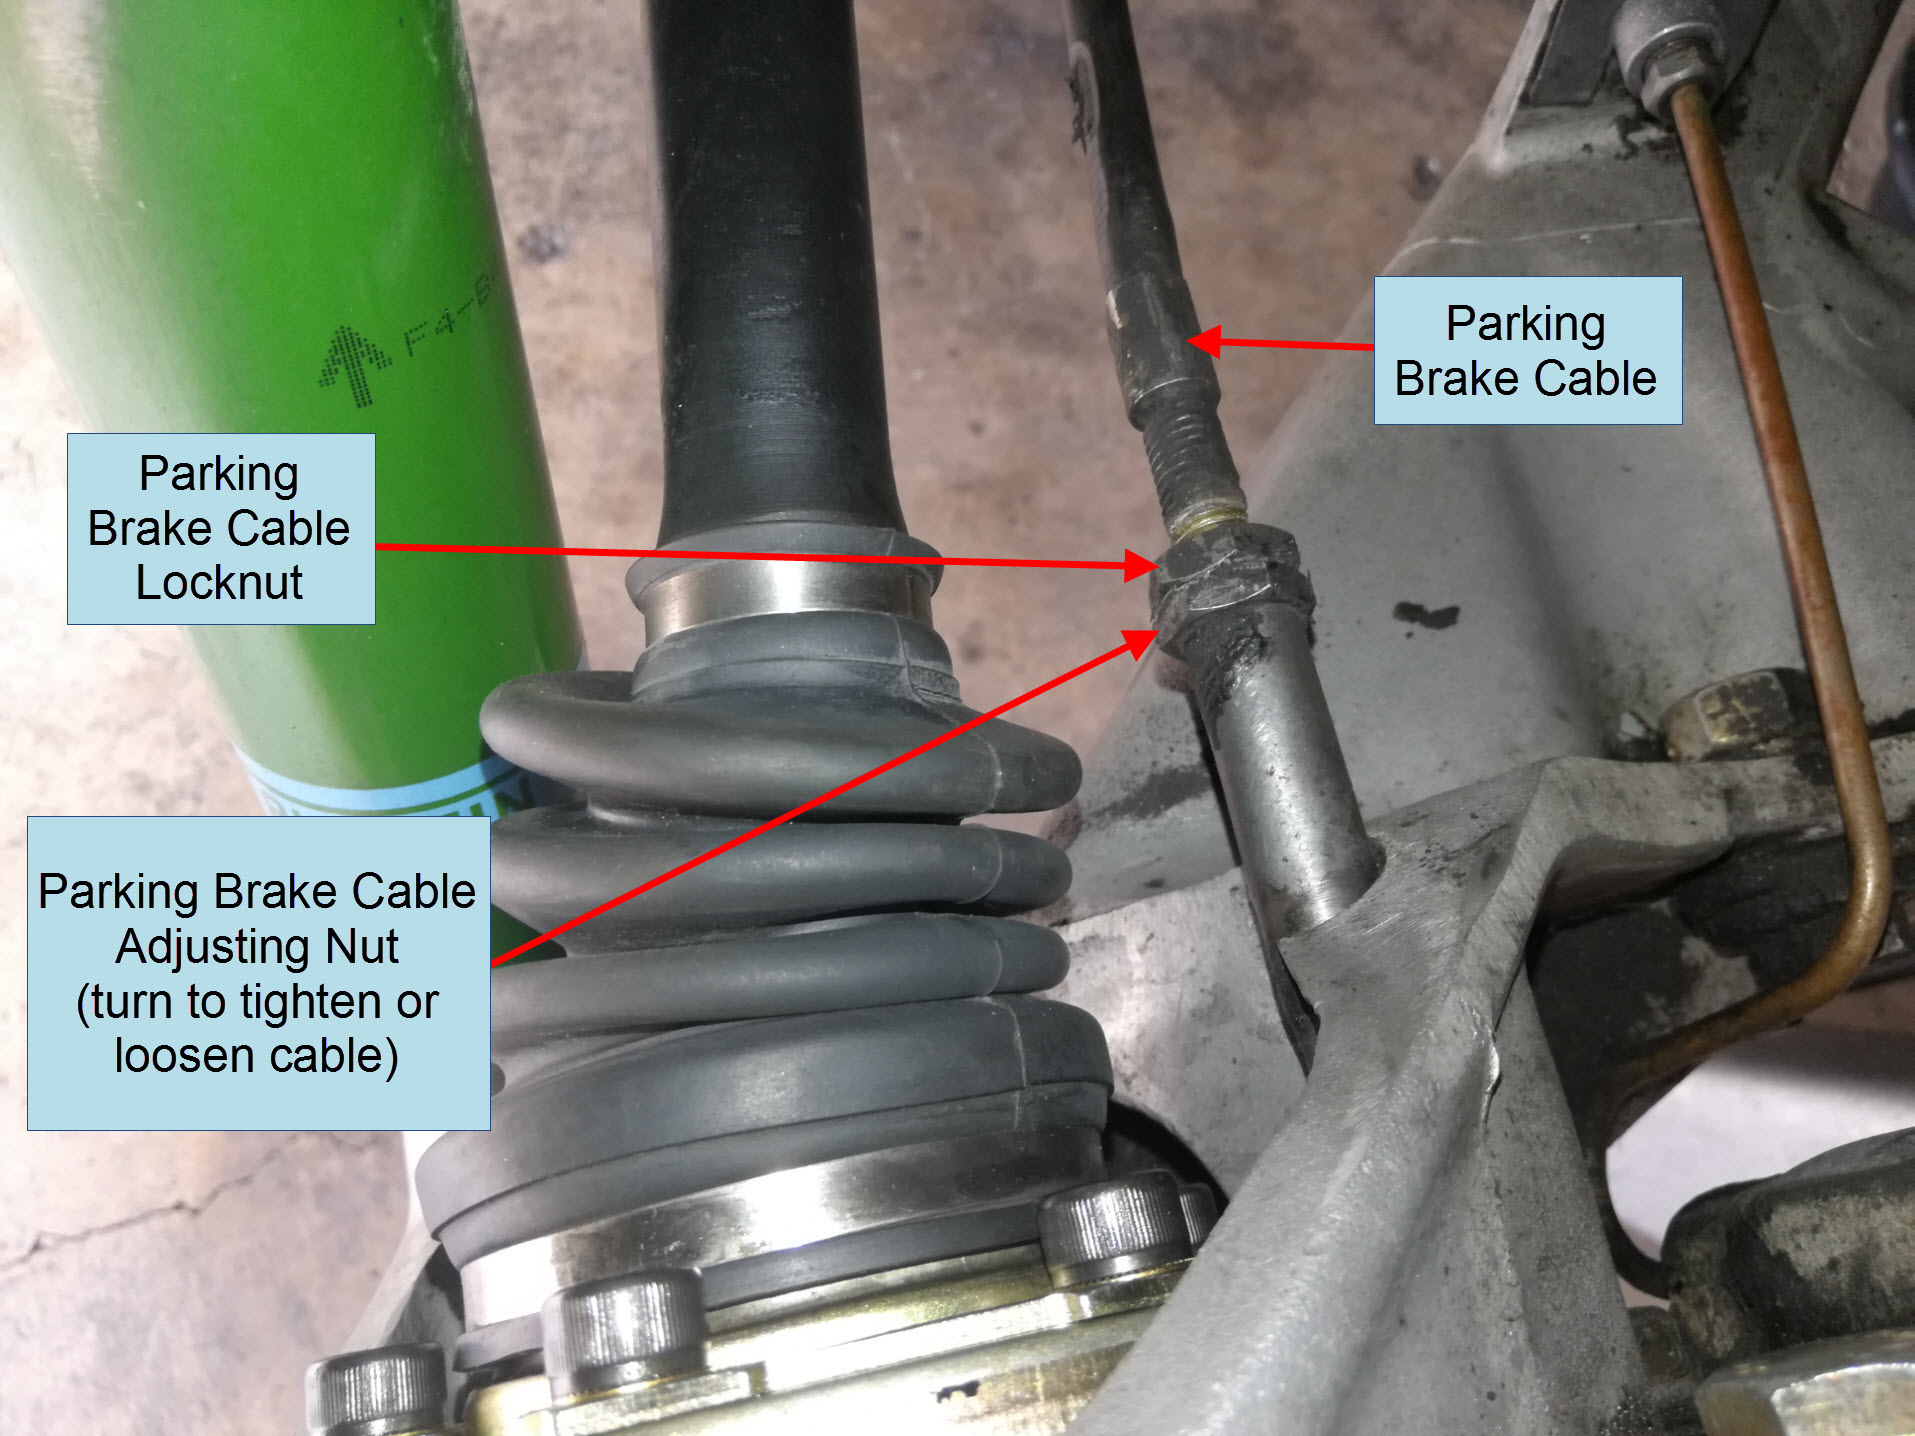
Before starting, make sure the parking brake handle is still completely down. Check that the parking brake cable (sticking out of the back of the trailing arm) has a bit of axial play in it. If not, adjust the lock nuts as needed to allow some axial play. In the same process as adjusting normal brake drums, line up the rotor adjuster hole with the star adjuster on the parking brake assembly. Turn the adjuster star with a flathead screwdriver until the rotor cannot be turned by hand. Then loosen the adjuster 4 clicks. The rotor should now rotate freely.
For illustration purposes, here is what is happening to the adjuster without the brake rotor in place.
Step 9: Re-install Caliper and Brake Pads
If you have installed a new rotor, you may need to slightly squeeze the brake pads apart to create more clearance for the thicker rotor. While supporting the weight of the caliper, cut the rope or the zip tie and carefully maneuver the caliper in position without damaging the hard brake line. Install the caliper bolts snug tight and re-install the brake line clip. Then torque the caliper bolts to spec. On the 911SC the caliper bolt torque is 60 Nm (44 ft-lbs). Re-install the brake pads and retaining hardware per this procedure.
Step 10: Adjust Parking Brake Cables
Note: Please finish replacing and adjusting brake shoes on both sides before proceeding.
Make sure the parking brake lever is still completely disengaged. If the parking brake lever requires more than 4-5 clicks to lock the rear wheels, or one wheel stops before the other, then the cables need to be adjusted.
Release the parking brake lever completely and adjust both cables so that equal amounts of thread are exposed on each cable while still maintaining very slight axial play on each cable. Both wheels should turn freely with the parking brake released. This is the starting point.
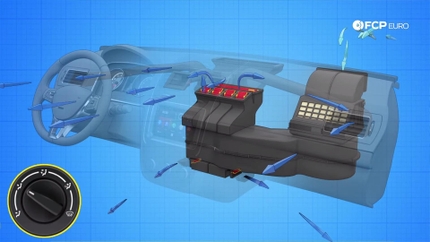
Now go to the parking brake handle and pull up the rear of the rubber boot. Behind it should be a pair of access holes in the floor to visually check a parking brake cable balance bar. The bar should be perpendicular to the front of the car. If they are not, one parking brake will activate before the other.
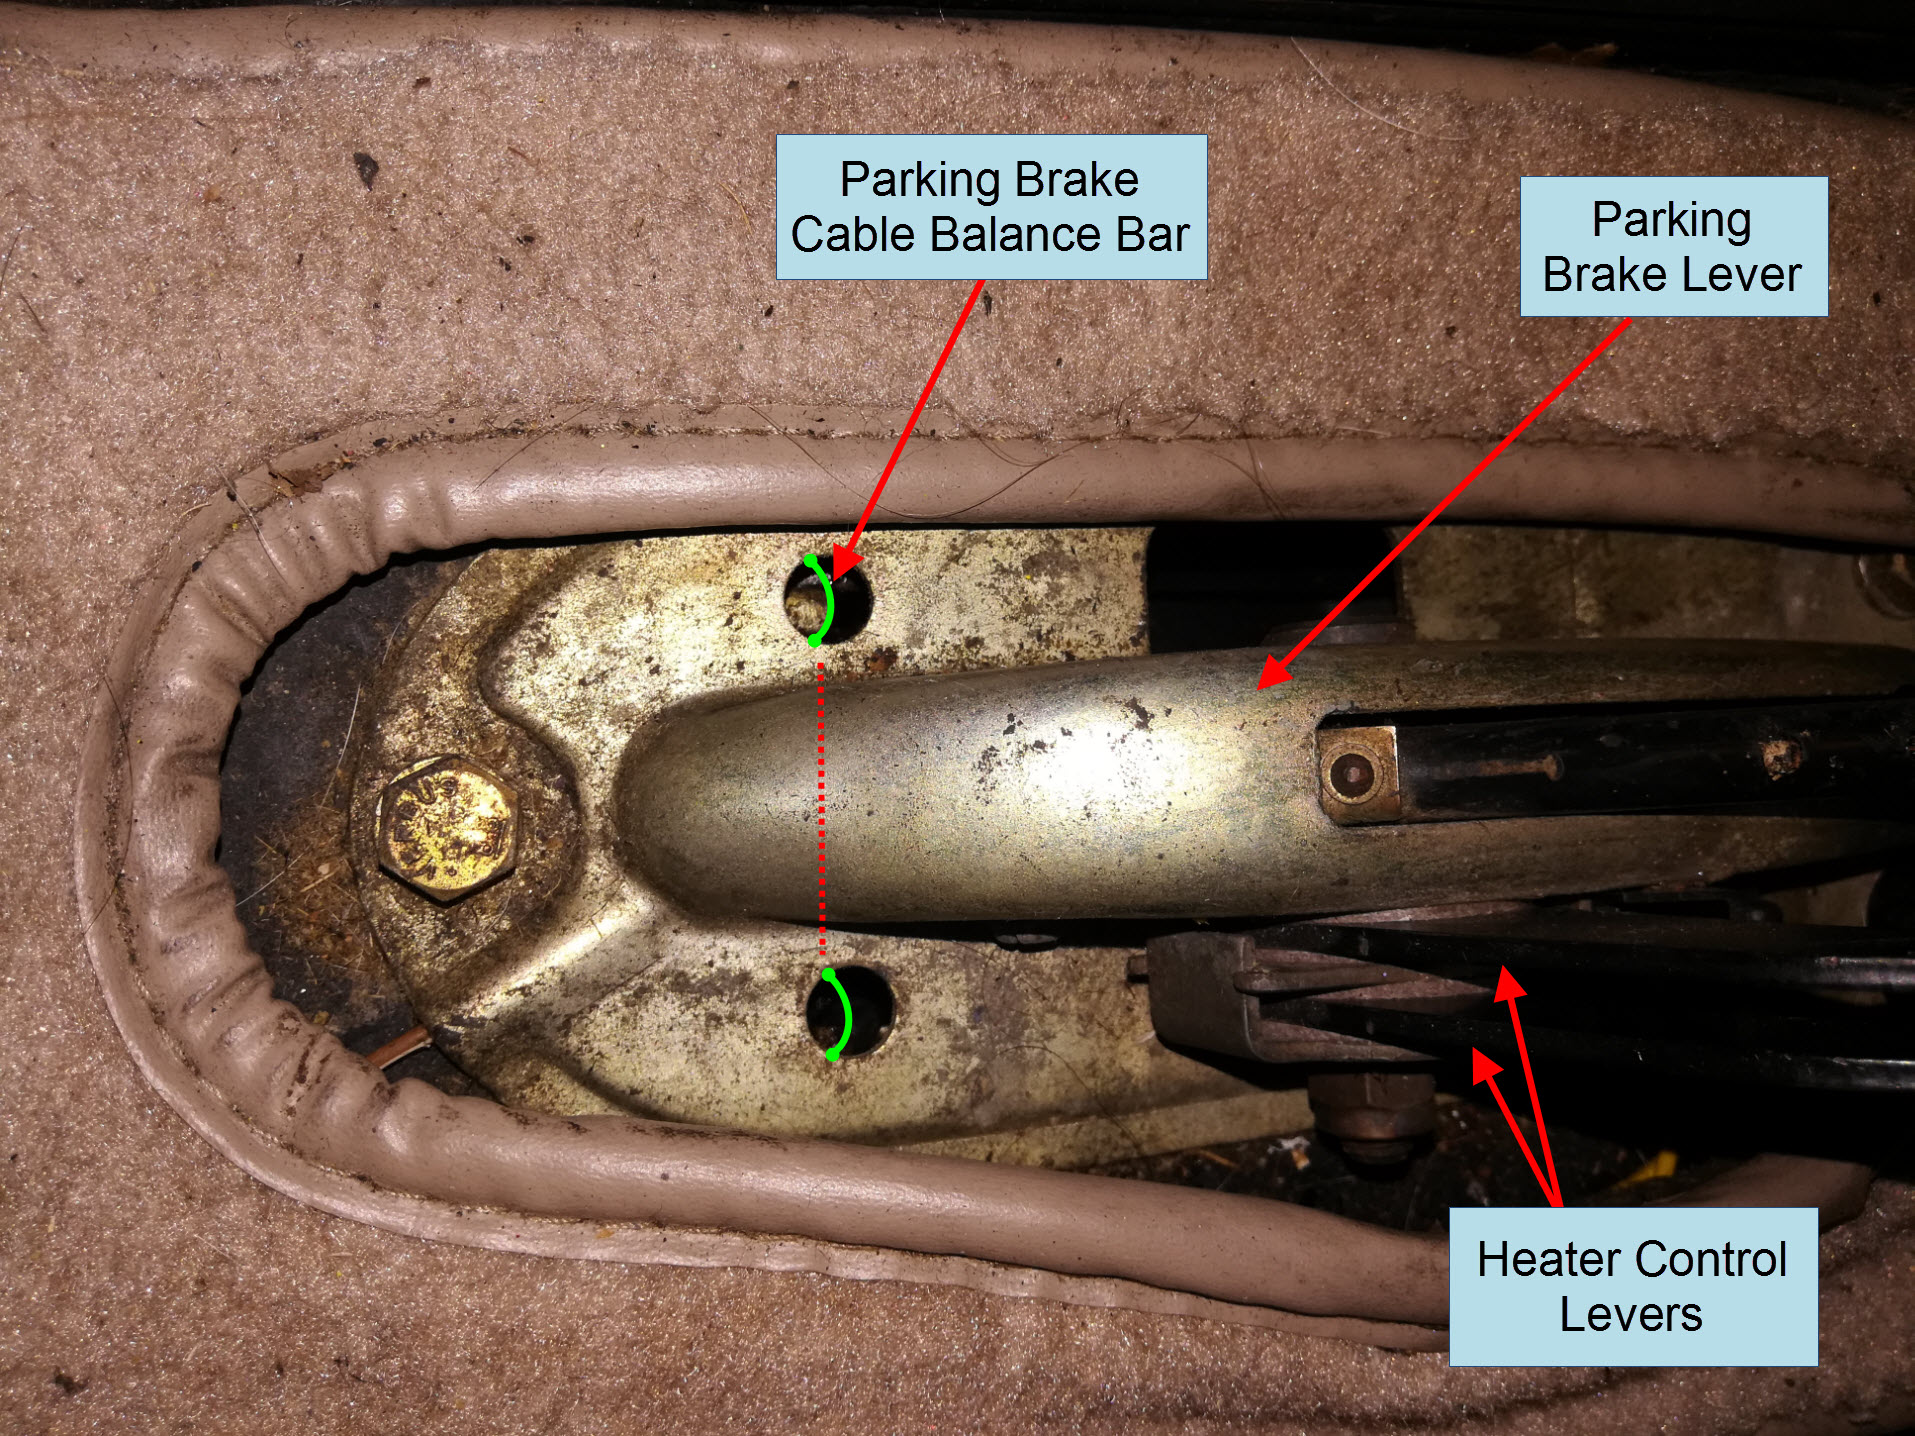
In this case, adjust the lock nuts on each cable until the bar is in the correct position. Then pull the parking brake lever 4 clicks and make sure the wheels are locked. If they are, and they turn freely with the lever fully released then the parking brake adjustment is complete.
Put the rear wheels on and the car back on the ground. Pull the parking brake and the car should now stay put. Enjoy greater peace of mind every time you park at your local car meet.
If you found this DIY useful, take a look at my entire air-cooled Porsche 911 rebuild, here.