When an aging Volvo starts to have odd front end clunking noises, lazy steering response, and excessive bounciness, your strut tops may have aged and be in need of replacement. The strut top has a rubber isolator bushing that sits below the bearing plate. The rubber used in the strut top isolator is prone to excessive flex when it ages, and the bearing plate that sits above it is prone to excessive wear and play when it ages. This contributes to poor handling, wandering steering, and rattling noises from the front end when driving over rough surfaces.
Note from the author: This is a semi-DIY because when I performed this, I had the use of a shop with a commercial grade strut compressor and pneumatic tools. Though I have pneumatic tools in my garage at home, this simple procedure can still be performed by the average DIYer that does not have access to pneumatic tools or an expensive free-standing strut spring compressor. Strut spring compressors can be rented from your local car parts store or purchased from one of many auto tools suppliers. Always follow all safety instructions and wear appropriate protective gear when using strut compressors and pneumatic tools.
The instructions provided for my Volvo XC90 will be similar to many other Volvos (FWD/AWD '93+) and should be easy to accomplish as a DIY - provided you have access to a strut compressor and a few special tools which can be easily ordered online.
Tools required:
- Vehicle jack
- 2x jack stands
- Strut compressor
- Volvo strut socket tool
- Socket wrenches
- Breaker bar
- Box end wrenches
- Torque wrench capable of -78 lb-ft range
- Penetrating oil
- Optional - 3/8in impact gun
- Optional - 1/2in impact gun
Step 1: Remove Front Wheels. Place the vehicle on jack stands and remove both front wheels. Never work under a vehicle supported only by a jack.
Step 2: Remove Sway Bar Endlinks. Remove sway bar end links. I find it easy to use a small cordless impact gun to remove the nut. If you're lucky, the nut will zip off. Otherwise you'll need to use a box wrench to remove the nut while keeping the center section stationary with a Torx bit.
Step 3: Unbolt Struts From Hub. Remove strut mounting bolts from hub. Pneumatic impact gun can help get these stubborn fasteners off quickly. Otherwise, spray down the threads with a penetrating oil and use a breaker bar to slowly work the nut loose from the fastener. Make sure to unclip the ABS wire from the strut.
Step 4: Unbolt Struts From Body. Have someone support the strut from the bottom, and then remove the 3 nuts holding the strut assembly in from the stop of the strut tower (under the front hood). Strut will drop out. Navigate strut out of the wheel well.
Step 5: Compress Strut Assembly. Using a strut spring compressor, compress the strut assembly so there is no tension pushing against the strut seat. This is where I cheated and had a very nice heavy duty unit that compresses the spring safely. A smaller style unit will work fine - make sure to follow appropriate safety precautions when using a strut spring compressor!
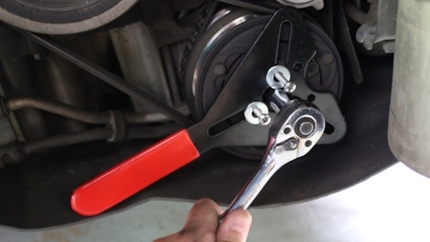
Step 6: Disassemble Strut Assembly. Once the strut spring is compressed, remove the strut top nut and bushing. A large pneumatic impact gun can zip off the nut - but if a pneumatic impact gun is unavailable, use a box wrench with to remove the nut while holding the center with a Torx bit. Remove the bushing under the strut nut. Next is the cross-shaped nut - this is where you will need the Volvo strut socket tool. There are many generic equivalents that work well. Use this special socket to remove the cross-shaped strut top nut. Again, an impact gun can remove this cross-shaped nut quickly, or use a box wrench to turn the tool while using a Torx but to hold the center section stationary.
Step 8: Remove / Replace Spring Seat and Bearing Plate. The strut can now be disassembled. Replace the spring seat and bearing plate.
Step 9: Reassemble and Torque. Assemble in reverse order. Torque cross-shaped strut top nut and strut top nut to 66 lb-ft. Torque the three strut mounting nuts to 24 lb-ft. Torque lower strut mount bolts (that bolt to the hub) to 78 lb-ft, then angle-tighten 60°. Volvo specs replacement of lower strut bolts. Generally the Volvo community has had no issues reusing the stock bolts. Torque sway bar end link nuts to 66 lb-ft.
From start to finish, this procedure took less than an hour with pneumatic impact tools and a professional strut spring compressor. I'd expect this to be a 3 hour job for the DIY garage user with hand tools and a rented strut spring compressor.


